9 - Molding and Casting
Individual Assignment
The assignment for this week is to create a wax mold using 3D milling in the CNC and cast it first with a soft material like silicone and then cast the silicon mold with a hard material. This week I decided to go for something simple just to learn how it is done and how to manage this products to be able to use them for my final project. For this reason I decided to make a mold of a sea turtle and cast it with chocolate.
Design the mold
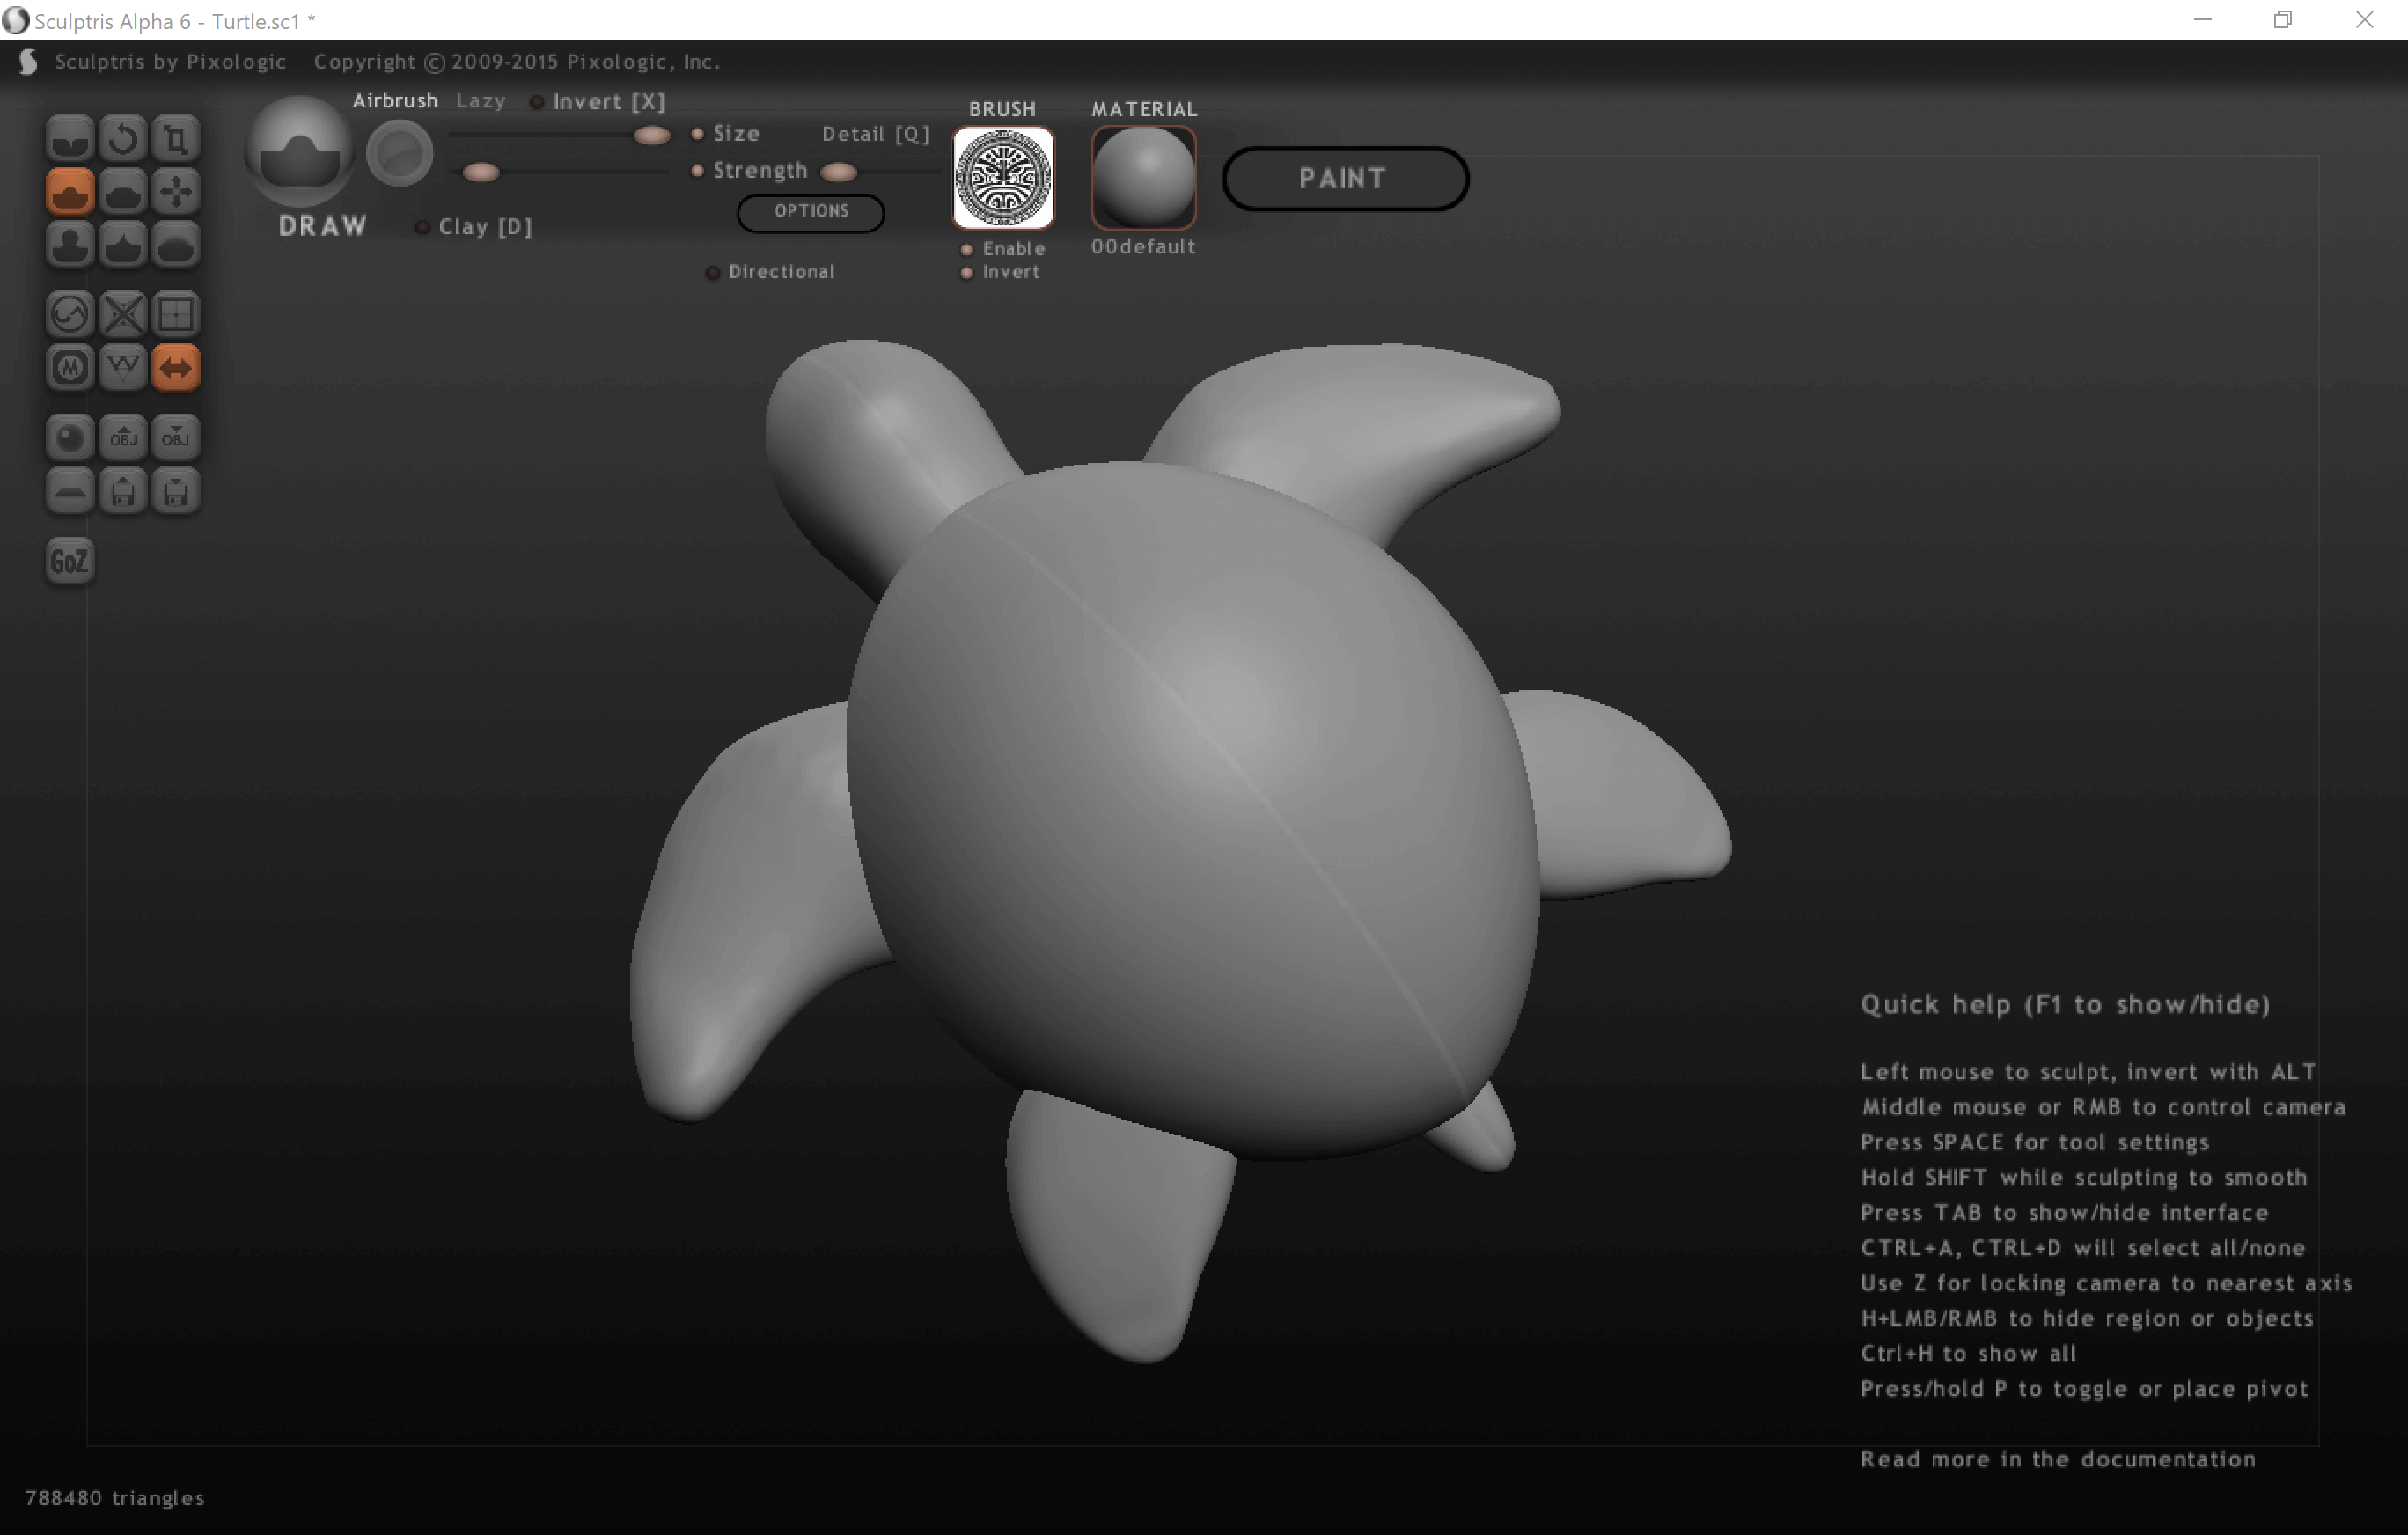
The first step was to design the sea turtle. To do it I decided to use Sculptris, a sculpture software because I really like it and it is nice to work and get organic models. You can export your model as a .obj file. I didn't take in account the size of the piece because I scale it after in another software.
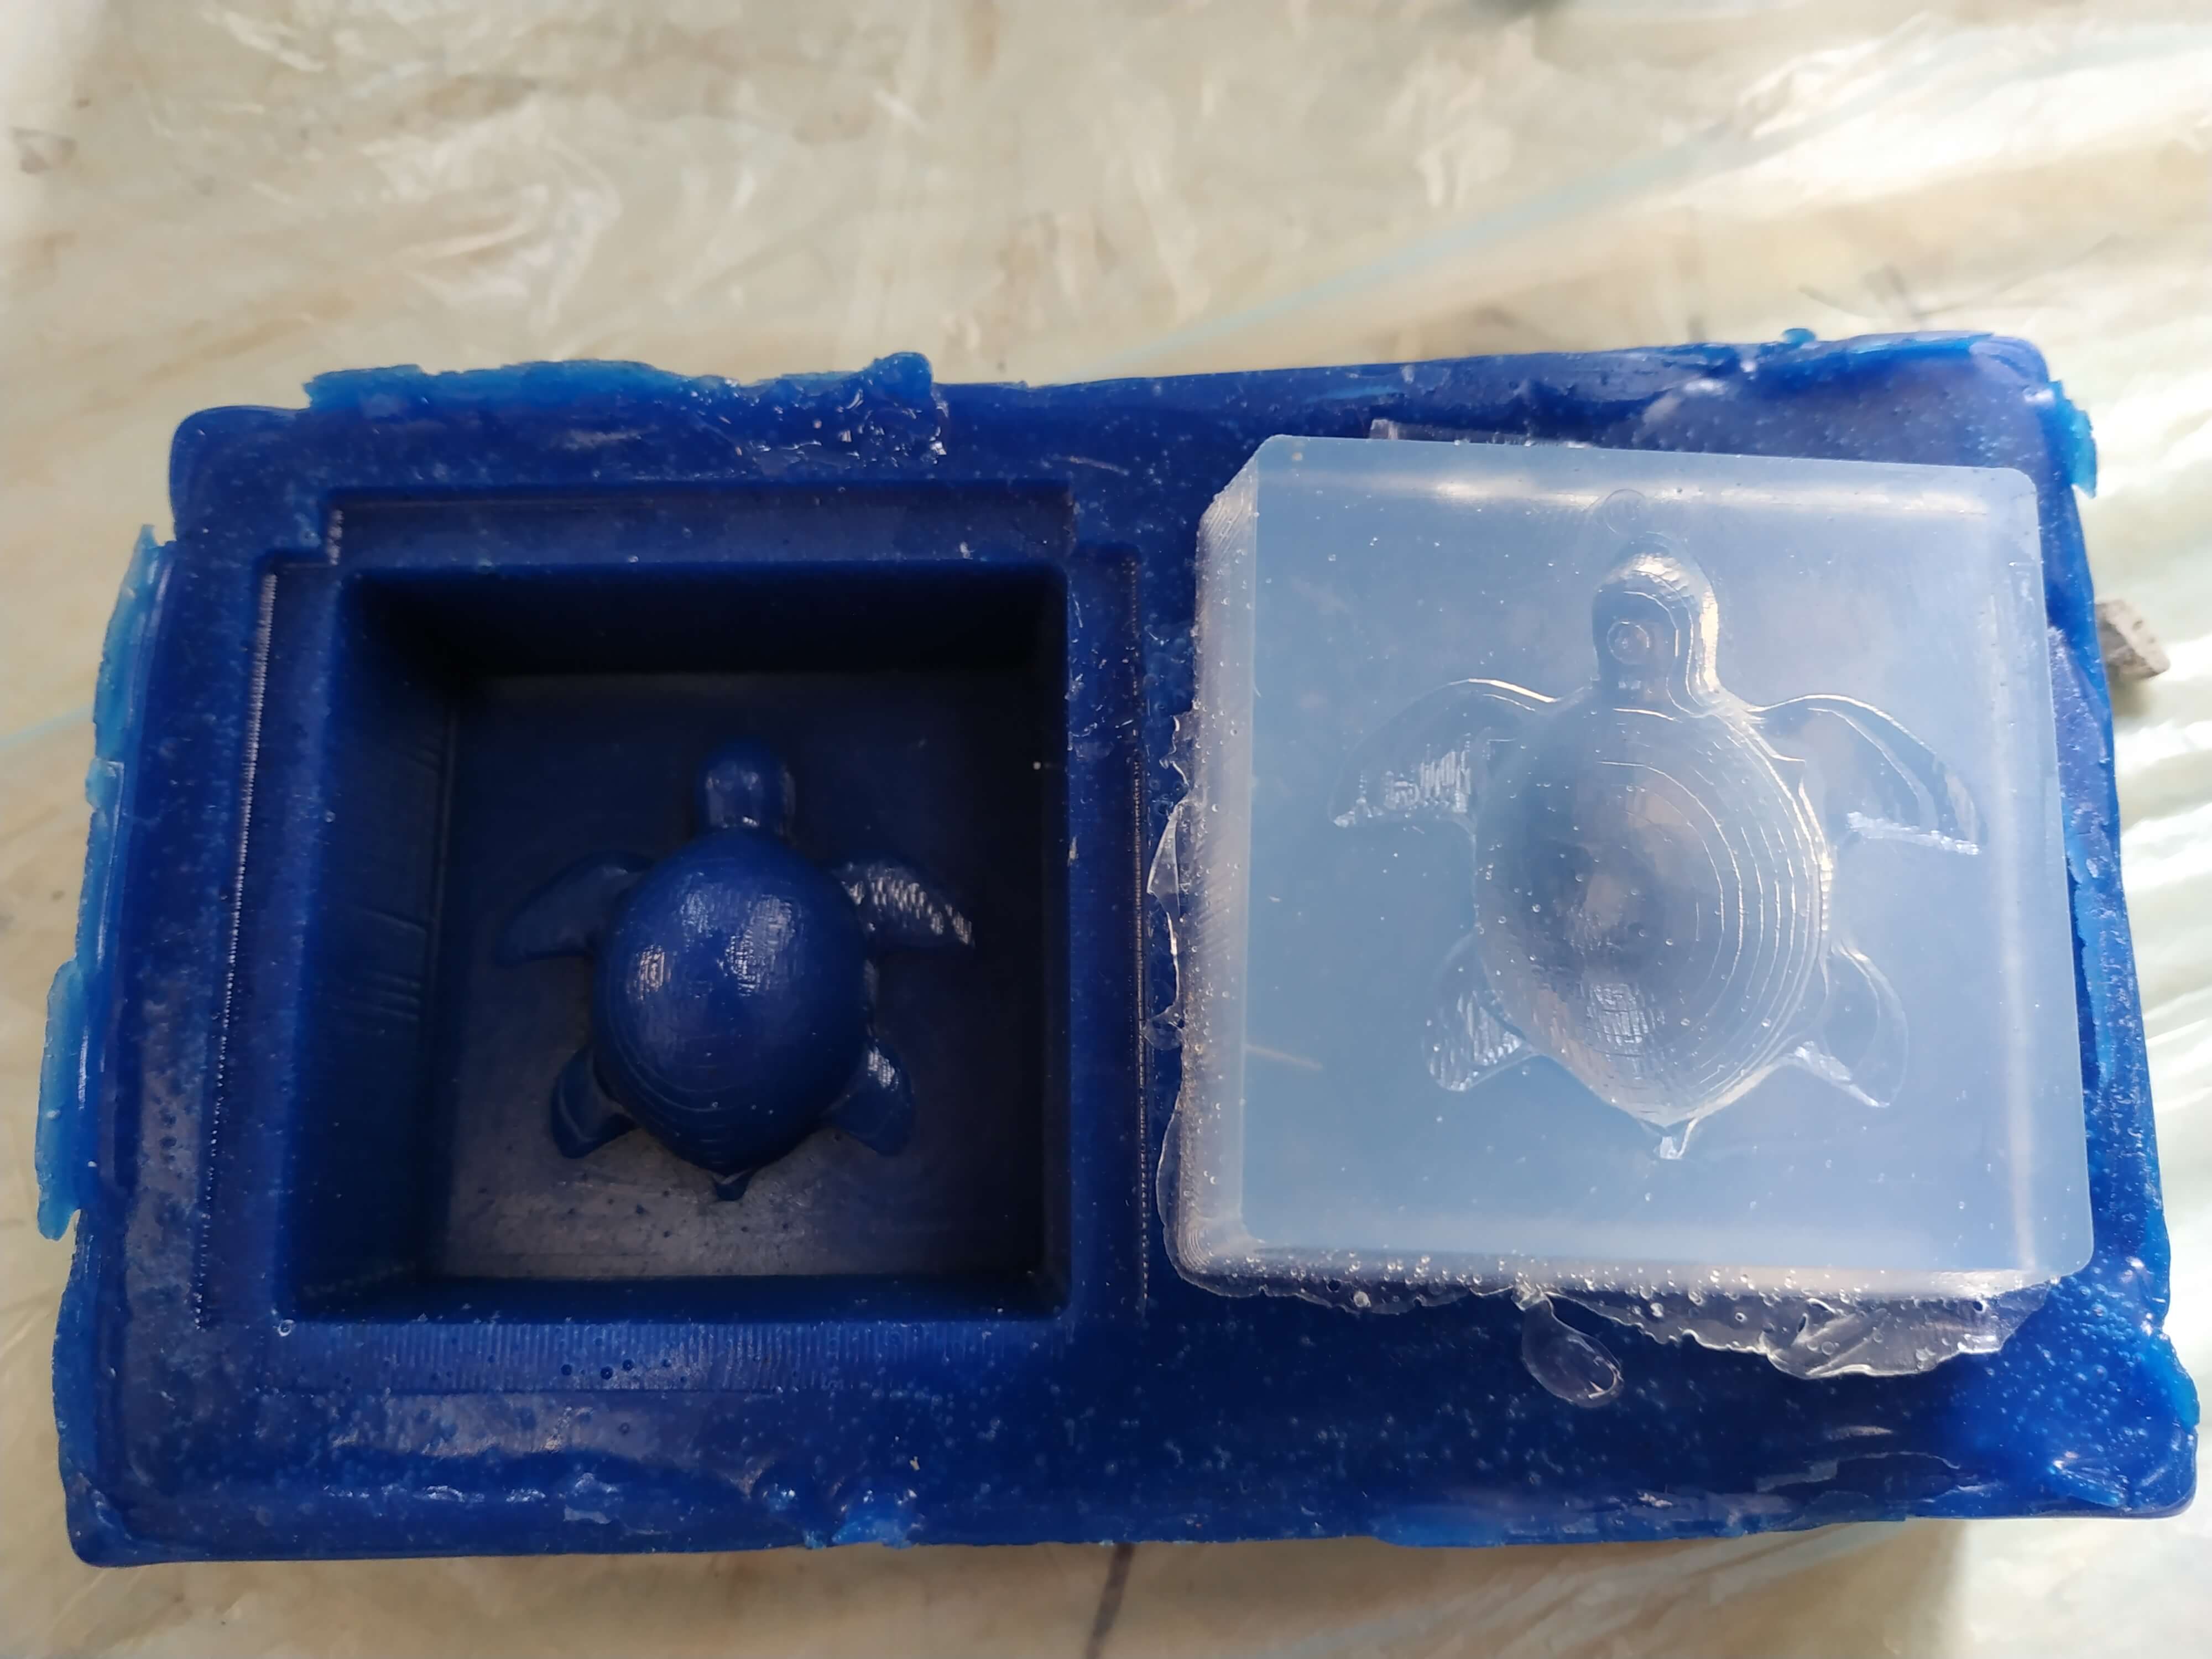
Then I imported it in Tinkercad, because it is really easy and you can work fast with big meshes. In Tinkercad I only wanted to scale the model, cut the down part as I only wanted a one side mold and create a bounding box needed by fabmodules to create the mold. It is important to create the box walls with some inclination to be able to take out the soft mold from the inside. Also, it is important to leave some gap between the walls and the object to allow the end mill to go through and mill the hole object, and also between the top part of the mold and the object to fully cover the object when casting it.
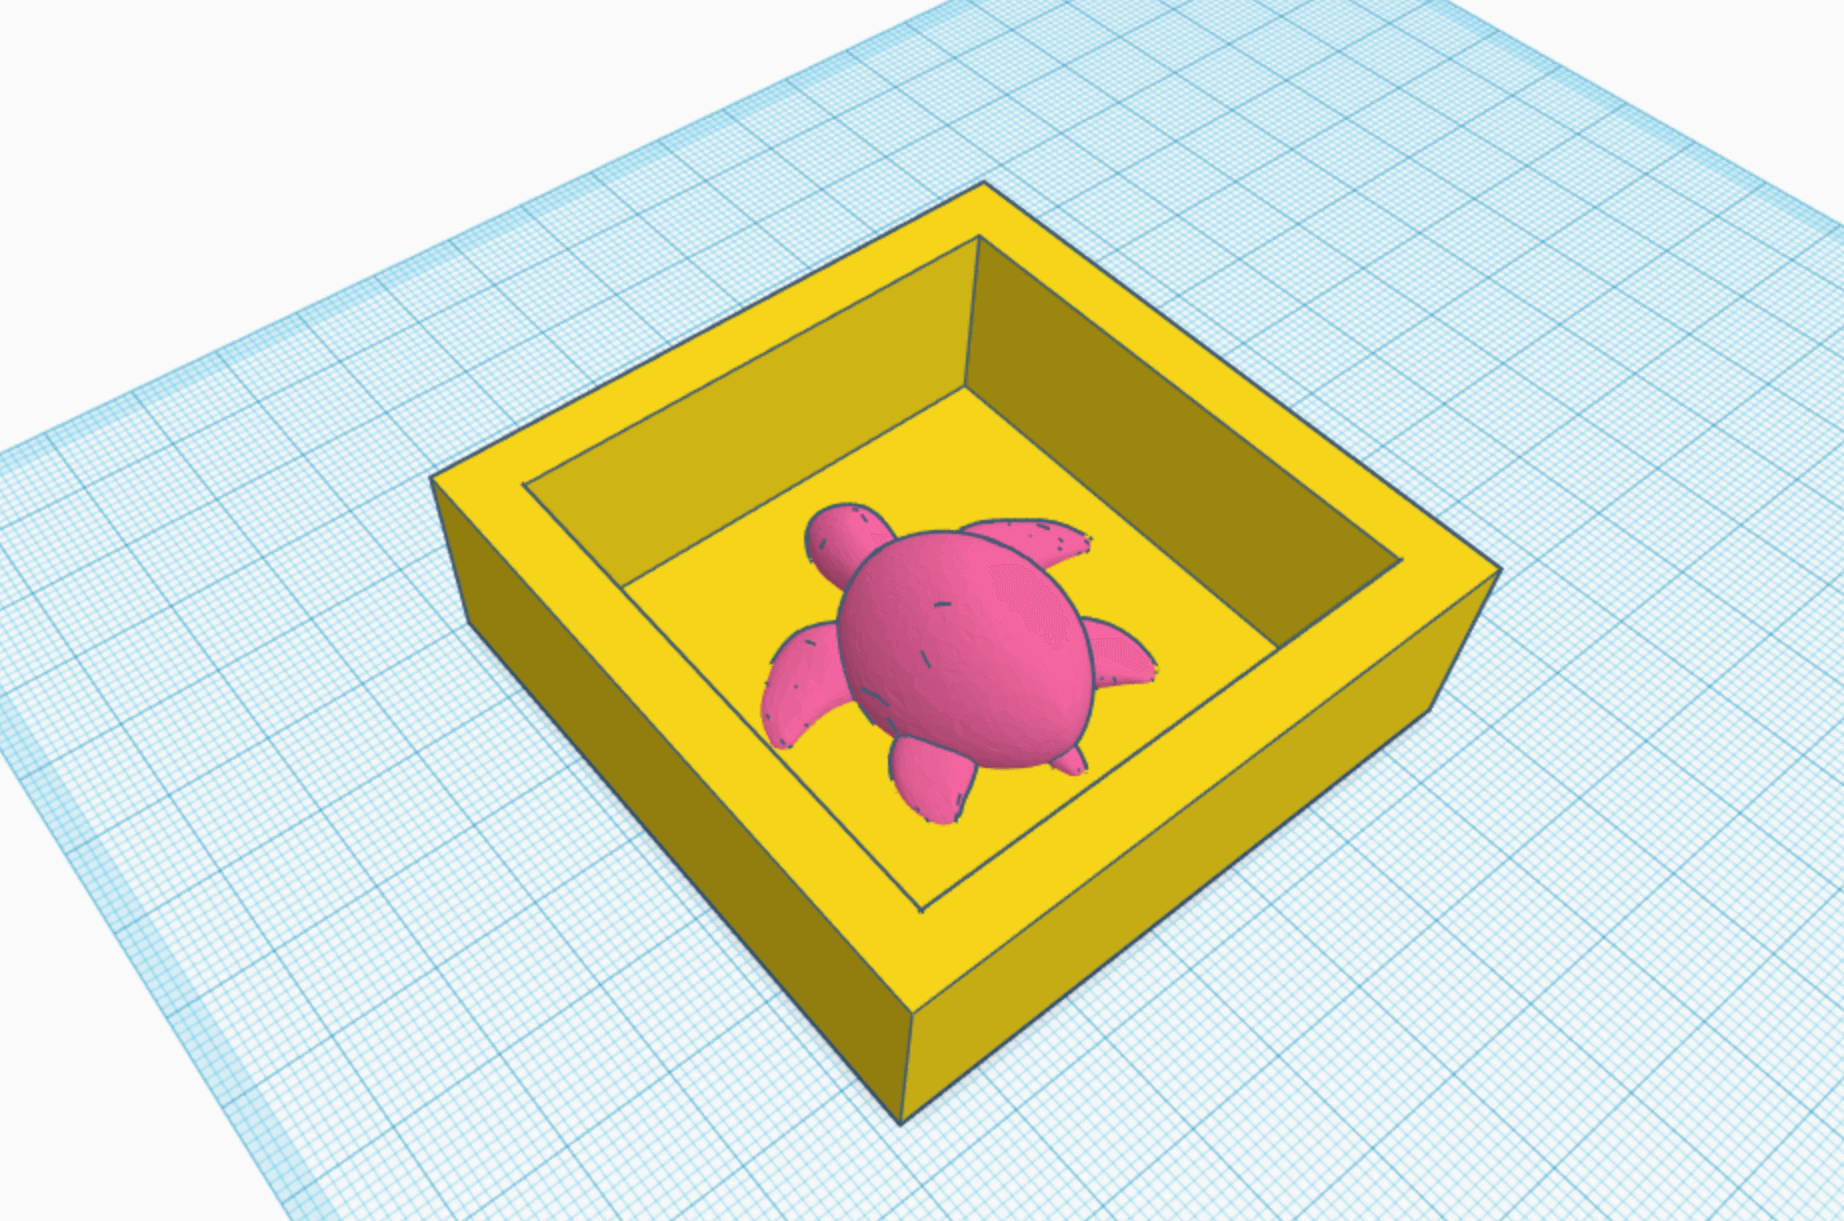
From tinkercad we can export the model as .STL and use it with fabmodules to create the CNC path.
Fabmodules
It's time to create the files for the CNC machine! To do it I used fabmodules because it is prepared for our machines and it is easy to do following some steps.
- Open fabmodules
- Click on input format and select mesh (.stl)
- Import your model
- Configure the input:
- Check the model dimension. Be carefull, the software is in inches, so if you did your design using mm like me, change the units/in parameter to 25,4 to get the correct values.
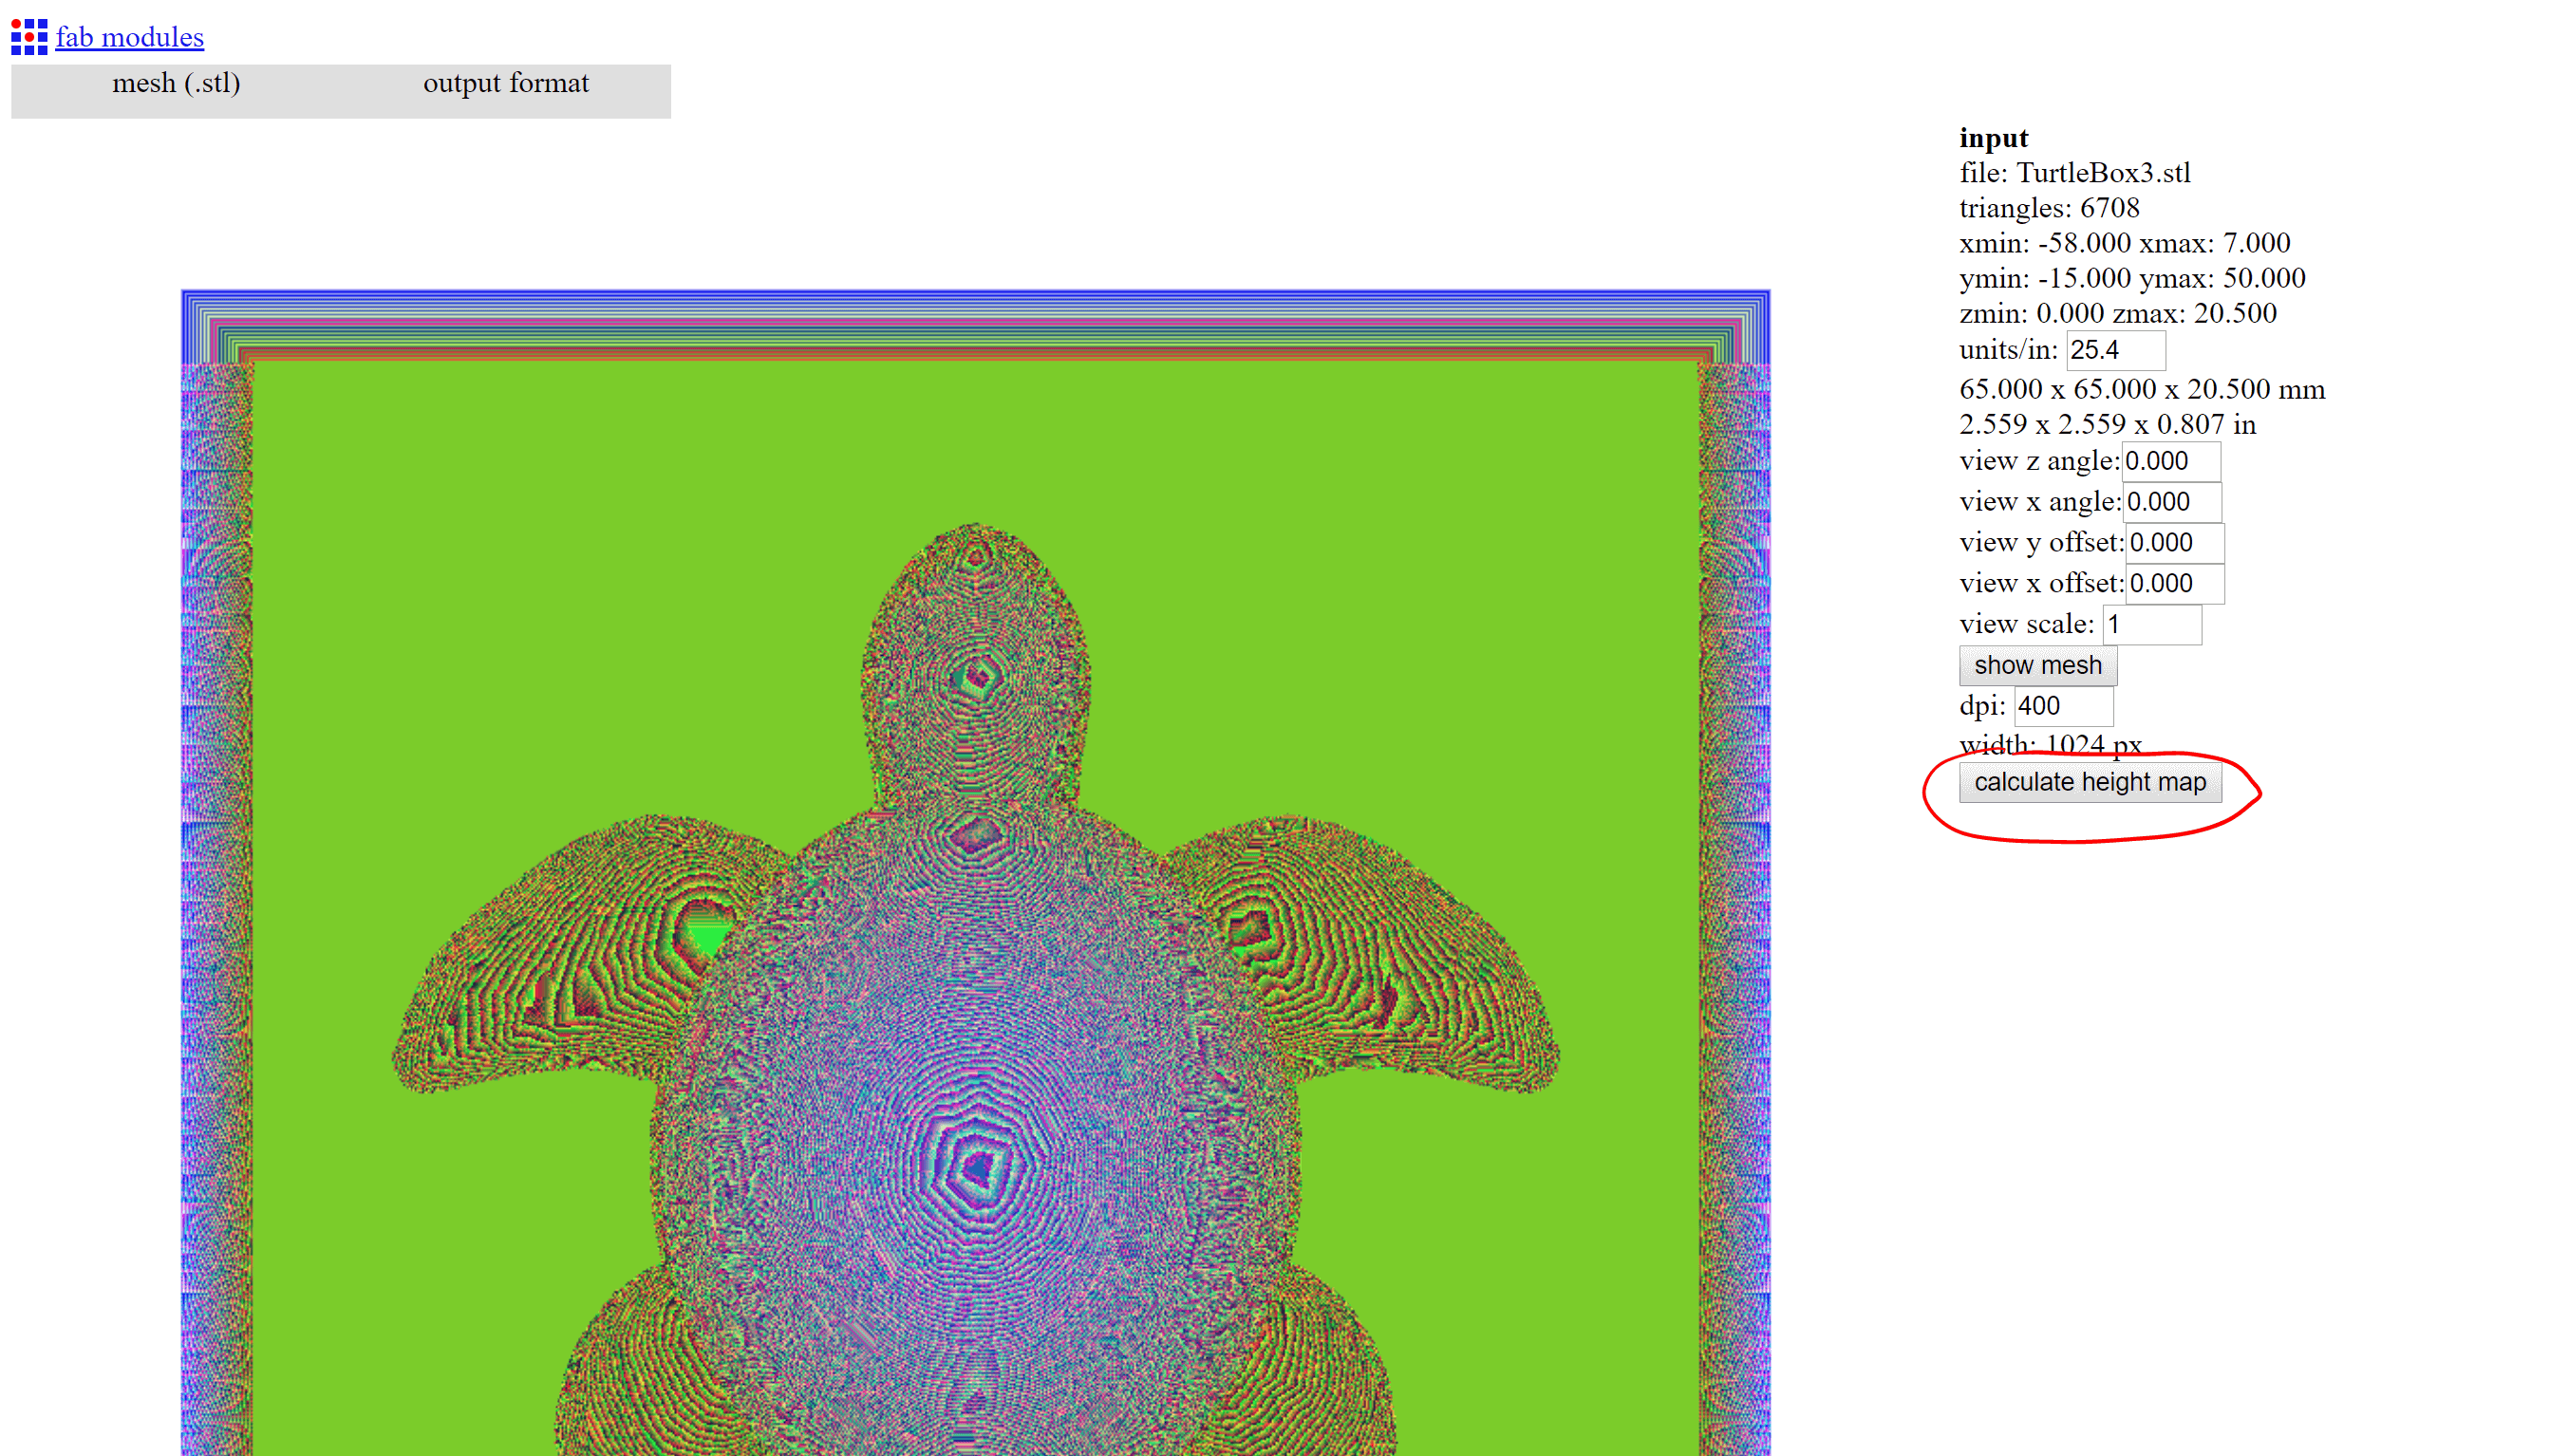
- You can change the resolution to get a faster calculation. I used a 400 dpi and the result was amazing.
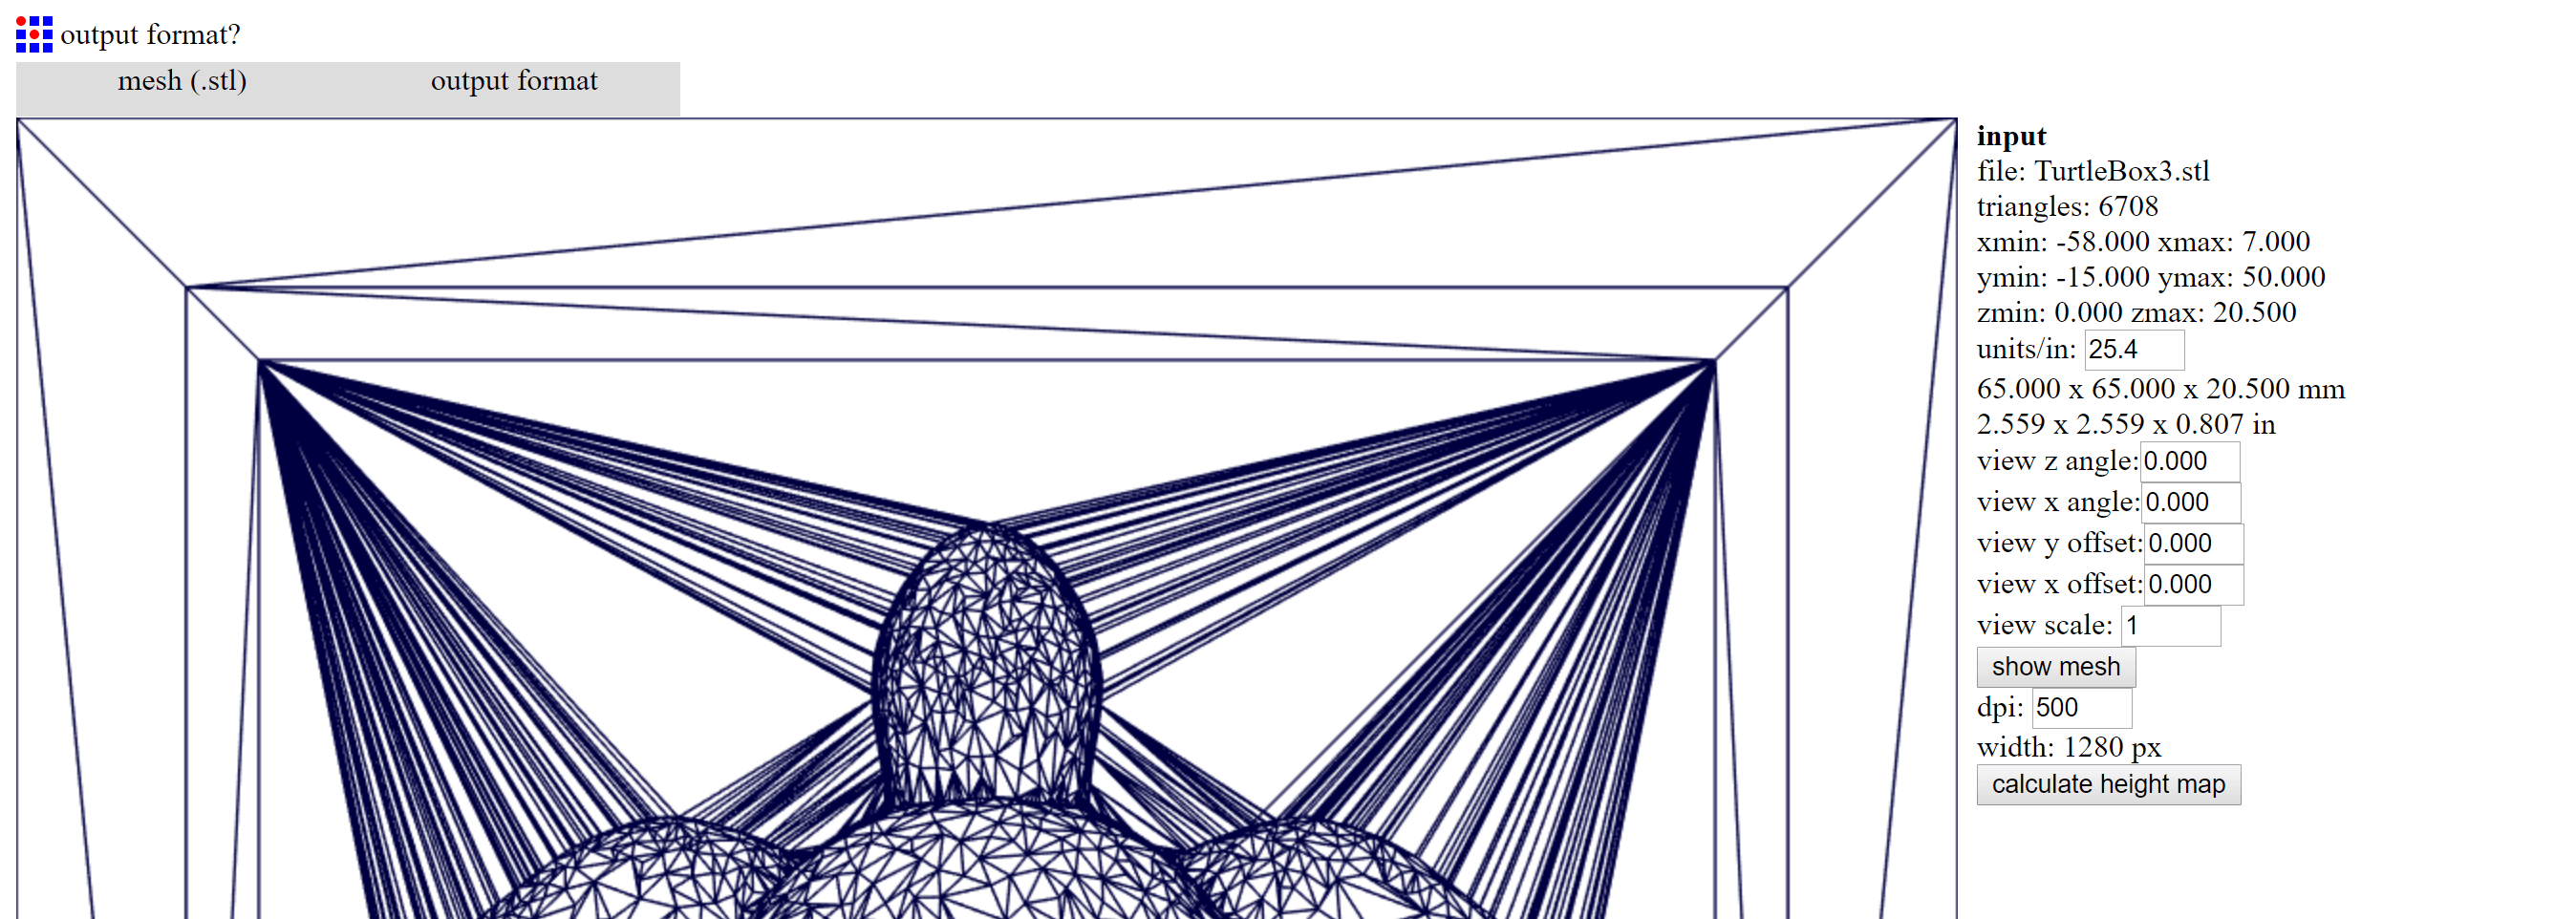
- Calculate the Height Map
- Click on output format and select the machine you will use, in my case the Rolland mill (you will select the model after)
- Click on process and select wax rough cut (1/8) to calculate the first rought cut.

- Configure the output:
- Chose the model of the machine you will use, in my case the SRM-20. Notice that default values will be uploaded.
- Set to 0 the values for x0, y0, z0 and to 5 the zjog leave the other values as they are.
- Configure the process:
- Check all the values
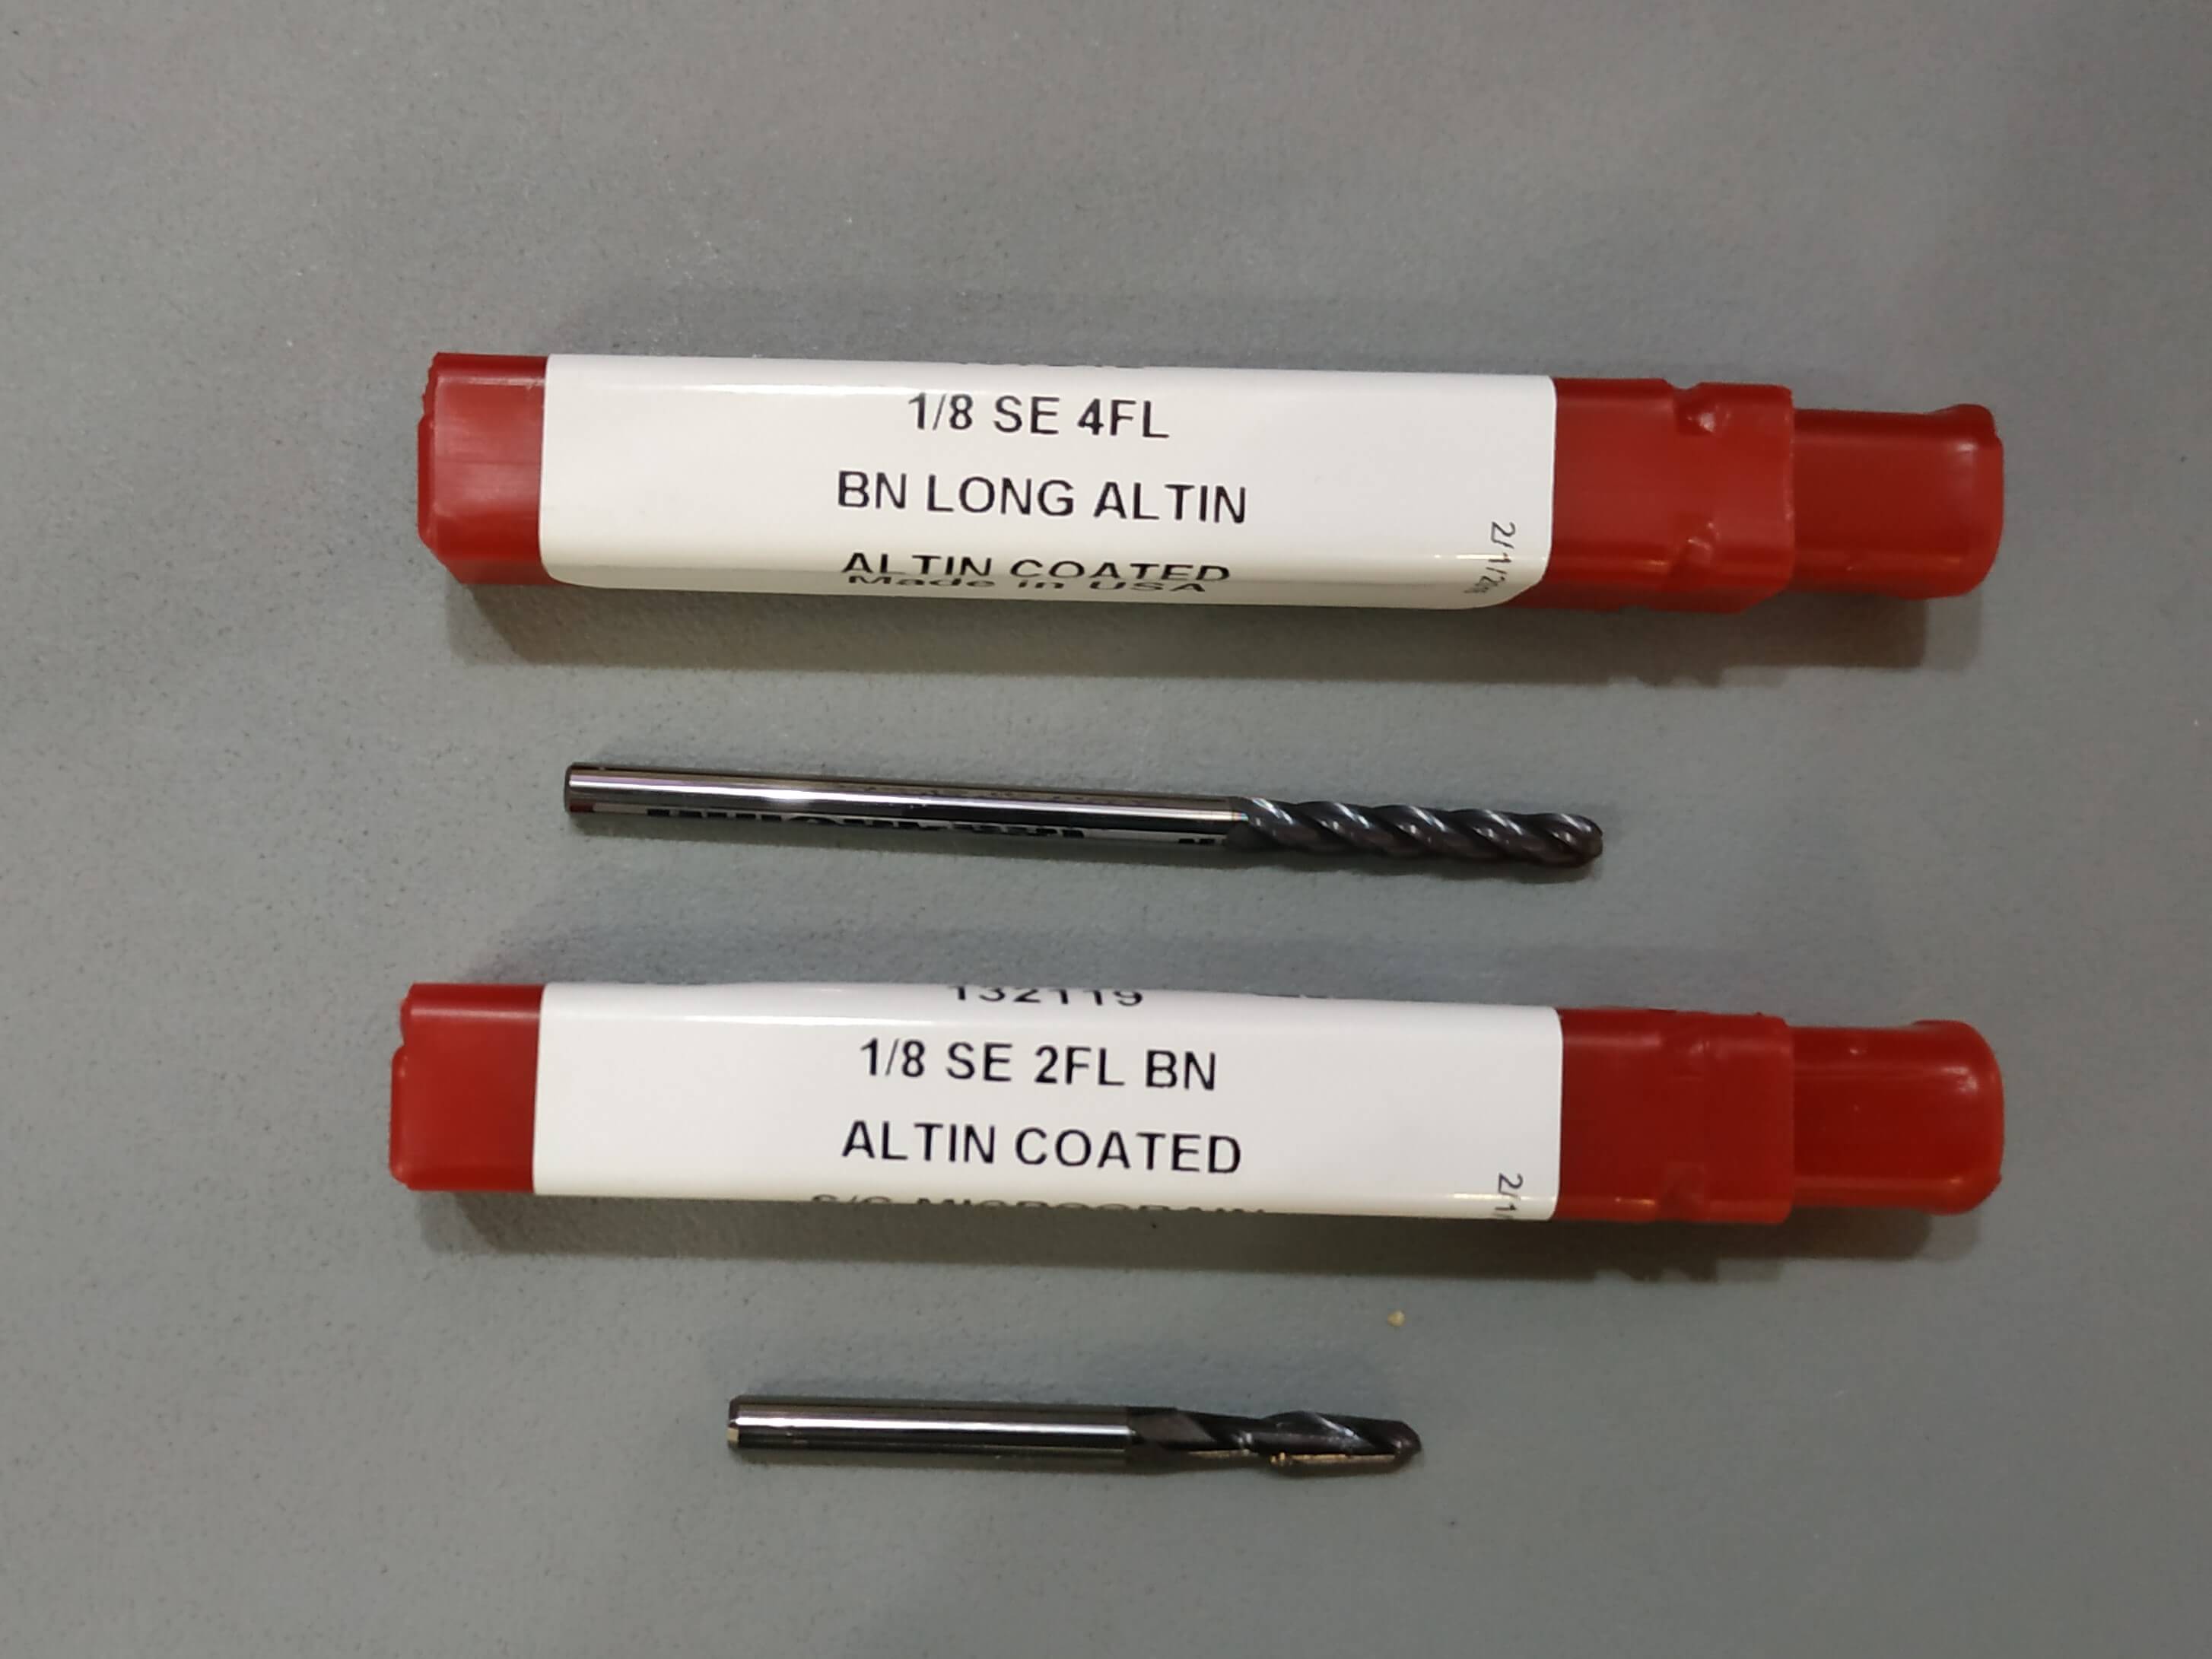
- Be carefull and change the size of the end mill accordingly to what you want to use.
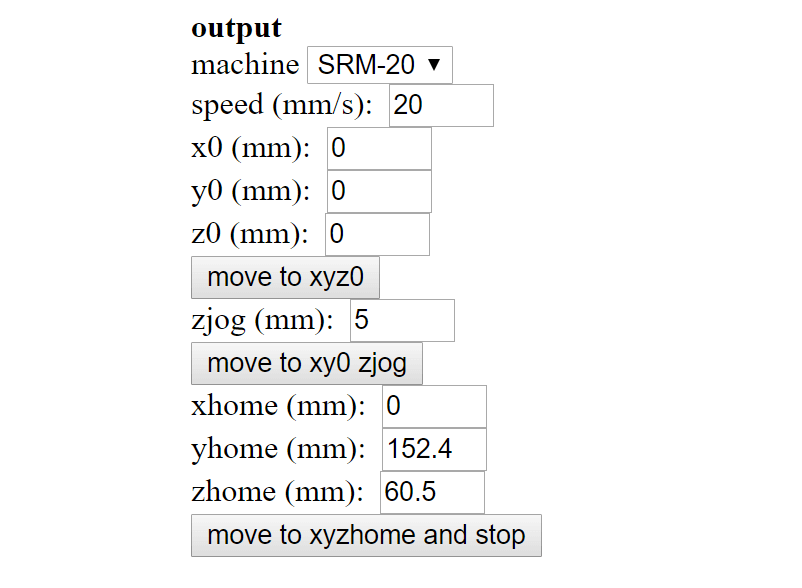
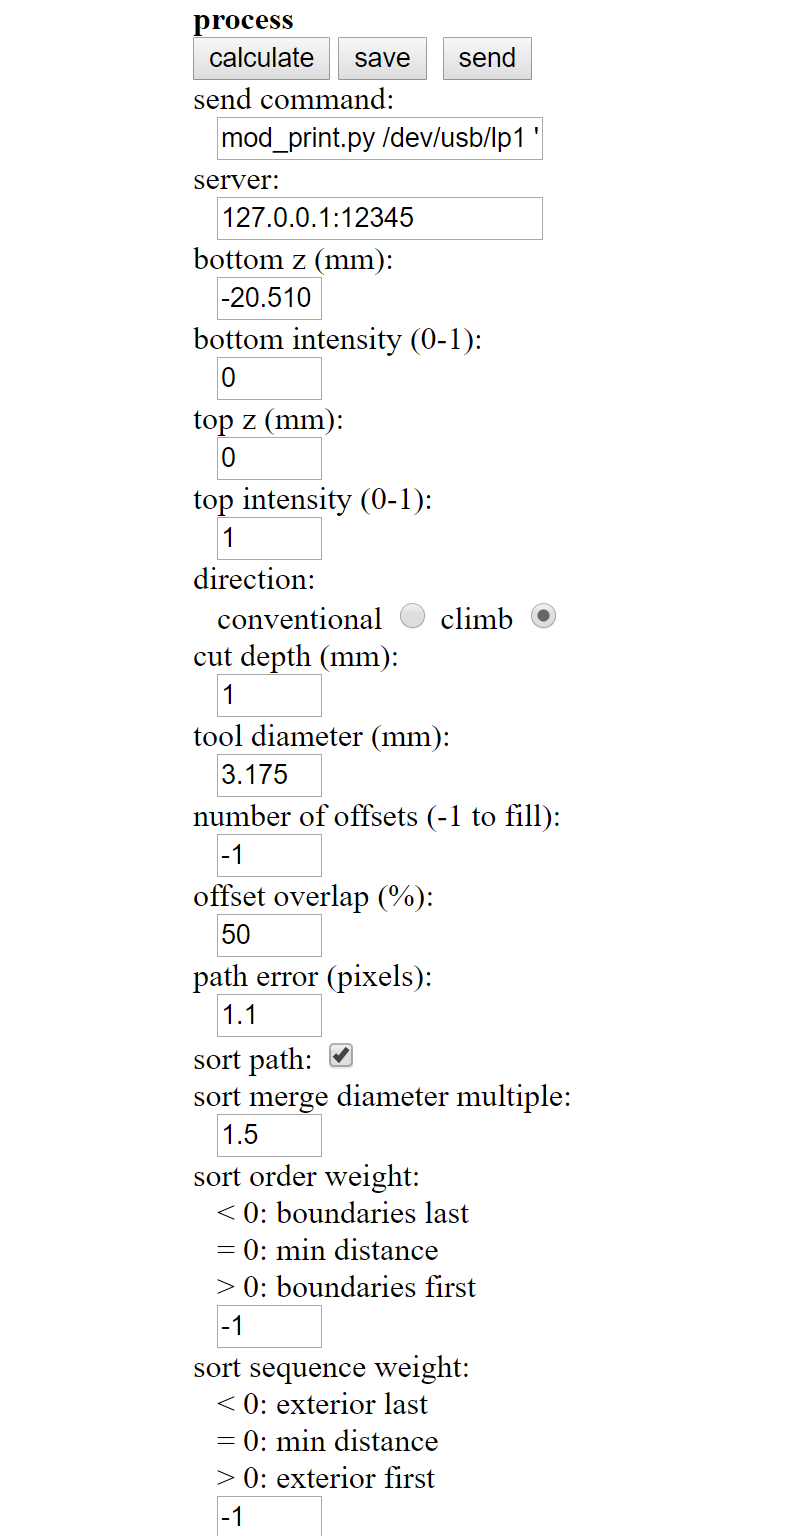
- Click on calculate under process and wait for the simulation to finish

- Click on save and you will have your file ready to go!
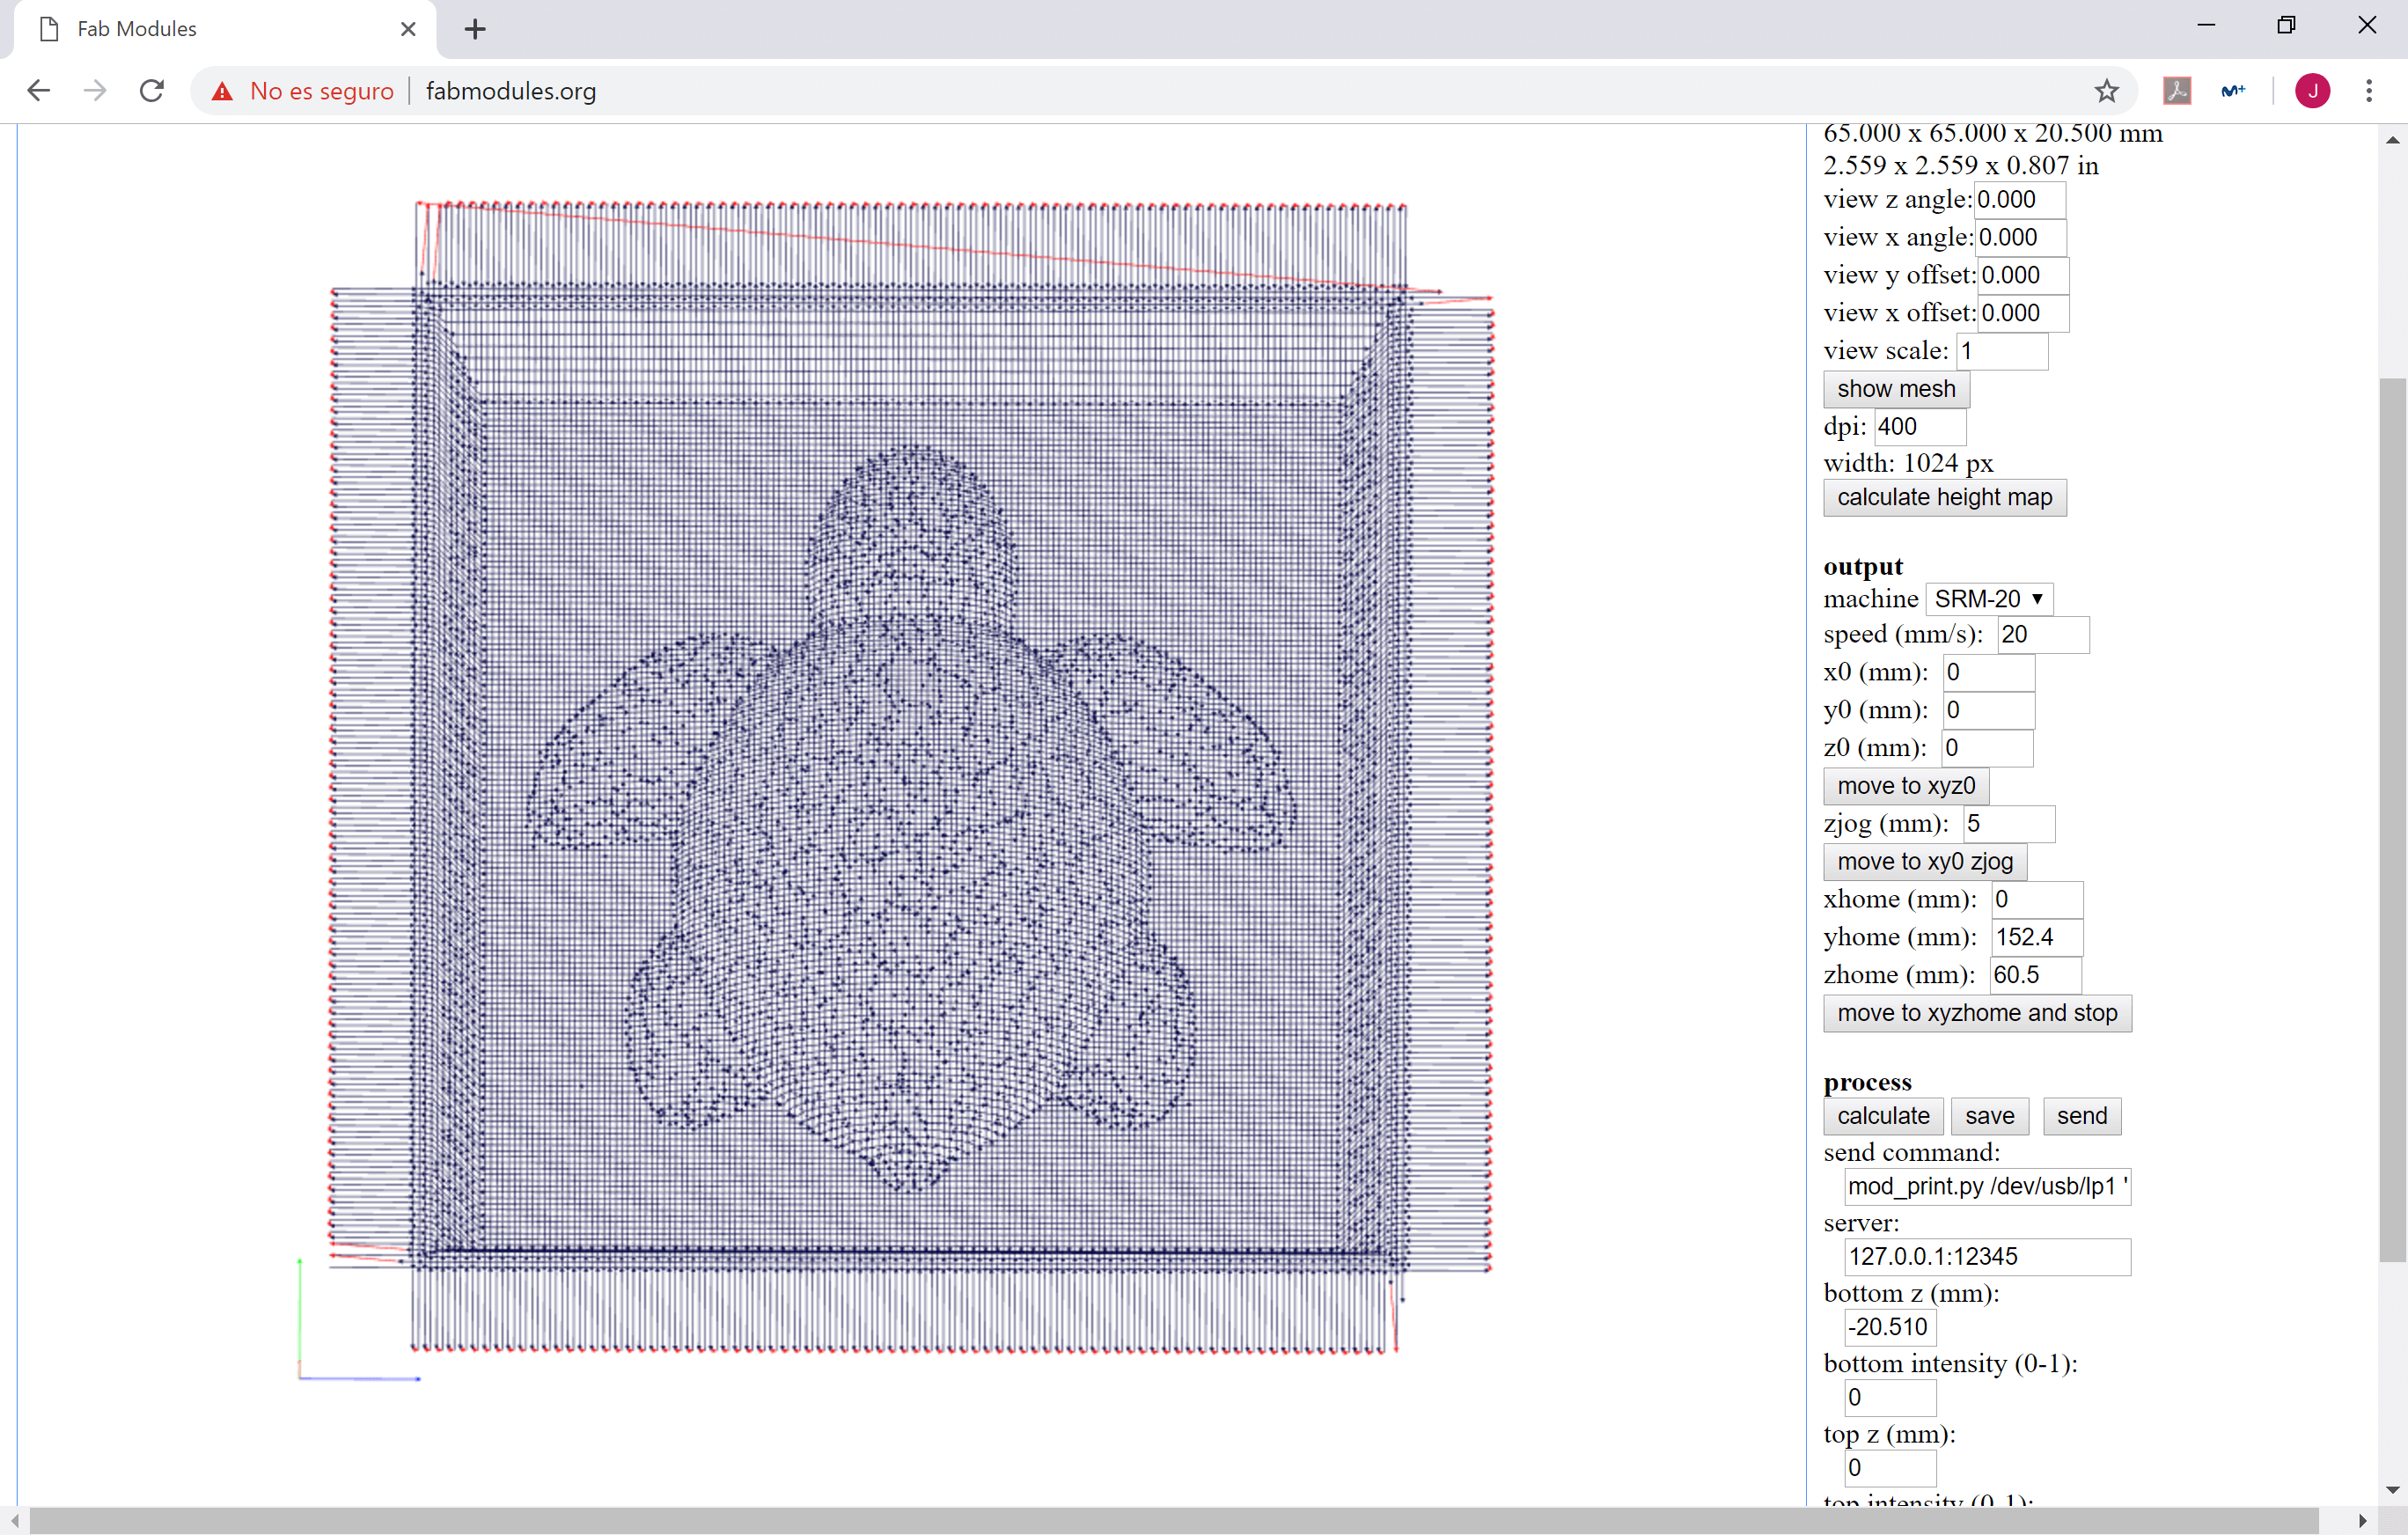
For the finishing you can follow the same steps, you can only change the process to wax finish cut (1/8) and check all the parameters. These are my parametrs:
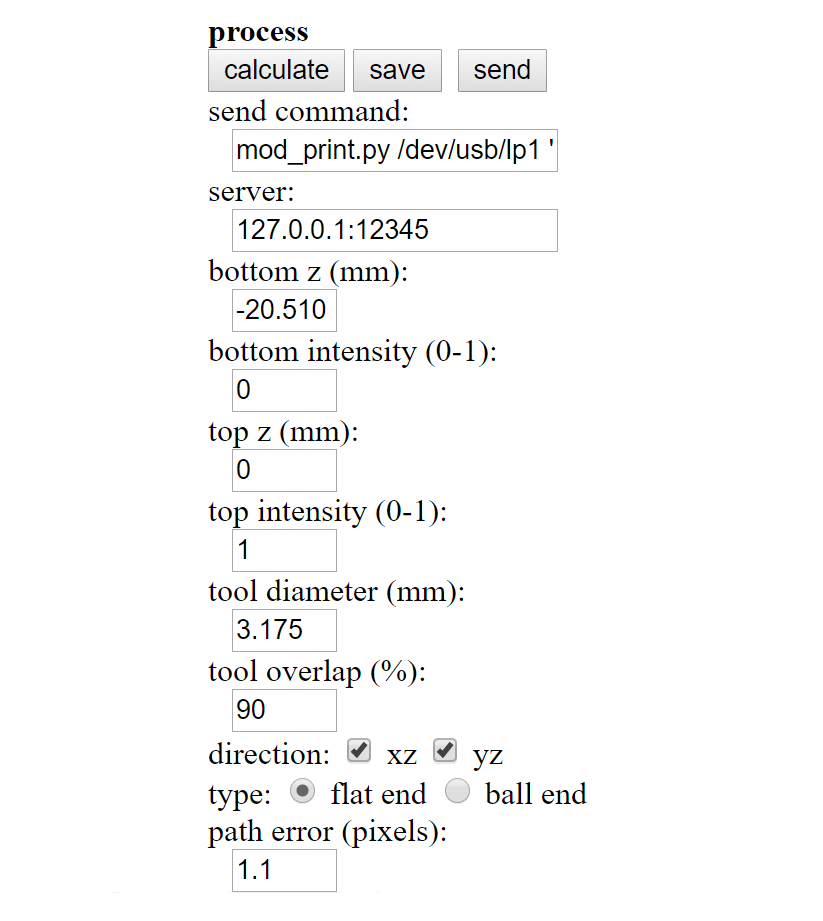
Remeber to set correctly which typw of end mill are you using, flat or ball end. Click on calculate, wait for the simulation and save the file. This is the final result:
Milling the wax
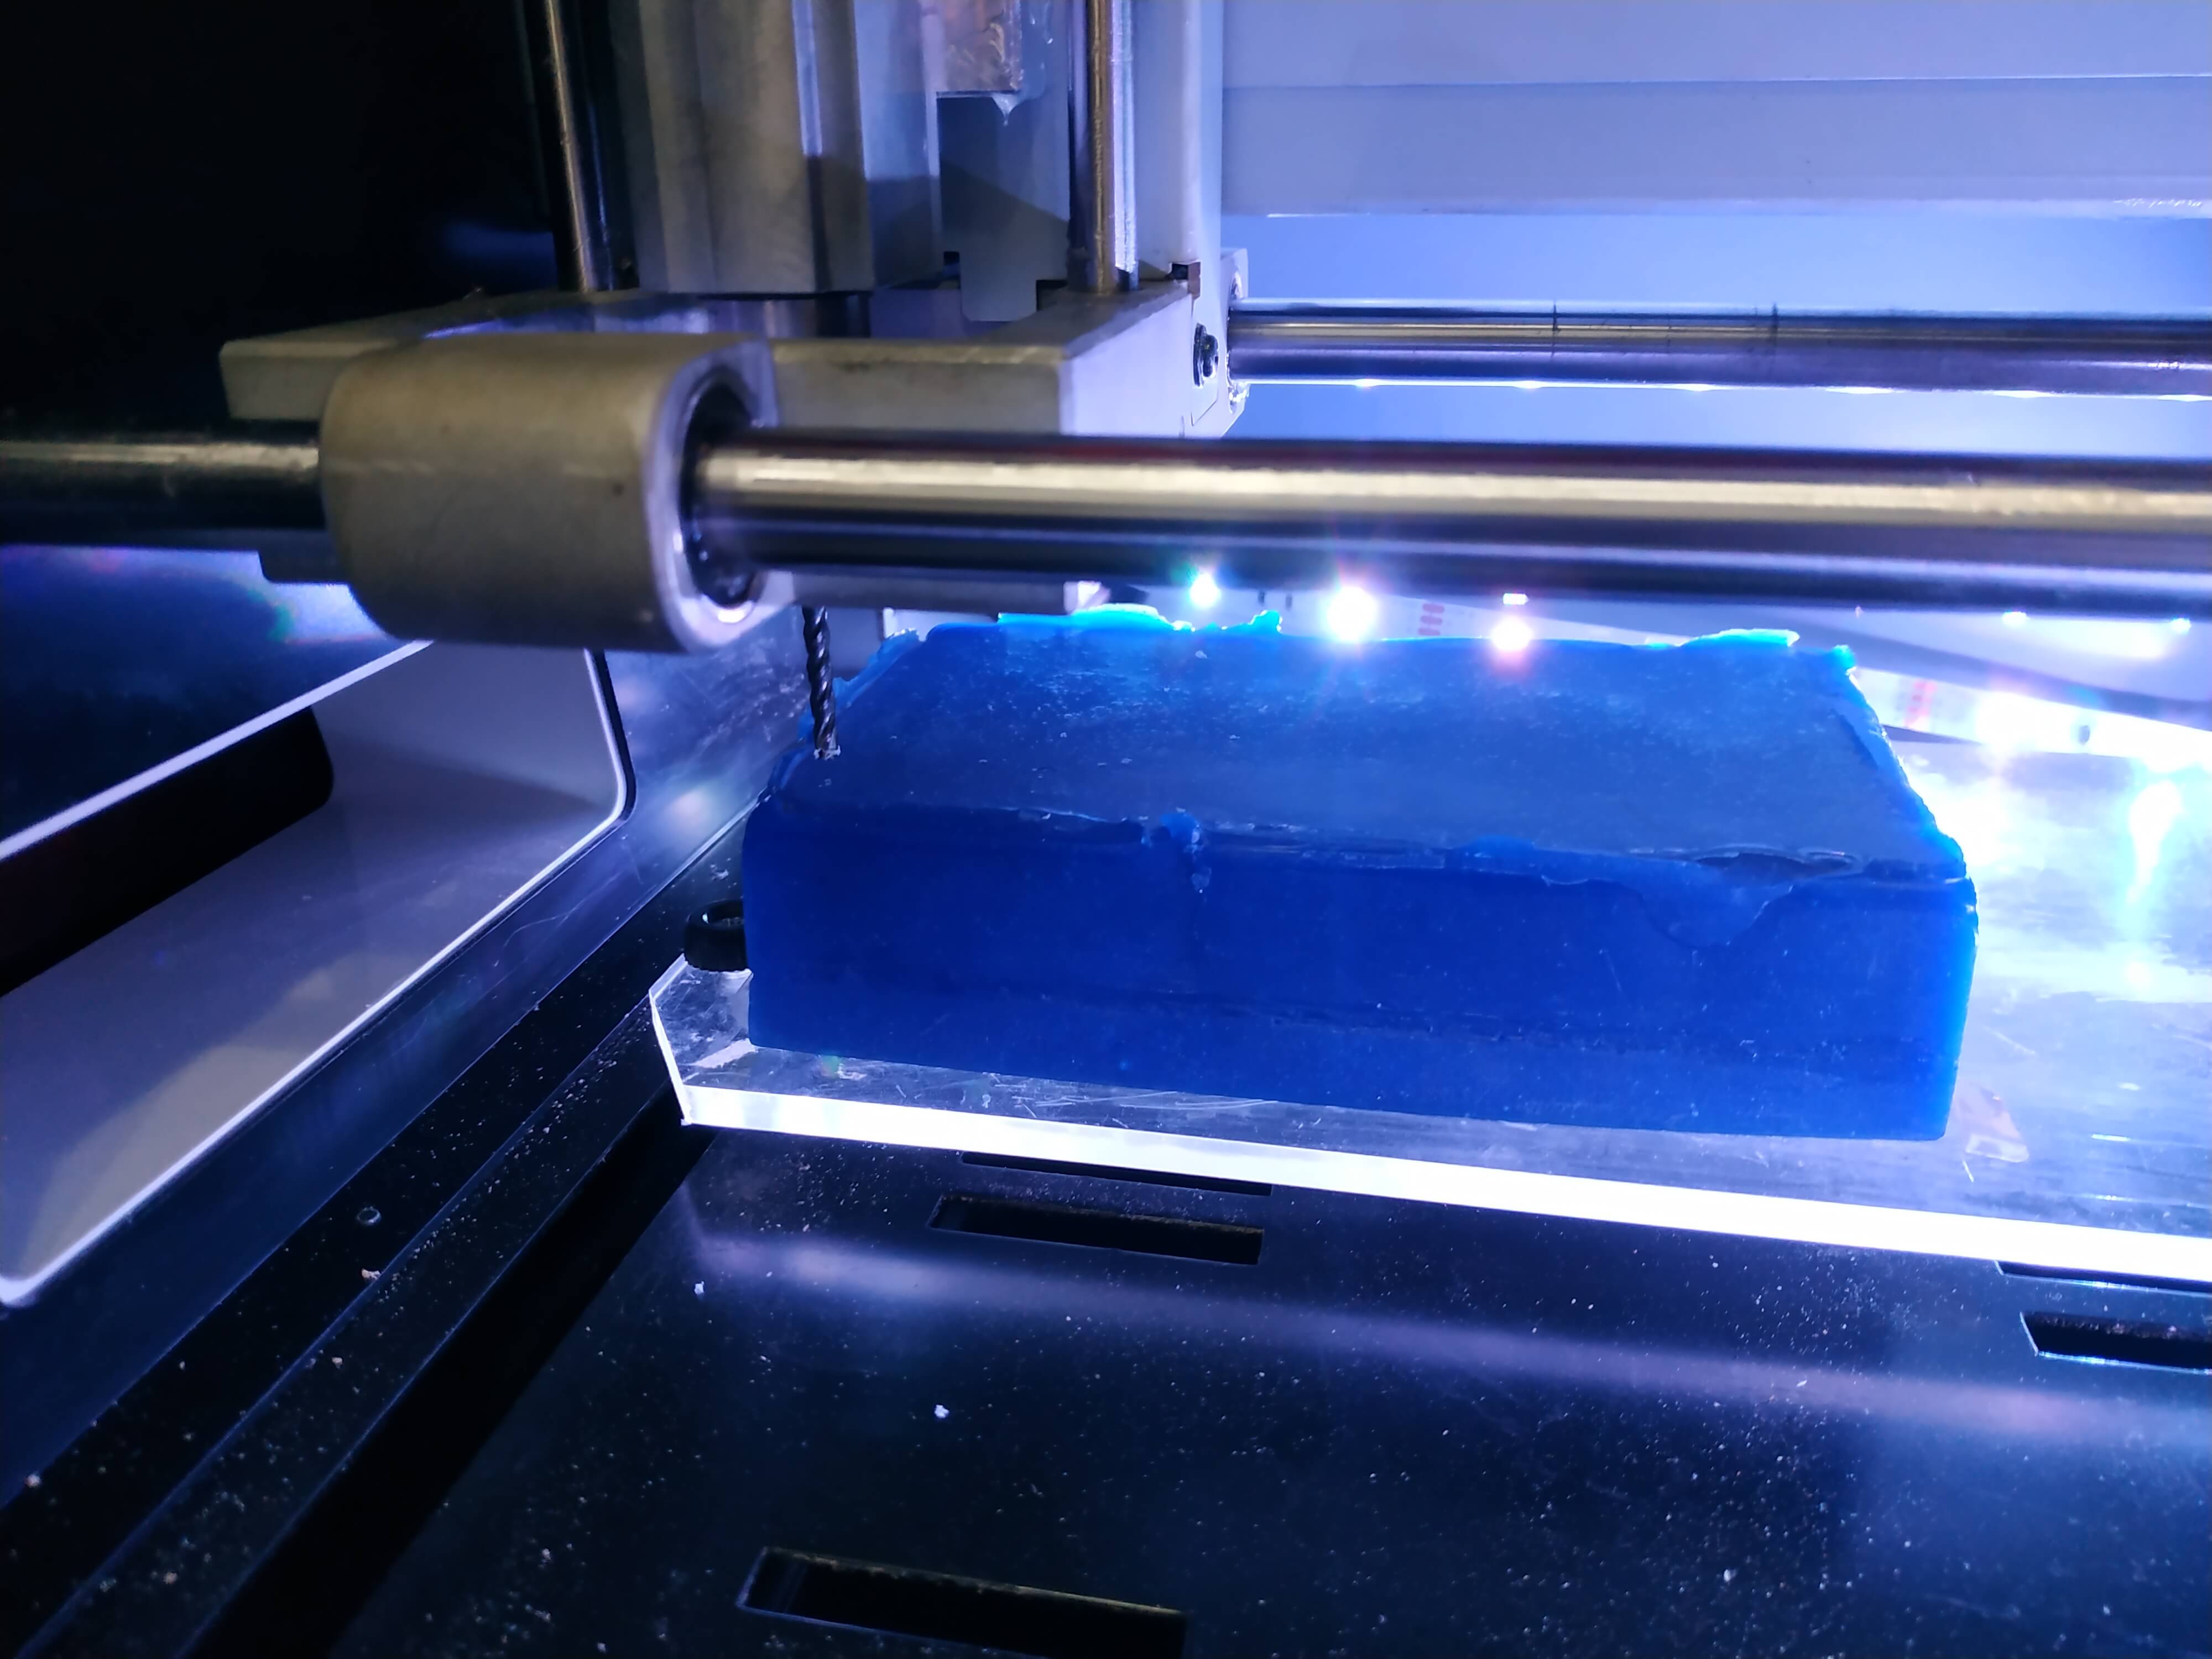
Grab your wax block, apply some double side tape and stick it into your CNC plate. With the files produced by fabmodules we can start the milling in the same way that we did during week 4 and 6!
But first, get your end mills and check that they are long enought to mill your block. This is really important, because if not the head of the spindel can colide with the block and breake the machine.
If the block is not flat you can use a flatten operation to make it flat, but as the wax is not a really hard material, if you set your Z0 in the lowest point it will be able to mill your mold perfectly. Put the flat end mill and set the origin. To set the Z origin I turned on the spindel and set it when it touched the block.
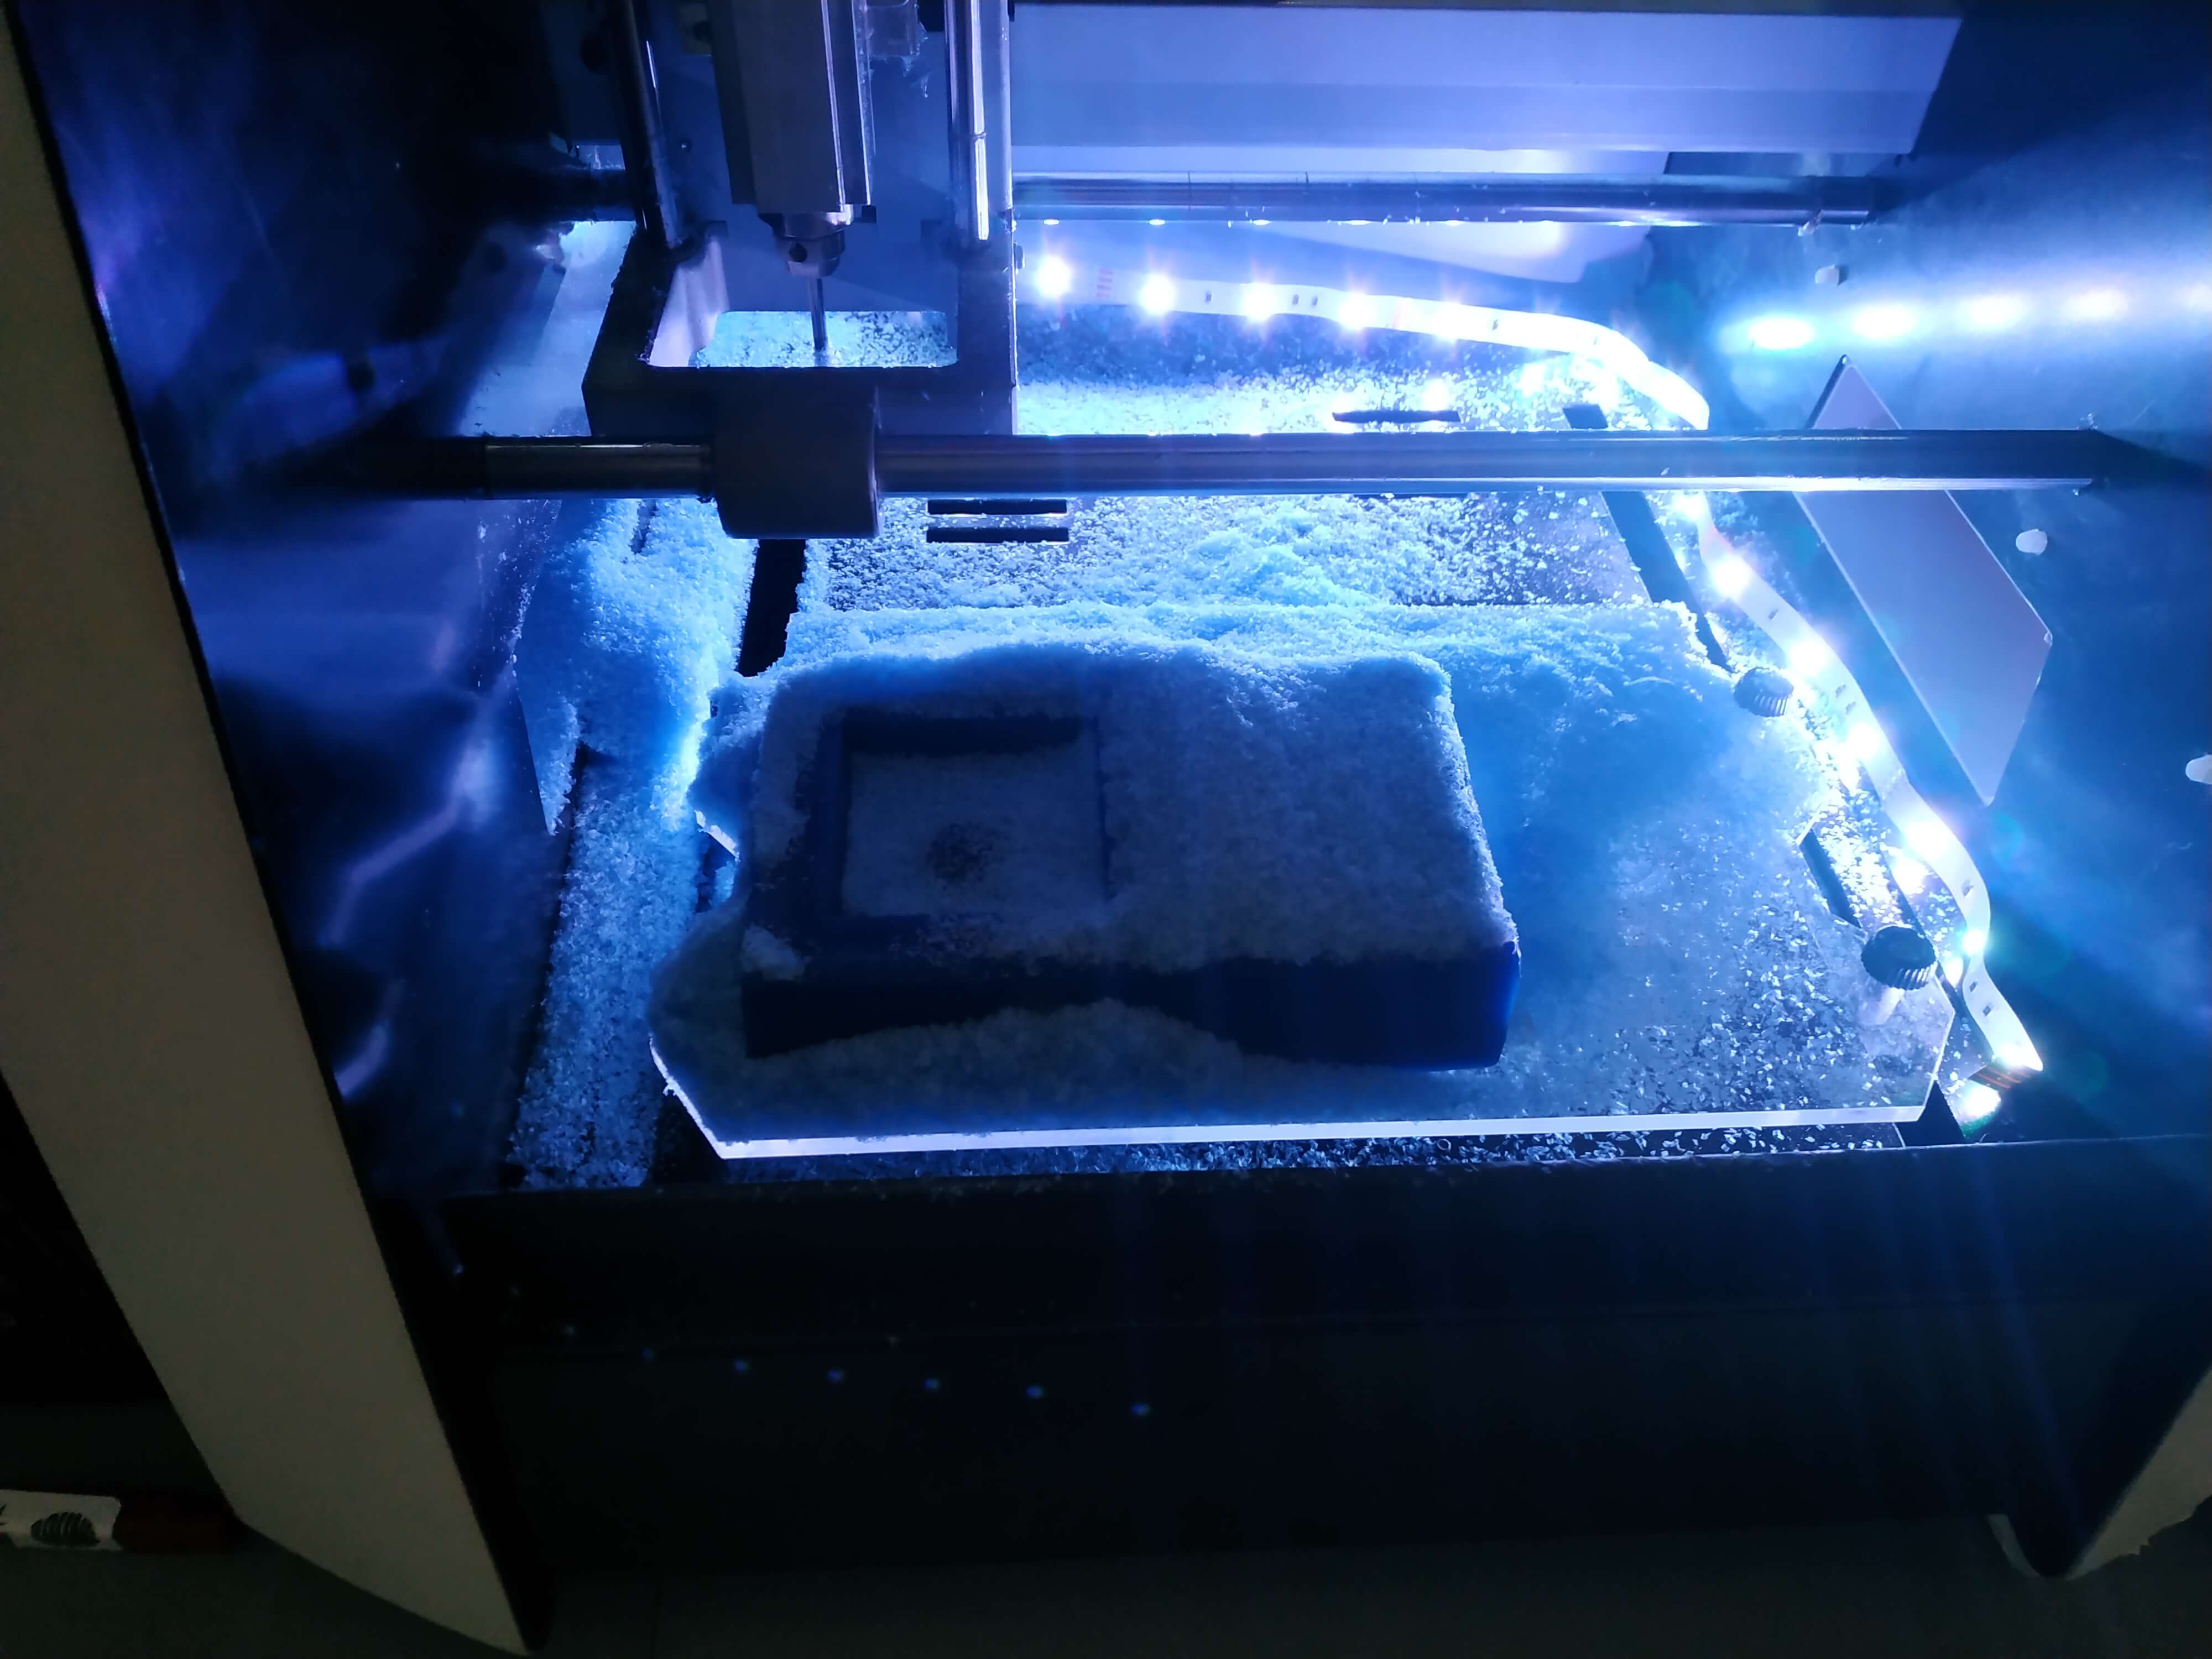
The first operation is the rought cut. It is the longest one as it has to take out a lot of material. Also, I found a problem in fabmodules and it did some strage things. First of all the overlap, I set it to 50% but then sometimes it seems like if it was set to almost 0%, so the cut was really agressive and I had to reduce the speed to 5. Also there was an error and it did the path for each layer twice, cutting in the air. For this reason it tooked so long, almost 2 hours. Here it is the final result:

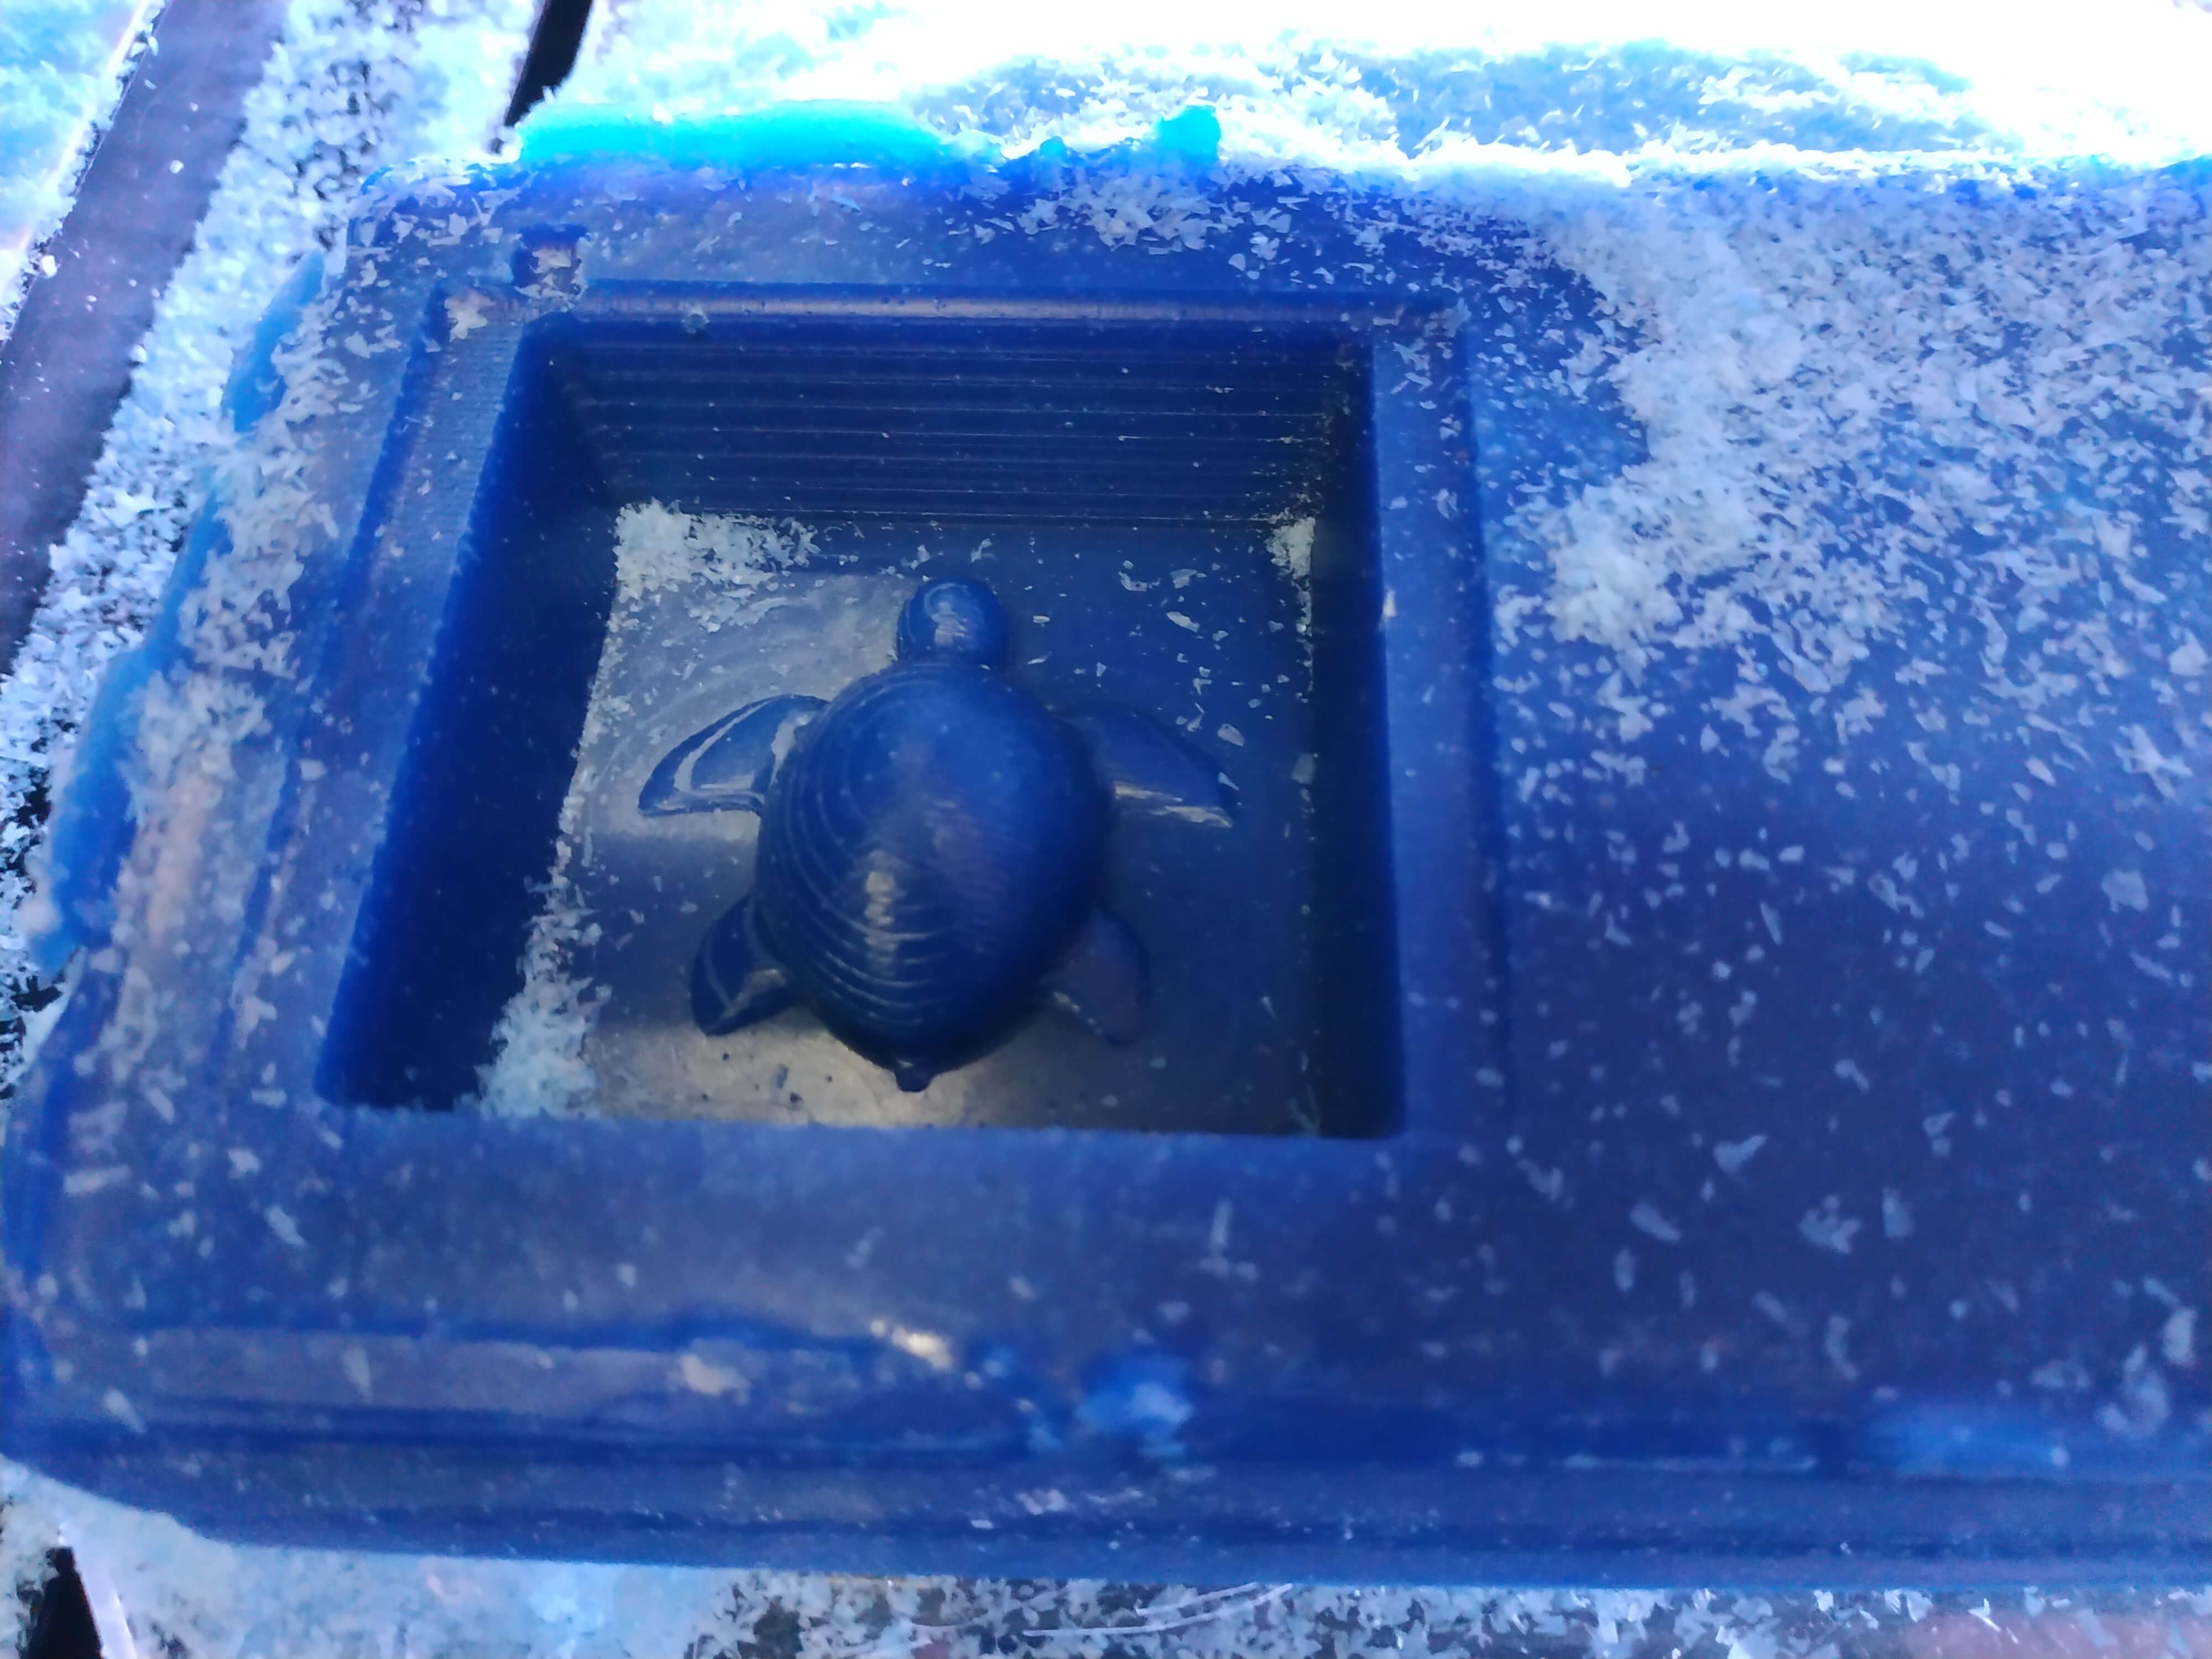
Then I changed the end mill to a 1/8 inches ball end. It was smaller, but it was long enoght to mill the whole block, so I put it into the collet, set the z origin again and start the cut. This cut was much faster, it tooked 30 minutes aproximately and the result was amazing!
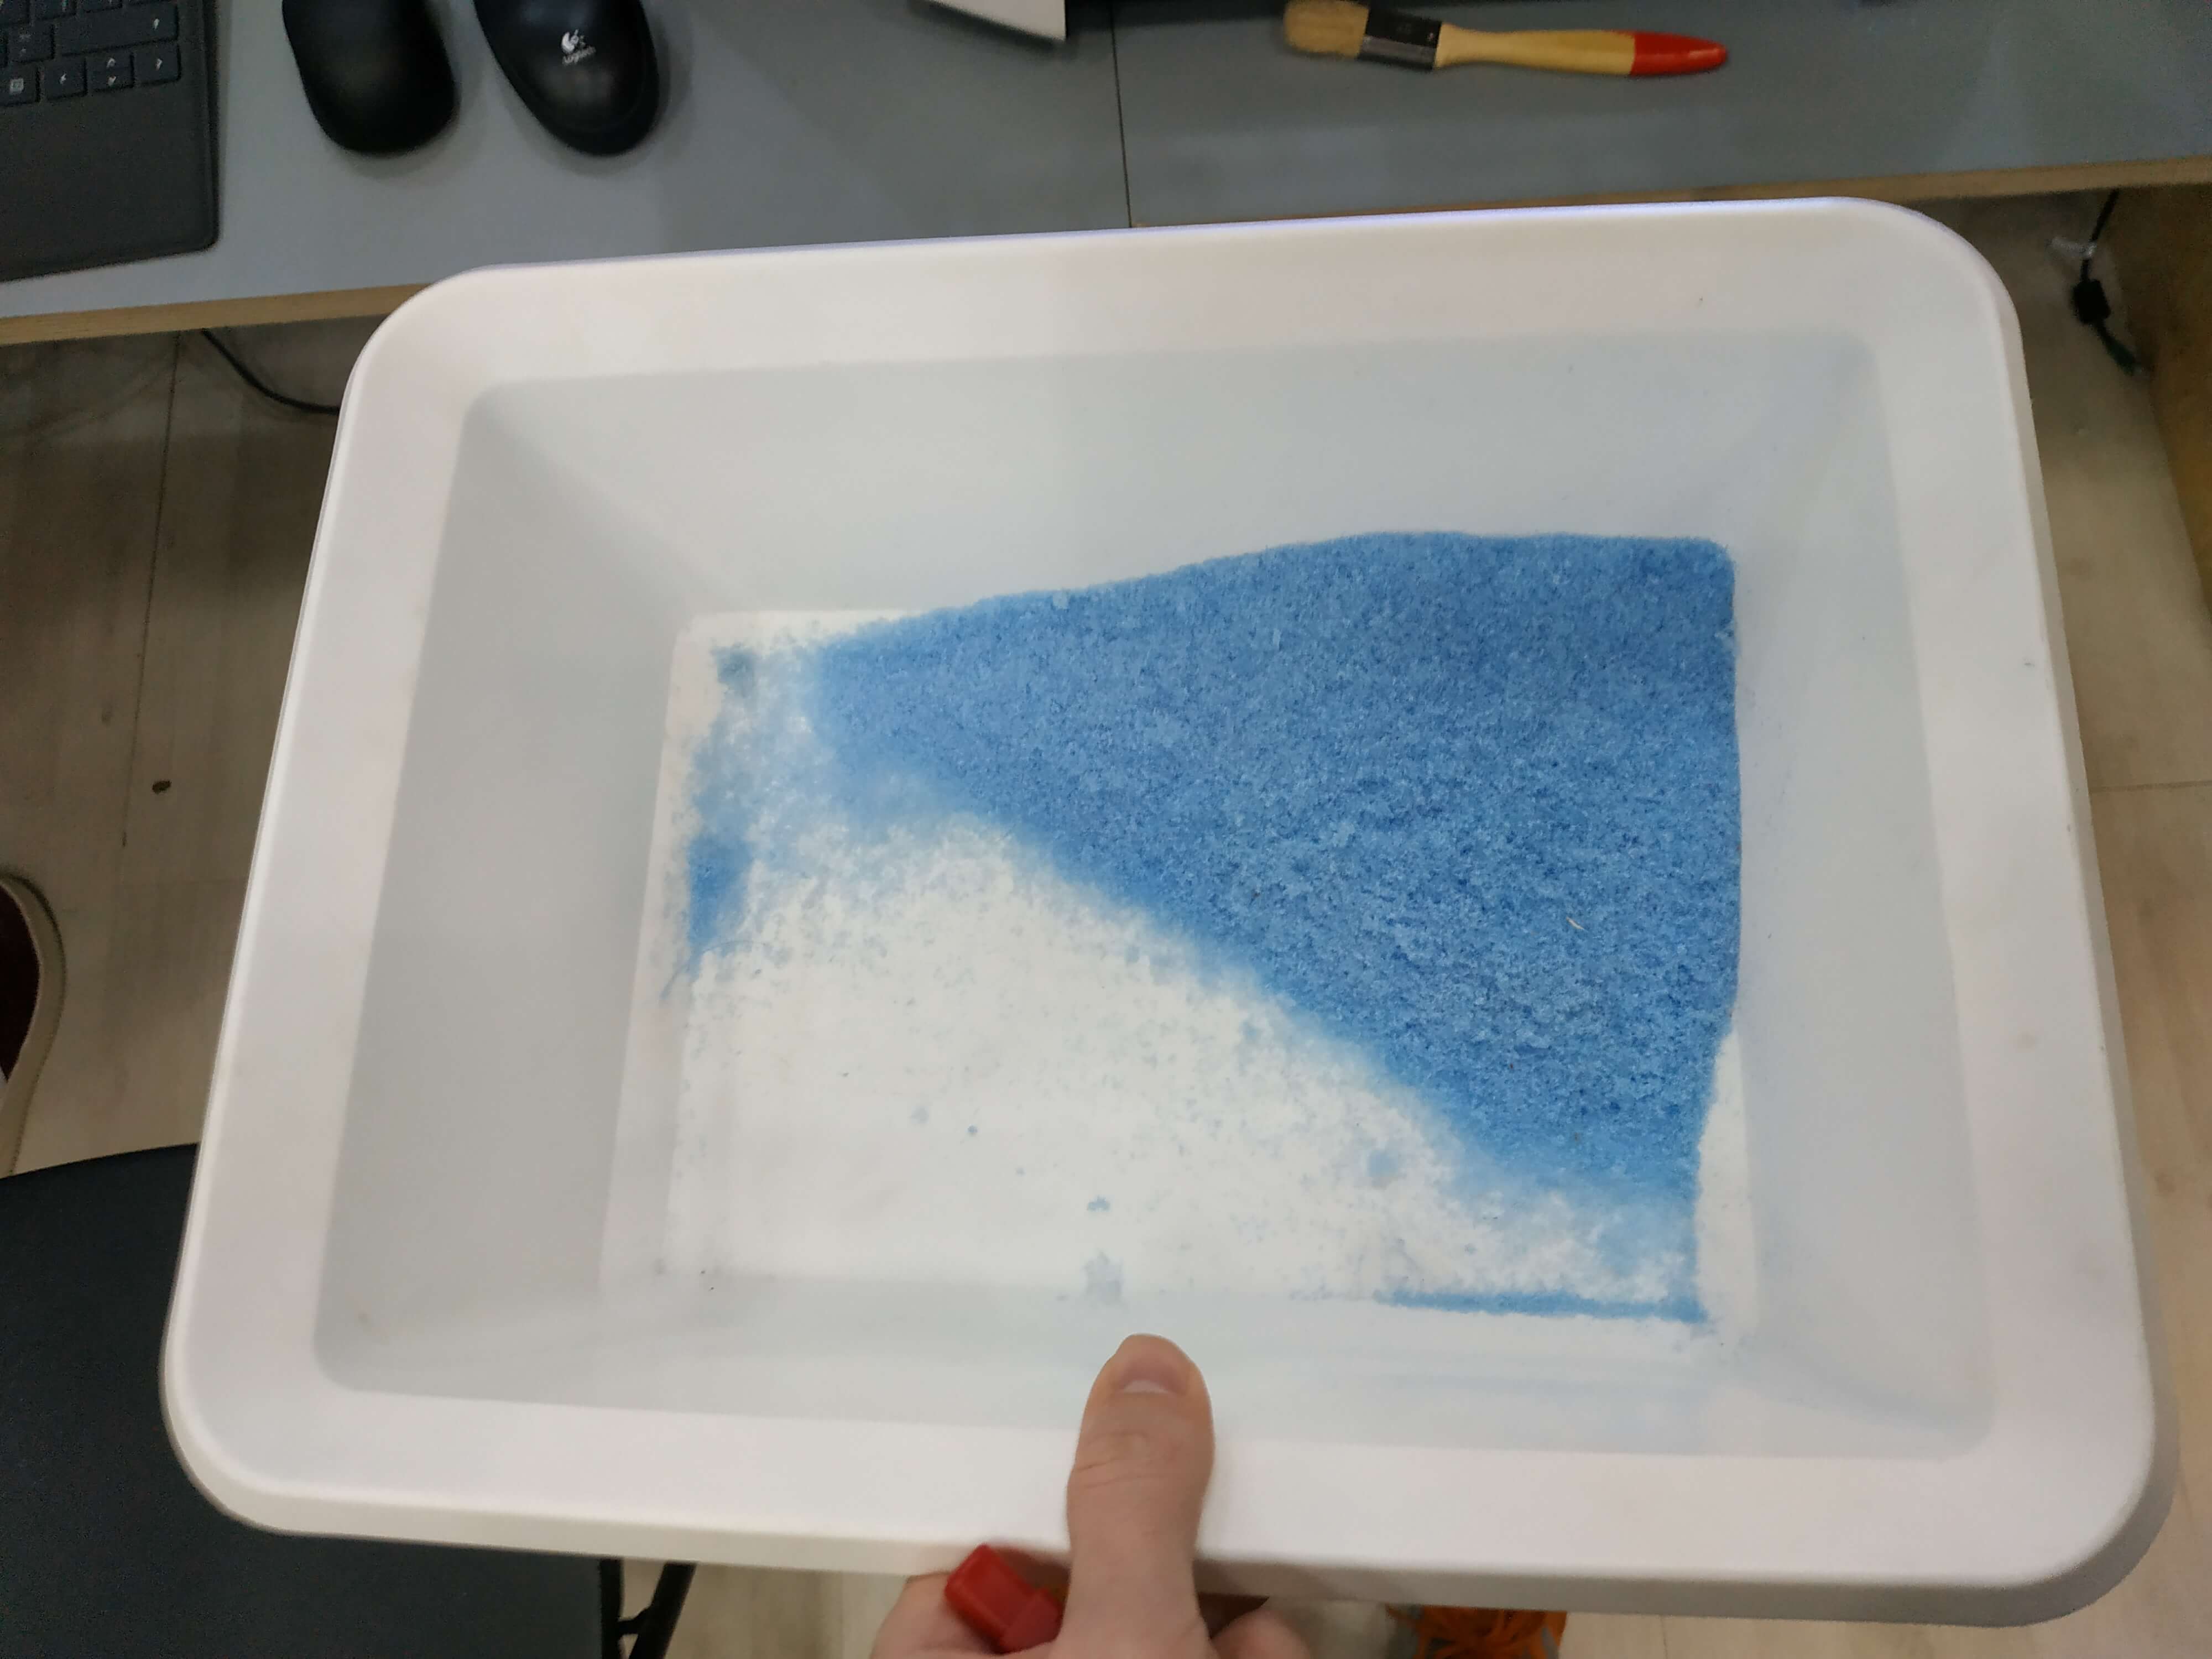
Remember that we are using wax, so all the chips can be melted and use them as a new mold! It is very important to clean it well and save all the spare material.
Casting
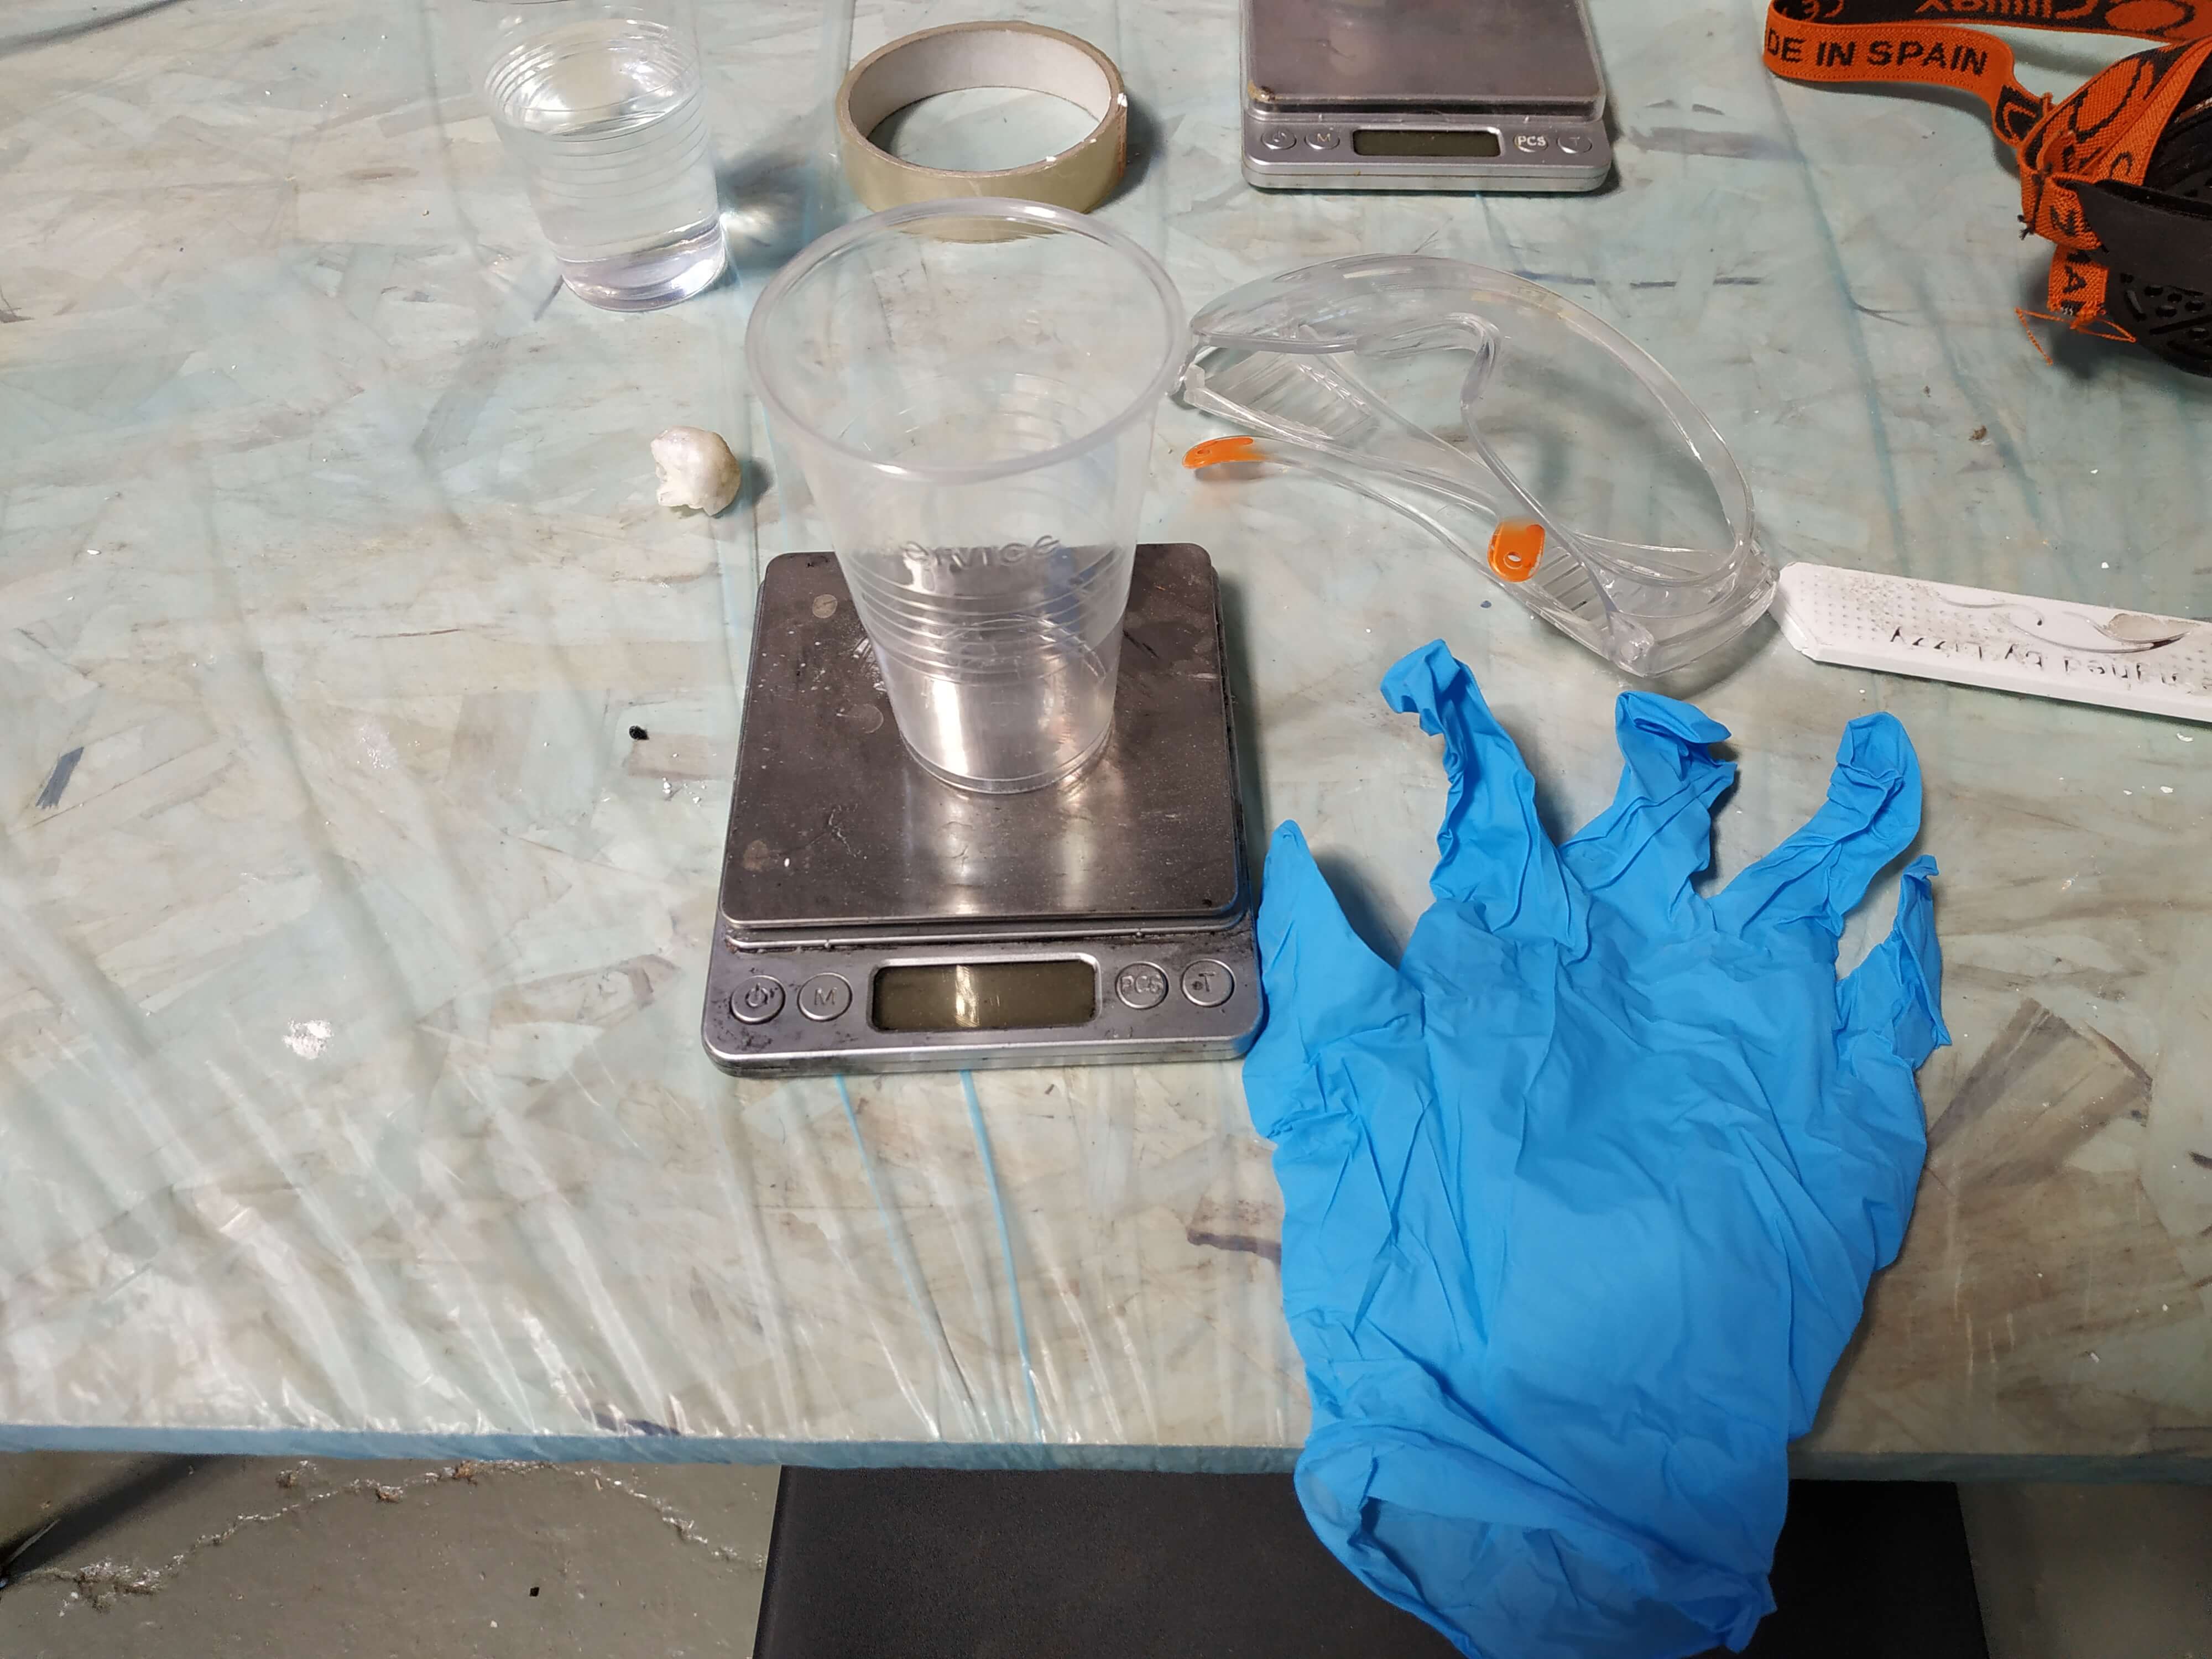
Now with the mold done it's time to cast it! I wanted it to be a Food Safe mold to make chocolates or ice, so I looked for a food safe material. Here in the lab be had Smooth On SUPRA Clear 18, a food safe silicone base material. Once I decided to use it, the first step is reading the Datasheet and, most important, the Saftey Datasheet. You can find how to use it in the web, the Saftey Datasheet here and the Food Safe Technical Bulletin here.
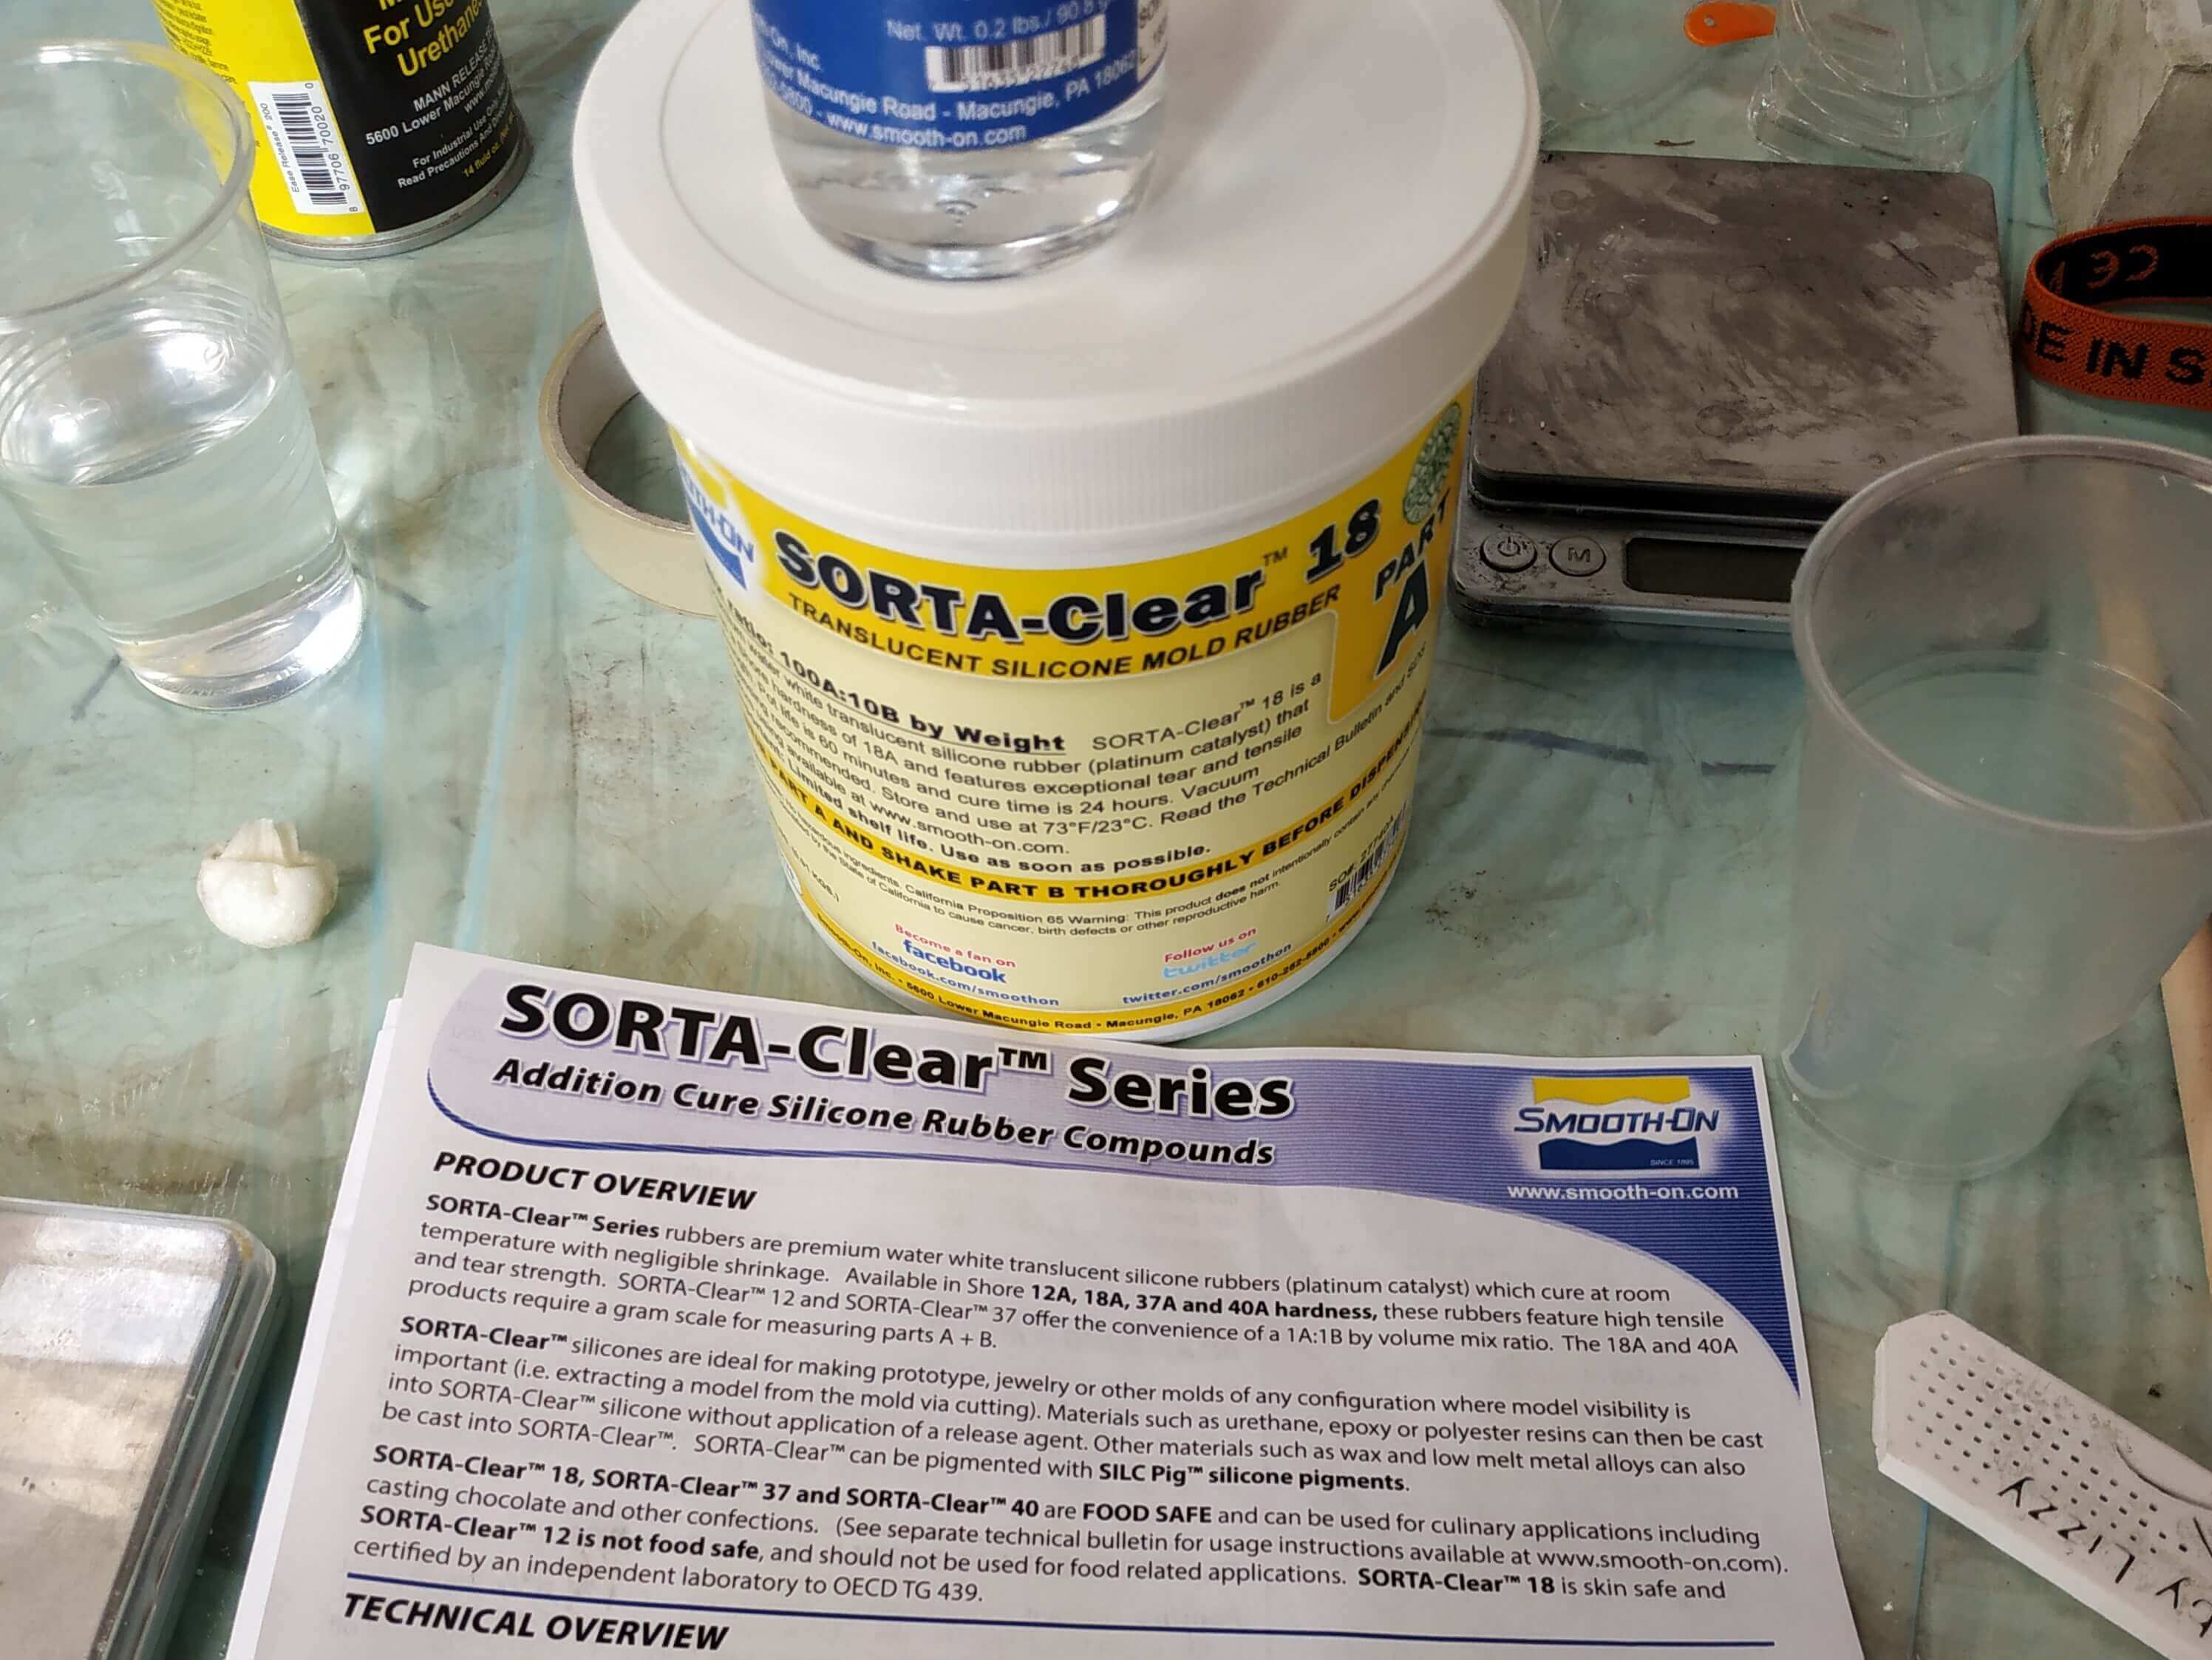
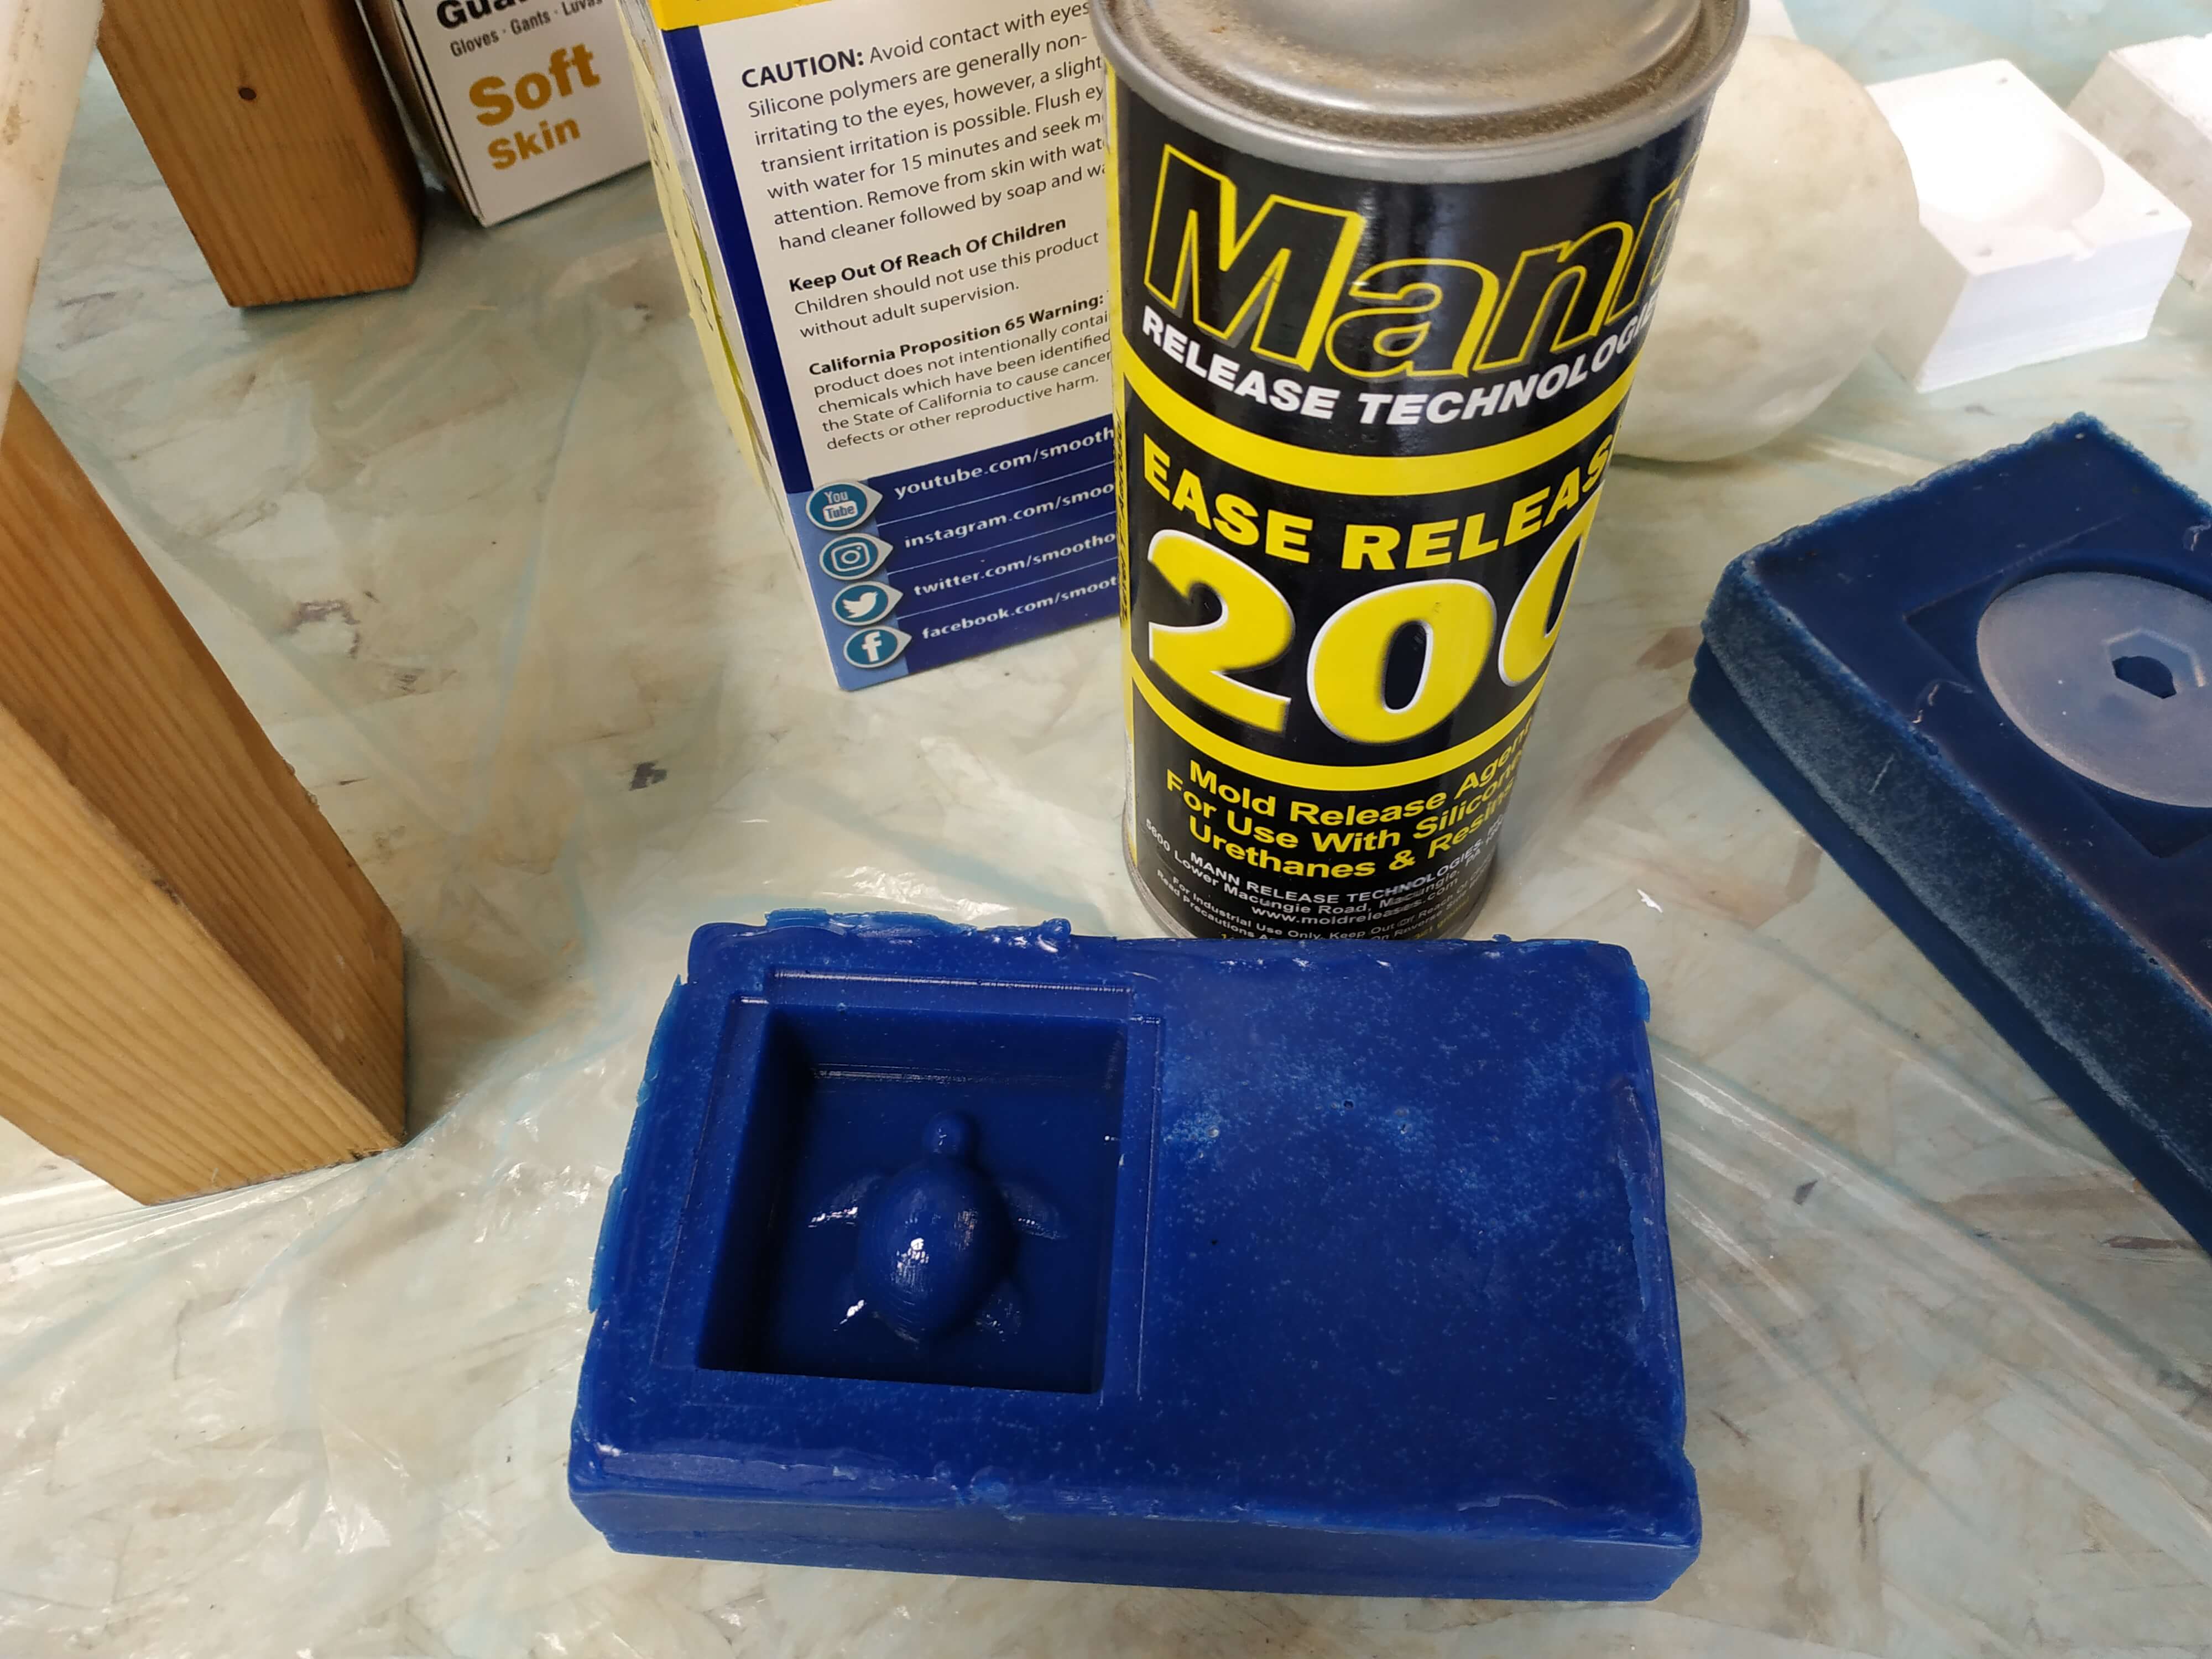
Before doing the mixing of the material, it is recomended to apply a release agent to the mold, for makeing it easy to tacke out the casting. I used the one recomended on the datasheet, it is important to reed it well because some prouct can inhibit the correct cure of the mold. Read the instructions on how to apply it and do it outside.
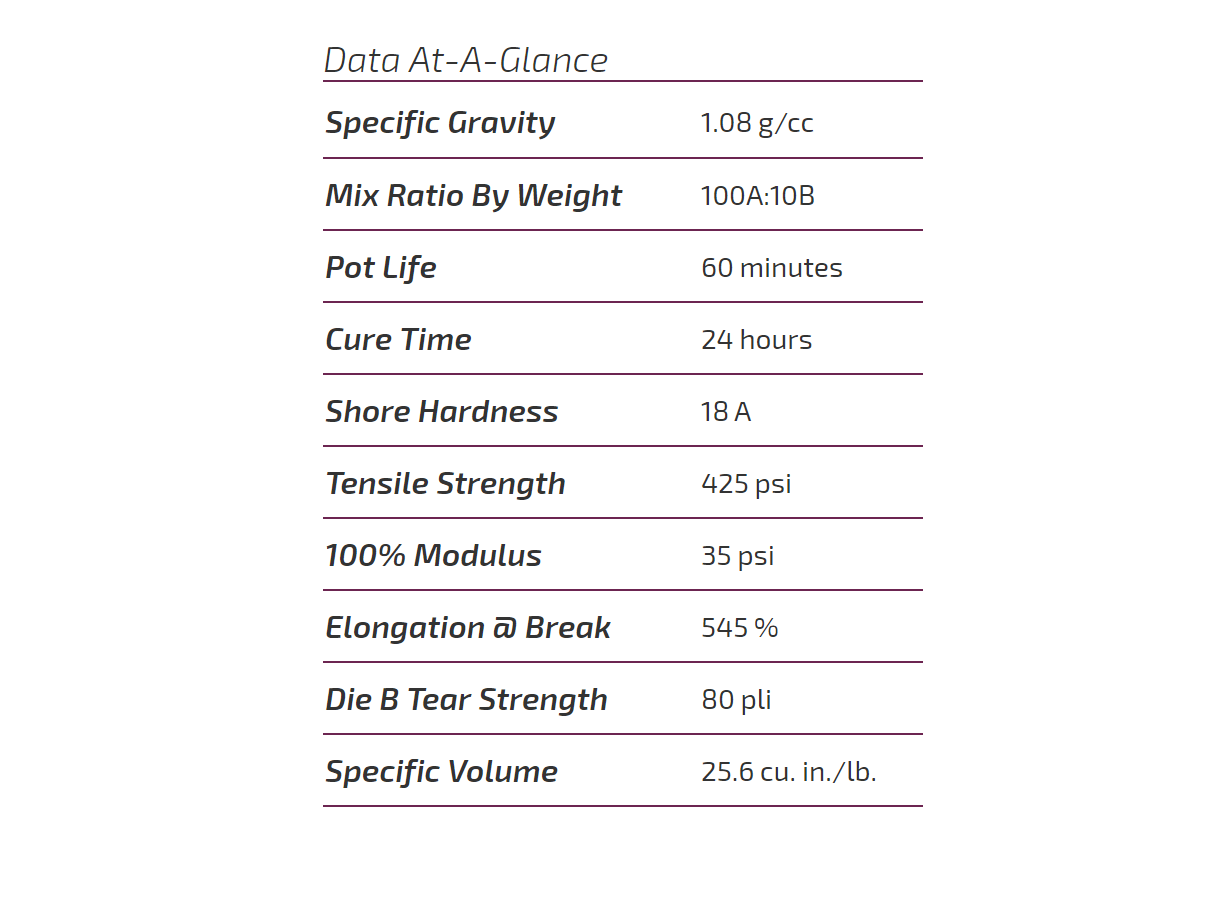
Then, it's time to do the mixing. Acording to the Datasheet we need a 100A/10B weight relation, so for 40 g of product A we had to add 4g of product B. Use a weighing scale to do it and allways use gloves. It is recommended to use double gloves to be able to ge them out without gettting in contact with the material. With the two products in the cup, it is time to mis it well. This is very important, so spend some time mixing, it is hard, but it is the key to get a nice mold. Using safety glasses is recommended to aboid any splash inside your eyes. Looking at the datasheet we can see that the pot life is 60 minutes, so we have one hour to mix the products and put it to the mold.
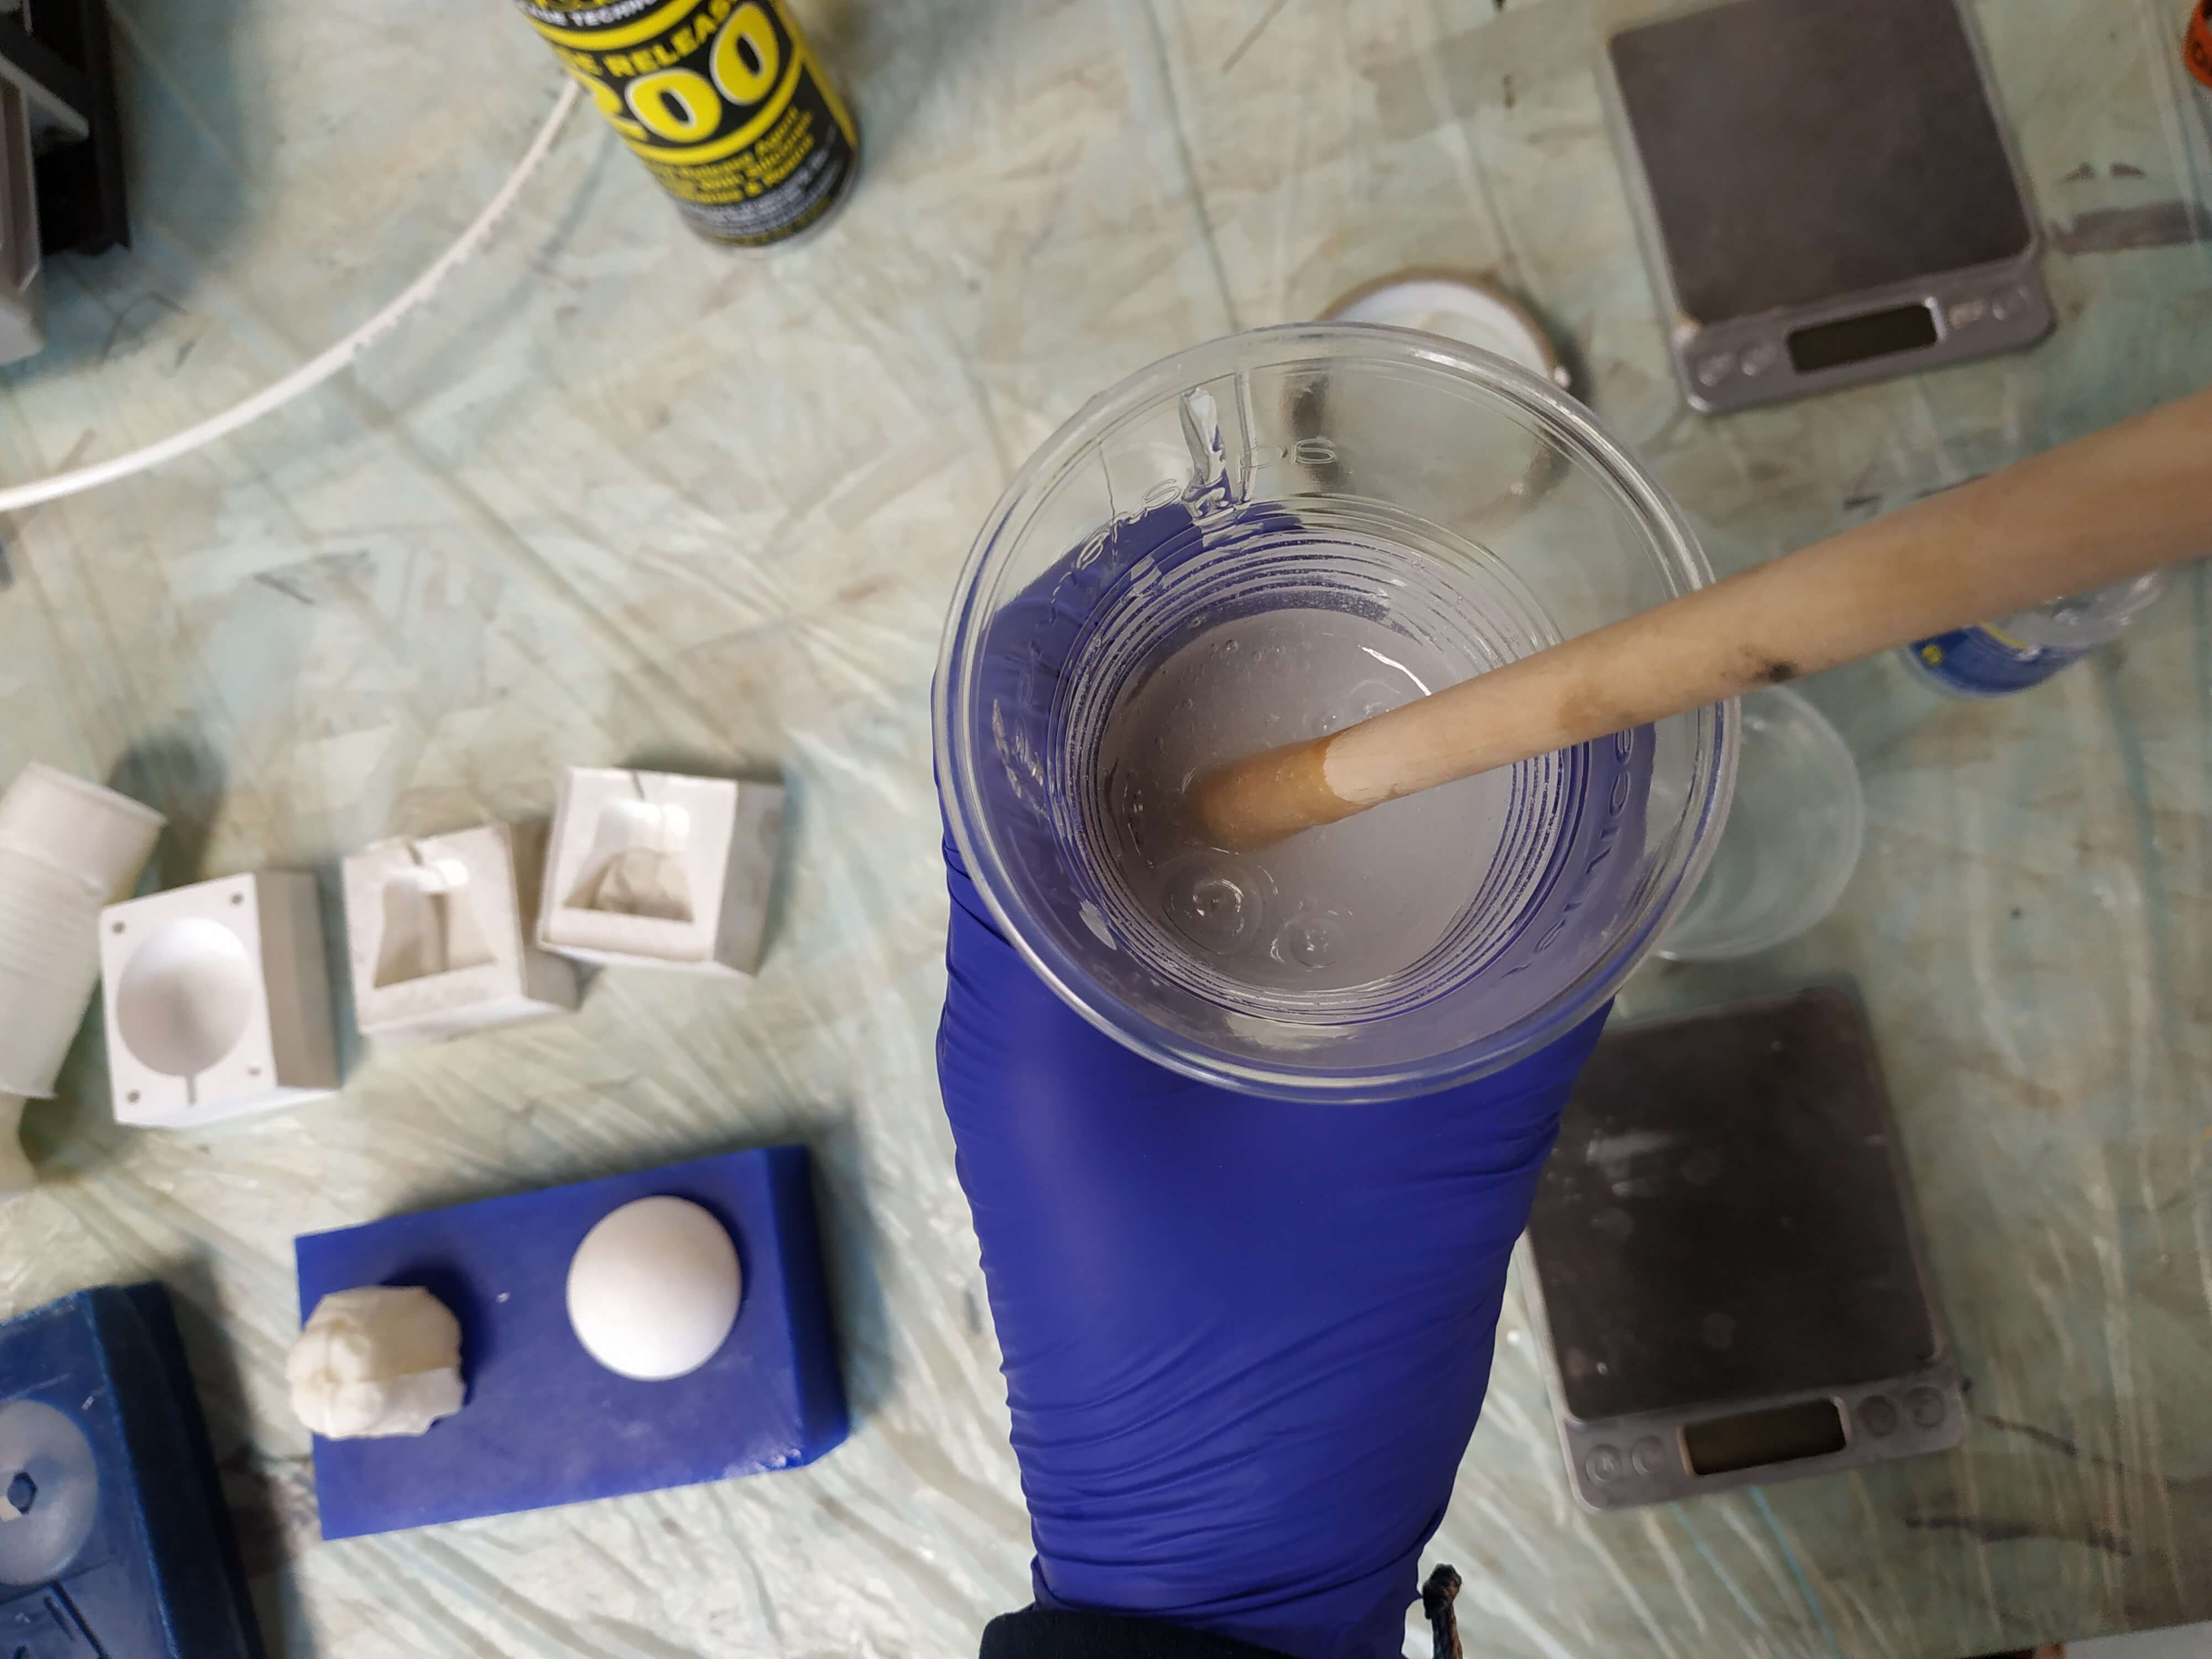
I used a home made vacumm chamber to release the bubbles from the mixing. Take care because it grows a lot, so be prepared to stop the vacumm machine before it overflows the cup. As much time you have it there much air bubbles it will get out. I repeted this process after the casting too.

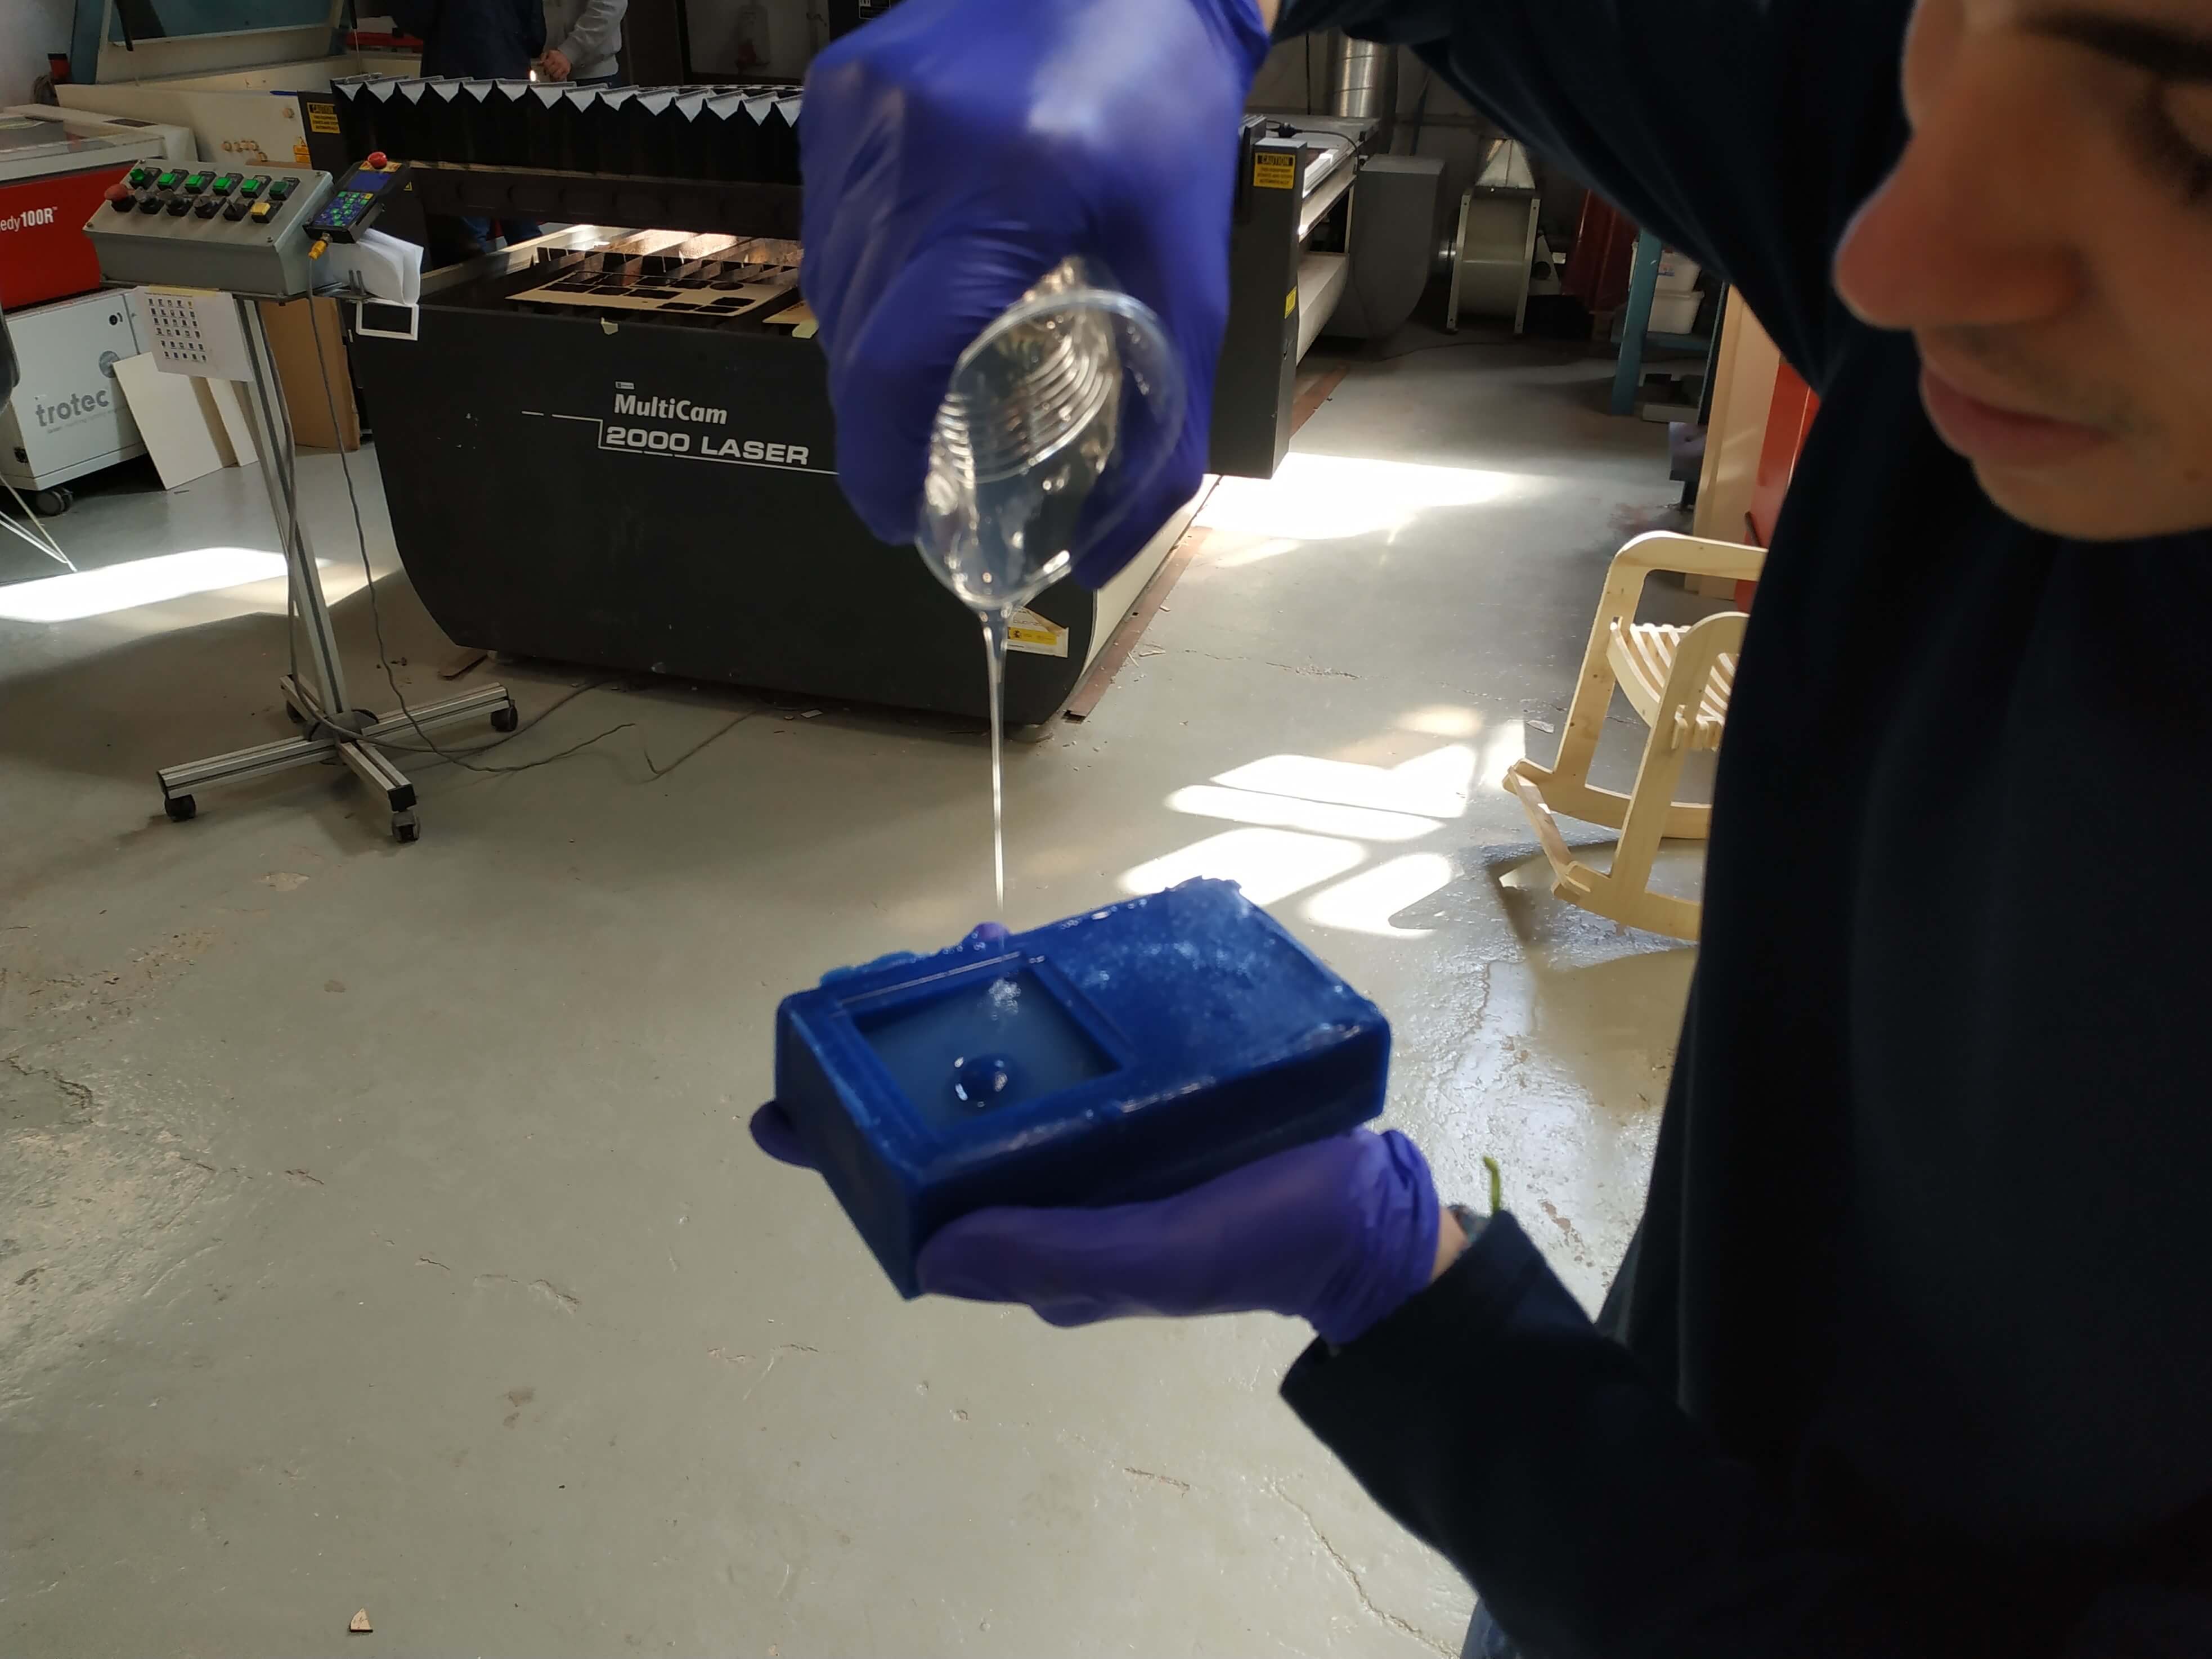
Now we are ready to put the silicone to the mold. It is important to start at a corner and throw it with a really thin line to avoid the creation of bubbles. I had the just ammount, so I had to take all the material from the cup with some help of Gustavo and the stick. There will be bubbles anyway, so vibrating the mold and put it again to the vacumm chamber helps to take the bubbles out.

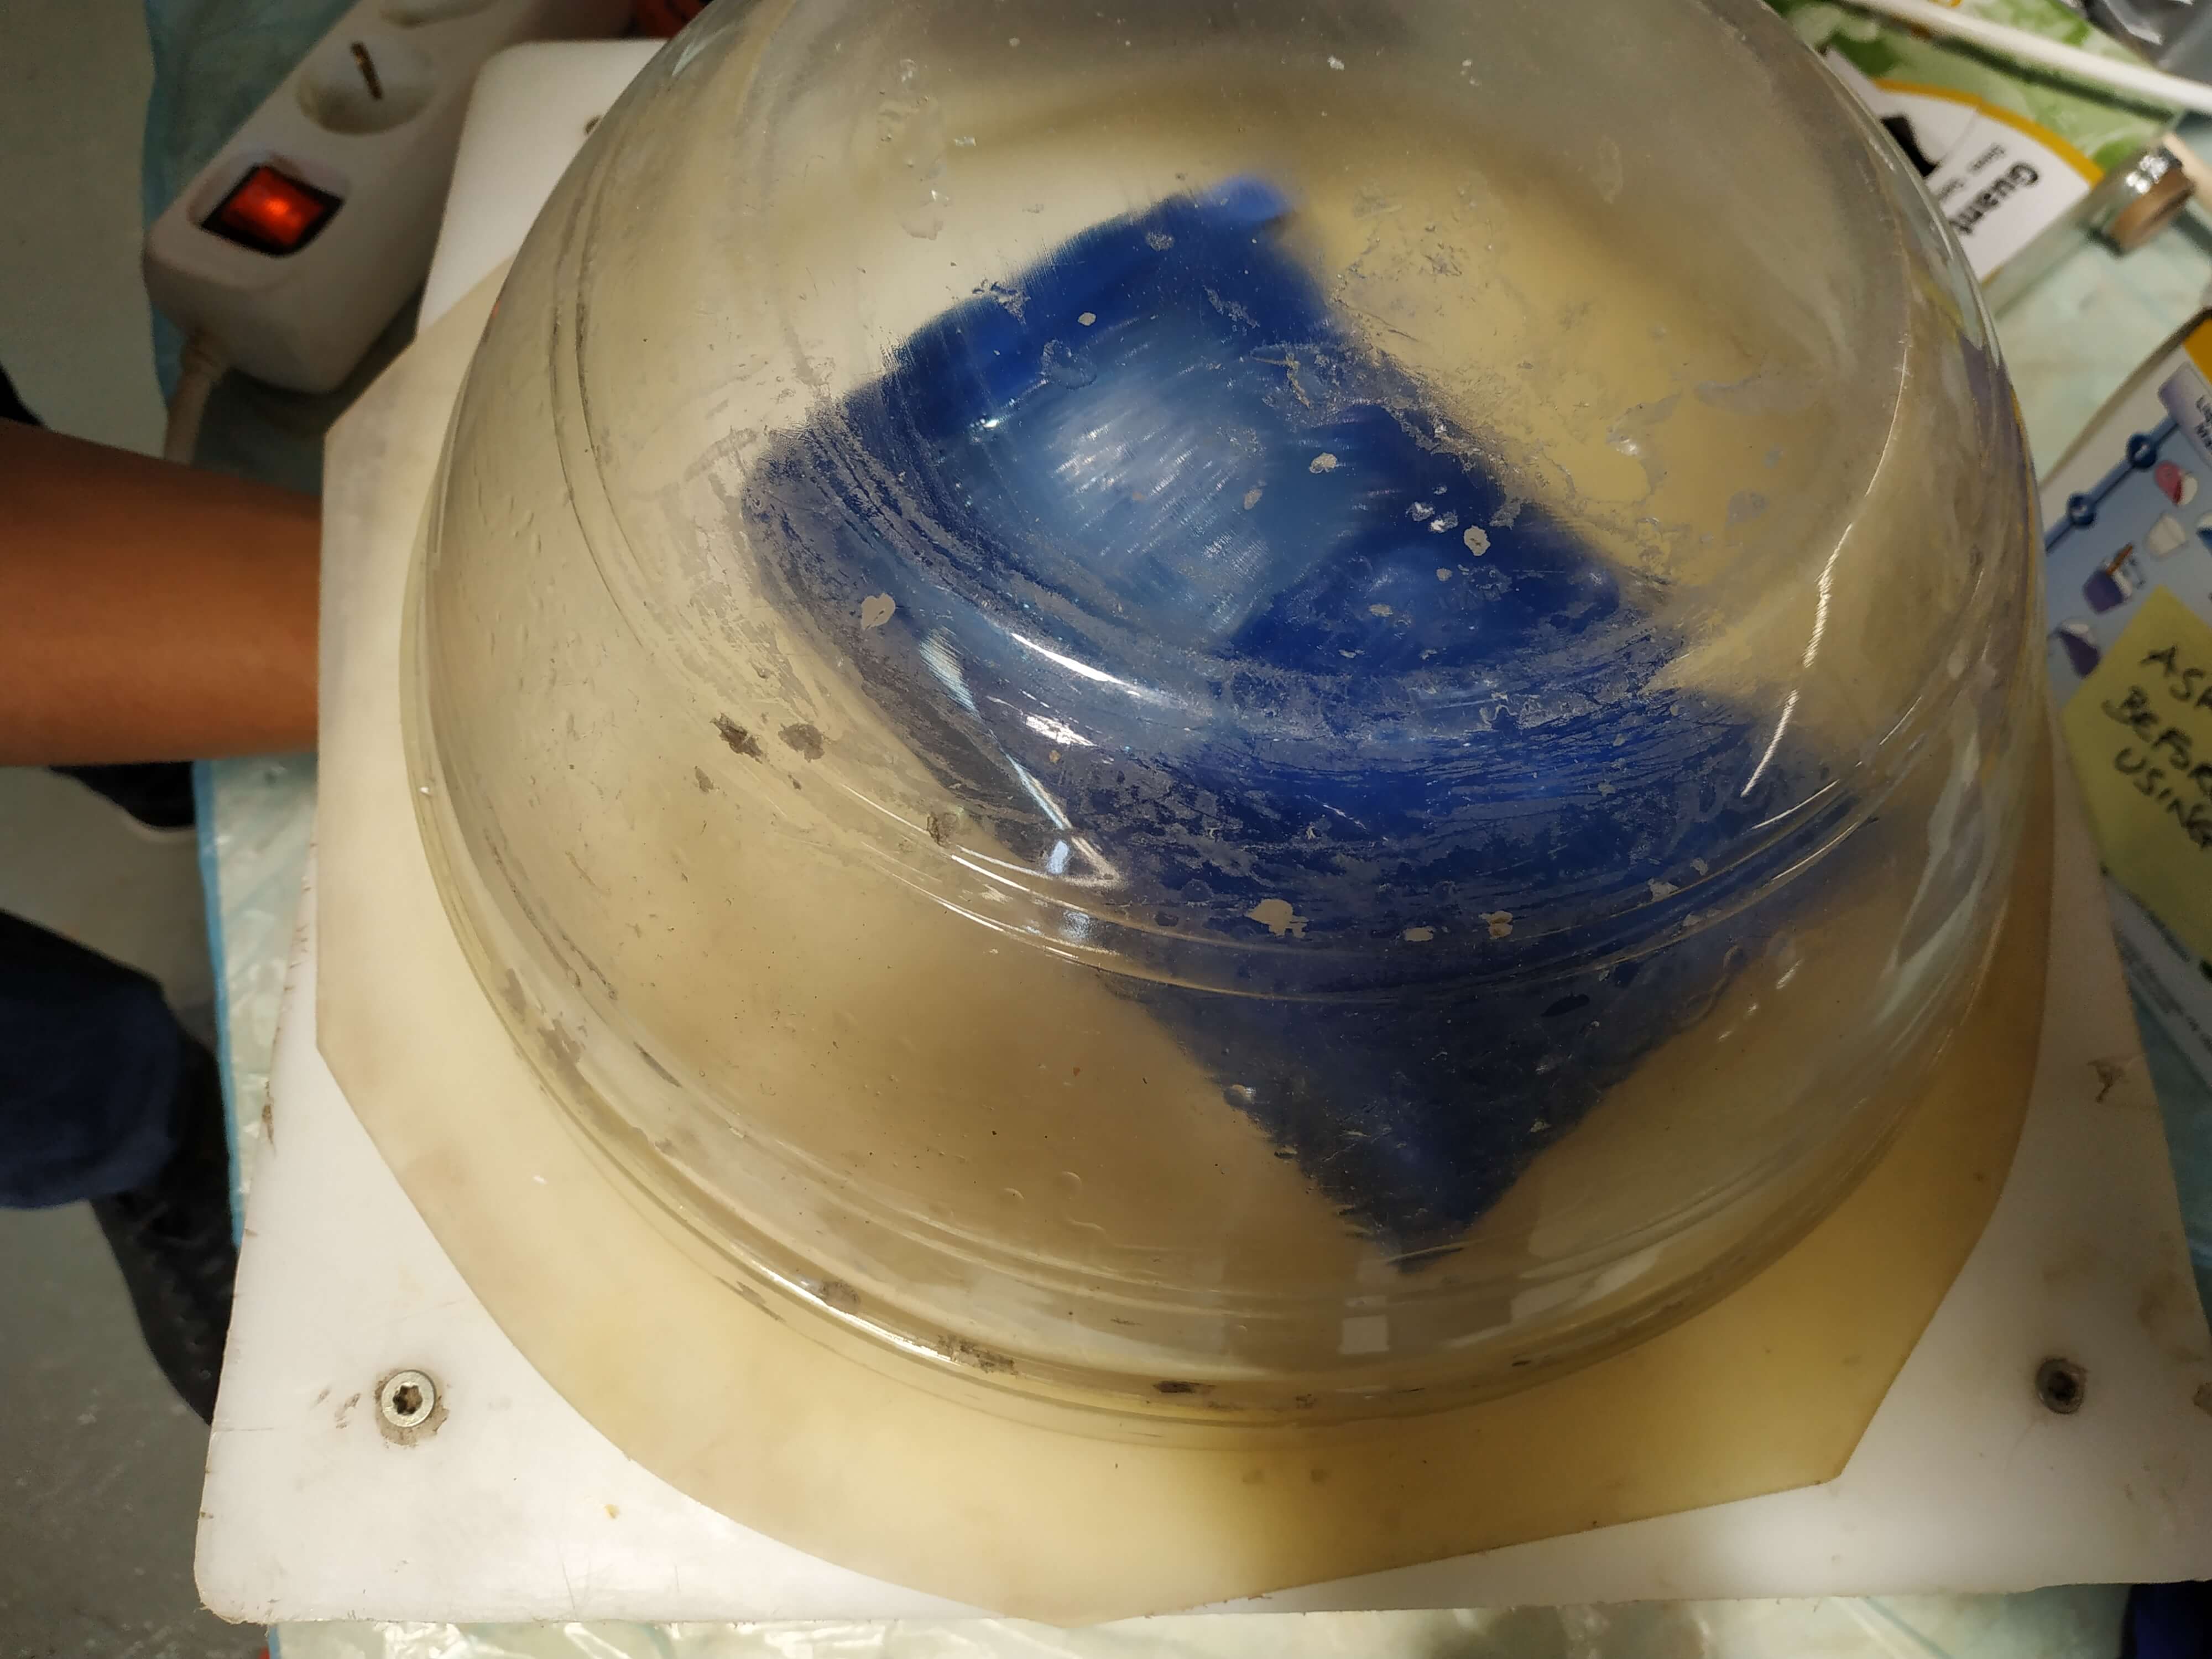
I repet this process some times until the result was good. Getting all bubbles out can be difficult, but it is important to get a great result. Then we have to let it cure for 24 hours.


Final casting
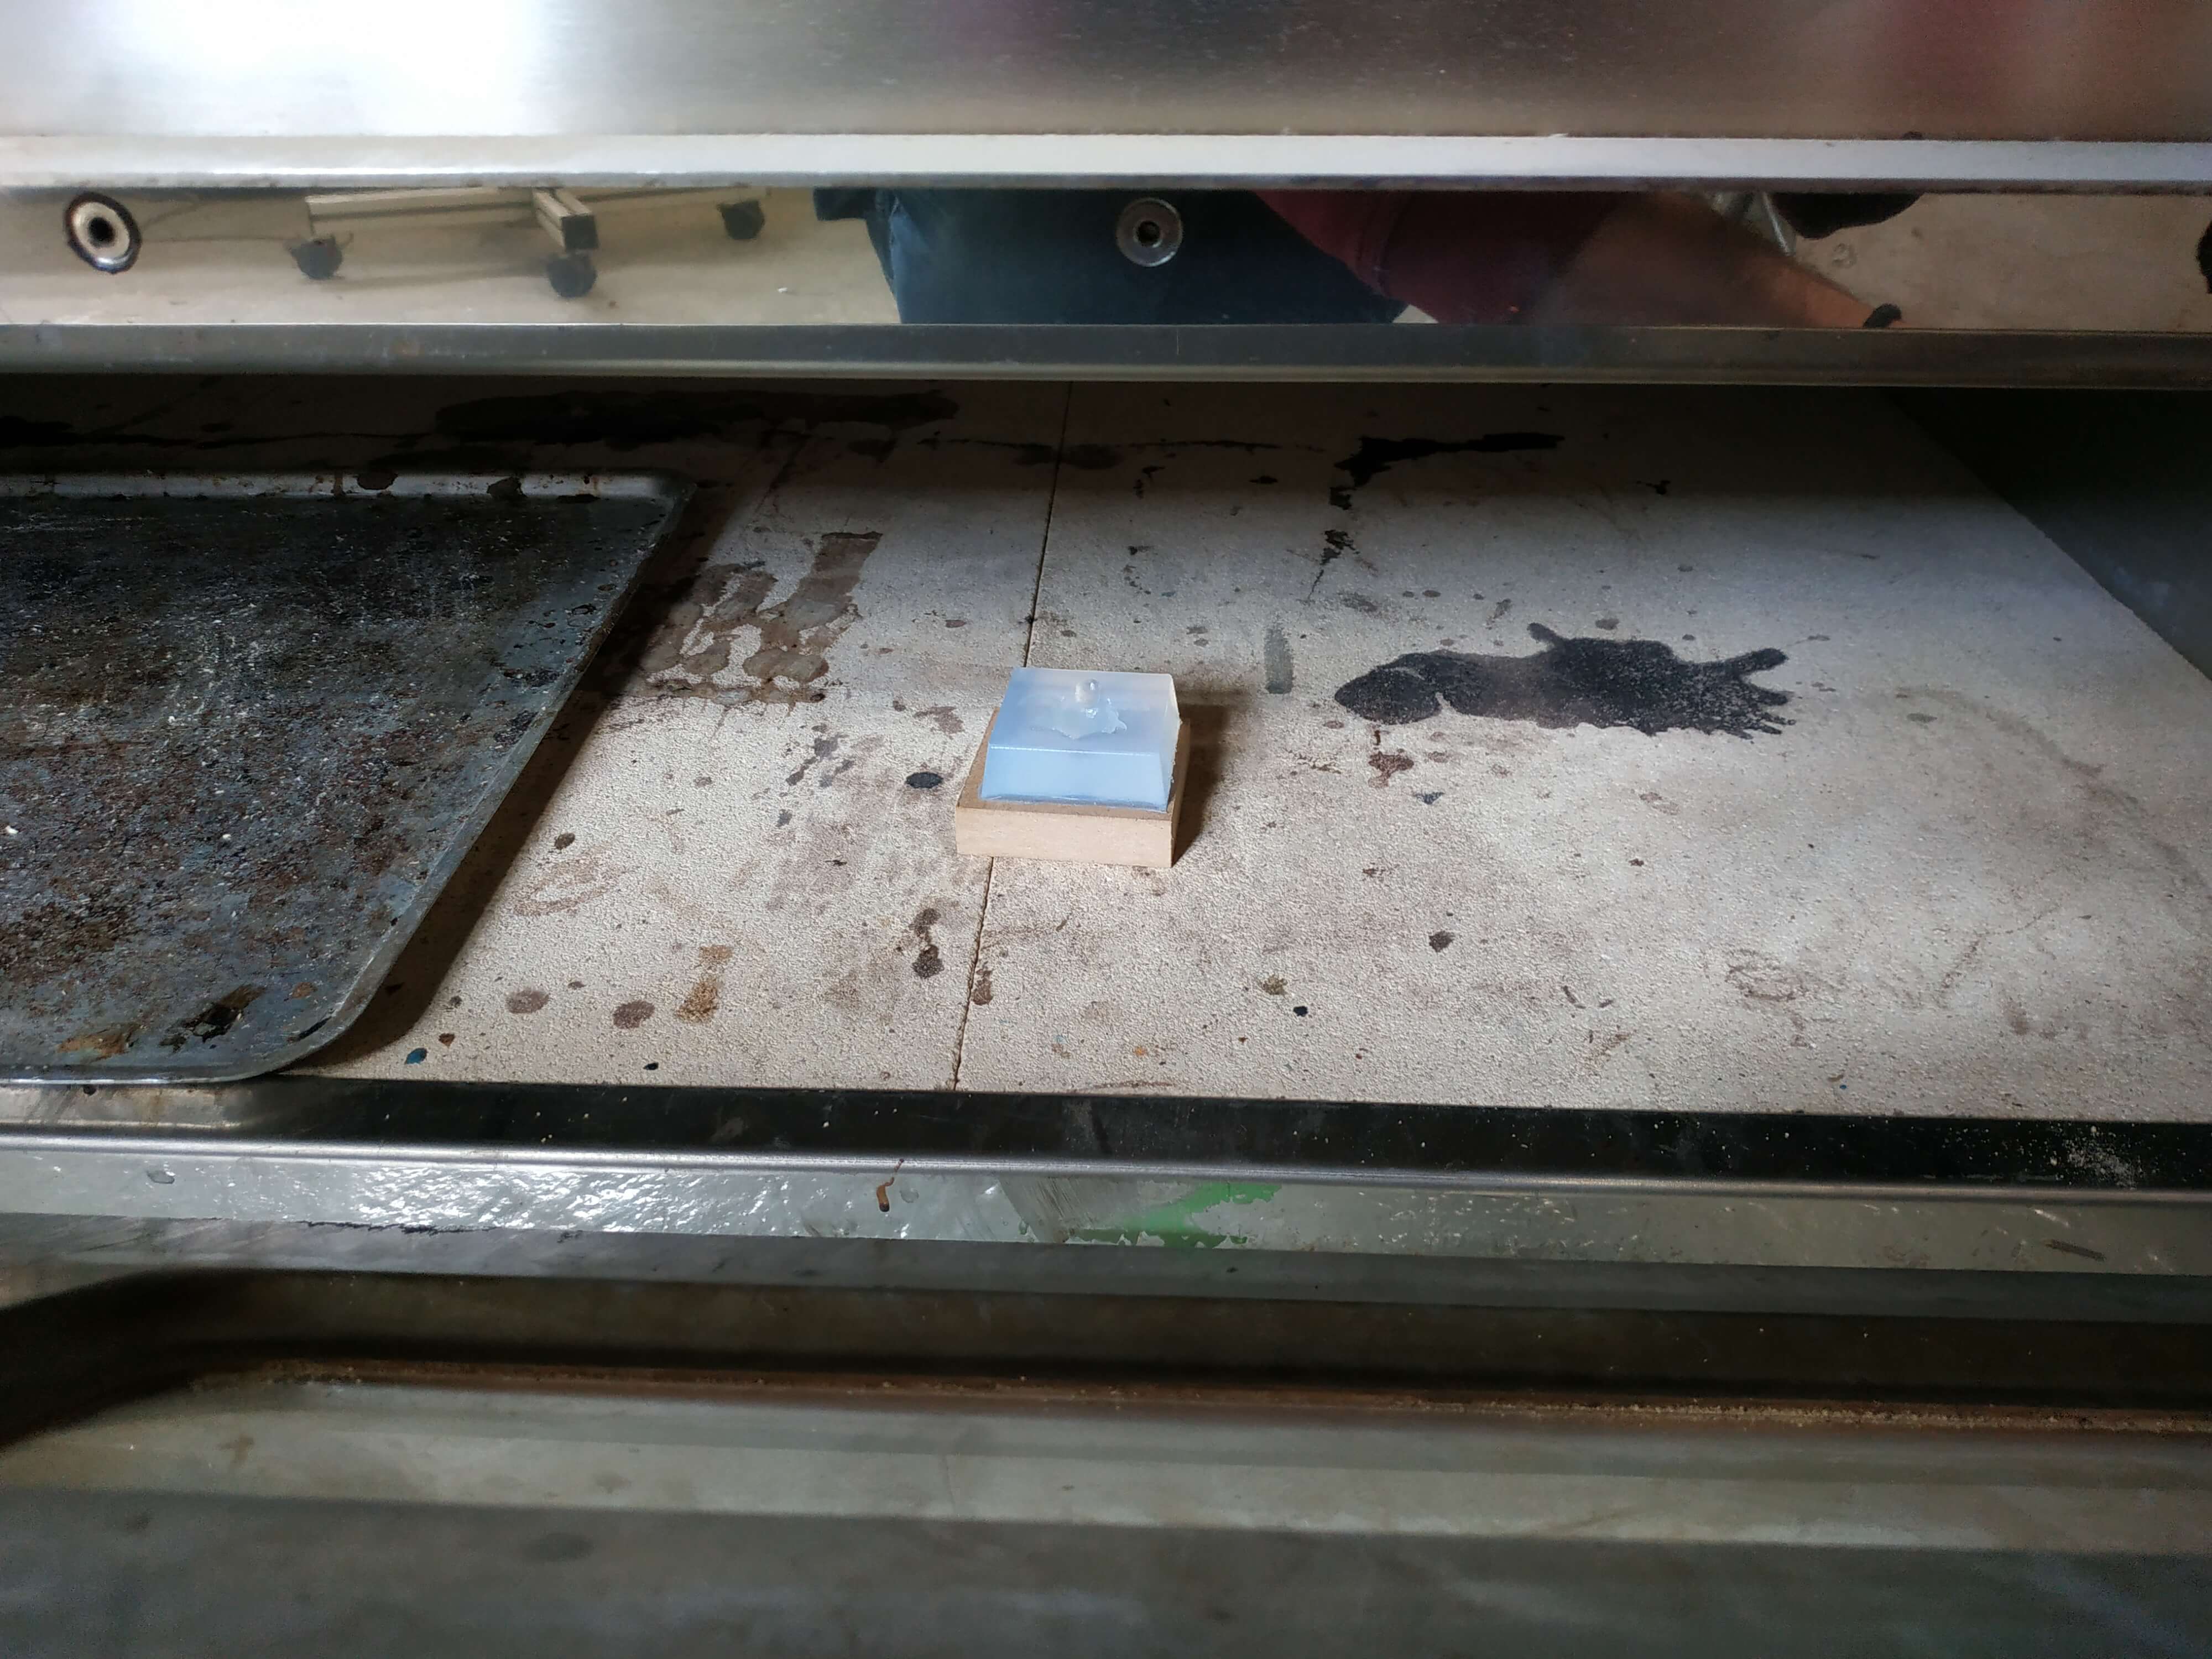
The last step was casting the mold with a hard material. I decided to use water first and freeze it. During the regional review I did a live demolding of the ice cube.
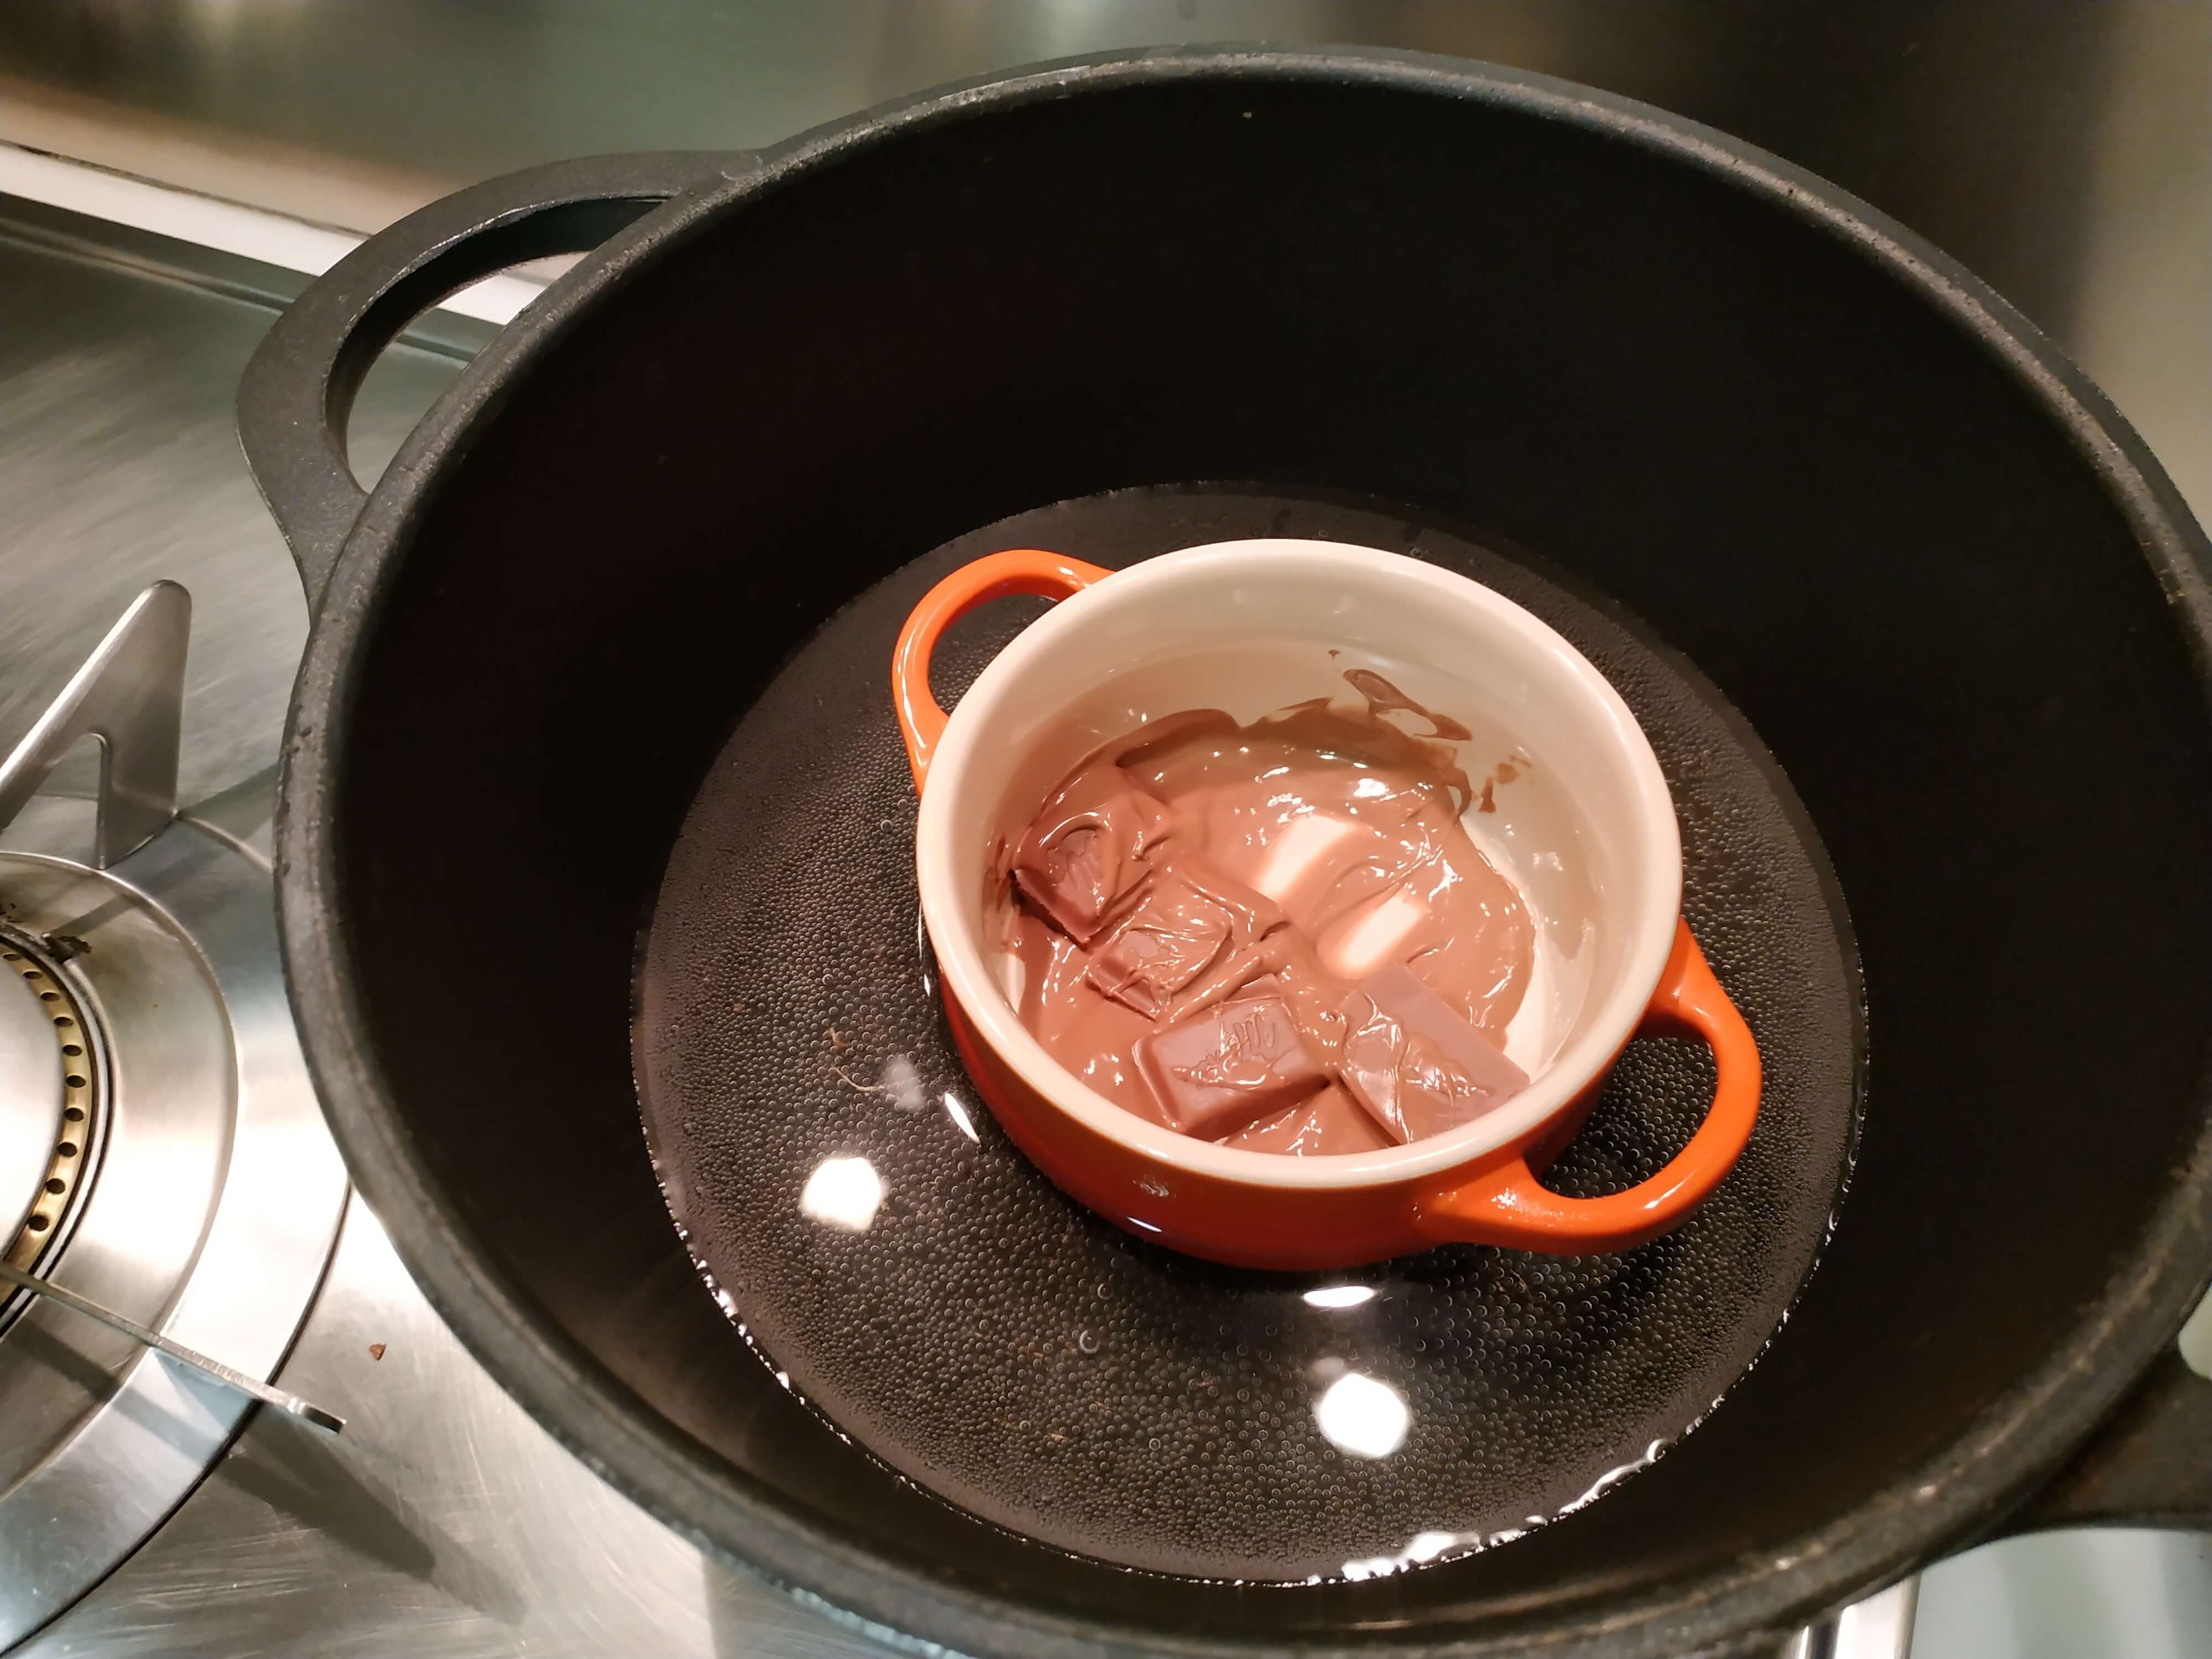
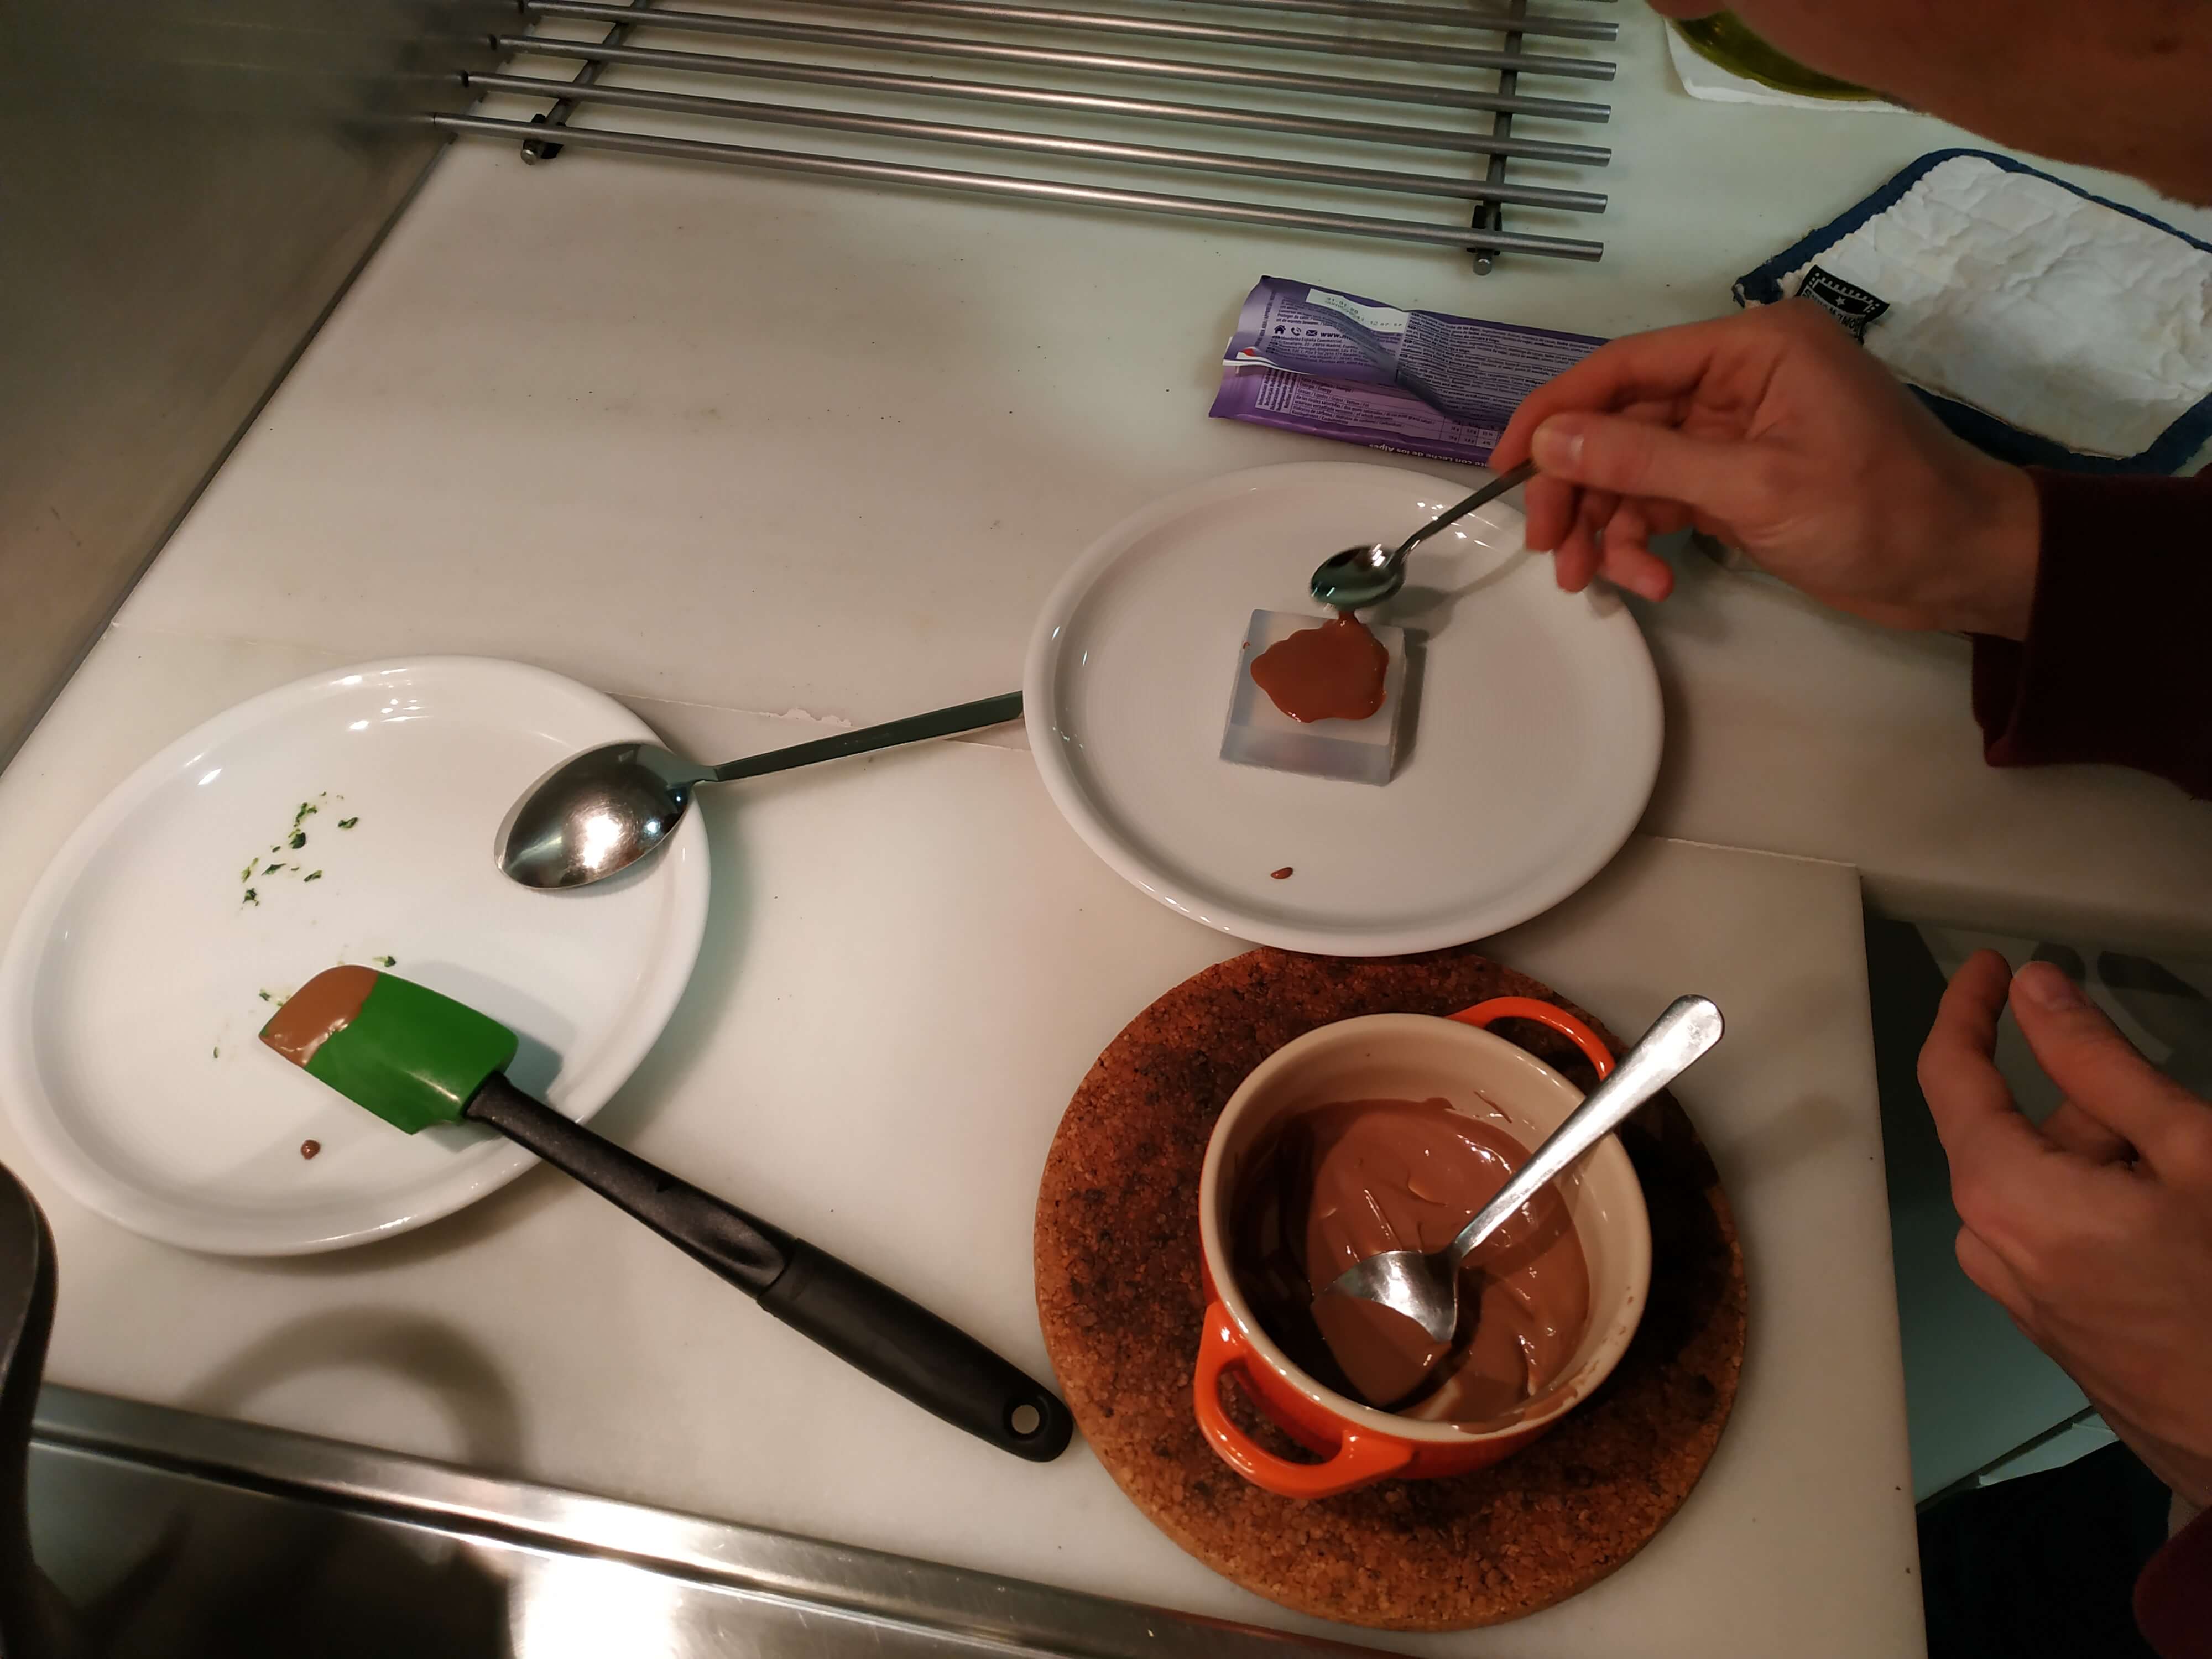
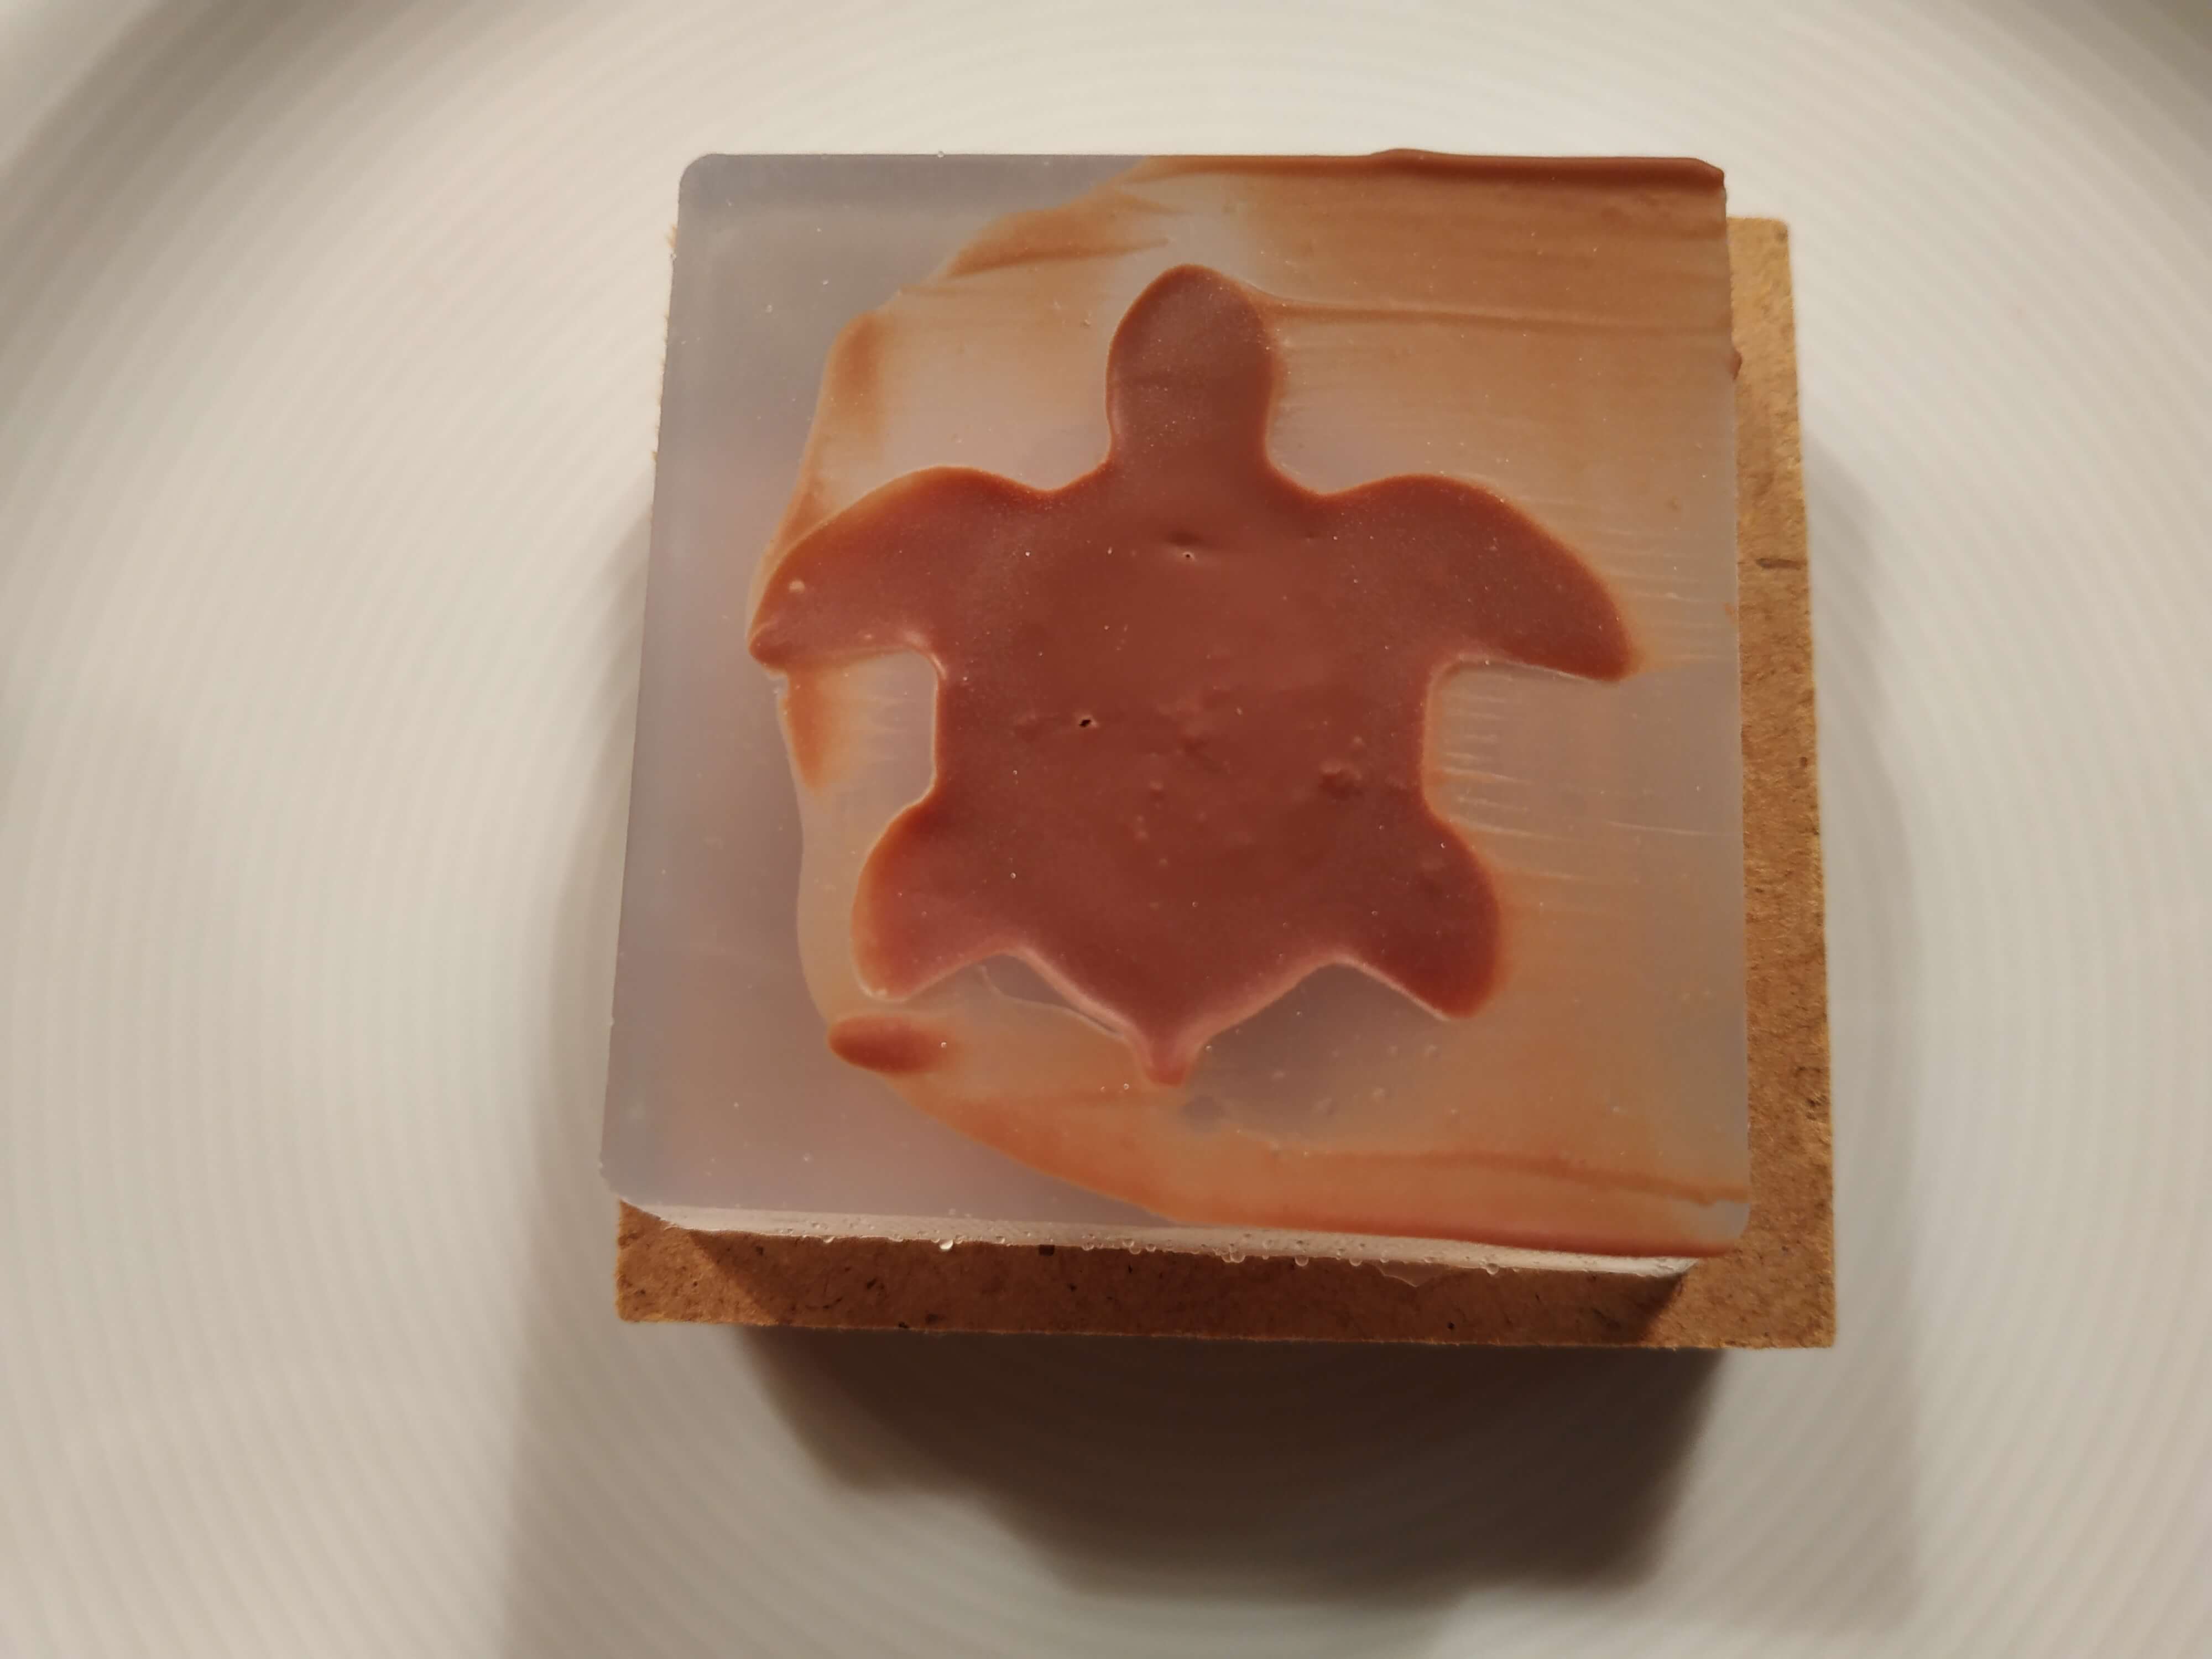
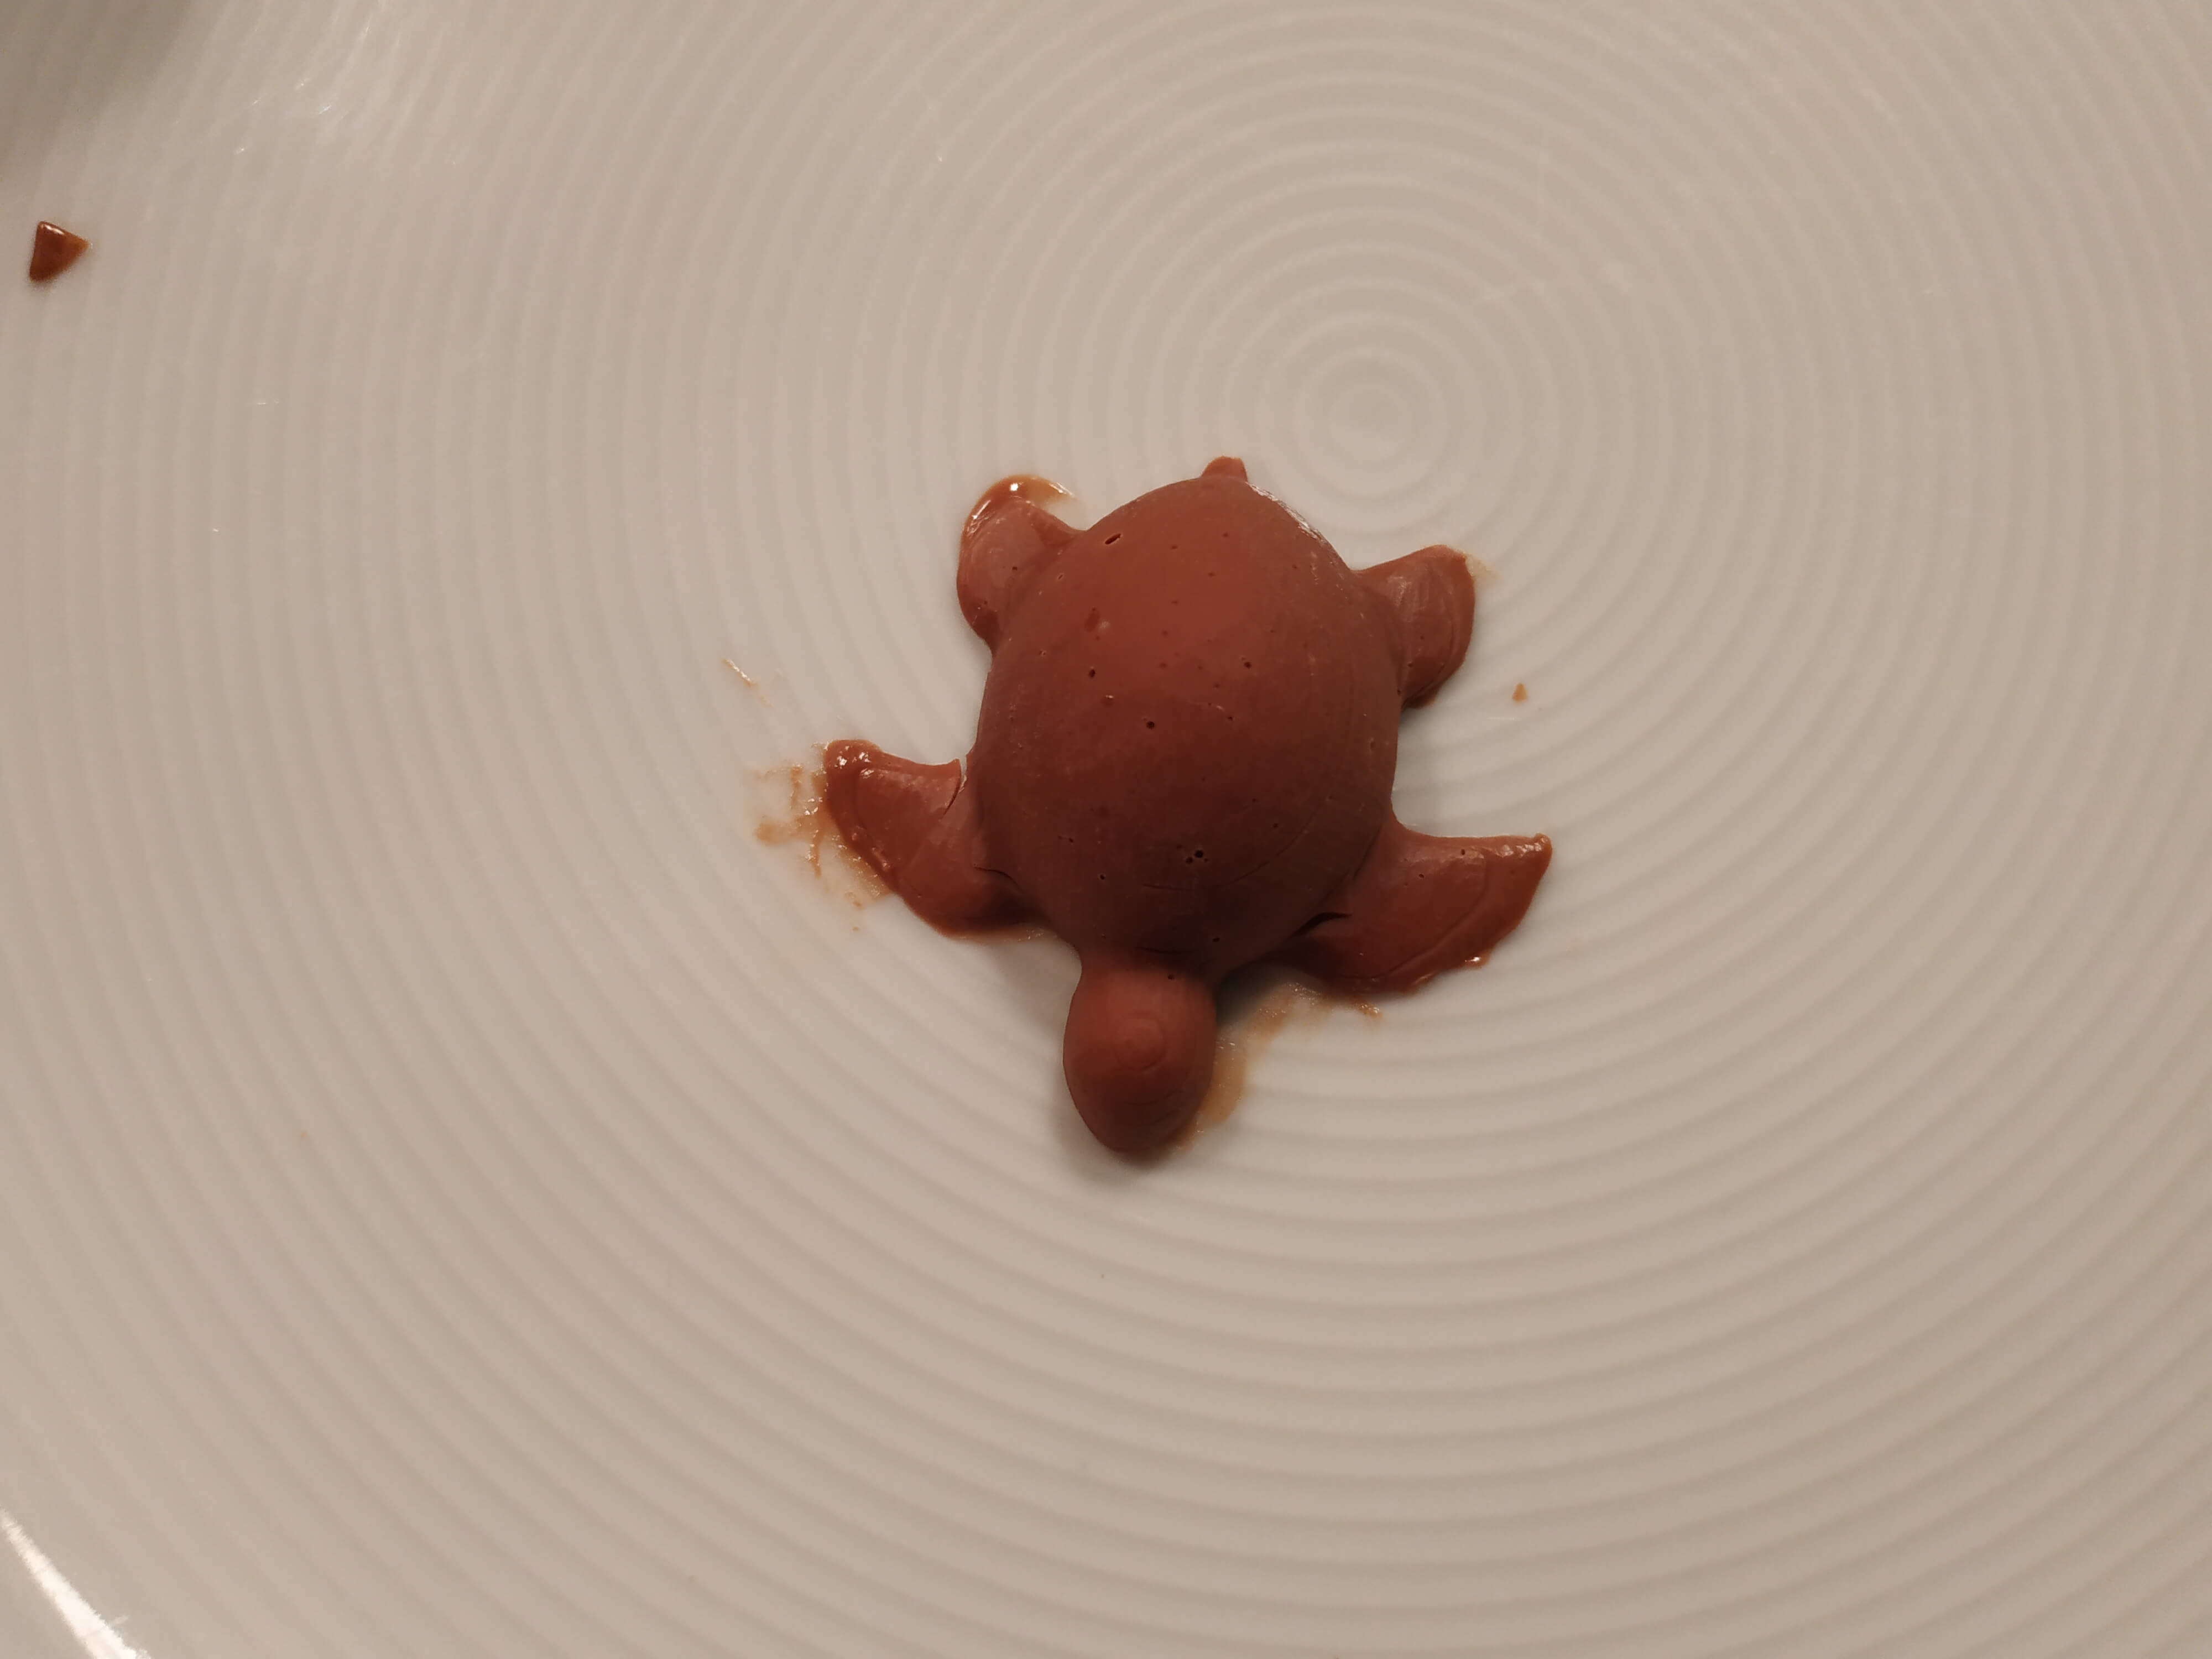
But the first ide was to cast it with chocolate, so, when I got home, I decided to melt some chocolate and cast it in the mold. It was a normal chocolate bar, so I decided to put it in the freezer for some time to get it cold fast and better. After having dinner I get it out of the mold, and the result was pretty good, it tasted good, but one of the turtles leg broke up when I was removing it from the mold. Also, I will need more molds if I want to make real chocolates.