Microscopy and AI for the Point-of-Care
This week I worked on defining my final project idea and started to getting used to the documentation process.
Presentation
This project aims to tackle diagnostic at the point-of-care, specifically microscopy.
Even more specifically, I want to tackle the microscopy diagnostic of malaria in low resource environment.
I was inspired by the DIPLE project by SmartMicroOptics which built a microscope to be used with any smartphone.
I believe that for a professional use smartphones are not the most adequate. Even if they are super modular and multifunctional, for application specific devices, I believe that it’s better to have a “batteries included” device and not rely on an external device for critical functions.
However, the smartphone is a perfect tool for communication of the infos or if it can integrate the full diagnostic functions, such as what FibriCheck did for arrhytmias detection or SkinVision for melanoma detection.
Applications
The first application I want to tackle is the diagnostic of malaria.
There are different ways to diagnose malaria and each has its own advantages and disadvantages, as described succinctly in the table below.
| RDT | PCR | Microscopy | |
|---|---|---|---|
| Sensitivity | Medium | Very high | Medium |
| Cost | Low | High | Very low |
| Ease of use | High | Low | Medium |
| Reliability | Low | High | User dependent |
Research
I have found a lot of already existing projects for portable microscopes:
- Foldscope: Very cheap but crazy delivery fees (60$)
- DIPLE: Adaptable to any smartphone and only 120 $ with a optical zoom of 150x
- Lensless microscope : Based on holographic microscopy
The last one looks like the most promising because without lens, it is most resistant to fungi growth and it has a huge Field of view (FOV). However it is the most complex technically and it is not commercially available. Anyway, I contacted the researcher to know more about it.
I ordered the DIPLE and it just arrived, I am super excited !
I plan on integrating the lens of the DIPLE microscope in my machine. However it would be great to find another source for lenses.
Structure
I want to build a hackable microscope, meaning that I want to make it as openable as possible. If that is not clear to you, imagine an Iphone which uses custom screws and all and take the opposite.
For that purpose I have imagined building it by stages with modular parts inside of it, so that internal parts and designs can change without affecting the general structure. That is based on the PhoneBloks concept of One Army (formerly Dave Hakkens).
I have discussed with Jonathan, a friend who works for the ICRC as a biomedical engineer in local hospitals and clinics for the set-up, maintenance of medical machines and devices of all sorts (MRI, CT, respirator, …) as well as the training and support of the local technicians.
His experience is that the most complex the machine is, the fastest it breaks and that if a piece breaks, very fast the whole thing is left unused even if it’s only a 50c spring that needs to be replaced.
However, based on my research of the current unreliability of the hand/eye microscopy exam, I am convinced that automating the sample imaging is key to make it reliable.
Thus, every piece needs to be easily replaceable, hence the stage structure.w
Now that I am thinking of it, I think it would be good to build it in a foldable shape so that you don’t lose any pieces and thus I might need to rearrange the order of the stages but that will come later.
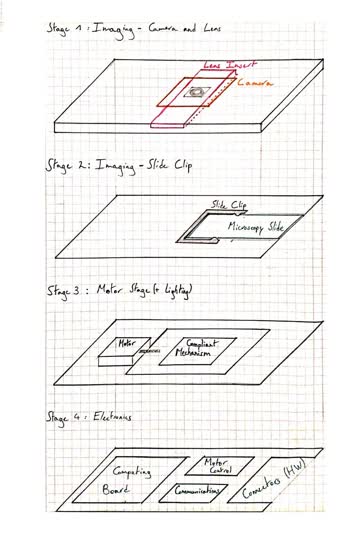
Stage 1 : Imaging
From my exchanges with Jonathan and reading reports of the WHO, I know that a common problem with microscope is the growth of fungi on the lenses. Therefore, the lense should be easily removable and replaceable.
The lense I will use at first are the ones provided in the DIPLE kit.
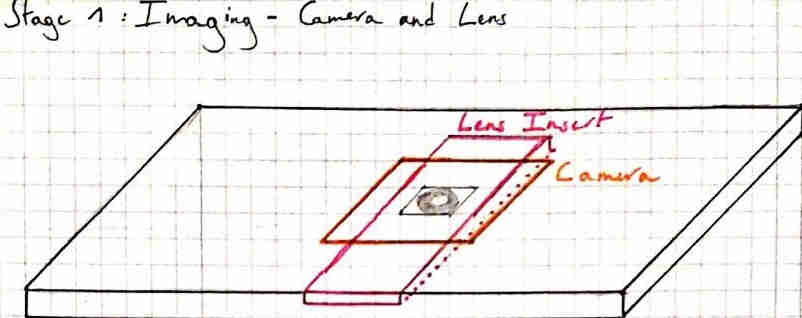
On top of the lense, I imaging using a HD camera like this one : Raspberry Pi, PiNoIR, Camera Module, CSI-2 with 3280 x 2464 Resolution
I have not looked for a specifically good camera for this application at this stage and I am very open if you have suggestions.
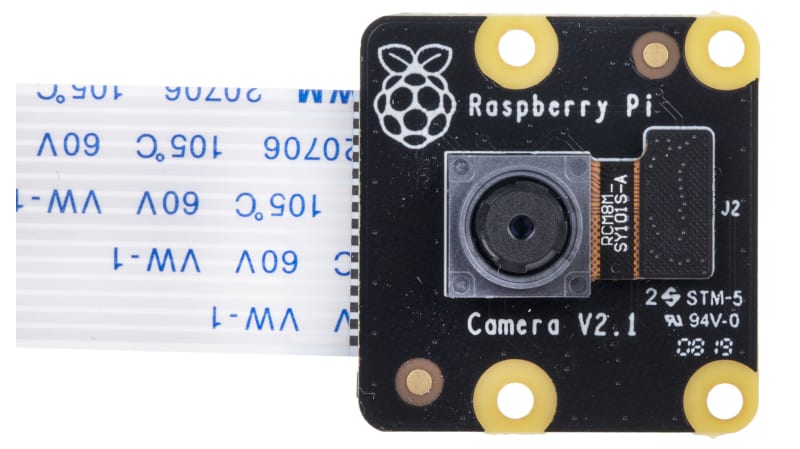
Stage 2 : Slide Clip
The slide clip is the piece with which the user will have the most interaction and thus it is very likely to break. Therefore, I kept it alone on this stage.
Off course the slide clip will need to be plugged on the compliant mechanism that we describe below.
Stage 3 : Motors and guides
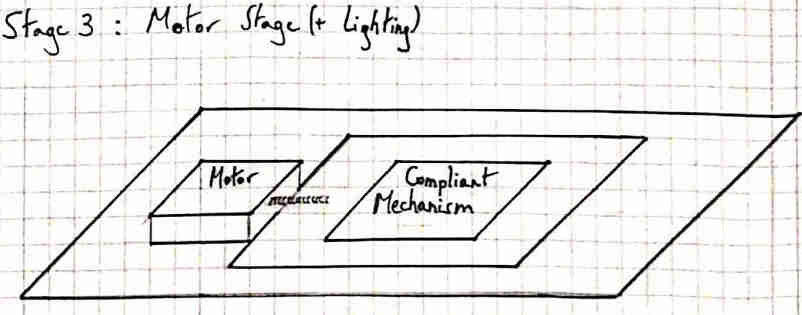
To stabilize the movement, I am thinking of using a compliant mechanism, actuated on one or two directions depending on the needs.
A priori, the microscopy test for malaria uses blood smears as illustrated below. Thus it might be sufficient to scan it in one direction only, as a first step at least.
The reasons to use a compliant mechanism are numerous but the biggest ones are:
- You can 3D print it
- It is very robust and resistant to shocks, sand and humidity.
- The wear is minimal given that there are no internal moving parts.
Stage 4 : Electronics
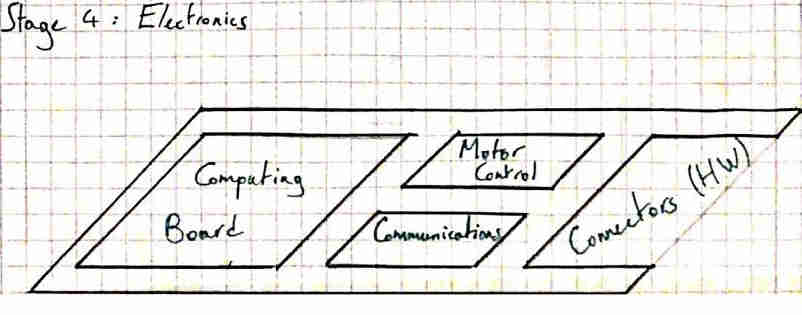
Finally, all the electronics are stored together in the lowest stage to make it the most accessible.
It is important to pack all the electronics together in my opinion because the whole thing needs to be protected from humidity and sand and thus I would rather limit that to one water-proof container.
Features & Functions
The different features and functions that I want to implement are :
- Easy use insertion of microscopy slides
-
automated scanning of the slides including:
-
taking picture
- moving the field of view to a neighbouring one
- lighting the slide (white light or for fluoroscopy)
-
Semi-automated analysis of the slides including:
-
potential merge of the pictures (for human readability)
- identification of the region of interest (parasites)
- identification of the species of the parasites
- count of the parasites
- easy cleaning of the lense
- Physical + Digital zoom = x1000
- easy to build in low resources settings
- connection to internet
- onboard image processing
- robust and resistant to tropical conditions : shock resistant and humidity and sand proof
- limited parts to ensure easy replacement and robustness
Possible components
The parts that I envision at this stage are:
- powerful lens
- motors
- micrometric screws
- light sensors
- LED : White, blue, green, red
- Camera HD
- Image Processor : potentially Raspberry pi
- Communication hub: Wifi and/or directly 2G/3G/4G connection
- control board for the motors
- “water-proof box”