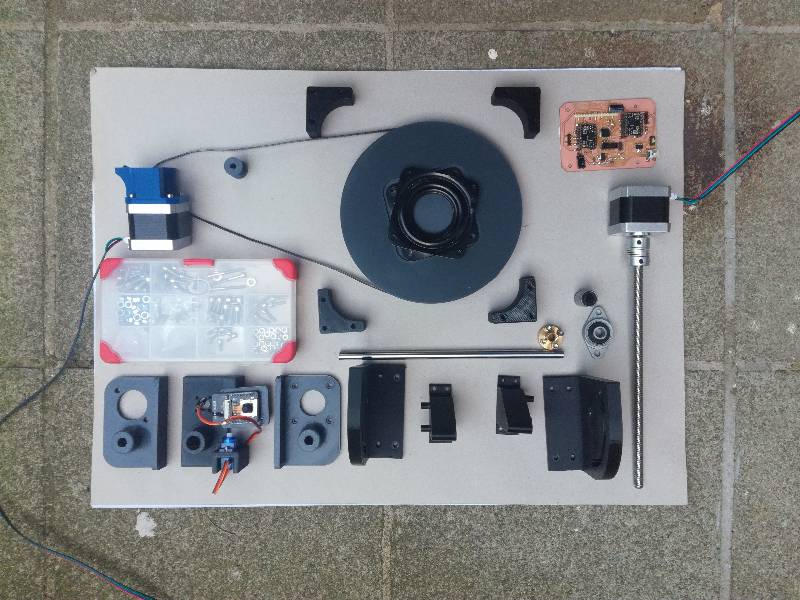
Project Build
Bill of Materials
Material to be ordered
The materials not made in the lab are the listed hereunder :
| Component | Amount | Price |
|---|---|---|
| OLED screen | 1 | 5,69 € |
| Rotary encoder | 1 | 1,67 € |
| Stepper Motors | 2 | 15 € |
| ESP32-CAM | 1 | 11,93€ |
| Vertical Axis | 1 | 5 € |
| Lead screw | 1 | 11,59€ |
| Closed GT2 Timing Belt 400 mm | 1 | 6€ |
| PLA filament | <1kg | 10€ |
| Servomotor SG90 | 1 | < 1,5€ |
| Lazy Susan/Turntable | 1 | 2,5 € |
| FR1 Board | 1 | 2€ |
| M3x12 screws and nuts | 12 | |
| M3x30 screws | 2 | |
| M4x12 Screws and nuts | 30 |
Electronic components
| Component | Price |
|---|---|
| ATSAMD21E18 | 3,70€ |
| Headers | < 1€ |
| Motor drivers Pololu A4988 | 10 € |
| AC to 12V DC Converter | 5€ |
In total, the costs for the material listed above is 89.58 €.
On top of that, for the rest of the material, I account for max 20 €, including standard electronics components, screws, wood and possibly PMMA.
Built material
The rest of the components are 3D printed, milled or laser cut.
The raw materials for that are :
- plywood around 1m²
- Plexiglas (optional for the casing)
- FR1 Boards
- standard fab lab electronic components
- PLA
All files are in the bottom of this page. The whole project is in the Fusion360 model.
The laser cut files are linked here
The STL files are not linked because of their size but can be obtained easily by exporting them from the Fusion360 model.
You need to 3D print :
| Components | Number of pieces |
|---|---|
| BottomMotorFixation.stl | 1 |
| Foot.stl | 4 |
| LeftRotationPart.stl | 1 |
| MotorControlFinalProject.step | 1 |
| SmallMotor-GT2 Timing Pulley v2 v5.stl | 1 |
| CameraHolderBase.stl | 1 |
| GT2 Timing Pulley v2 v1.stl | 1 |
| LeftRotationSlot.stl | 1 |
| RightRotationPart.stl | 1 |
| TopMotorFixation.stl | 1 |
| CasingElec.stl | 1 |
| HorizontalRotaryMotorFixation.stl | 1 |
| MenuHolder v6.stl | 1 |
| RightRotationSlot.stl | 1 |
Then laser cut one piece of each.
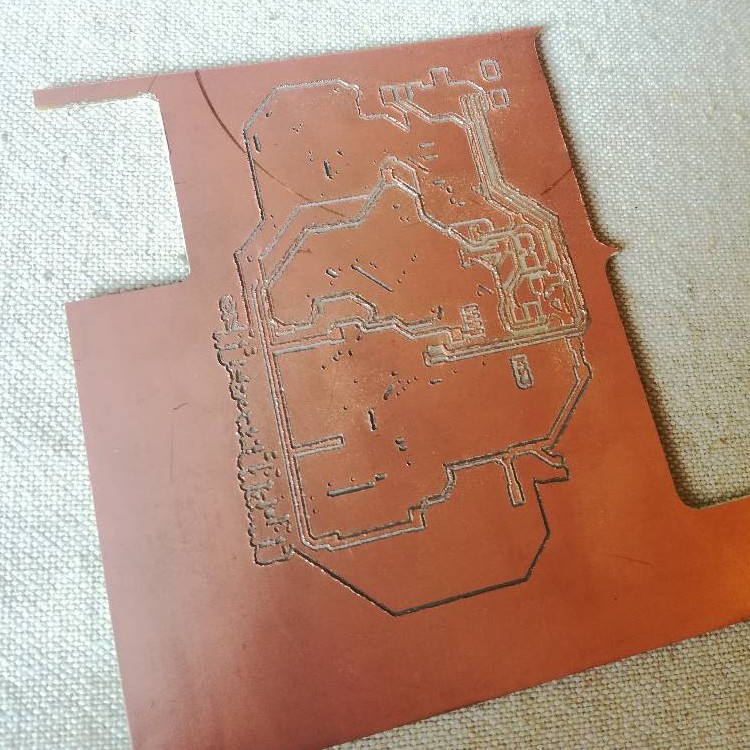
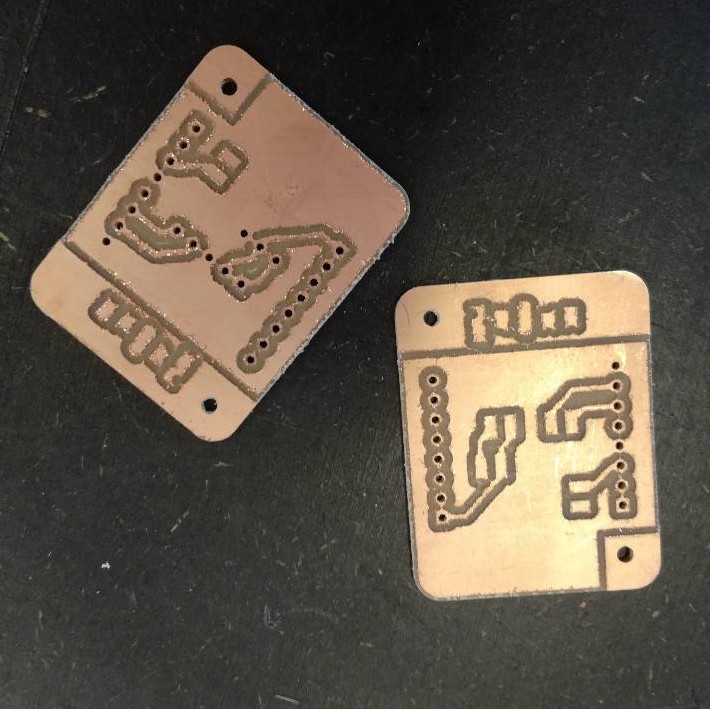
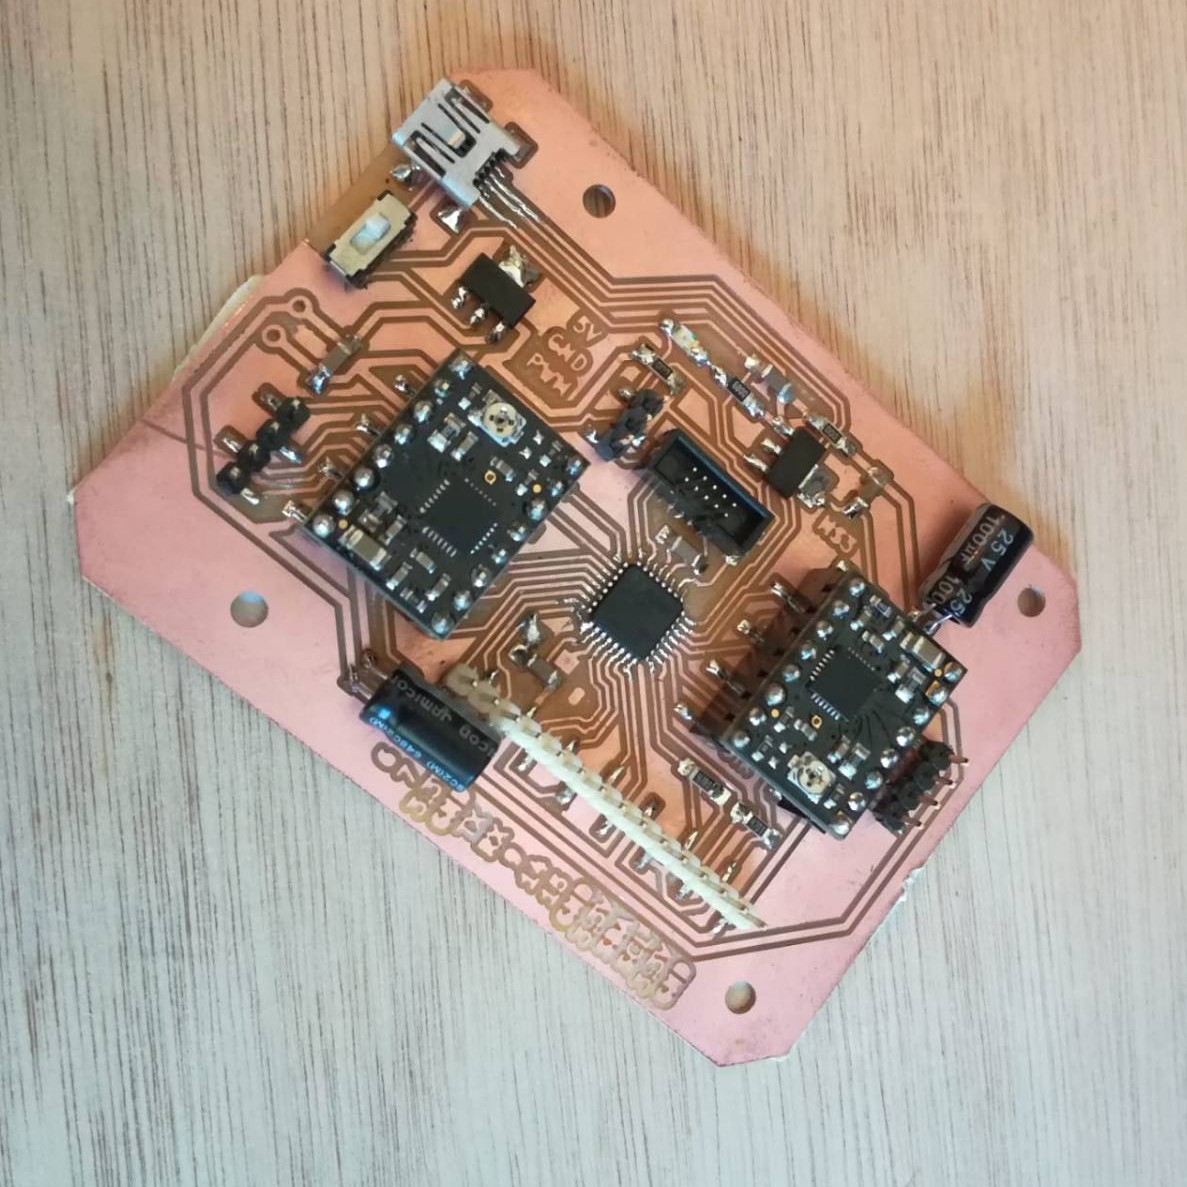
Milling the boards :
You have 2 boards to mill, the Gerber files are in the Kicad project along with the BOM of each board.
The two Kicad projects are linked hereunder:
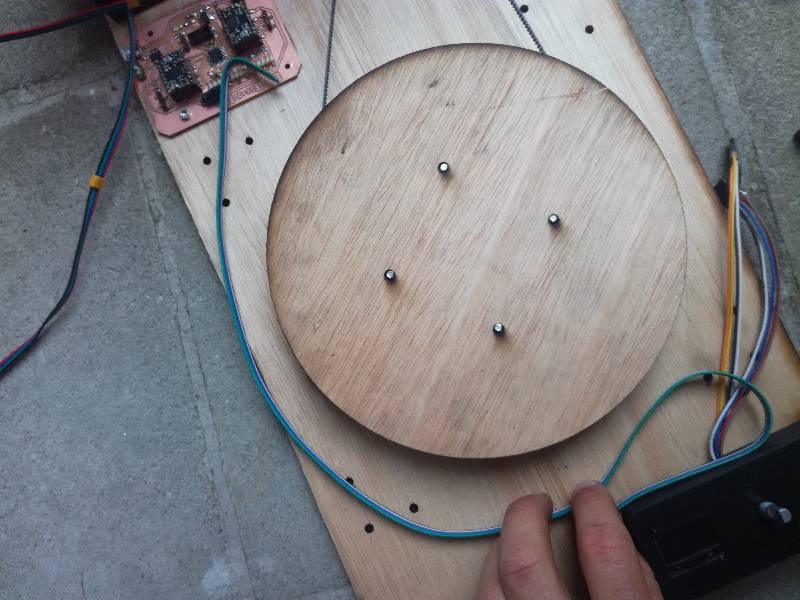
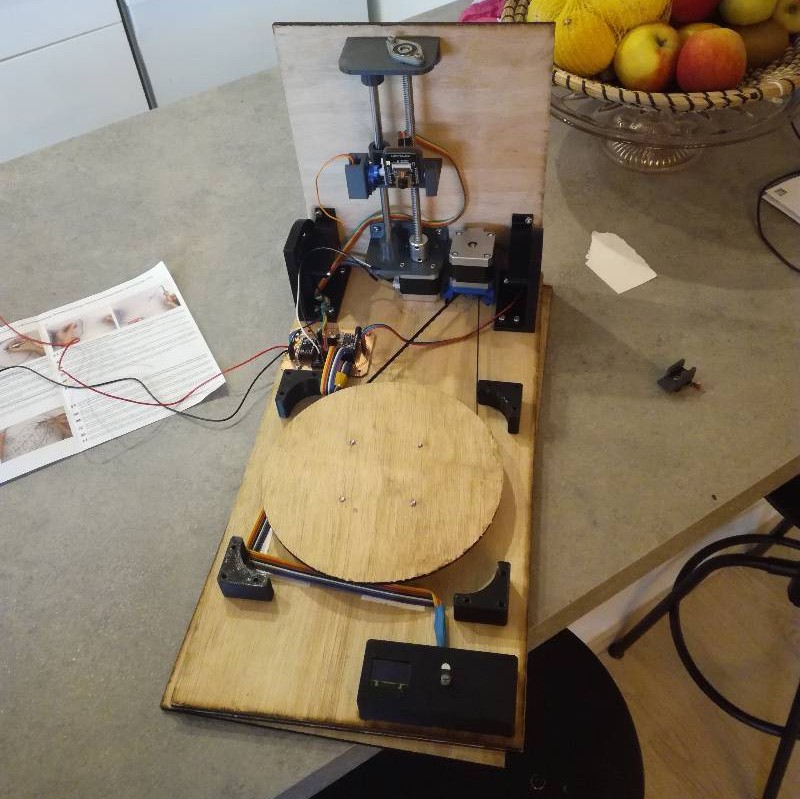
Assembly
Prepare everything and you’re ready to start assembling.
Let’s be honest :
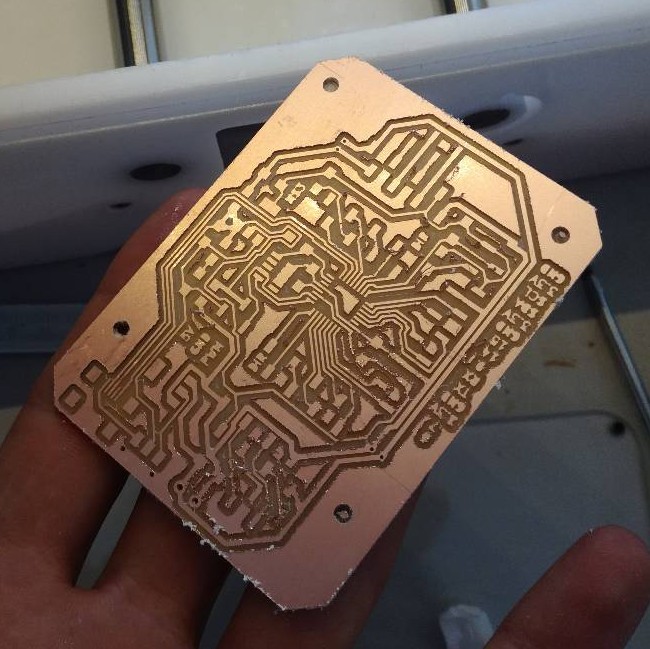
Be careful with the zeroing of your CNC before milling the board otherwise it might fail often.
Wiring
The assembly is made but we still have to wire everything so to cut all the wires at the right length and put the right socket.


Programming
To load the programs, I made a CMSIS-DAP programmer based on Quentin’s design and I advise you to make a couple for yourself.
I used the standard bootloader of mattairtech for the SAMD21E18, but you could also use the SAMD21E17 in which case use the appropriate bootloader for the SAMD21E17.
To load the bootloader, I used edbg with the JTAG connector of the CMSIS-DAP programmer with the following command, ebpv standing for e - erase, b - verbose,p - program,v - verify.
edbg -ebpv -t samd21 -f sam_ba_Generic_x21E_SAMD21E18A.bin
To use the scanner, you can simply connect it to the your computer and use the interface, launching it with :
python PATH_TO_FOLDER/SerialInterface-3DScanner.py
The other option is to send instructions directly with the serial monitor, sending “STATE_SCAN” to start a scan or SENDING “STATE_HOMING” to launch homing.
Testing : Scanning and Storing
Now the important thing is to test it : Can it scan something ?
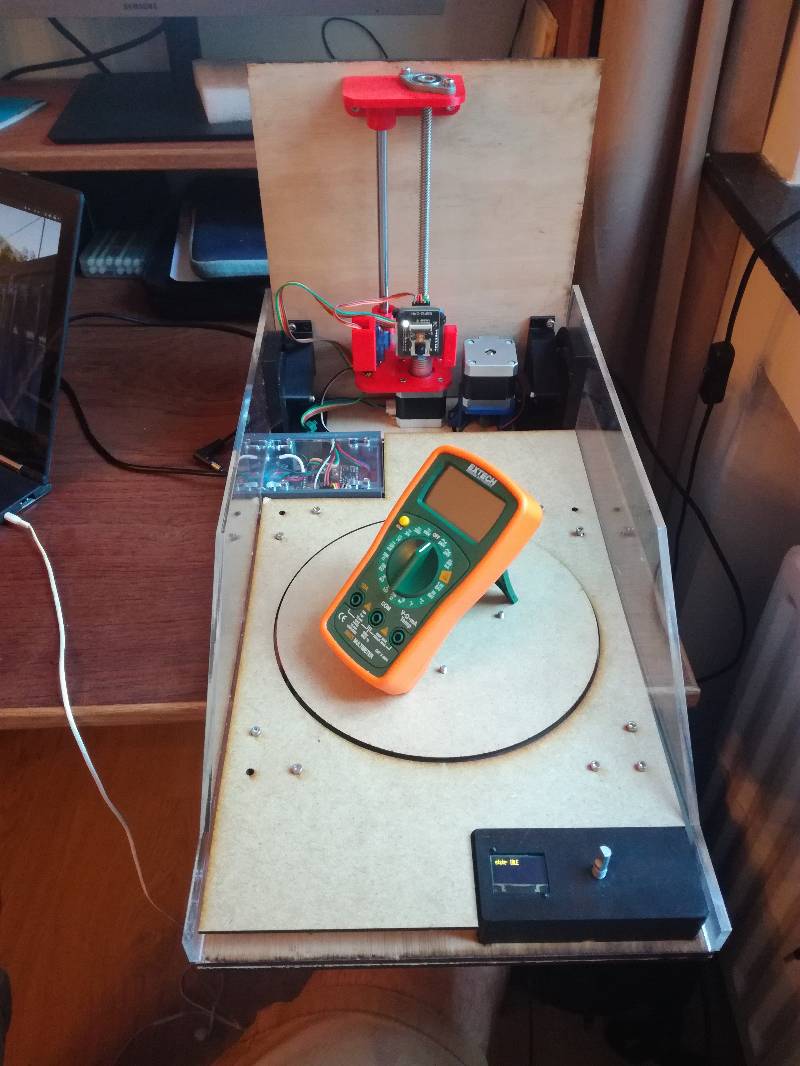

The second objective was to store it and it works great !

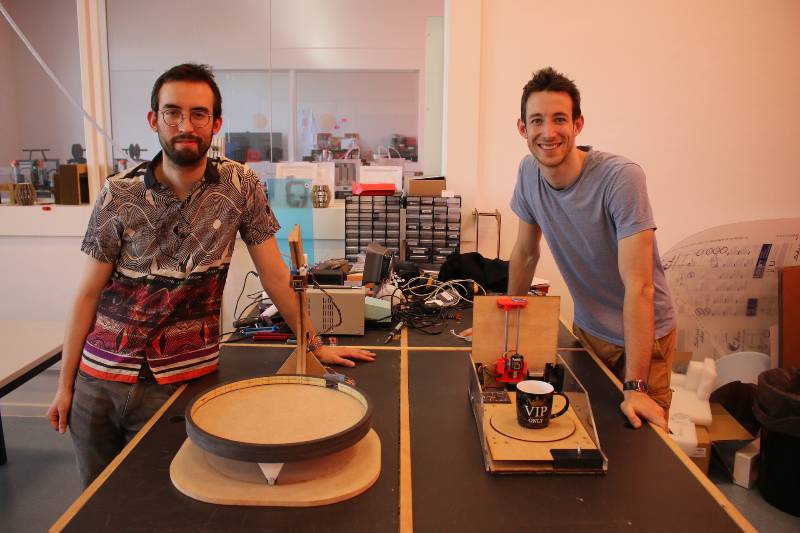
We now have two generations of 3D scanner at FabLabULB and their inventors !
Files
Mechanics
To demonstrate capability in FreeCAD, I decided to make one component in FreeCAD.
STL files for 3D printing are too large to include.
Electronics
Code