3. Computer Assisted Design
This week I worked on Computer Assisted Design and made a first digital design of my final project idea. I also went back on the documentation process and visual of my website that I had neglected last week.
Learnings from last week
As I wrote last week, I want to have a more structured approach to my assignments and website. Thus here are the different sections that I want to have in each assignment’s page.
Study Plan
- Assignment definition: What do I have to do for next week ?
- What do I know already ?
- What do I want to learn ?
- What time will I dedicate to each topic ?
- What do I want to build by the end of the week ?
Research: Covering the core topic of the lesson what did I try as tools, what did I read related to the subject
Study plan
Assignment
Model (raster, vector, 2D, 3D, render, animate, simulate, …) a possible final project, compress your images and videos, and post it on your class page.
Discover, learn/test and choose some of the tools presented in the class
Reference: * http://fabacademy.org/2021/docs/assessment/computer-aided_design.html
What do I know already ?
I have already worked with CAD softwares, especially Solidworks, Fusion360 and Onshape.
I have barely ever worked with GIMP and never worked with 2D CAD softwares such as Inkscape. I heard of nTopology during the Open Global Saturdays and I found the concept of Field Driven design particularily interesting.
What do I want to learn ?
I want to become independent and learn FreeCAD or FreeCAD daily as I have been advised by Nicolas De Coster.
I want to test Inkscape as I have heard that you need to draw svg to laser cut objects.
I want to discover Blender, especially rendering and animation. Off course I want to discover how to design and sculpt in Blender but I want to focus on the rendering rather than design which I know I will be more comfortable in CAD for my engineering activities.
What time will I dedicate to each topic ?
| FreeCAD | Inkscape | Blender | |
|---|---|---|---|
| Objective | Get used to the menus and be able to draw fast in FreeCAD | Understand what the usecase is, Create a svg file from a picture or a PDF, Discover the interface | Discover the menus, Learn how to sculpt simple things, position objects, render my designs, test materials and make an animation to illustrate the use case |
| Time | 1.5 days | 0.5 days | 3 days |
On top of that, I want to dedicate some time to review my website and improve my picture resizing workflow using OpenCV and python and a proper file structure.
What do I want to build by the end of the week ?
| FreeCAD | Inkscape | Blender | |
|---|---|---|---|
| Objective | Build a first model for my final project, Build a chandelier model for my girlfriend | Prepare the work to laser cut the game Secret hitler | Render an animation of my final project and of the chandelier |
Research 2D
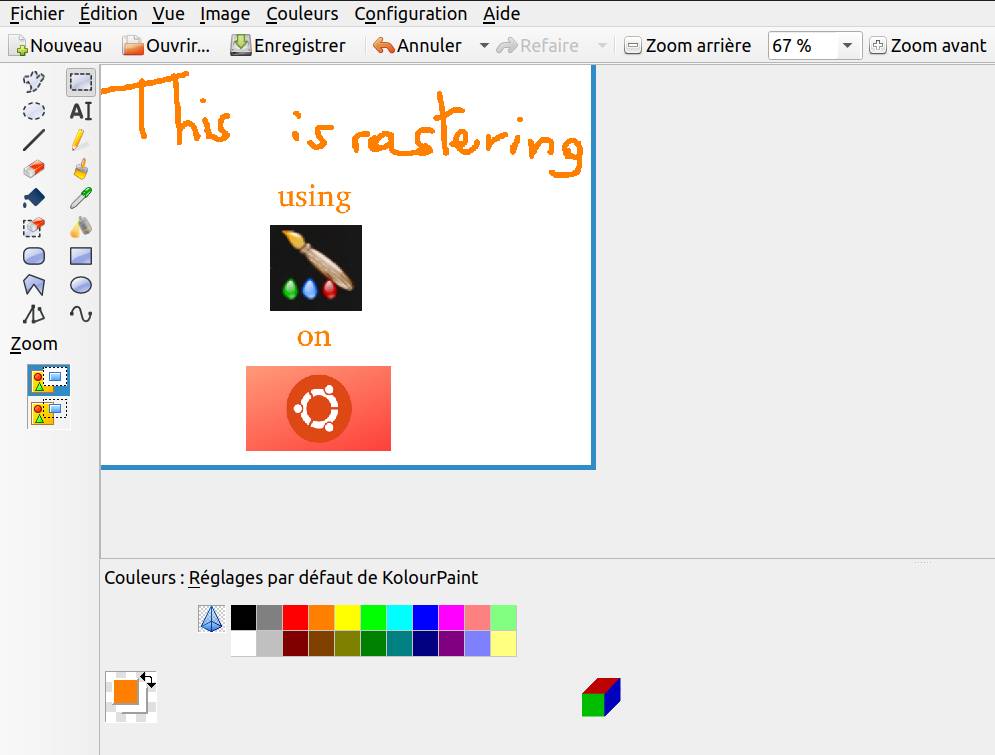
Raster : KolourPaint, GIMP, Shutter…
Raster images are pixel defined images. Because of that, the quality is dependent of the scale of the image. When you increase the size, you get a blurry image, that is because it’s pixelated.
I tested and used different softwares for rastering/pixel based to edit my pictures or quick drawings and annotations.
The one I advice is Shutter. It is very appropriate to take screen capture and beautifully edit on the go. Shutter has also a feature for capturing menus in the windows you use.
Regarding other rastering softwares the most classic is Microsoft Paint and on Ubuntu one equivalent is KolourPaint. It’s pretty much the same, very intuitive but quite limited similarly to Microsoft Paint.
I looked into Gimp but did not do any tutorial as I have never felt the need to use advance functions.
Inkscape
If you need a file that does not change with scale, you need a mathematical description of it. We call that vector images.
Vector images do no store information in boxes (ie pixels) but rather in an analytical format, a vector.
You probably remember vectors from your high school math lessons.
A vector describes a displacement between an origin and a destination. The advantage is that you can define the displament using equations.
An easy way to understand vector images is to look at a parabole graph for example. Changing the scale on the graph of the parabole will not get you a pixelated graph. That is because for every point on your screen a vector was computed to provide a value.
The code to get to the image of a parabole whatever the screensize would be something like this
First you need a list of all the points on your screen.
You can build it with the limits of the x-axis, y-axis and the resolution of your screen.

Let's say that you have a 1024x512 screen.
The part of the graph that you zoomed in on is

X betwenn -2 and 4
Y between -1 and 3

The list of points would be :

points = [] # A list in Python
x = -2
y = -1

resolution_x = (4 - (-2))/ 1024
resolution_y = (3 - (-1))/ 512

while x < 4:
  while y < 3:
    points.append((x,y)) # Adding an element to a list in Python
    y = y + resolution_y
  x = x + resolution_x

Then to obtain the colors

def color_parabol(x,y):
    if y == x²: # Or whatever other equation
      return "black" # Or any other color
    else:
      return "white"

And to obtain the graph
for x,y in points:
  plot(x,y,color = color_parabol(x,y))
Here you can see two paraboles one is a raster image and the other a vector image.
Which is which ?
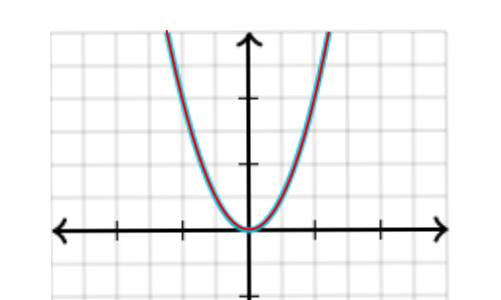
Let’s zoom in to find out the difference !
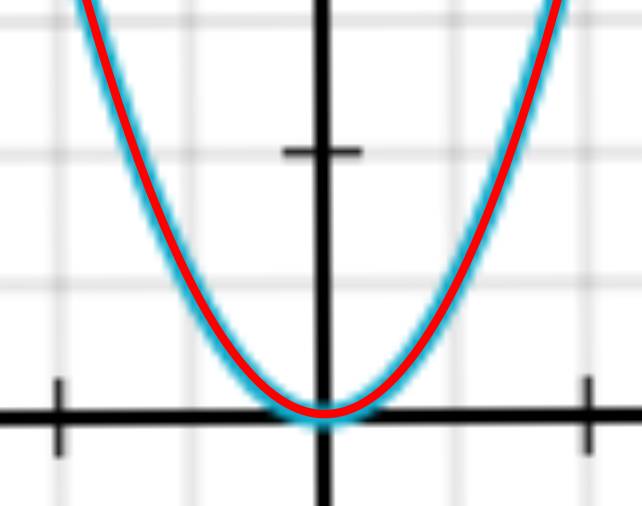
And a little more…
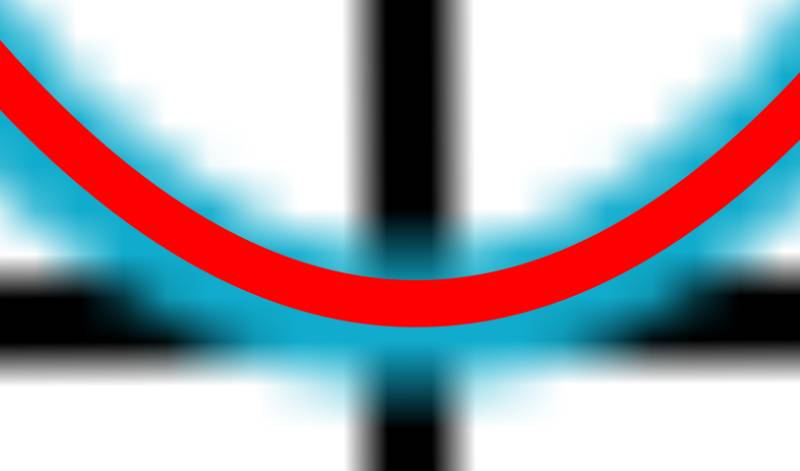
The blue one is a raster images, we see that it gets blurry as you zoom in. The blurr comes because to compute pixels smaller than the encoded ones, the software averages the blue and the white.
The red one stays sharp because the edges a recomputed for each zoom level.
I also tried some functions of Inkscape, and playing with bitmap conversion.
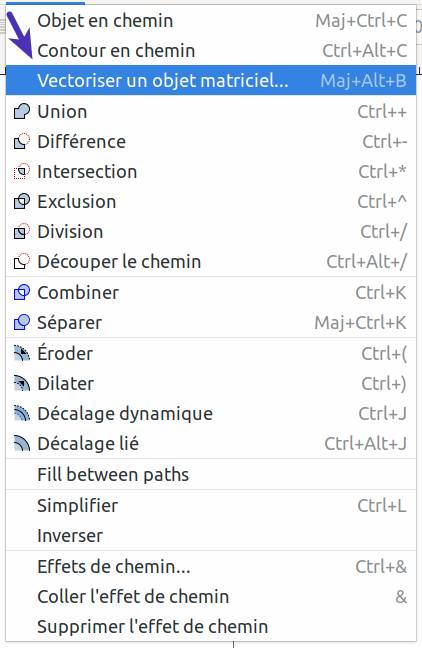

If you are looking for a place to learn inkscape, start with the included tutorials in the menu : Help > Tutorials.
Basic Tutorial
I am following the included tutorials of Inkscape.
You can find them in the menu Help > Tutorials.
I’ll start with the basic tutorial and see how far I go.
First, it’s nice that it is included in Inkscape and that it is in the same language as the menus !
There are many toolbars
- on the left, drawing and editing tools
- on the top, below the menus, general commands and controls over the selected tool.
- on the bottom : indication and messages
To go back to the “normal” mouse click it in the left menu or use the spacebar !
Using Ctrl while: * moving the object snaps it to the closest axis * while scaling it, it preserves the ratio * rotating or shearingit, it snaps to 15° increments
You can do a lot of things with the keyboard such as using < and > to scale the object or the arrows to move it.
One thing I always use is align and the shortcut is Ctrl + Shift + A
To reorder objects the “Send to front” or “Send back” is done using “Page up” “Page down”.
Shift Tab is also useful to find the object most at front and Tab to find the object most at the back.
If you want to select similar objects, you can select the first one then go to “Edition > Selectionner même” and choose the option you like, for example select all shapes with the same contour and background.
Shapes tutorial
The second tutorial is about shapes.
A lot is obvious so i’ll stick to the most interesting bits.
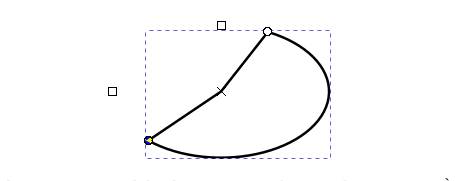
To make circles, arcs, ellispses or portions, you can manipulate the handles.
The thing that is not obvious is that to make the radius appear you put the handle outside of the disk, and to make the radius disappear, you put in inside of the disk !
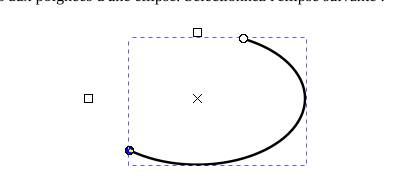 |
 |
|---|---|
| Handle In | Handle Out |
Research: 3D CAD
I have made a review of the different CAD softwares I tested and discovered:

I only compared them on simple functionalities around 3D modeling so sketching and turning sketches in 3D bodies or surfaces.
Review of Solidworks, Fusion360 and Onshape
Solidworks : Difficult to learn but great functionalities
Formats and Licences
Solidworks is really expensive and requires you to upgrade regularily. It is not a SaaS per se but the business model makes it very similar to one in disguise.
Given that I don’t have a licence and won’t have one in the future, I want to avoid using it as much as possible. What I find particularily despicable in Solidworks is that they force users to upgrade to the new version (there is a new one every year) by blocking backwards compatibility. What that means is that with Solidworks 2019, you cannot read Solidworks 2020 files which is crazy in my opinion.
Usability & Performances
I worked on Solidworks at the job I had in 2019 and to start with it, the boss offered me a training of 4 weeks two days a week. This is important to understand the challenge that it poses. There are a lot of functions and they can become very accessible because you can customize everything but when you get it for the first time, it will take some time to find them.
The user interface is still in the 90’s paradigm all customisations were possible but the base UI was very shitty. They have done some good work to make it more legible but it is still not so user-friendly.
One thing is that they do not have practical interactive tutorials and most of the tutorials are paper-based which makes it even harder to learn.
Fusion360 : Good UX, advanced collaborative use and good functionalities
I used Fusion360 at another company but this time I had to learn it by myself. It took me a couple of days with the video tutorials and it went great.
Formats and Licences
Fusion360 is a SaaS meaning you will always have to pay for it so you will remain dependent of them to read your files. However, it is quite cheap for individuals (for the moment). They used to offer a version for hobbyist for free but unfortunately that has changed and even if they went back on that decision, it is still very clear that they are moving towards fully premium, removing all hobbyist licences.
Usability & Performances
Fusion has great tutorials and a lot of functions. It is great for collaboration, but it lacks certain functions that Solidworks has and the sketch UI is bit less easy to use as Solidworks’ UI. Unfortunately, I don’t remember what functions were more difficult and I did not get access to a Fusion360 licence from the FabAcademy this week so I couldn’t retest it.
Fusion360 gets extra points for their easy-to-use platform to share designs with other stakeholders. Solidworks offers that as well but it’s not as well integrated imo.
I am disappointed that they still do not try to support OS like Ubuntu as that is my main OS. I saw that is now runs in Chromium but it is way too slow.
Onshape : Great UX, online, free for open source but sometimes buggy
Onshape is amazing you learn it very quickly and they have great tutorials. It was the first CAD tools that I learnt, on my own at university and it’s my go-to tool because it’s usable online for free for opensource projects.
Formats and Licences
Onshape has a freemium model similar to the one of GitHub before. It is free for opensource projects and you have to pay to keep it private. I find totally acceptable and thus there is no reason no to use in that regard.
Usability & Performances As I said OnShape is great regarding the UX, you can even use it with their smartphone app ! You don’t have to install anything on your computer as it runs online and within your browser which makes it even better.
However, it comes at a price for performances, as any cloud based graphical intensive tool, it depends highly on the internet connection. On top of that, numerous times, I tried to use OnShape and was faced with critical bugs that completely froze the website and that I could not solve.
FreeCAD & FreeCAD Daily
Because I knew quite well the other softwares, I took a in-depth look at FreeCAD, because it was very difficult to start without dedicating time to it.
Formats and Licences
FreeCAD is in that regard, the best tool, it is opensource and thus will always be free and you will always be able to open your files whatever happens with the maintainers. The file format will remain open as well. FreeCAD is also available on all OS so that’s good !
Usability & Performances
I tried FreeCAD and in short, the interface and UX is horrible compared to the other CAD softwares that I know. Regarding performances, I know a lot is possible if you learn enough and you can completely interface it with Python which is nice.
Because I rated it very bad on ease-of-use, I did not rate it very bad in performances as some features are just hidden.
Here are my critics:
-
Measurements : There is a whole toolbar only for measurements buttons (vertical, horizontal, length, radius, angle, …) where on all the others you only have one and the context (ie. what you have clicked and where your mouse is)
-
Reference for measurements : The reference for measurements must be points if you want to define the measurements between different lines. This is very impractical and counter-intuitive to define the distance between two parallel lines or other such situations.
-
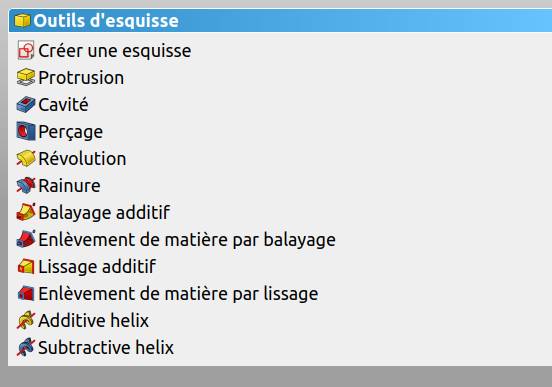
Menus: There are so many menus to create a part (part, part design, …) and the toolbars depend on the menu you select but not completely so it is very difficult to navigate and learn. When using a specific tool I had numerous bugs and when I did not, it often did not work without indicating me how to do better.
-
Outside geometries : You need to import outside geometries before using them as reference
-
Creation timeline : I love as many others, the creation timelines in Fusion360. In Solidworks it is also quite easy to understand but in FreeCAD it is less easy to go back in time. You can hide surfaces by clicking space which leads to something similar as “put in suppression” in Solidworks but it is still not clear .
-
Sketch space :
-
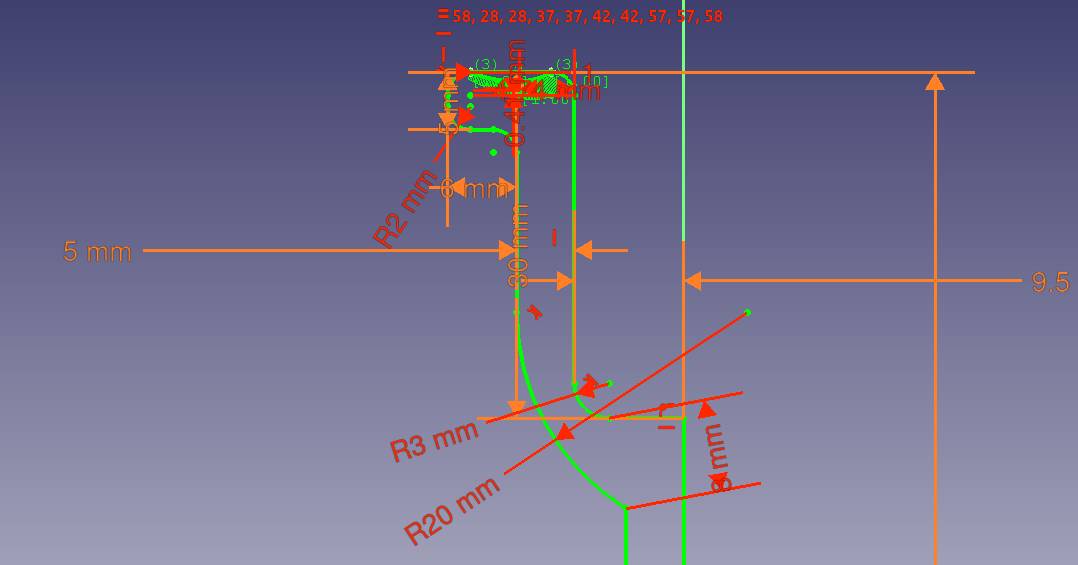
Zoom : When you dezoom from a sketch, the sketch gets crowded by measurements and you can’t see anything anymore.

- Tools : Different sketching tools that I find super useful to add points at intersections or simplify sketches are not available. There is also no centered rectangle which is a pity.

Different tools such as fillet are also destroying constraints instead of keeping the geometry as construction lines and adding new solid geometries.
-
Sketch Orientation : Sometimes it seems that the orientation of a sketch is done arbitrarily and because horizontal and vertical measurements are “hard coded” and thus depend on this default orientation and not contextual, it happened multiple times that after checking my whole model I added measurements in the wrong direction.
-
Constraints : So many times, deleting an line or measurement makes FreeCAD crazy and you can’t do anything but start again in another way.
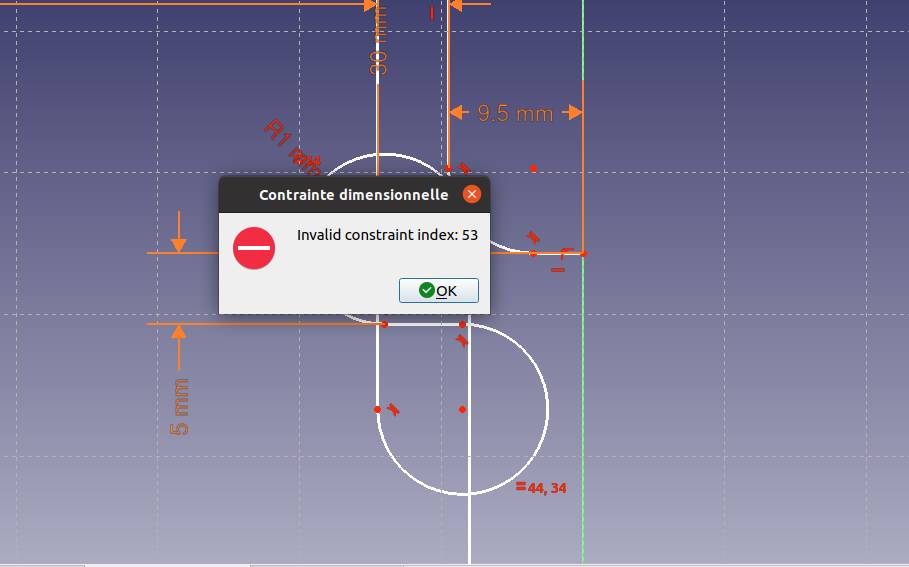
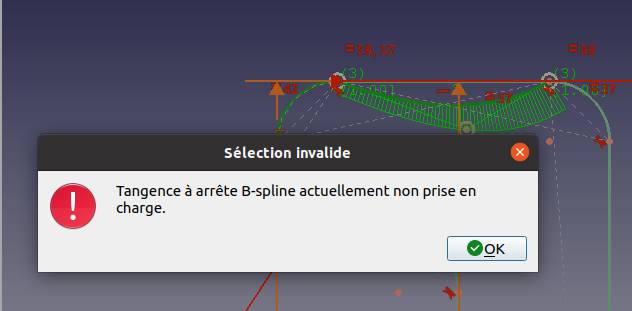
- Missing features : some features such as the tangent constraints for splines are not implemented.
nTopology
I wanted to learn about nTopology because of the different paradigm their software is based on : Field Driven design. I did not test it as I had no access to it but I reached out to a friend who tested it and said it was real hard to learn.
I read their white paper that you can find here. Field Driven design looks like an amazing advance in terms of material optimization, especially in medical applications.
Field driven design is an implicit way to design a piece, by defining what you want it to do functionally instead of geometrically. You do that by using equations that constraint the design.
I was very interested to pursue it so I applied joined one of their workshops for which you receive a trial licence.
Learning
FreeCAD
Installation
I followed the advice of Nicolas De Coster and went to FreeCAD-daily instead of FreeCAD.
To download it, as many packages, you go to the offical wiki of FreeCAD to find the link to the PPA or use the following:
sudo add-apt-repository ppa:freecad-maintainers/freecad-daily
sudo apt-get update
sudo apt-get install freecad-daily
Learning
I started my journey directly diving in. That is what I had done for other CAD softwares, but FreeCAD was too hard.
I described plenty of my difficulties above in the FreeCAD section, here is the process I followed.
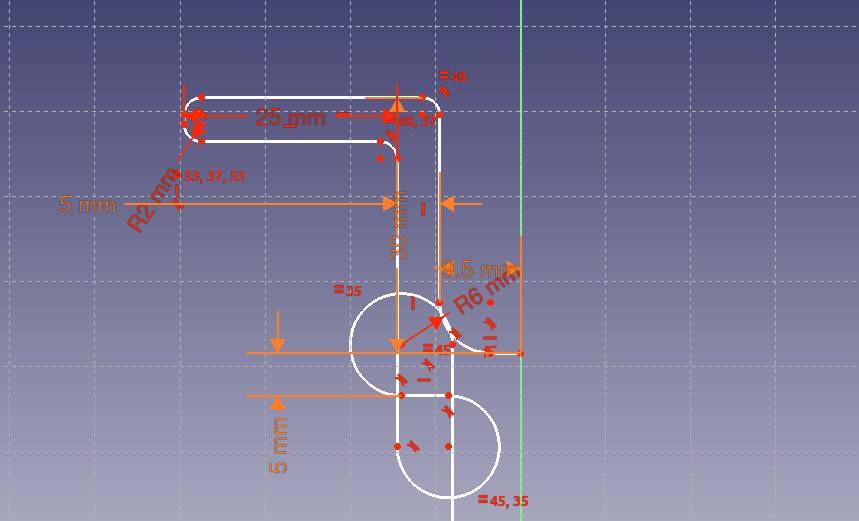
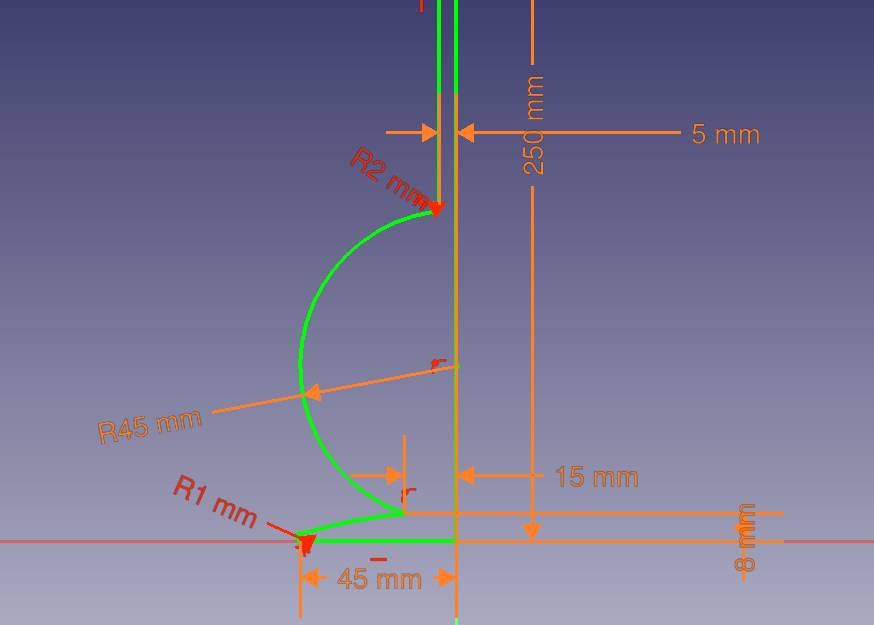
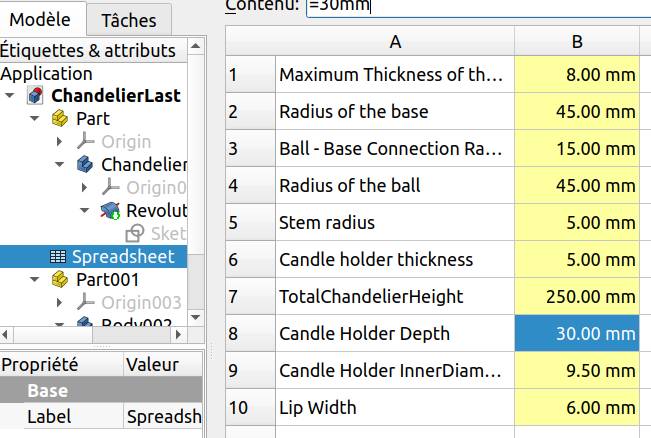
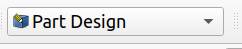
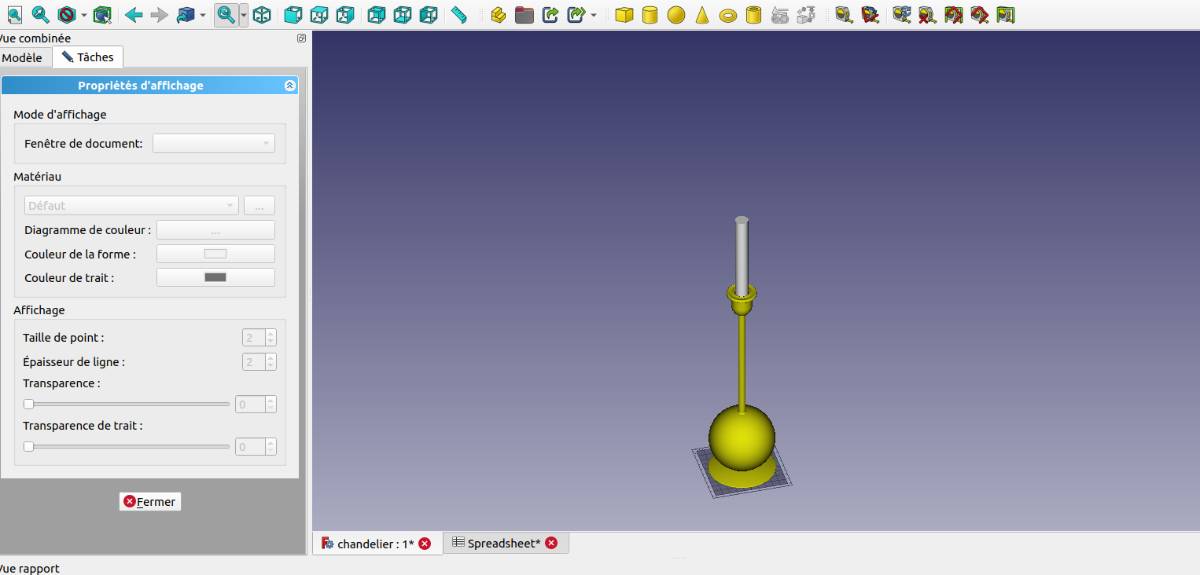
It was a very simple axially symetric shape so I made one sketch and a revolution of it.
For rendering, let’s move to Blender !
Blender
Installation
I downloaded the latest online archive (2.91) and extracted the content and launched it by clicking the “bender” file.
If it does not work, you have to check the properties and enable it to be run.
Learning
My Blender journey started on the Blender official website looking for the official tutorials…
I think I watched 45 minutes of tutorials only for basic functions and because I was not using what I was hearing I forgot it all pretty much immediately.
So I don’t advise anyone to do that.
After that I skipped to the later tutorials and it was actually worse because I still could not do anything as I did not know how to do the basic stuff (I had skipped half of the basic tutorials videos.)
So no luck looking at the official tutorials.
I now think that this guy could help a lot in deepening my understanding of Blender so I’ll look into it later:
Then I asked for Quentin’s help (one of our instructor) and it was fantastic ! Quentin is a magician with Blender, he built his own games with it when he was 16 so he is at mastery level from where I am looking.
We covered basic stuff such as moving objects (G) and resizing (S) them, separating (P) them, changing viewer mode (Z), rendering (F12), subdividing the mesh, creating material and light emitting materials, changing the background materials, adding texture to surfaces, extending meshes (E), sculpting, …
I worked on my own for the weekend and Tuesday we went back to it and looked into rendering my chandelier.
Once that was done, I wanted to denoise the rendering because I had a low light scene so it was really noisy. Given that I had already been confronted to that problem, I know it will be useful in later projects.
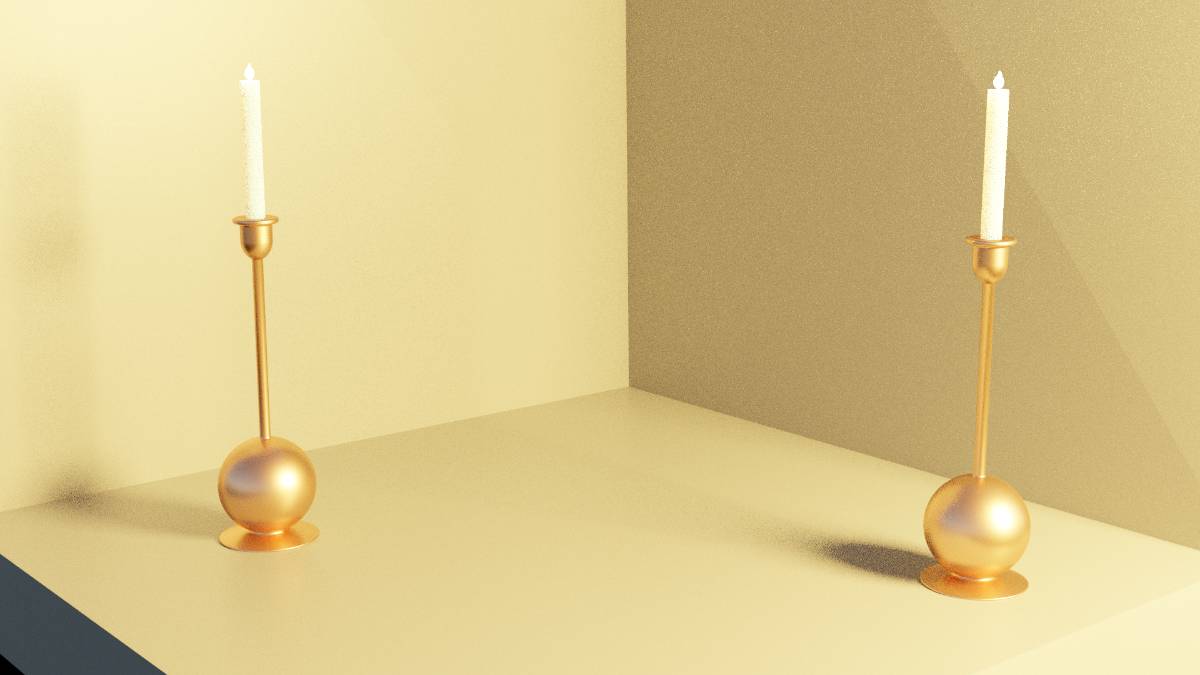
I got to a final result of which I was quite happy !
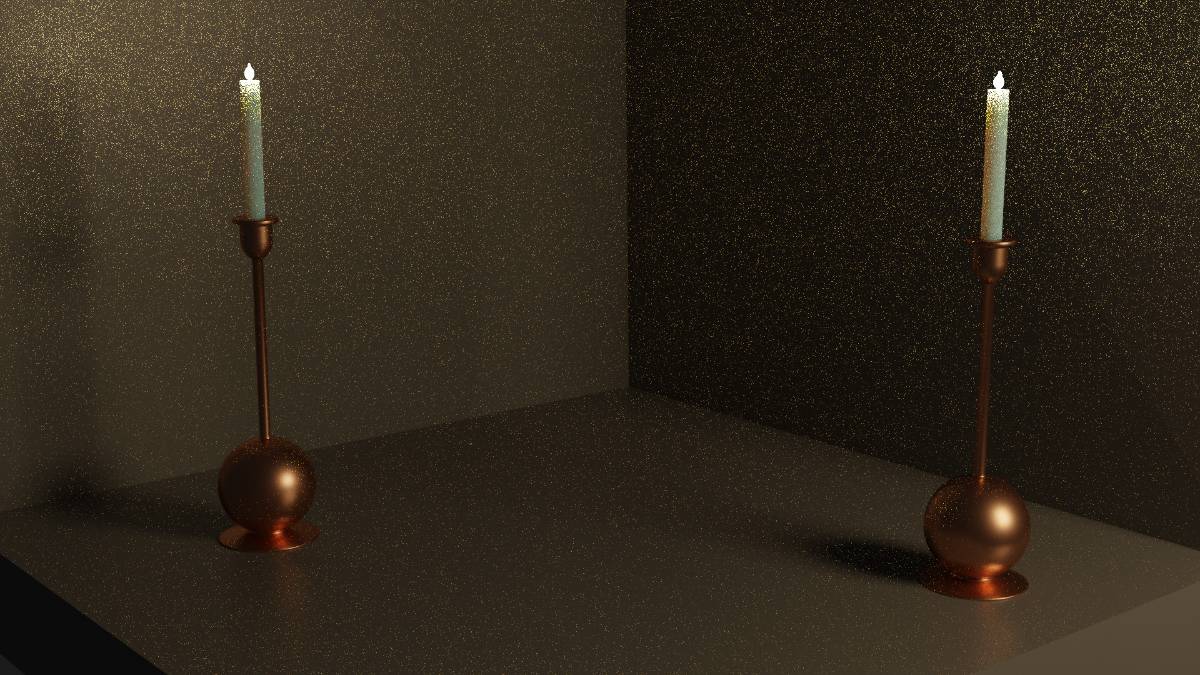

My girlfriend wanted them golden instead of coppery, so I tweaked the material to get a final result.

Which I am quite proud of !
I then tested with more sunlight but did not like it that much.
CAD of the final project
I made a first draft for my Final Project in Fusion360 finally, because the CAM tools were included and easy to use.
It’s in the downloads here below.

Downloads:
- FreeCAD Chandelier
- STL Chandelier
- Blender Rendering of the chandelier
- Draft CAD of the final project