Week 1: Principles, practices and project management
First draft of my final project: A characterization test bench for pneumatic endoscopes
Context
I am currently doing a PhD in biomedical engineering, focusing on the development of an eco-designed pneumatic endoscope. As part of this research, I need a test bench able to fully characterize the endoscope tube that I’m developing.
An endoscope is a flexible tube, including a camera and an operating channel, which is inserted into the natural orifice (mouth) for the minimally invasive diagnosis and treatment of pathologies of the digestive tract. Within this research, the usual cable-based actuation of the endoscope is being replaced by a pneumatic one, meaning that the end of the tube is bent thanks to pressure applied in pneumatic chambers.

Bending principle: when pressure is applied in one air channel, a bending occurs

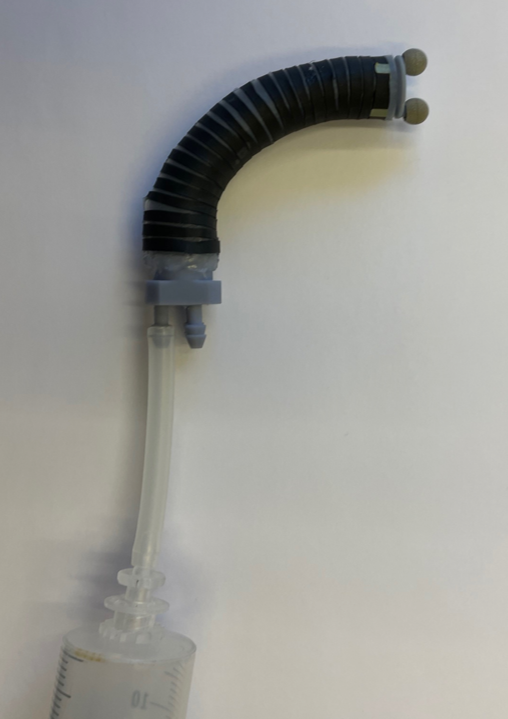
A pneumatic actuator that I have made
In order to fully characterize my endoscopic tube, I want to determine the relation between the pressure applied in the channel and the corresponding flexion, as well as the force that can be applied with the tip of the actuator in function of the applied pressure.
Project
I will develop a test bench able to:
- control the pressure applied to each channel (3);
- track the tip of the actuator in order to determine the flexion angle;
- monitor the force applied on the tip of the actuator.
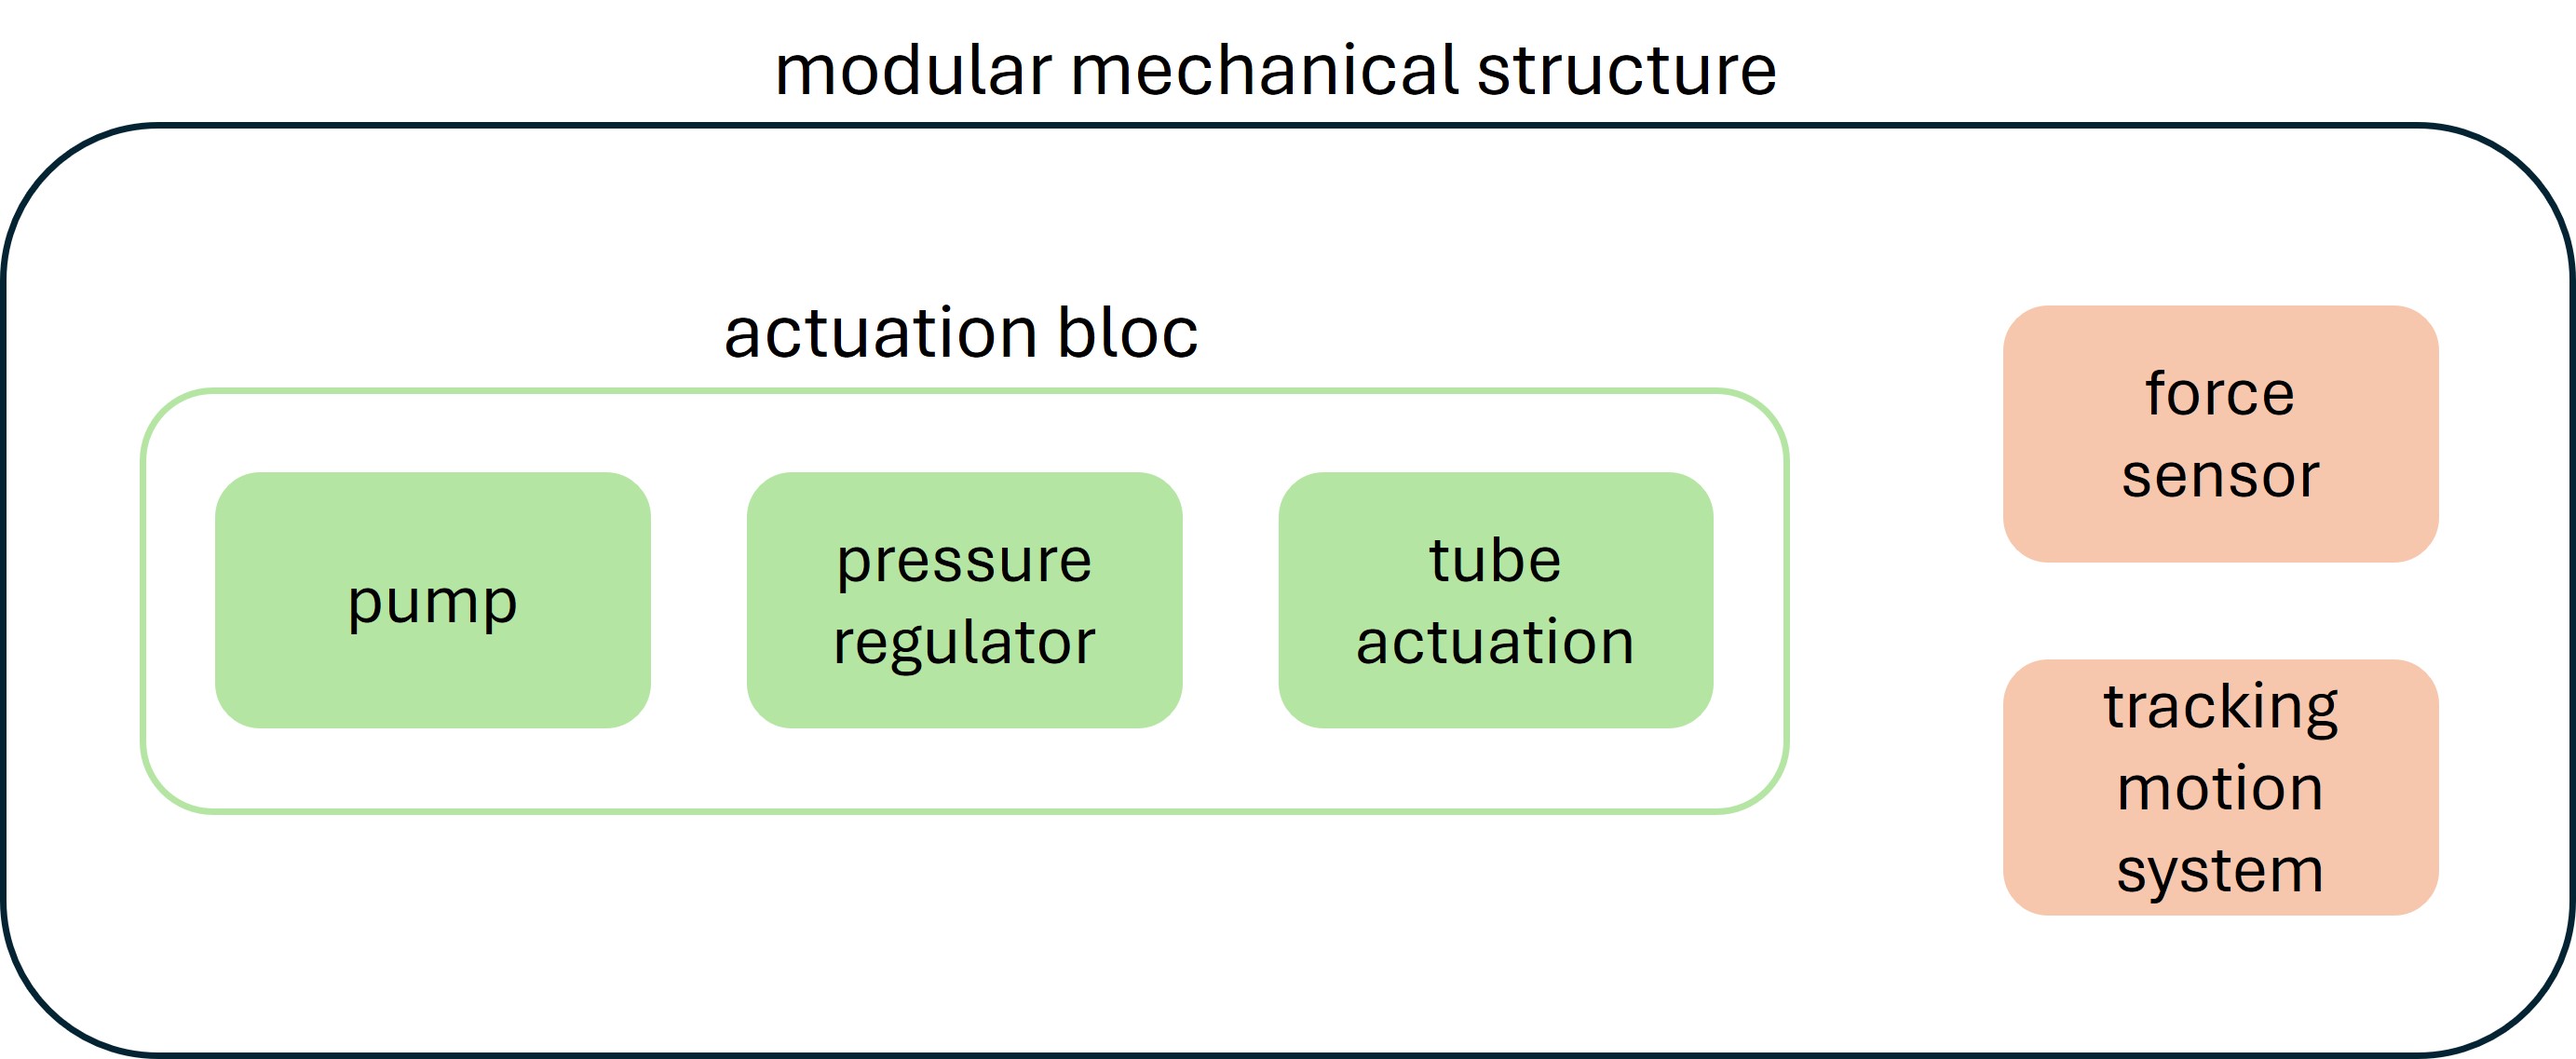
The test bench will thus be divided in multiple parts:
- An “actuation bloc” composed of a pump, the pressure regulator and the endoscopic actuator;
- A tracking motion system: I will use the commercial OptiTrack capture motion system, which uses camera and markers (that can be seen on the tip of my homemade actuator above);
- A force sensor: will be placed in the test bench in order to be in contact with the tip of the actuator;
- A mechanical structure to hold the endoscopic actuator, as well as the force sensor and the tracking motion system. This mechanical structure will be designed to be as modular as possible.

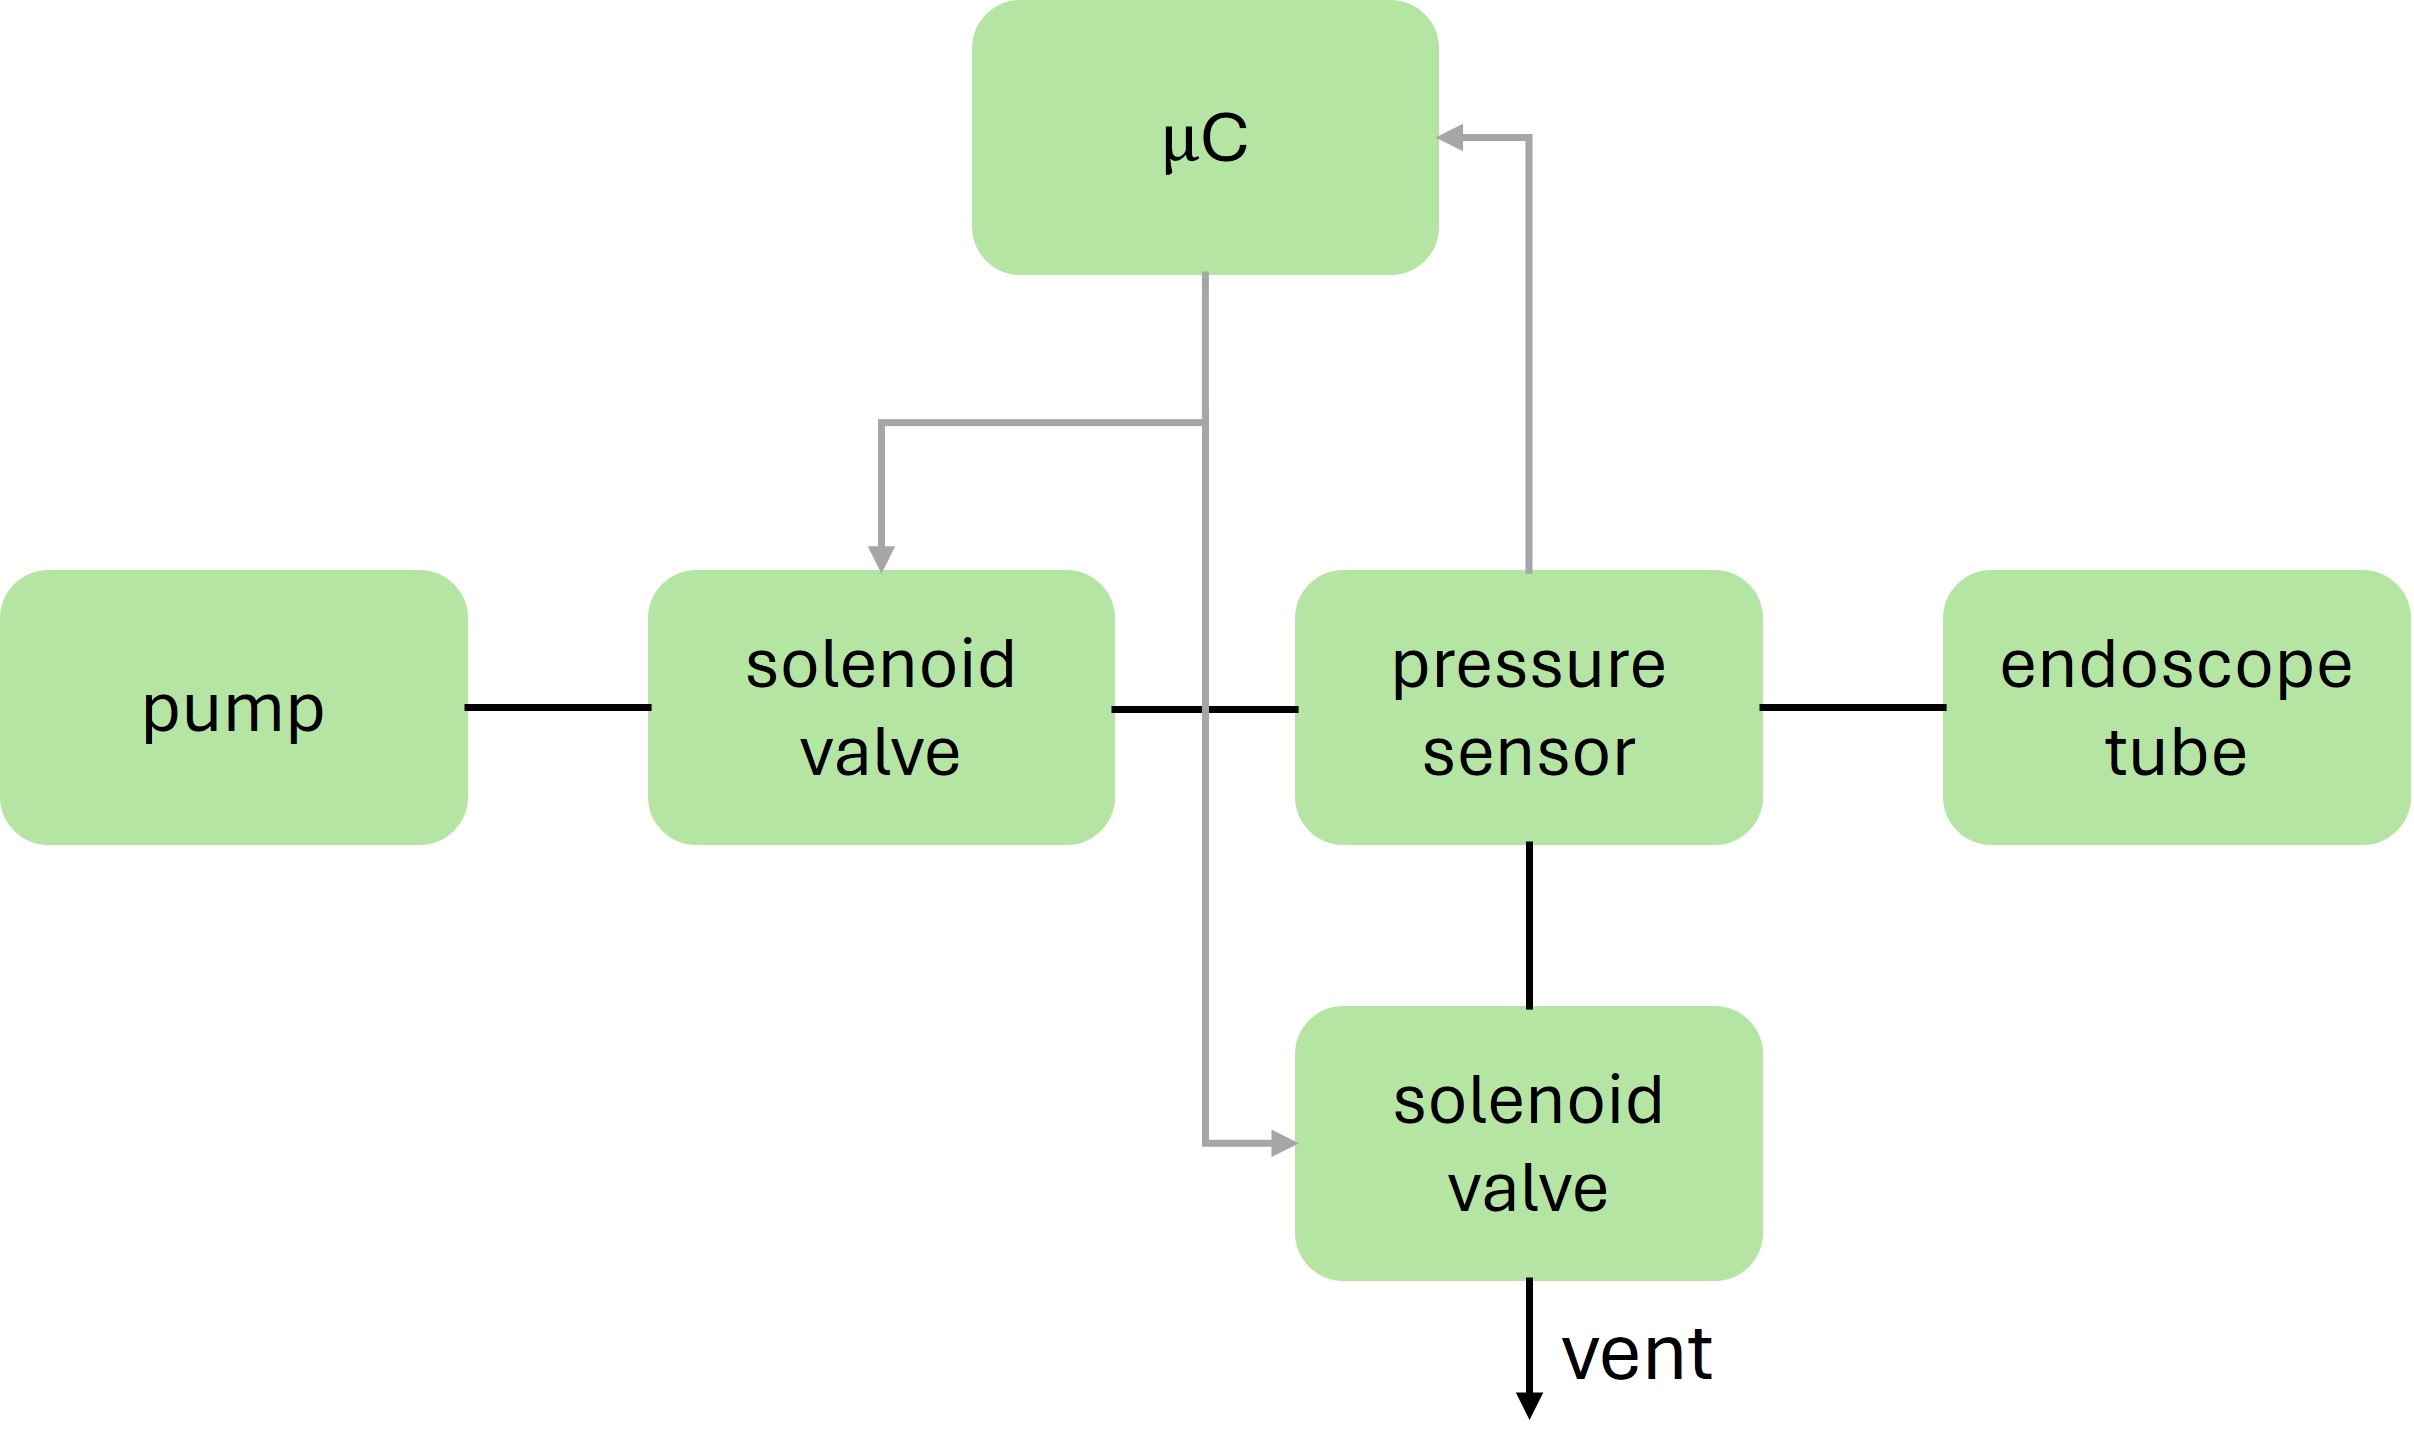
The pressure regulator will be composed of multiple components, mainly solenoid valves and a pressure sensor. The best architecture will be determine in order to obtain a good precision on the pressure control, as well as a fast actuation. Previous projects and litterature will help me to determine how to construct this bloc. One of the possible solution is sketch bellow, it is developped in the following article Watson 2019.

Previous job and inspiration
Obviously, projects like mine have already been done and I will use them as ressources during my Fab Academy journey.
- Fab Academy final project: A modular characterization platform for soft robotics
- Articles:
- Soft Robotics Toolkit
My web page
The other assigment of the week was to create a web page where all the Fab Academy journey should be monitored. I will explain how I did it bellow.
Tools
This week I also created my first web page ever. As a beginner, I didn’t want to waste time for my documentation, so I chose simple tools to create my website.
-
I will use MkDocs as a static site generator, rather than coding everything in html. The documentation source files are written in Markdown, which is quite easy to use for the daily monitoring needed in the Fab Academy, and I am also already familiar with the Markdown syntax as I use Obsidian for my thesis notebook.
-
VS code will be used as my text editor, to create and modify my documentation files.
MkDocs
I have followed the introduction tutorial that can be found on the MkDocs web page to start my web page.
The first step is to download MkDocs, and then to create a project, i.e. the website. It is done in a terminal with the 2 commands below.
pip install mkdocs
mkdocs new my-project
It will create a configuration file (“mkdocs.yml”) as well as a “docs” folder that will contain all the documentation files. The ;yml file is a YAML configuration file that specifies site settings such as the title, page list, and themes to use. You can customize this file according to your needs, but MkDocs provides a default configuration that works well to get started. It will also create a first file “index.md” in the “docs” folder, which is basically the first page of the website.
I have change the basic website theme by downloading another one.
-
MkDocs website -> User guide -> choosing your theme -> Third party themes -> Community wiki
-
I choose “bootswatch” and I downloaded it with the command
pip install mkdocs-bootswatch -
I choose the color, by selecting the “simplex” bootswatch theme. It is done in putting that in the “mkdocs.yml” file as shown below.

Then you can run the website locally with the command python -m mkdocs serve. It’s also documented as just mkdocs serve on the MkDocs tutorial but it was not working on my side. The command will start a local development server, and you can view your site by accessing “http://localhost:8000” in your web browser.
Starting the web page
I have first cloned the repository that was created for me on the Gitlab of the Fab Academy. I have used the command below to clone the file with the SSH link.
git clone git@gitlab.fabcloud.org:academany/fabacademy/2024/labs/ulb/students/charlotte-deroubaix.git
At this point, you should do the authentification to be able to clone the repository. To do that, I have created a SSH key on my Gitlab account, that will allow to create a secure connexion between gitlab and my computer. A SSH key can be created for each computer that will work on the project.
To create a SSH key:
-
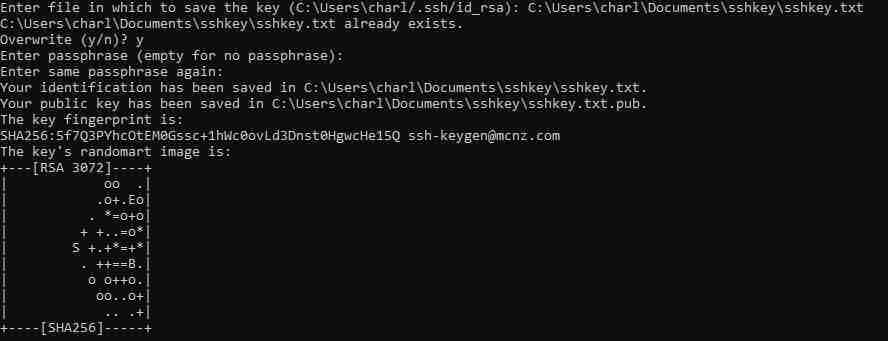
Open a terminal and use the following command
ssh-keygen -o -t rsa -C "ssh-keygen@mcnz.com" -
Name a file where you want to write the SSH key

-
Go on gitlab to your profile -> edit profile -> SSH key -> add a new key -> past the SSH key you just generated in your file
Once the connexion between your PC and gitlab and that the git repository is cloned, I can do all the changes on my files locally, and then “push” it on Gitlab so everyone can see the changes on my website. After modification, I can use the command “git status” to first see which files have been modified.

Then the following commands are used to push the modifications on Gitlab
git add .
git commit -m "msg describing the modification"
git push
In the gitlab repository, it must include a “.gitlab-ci.yml” file, which is a YAML configuration used by GitLab to define the steps, tasks, and actions to automatically execute when you push changes to your GitLab repository. It specifies how to build, test, and deploy your application or website.
Update week 3
After some discussions with my thesis supervisor, I have changed a bit the global idea of my final project. The goal will still be to construct a test bench able to characterize my prototypes, but less effort will be put on the development of an homemade pressure regulator. Indeed, I am currently in a prototyping phase of my thesis, in which multiple designs must be tested with the test bench that I will developped. Instead of developing the pressure regulator, a commercial pressure regulator will be purchased, and this part of my final project will be replaced by prototyping different designs. They will be tested on the test bench, to be fully characterized, so that the best design can be chosen.
The project is defined in the section final project overview