Week 13: molding and casting
Assignment
Group assignment:
- Review the safety data sheets for each of your molding and casting materials, then make and compare test casts with each of them
- Compare printing vs machining molds
-> see group assignment
Individual assignment:
- Design a mold around the process you’ll be using, produce it with a smooth surface finish, and use it to cast parts
- extra credit: use more then two mold parts
What I did
I did a mold to cast my pneumatic actuator for my final project!
Mold design
I already had a mold to cast my pneumatic actuator, but the design was very bad and not efficient, so I used this week to design a new mold.
Previous mold design
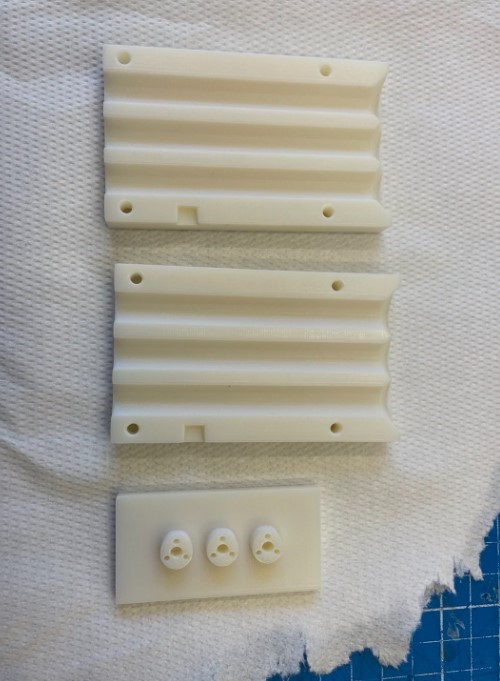
The first mold that I did before the fab academy is shown below. It was 3D printed with a Prusa printer, but the design was not that good for the following reasons:
- Not efficient: only one actuator can be made at a time
- Not easy too close: it was made out of 2 walls that had not any closing features between them, so I was using Colson necklace to close the mold
- The 2 molds were not perfectly fitting so silicone were flowing out between the walls, leading to irregularities on the outer surface of the actuator, and also it led to non repeatable results between different molding
New mold design
The assignnment of the week is to have a mold with a good surface finish, so I will use a SLA printer (Elegoo) instead of a FDM printer.
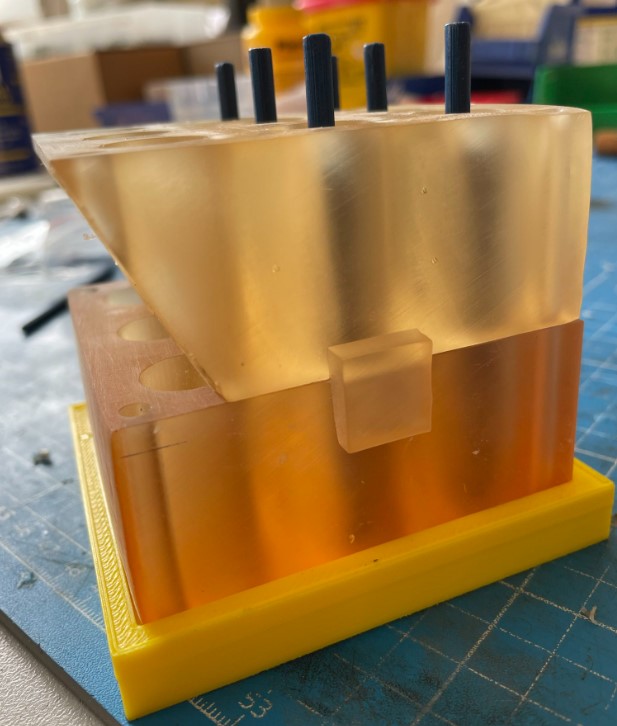
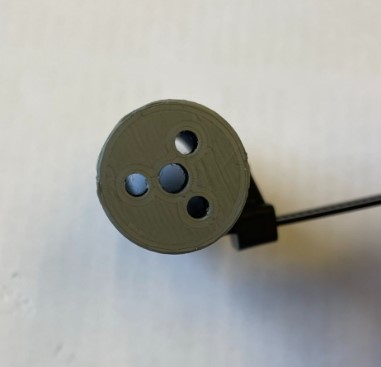
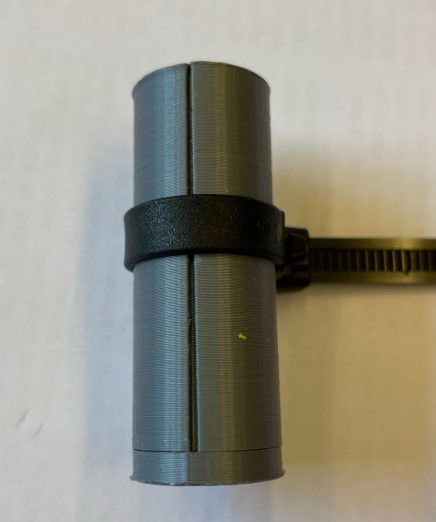
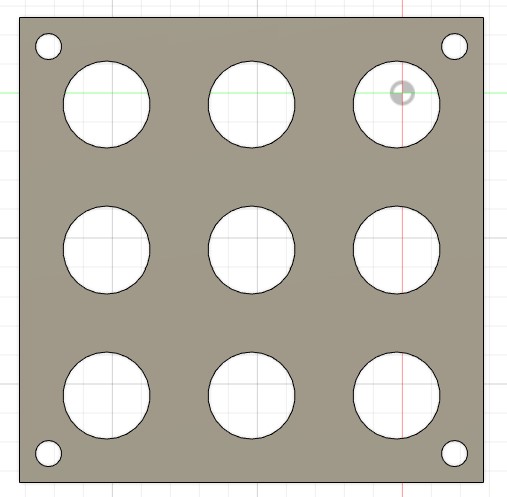
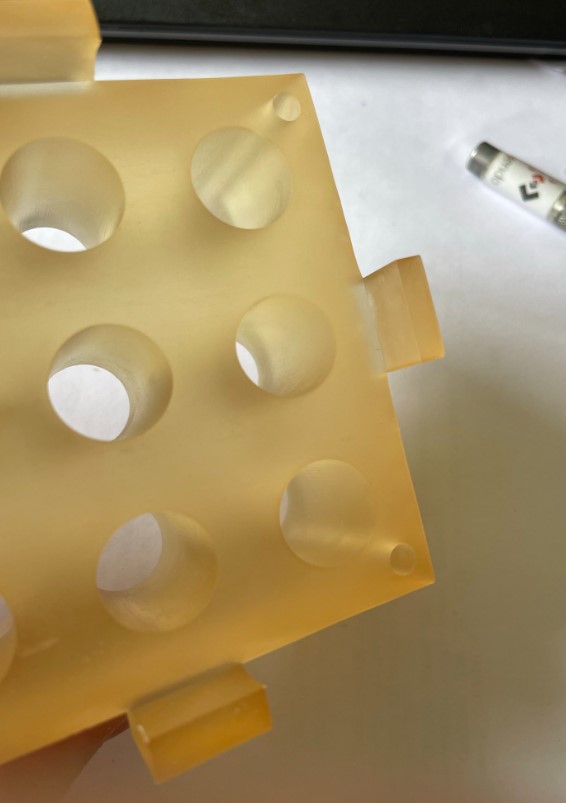
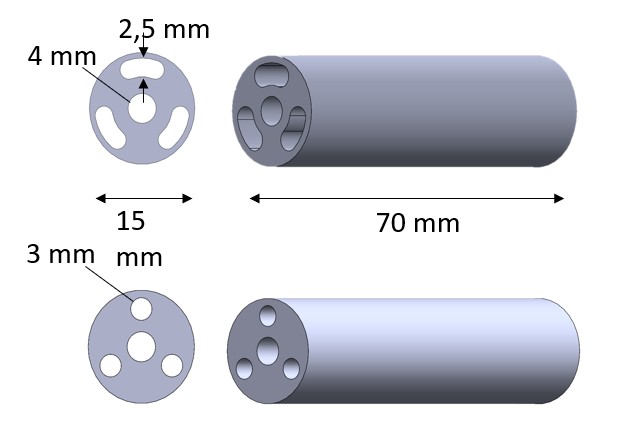
The mold will be divided in 3 parts shown below:
- The bottom part, on which tubes will be fixed in to create the air chambers and central lumen. The edges are higher so the second part of the mold will be aligned perfectly, and it will also prevent the silicone to go out of the mold.
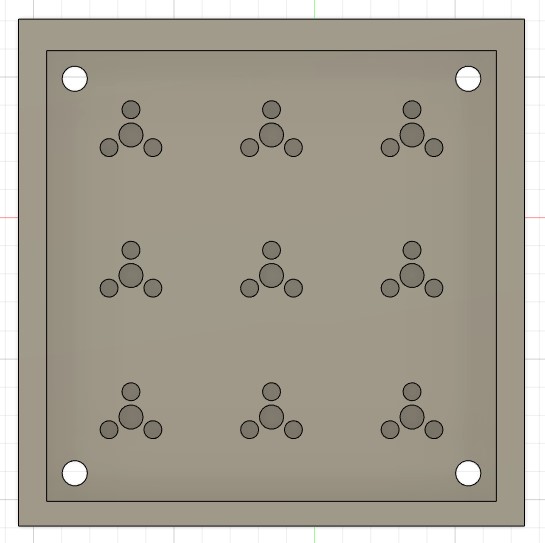
- The second part is made of 9 cylinders, so 9 actuators can be made at the same time.
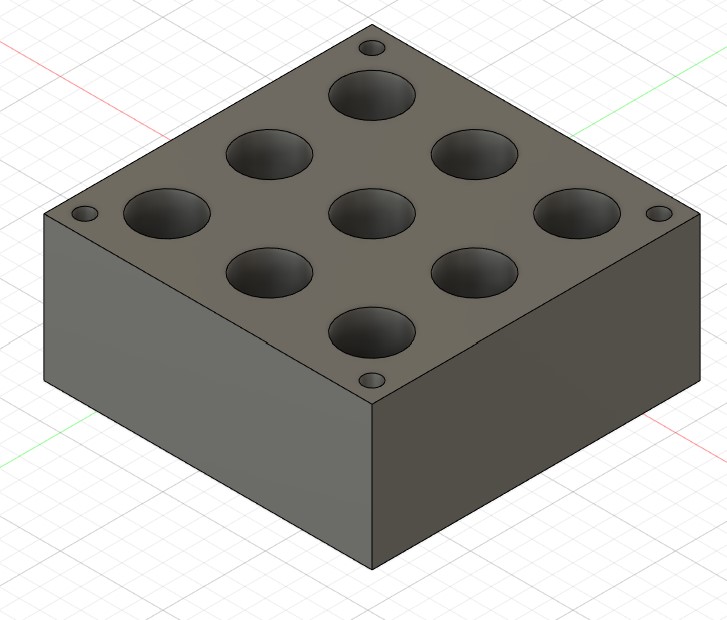
- The last part is the same one as the middle part, but with 4 parts added on the edges to be aligned perfectly with the rest of the mold. The mold is divided in 2 upper parts in order to facilitate the demolding.

Mold design files
The design files of the different mold parts can be downloaded here .
Mold manufacturing
I used the Elegoo printer of my lab to do the mold. Another option would have been to mill the mold in wax for exemple, but I didn’t have the time to test both, so I just chose the easier option for me.
Printing
For printing details and how to use the Elegoo, you can check my page of week 5. I used the chitubox software to prepare the printing file, and then I just launch the print.
Post process
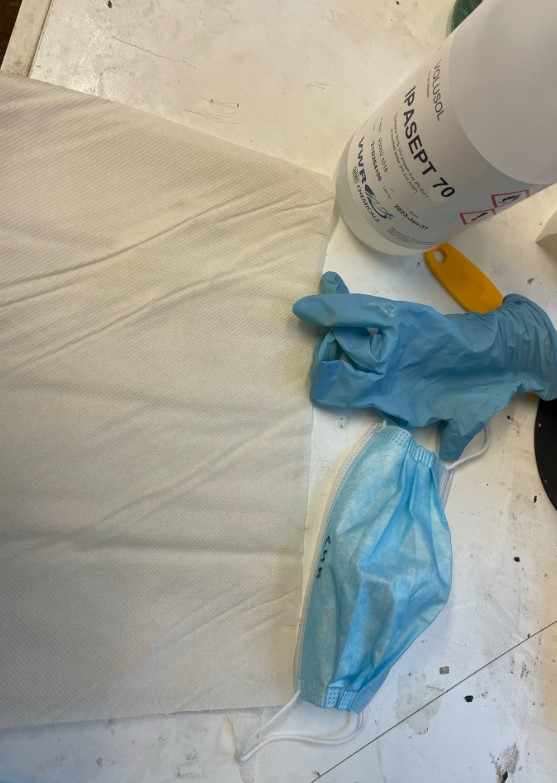
I was very careful with the post-processing, because I read on the smooth on website that sometimes silicone can have problems curing if the resin mold isn’t cured itself. The resin would act as a cure inhibitor. I thus followed the steps described bellow, and I also used translucent resin, as it was advised on smooth on website. Indeed, UV light will go through the mold easily, and then cure the resin better than if I use an opac resin.
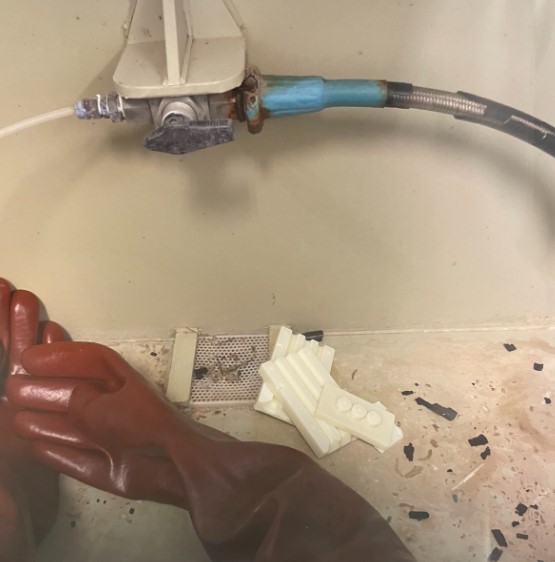
- Cleaning the excess of resin with isopropanol
As you can see here, i first had a problem with the printing because there was not enough resin in the tank, so the print was not finished..
-
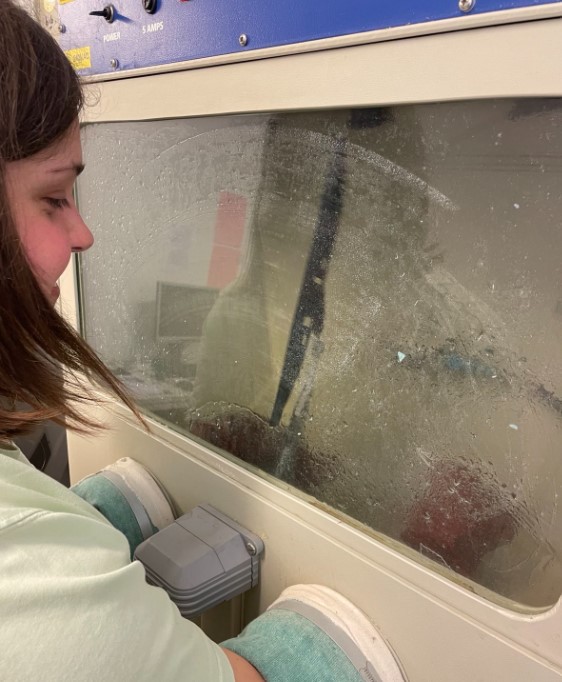
I put my piece in the UV machine for 10 minutes. The plate is rotating, to make sure that the UV light is going everywhere for a better cure.
-
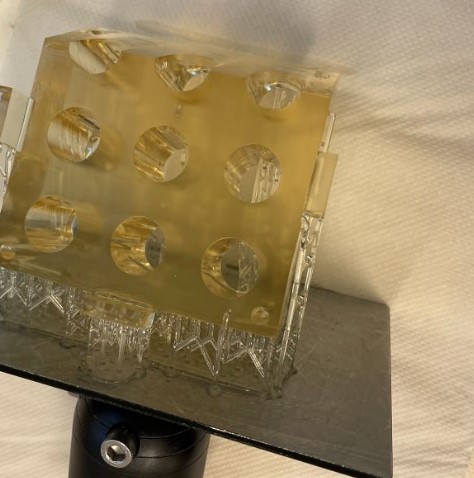
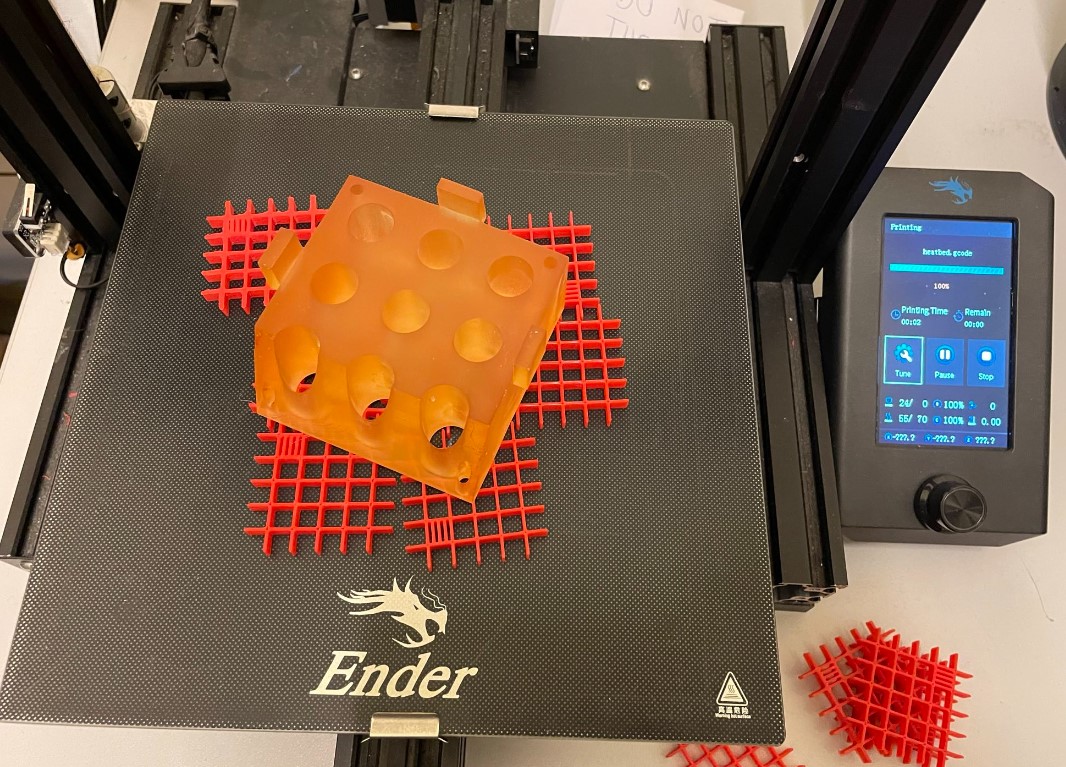
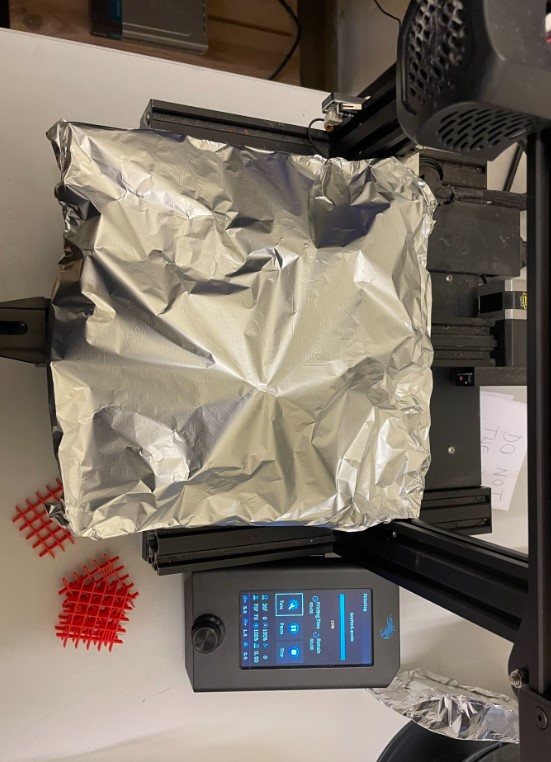
I heated my mould for 4 hours: I created a gcode that just heat the bed of a 3D printer for 4 hours at 70°C, I put my mold on it and covered it with aluminium foil. The heat will help to cure the resin. As you can see on the picture, the mold is orange, which is already a good visual indicator that UV light has reached all areas of the mold when it was in the UV machine.
- I did a test with very fast curing silicone: it works perfectly, no problem of curing
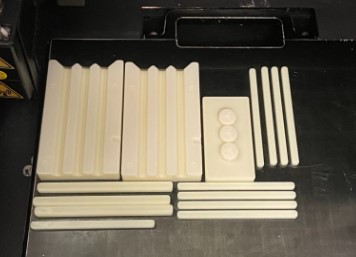
Manufacturing results
Here you can see the surface finish comparison between my old mold printed with an FDM printer and the new mold with SLA printing. The surface finish is way better with the SLA printer, which is good for this week assignment.
Old mold surface finish:

Molding
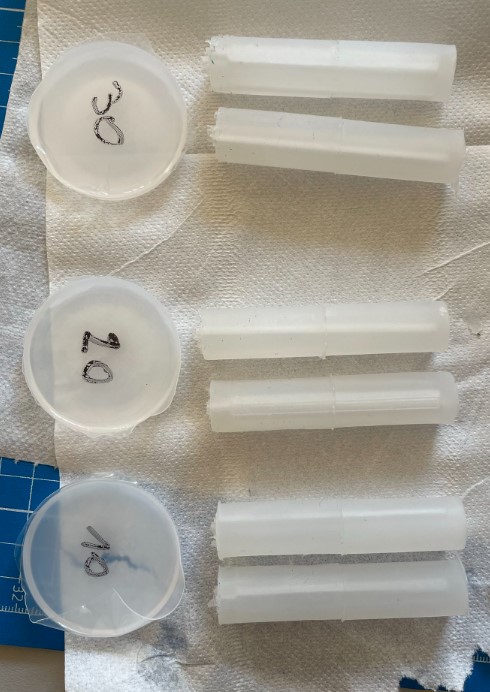
I molded the pneumatic actuators for my final project with different silicone types. I want to study the impact on the shore hardness on the pressure needed to bend the actuator. The harder the silicone, the greater the pressure required to obtain the same bending angle. The test bench developed for my final project will enable me to characterize these features.
| Silicone | Pot life (minutes) | Cure time (hours) | Shore hardness |
|---|---|---|---|
| Dragon skin 10 medium | 20 | 5 | 10A |
| Dragon skin 20 | 25 | 4 | 20A |
| Dragon skin 30 | 45 | 16 | 30A |

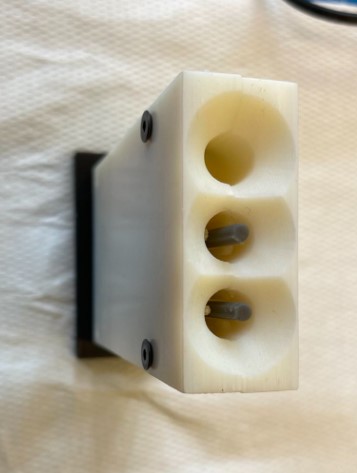
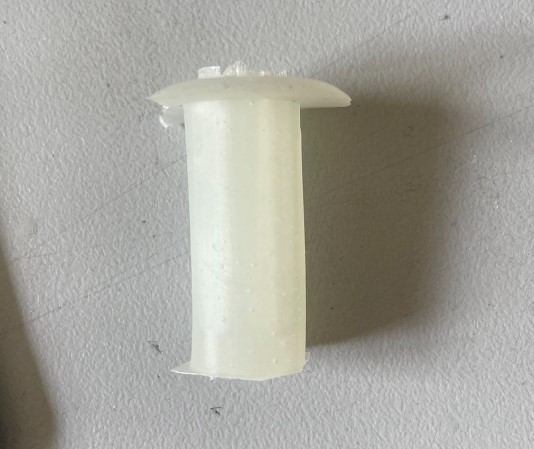
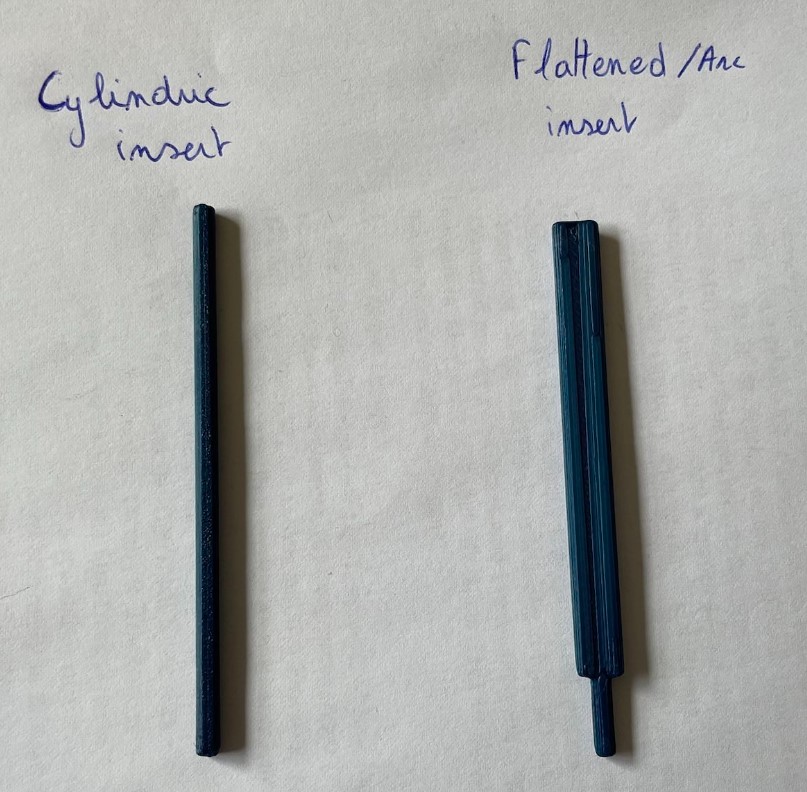
I also want to study the impact of air chamber surface and shape on the applied pressure. I therefore used inserts of two different shapes, as shown below. The inserts have been 3D printed with a pprusa printer, but the result could be better, it’s not very precise. The inserts are fixed in the PLA part of the mold.
Assembling the mold


Silicone preparation
- First step is to pour the 2 silicone parts - Part A and B - in a pot with the good ratio -> datasheet of the silicones give the ratio, here it’s 1A:1B. I used a scale to be precise, as the ratio should be respected to have the good material properties.

-
Mix the 2 parts, it’s important to avoid silicone not curing! Scrape the sides and bottom of the mixing container several times.
-
Vacuuming: not all silicones need to be vacuumed, but the dragon skin datasheet indicates that it’s safer to vacuum to remove entrapped air bublles before pouring it in the mold. Depending on the pot life time, the silicone can stay less or more time in the vacuuming bell. I put a timer to be sure.
Datasheet recommandations


Results after vacuuming- no air bubbles in the silicone pot

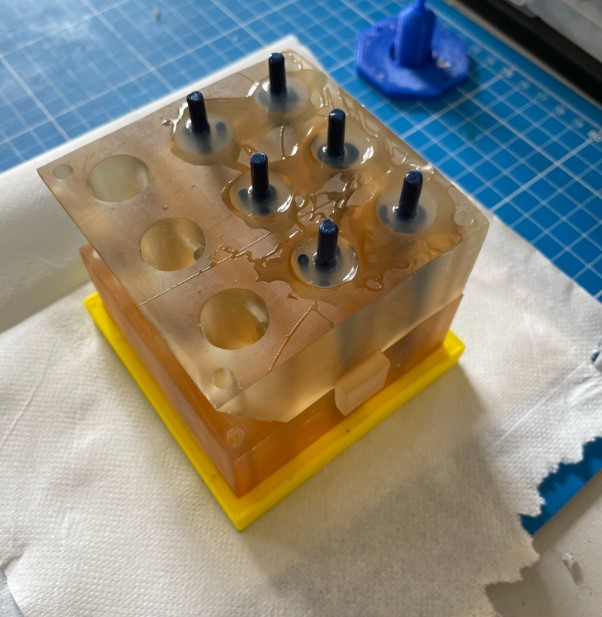
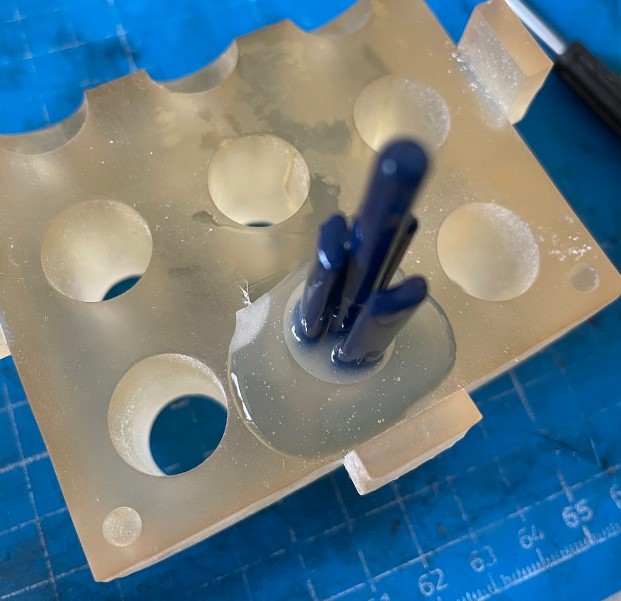
- Pour the silicone in the mold: pouring it slowly and with an uniform flow will help minimize entrapped air.

- Wait for the curing time before demolding
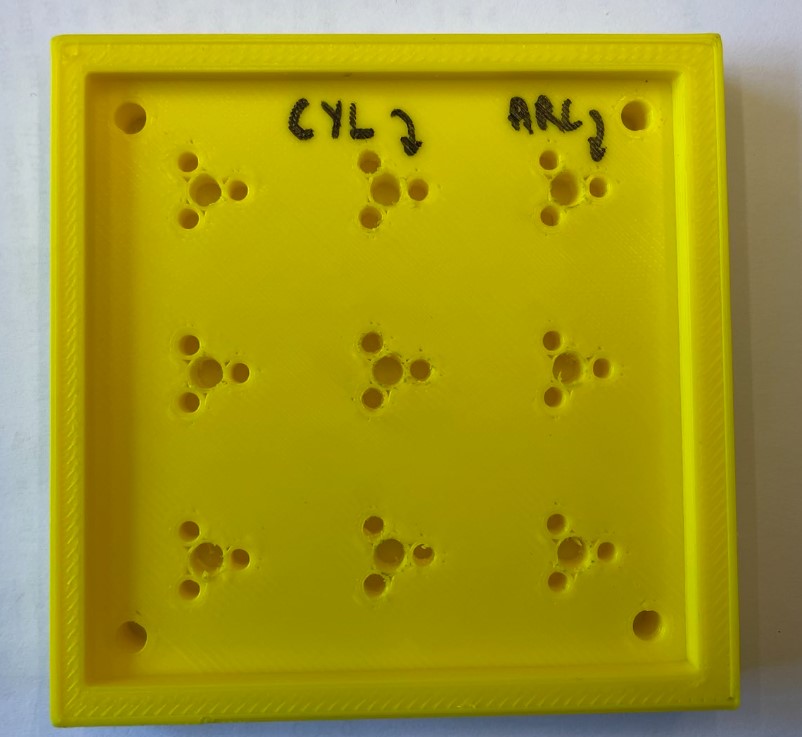
Molding results
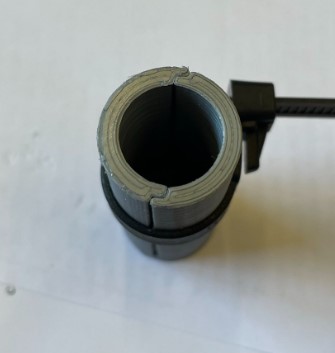
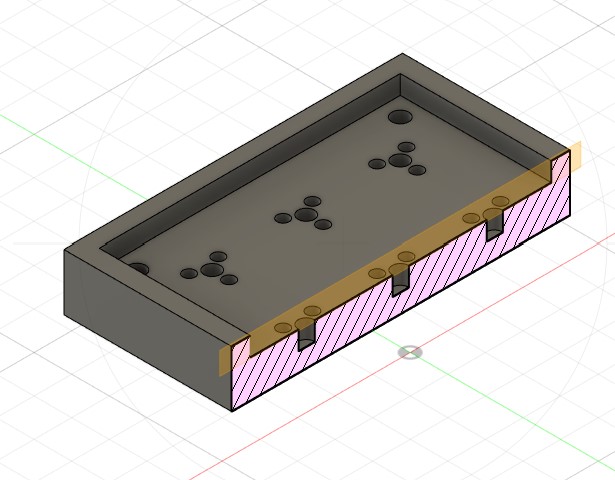
Demolding
The mold could be improved for the demolding part that was not as easy as I thought. Indeed, a thin layer of silicone had flowed between the different parts of the mould, making it very difficult to separate the two resin blocks. Fortunately, the upper part of the mold was not well printed, so there was an opening for a lever arm, but otherwise such an opening would have to be added to the mold design.

Results
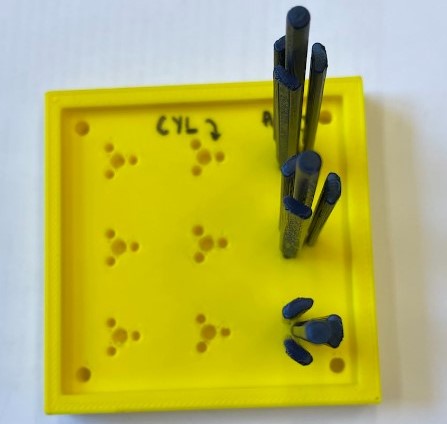
As we can see on the picture below, the surface finish of the actuator are very good, except of course for the line in the middle because of the mold junction. I had no problem of uncured silicone, except in the bottom part of the mold, between the PLA and the first resin part, but no problem at all for the actuator.
Here you can see the 6 pneumatic actuators that have been made with the mold:
Update week 18
Resin mold - SLA printing
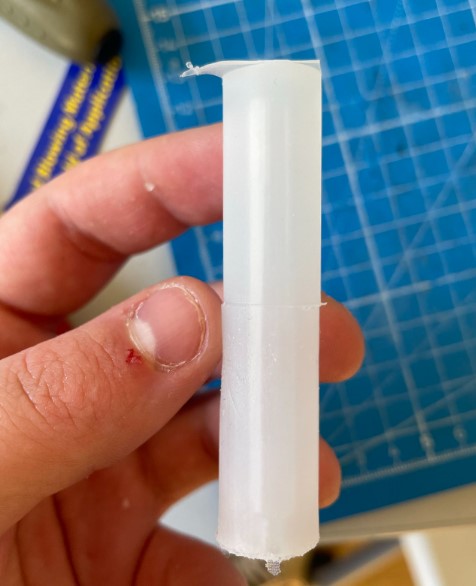
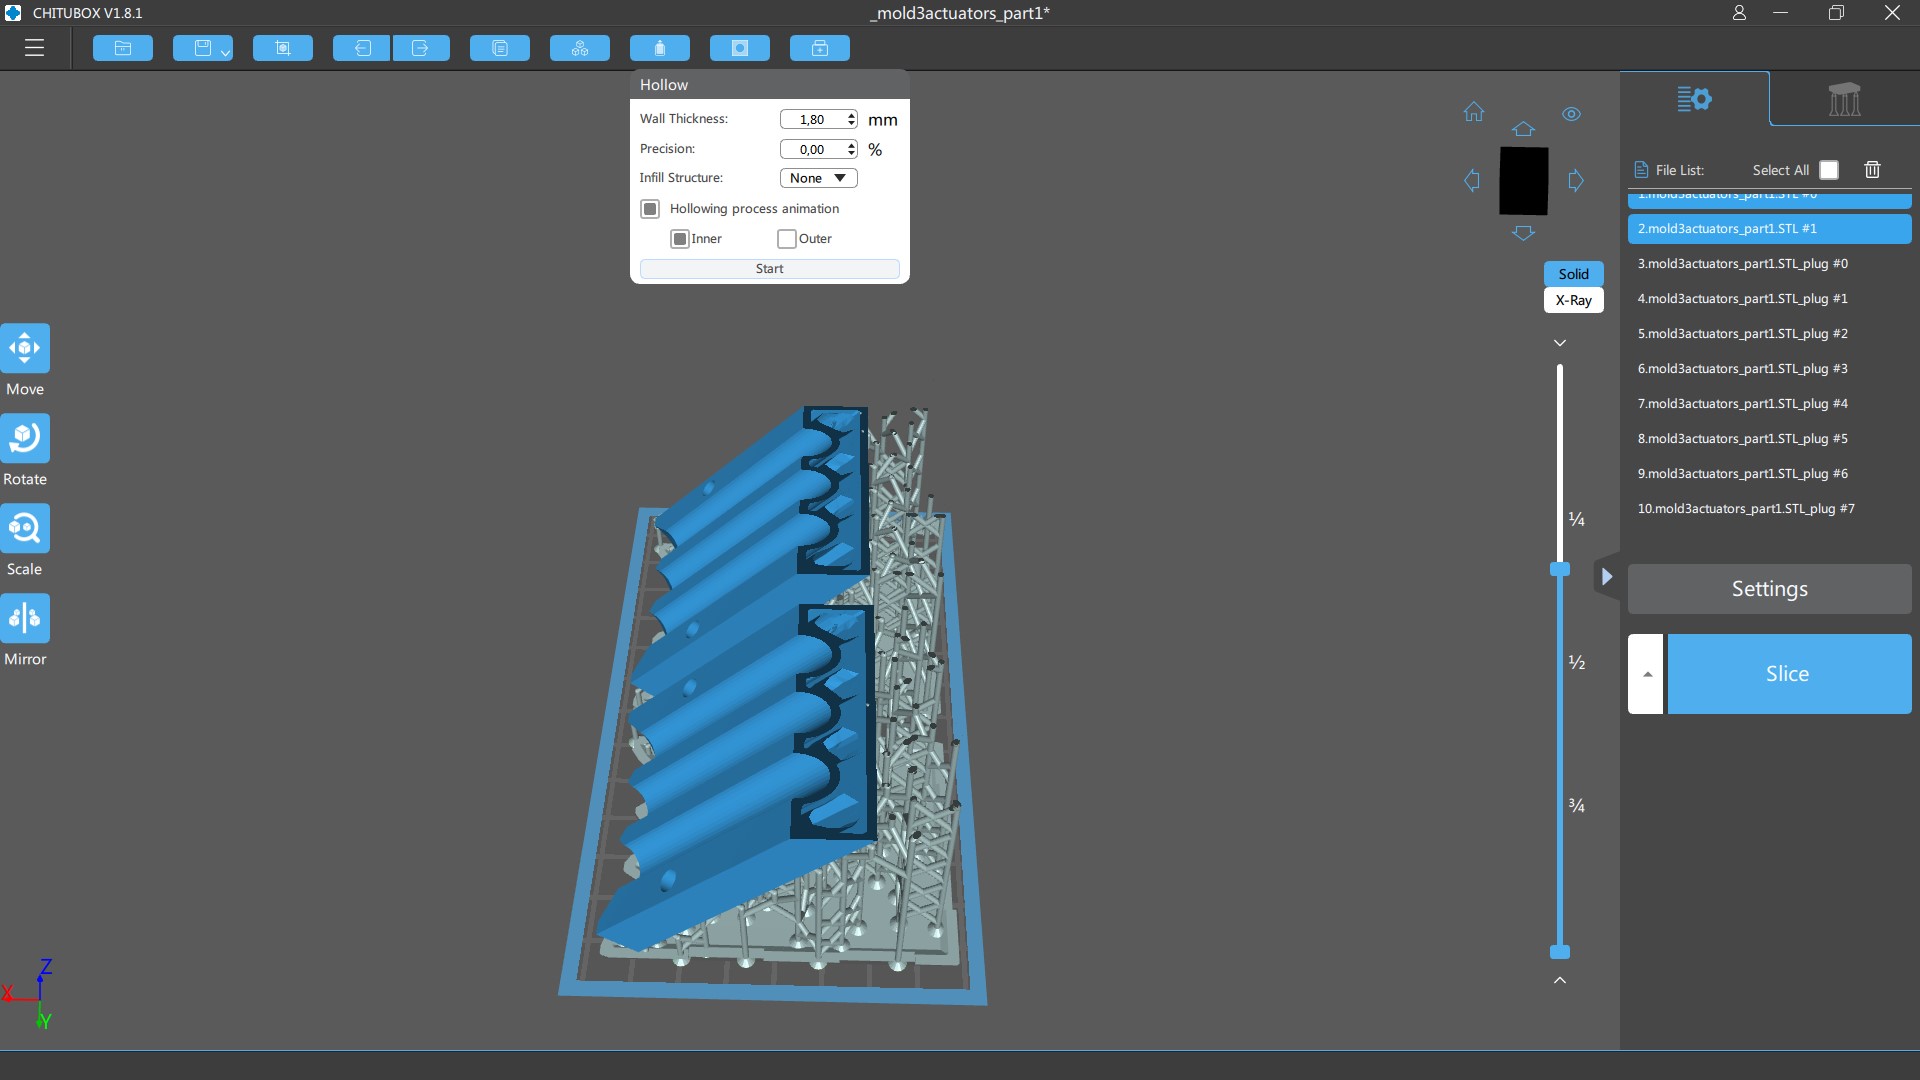
I found out that you can in fact save a lot of resin y making an “hollow print” -> it’s an option available on the chitubox software that I used to make the print file for the Elegoo Mars 2 SLA printer.
Here is how to do it, with the function hollow you can choose the wall thickness of your part:
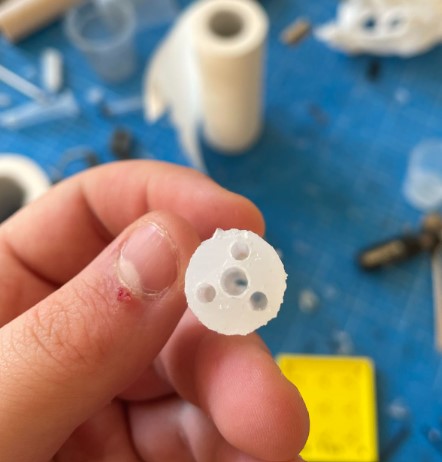
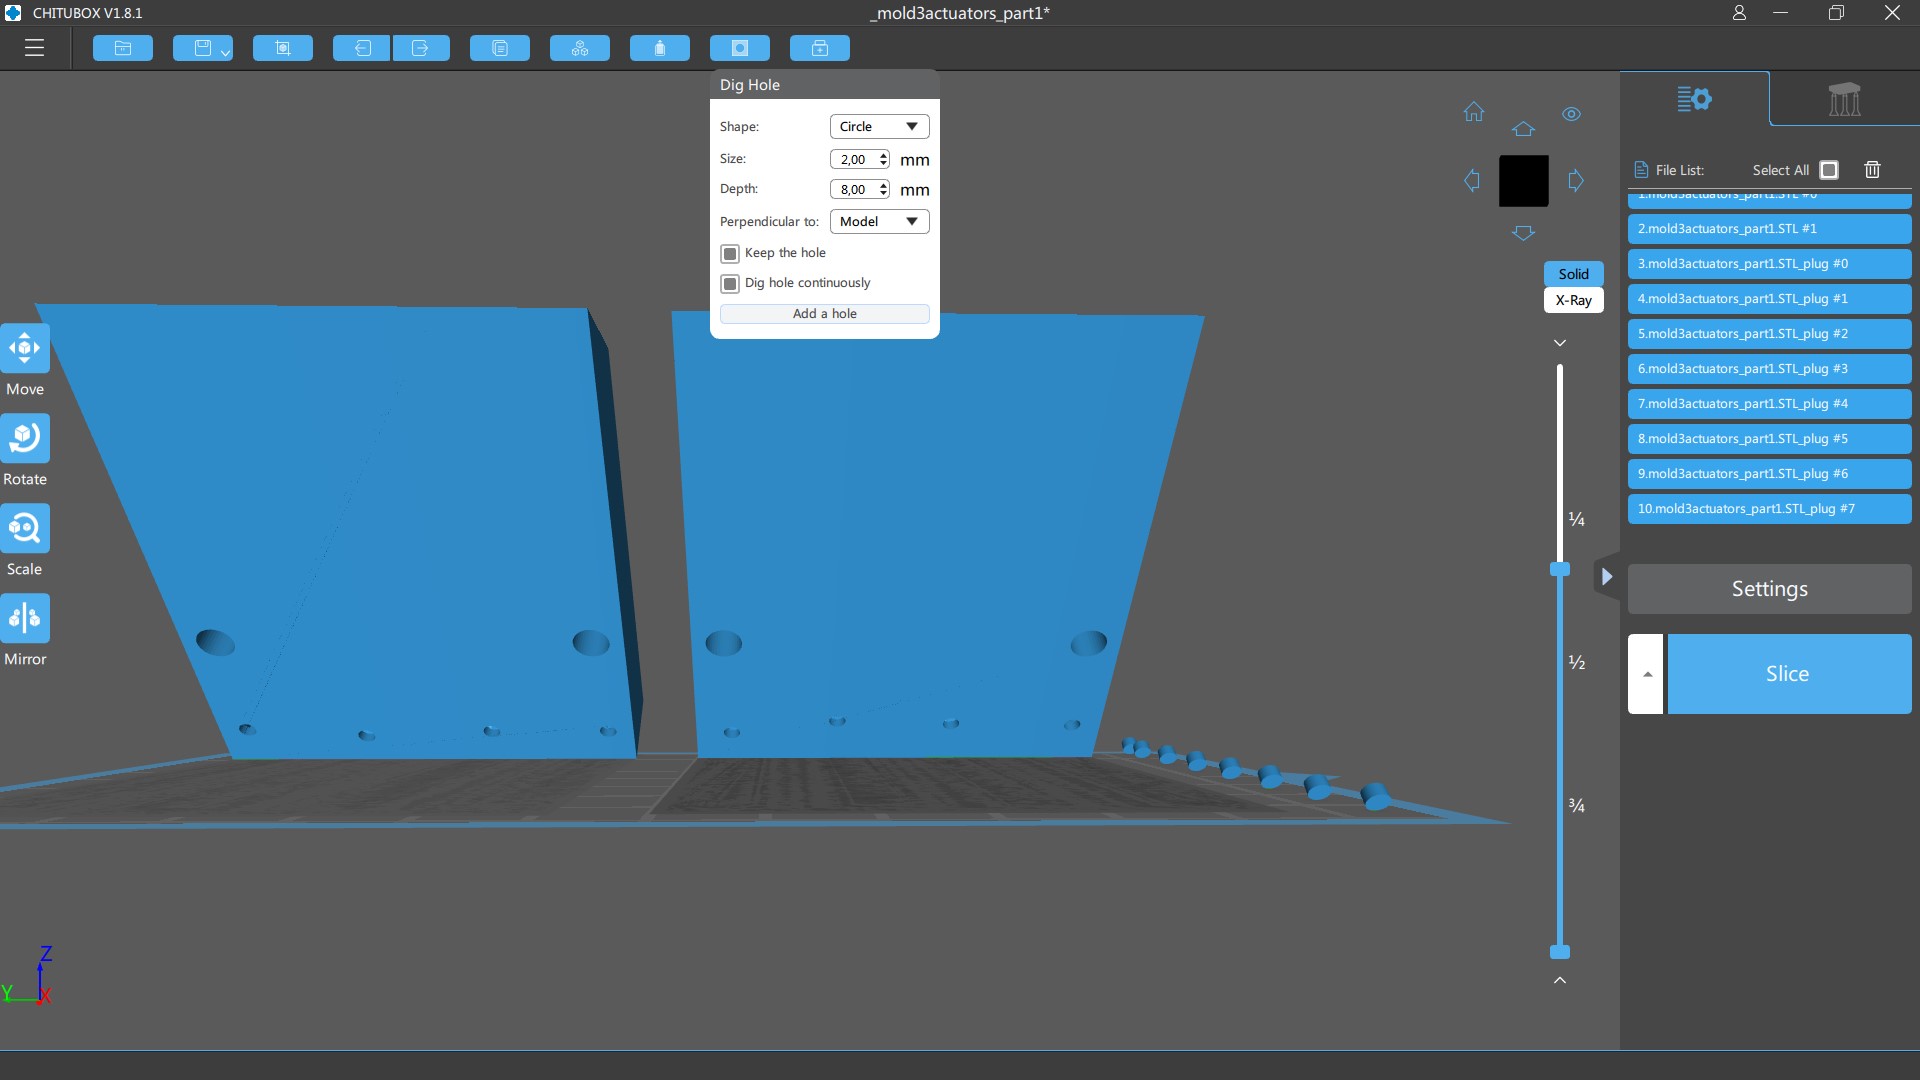
Then you need to add some small holes (see the 4 small holes in the bottom of the parts) in your part so the excess of resin can go out:
Here is the result before cleaning and post curing process, we can see that there is still a bit of resin that will go out with the small holes:
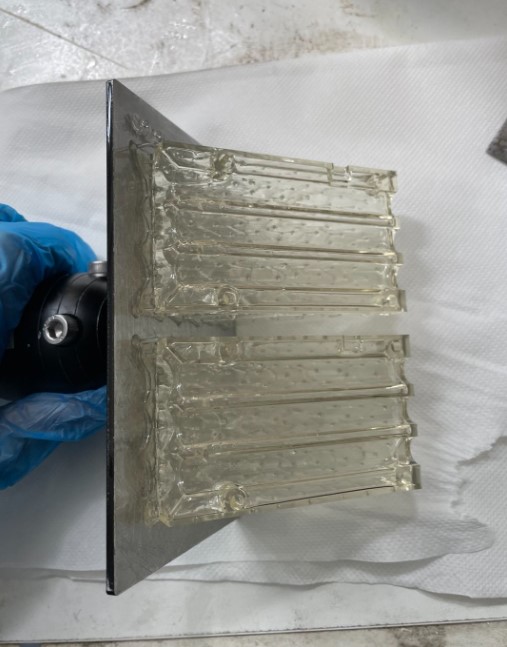
After curing, good surface finish:
Resin mold - PolyJet
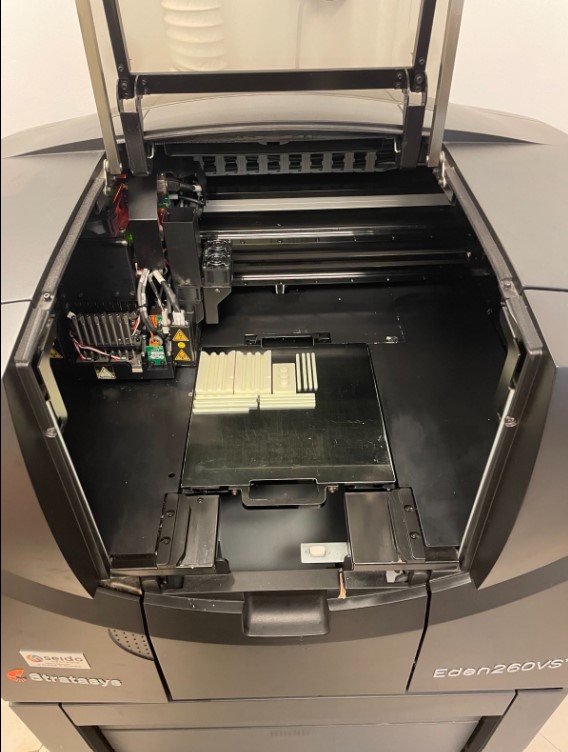
I wanted to test the PolyJet printer that we have at my lab since a lot of time, so I printed the same mold as the one above to compare the surface finish of the 2. The PolyJet printer that we have is a Stratasys Eden 260v, and the idea is that small droplets of resin are dropped on the bed of the printer, and cure with a UV light, it’s thus the same layers idea of a FDM printer but with the UV light curing of a SLA printer.
When the print is finished, the parts are fully recovered by a layer of support that will be dissolved in water.
Cleaning
To remove the support, it can be put in water for 12 hours, and before that, the maximum of support can be removed with high pressure water if the parts are not to fragile - as my mold.
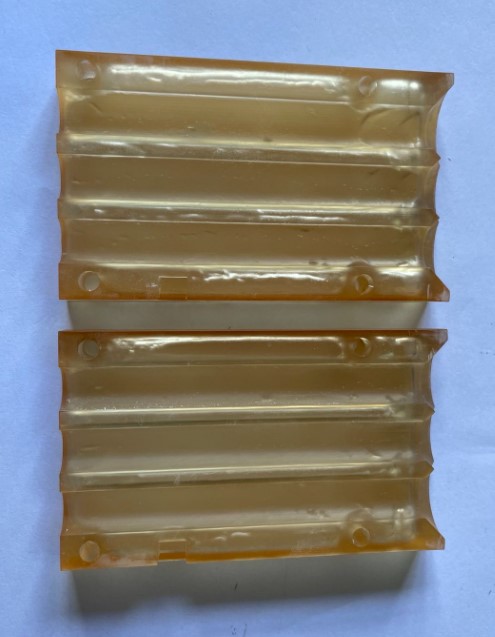
Results
Here is the mold result after the support dissolution: