Final Project : proposal
Week 01
My current idea for a final project is a 3D scanner based on photogrammetry. For this pupropse, I want to attach 1 (or more) small rasperry pi camera to a rig. The object or the camera should rotate/move to capture a wide variety of angles.
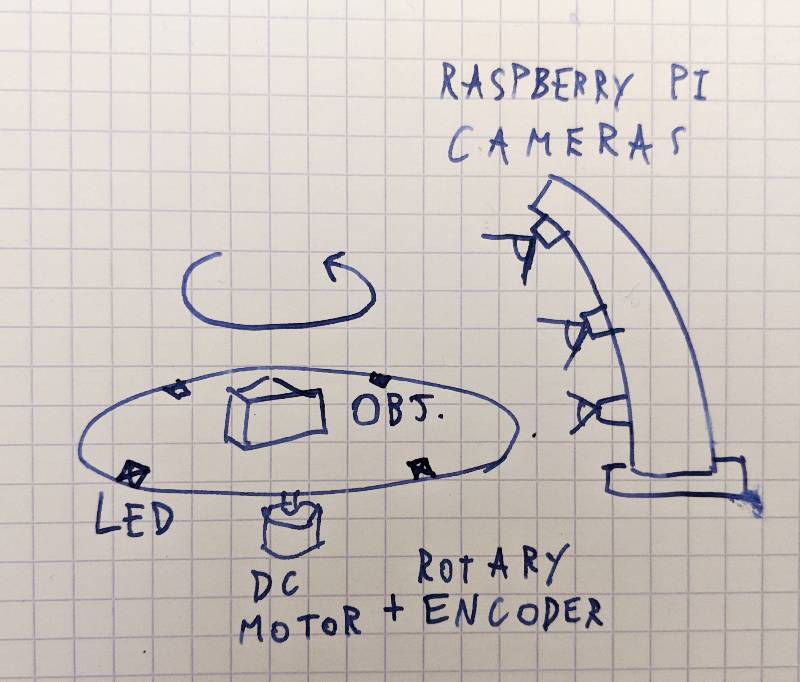
The most tricky aspect is the lighting, as the photogrammetry software is very sensitive to local changes in brightness. Therefore, I want to attach LEDs to the turntable, making them fixed relative to the 3D scanned object.
Week 02
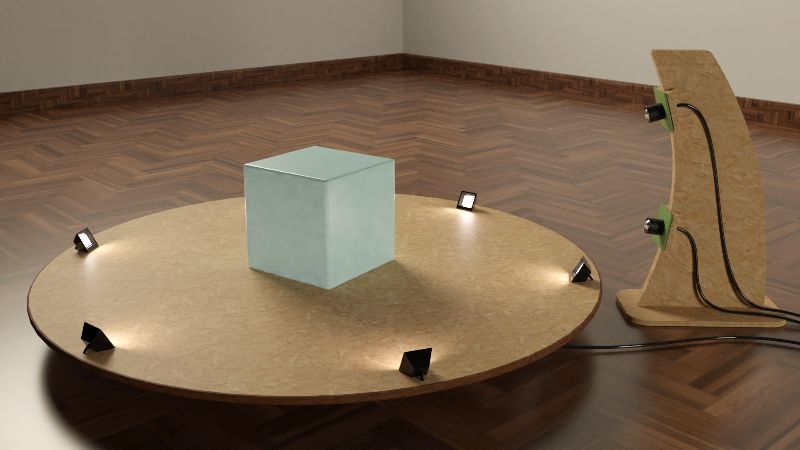
I started designing some mockup 3D rendering of my project. I’m still unsure about the number of cameras. I can either use two fixed cameras, or a single moving camera. The benefit of the latter is to allow a parametric precision: by placing more virtual cameras, I should obtain a finer result with the photogrammetry.
Week 04
The small pcb that we built got me thinking about the electronics of my project. We have plenty of 32 bit chips at the lab now, so I can easily use one as the main controller for the motors. For now, I think I will need:
- Servo or stepper motors.
- Motor driver (H-bridge).
- LED driver.
- Camera (webcam or Raspberry pi).
- Host for the Camera.
Ideally, I don’t want to use a host PC but an embedded computer.
Week 05
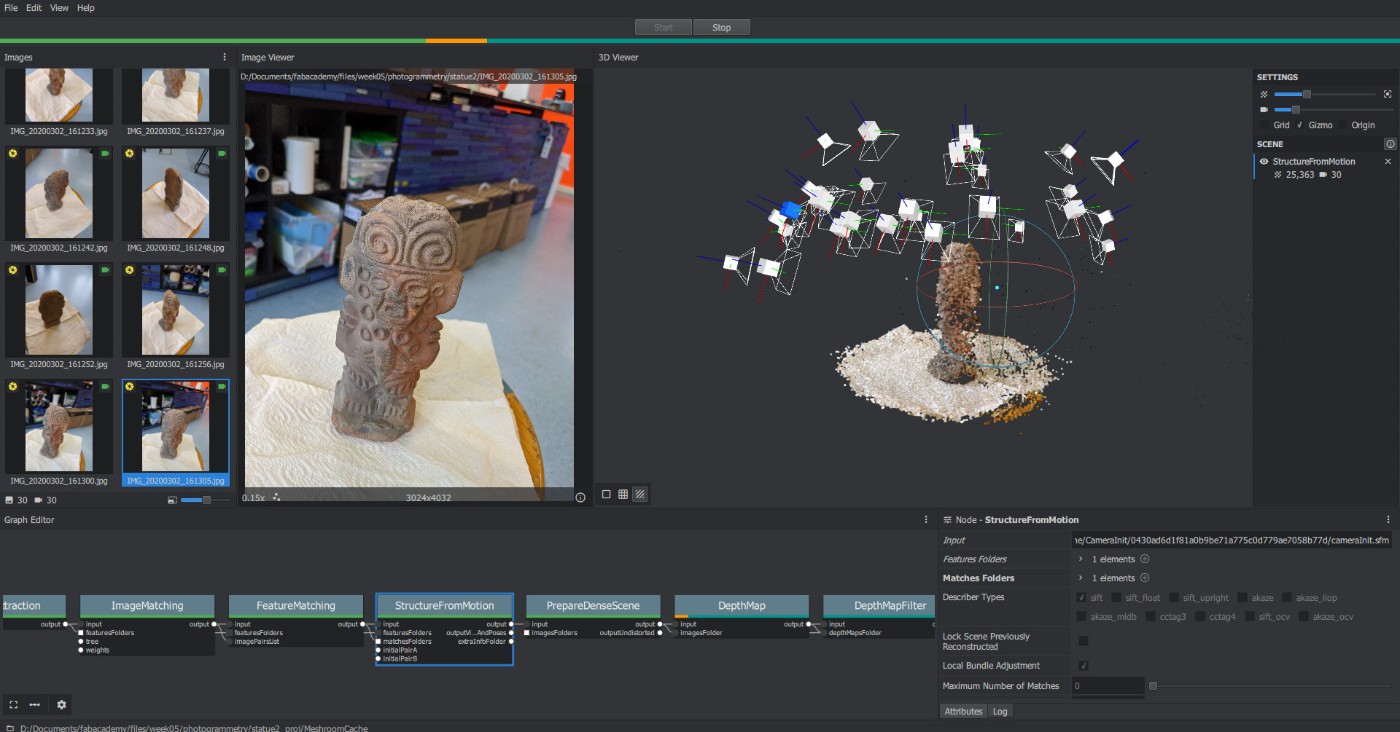
I tested the Meshroom program for photogrammetry. I’m very pleased with the results, so I think my scanner will be based on this software. The challenge is to automate the upload of the images in a neat way. I don’t want to manually copy the files after shooting, so the PC will have to communicate with the camera host continuously.
Week 06
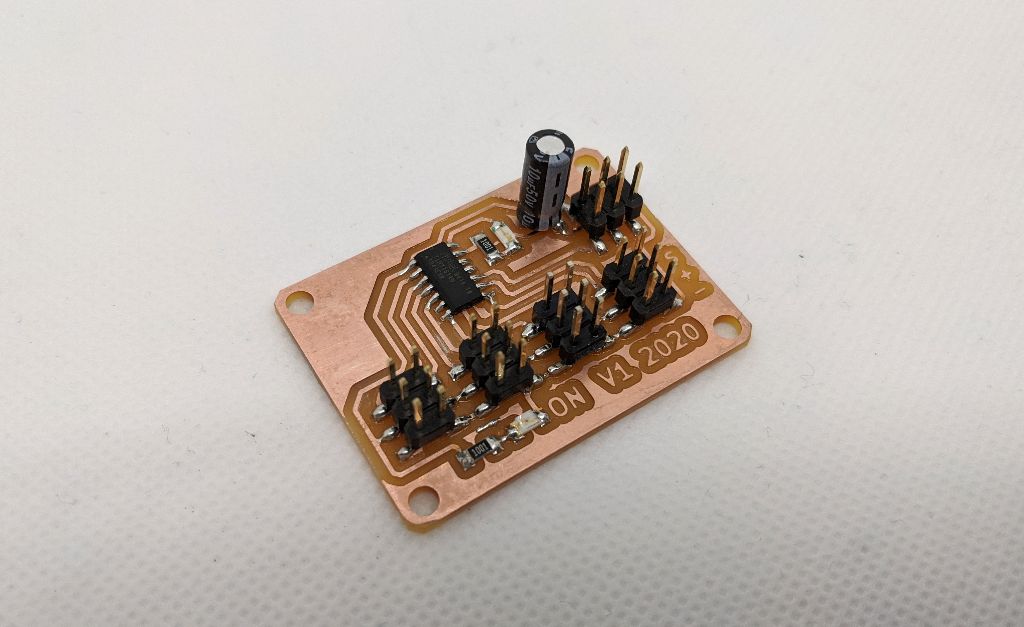
I designed a very simple PCB to make use of the GPIO pins of an ATtiny1614 chip. I think this can be used as the brain of the project, or at least to control the motors of the turntable. I will soon try to attach some motor drivers to it.
Week 10
In this week’s assignment, I designed a more detailed 3D rendering of the project, showing the function of each component.

The project moves using stepper motors. Mechanically speaking, the most interesting component is the camera rail, that allows the camera to move up and down along an arc:
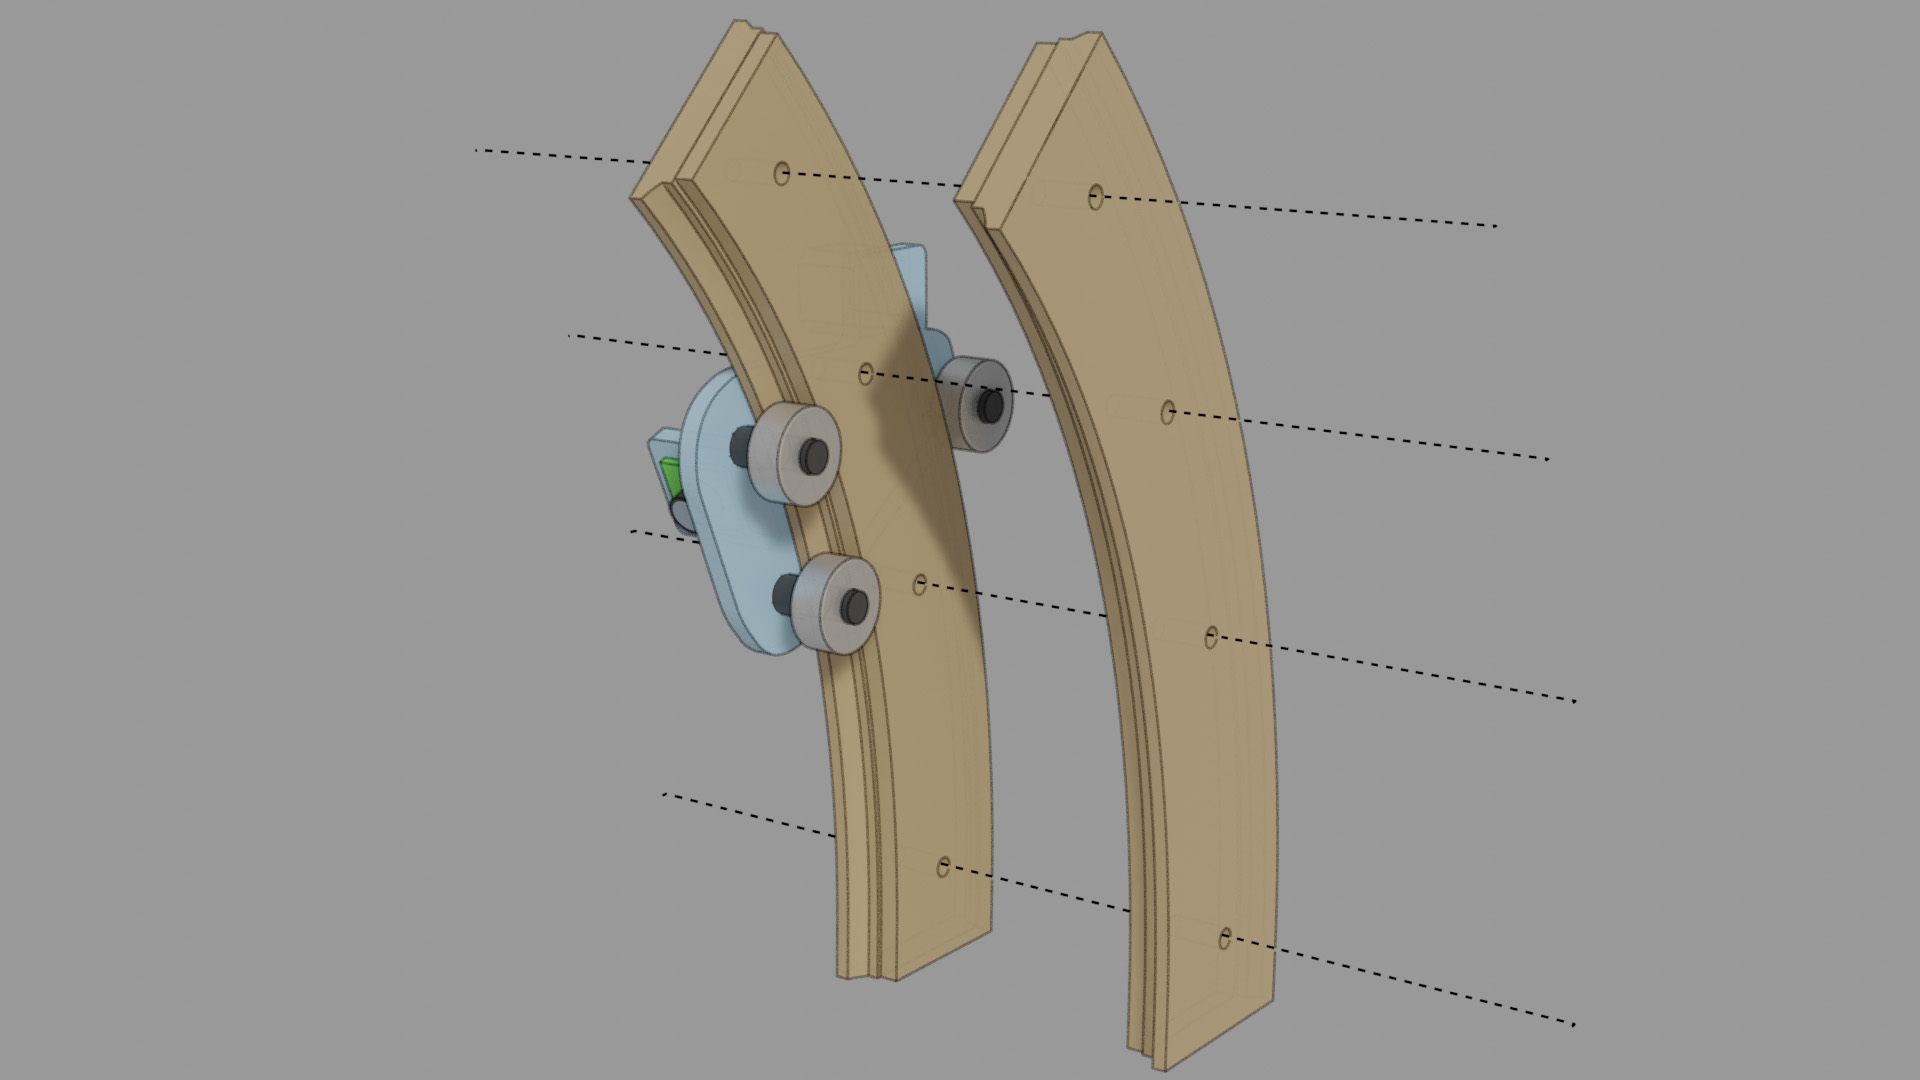
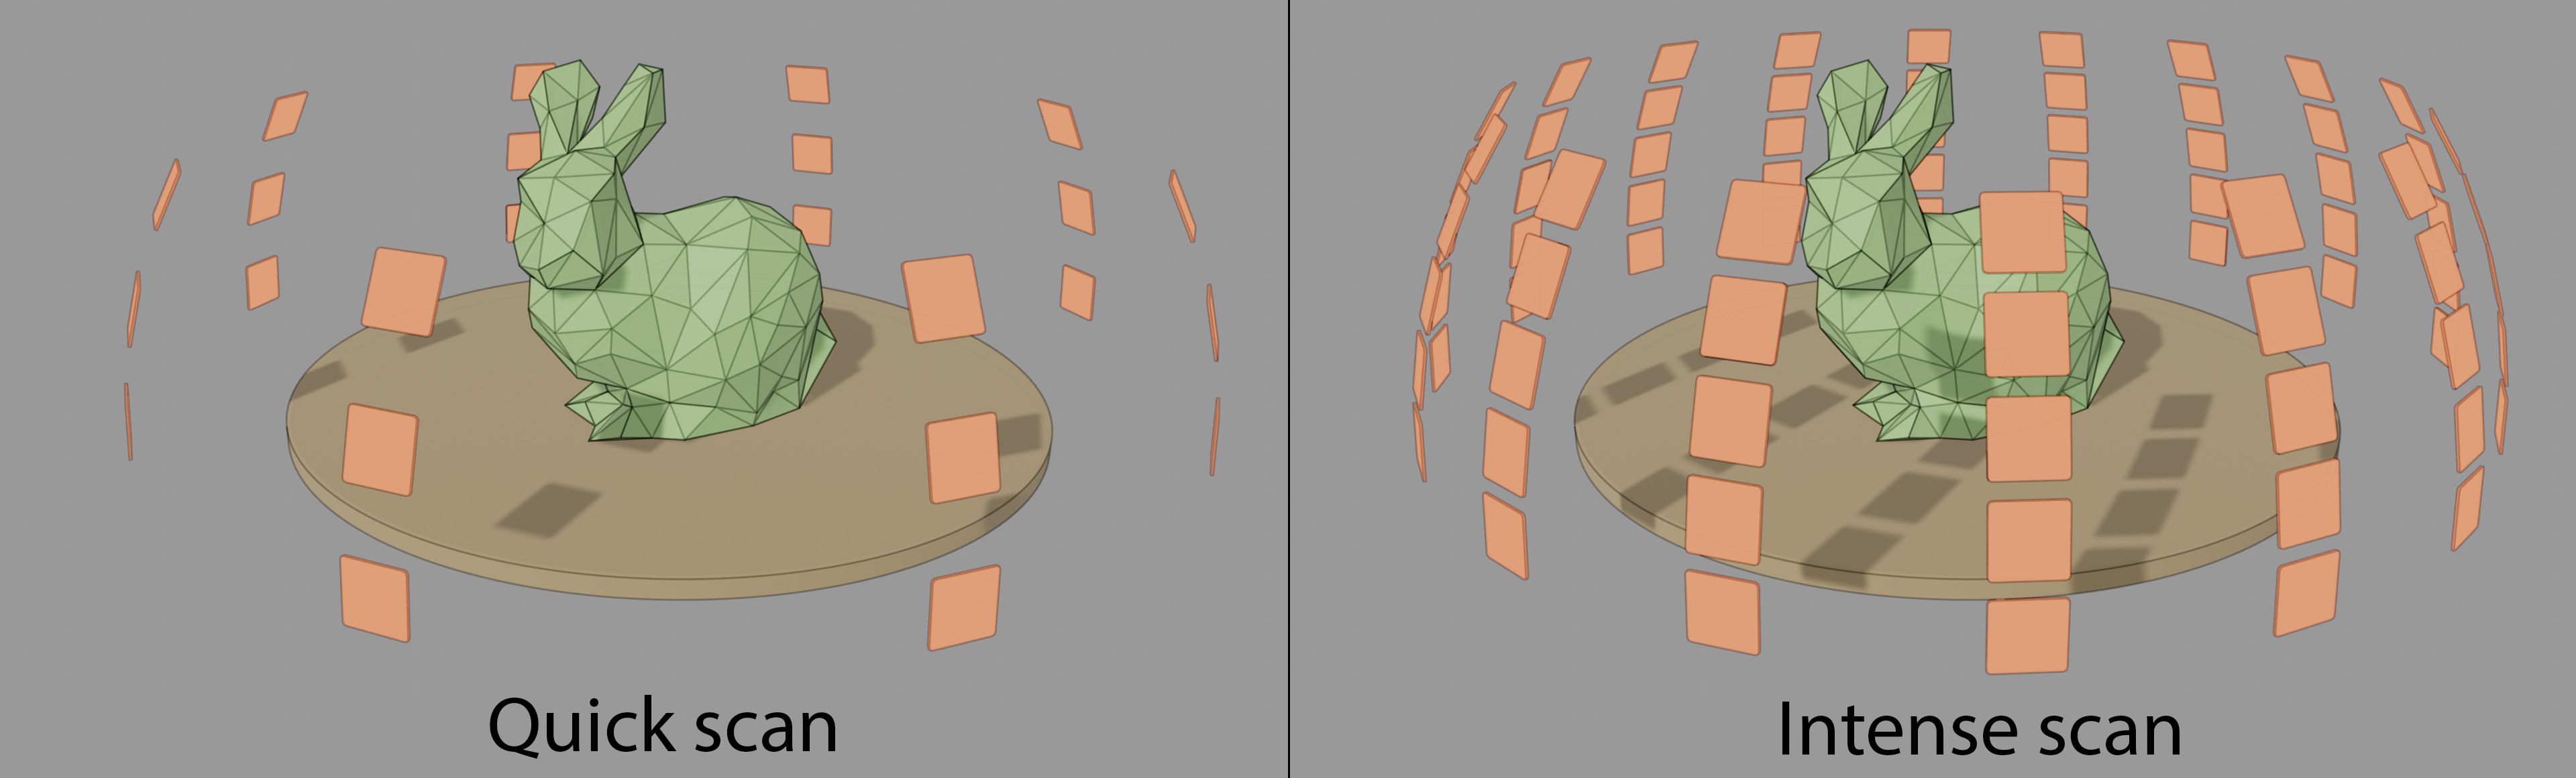
This should move thanks to a curved rack gear on the back of this part, which will be laser cut and intergrated. Thanks to the motion of the camera and platform, we can have several scanning resolutions. A more intense scan will take longer but should reveal finer details thanks to how photogrammetry works.
Week 11
I managed to control a stepper motor with an H-bridge and my ATtiny1614 board. At 5V, the current is a bit low, but the motor still has enough torque to drive the main platform.
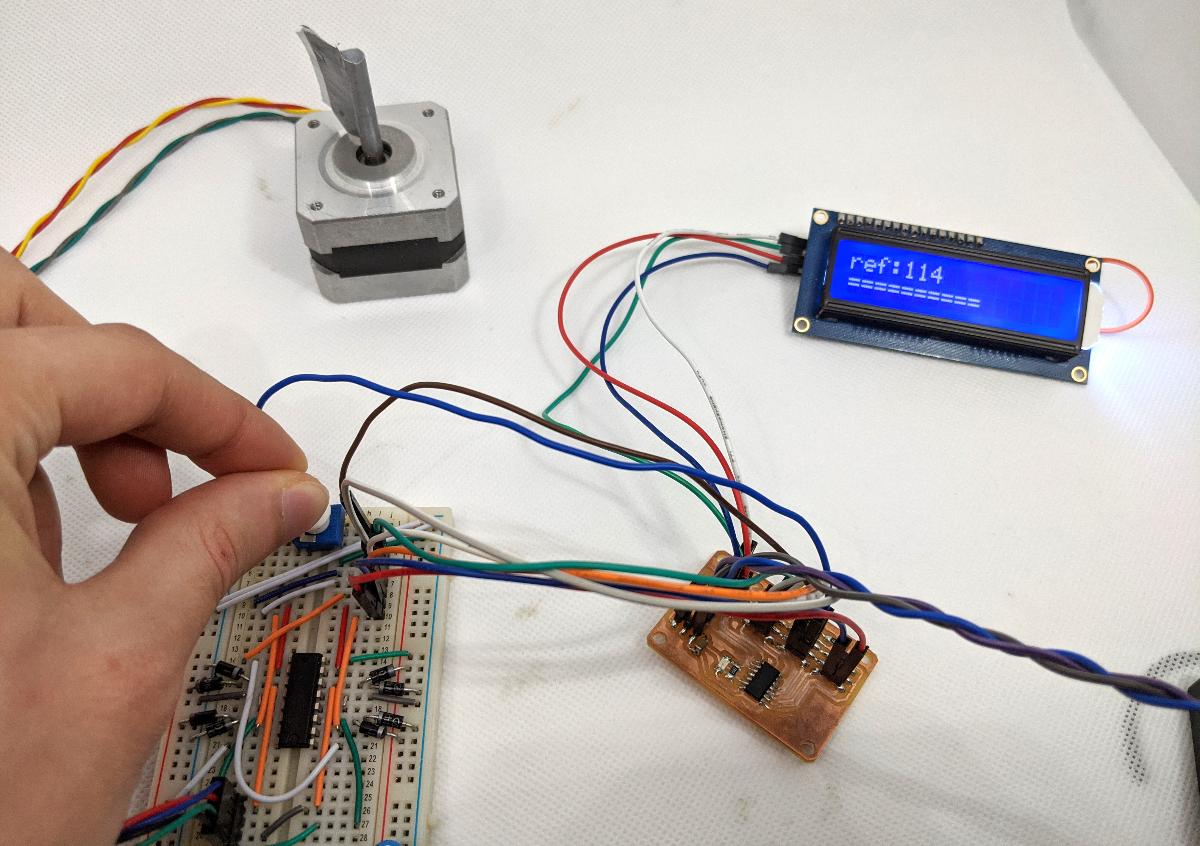
I control the stepper’s motion using the ATtiny’s timer, which guarantees a constant speed:
I designed a board to place the H-bridge onto. However, it is a very generic board, not dedicated to driving stepper motors specifically. I should try to put two L293D on the same pcb and add inverters to have only 1 control pin per coil. This way, my ATtiny1614 could drive both motors, and probably the LEDs as well.

Week 13
My ESP32-cam module arrived, and I played with it a bit. It’s quite handy, and I’m impressed by the embedded WiFi and bluetooth. It’s so straightforward that I decided to make it the main platform for communicating through the PC. There will still be a serial connection for manual control or updating the firmware of the ESP32.

Week 15
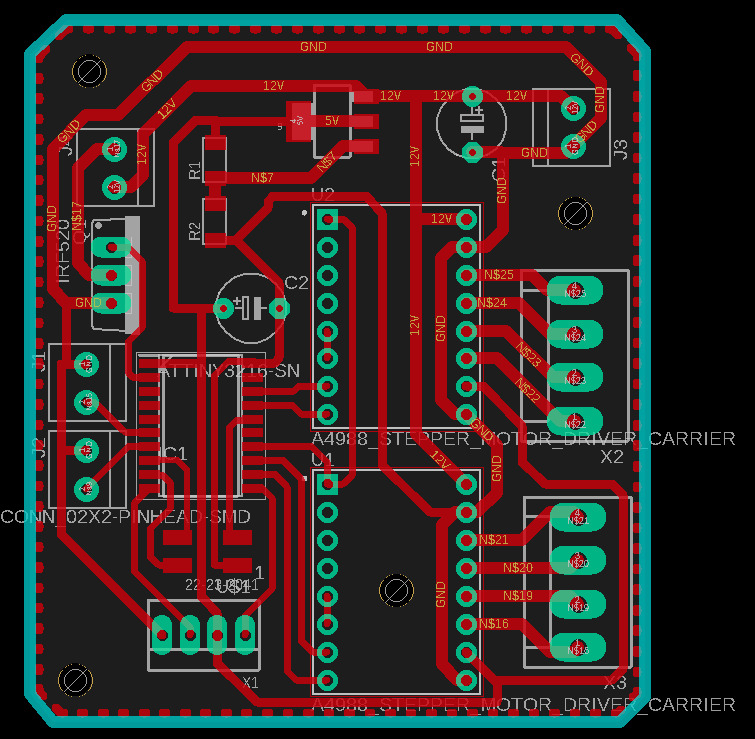
I designed the main board for controlling the motors. It is kind of like a mainboard for a CNC machine, but has only 2 axes, and a CMOS for controlling the LED lighting of the 3D scanner.
Week 18
During the mechanical design and machine design, I designed a new type of motor controller that makes use of distributed computing:

In my implementation, each node is equipped with an ATtiny412 microcontroller, and communicates with the next node through a serial line. I already designed and tested 2 boards, that can be used to drive the 2 stepper motors for this project:
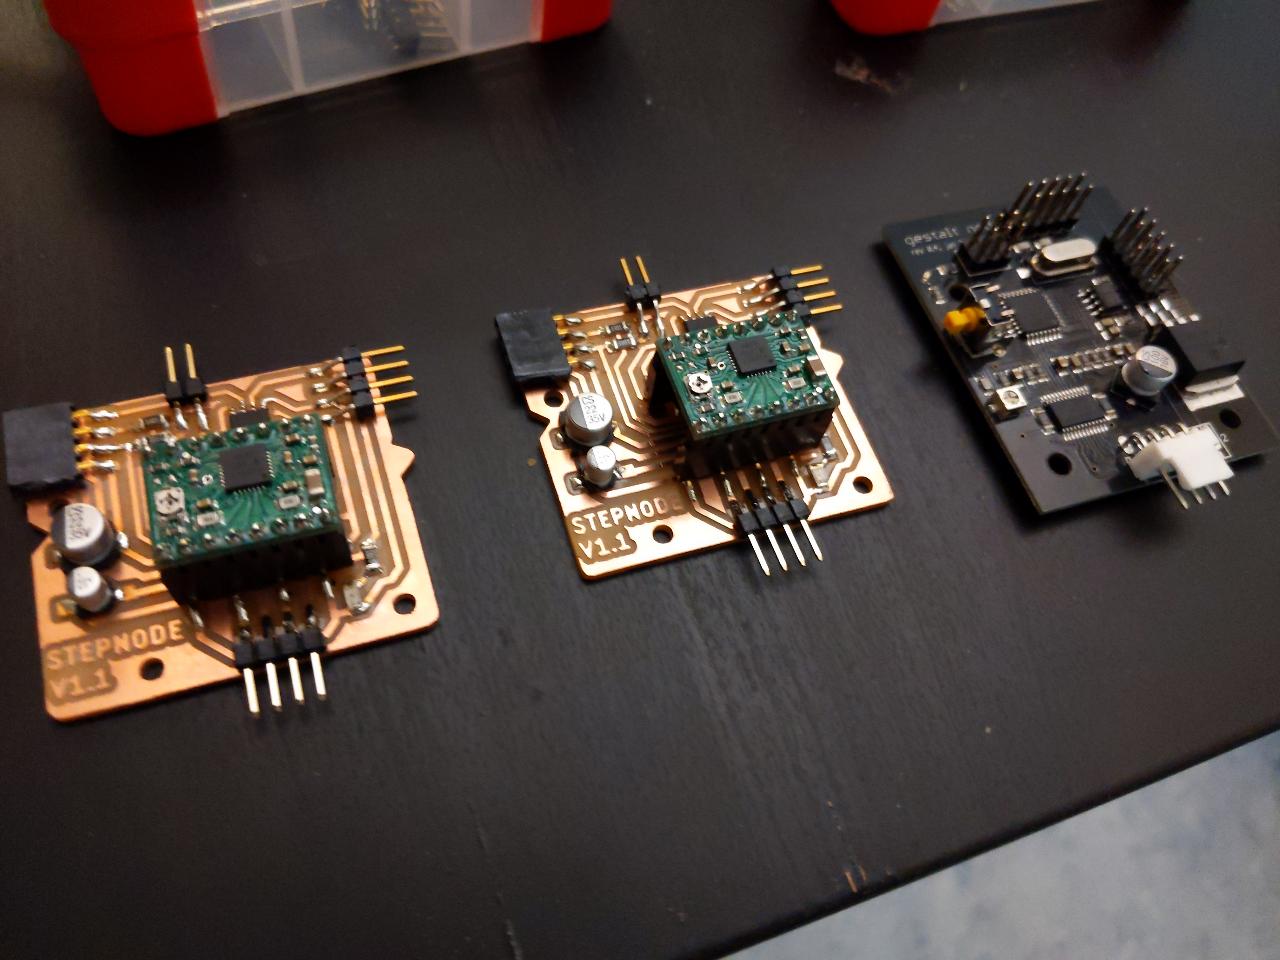
You can have more information on stepnodes on the week18 assignment page.
Project management and development
After all fabacademy assignments were completed, I spent around 4 weeks developing my final project, you can read about it in the dedicated page. The planning and management is discussed on this page.