2. Project management
In this assignment, we have a look at the process of documenting and managing the work that is carried out weekly during the semester.
Research
Throughout the fabacedmy program, every student should document their weekly work through our personal websites. For my own website, I looked at several options:
- Markdown + mkdocs: this seems like the simplest option. Markdown is an elegant way to write documentations very quickly, as well as embedding simple media. Mkdocs goes one step further, and converts these .md files to fully-functionning .html webpages. However, modifications of the theme are limited.
- Bootstrap: a great javascript library that comes with plenty of useful classes for quick web design. As a bonus, webpages are automatically responsive, meaning that they can adapt to any screen size (including mobile devices).
- html: the most low-level method for designing a website. This gives access to all features supported by web browsers, through a universal API. It very straightforward to design a static webpage with pure html. However, embedding any form of dynamic content also requires basic knowledge of javascript in most cases.
In my case, I have decided to use mkdocs for the first few weeks, and possibly switch to a bootstrap-based website when I get more experience with javascript. The good thing about mkdocs is that I can always recover the html content and copy/paste it in a more complex website later on.
Working with git
The website of each student is hosted in a git repository, on a custom gitlab server. Gitlab is a web interface to create and manage git repositories, and enable meta-features such as groups and issue tracking, enriching git with a more natural framework for teams. On the other hand, interfacing with gitlab’s server is still done through standard git commands.
After creating a ssh key, the first step is to clone the git repository to create a local copy. The https address of the server can be found on gitlab:
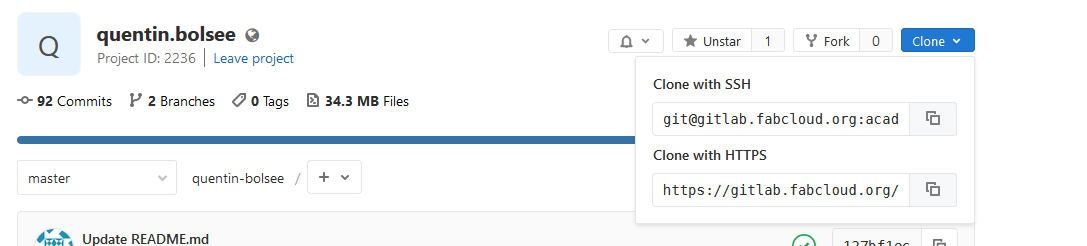
After installing git, I can clone the respository with the git clone command:

Any change to a file in this local version of the repository are detected by git, and can be commited then pushed to the server (remote).
If some files should not be detected by git, such as temporary files or hidden configuration folders created by IDEs, they can be indicated as glob patterns in the .gitignore file.
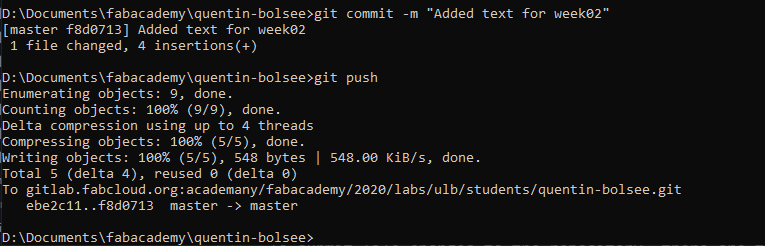
To submit file changes to the repository, there are three commands to remember. The first is git add, which registers file changes (and/or new files):

The next step is to commit those changes with git commit -m "<message here>". This creates a commit object, which includes all changes registered with git add, and a short message describing those changes. This message lets you remember which features came with a commit, so that you can reverse them if needed. Finally those, commits can be sent to the remote branch (in this case the fabcloud gitlab) using git push:
If multiple users or machines are working on this repository, they can download those changes with a git pull. Doing it on a regular basis is a good way to avoid bad surprises such as conflicting changes between the local and remote branch.
Using mkdocs
At the time of writing, I am using a website based on mkdocs. As explained before, I simply to write this text using markdown syntax, then generate html pages from that using mkdocs build. There are two files that allow me to configure the mkdocs server on my fabcloud gitlab and they are both placed in the root of the repository. The first file is mkdocs.yml, consisting of the following:
# Replace the text below to customize your site
site_name: Fab Academy Quentin Bolsee
site_description: My Fabacademy site

site_author: Quentin Bolsee
docs_dir: docs
site_dir: _site
copyright: Creative Commons Attribution Non Commercial
theme:
  name: material
  palette:
    primary: "white"
    accent: "light blue"
  font:
    false
  feature:
    tabs: true
extra:
  social:
    - type: "github"
      link: "https://github.com/academany"
    - type: "twitter"
      link: "https://twitter.com/fabacademany"
    - type: "linkedin"
      link: "https://linkedin.com/in/academany"
    - type: "instagram"
      link: "https://instagram.com/fabacademany"

markdown_extensions:
  - extra
  - smarty
  - admonition
  - pymdownx.arithmatex
  - codehilite:
      guess_lang: false
  - toc:
      permalink: true

extra_javascript:
  - 'https://cdnjs.cloudflare.com/ajax/libs/mathjax/2.7.0/MathJax.js?config=TeX-MML-AM_CHTML'
Note that I use the material therem, with white as the primary color, and light blue as the accent color (e.g. for links and buttons). I also added the pymdownx.arithmatex extension, and the extra javascript needed for it under the extra_javascript section. This allows me to write mathematical formulas with LaTeX syntax, which I often use during my PhD research. For instance, I can write of Maxwell’s equation as:
\nabla \times \mathbf{E} = - \frac{\partial \mathbf{B}}{\partial t}
Adding dollar signs $ around this text producs the following:
The next file to configure is .gitlab-ci.yml which describes a series of commands executed by the gitlab each time a push is made. In this file, I write the following:
image: python:3.8-slim

before_script:
  - pip install -r requirements.txt

pages:
  script:
  - mkdocs build
  - mv _site public
  artifacts:
    paths:
    - public
  only:
  - master
And the file requirements.txt contains the following:
mkdocs
mkdocs-material<5.0
This basically tells gitlab to install the mkdocs package on a Python 3.8-slim distribution, then run mkdocs build to build the html content.
Image compression
When writing documentation, any embedded media should be kept to a minimum file size. This is not only to ensure minimal use of the server storage, but most importantly, it provides a smooth experience to the users, as the webpage’s loading time is signifcantly reduced.
For this purpose, I prepared a small Python script that will convert any image to a medium quality .jpg format, resizing the image if needed. This script makes use of OpenCV, an excellent open source image processing library. Here is the current form of my script:
import cv2
import os
import argparse
import numpy as np
import glob


def parse_arguments():
    usage_text = (
        "Usage:  python resize_img.py [options]"
    )
    parser = argparse.ArgumentParser(description=usage_text)
    parser.add_argument("path", nargs=1, help="Path to the image.")
    parser.add_argument("-w", "--width", type=int, default=800, help="Max width allowed [px].")
    parser.add_argument("-q", "--quality", type=int, default=70, help="JPEG quality when saving.")
    return parser.parse_known_args()


def process_img(path_in, args):
    path_in_name, ext = os.path.splitext(path_in)
    path_out = "{}_web.jpg".format(path_in_name)

    img = cv2.imread(path_in, cv2.IMREAD_UNCHANGED)

    h, w = img.shape[:2]

    if w > args.width:
        ratio = args.width/w
        dsize = (args.width, int(h*ratio))
        img = cv2.resize(img, dsize)

    cv2.imwrite(path_out, img, [cv2.IMWRITE_JPEG_QUALITY, args.quality])


def main():
    args, _ = parse_arguments()

    path_search = args.path[0]
    filenames = glob.glob(path_search)
    if len(filenames) == 0:
        print("File not found: {}".format(path_search))
        return

    for path_in in filenames:
        process_img(path_in, args)


if __name__ == "__main__":
    main()
In the following weeks, I will most likely need to investigate video compression as well, for which ffmpeg should come in handy.