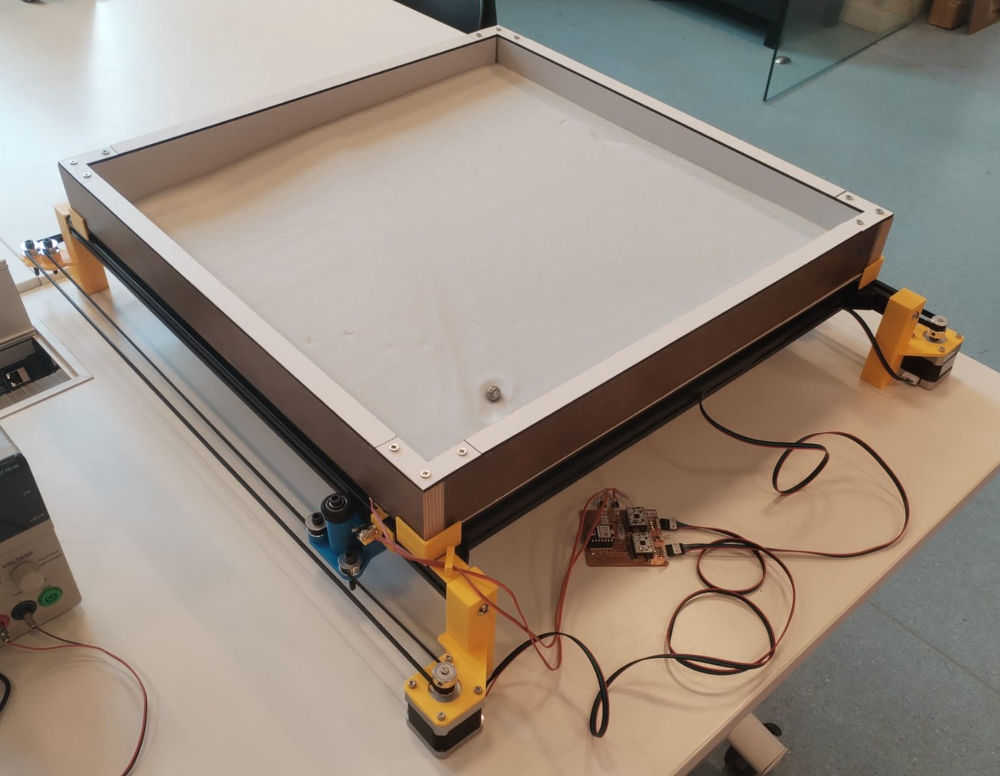
Hero shot
Group assignments
For these weeks assignments, with Elodie, Michel and Jonas, we decided to make a kinetic sand table. The explanation of the project can be found here.
Here's a general overview of everyone's contribution :
-
Elodie
- 3D Structure
- 3D pieces
- Sand drawing
- Slide
-
Michel
- PCB
- coding
- Step motors
- Data handling
-
Jonas
- Trolley
- Structure assembly
- Video
-
Fabio
- Enclosure
- Structure
- 3D pieces
- Data handling and sand drawing
Personal assignments
Enclosure
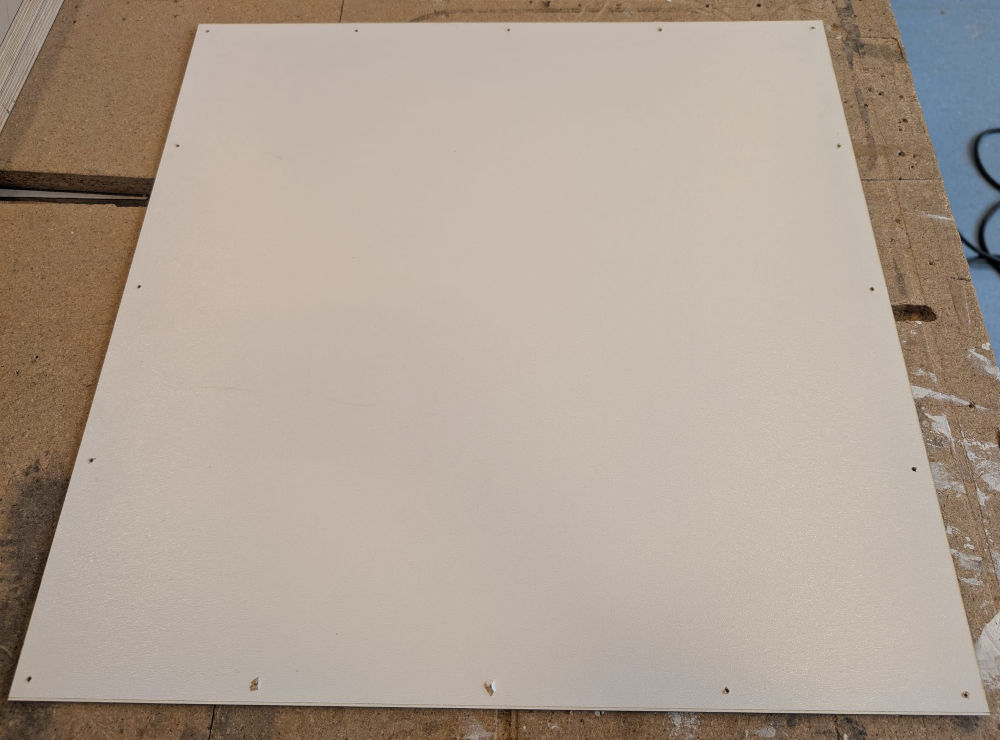
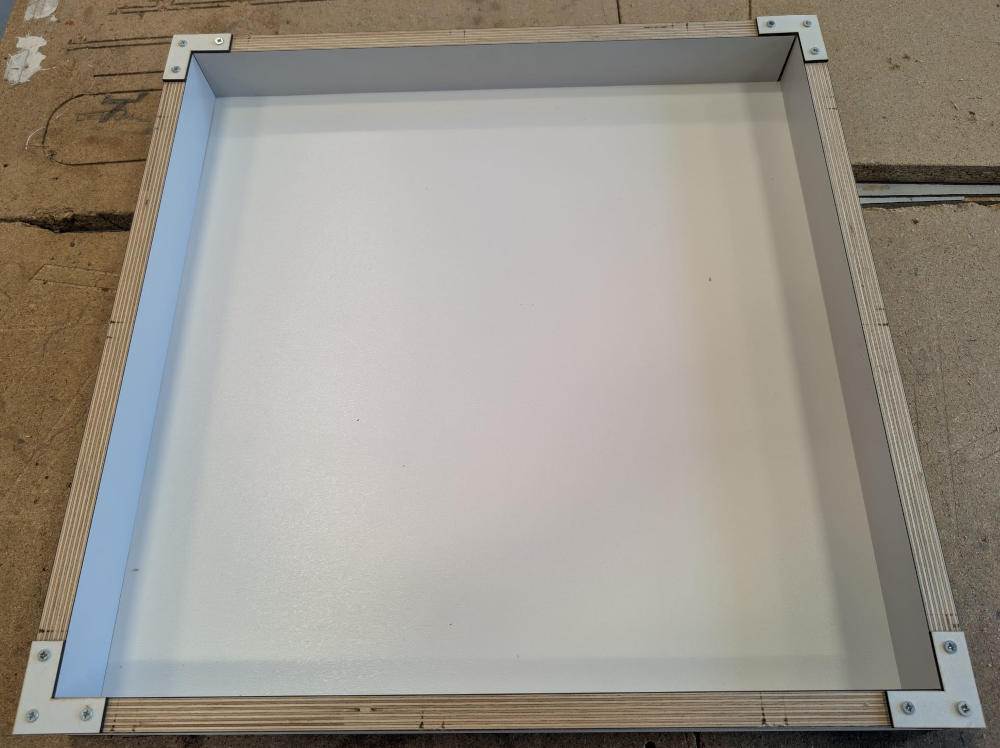
I had to make the enclosure that will contain the sand and the metallic marble.
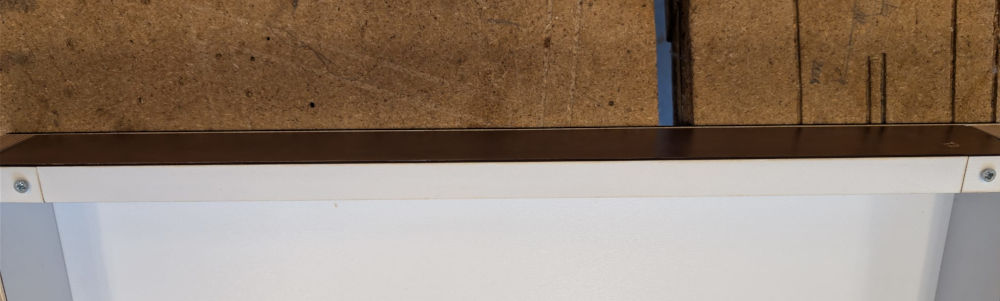
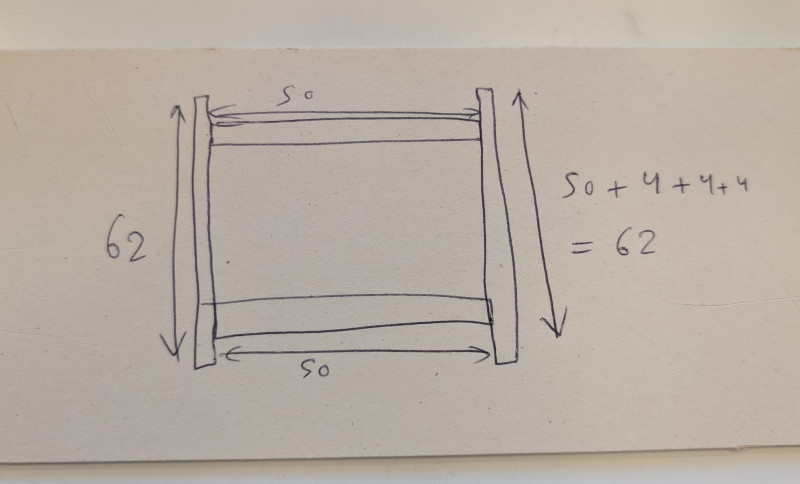
My enclosure 50 cm² and is composed of one base with its thickness being thin so the magnet can control the marble through the wood and the sand and four walls thick enough to have a solid enclosure and make sure the sand doesn't escape.
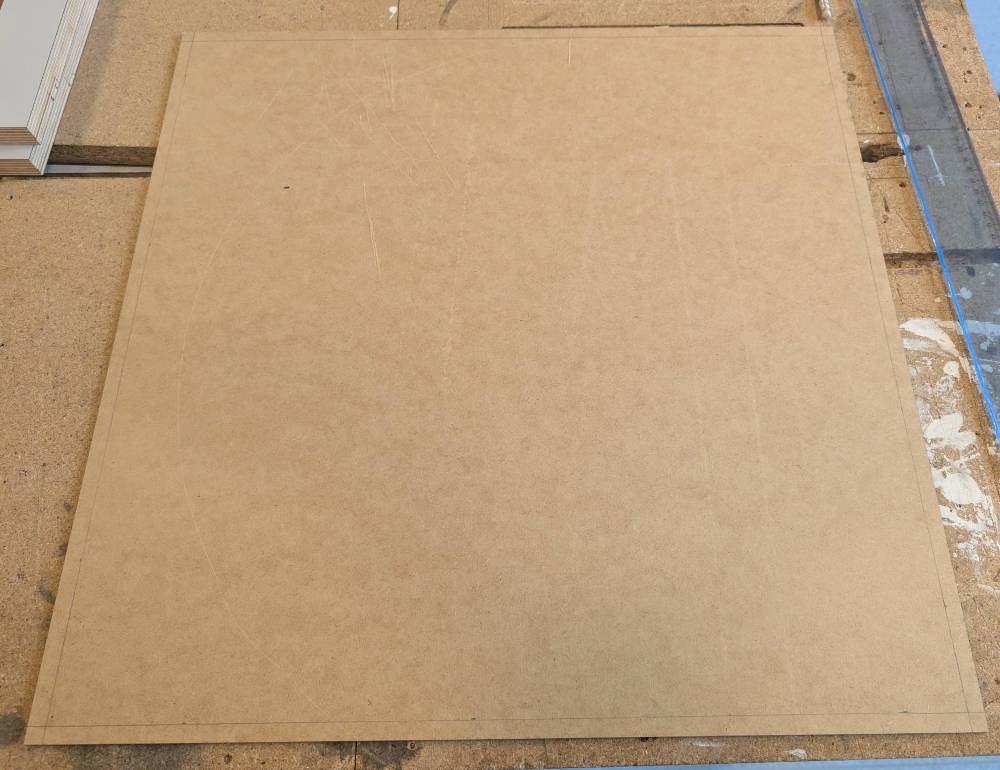
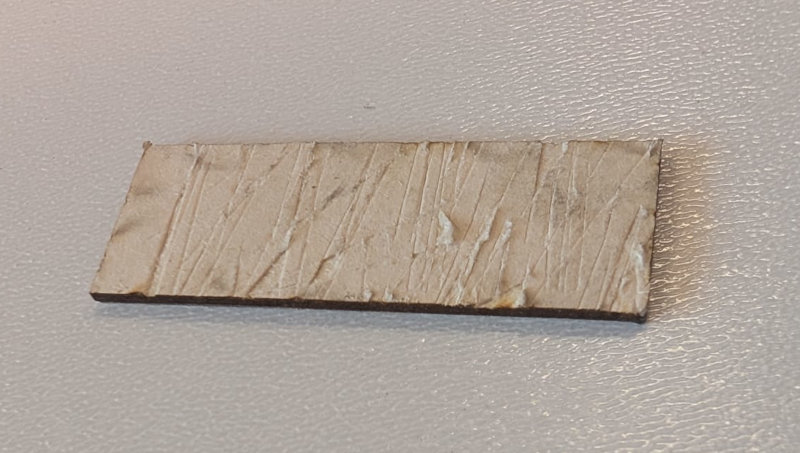
For the base, I use a panel with a thickness of 3mm and for the walls, a plank of wood with a thickness of 18.75mm.
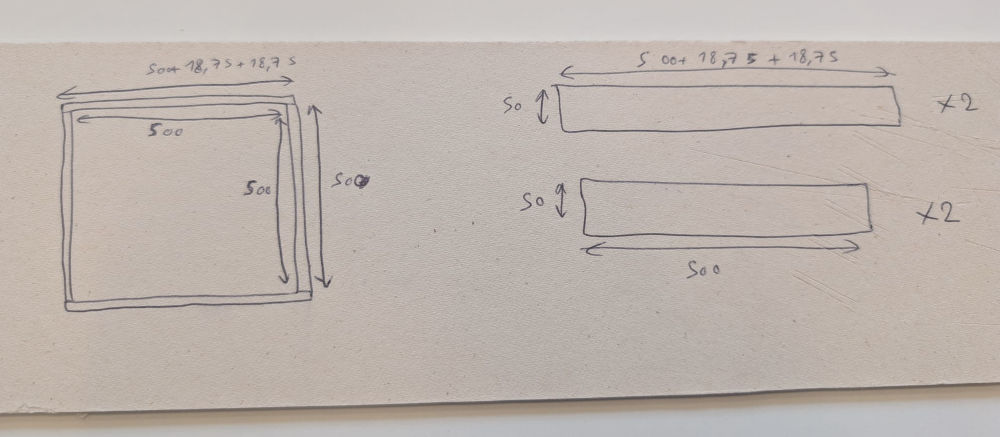
(Plans to prepare the base and the walls)
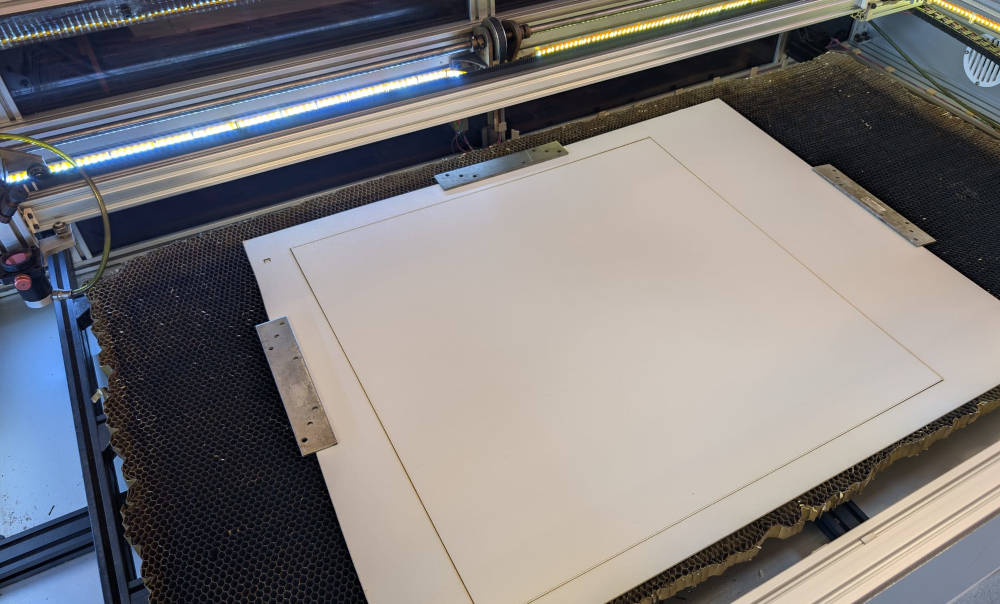
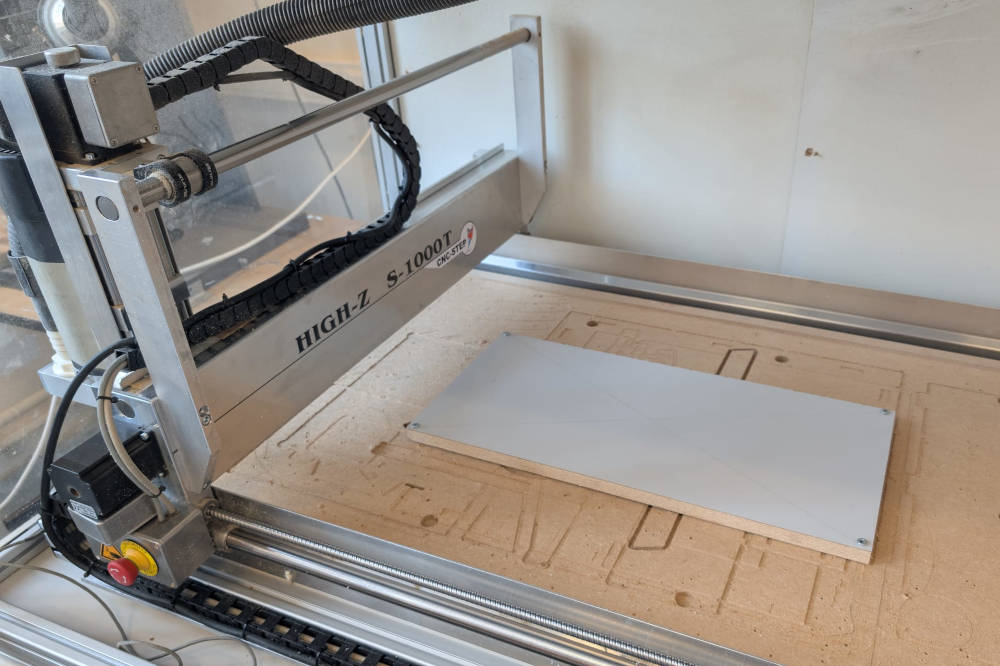
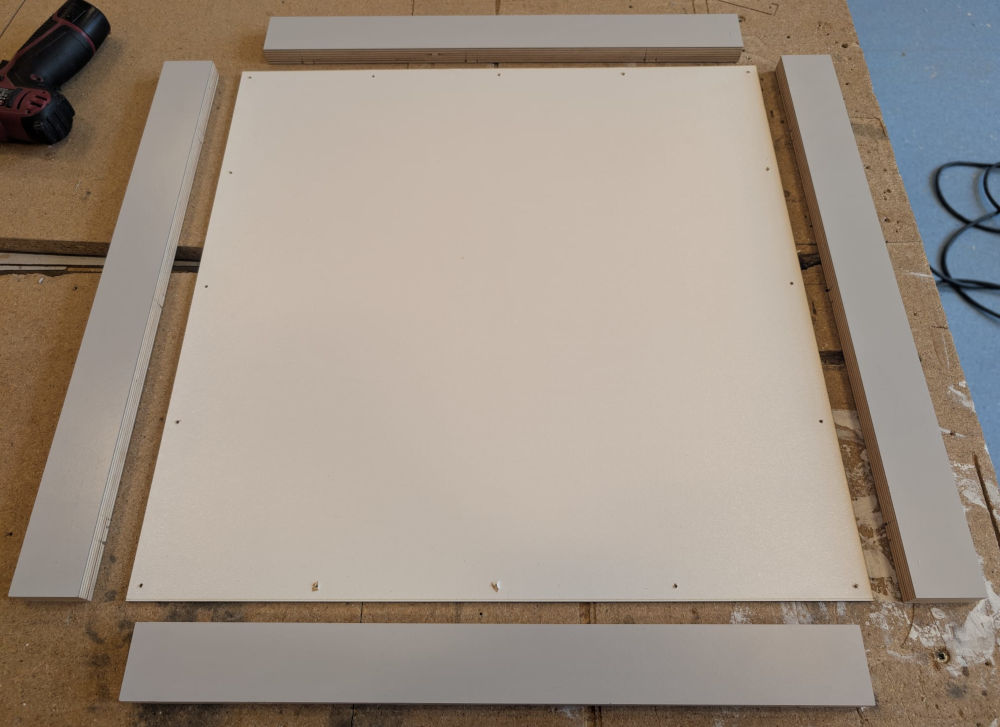
For the base, I use a laser cutter machine (the Lasersaur).
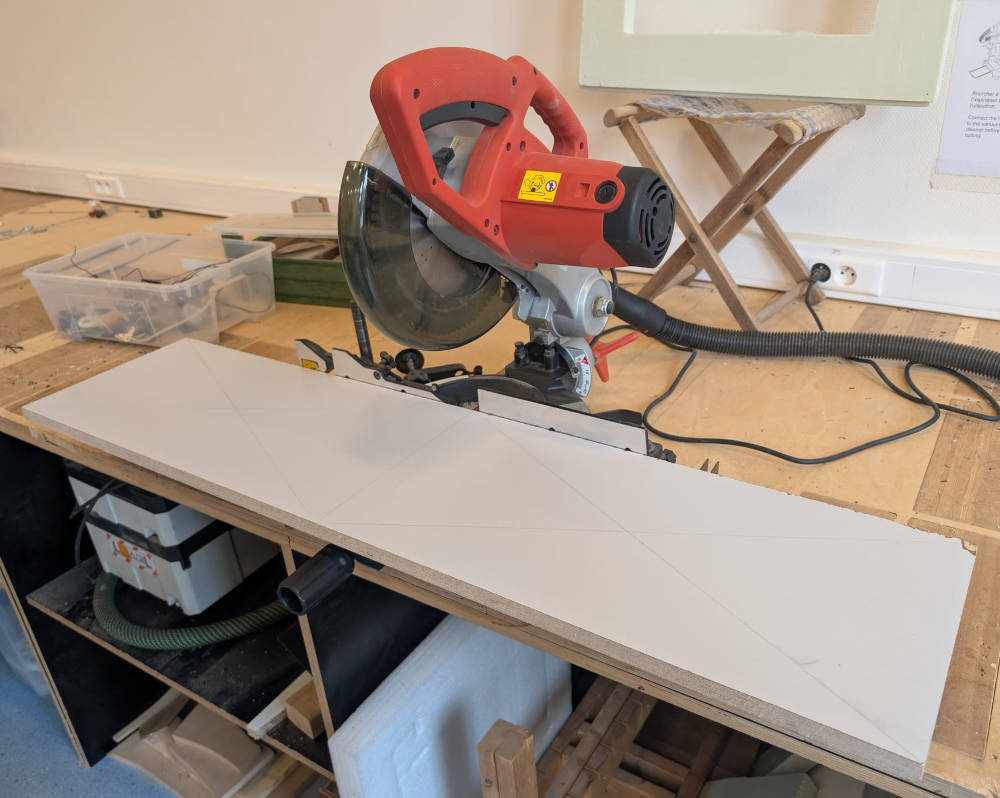
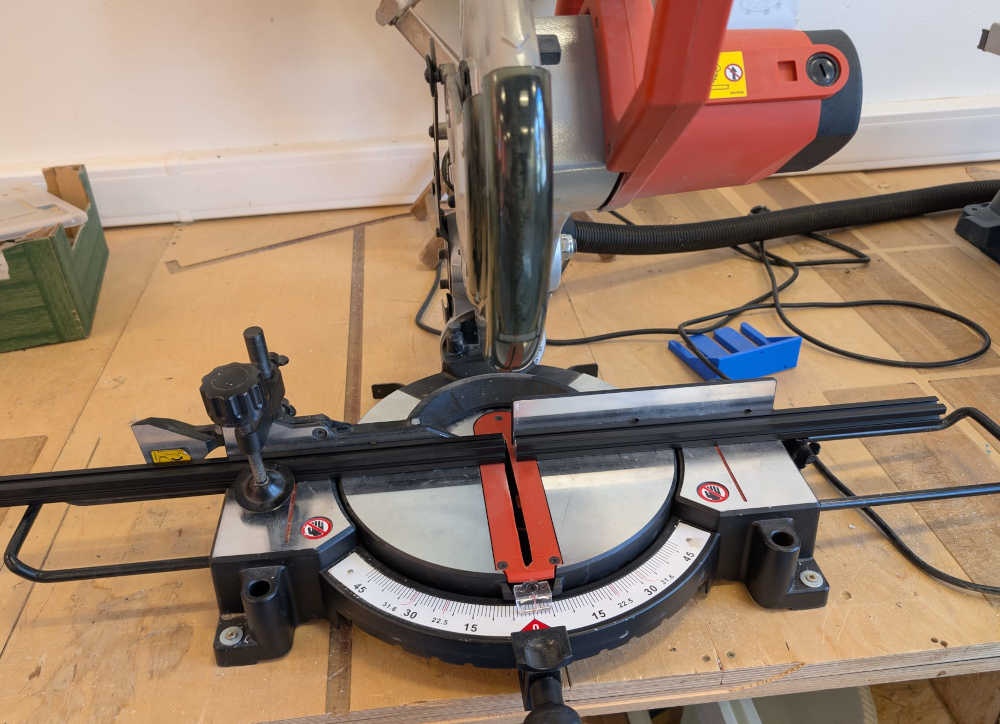
For the walls, I have to cut the plank in half with a miter saw.

Then, I use a CNC machine (High-Z S-1000/T) for specific dimensions.
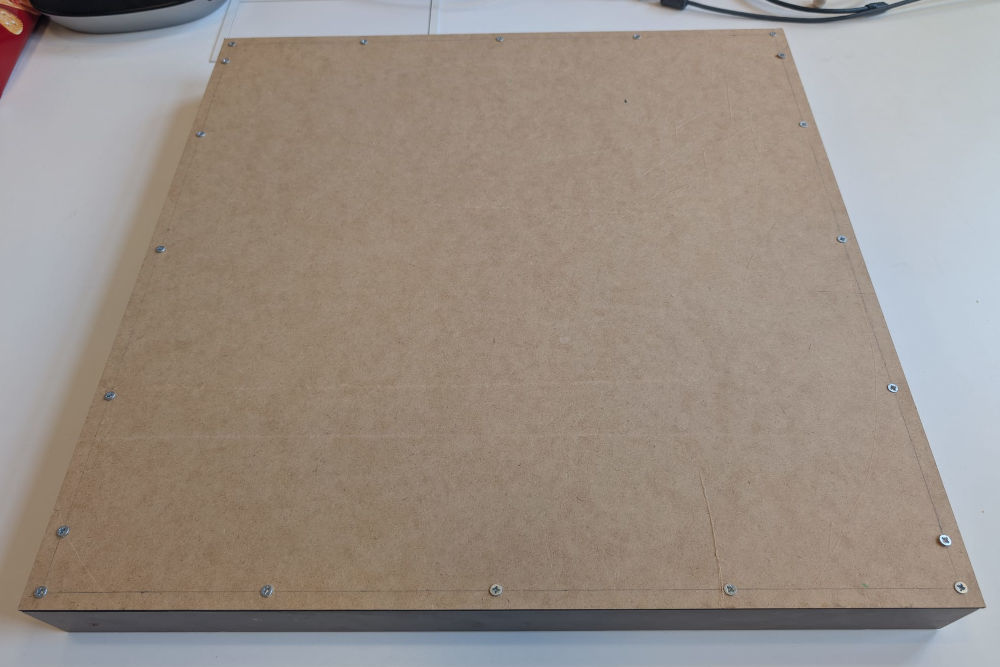
Now, to mount everything together, I first prepare the base with holes for the walls.
I place every wall under the base and pre-drill some holes on the walls for a cleaner finish then screw them together.

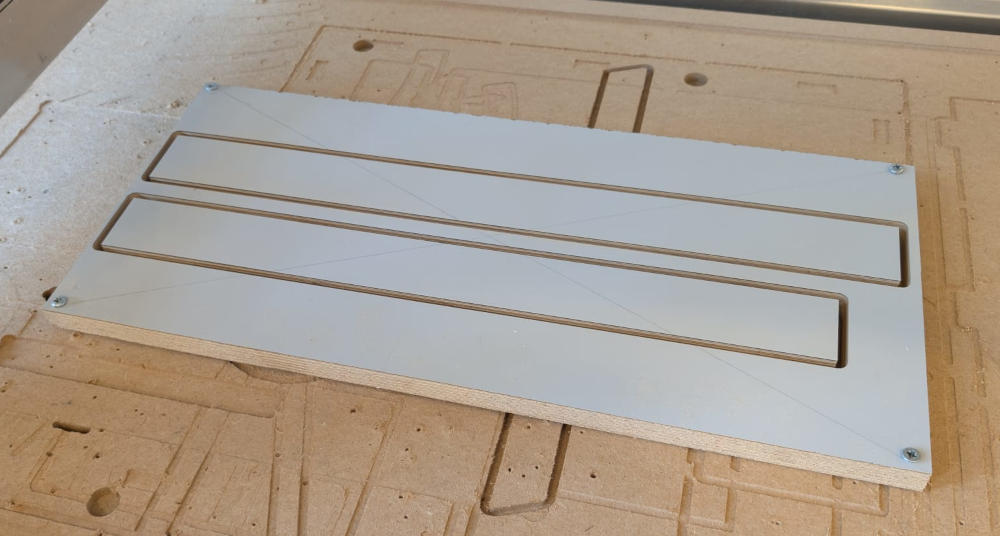
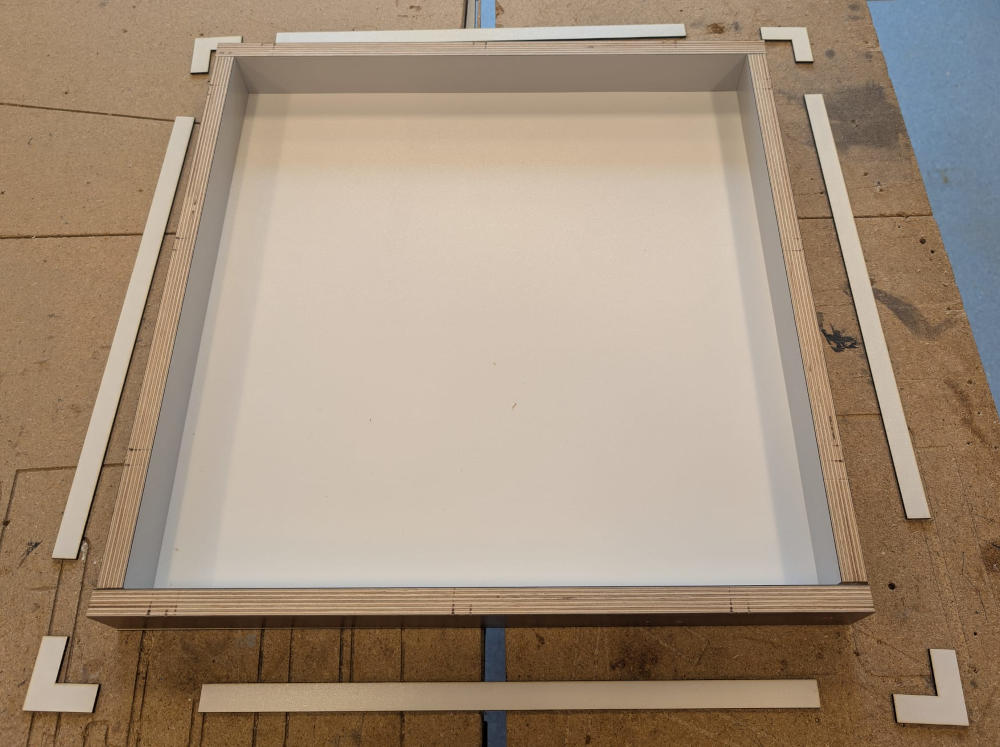
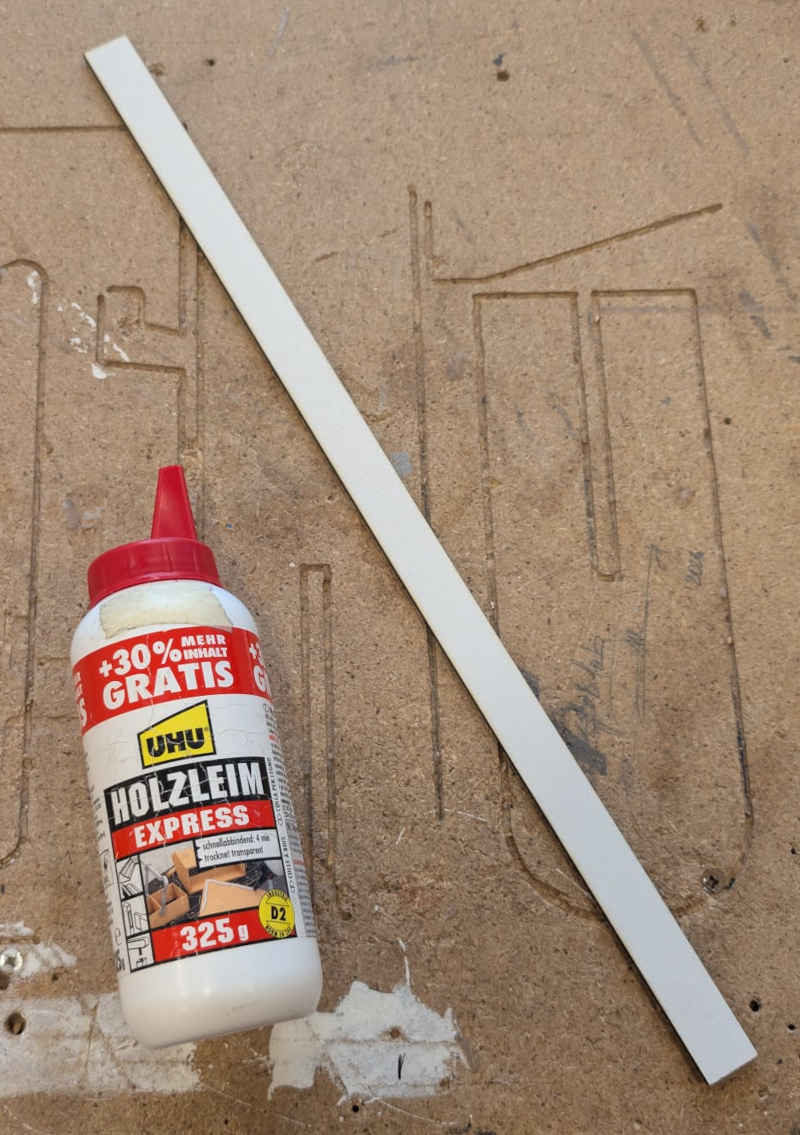
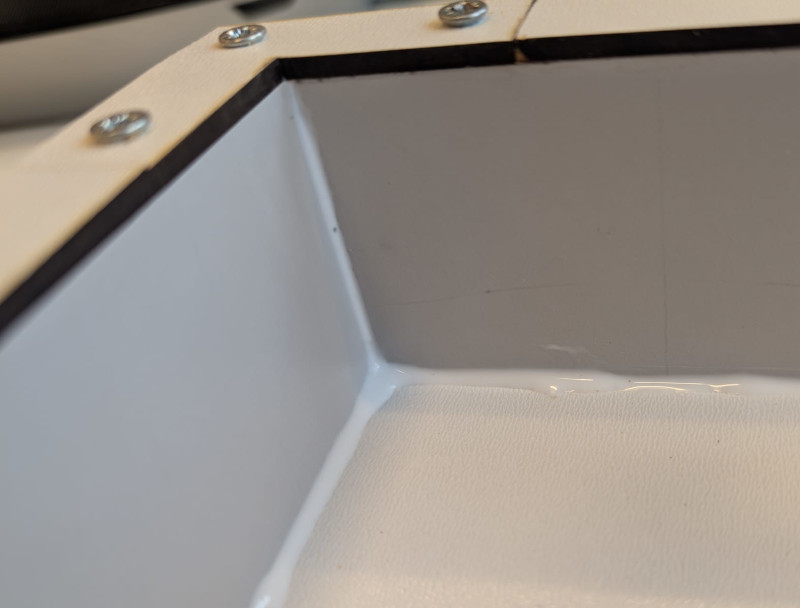
I notice there is a gap between two walls, so I laser cut a tiny wooden rectangle that fits to close the gap.
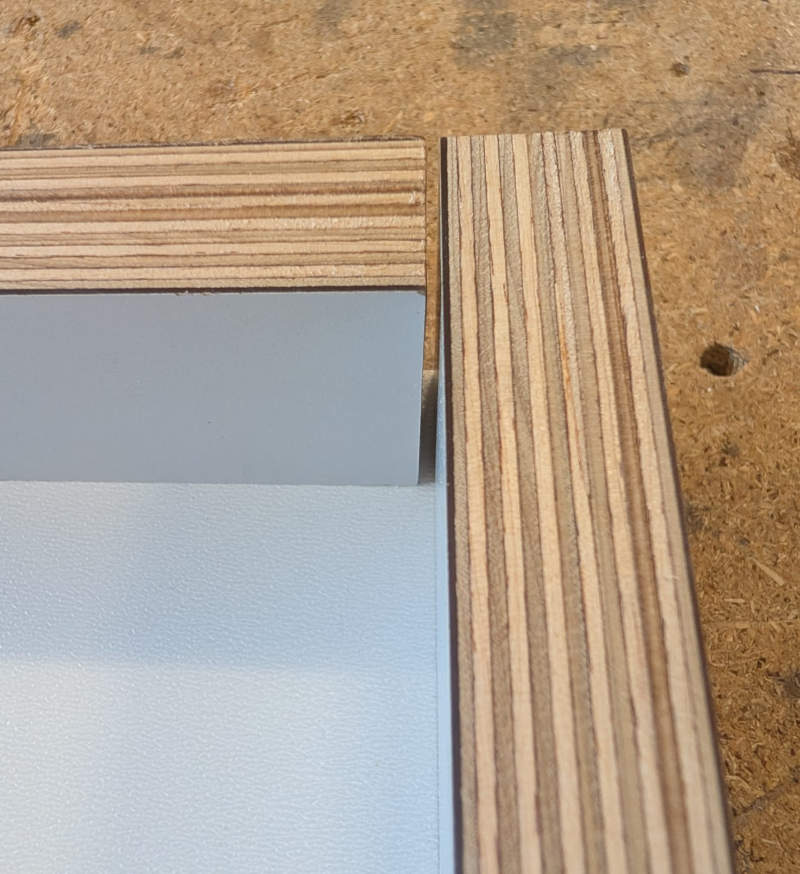
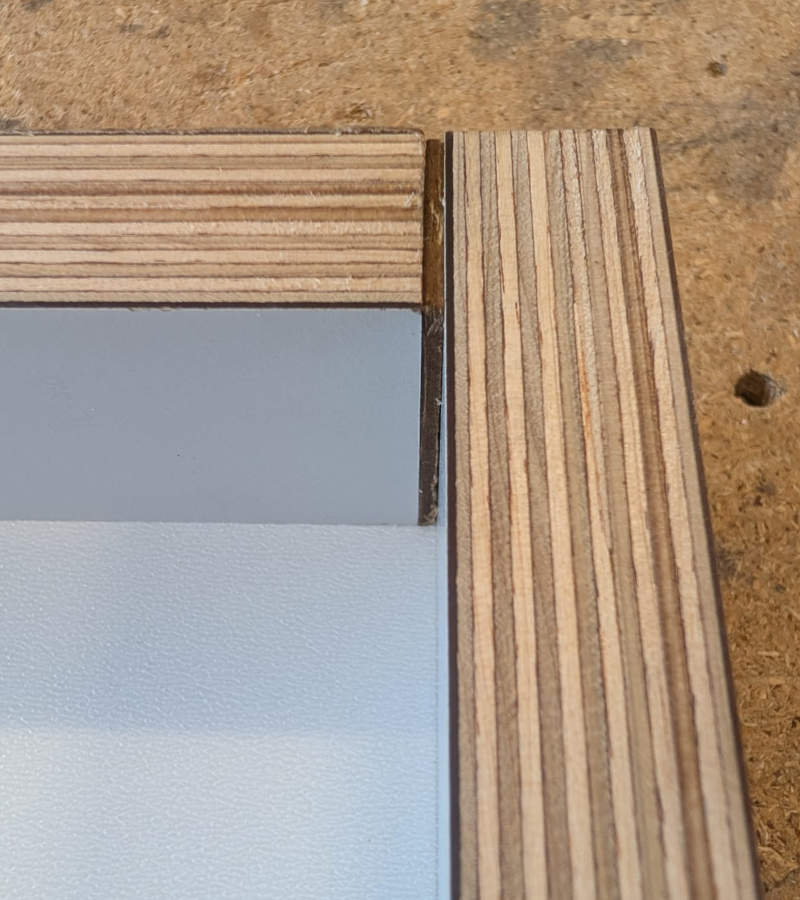
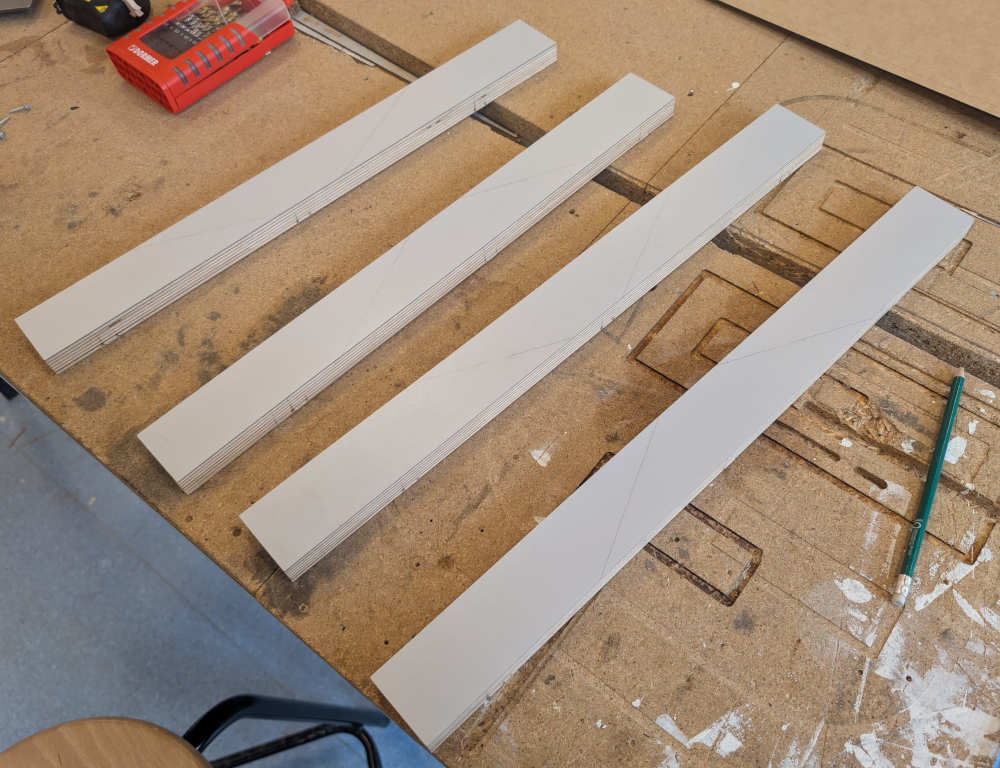
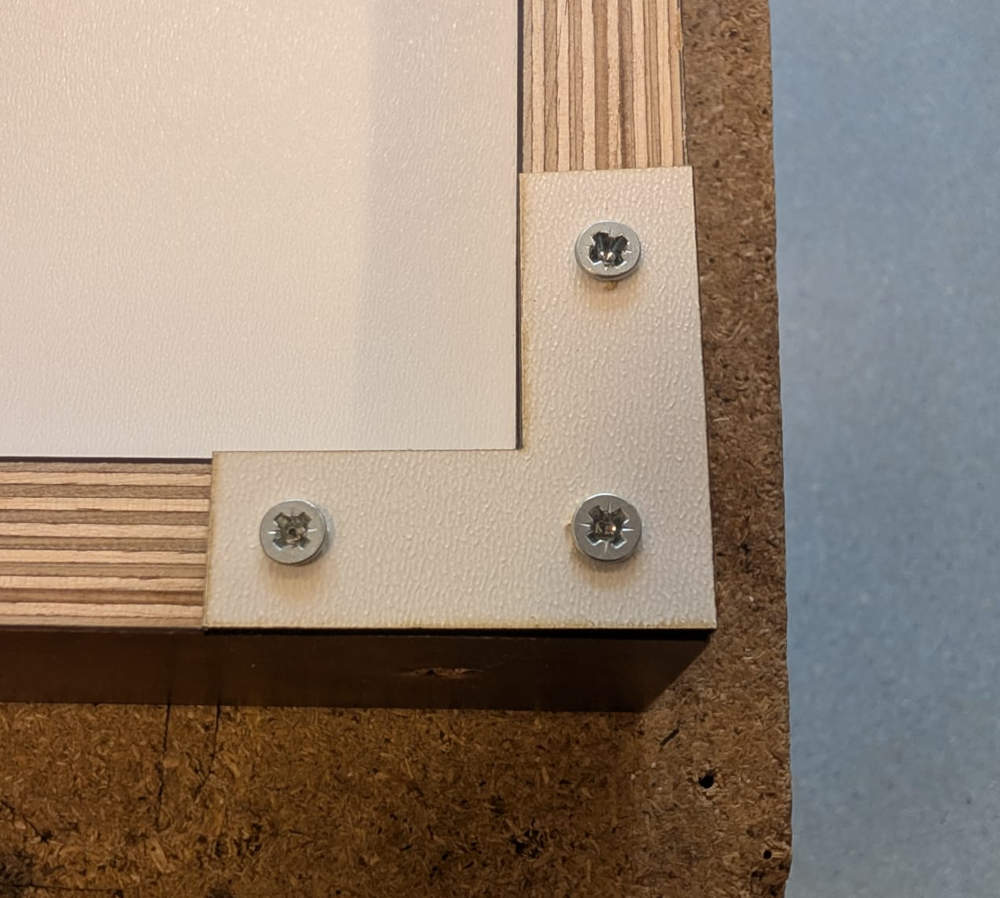
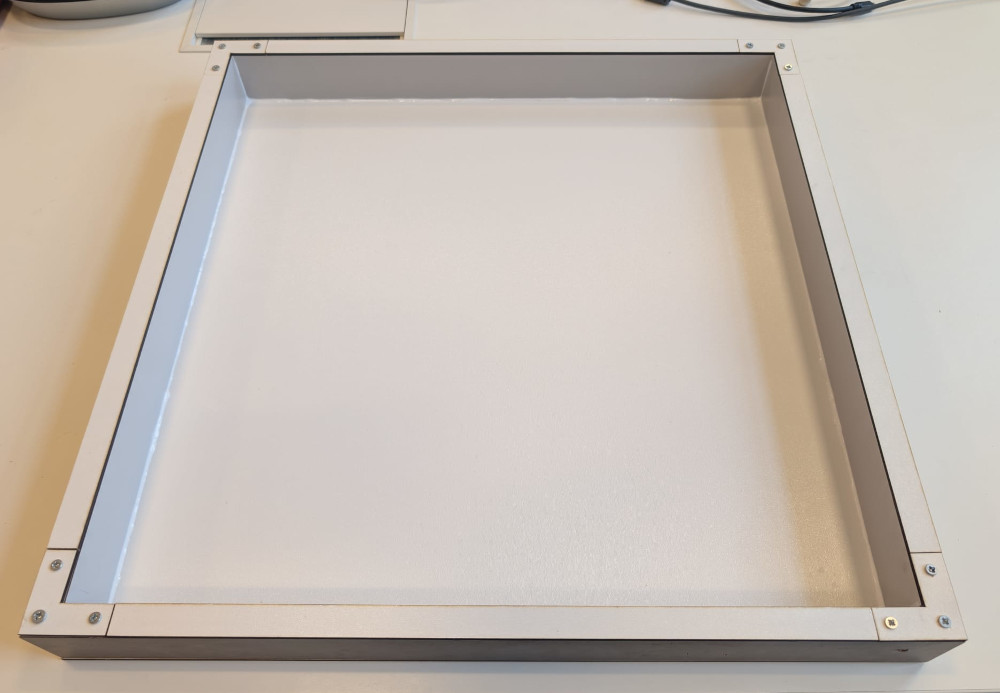
For an even better esthetic and solid finish, I laser cut long rectangles and L shape parts (both made of a thin wood) to link the top of the walls together.
For the L shape parts, I screw them to the walls to have a correct angle (~90°).
For the long rectangles, I simply use wood glue.
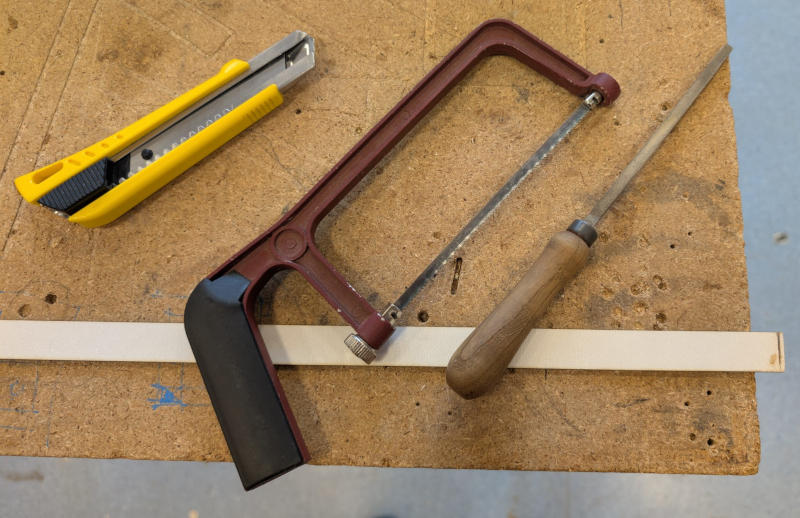
Some of them needed a bit of shortening.
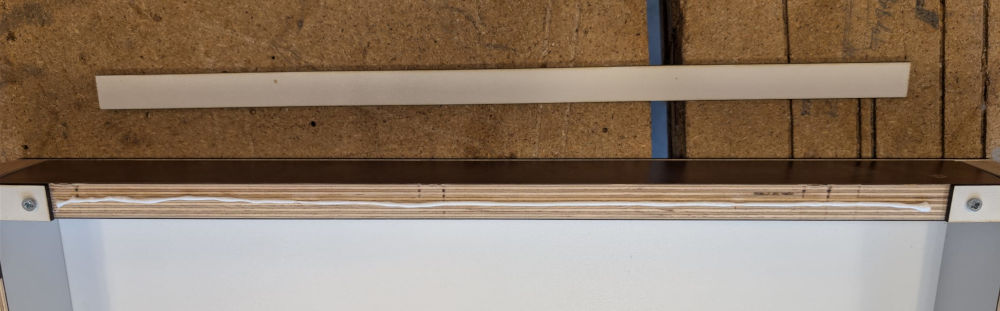
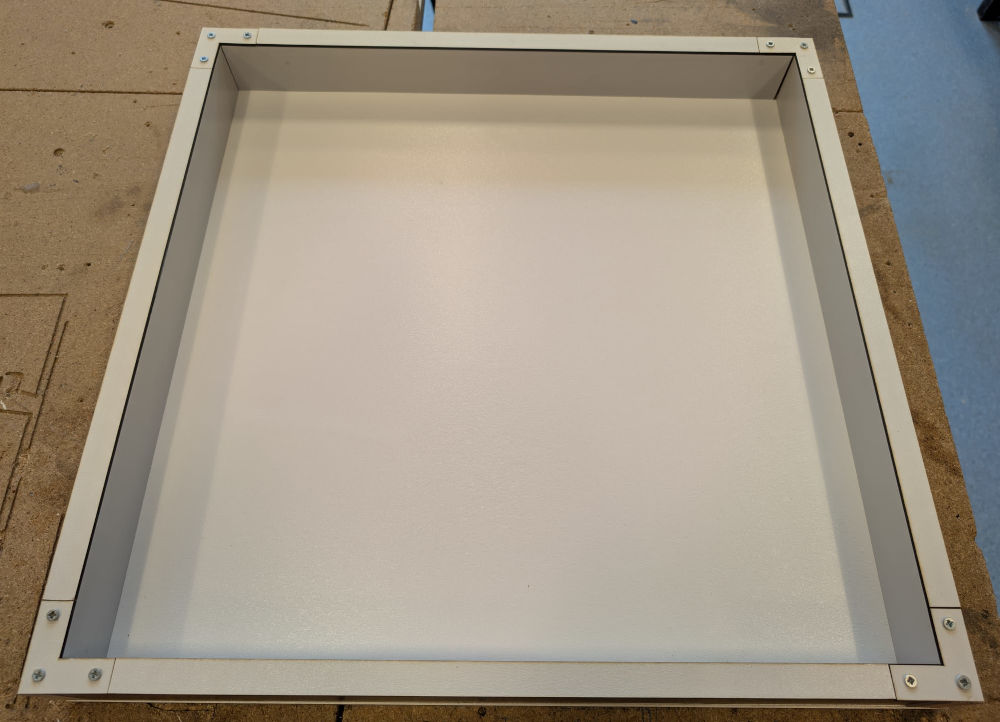
Finally, I add wood glue at every edges to make sure the sand wont slip between the base and the walls.
Final result, with its final inner dimensions being : 49,7x49.9 cm.
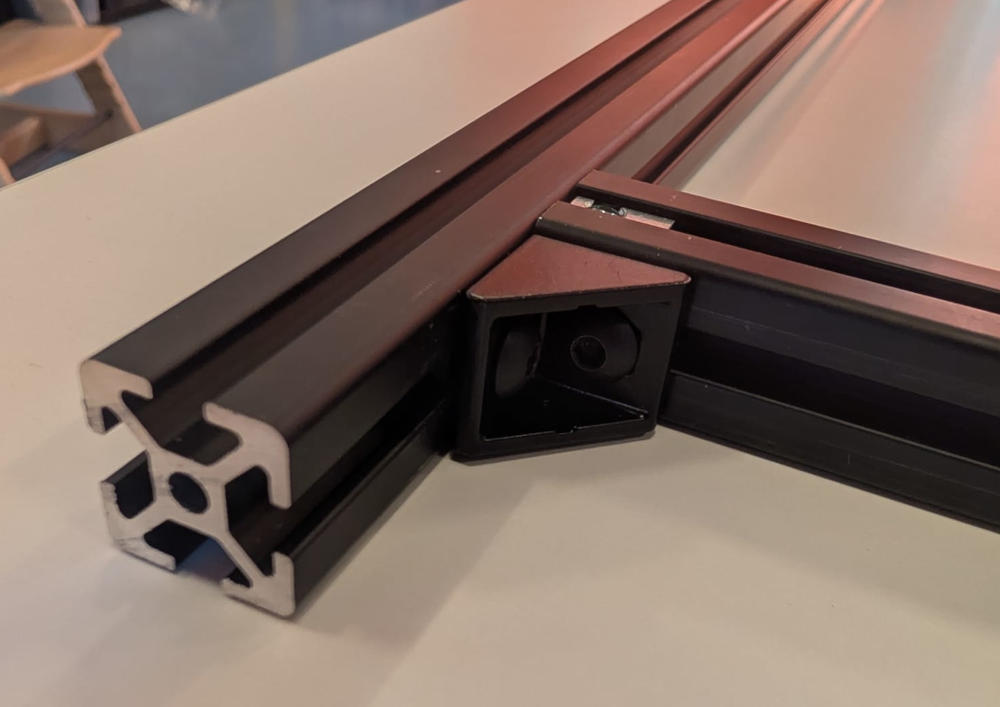
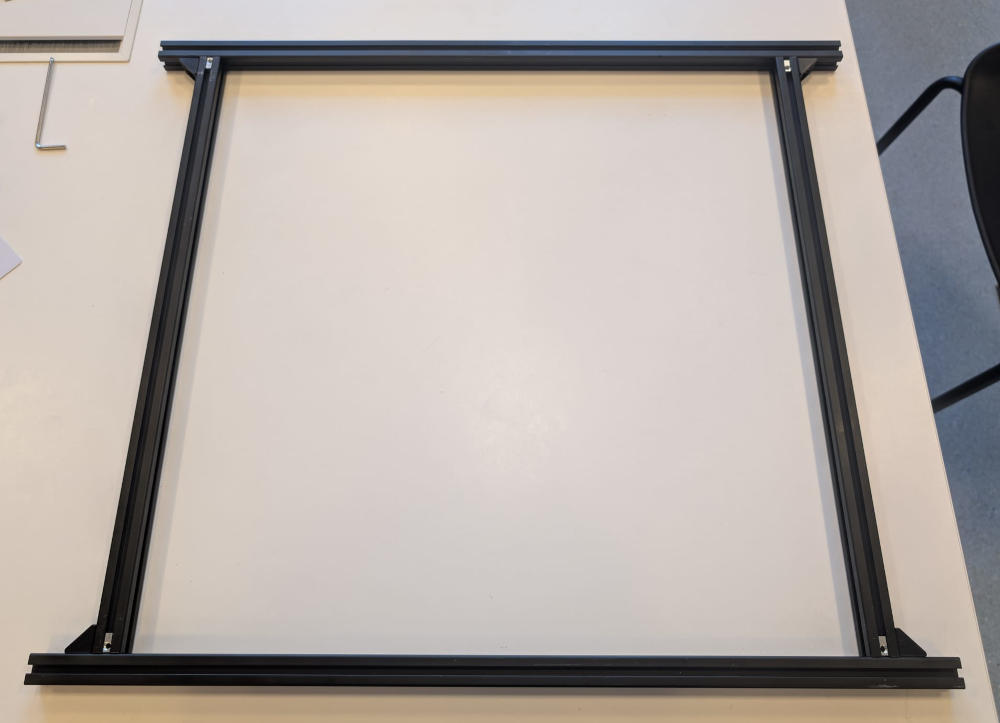
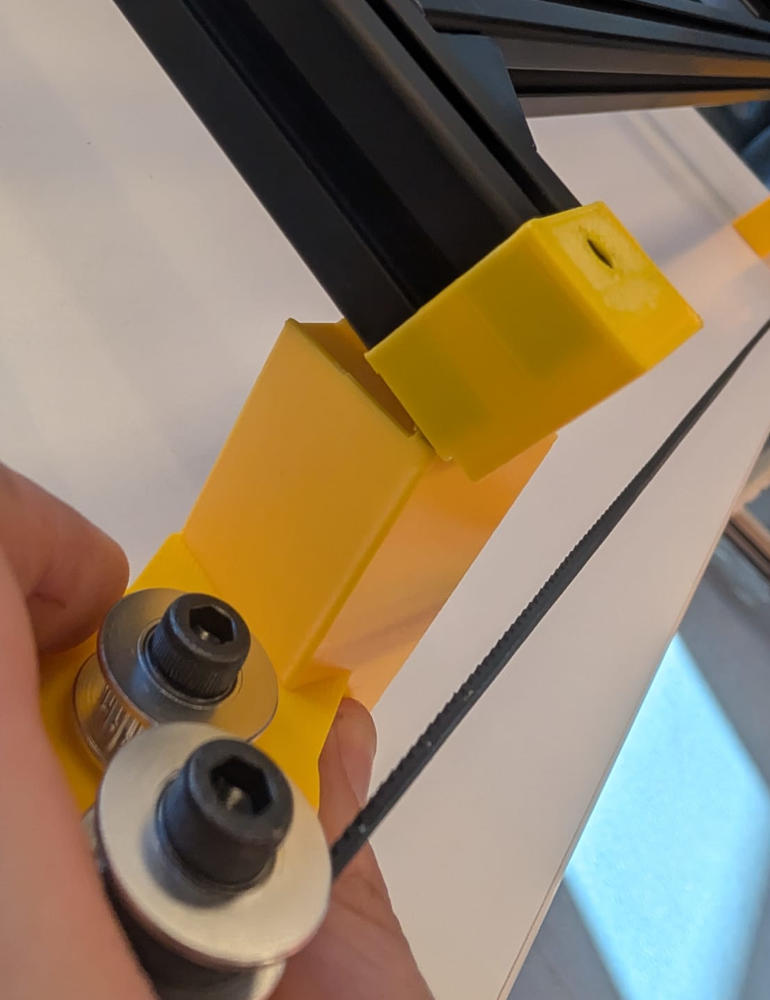
New structure
The initial structure wasn't really reliable because of the L shape pieces, the beams could sometimes move and the inner dimensions were also smaller than the 50cm² we decided on because we used already cut beams that were 50cm long.
I decided to make a new one with new connectors for better sturdiness and use longer beams to have the 50cm² zone we decided at the beginning.
(Plans to prepare the new structure)
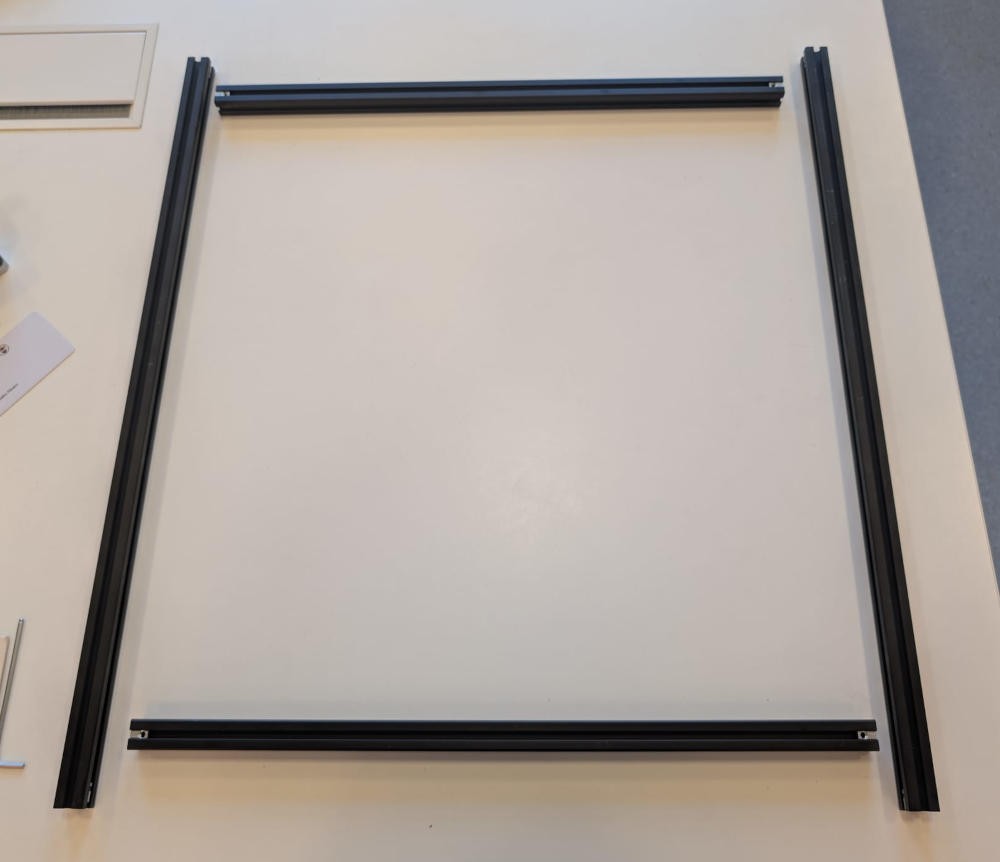
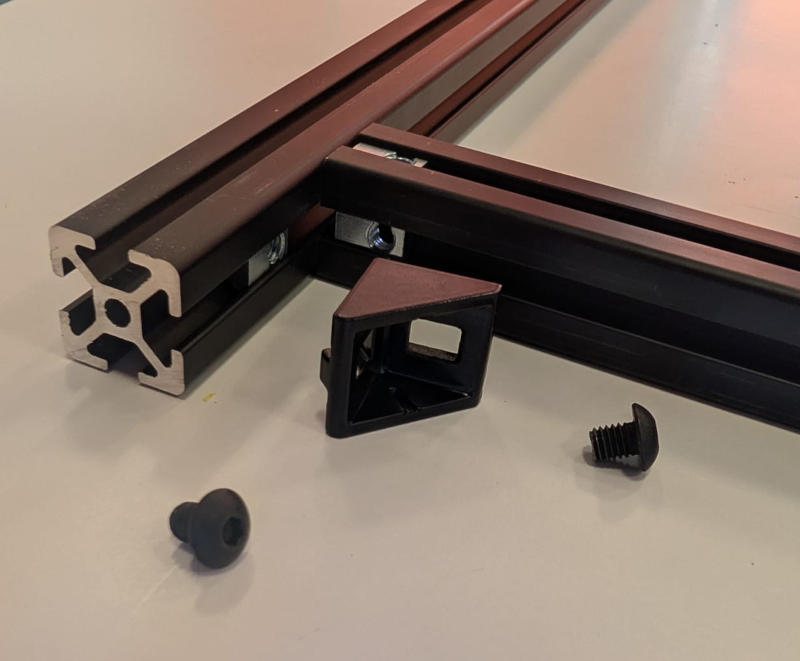
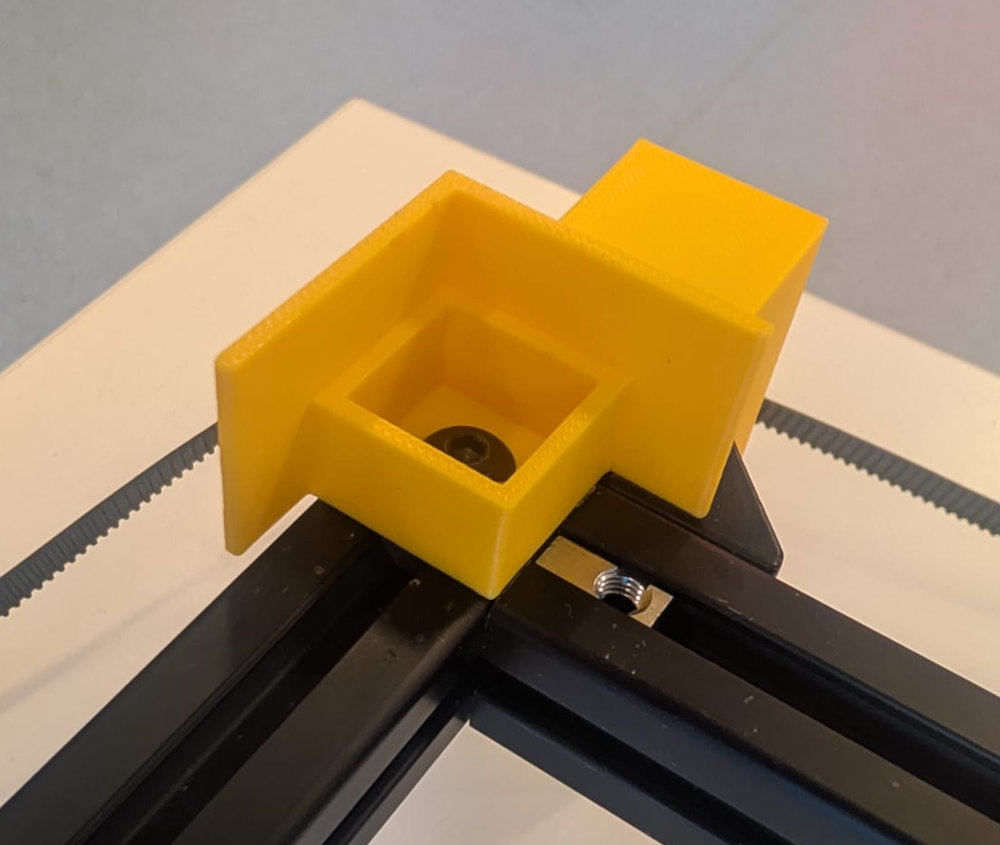
The new connectors are these angle brackets, they are way more reliable and efficient.
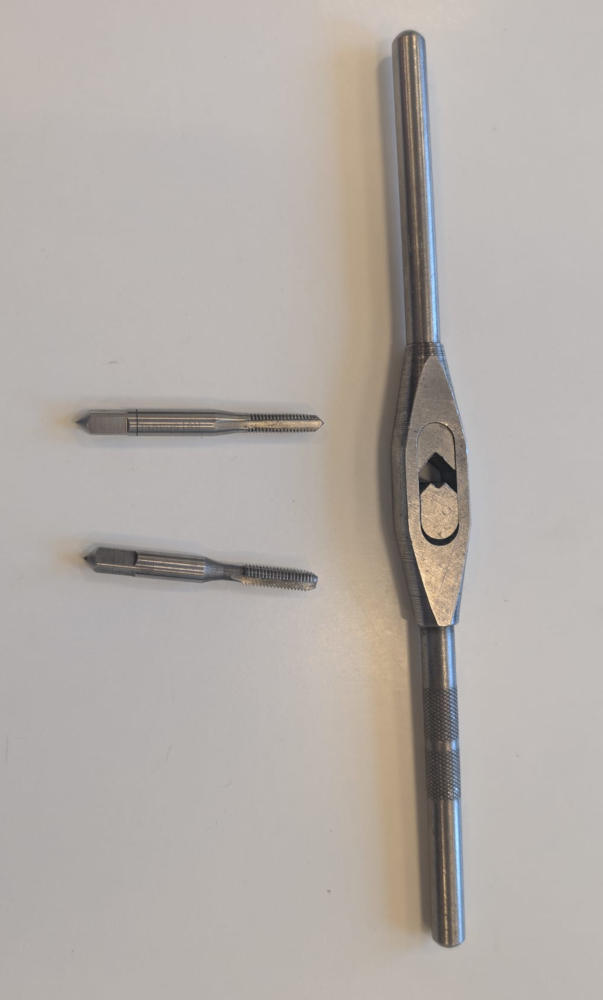
Screw threads
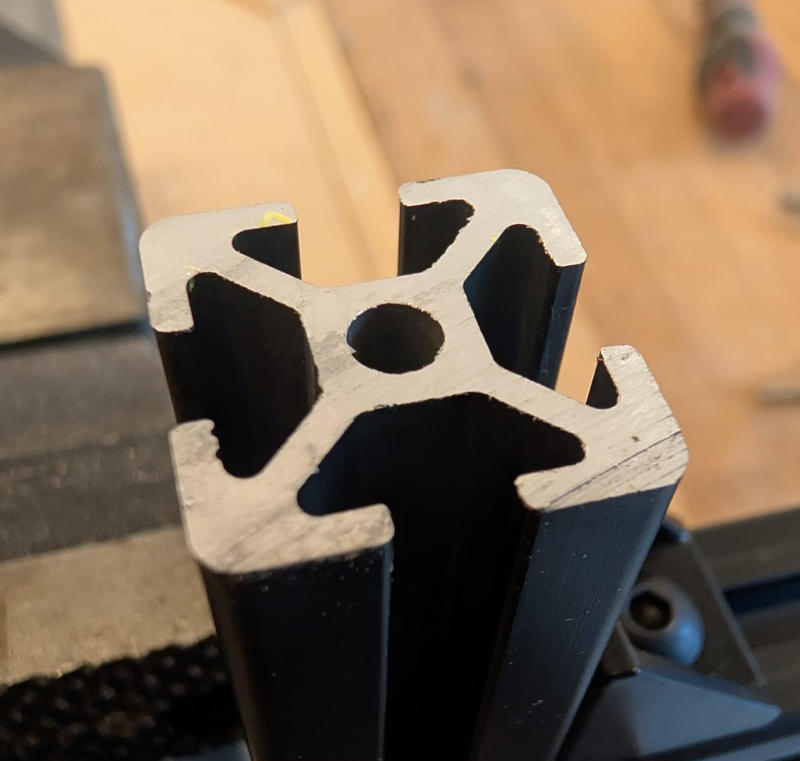
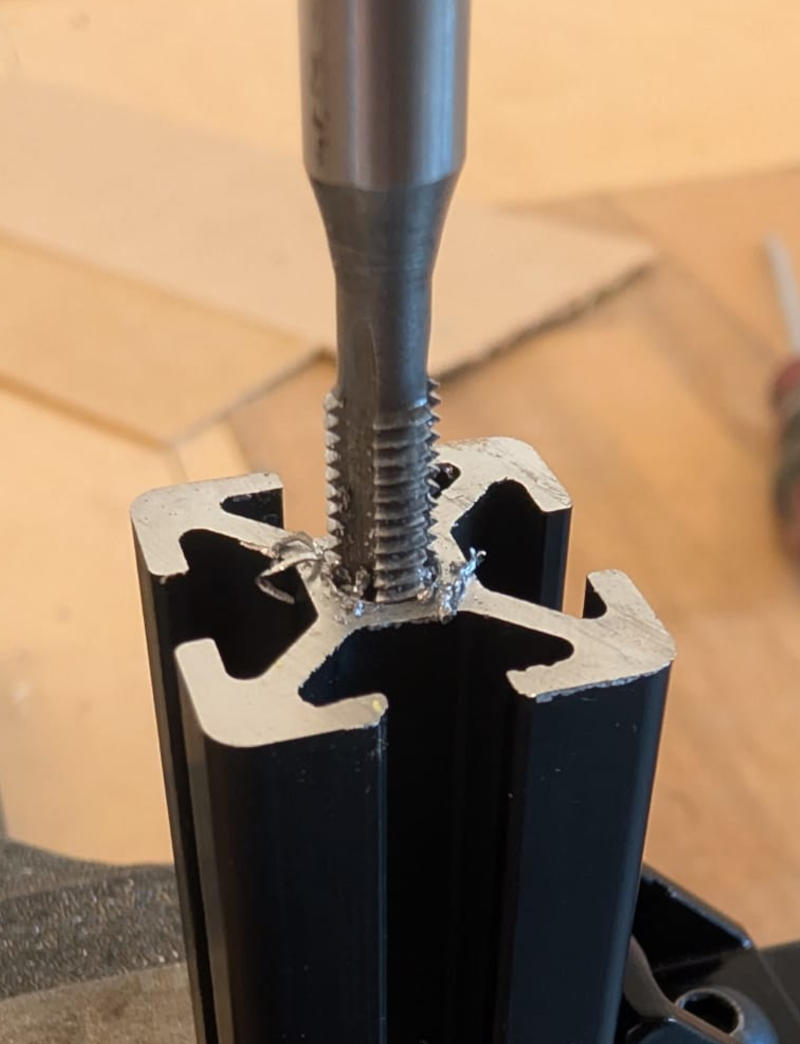
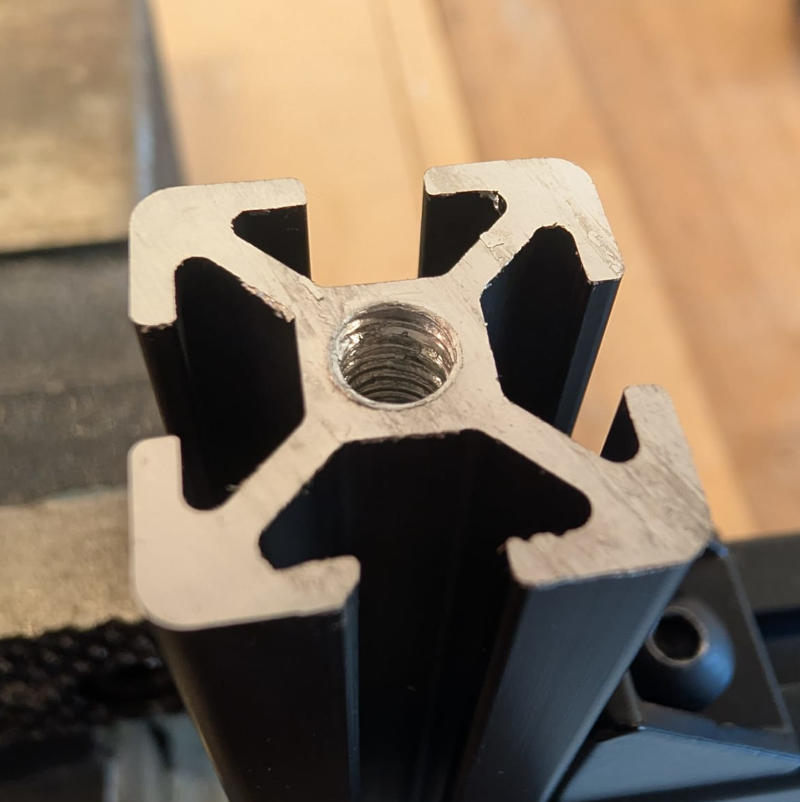
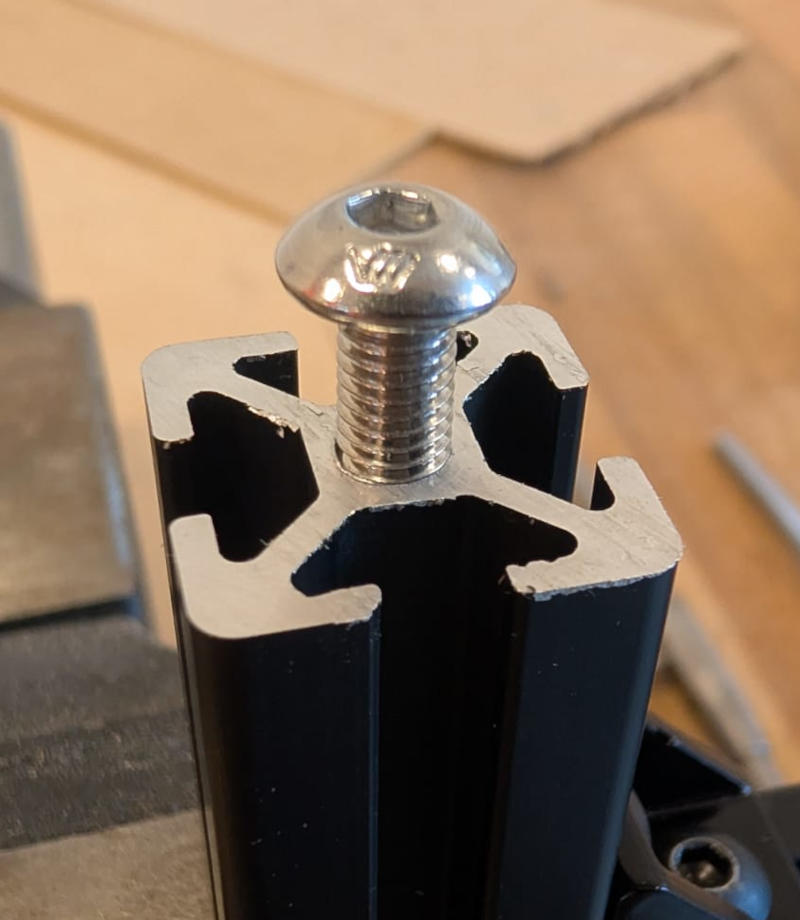
The beams have a center hole but we cant just insert a screw in there, I used a tap wrench and threading taps from my workshop to make the screw threads.

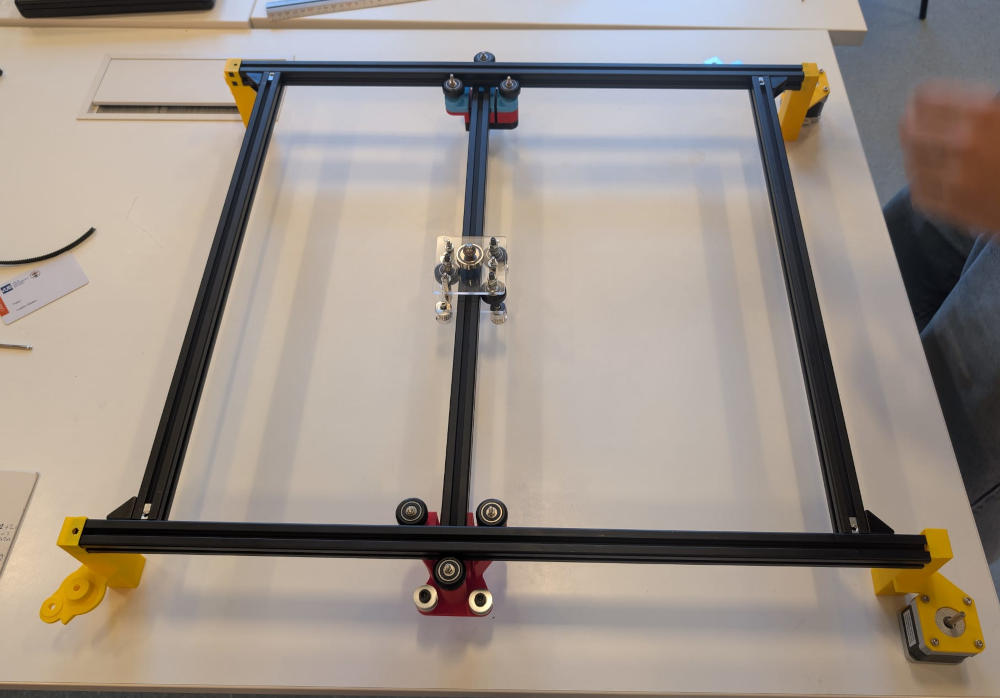
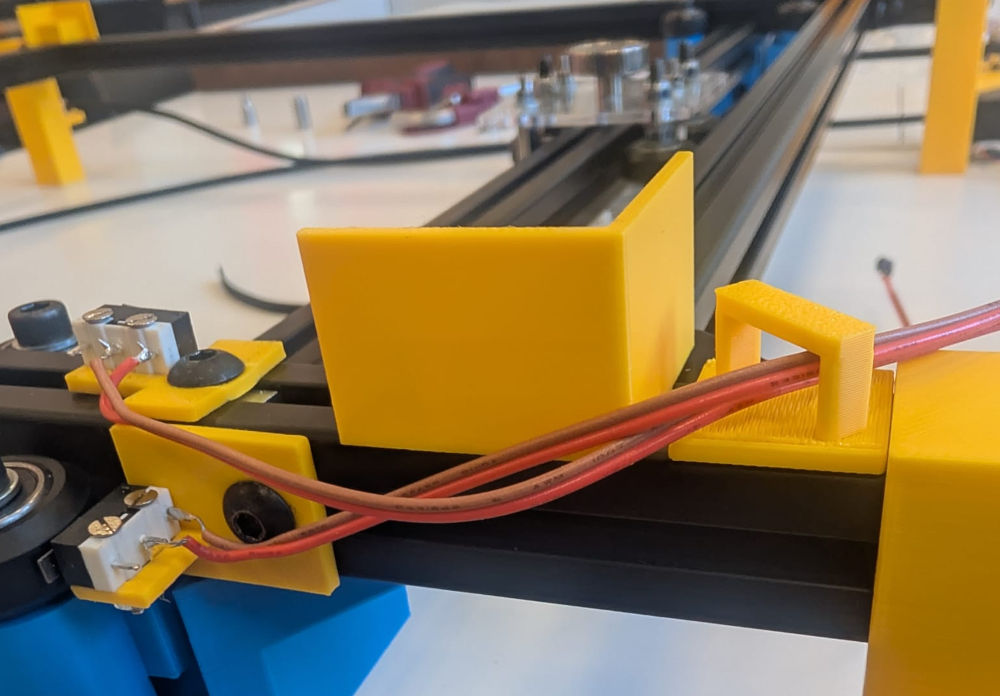
End-switches holders
I had to make the end-switches holders to home the machine at a specific position.
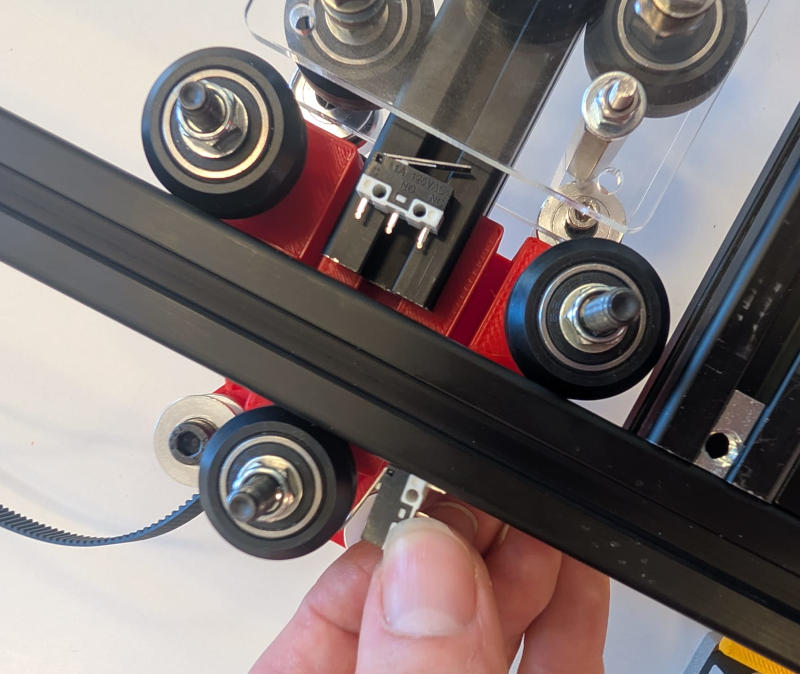
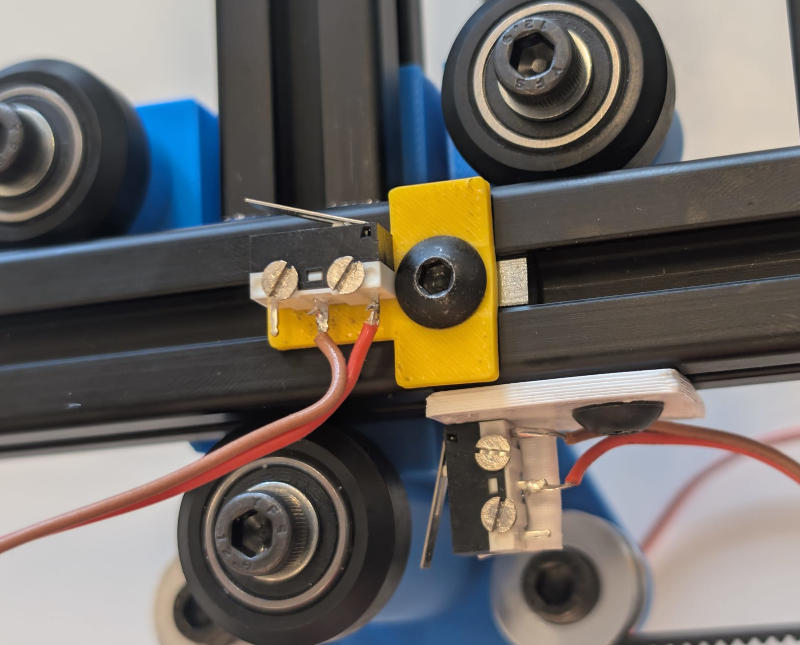
I also added a 3D piece to lead the cables of the end-switches.

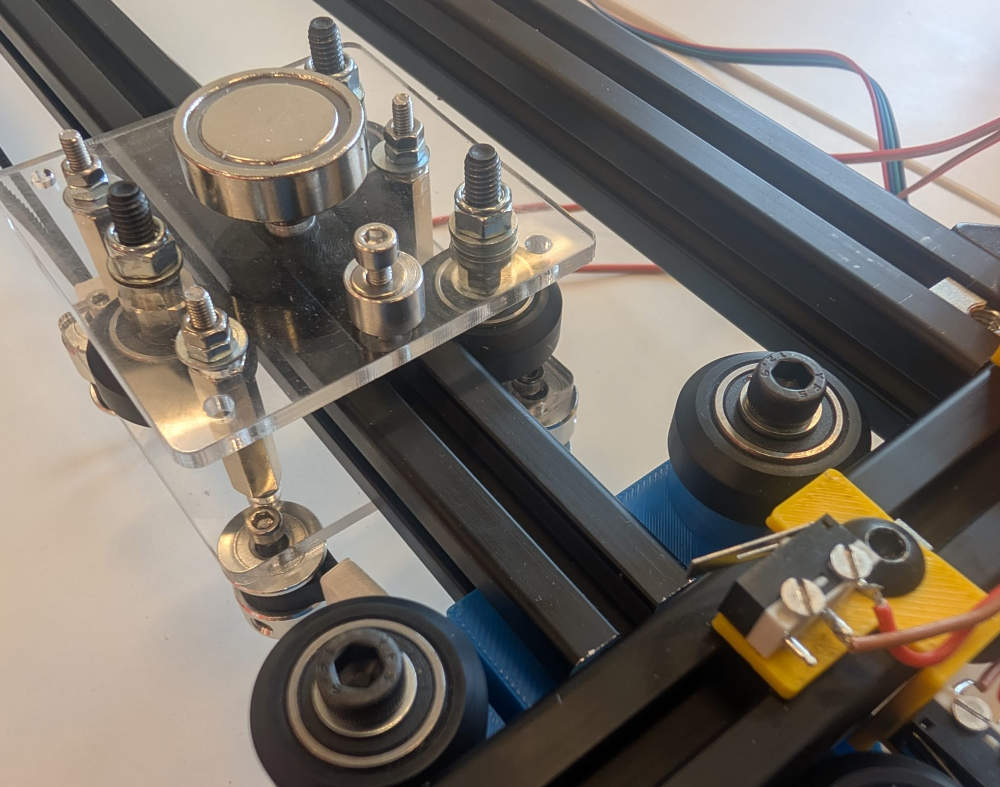
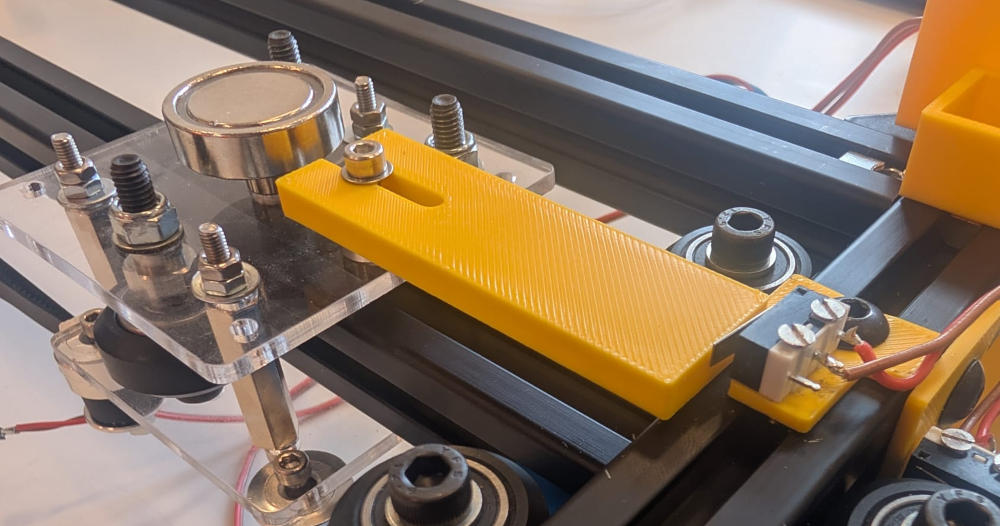
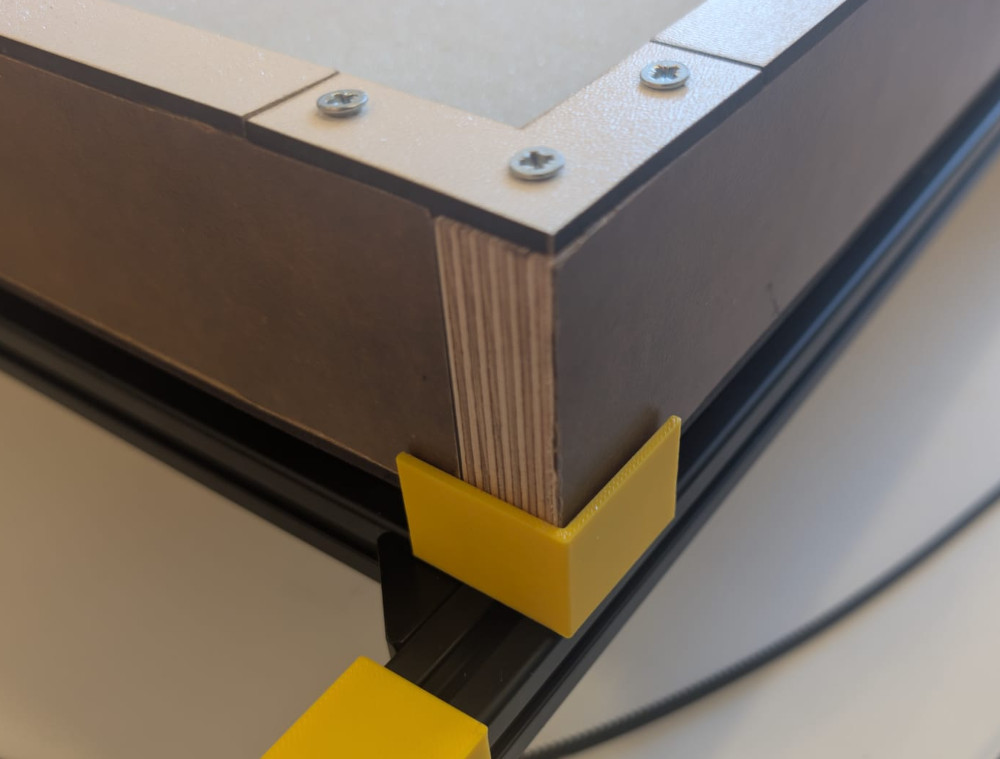
Enclosure holders
I made holders in 3D where the enclosure will be placed to finally have a fixed position.
Drawing on the sand table
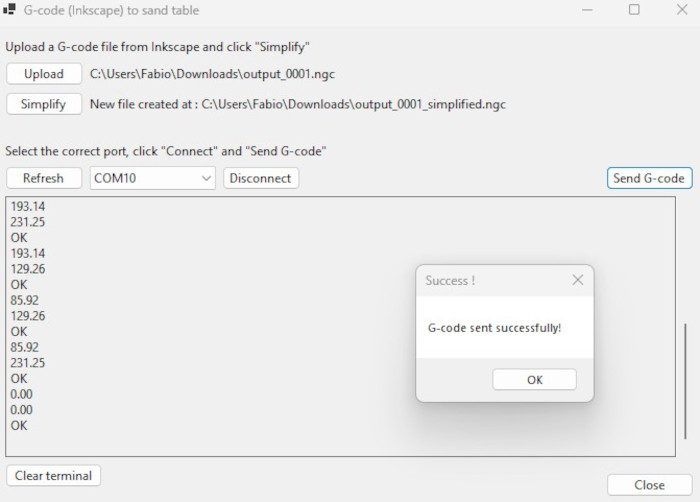
To draw on our sand table, the easiest is to create and send G-code lines and read them to then create the drawings on the sand table.
We kept this part for last and I decided to give it a try when everything in the hardware part seemed ready.
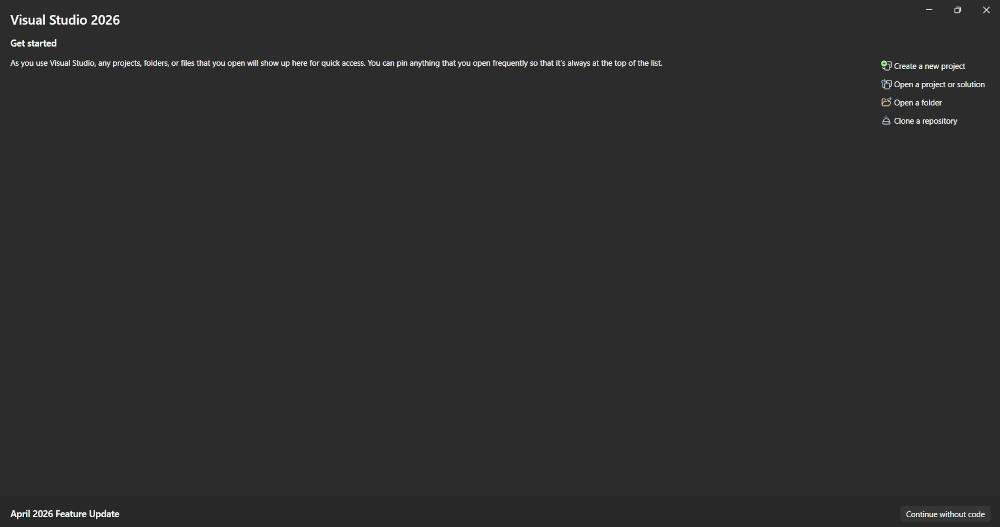
The idea is to use Inkscape to create drawings and convert them in G-code (Inkscape has a built-in extension to do that), then use Visual Studio (not Visual Studio Code !) to create an application to modify the G-code file to have a new file easier to work and then send the data to the microcontroller.
I'll try 2 different applications, one to simplify a G-code file from Inkscape and a second one to connect to a microcontroller to send it specific data and make sure I have a good communication, when both of them work well, I'll merge them to have a final app.
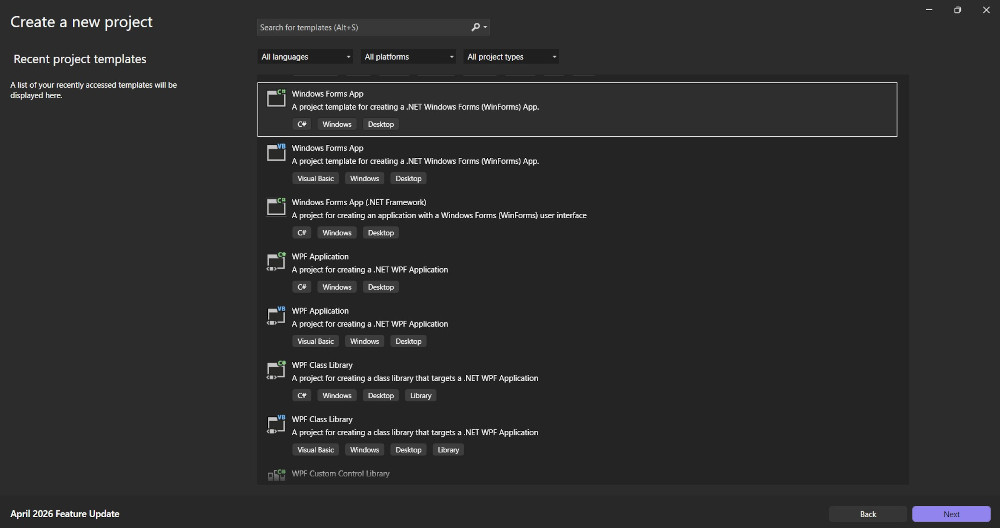
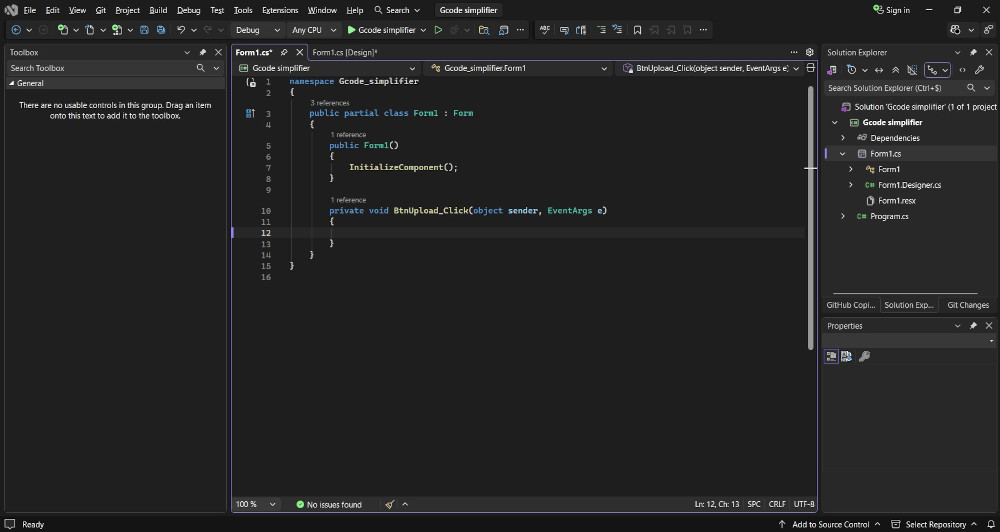
When starting with Visual Studio, I have to choose what kind of project I want to do, in this case, I'll make a Windows Forms App in C#.
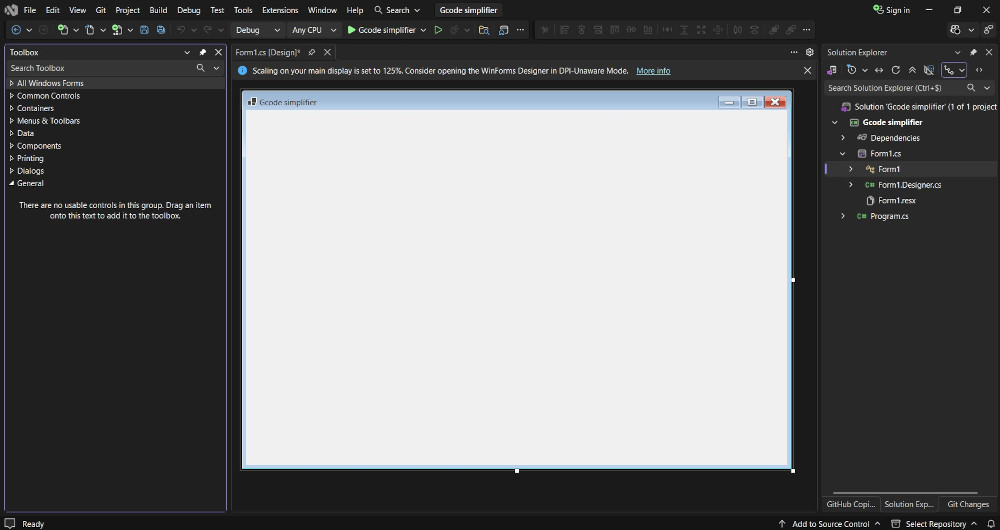
This is the window where the magic happens, I can now drag and drop different "tools" to customize my application thanks to the Toolbox on the left.
In this case, I added two buttons and two text boxes.
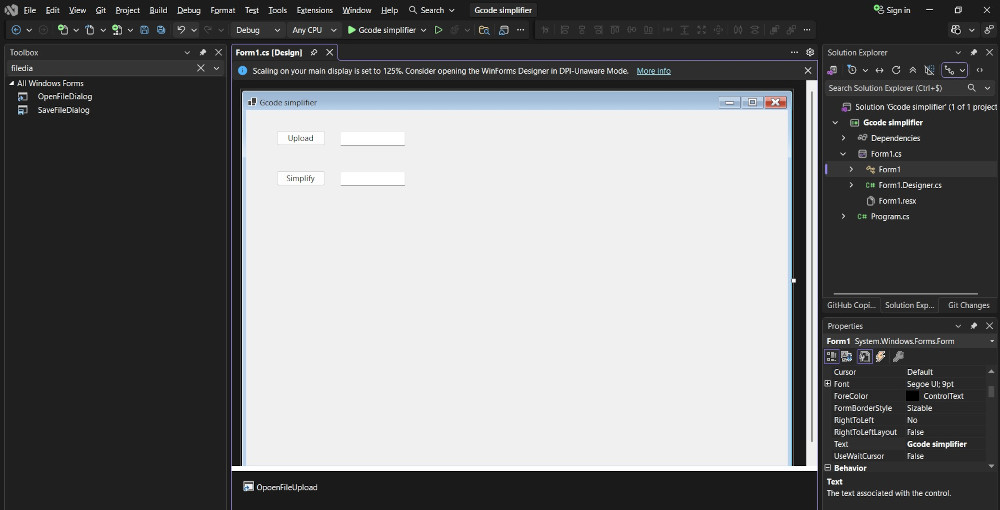
Now to code my buttons and make them work, I simply double click them and a new tab appears to start coding what happens after a specific action.
-
Application 1 : G-code from Inkscape simplifier
This app will "simplify" a G-code file generated by Inkscape to modify its content to only keep the useful data and arrange them in a way to easily communicate them to a microcontroller.

The idea is to only keep the G-code lines that make a movement, so when X or Y are modified, delete everything else, and arrange them like this :
- X
- Y
- X
- Y
- ...
Here's an example :
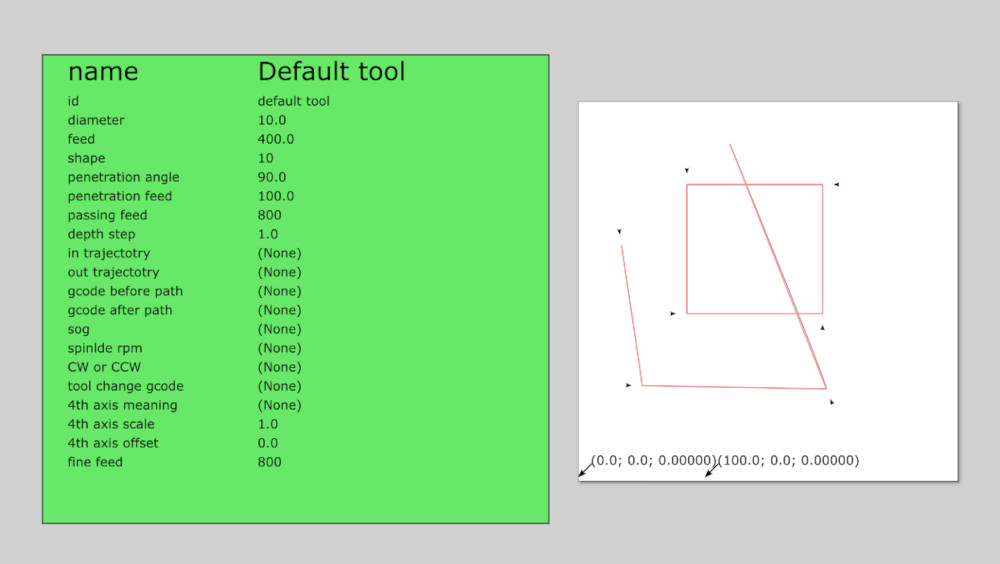
(Drawing in Inkscape)
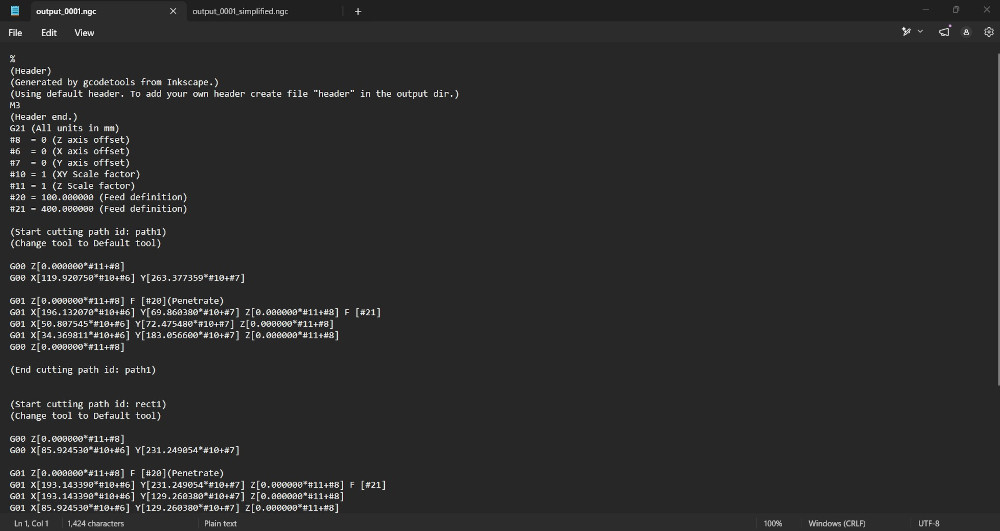
(Before modification)

(After modification)
-
Application 2 : Communication with the microcontroller
This app allows me to connect to the serial port of my microcontroller and send it data, depending on what I send, the microcontroller will respond with a specific response.
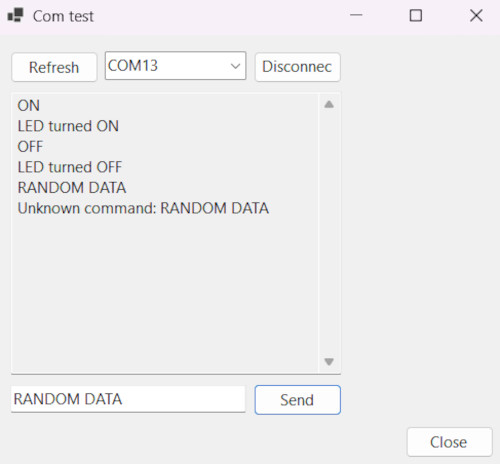
In this case, if I send "ON" or "OFF", the microcontroller responds with "LED turned ON" or "LED turned OFF" and in case of a random data, it says "Unknown command: ".
-
Final application
This final app is the fusion of the two previous one, I must first upload and simplify a G-code file generated by Inkscape, connect to the microcontroller and click "Send".
The app will send the first pair of the X and Y values, the microcontroller will receive the data, execute the movement and send back "OK", when the app receives the "OK", it sends the second pair and keeps going until the G-code is fully sent.
Once the drawing is done, a message box will appear saying " Success !".

Future improvements
-
Enclosure
Replace the current "sand" with good one to make the drawings more accurate and make less noise and close the enclosure with a glass/plexiglass/PMMA top panel for a professional look and no sand jumping out.
-
Enclosure holders
Make it so to enclosure holders are adjustable to tighten the enclosure even more and make sure it doesn't move.
-
Drawing on the sand table
Change the data handling and transmission to have something that understands G-code commands and directly transmit the data without modifying it (would allow for better drawing and rounded curves).
Problem(s) met
-
Fragile 3D pieces
The first 3D pieces for the holders were thin so after manipulating them, we accidentally broke one.
-
G-code
At this point, this machine only works with Inkscape (the final app was made for Inkscape's G-code format) and doesn't support curves as we didn't have time to code it yet because their G-code is a bit different in Inkscape.
Useful file(s) (Click to download)
- Enclosure pieces (Autodesk Fusion and Inkscape)
- End-switches pieces (Autodesk Fusion)
- Trolley extension for end-switch (Autodesk Fusion)
- 2D and G-code files from application 1 (Inkscape)
- Communication test from application 2 (Thonny)
- Application 1 (Visual Studio)
- Application 2 (Visual Studio)
- Final application (Visual Studio)
To access the applications, in the downloaded files, go to : "...\bin\Debug\net10.0-windows\" and launch the ".exe" files.
Assignments checklist
- ✅Documented the machine building process to the group page.
- ✅Documented your individual contribution to this project on your own website.
- ✅Linked to the group page from your individual page as well as from group page to your individual pages.
- ✅Shown how your team planned, allocated tasks and executed the project (Group page).
- ✅Described problems and how the team solved them (Group page).
- ✅Listed possible improvements for this project (Group page).
- ✅Included your design files (Group page).
- ✅You need to present your machine globally and/or include a 1 min video (1920x1080 HTML5 MP4) + slide (1920x1080 PNG) (Group page).
- ✅Show progress in documenting the assignments.
- ✅Show progress on your final project idea/s and planning.
- ✅Made a schedule for remaining tasks.
- ✅Meet with your local and global instructor.