Prior knowledge
|
I really like it when a project is clean and nice to look at, so I try to do my best when making projects to make them look good, whether it is for personal or professional projects. |
Integration
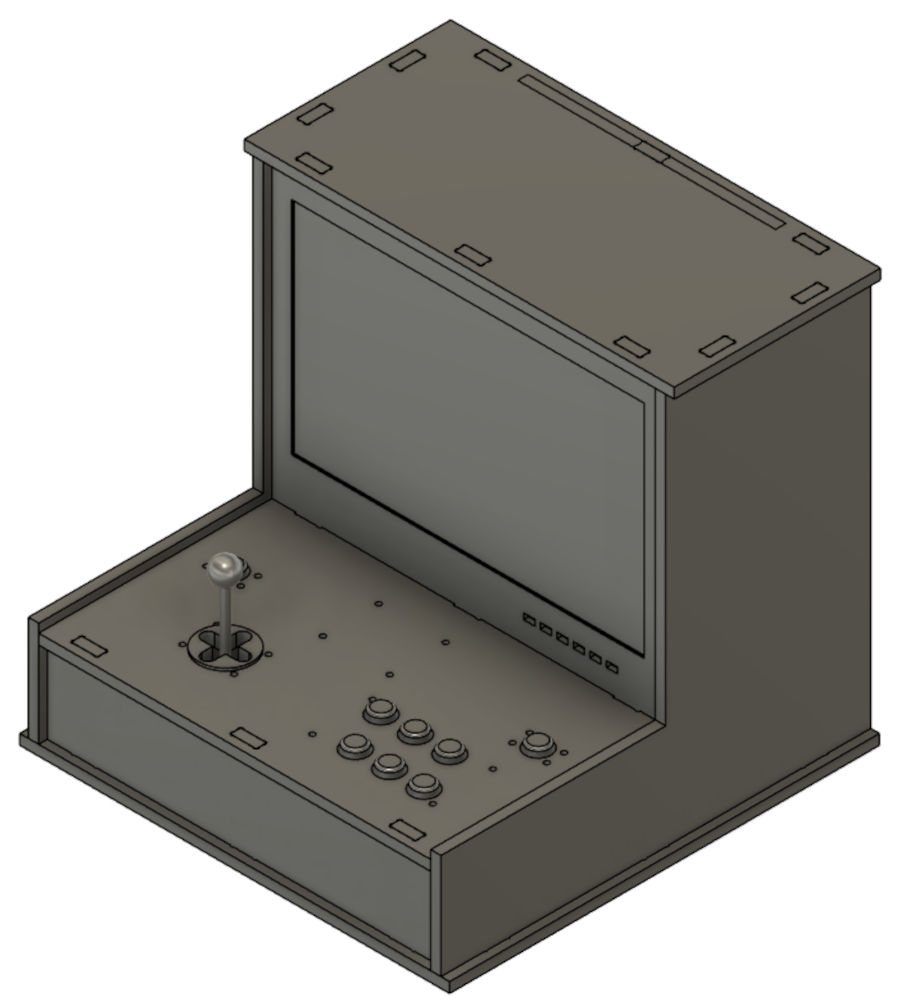
Here's a first glimpse of the enclosure I made on Week 07 (computer-controlled machining) for my arcade machine.
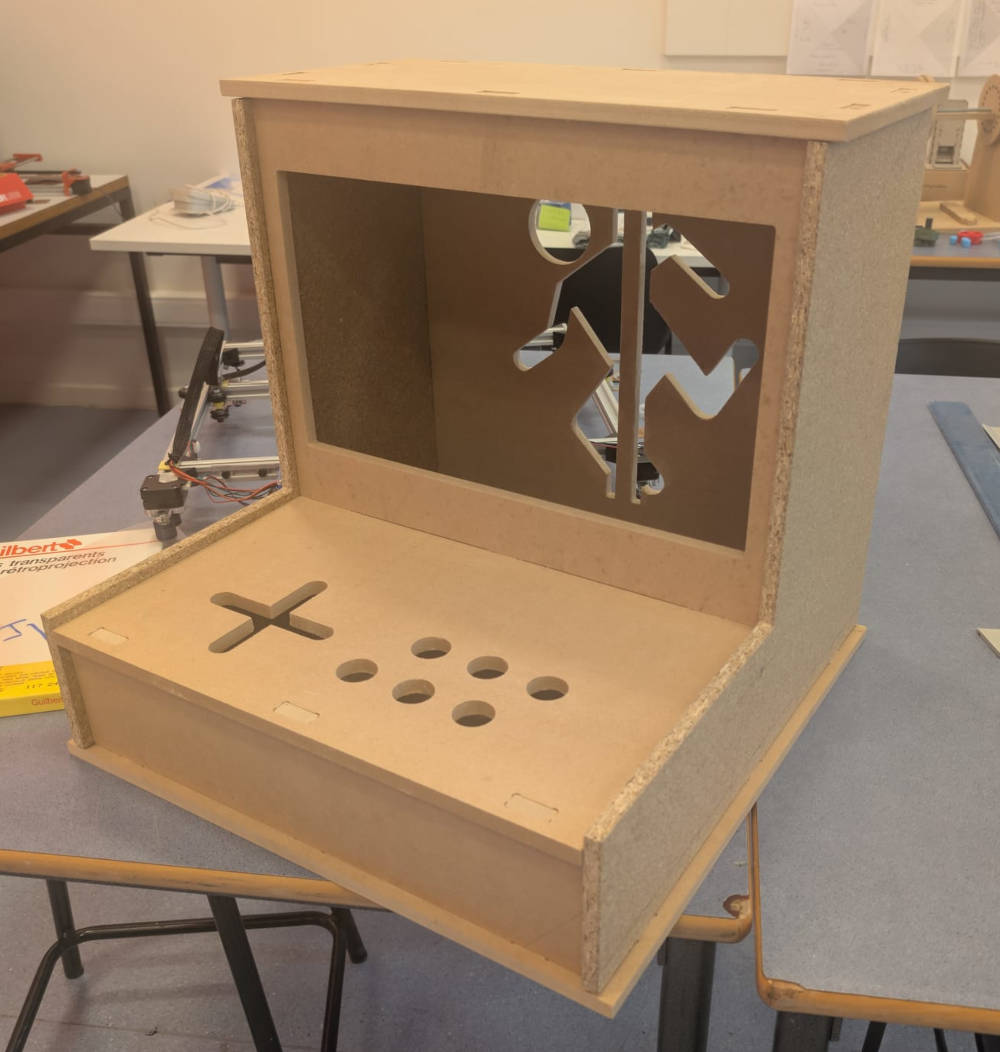
I'll work based on it and modify it to integrate everything I need to make my final project.
The main things I can think of to integrate and finalize the project are :
- PCBs to send inputs ;
- Raspberry Pi 5 to receive the data and serve as a game interface ;
- Monitor ;
- Speaker ;
- Power supply.
PCBs
My arcade machine requires multiple PCBs for everything to work well that will be fixed on the controller board with smart cable management.
Since some of my components are through hole, I decided to make my PCBs with bottom layers only.
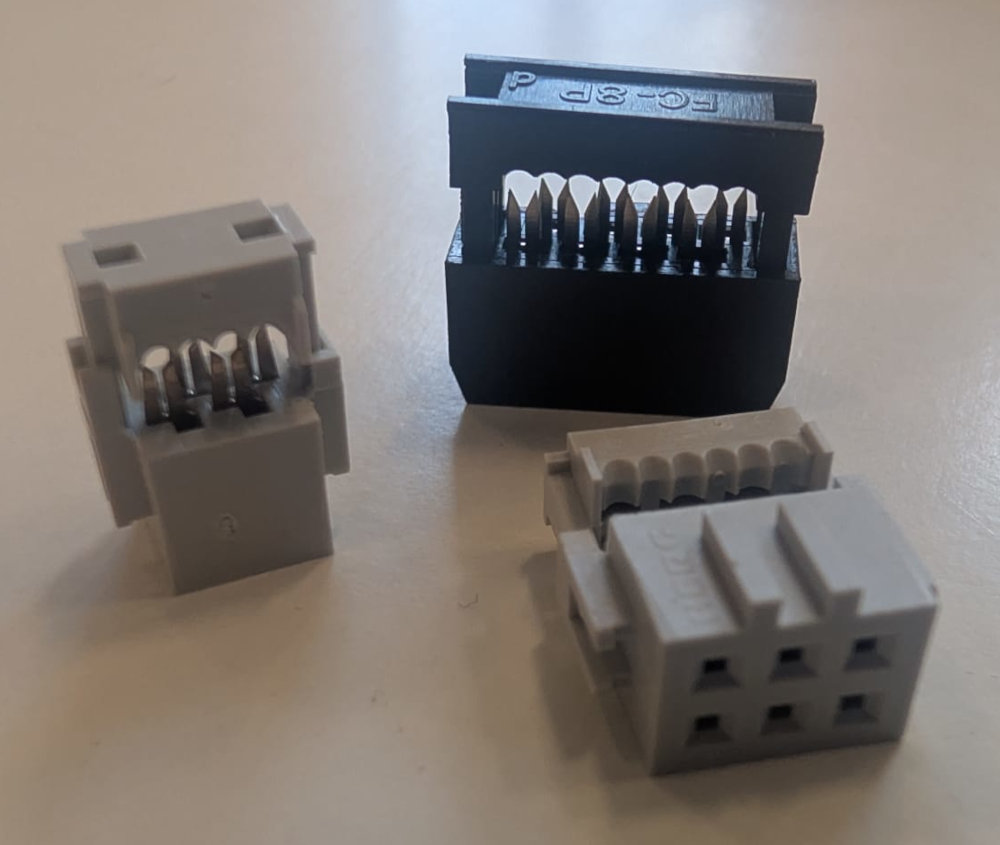
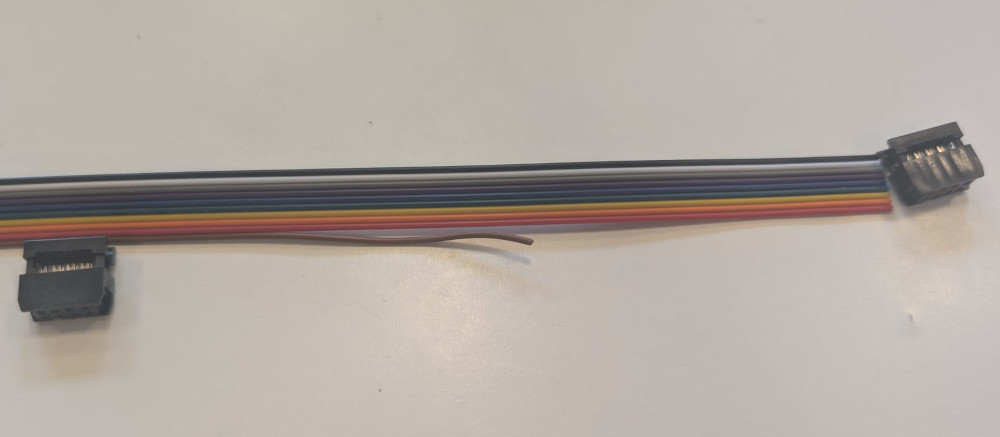
Once they'll be done, I'll need a smart and clean way to connect them together. For that, to avoid having cables flying everywhere, I'll use these IDC connectors and ribbon cables to connect them together, its main advantage being that the cables are stuck/glued to each other and the connectors are easy to plug/unplug.
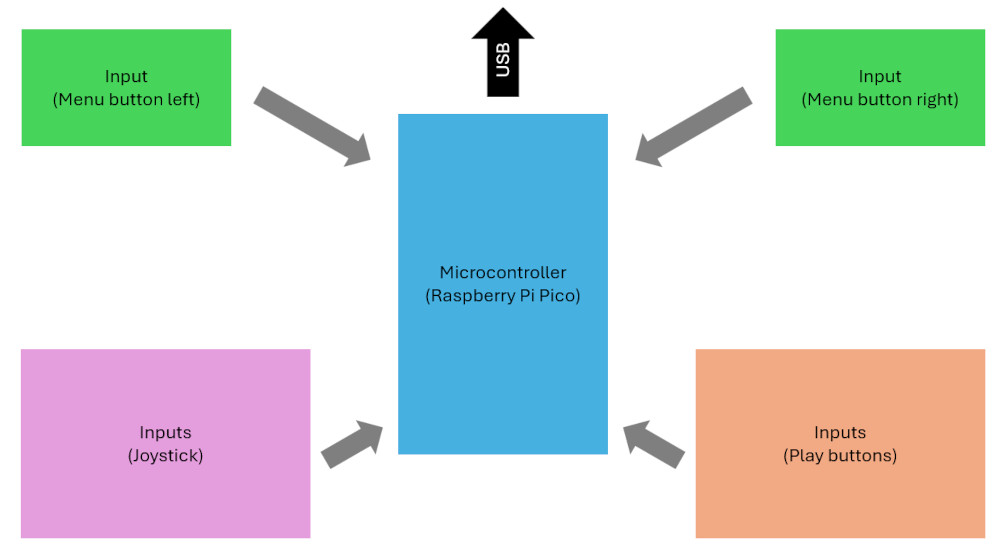
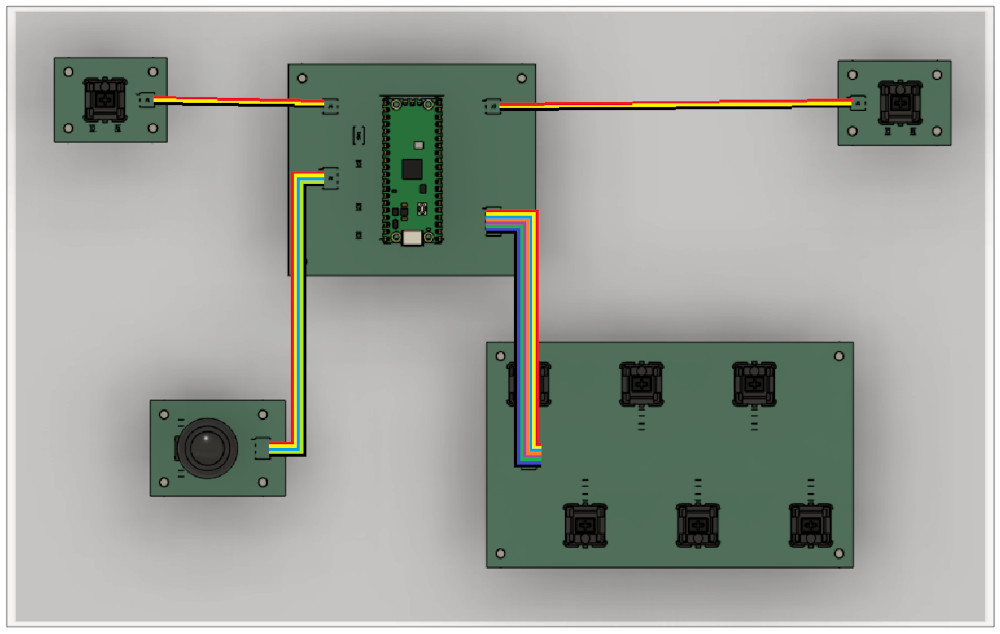
The main idea is to have the input circuits being connected to a central microcontroller PCB that will receive all the data and send it to the Raspberry Pi 5.
I just finished the PCBs and I didn't modify the enclosure yet, so for now, here's a 3D model of what I'm aiming for :
Raspberry Pi 5
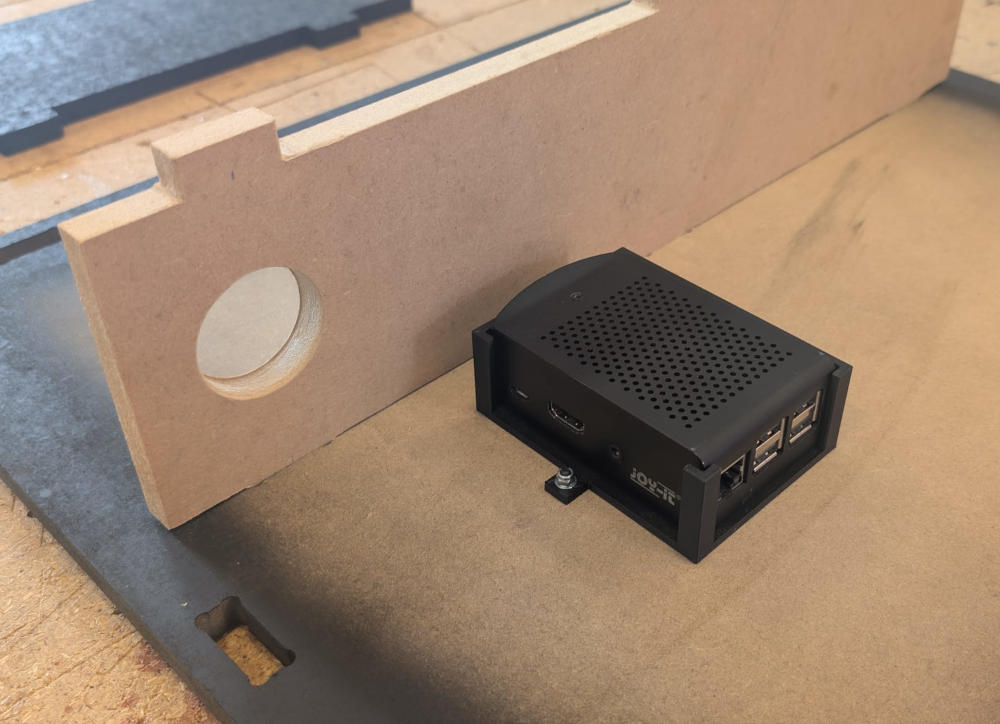
Since the Raspberry Pi 5 is a single board computer (SBC), It is already "finished", I also have a custom enclosure for it and due to the free space inside the enclosure, It wont be a problem to find a good spot for it.
The idea is to simply have a 3D model where I can just place the Raspberry Pi 5 in and a hole where its cables will go through.
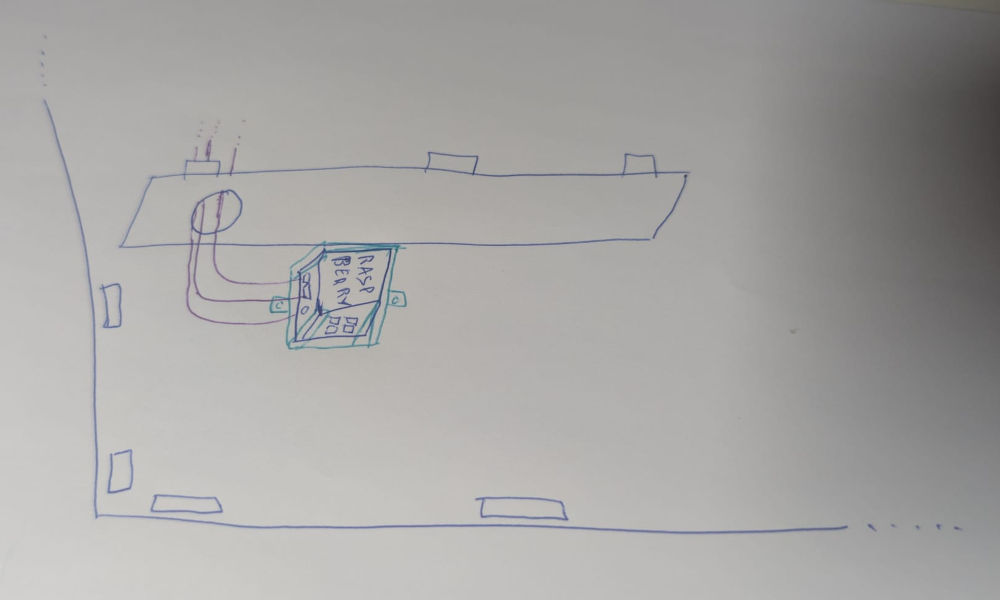
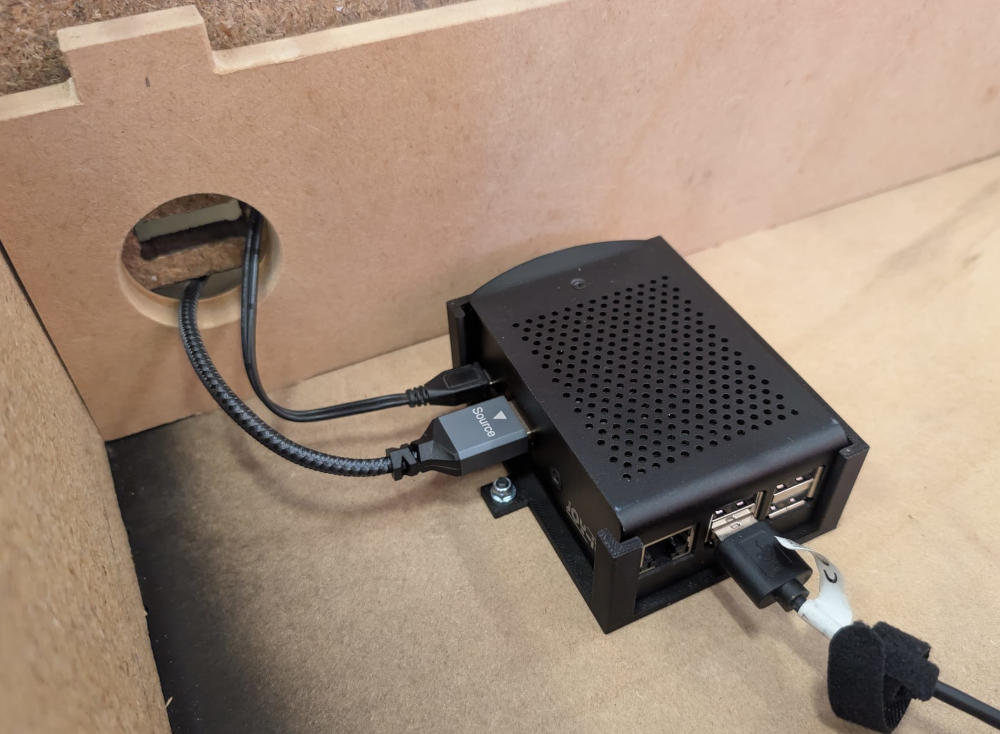
After initially using a Raspberry Pi 3 and working like this for a while, I realized it was impossible to interact with it physically since it is directly under the controller and it is annoying to dismantle so I took the opportunity to move its place after switching to a Raspberry Pi 5, final result here.
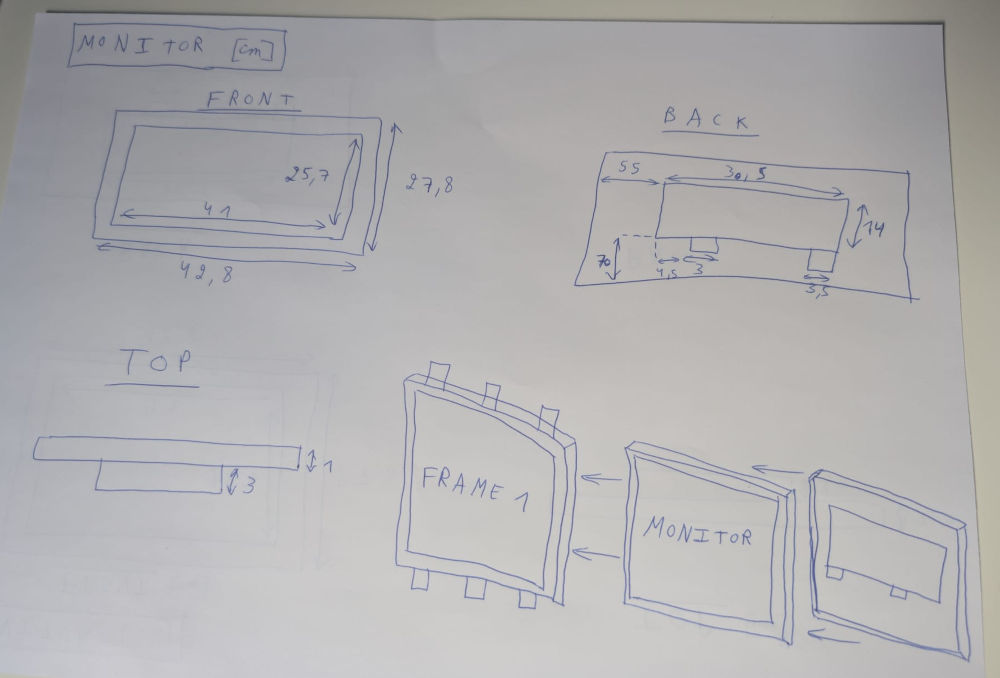
Monitor
I already found an old monitor I can use, I just need to modify the enclosure to install it correctly so only the useless part of the screen is hidden. Due to the enclosure's size, it would be easy to integrate.
The idea is to make 2 frames that will sandwich the monitor.
Speaker
I kinda forgot I needed a speaker, the easiest option would be to use an already existing one or create one myself, then connect it to the Raspberry Pi 5 using a jack cable, but the later would need a bit of research time. It would be easy to integrate, I just need a well made hole in the right spot so the sound is distributed equally.

Power supply
I'll only need two Type C electrical socket for my project, one for the monitor and the second for the Raspberry Pi 5, which himself powers PCB modules, I can do that due to their low consumption. I intend to either use a power strip or connect them to a panel mount IEC connector.
Final 3D model
After thinking of everything, I modified and remade some parts and assembled the 3D model of what the final project will look like :
Assignments checklist
- ✅Made a plan for system integration for your final project.
- ✅Documented your plan with CAD and/or sketches for system integration.
- ✅Implemented methods of packaging.
- ✅Designed your final project to look like a finished product.
- ✅Documented system integration of your final project.
- ✅Linked to your system integration documentation from your final project page.