Prior knowledge
|
I have a bit of experience in 2D drawings and a lot of experience in 3D modeling. |
Hero shot
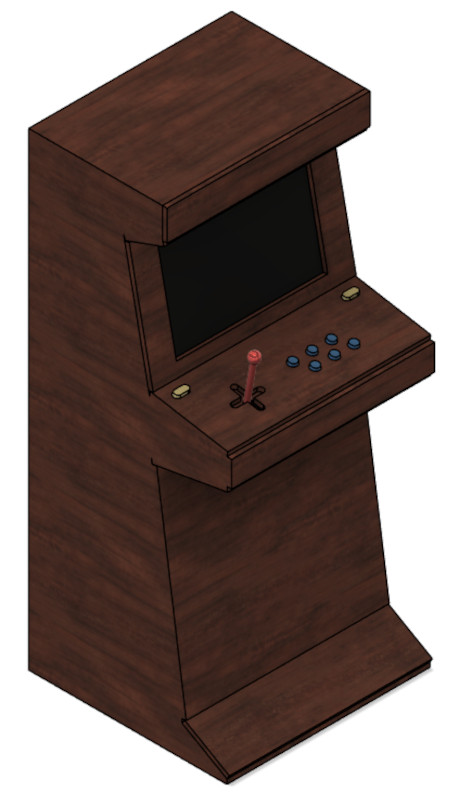
Image editing
For image editing, I compare GIMP and ImageMagick, but the latter is a command line-based tool, so it's a no go for me so I try GIMP.
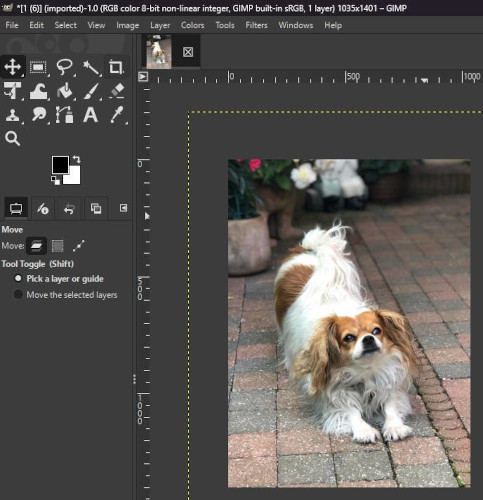
GIMP (which stand for GNU Image Manipulation Program) is a free open-source image editor. The program has images.
Here's an example of scaling and compression with an image of one of my dog, you start by opening or pasting your image on the GIMP interface.
-
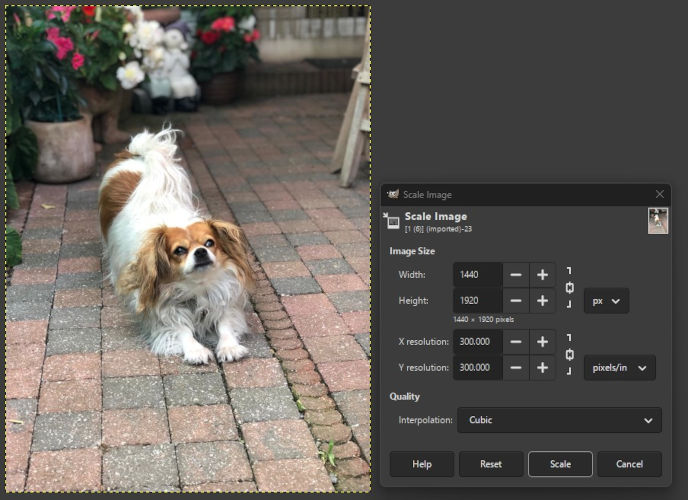
Scaling
Right click your image, select Image then Scale Image ... and change as you wish.
-
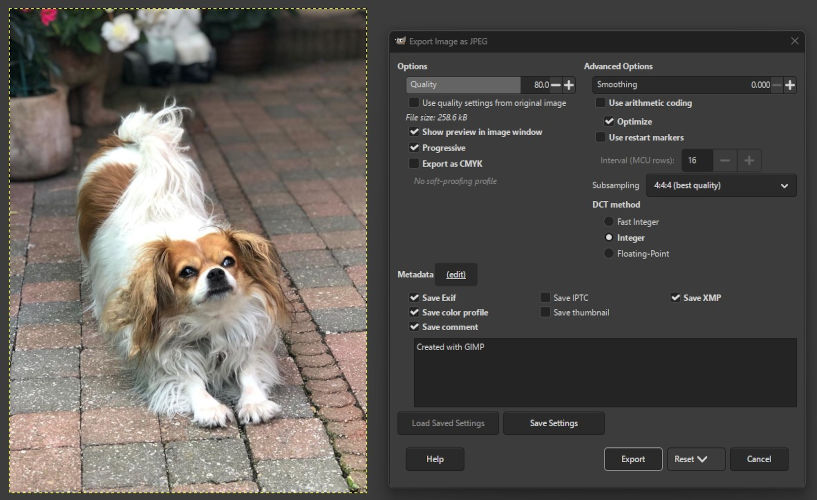
Compression
Select File then Export As ..., rename your image and make sure it ends with .jpg then change as you wish (to lower the file size, modify the quality).
Video editing
For video editing, I use Ezgif, it is an video editing website with various tools
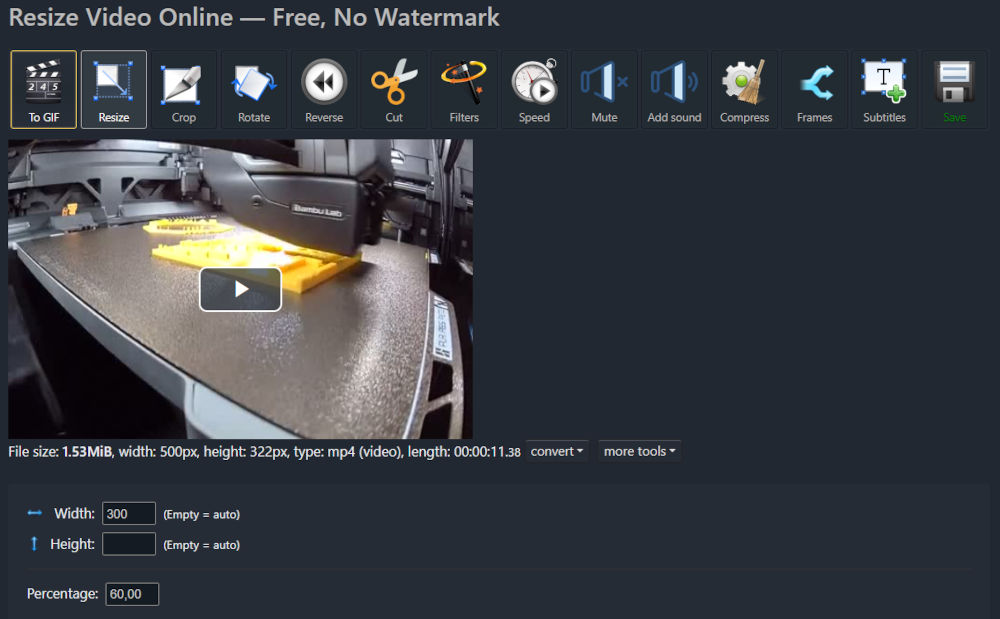
The main tools I use are : Resize, Crop, Cut and Mute, these all reduce the final size of a video.
-
Resize
Allows to change the width and height of the video in pixels.
-
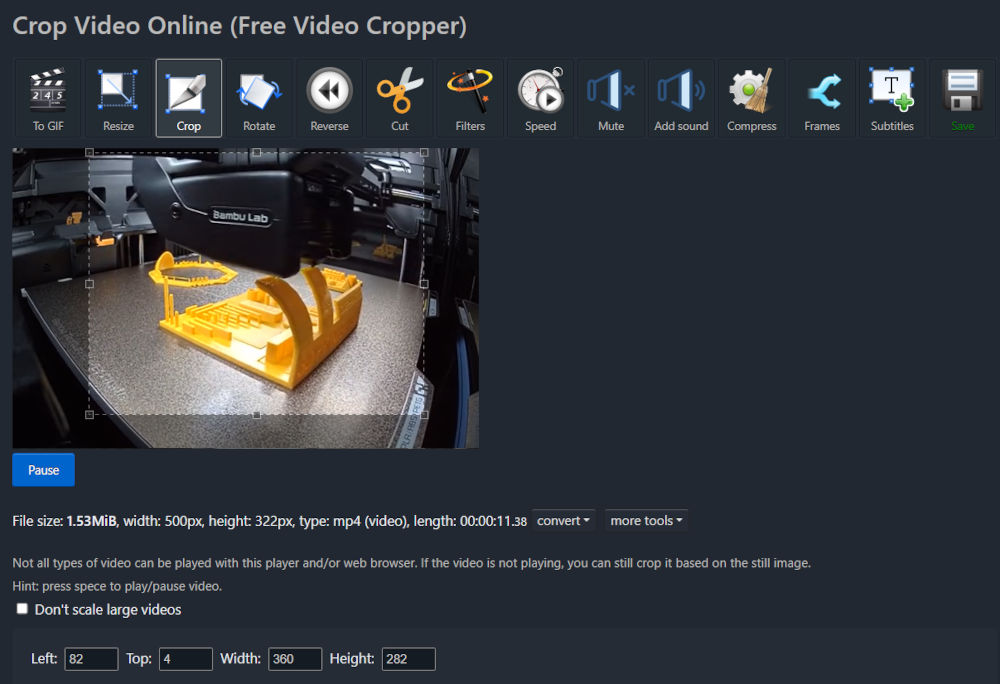
Crop
Allows to keep only a specific spot of the video by drawing a rectangle.
-
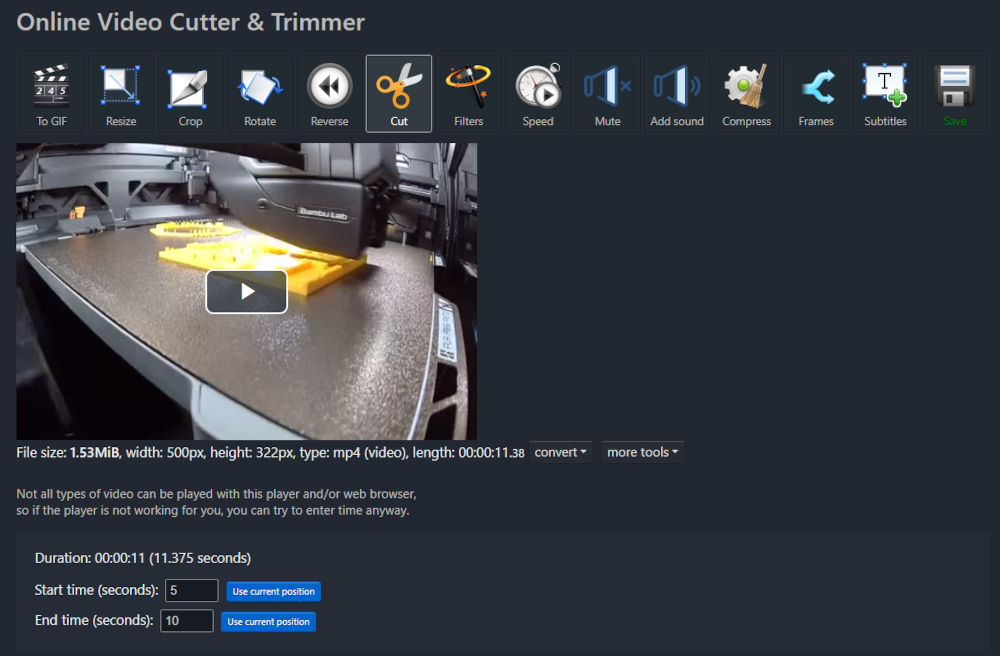
Cut
Allows to shorten the video by choosing when it starts and ends.
-
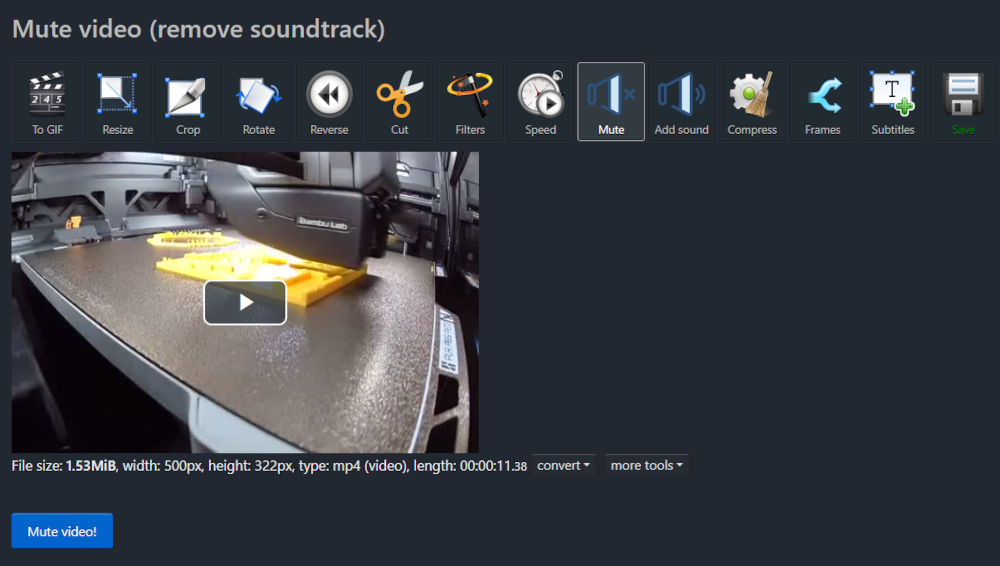
Mute
Allows to mute the entire video.
Sketch
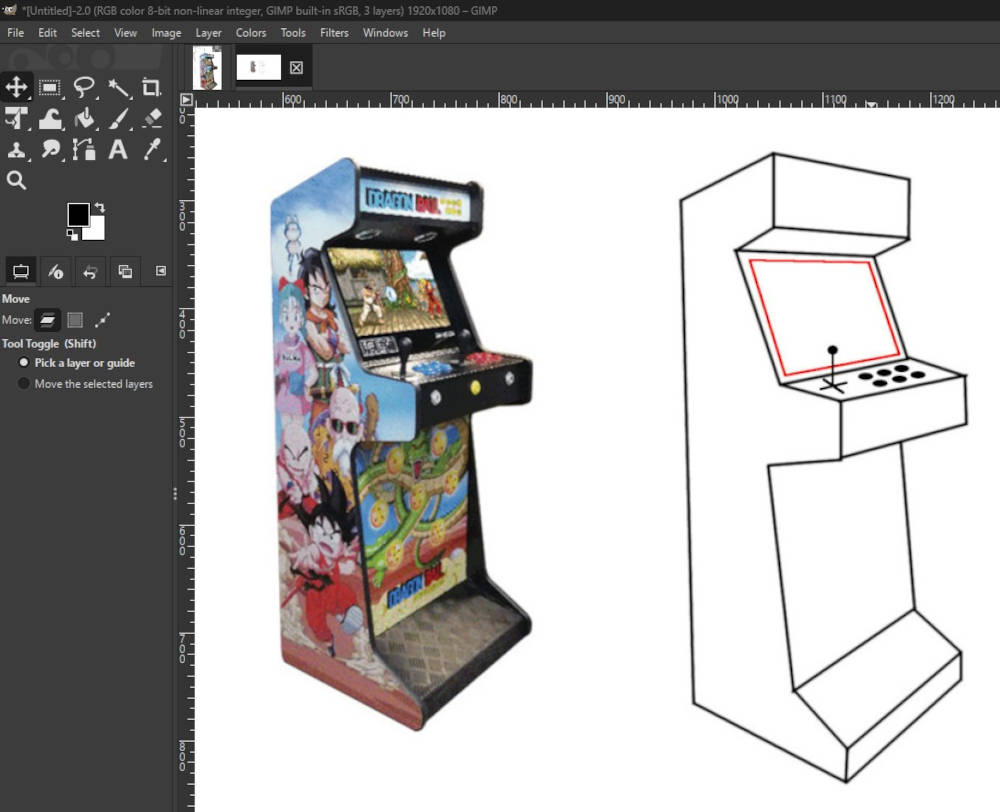
To make the sketch of my final project, I used GIMP.
I simply had a first layer with the image of the arcade machine whom I liked the design the most and, on a second layer, drew on top of it.
2D
I already used Inkscape and I still use it now and then. It is a free and open-source vector graphics editor, so mainly for 2D drawings. It possesses an interface with various tools.
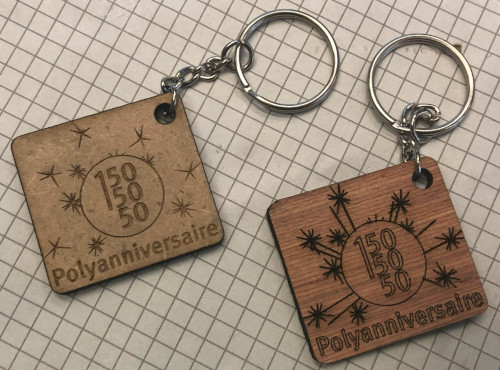
For example, last year, to celebrate the birthday of a specific event where I work at, I was asked to help make keychains with a laser cutter machine.
I just modified the drawing in Inkscape with different colors to either cut or engrave, then export the file into a laser cutter machine.

3D
I already have a bit of experience with SolidWorks but that was a long time ago and for 6 years now, I've used Autodesk Fusion and it will be the program that I use for 3D modeling for my final project.
We were asked to try more programs, so I chose Onshape and FreeCAD.
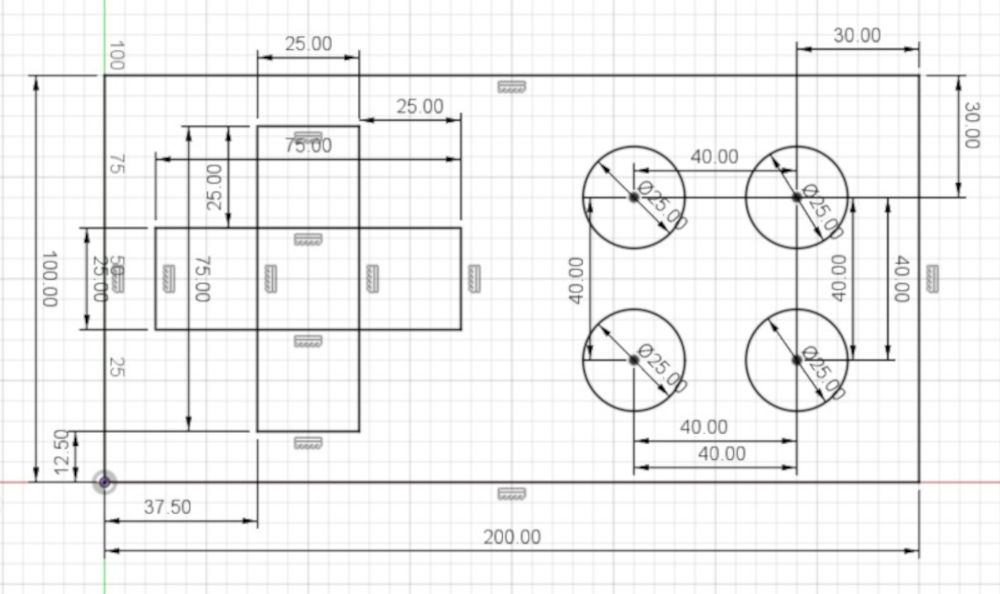
To try them, I'm going to create the same 3D model on all three programs : a joystick, 4 buttons and their base.
-
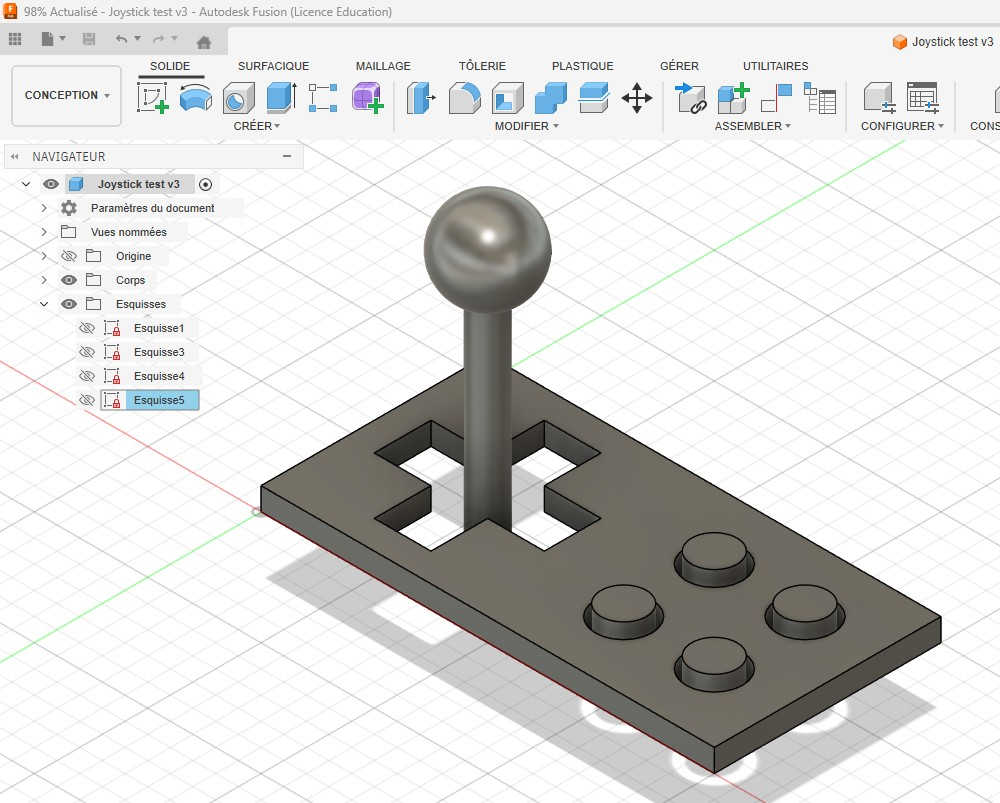
Autodesk Fusion
Autodesk Fusion is a free software (limited features with the free version) and cloud-based parametric or direct 3D modeler.
I've used it for the past 6 years so I already know a lot about it. I like the way it's tools are well organized and explained, the software allows for more than just making 3D, it can also create files for a CNC machine or make simulations and animations.
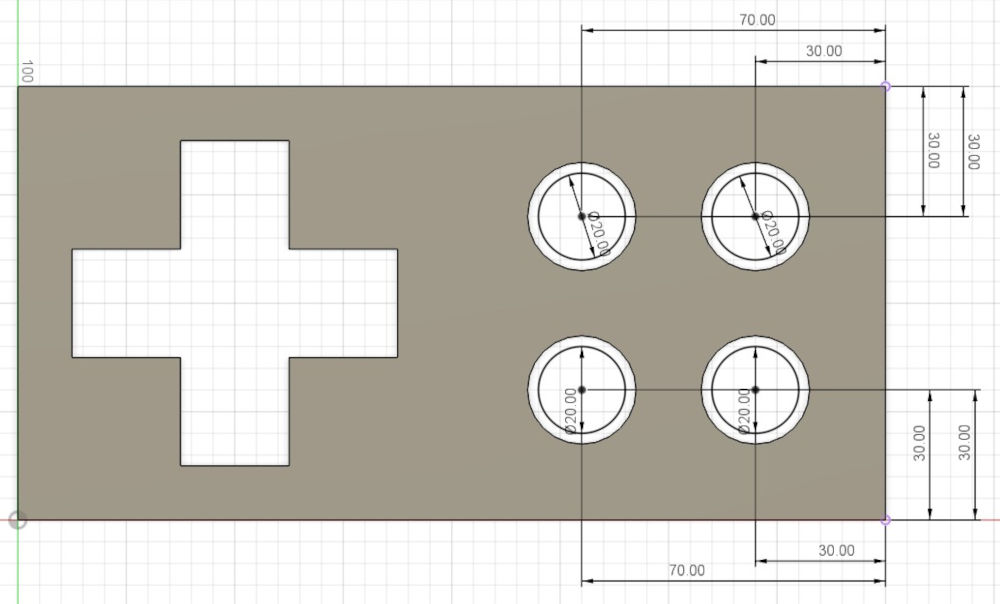
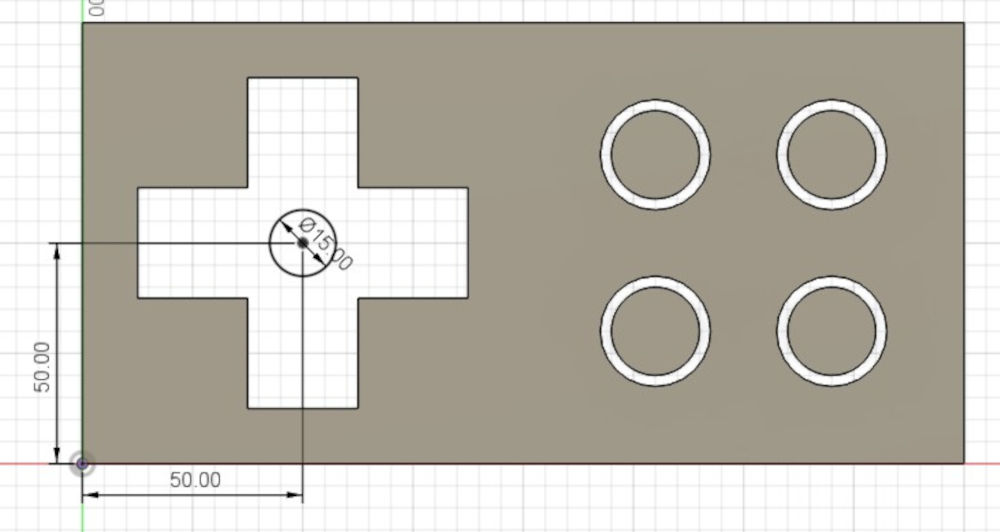
I first start off with the base, then extrude it :
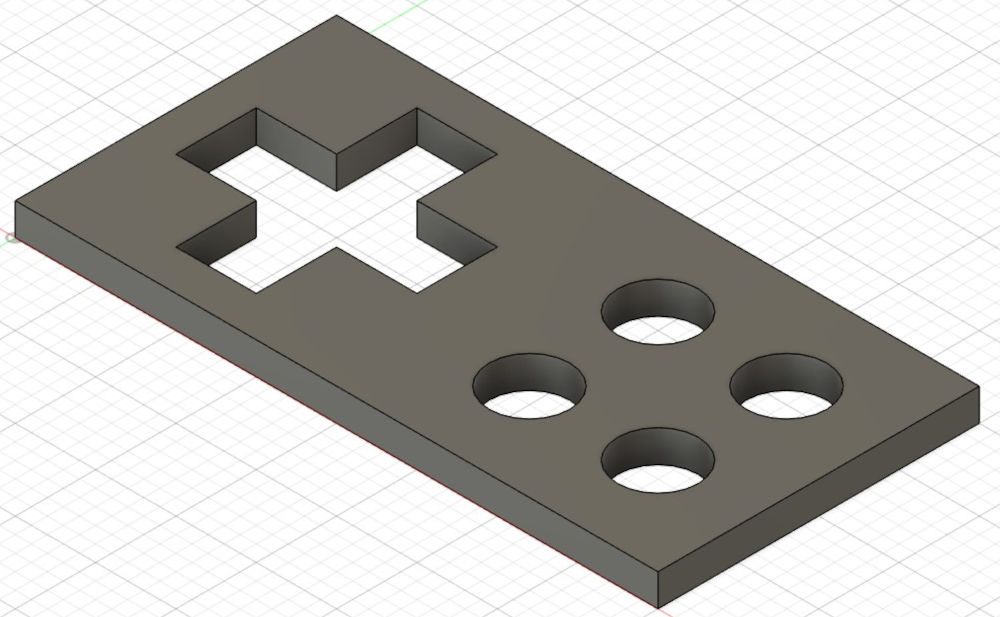
Then I add the buttons :
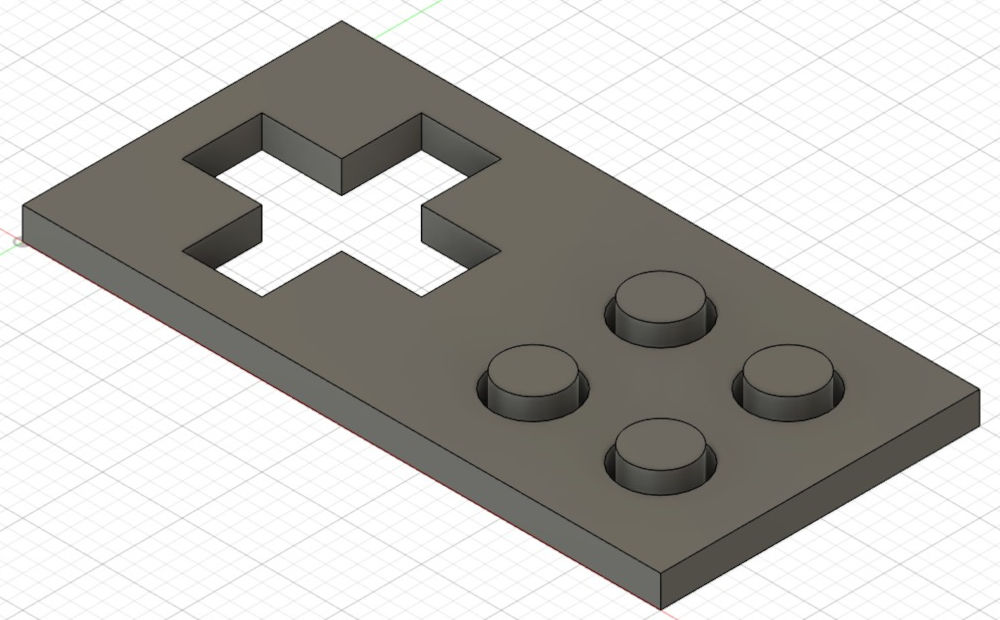
After that, the joystick base :

And finally, the joystick head, which I created using a revolve operation :
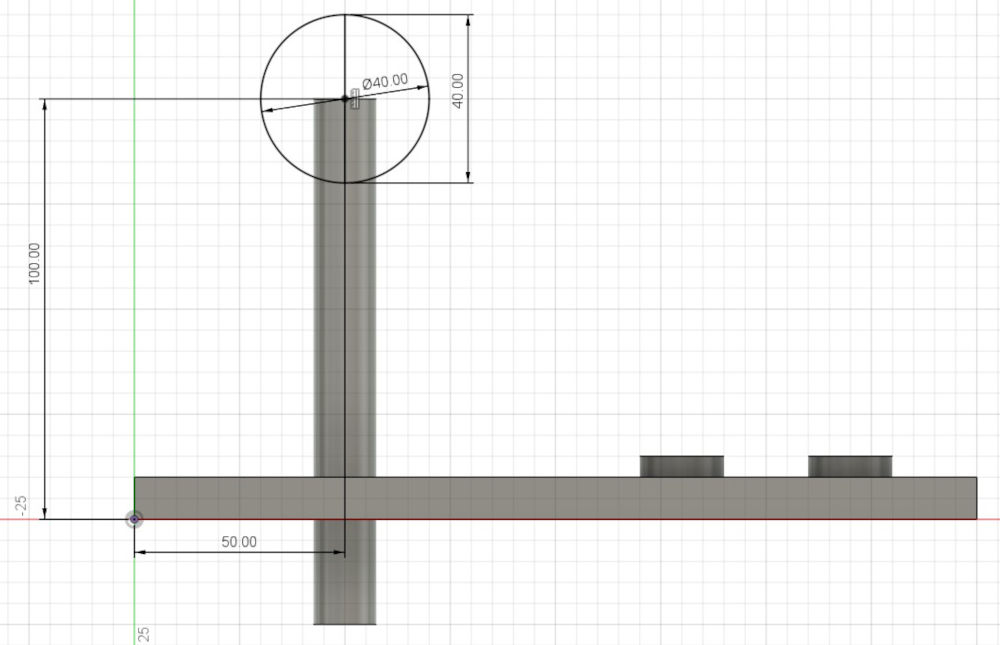
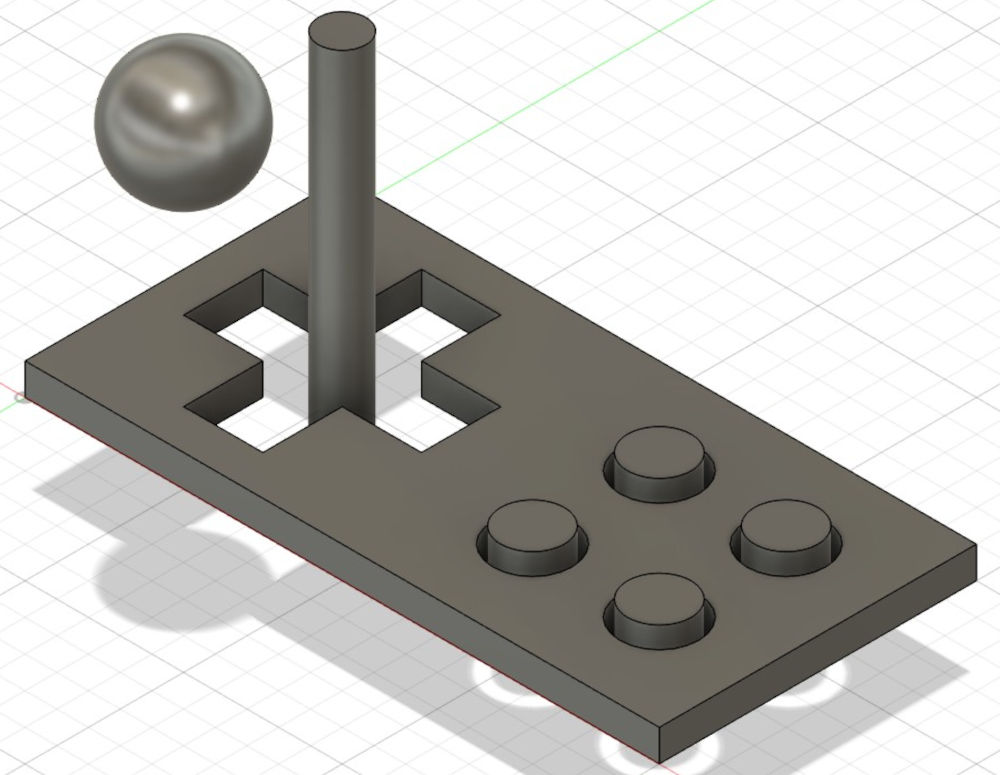
I then move the joystick head to center it on its base :
-
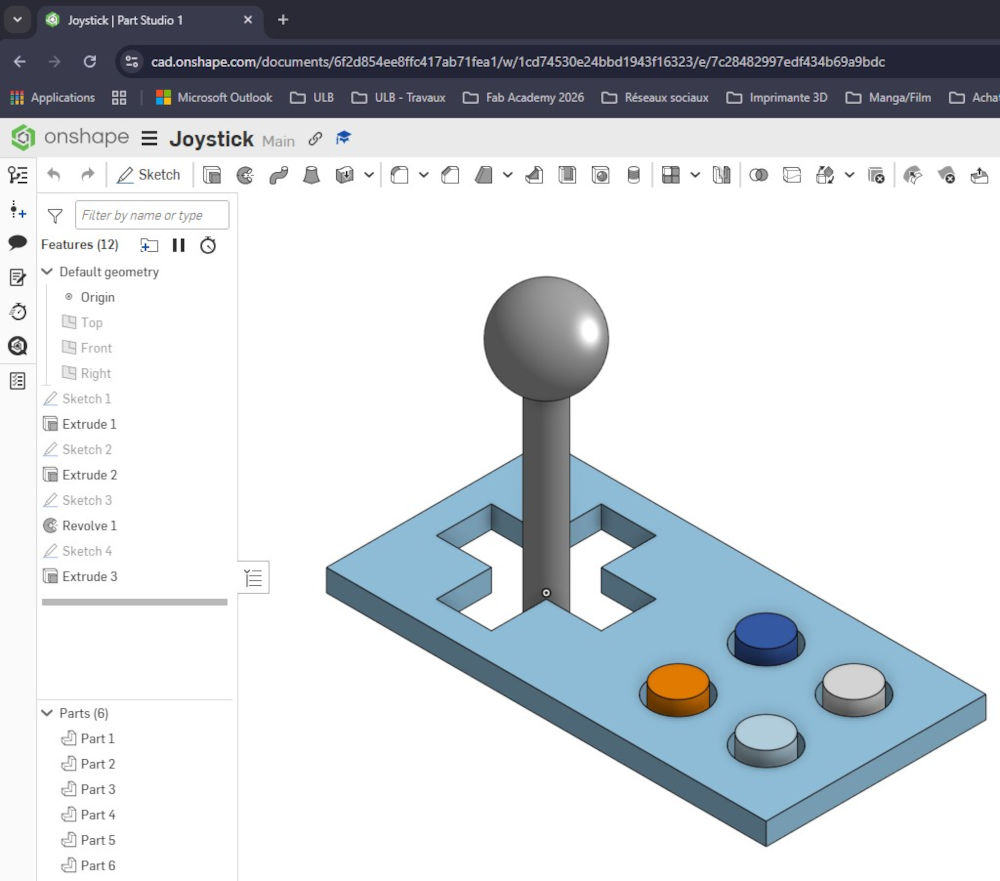
Onshape
Onshape is a free browser and cloud-based parametric or direct 3D modeler.
Its interface and tools are easy to learn and I've had no problem while making the 3D model. I don't like the fact that it is browser based.
The process is the same as Autodesk Fusion, one element at a time. The different colors are due to the software.
-
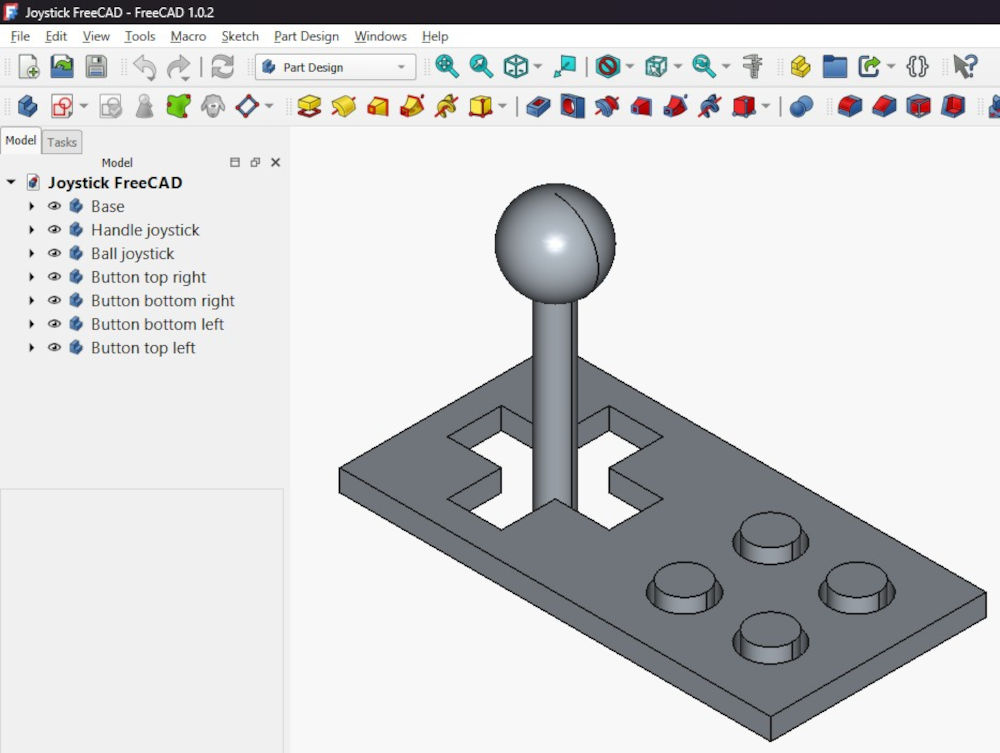
FreeCAD
FreeCAD is a free software and open-source parametric or direct 3D modeler.
Its interface and tools are easy to learn but I don't like the fact that when I want to a new element on the model, I have to do it "on the void" instead of clicking on the existing model to start from an existing surface.
The process is the same as Autodesk Fusion, one element at a time.
Animation
I decided to try an animation with the 3D model I used to test the 3D modeling programs, I try first on Autodesk Fusion but its animation feature wasn't very interesting for what I had in mind, so I try Blender.
After importing the STL file of my 3D model that got exported from Autodesk Fusion, I look a lot of Youtube videos and ask ChatGPT to learn Blender.
Here are some tutorials for basic operations :
-
Ungroup a piece
My STL file was at first an assembly of 6 pieces, but after importing it in Blender, it was grouped and considered a single piece.
To separate them :
- In Object Mode (Blender has 2 modes : Object Mode and Edit Mode) and "left click" the piece;
- Press "Tab" to enter Edit Mode;
- Press "P";
- Select By Loose Parts.
My pieces are now ungrouped.
-
Linking objects
Now that my pieces are ungrouped, they are all unlinked, whenever I move a piece, it moves alone but I want all of the pieces to follow.
To link them between each other :
- In Object Mode, "left click" the child piece (the extra piece);
- Hold "Shift" and "left click" the parent piece (the base piece);
- Press "Right click";
- Press "Control" and "P";
- Select Object.
My pieces are now linked between each other. If you have more than 2 pieces, do everything again but with the others children pieces, I suggest doing this before going to the next step.
-
Origin
Before animating, the origin of the piece I want to animate is not at the bottom and would have made the animation really weird so I need to :
- In Object Mode, "left click" the piece;
- Select Object (on top of the screen), then Set Origin, then Origin to Geometry;
- Press "Tab" to enter Edit Mode;
- Select Select Mode : Face then with your mouse, "left click" or select the face you want your origin on;
- Hold "Shift" and "S" and select Cursor to Selected;
- Press "Tab" to enter Object Mode;
- Press "left click" on the piece then select Object, then Set Origin, then Origin to 3D Cursor;
The origin is now centered at the bottom of my piece (Youtube tutorial).
-
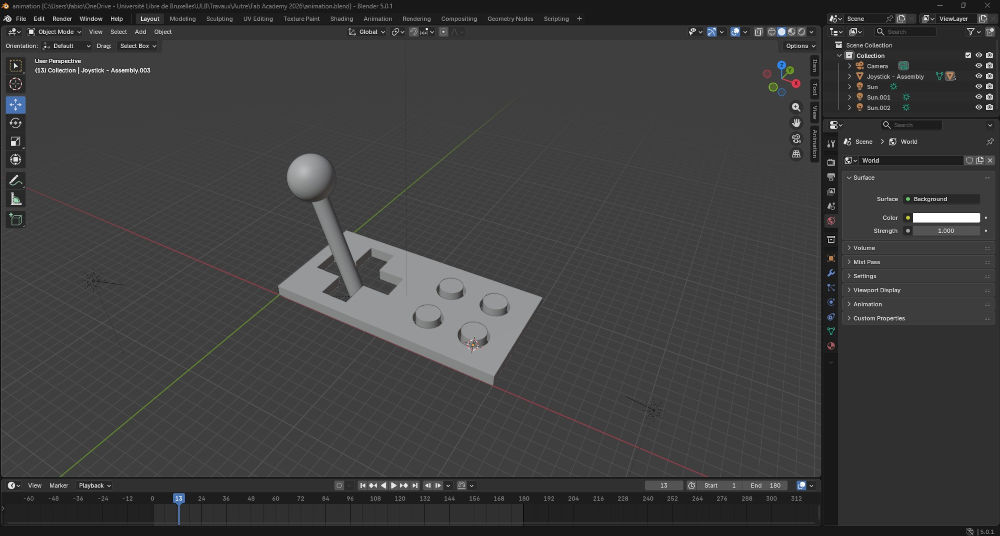
Animation
Now for what looks like the hard part but is actually easy.
- In Object Mode, "left click" the piece you want to animate;
- Press "I" to insert a keyframe (like a checkpoint or save of the animation);
- Go forward in the keyframe (bar with numbers at the bottom of the screen, for this example, I chose 10 frames);
- Change the parameters in the Object window (on the right of the screen, you can change location, rotation, ...);
- Press "I" to insert a keyframe;
- Repeat until you reach the end of your desired animation.
Your animation is now done. You can click play (on the bottom of the screen, above the bar with numbers) to check it.
-
Rendering
To render your animation and export it :
- Change the parameters in the Output window (on the right of the screen, you can change resolution, frame range, output, ...);
- Select Render (on top of the screen), then Render Animation.
Your animation is now rendered and exported.
The order for everything to work fine is : Ungroup a piece, linking objects, origin (for one piece), animation (for one piece) and redo step 3 (origin) and 4 (animation) for all the other pieces.
Now that this is done, I want to create a GIF out of this animation but Blender can't do that, so I use GIMP and the help of ChatGPT.
I have to rename all the images of the render in a specific way, so I place them in a folder and press "Shift" and "Right click" and press Open PowerShell here.
Type the following line in the terminal that opens :
                $i = 1; Get-ChildItem -File | Sort-Object Name | ForEach-Object
                { Rename-Item $_.FullName ("Frame {0:D3} (83ms){1}" -f $i++, $_.Extension) }
This will rename all of the images like so : Frame 00x (83ms) (with x being the number of the frame and 83 the delay between each frame).
-
Making a GIF
To create a GIF using GIMP :
- Select File then Open as Layers ... and select all of the files of the render;
- Select File then Export As ... and a new window opens;
- Uncheck Save Comment, check As Animation and Loop Forever, specify the delay between frames and export.
Your GIF is finally done.
To lower the GIF file size, I also use an online GIF compressor (N°1) which is limited to 10 compression per days and later found online GIF compressor (N°2) that gives more options of compression.
Here's my final animation :
3D model of my final project
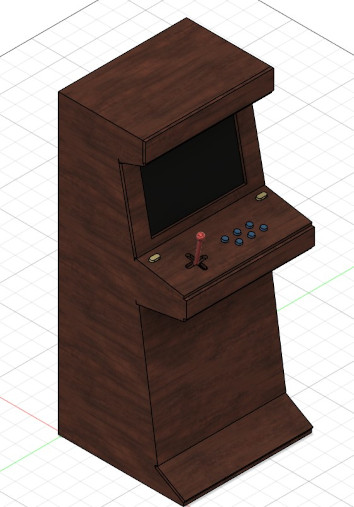
To make the 3D model, I'll take inspiration from my sketch (made with GIMP), use Autodesk Fusion and ask ChatGPT typical dimensions for an arcade machine.
To make the model, I start with the base and then add new elements on the same design (this is not an assembly, just one model), I try to give it some angles to have a typical look of an arcade machine (I had a bit of trouble for some of the pieces who had an angle), I also take off matter for the joystick and the buttons holes to then add them in these holes.
Finally, I give the surfaces color to have a first idea of what I'm aiming for.
Here is a GIF showing step by step how I created the 3D model and an image of the final model :
Problem(s) met
-
FreeCAD and multiple bodies
It was my first time using FreeCAD and when I tried to add a second piece inside my first piece (in a hole), FreeCAD will let me make a new sketch but wont extrude my new piece. To fix this, I have to add a new body and make a new sketch on it to create a second piece and place it correctly inside the first piece (Onshape and Autodesk Fusion don't have that problem).
Useful file(s) (Click to download)
- Joystick 3D file (Onshape, doesn't have a file extension proper to it so here's the stl file)
- Joystick 3D file (FreeCAD)
- Joystick 3D file (Autodesk Fusion)
- Joystick animation file (Blender)
- Arcade machine 3D file (Autodesk Fusion)
Assignments checklist
- ✅Modelled experimental objects/part of a possible final project in 2D and/or 3D software.
- ✅Shown how you did it with words/images/screenshots.
- ✅Documented how you compressed your image and video files.
- ✅Included your original design files.