12. Mechanical Design, Machine Design
▶ Mechanical Design
- Design a machine that includes mechanism + actuation + automation
- Build the mechanical parts and operate it manually.
● Introduction
This assignment is a group work only so because I’m alone I will work with my Instructure.
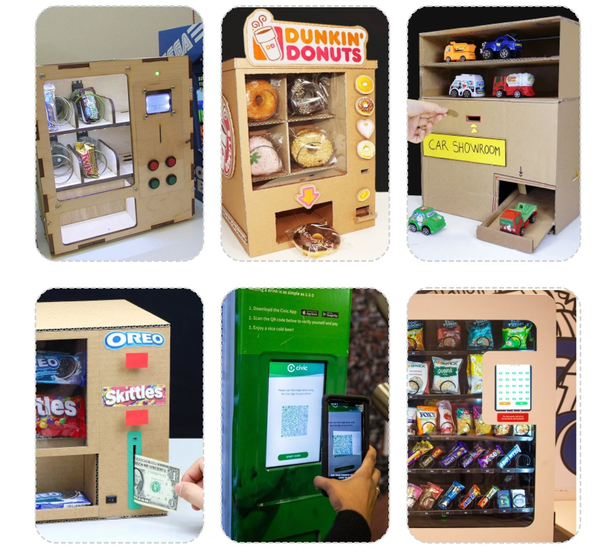
I start searching for a simple project something with all the requirements that include mechanism, actuation, and automation in addition functionally and found a couple vending machine projects:
Venduino is a DIY Arduino vending machine.
there are donut vending machines toys and chocolate vending machines and different payment ways are coins or cash or by scanning a code for online payment
Laser Cut Vending Machine
This is a perfect project for me because it’s easy and includes all the requirements and there are many resources and tutorials about this project.
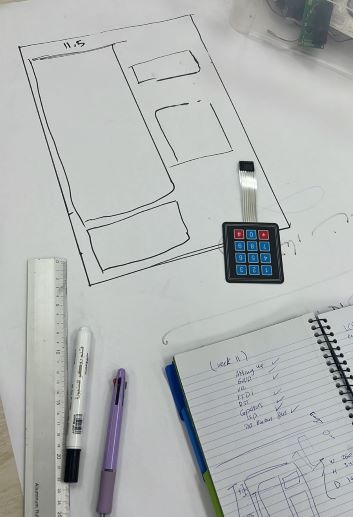
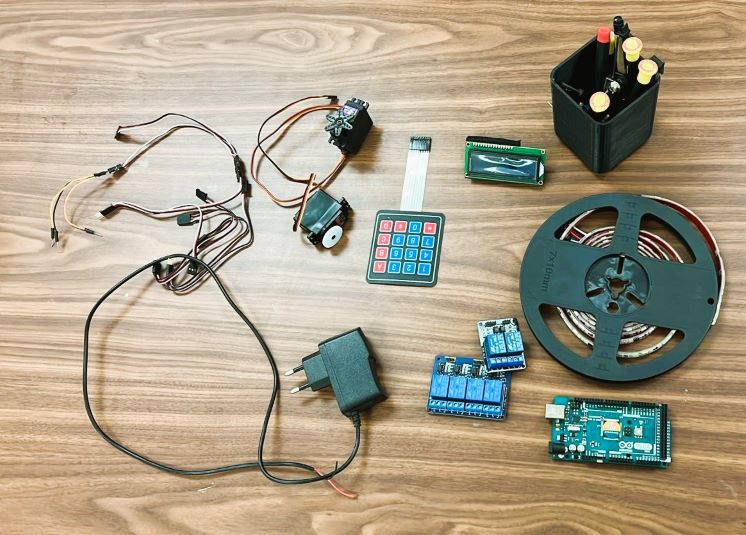
● The materials
- 3x sheets of3 Sheets of Colored Acrylic 6mm - 60x40 cm
- 1x Sheet of transparent Acrylic 3mm - 60x40 cm
- 1x Arduino mega
- 4x Small Servo Motor
- 4x Spring
- 1x LCD 2×16
- 1x Keypad
● Software used
Mechanical design by Mkaercase and Inlscap

The programmer
● Rough sketch

● Fabrication
The main body
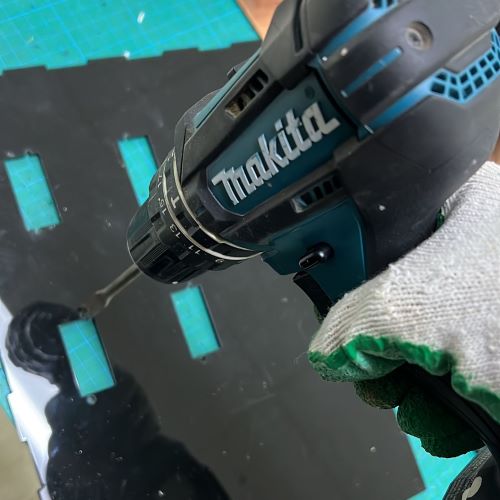
the body of the vending machine is based on the joints so I designing the body by using the T-slot joints but because there is a problem with Acrylic cutting I decide to move to the easiest way to cut the acrylic soft and clean by using Finger joints.
first I design a solid box by https://ar.makercase.com/#/basicbox and after this I Saved the trace and by Inkscape I add the holes
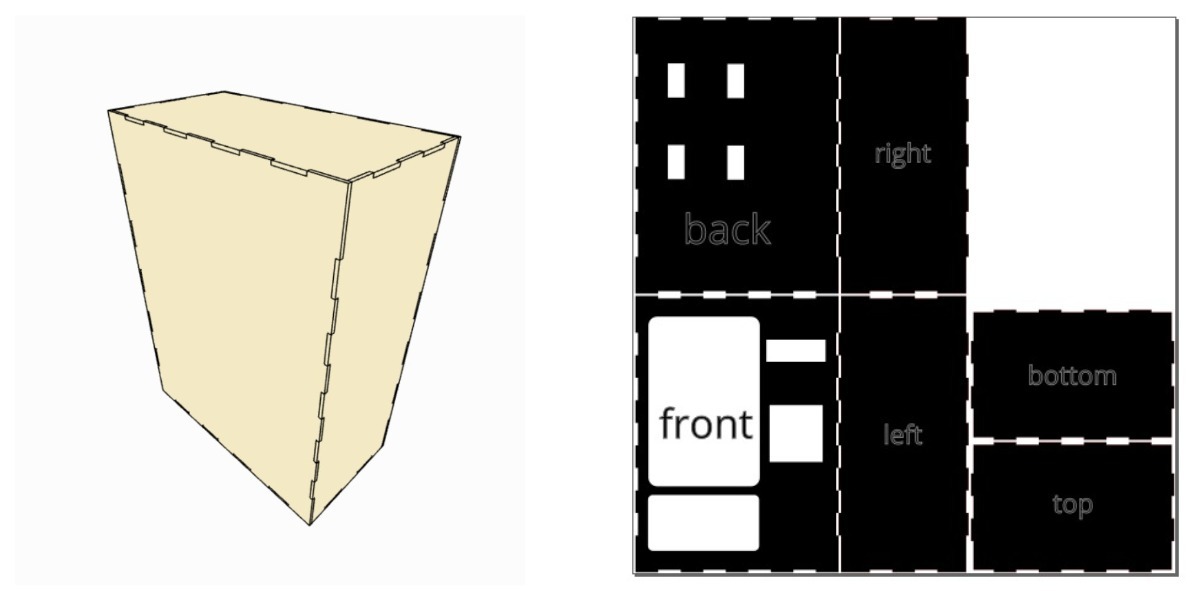
cutting the body with laser cutter and assembly all the pieces by using CHLOROFORM
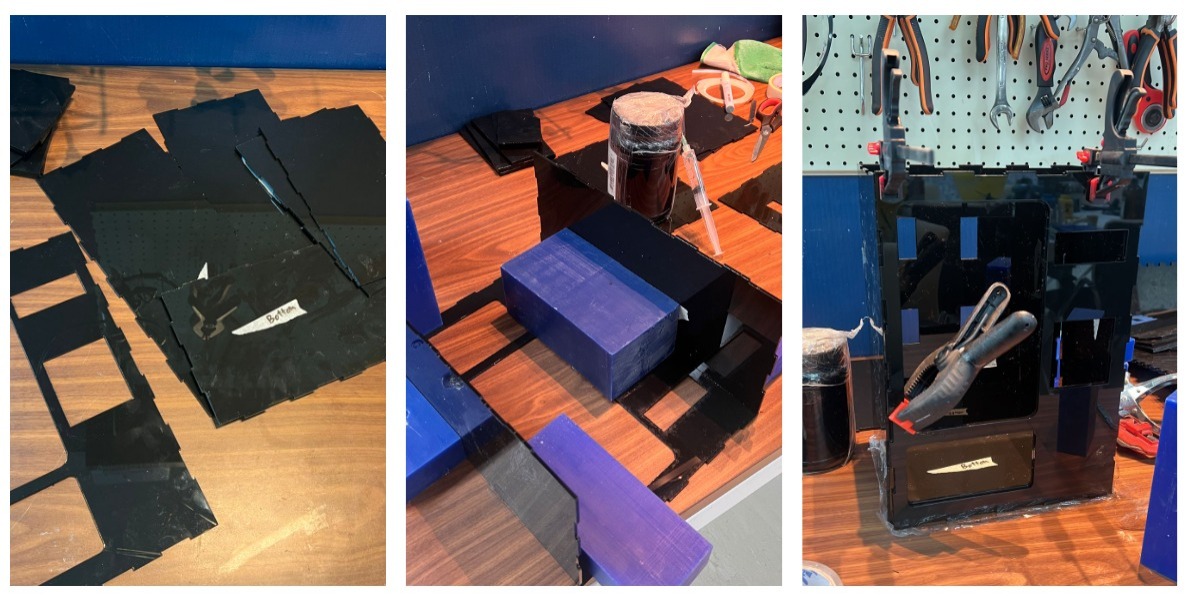
I forgot to add servos holes in my Design so I drill it
made a spring
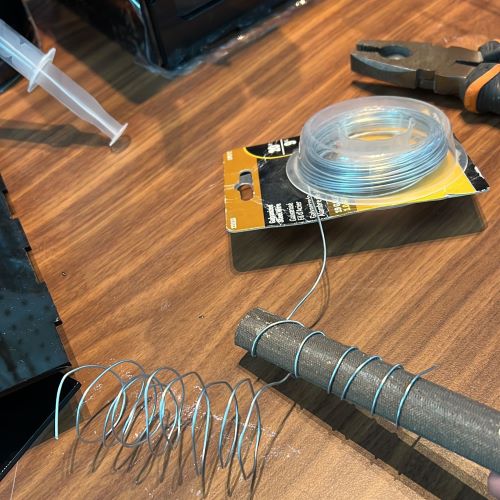
Made the spring that will push the Items, If you press the code number of items they need from the keypad the spring will move in 360 degrees one time to push the item down to the pickup open
shelves
To assembly, the shelves was not an easy process. the shelves stick by one side only and they should be straight and very staple to hold the items very well.
● The output and Input devices
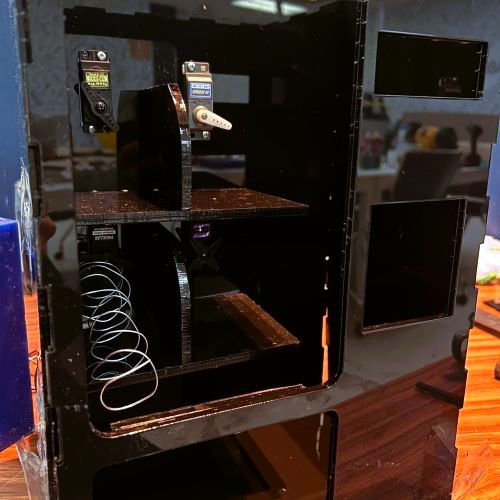
The Servos
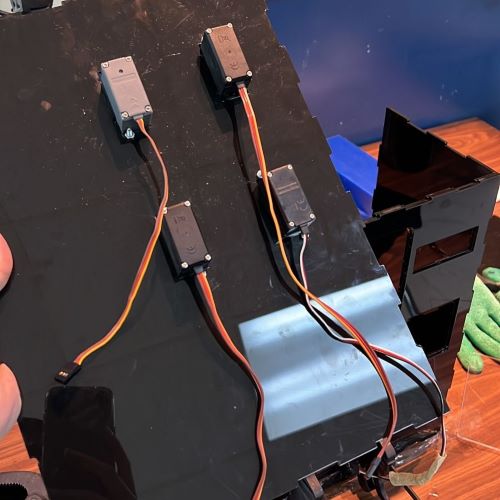
start assembly of the Servos I using 4 serves (360 degrees) so technically I will have 4 Items, each servo will connect with the keypad and LCD screen.
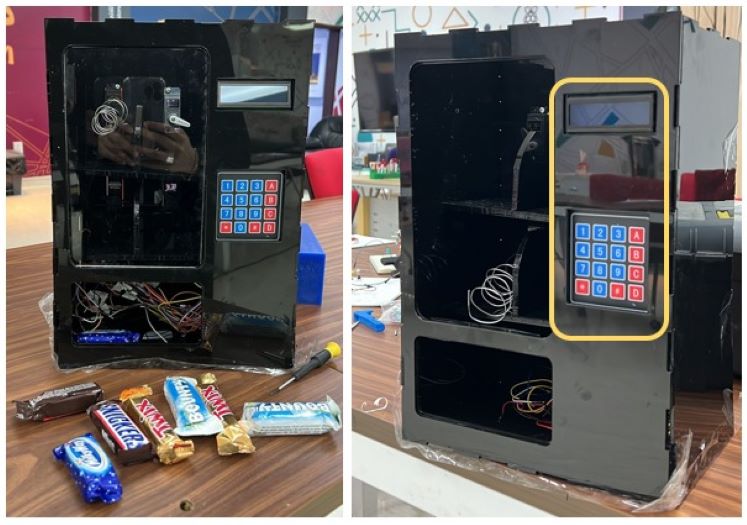
Keypad 4x4
the keypad is the main component in the Technical part. the servos and LCD screen connect with it.
LCD Screen
If you write the code number for the items you need its will be shown on the LCD screen and the servo will move to push it.
● Connection
You find it with details in group assignment page Group assignment
● Coding
You find it with details in group assignment page Group assignment
● Automation
Youtube
problems
I’m unable to push files from my repository and getting error.
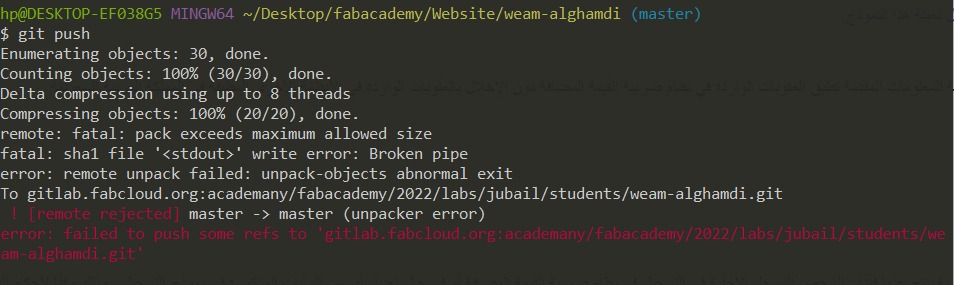
So I tried to following the steps (Failed pushing files to the repo) to fix it) but it does not fix after this I try with my Instructure after many commit and we spent 1 hour trying we use the “git reset” command with the “–hard” option.
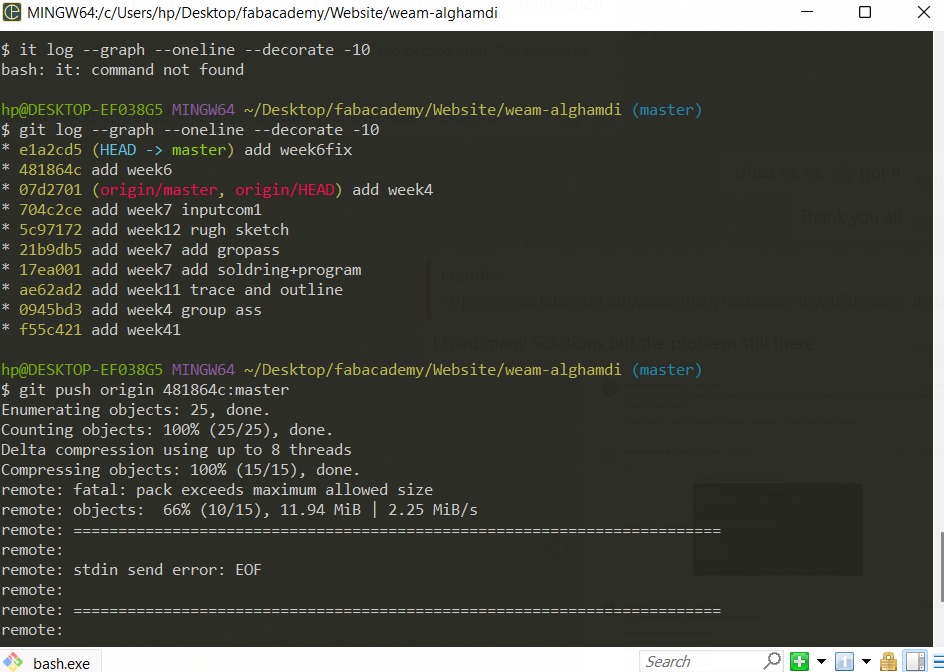
 git log --graph --oneline --decorate -10
git show
git diff-tree --no-commit-id --name-only -r 481864c
git reset --hard HEAD~1

I faced a problem when I try to cut the 6mm Acrylic sheets the laser cutter do not go to the correct depth do the finishing wasn’t good after trying many times I decided to change the acrylic depth by 3mm
Future developments
Add number: To improve my machine I want to add numbers on the shelves so if you want to choose any product you will know which the number of shelves.
QR Code: On another side, I would like to connect the machine by the application so I can add the QR code and the people come to scan it and then can choose the number for the product then the servo will move automatically.