6. 3D Scanning and printing
Individual assignment
- Design and 3D print an object (small, few cm3, limited by printer time) that could not be easily made subtractively.
- 3D scan an object, try to prepare it for printing (and optionally print it.
● Design an object
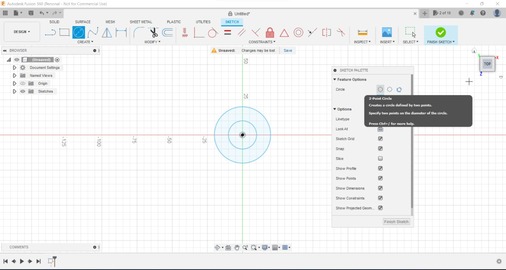
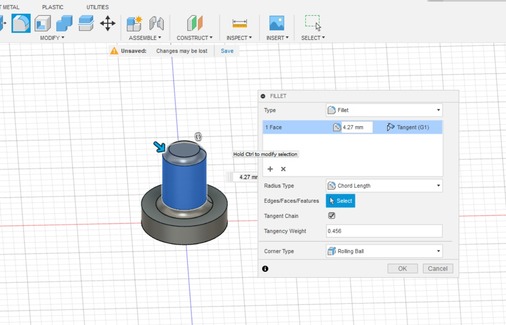
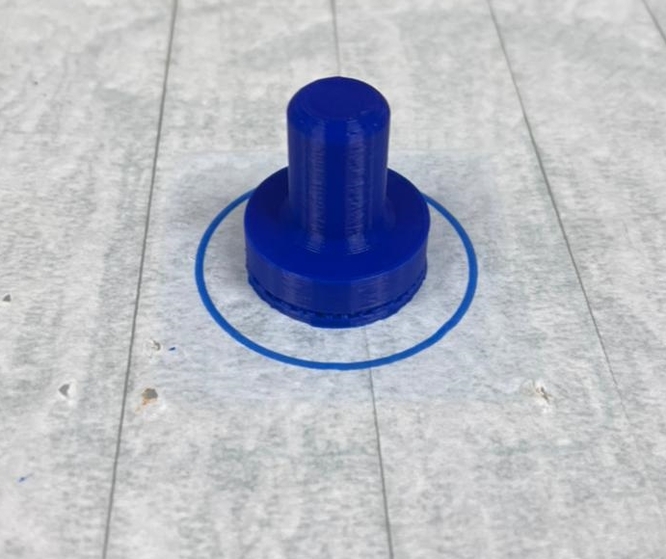
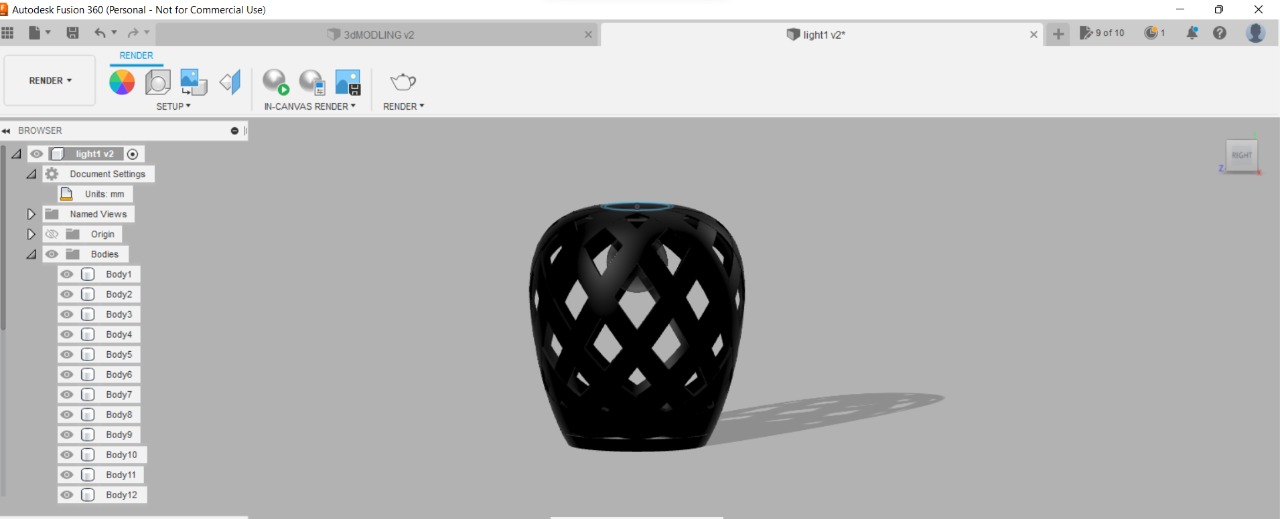
I designed a simple 3D stamp by using Fusion 360
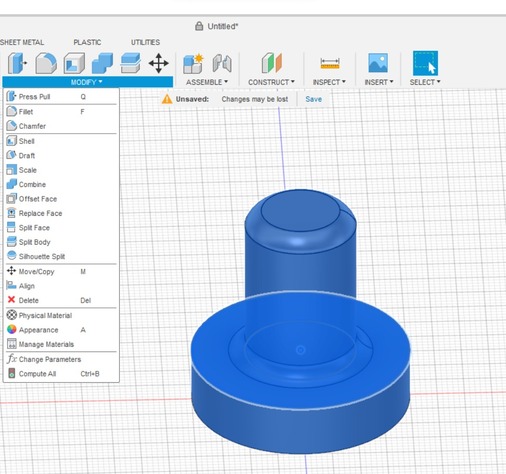
I started with the exoskeleton of the stamp
Sketch > Circle diameter > Extrude
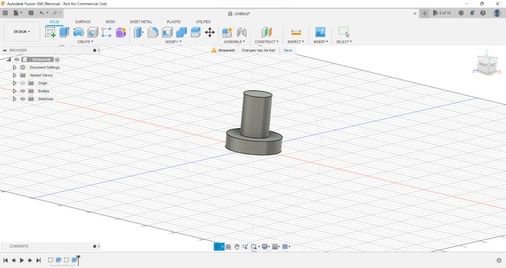
Modify > Fillet
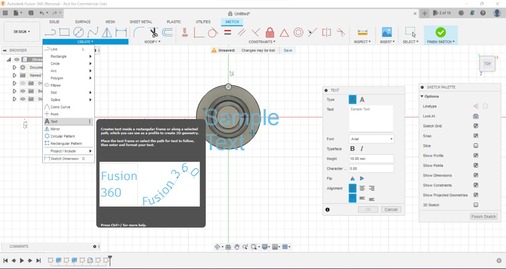
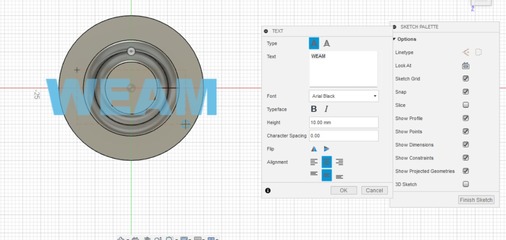
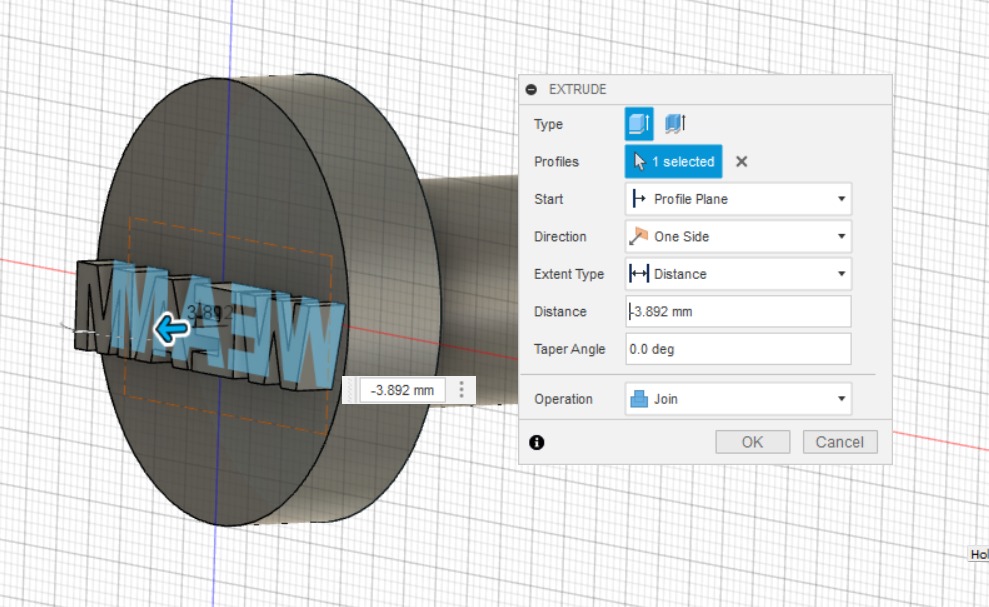
Then Texting
Create > Text > Extrude
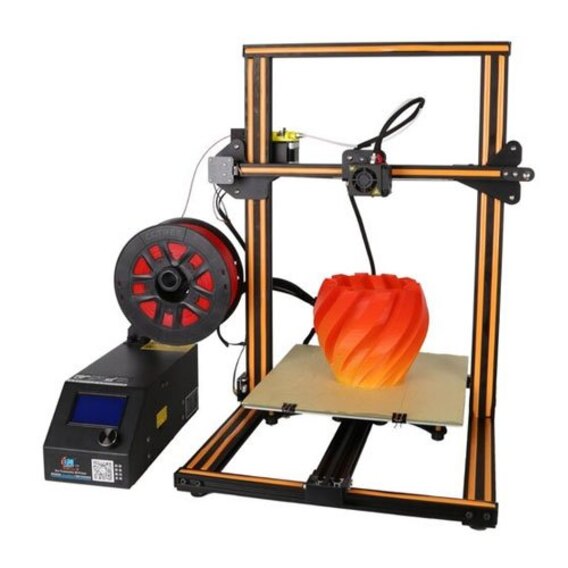
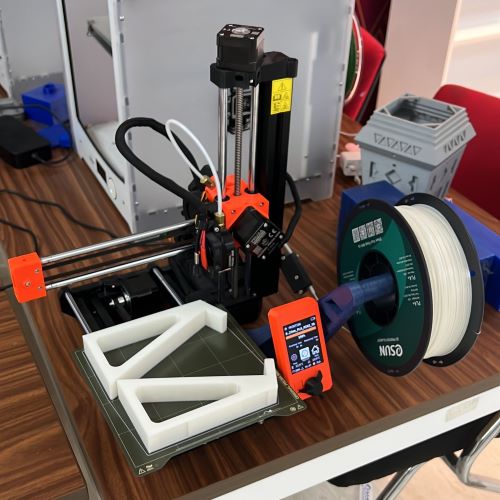
● Creality CR 10
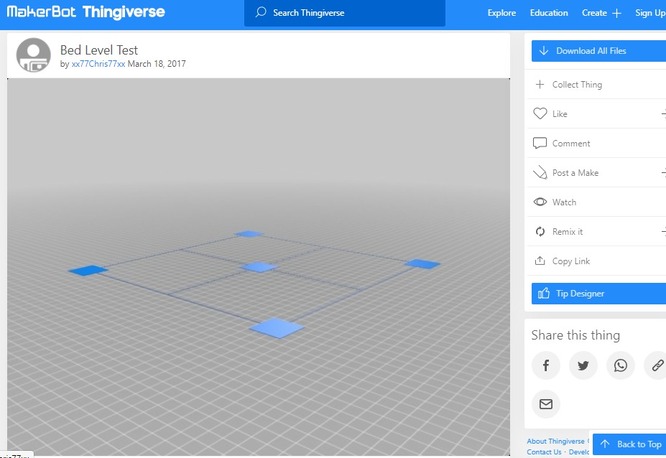
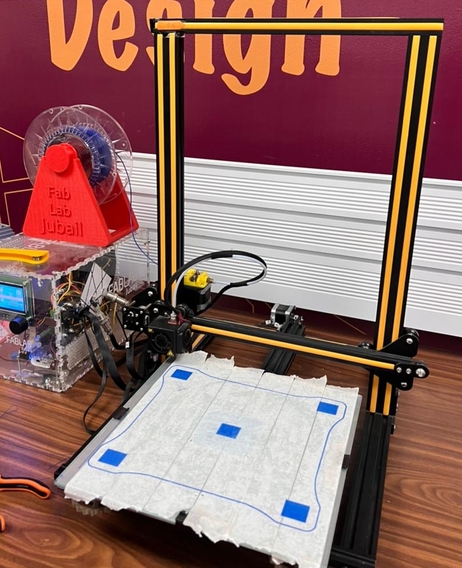
- ✦ Bed Leveling
By printed the bed leveling calibration test and this is how it came out.
● Cura Slicer
✦ Software
Make sure that you have the software installed in your computer , if not you have to install it from Here.

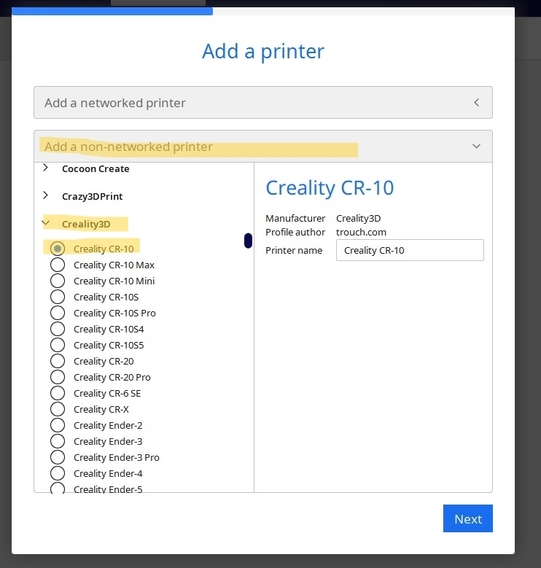
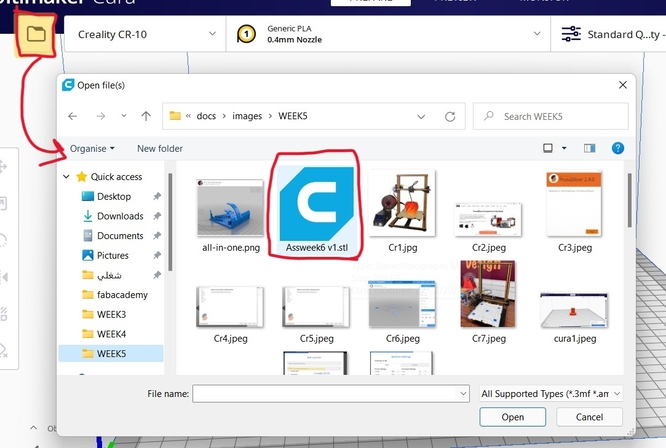
1/ Adding printers manually
2/ Start the print by opening the file in cura
From the file icon in up left or By Drag and Drop
3/ Cura workflow
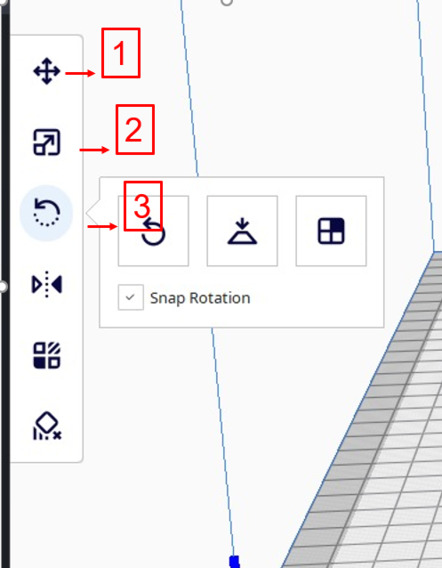
Tool option
1)3D model move.
2)3D model scale.
3)3D model rotation.
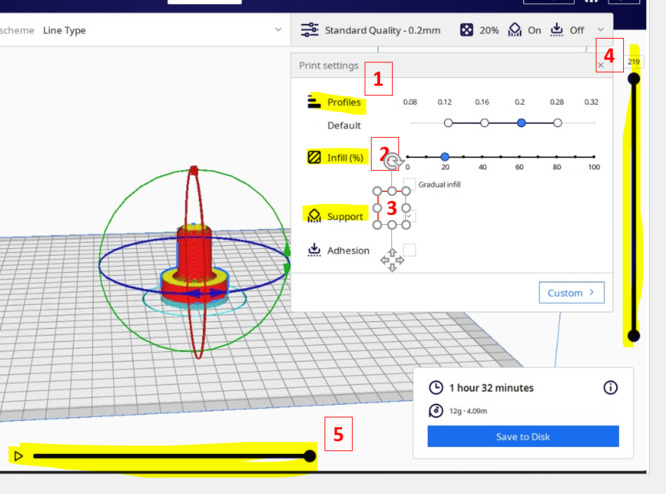
Print settings
1) Print profiles The available profiles for the current configuration are visible.
2) Infill The infill slider can be used to easily set the overall model strength.
3) Support Enable or disable automatically generated support structures, with either of the available extruders, to get reliable and successful prints when necessary
4) The layer slider This can be dragged to drag a layer range up and down.
5) Start simulation This starts the simulation of the currently active layer to provide visual feedback on the printing process.
● Print My Stamp
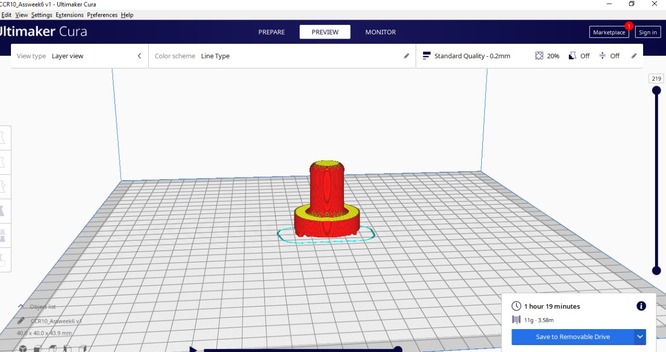
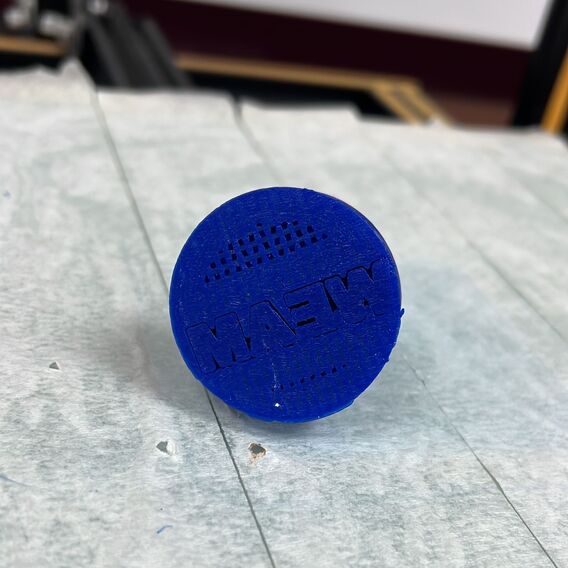
Remove the support
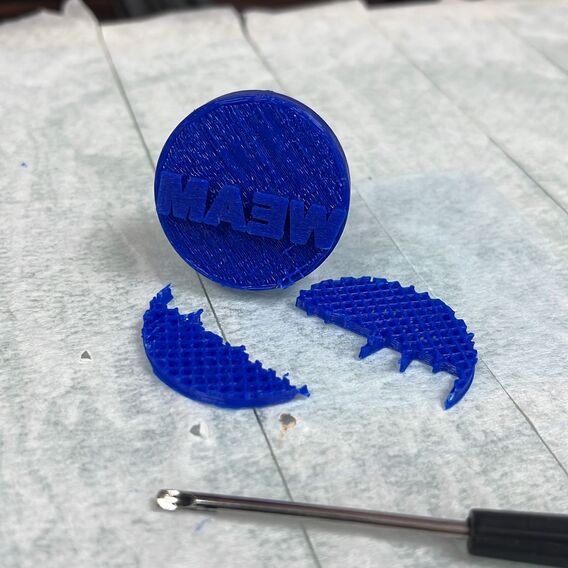
Try my stamp
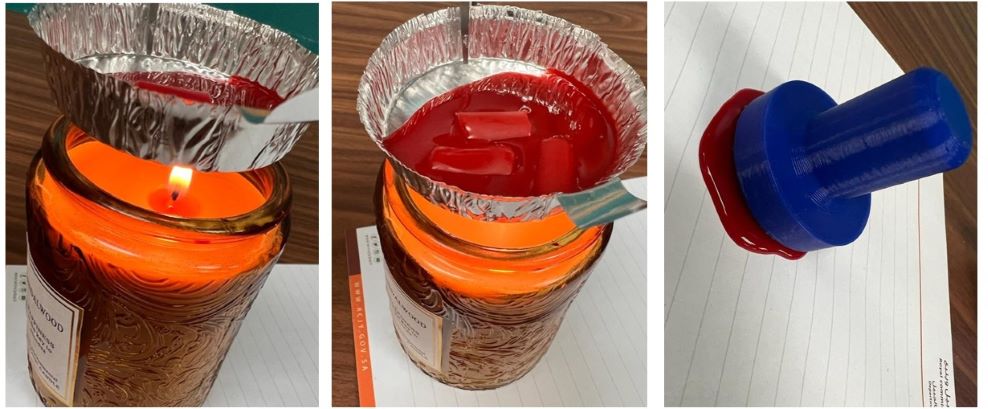
I try using my stamp with wax, I melt it by using a candle but unfortunately, the stamp stuck to the PLA melt at very low temperature (between 50 and 80) because of the melting temperature the stamp melted and stuck together so I print other Stamp and use it with Ink.
Final Result
▶ For my final project
After I finish learning and practicing with a simple model now I will work on one of the 3D pieces I will use on my final project and because I finish my week assignment early I have a chance to use another 3D modeling program
final projectfinal project
One of my colleagues advised me to use the Onshape so I do a quick search about it
The feature of onshap:
- you can use it online no need to install it.
- full cloud store so you can use any computer you need only your email and you find all your designs.
- you can share the screen while you work.
because of all these features I’m using Onshape for all my final project models, If I face any problem with my design I need only share it with my colleagues and then he help me to develop and modify my design
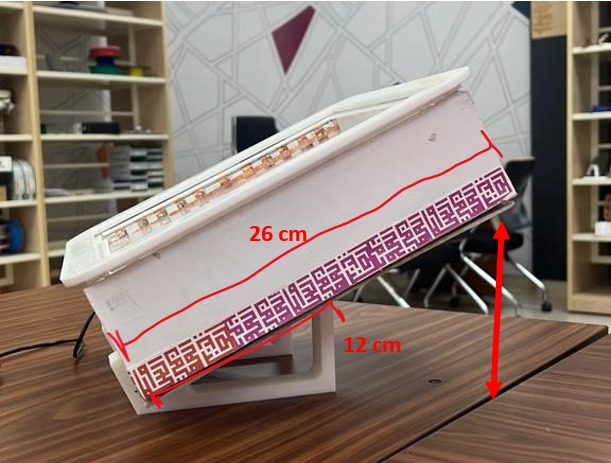
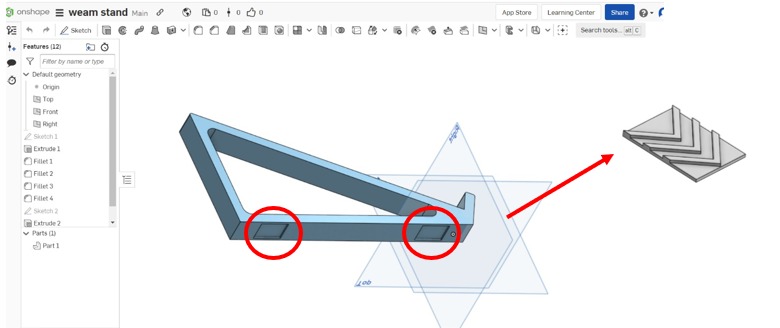
I create stand to my light play board for my final project
when I start the design I am worried about the right angles and the right height of the stand .my plan is to create the final project box with light material but I think it’s will still heavy because there are many sheets inside So I start to design it at 45 degrees and the height of the stand was half of the box hight.
The box height is 20 cm. The stand height is 12 cm with 45 degrees.
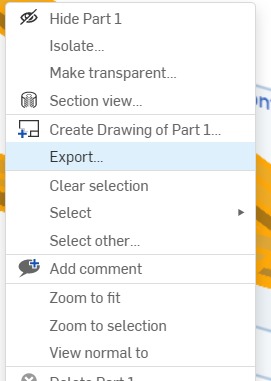
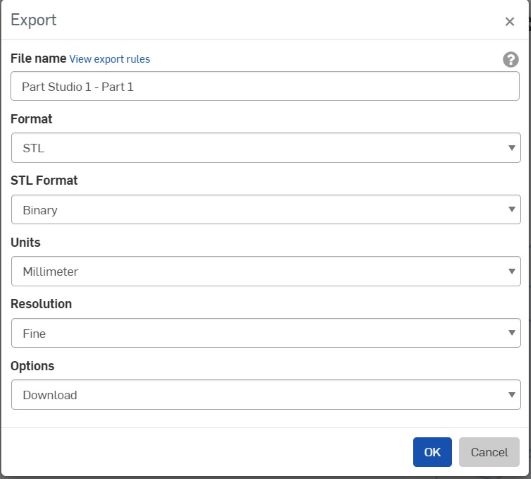
After I finish my design in Onshape I export it to an STL, Select all the objects then click right click, the menu shows up then click Export
from here you can choose the format and units and there are different options
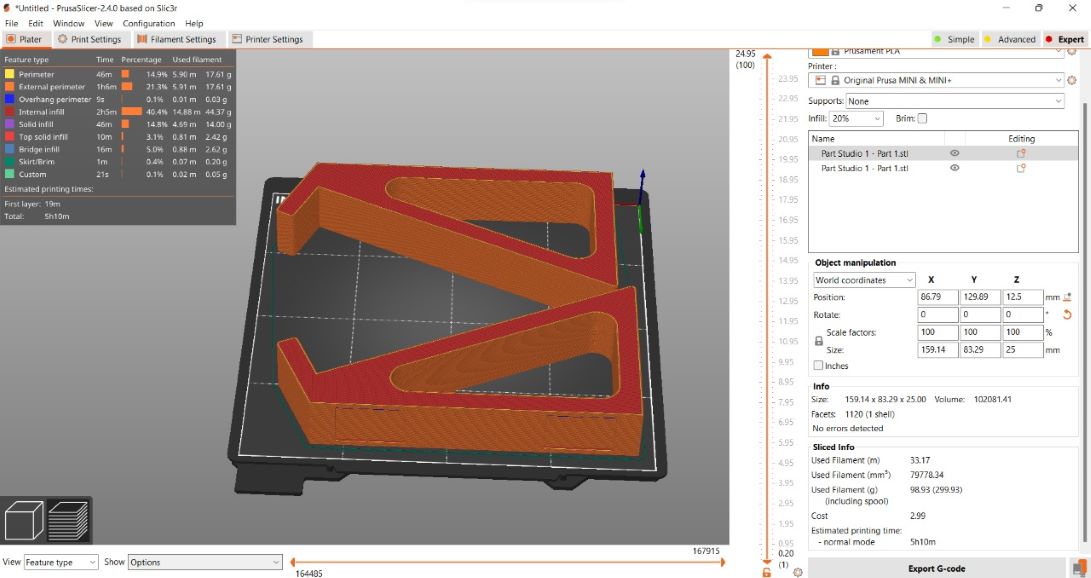
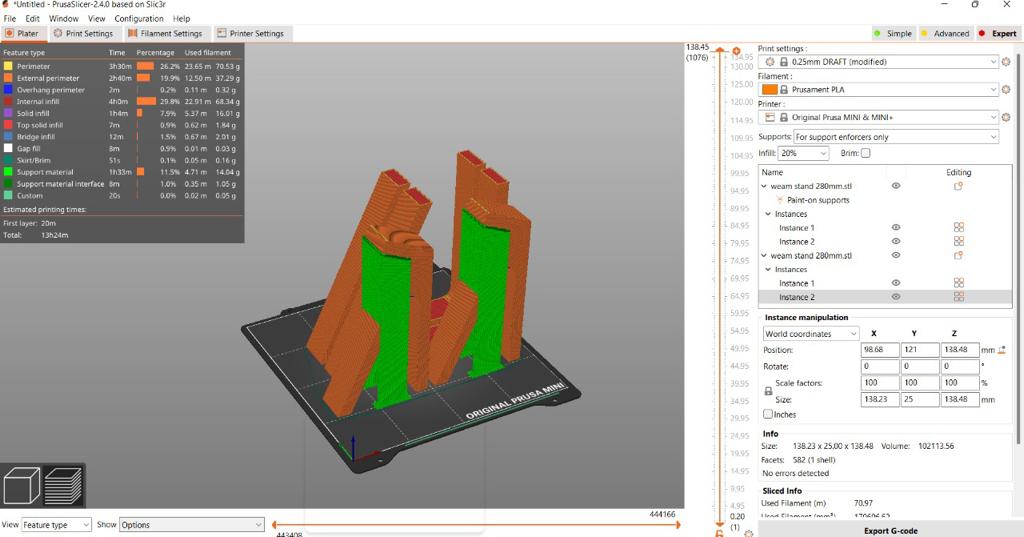
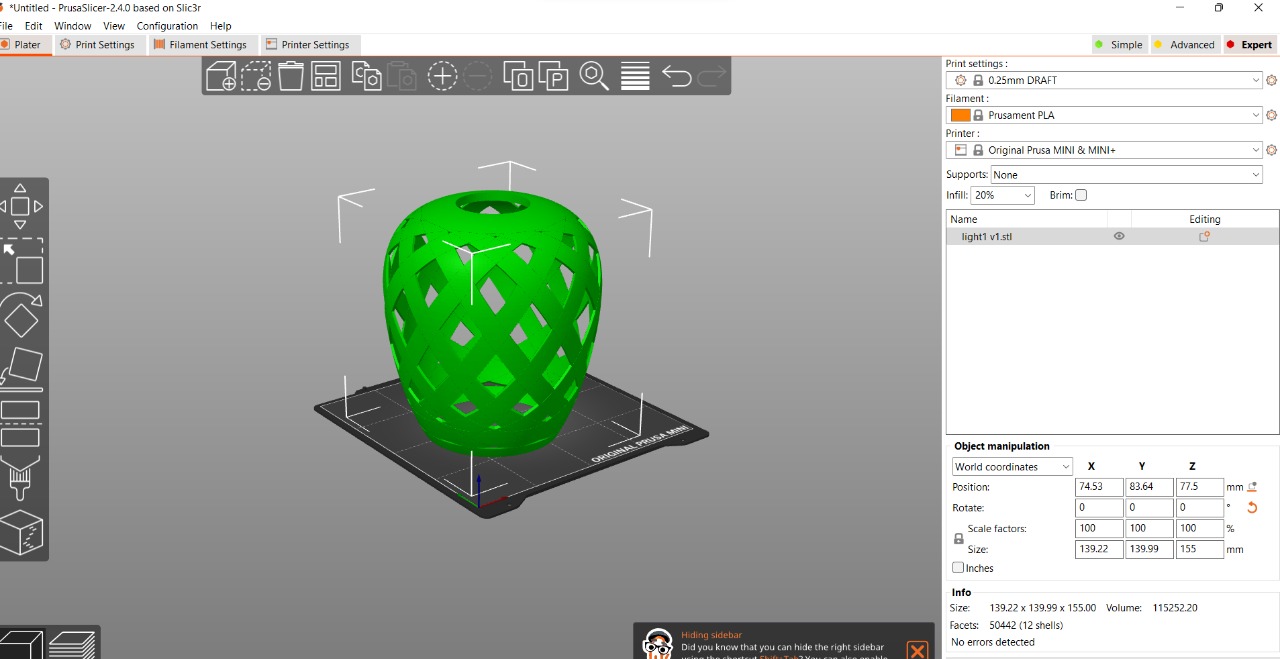
then I open the Prusa slicer to send it to the machine, Import the file and set it up
Print it
Note
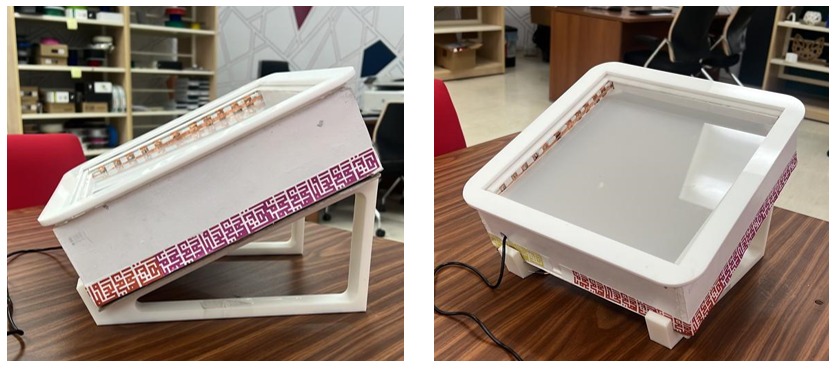
when I finished with my final project I tried the stand with the box and I noticed the stand was unstable ,very short so I need to replace it with another one
I extended the length of my old design in Onshape

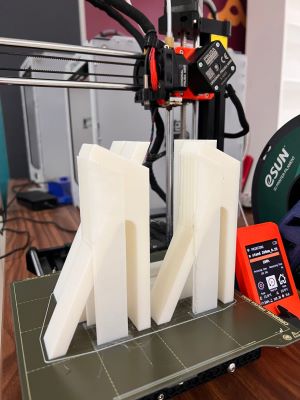
, it became very long so I divided it into two pieces because I’m using Mini Prusa, so my design became oversized
here after the print its finished
you can see the different sizes between the old and new stand
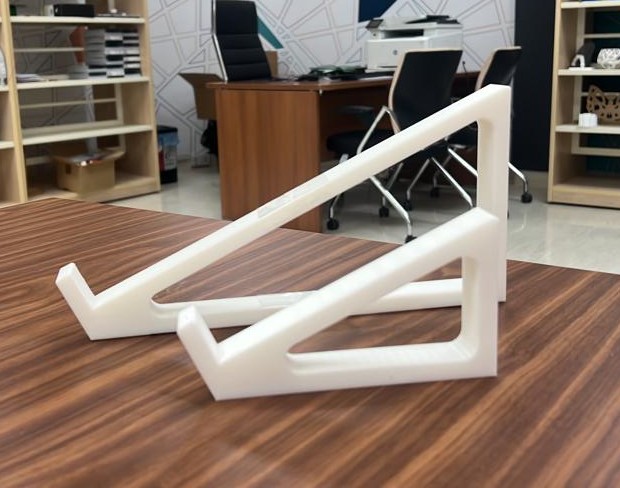
The final touch on my stand, I want to add rubber to be sure the stand is a stable , and in onshape I’m already designing a place for the rubber
here I print my small staple rectangle by using a black rubber filament (I borrow it from my colleagues)
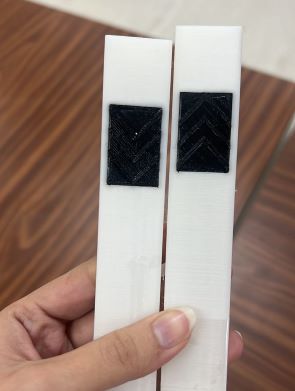
Final Result
Design and 3D print an object (small, few cm3, limited by printer time) that could not be easily made subtractively
video Explain
▶3D Scanning

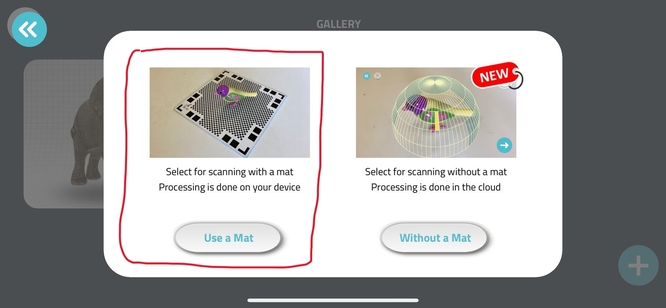
1/ For 3D scanning I used Qlone application install it from app store
Qlone 3D Scanner by EyeCue Vision Tech.
2/ Use with MAT
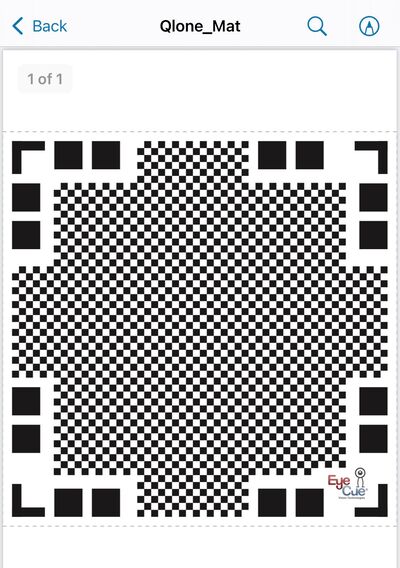
I Download it and print the mat
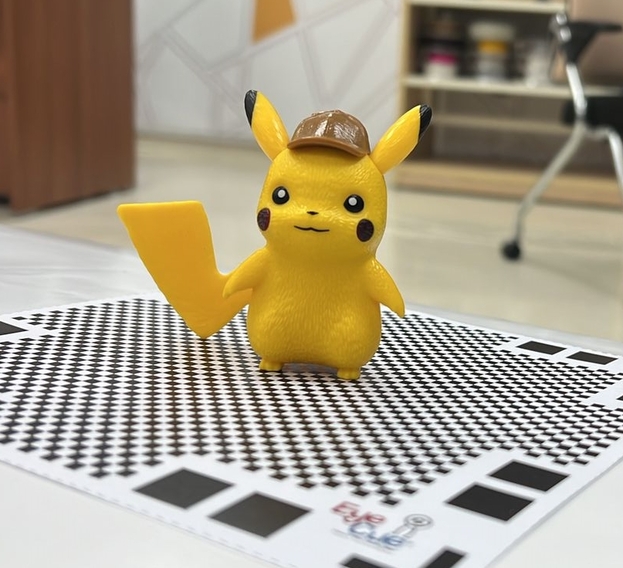
3/ Prepare the object and the mat.
4/ Start Scanning if the screen became Blue That mean its correct and you can go around the object until all shells finish .
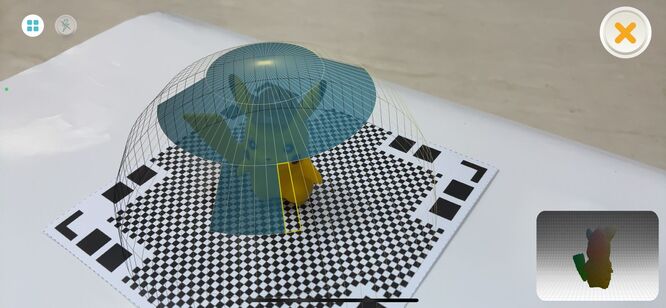
5/The scanning is ready.

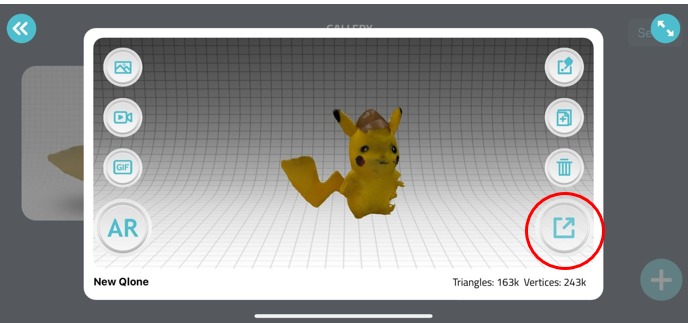
6/To export your scanning object click the Icon down on the right side
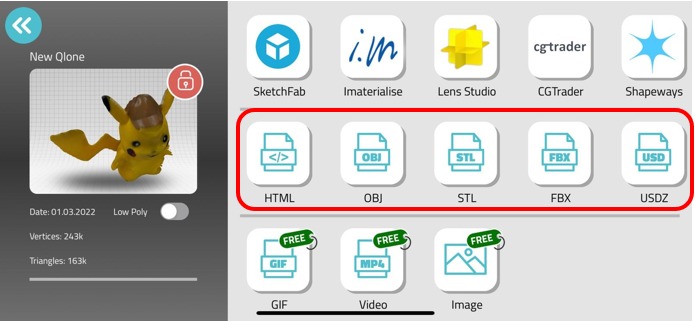
7/ The app will show you different types of saving formats, you can download your object and modify it BUT you need to upgrade it and you should pay for it
8/ Modify your scanning object
to make your scanning ready to print ,As you see in the picture there is a problem on the right side of the scanning object but you can Modify an STL file by fusion 360
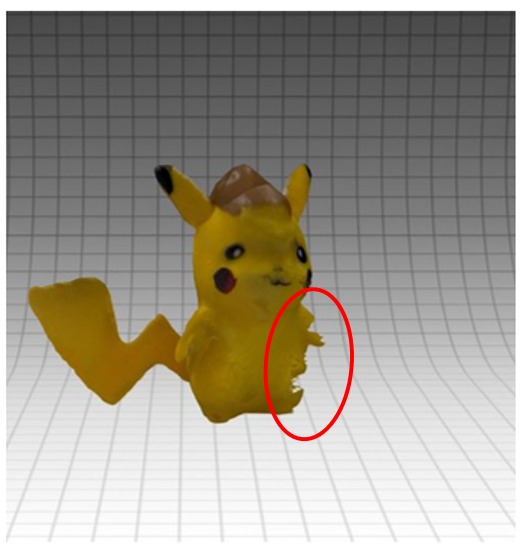
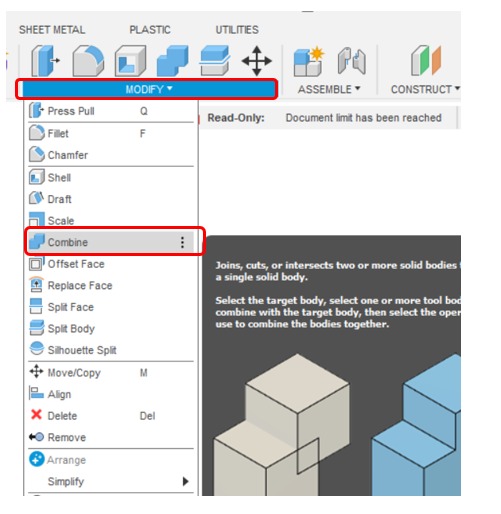
I need to download the scanning object by STL file and then open it in fusion 360 (or any 3D program that supports one of the saving file formats) then re-draw the missing part then there is a very important step when you finish the drawings in fusion you should combine the bodies to make it one object and be ready to print. go to
Modify >> Combine
then click both bodies then OK