4. Computer controlled cutting
Group assignment ✌
- characterize your lasercutter’s focus, power, speed, rate, kerf, and joint clearance.
- Document your work to the group work page and reflect on your individual page what you learned.
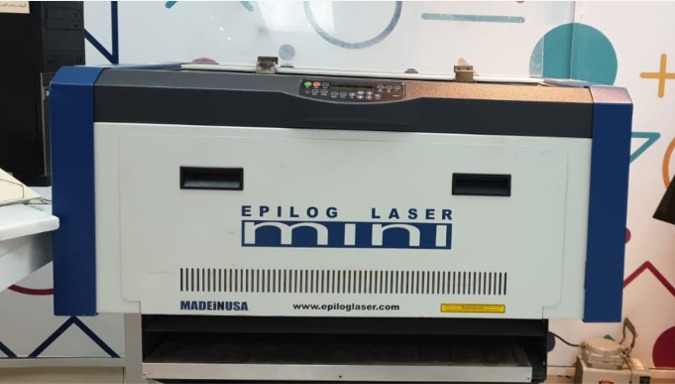
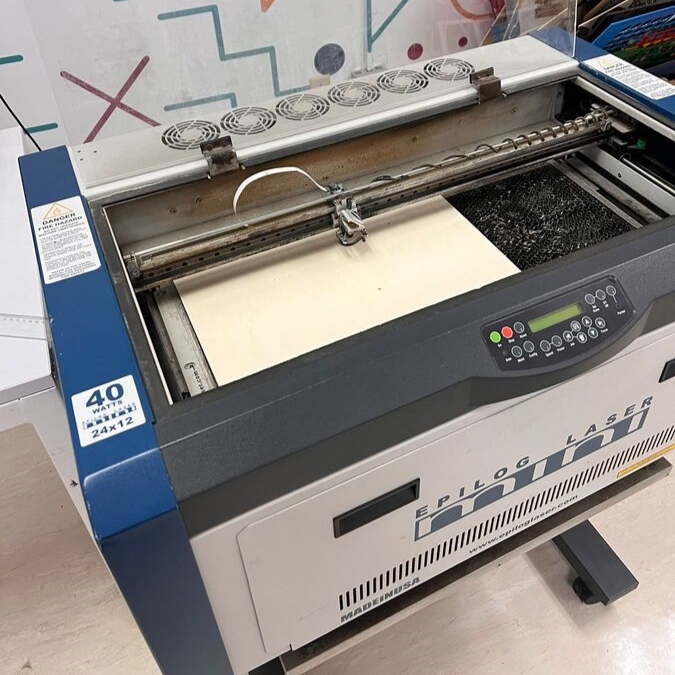
Here in our lab, we have an Epilog laser mini 40 watts 24X12
Computer steps
To send your design to the machine you should save it by PDF then open the file and click print, from the printer choose the machine you want to use here I used Epilog Engraver Winx64
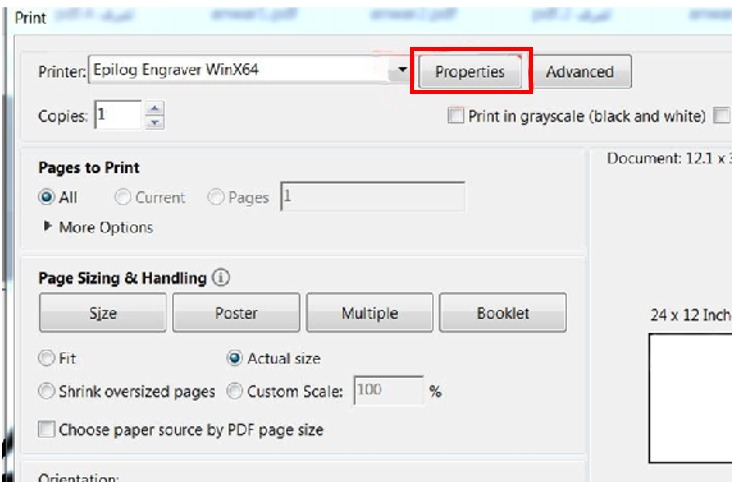
then click properties and this window will show up
then click properties and this window will show up
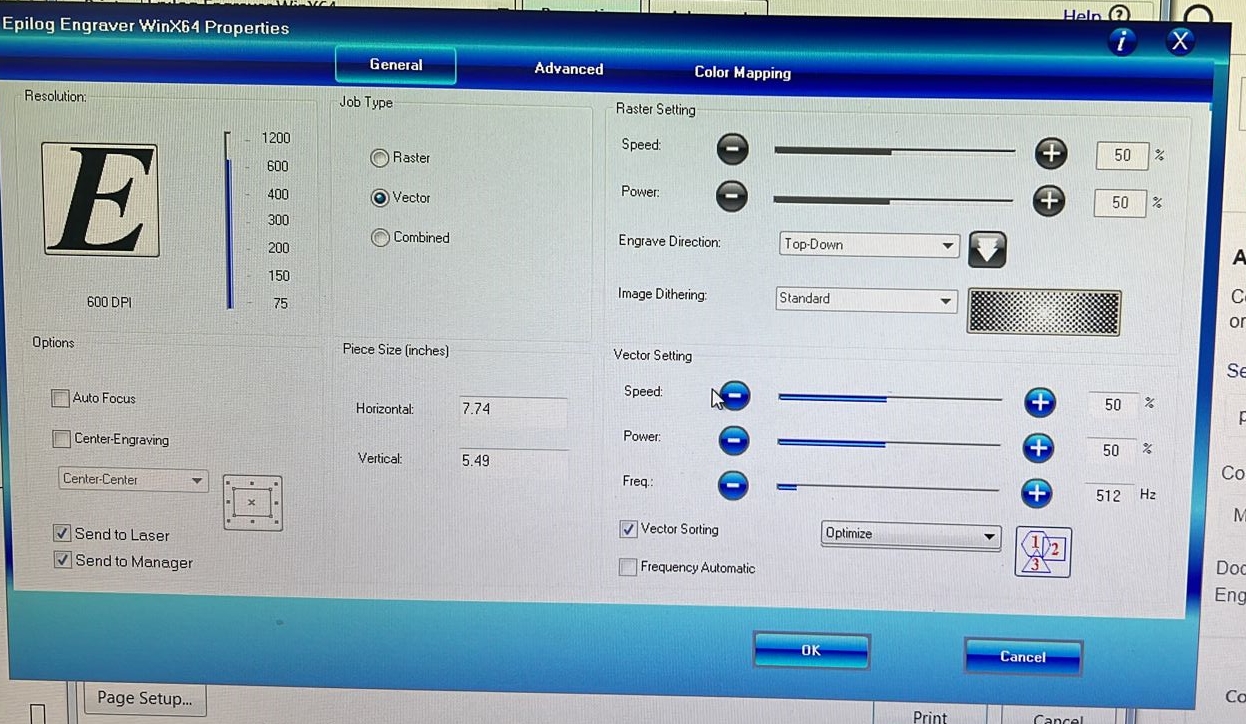
here you should type the size to your design >> take it from the SVG file ((Inkscape program)) by Inch unit and you should change the raster and engraving settings by following the material settings (I explain it with details down)

Customizing Settings
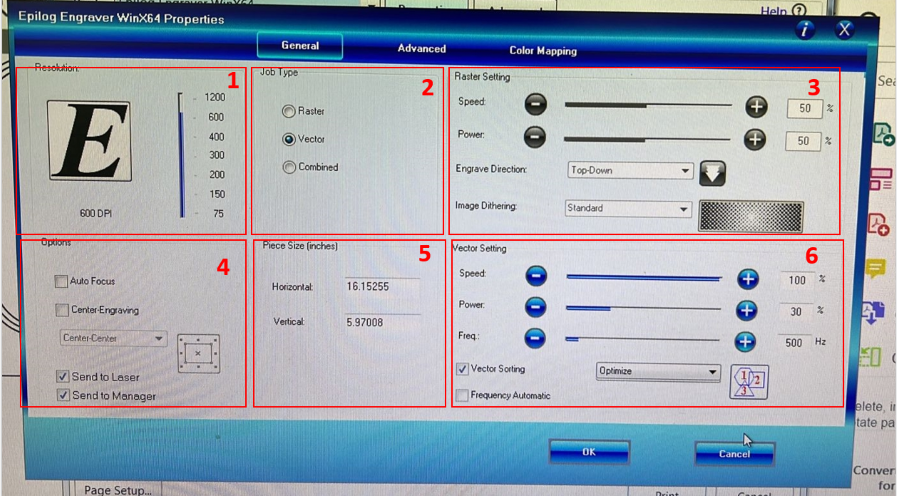
1 . Resolution:
Resolution is measured in dots-per-inch, much like a typical paper printer. DPI can range from 75-1200, and can result in significant differences in image quality.
2 . Job Type:
Raster select this option if your project need engraving only.
Vector select this option if your project need Cutting only.
Compound If your project have both engraving and cutting together.
3 . Raster Setting
Speed The speed that the lens moves back and forth. This results in deeper and more pronounced engravings.
Power The strength of the laser. The higher it is, the more pronounced the engraving.
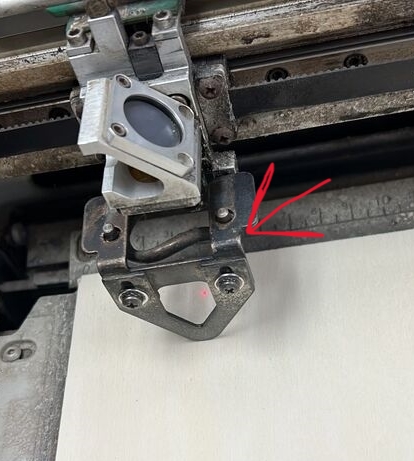
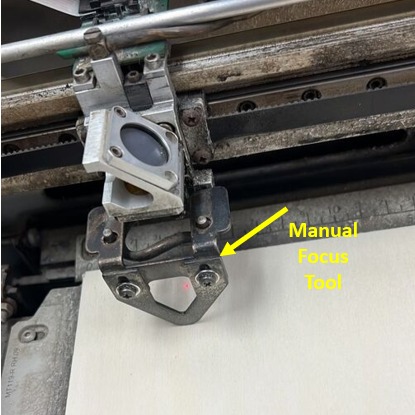
4 . Auto Focus
This setting would automatically adjust the bed height do the focusing key would not be necessary or you can do it manually by using measuring tool like in the picture ((I explain in detail down)).
5 . Piece Size (inches)
The piece size must be specified here, and it must match the size of the Workspace.
6 . Vector Setting
Speed & Power The same as in the Raster Setting - speed is how fast the lens moves and power is the strength of the laser.
Frequency The pulse rate of the laser. What settings works best depends on the material.
Machine steps
Inserting the sheet with the same material and thickness as we put in the computer setting.
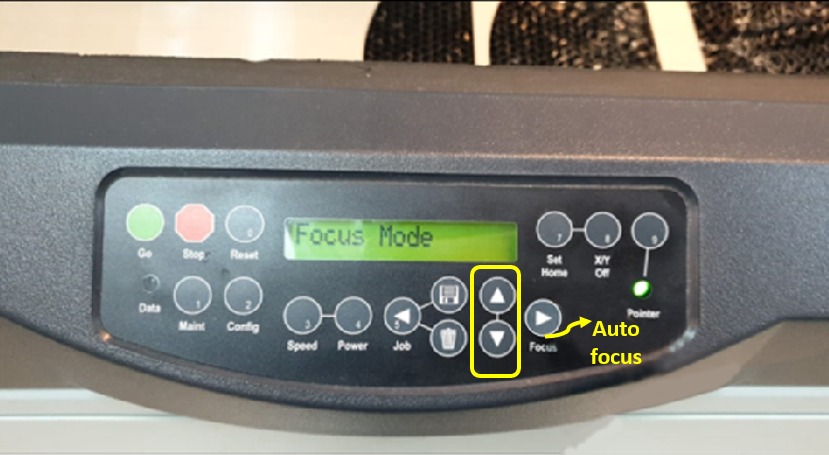
then put the focus tool on top of the lens and click Focus, it will adjust the focus automatic but here it’s broken so we use the arrow in the control panel
we move the sheet until we see the manual focus tool attached with the material sheet
● MATERIAL SETTINGS
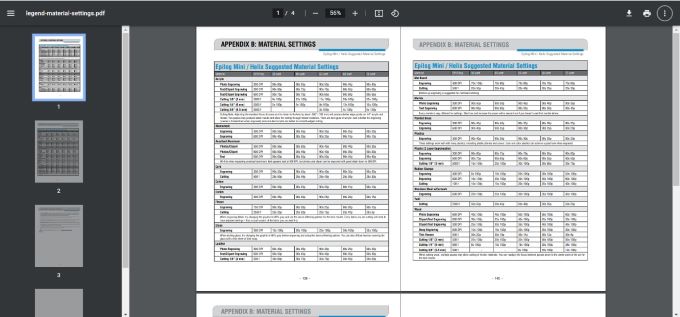
Each material has different settings (Frequency, power, and speed) and its change depends on the material types like wood, glass … etc and material thickness like 3mm,6mm …etc and to know each setting you can follow the manual here https://www.epiloglaser.com/assets/downloads/legend-material-settings.pdf.
● Trying different setting
I tried different settings on the same type and thickness of the material (Wood-3mm ) as you see for the frequency of 600 PDI I change the number of passes and the power and speed in sample number 2 (in the middle).
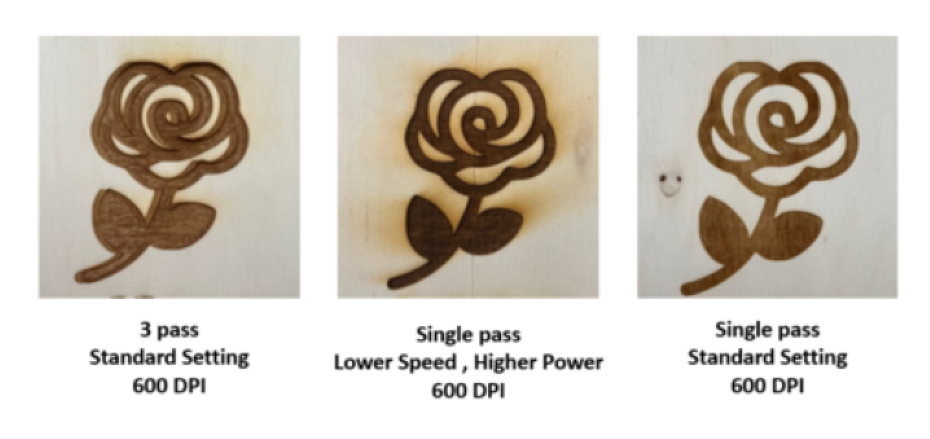
for me the perfect engraving it with the standard settings (45s 100p) and only with one pass the draw is clear without burn around.
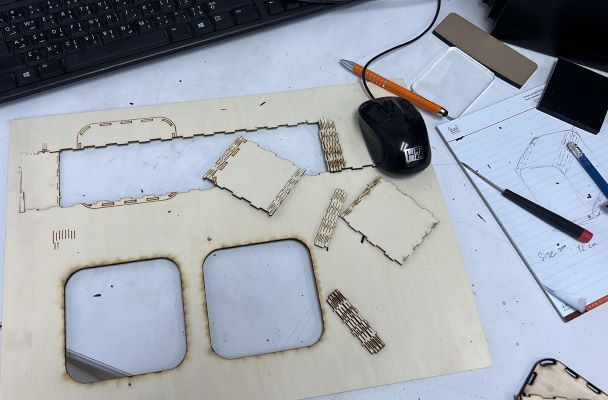
●Trying different types of joints
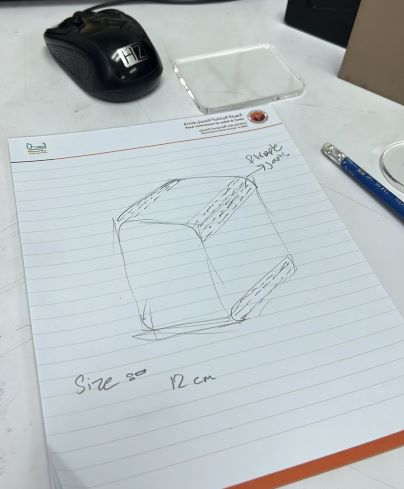
I want to try designing and cutting a box with T joints and a flexible wood pattern around
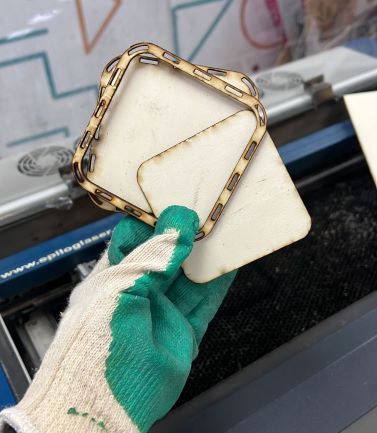
for the T joints the cutting is very well but the problem is with the space between the slot and the fingers are a little bit different like around 0.2 mm so it’s hardly join .
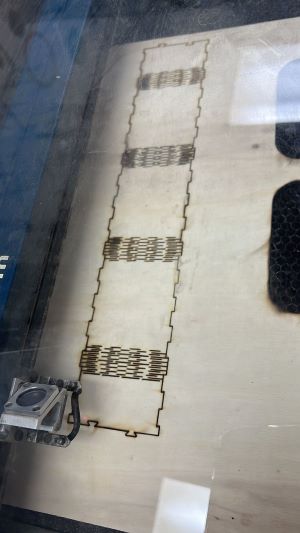
For the flexible pattern, the outline is cut very well but the lines of the pattern are very tight and near to each other I try to move it but it broke, unfortunately, this project failed but now I understand I should make a minimal line with 3 mm thickness