14. Interface and Application Programming
This week was for creating an interface and application that would connect and work with my board.
Another thing I have no experience with. Let’s give it a shot.
Processing
I decided to start with Processing. Garrett recommended it as something easier to start with, and Niel had mentioned in the lecture that people who liked Arduino would like this. Since I’m super new to programming, and only have used Arduino so far, I figured I’d start with something similar.
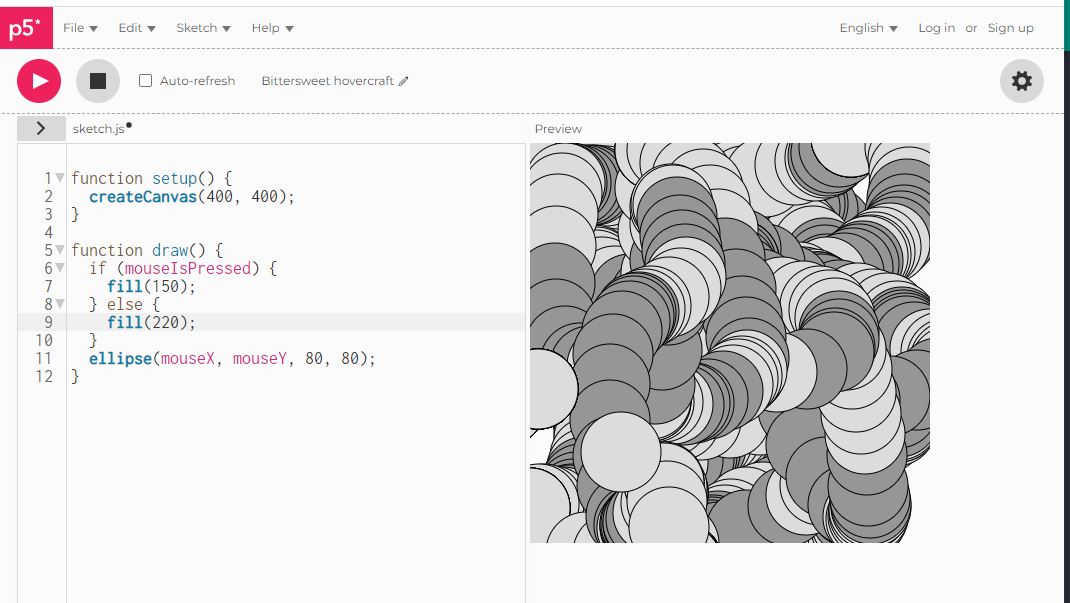
Shapes
I started looking through the examples, and messed around a bit with the Bezier code, after I downloaded the editor. I wasn’t quite sure what I was changing or what each line did, as short as it was, so I decided to watch the tutorial and get a better understanding of what was happening.
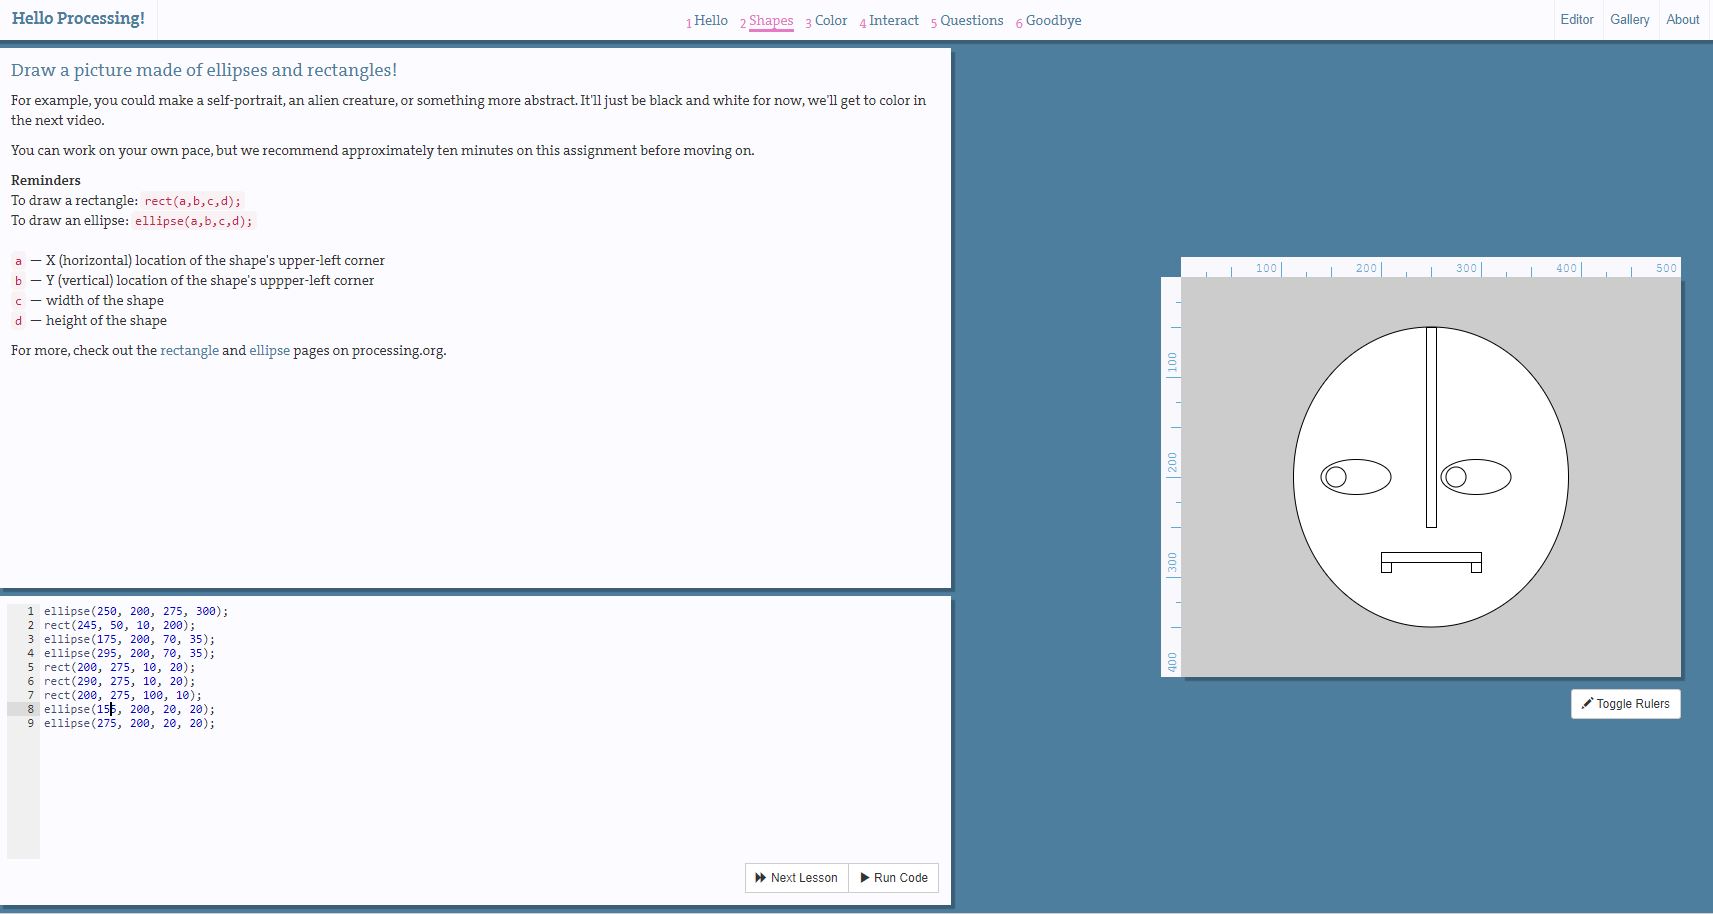
The instructor, Dan, was very enthusiastic during the whole thing, which I greatly appreciated. He made everything very clear, and it was fun to mess around with the little bits of code he presented.
Colors
The next portion was all about colors, and I had a lot of fun applying them to my face. My only complaint was that I had to retype all my code again, but Garrett told me once before that it’s good practice to do exactly that. When you retype it yourself, you’re actively reading and writing each line, practicing the syntax, and remembering when and where to put the character and punctuation.
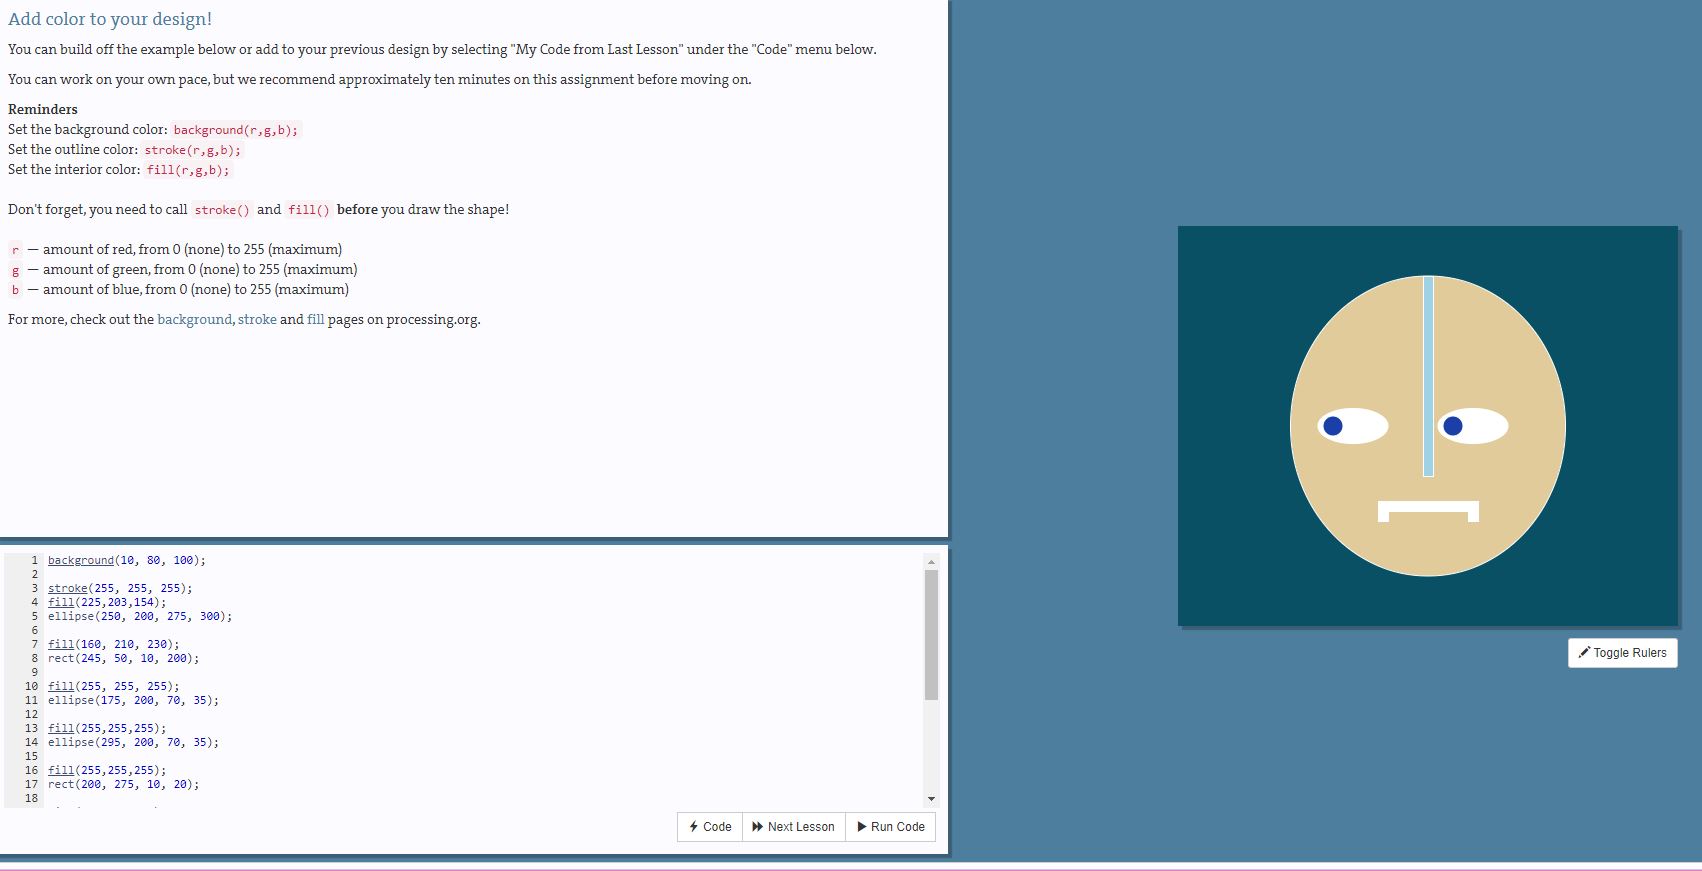
Now it looks like a vampire with blunt teeth.
Interact
Then they introduced how to animate the drawings, or interact. Honestly, I could learn code from this guy all day. Everything has been really easy to follow, and if I ever made an error, the exercise highlighted the problem and showed me how to correct it, so I never felt stuck or got frustrated with myself and the code.
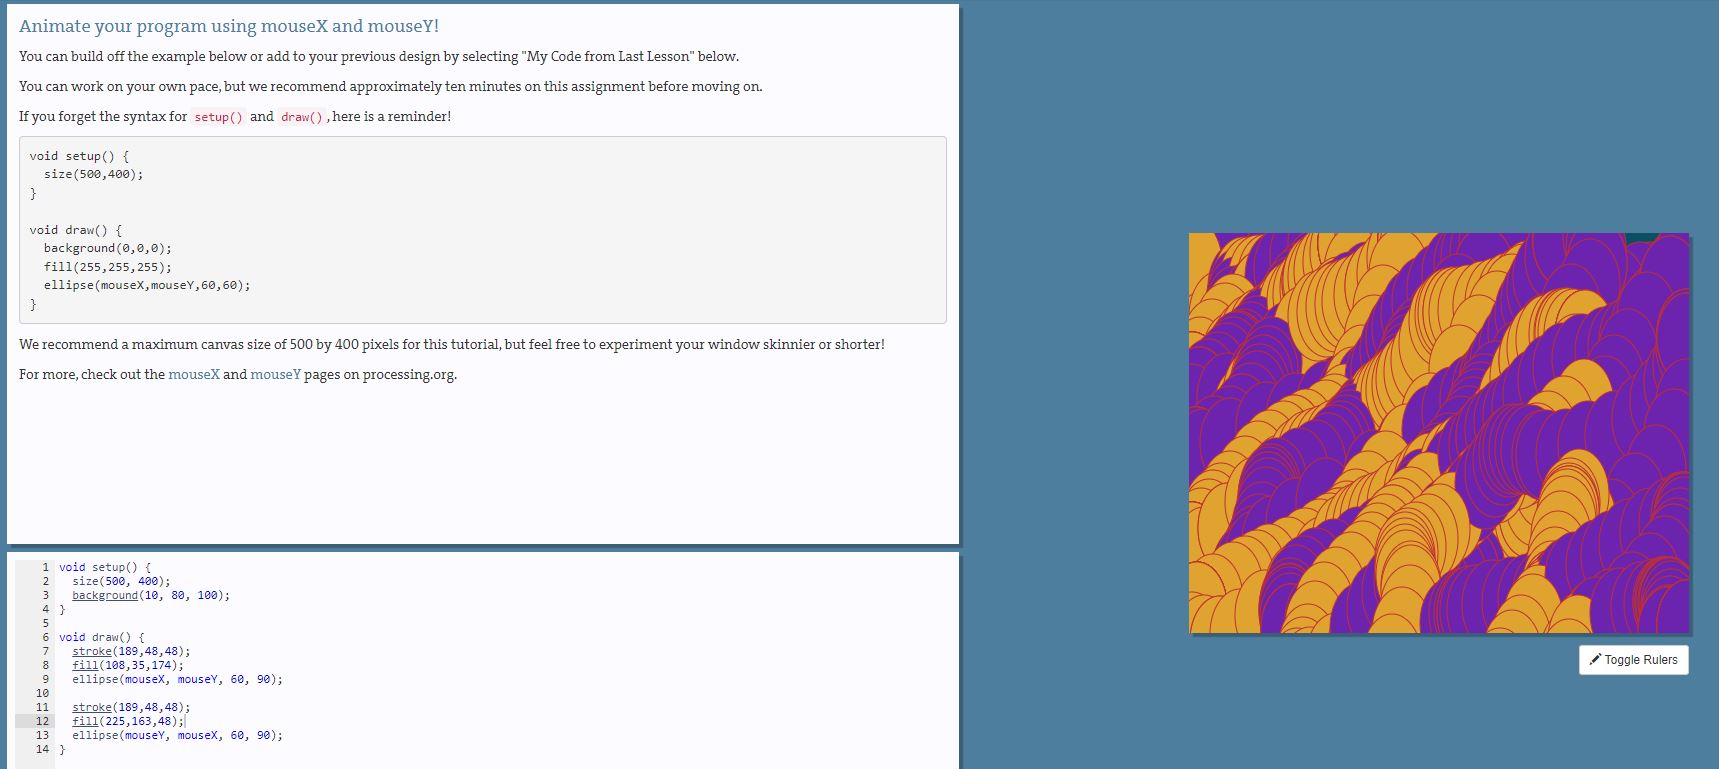
This was my introducation to drawing at my mouse location, and I immediately had some ideas about how to use this.
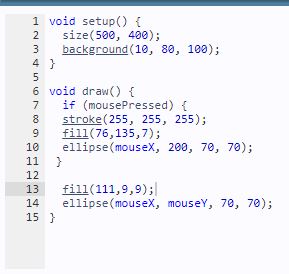
Questions
Last, he explained how to use questions, or if else statements to allow multiple things to happen depending on the if statement. This was also a lot of fun to play with, and I really want to get into this more down the line.
The thing I liked the most about this language is how each function is very clearly named by what it does. If I want to use the mouse in a certain direction, then I just use mouseY or mouseX. If I want an ellipse, I write ellipse. It’s very straightforward, which I very much appreciate.
P5js
The next thing I tried was p5js, which is very similar to Processing. I started with the basic tutorial on the Get Started page, which again, was very similar to Processing’s starting code. This made it easy to pick up.
I also enjoyed that the auto generated name for the session was “Bittersweet Hovercraft”. I’m leaving that as is.
For the rest of this, I’ll be referencing back to Garrett’s page for a lot of info, and a lot of the test code to try things out. I don’t have the same sensor that he used, so I’ll have to try to get my button to work. Fingers crossed.
Research and Setup
I read through a lot of the links he had on his page, and I found this one from NYU TISCH to be especially helpful. The intructions were clear and explained exactly which sections of code did what, and how to write them. It seemed straightforward enough that I could change the number of sensors if I wanted too. I’ll be using it to try this process.
In this case, I’m going to try one of my own boards and hook it up to an ultrasonic sensor Garrett gave me a little while back. It’s the same sensor he used in his test, so it will serve as a good baseline for tinkering with the program.
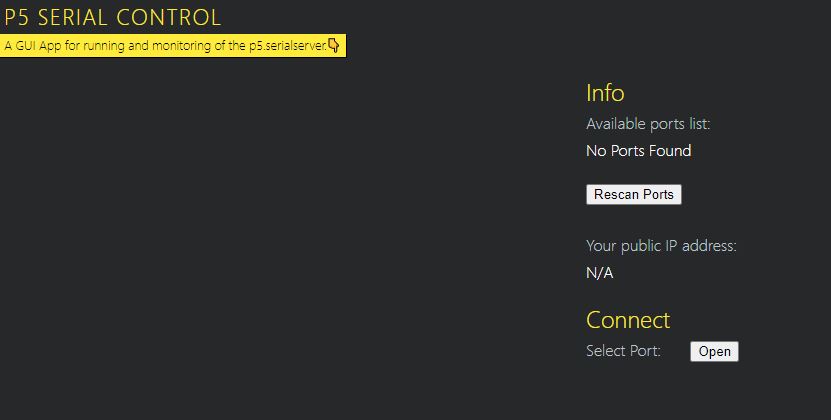
There are a couple things that need to be added and/or downloaded in order to make this work. First is the P5-serial control application. When running, this application scans for ports on the computer when something is plugged in.
Next, I added the following line to the index.html in the online editor:
<script language="javascript" type="text/javascript" src="https://cdn.jsdelivr.net/npm/p5.serialserver@0.0.28/lib/p5.serialport.js"></script>
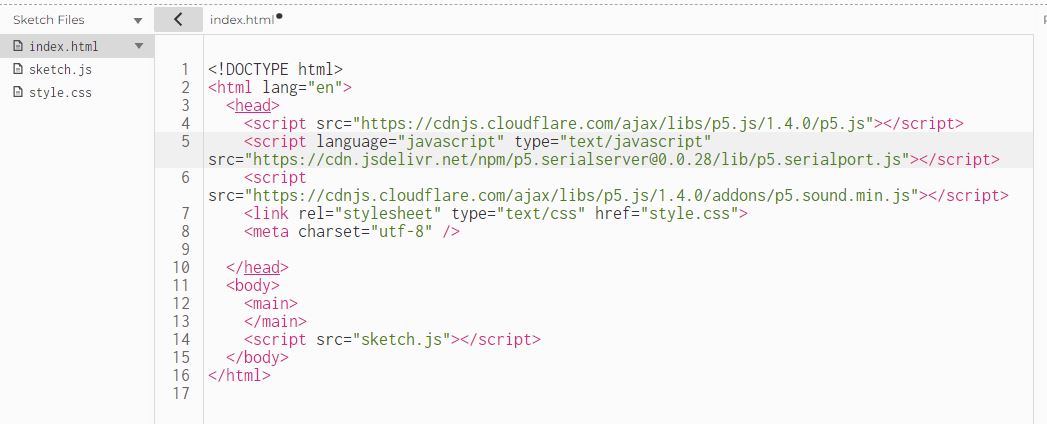
This is from the online editor. On the left hand side is an arrow pointing to the right. When you click on it, it reveals the sketch files, where index.html is located.
The last thing to do is to check which port is being used. After plugging in a board, I used the following code from Garrett to see what the port number was.
let serial; // variable to hold an instance of the serialport library

function setup() {
  serial = new p5.SerialPort(); // make a new instance of the serialport library
  serial.on('list', printList); // set a callback function for the serialport list event

  serial.list(); // list the serial ports
}

// get the list of ports:
function printList(portList) {
  // portList is an array of serial port names
  for (var i = 0; i < portList.length; i++) {
    // Display the list the console:
    console.log(i + portList[i]);
  }
}
I Thought This Would Work
After downloading, I unzipped and ran the program, which opened in a web browser. I had a board plugged in when I opened it, but it didn’t show any ports were open. I rescanned, but nothing showed up. I tried moving the board to different ports, but nothing ever appeared, so I closed it for now. I’ll see if there’s something else I can do.
At this point, I think my problem is due to my programmer. I need something that can output(?) serial, and that board doesn’t, but I did remember that I had a second board that was exactly the same. It’s the one that Garrett had ordered to be made. Same board, just looks more professional. So I plugged that one in and tried the following code from Adam’s site, Sheek Geek to test it out.
void setup() {
   SerialUSB.begin(0);
}

void loop() {
      SerialUSB.println("hello"); //Send stuff from USB to serial port
} //end loop
And it worked! I could see “hello” in the serial monitor, which was a great sign for me. Except when I reopened the port scanner and tried again, I still came up empty.
I did some Googling to figure out what the problem was, and came across a couple different programs to check the port, then try to open a port. The first program said that my serial port was closed, not surprising, since I wasn’t getting anything. The second one tried to open the port, using the information from Arduino. I knew I was connected to COM5, so I changed the com name in the program and ran it, but the only thing that came up with a black box. Since it didn’t match anything in the program for what to expect, I assume it failed, adn a quick check with the port program confirmed it.
I thought maybe having the Arduino program up was potentially conflicting with the port program, so I closed it and tried again, but still got nothing. I’m sure that wasn’t helping things, however.
At least I know the board works. It’s the little things sometimes.
Last thing I tried was connecting my Arduino to see if that would even work. I hooked it up and ran the example program to test out the serial port.
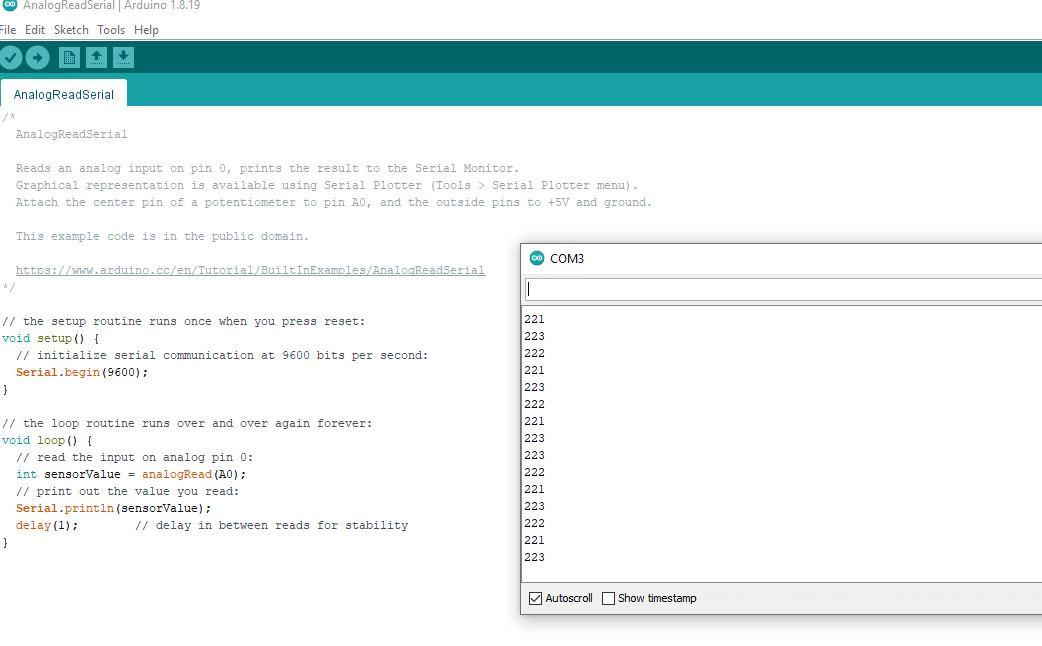
That’s a good sign, so I closed the program and looked for the port again with the p5js program.
Nada.
So. Moving on to try something else.
MIT App Inventor
I was really interested in trying this out when Neil mentioned it in the class. It looks like a lot of fun to mess around with, so I figured I’d play around and see what it can do.
I started out by downloading the emulator for the computer. I installed it, but then I had administrator issues.
One of these days, I’m going to figure out which god/goddess of technology I’ve pissed off, and I’m going to beg for forgiveness. It really doesn’t matter what form the technology takes, whether it be phone, computer, games, consoles, whatever, they never work for me the first time.
My boyfriend thought I was joking. He quickly figured out I was not.
After trying multiple times to get the app to work on my computer, I finally gave up. I’m not sure what else to do at this point. I really wanted to try this out, but I guess today isn’t that day.
Files
Most of the programs I used through this are found in the pictures. For the rest, I have them throughout the page.
Group Project
The group project can be found here.
Unfortunately, this was another week that I was unable to help with, despite it being one that I probably would have learned a lot in. I’ll have to go back and go through everything that Garrett was able to do, and hopefully take the time to try it out myself when I have more time.