18. Project Development
Project Development
This is it, the final push! This week is about creating the final list of things that need to be done; deciding what stays and what goes, what tasks can be done together and what needs the most time.
Let’s go!
Downsizing
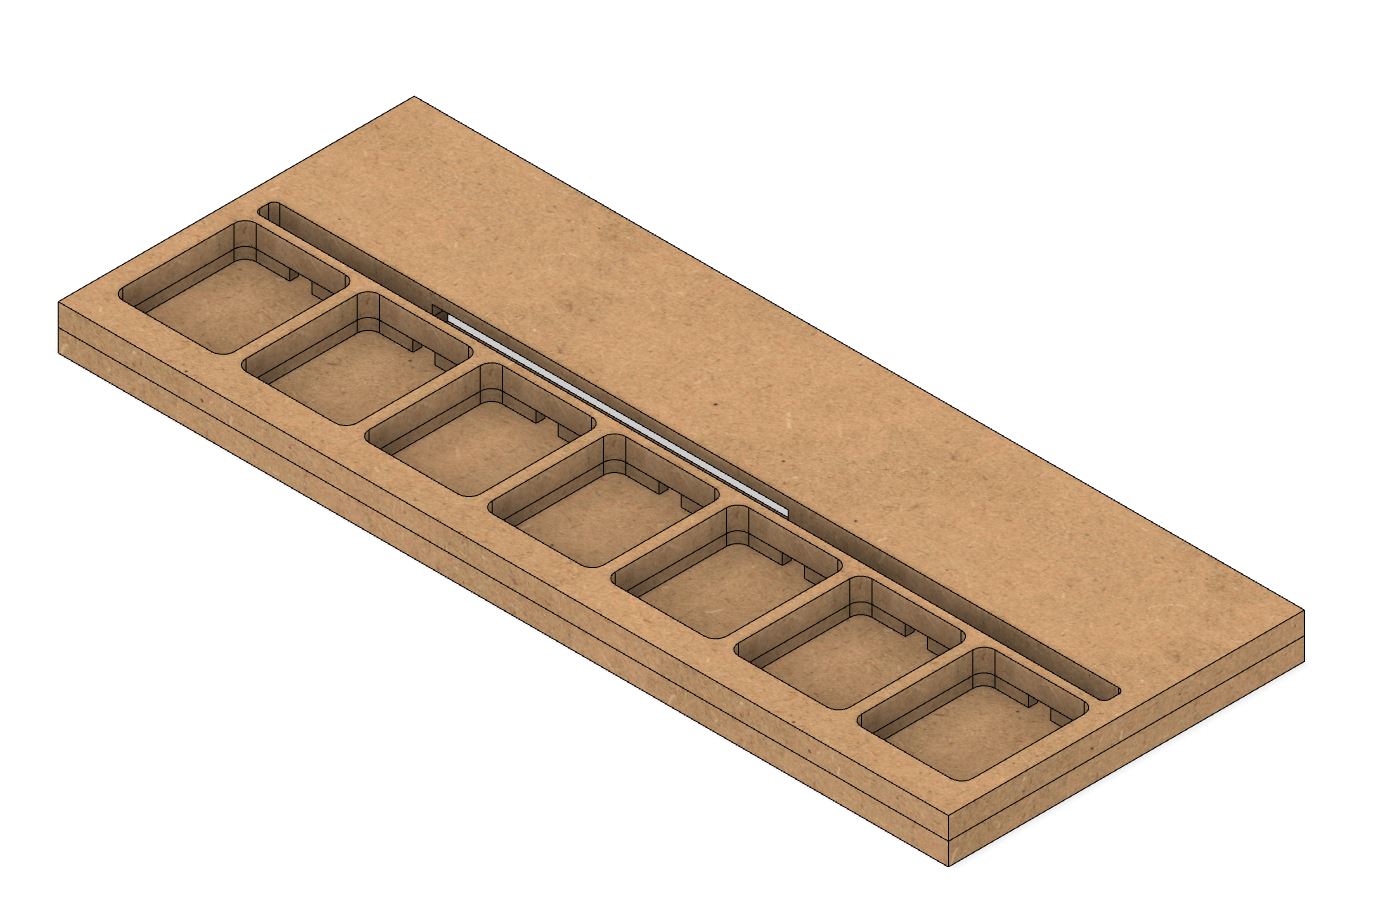
I have a lot of things that need done, and because of time constraints, I had to downsize my project (yes David, you were right). Downsizing means instead of doing a month calendar, I’m going to make a weekly calendar, one that’s much smaller, can either sit on a desk or hang on a wall, and has the same basic concept.
The biggest hurdle for me throughout this entire semester have been the electronics and programming. I don’t have the foundation or basic knowledge in either to really create what I need. I’ve had a lot of help from Garrett, Adam, and David to get me to this point, but the most frustrating thing has been how little I really understand. Because of this, it’s taken a really long time to create even basic breakout boards. Each one I make I double check with one of them, then have to go back and redesign or tweak something. Given how many boards I would need for my monthly calendar, I wouldn’t have enough time to either make every single one or have them sent out and made.
Thus the week! To be honest, I should have done this one in the first place, but I’m glad I did it this way. I already have most of the monthly calendar designed, so I know I can get that finished in my own time. Plus it was really easy to create this smaller project based on all the work I had already done.
Remind Me Again: Weekly Edition
Ta da~!
Tasks Completed and In Progress
Complete
- Redesign Weekly in Fusion 360
- Prep files for ShopBot and laser cutting
In Progress
Base:
Mill out base on ShopBot(Done 6/2)Assemble top and bottom pieces(Done 6/3)
Top:
- Finish design for buttons and screw holes for assembly
Laser cut acrylic top(Done 6/2)Clean up edges(Done 6/3)
Center Piece:
Laser cut pieces(Done 6/3)- Assemble/glue black and white pieces
Buttons:
- Finalize design of buttons
- 3D print with resin (clear)
- Post processing
- Test fit
Electronics:
- Redesign breakout board with correct button placement
- Mill and solder new boards
- Create cables to connect boards
- Finalize control board
- Mill and solder control board
- Test if power supply will work
- Create custom USB cable to connect power to control board
Programming:
- Combine individual working programs
- Test boards connected together
- Test with power supply
- Reorder colors of lights, easier to see differences
What’s Worked and Hasn’t Worked
Positives and negatives of each component.
Design
What Worked
I’ll be honest, this is a simple project, relatively speaking. The hardest part was figuring out the final dimensions. Was it going to be too big? Too heavy? An unreasonable size? Will all the pockets fit? However, because of its simplicity, the original basic design worked! This allowed me to easily downsize it to the weekly version without much hassle.
What Didn’t Work
At the same time, the original design didn’t account for the guts of the project, the cable management and places for the control board and power. I had to add them in later, but, in a way, it worked out better this way. Having a blank slate made it easier to add these features when I had a better idea of what the whole project required.
The second thing that didn’t work was the profile, or how thick I wanted it to be overall. I was hoping to keep the board as thin as possible for weight, but I had to make it thicker for the NeoPixel light diffusion.
Next, the acrylic top originally had a channel on the back where some material would lay to become the “grid”. My first thought was to use some sort of rubber or silicone to fill this, and I was going to try to pour silicone after the Mold and Casting week, but the space between the pockets was too narrow. I then tried different spacing to allow for more room, but that ended up making the overall size of the board way too big.
I then considered a few other options, such as laser engraving, vinyl cutting a grid, and felt. Laser engraving would be the most precise, but wouldn’t give me the black color I wanted. Vinyl cutting would work, but I had never cut something that large before. Plus I would have needed to line everything up perfectly to work. Felt seemed like a much easier option. It cut easily with the laser, was rigid enough to hold its shape yet flexible enough to manipulate, and helped to diffuse the light from the NeoPixels.
In the end, I scrapped the channel entirely and went with the felt.
NeoPixels
What Worked
My original plan was to have some sort of lights in the pockets, and Garrett suggested NeoPixels. After a bit of research, they seemed fairly straight forward, and there was a ton of support for them. Plus they can be a huge range of colors and can either be really bright or dimmed low.
I was able to start playing around with them quickly since Garrett had some on hand, which was very helpful.
What Didn’t Work
After some research, I found some NeoPixels that were RGBW, or had a white light added on as well that was stand alone. I wanted to use these since I wanted the default light to be white, but they turned out to be a bit more complicated and didn’t have as much information and support. The footprint for this style had six pins instead of four, meaning I would have had to change each board I had made so far to test them.
In the end, I went with the simple NeoPixels. After some tests, I found that they’re able to create a white light that will work just as well.
What I’ve Learned
Ho boy, there is so much to put here. This entire experience has been one enormous learning experience.
The main thing I learned is how little I actually know, even in areas I have experience. I’ve done 3D printing, I’ve done mold and casting, but both have been quite limited applications.
I have so many ideas and things I want to make and try in the future, as well as ideas for things the lab doesn’t have that I want to try. I want to experiment and push my knowledge forward, and apply it to what I’m doing now, both at work and for my students.
But most importantly, I’ve learned that in order to push my potential forward in Fab Academy and teaching in general, I need to focus on programming and electronics.