Video editing
The last skill I got to learn and put in practice in fab academy was Video Editing.
This was the 3rd time I was mounting a video in my life and it was quite fun, despite being super stressful due to time constraints.
Storyboard
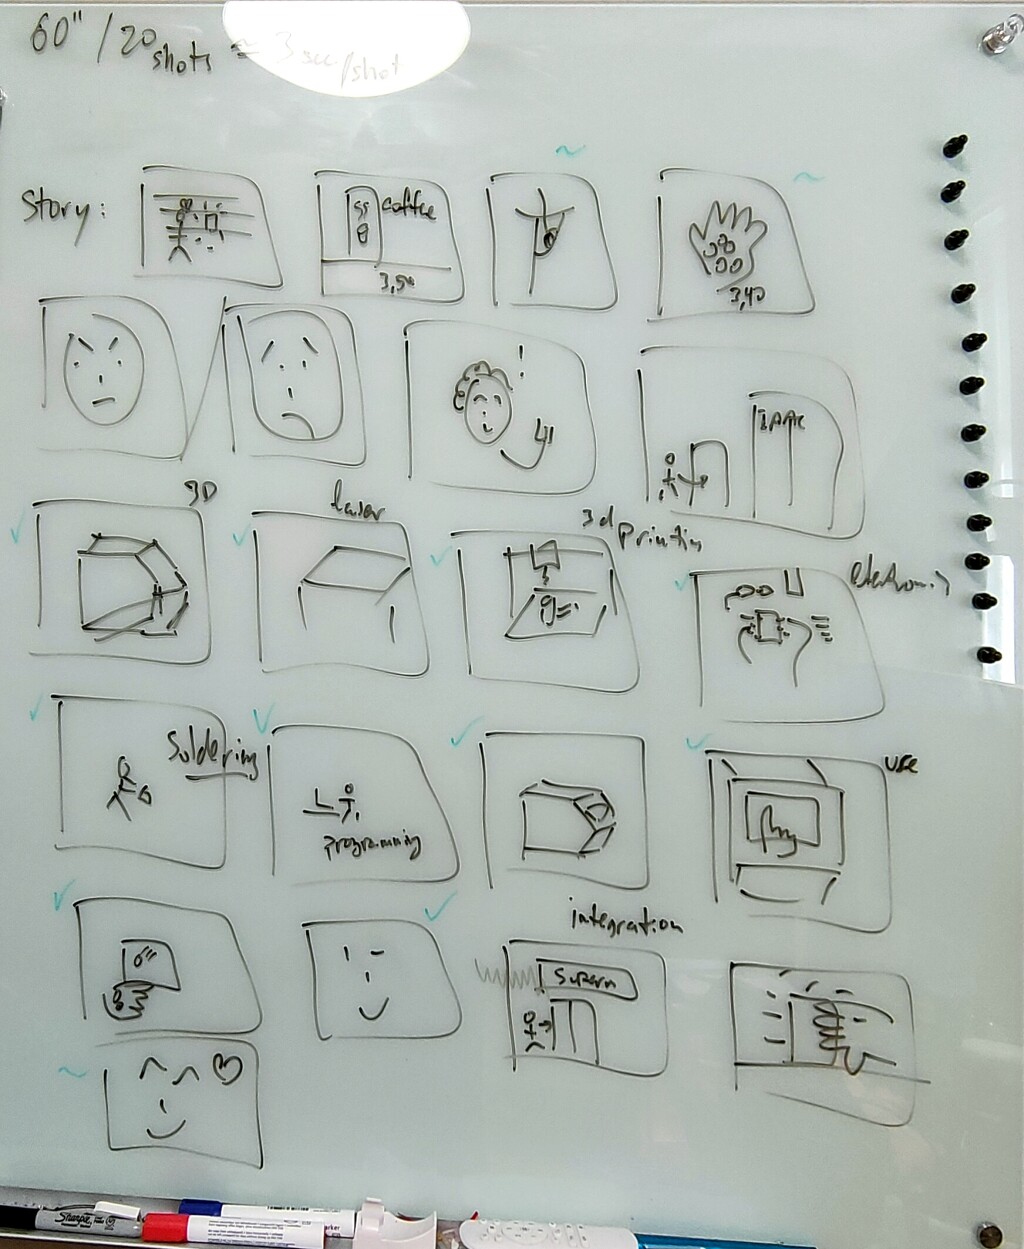
Storyboard Transcript
The main vision for the video was sketched quickly, and it covered someone who wants to get a coffee but is not carrying the exact change to purchase it, maybe because they left the house in a rush.
They decide that they need an electronic piggyback so this doesn’t happen to them ever again.
They then enroll in FabAcademy to learn all the skills that are needed to completely build one for themselves.
The video transitions through each of the skill and technologies, showing a 5-second demo of each.
It ends with the person using the machine to get the exact right change to buy some coffee and going back to the supermarket to buy the original packet of ground coffee that they could not buy at the beginning of the video.
The last scene of the video is the person drinking a coffee in a starbucks-like coffee shop, as a Non sequitur comic reward for the viewers who have good attention to detail.
Video compression
The last thing we needed to do was compress the video so it has the Maximum quality without surpassing the 10MB file size limit in gitlab.
The following command uses ffmpeg to compress a video using a specific compression rate/quality,
configured via the -crf xx value
ffmpeg -i input.mp4 -vcodec libx264 -crf 28 -preset medium -vf scale=-2:1080 -acodec libmp3lame -q:a 4 -ar 48000 -ac 2 output.mp4
Changing the -crf xx value until the video has your required size works quite well, and it’s better to do it by trial
and error. Larger numbers result in smaller (and lower quality) video files.
Here’s an example, as a rough reference point.

CRF 38 resulted in the 9 MB size that I ended up using