Application Programming
A key component in this project is the user interface.
I wanted to have an interface that can be easily updated and extended, without being limited to how many pins my microprocessor had, or which pins I exposed.
Programming the user interface
An easy way to achieve this was to have the board receive commands via Serial commands that could be sent by a computer.
A Raspberry Pi is a small, low-power, easy-to-configure, fully-featured computer that can run a number of lightweight Operating Systems and applications.
One of the common things it can do is run custom applications written in a high-level programming language (like Java, Ruby, Python, etc…), and (optionally) show a user interface through an add-on touchscreen that can be purchased commercially.
This seemed like a good combination for this project because, not only it met all of the requirements (extensibility, upgradability, customization, etc…), which would be impossible using physical buttons. It also leveraged
Orson
Orson is the name of the application that will control the user interface. It’s a reference to Orson from Orson’s Farm / US Acres TV Series by Jim Davis.
![]()
It is a crude and quick clone of the tic-tac-toe app I programmed for week 11 - Machine Design, since it already has all of its components in place:
- Communicating over Serial protocol, via USB
- Exposes a web application
- Configurable via .properties file
- although this is becoming less relevant: the new code has been improved to automatically detect the correct USB port and attempt to connect to it on application launch.
- It provides a simple web interface so that it can be controlled from a browser
- In this case, the browser will be running from the raspberry pi as well: just so we can stress test its memory and performance a bit more.
- That´s pretty much all we need for now!
- It’s lightweight enough (lol!) that it can support up to 1 concurrent user at the same time! 🤯
A small app provides a UI to control a coin dispenser, designed as part of the final project for FabAcademy 2022
The backend
The backend application has very few responsibilities and barely any logic:
- Serve the frontend files needed, through Spring’s MVC config
- Collect incoming HTTP requests and convert each request into individual coin operations
- Send each coin operation to the main board via serial (USB cable)
Command parsing
One of the important responsibilities that the application has is to convert a single user click/touch into a variety of commands to be sent to the microcontroller.
The logic is fairly simple and right now the operations are encoded as part of the frontend, so the backend only needs to parse an HTTP request and send it directly via Serial.
For completion’s sake, I’m including here two sample unit tests that showcase this simple requirement.
class ArduinoWebControllerTest {
    //[...]
    @Test
    void testCreateSerialCommands_createsOneCommand() {
        List<String> serialCommands = ArduinoWebController.createSerialCommands("EJECT 020");
        assertNotNull(serialCommands);
        assertEquals(1, serialCommands.size());
        assertEquals("EJECT 020", serialCommands.get(0));
    }

    @Test
    void testCreateSerialCommands_createsTwoCommands() {
        List<String> serialCommands = ArduinoWebController.createSerialCommands("EJECT 020 010");
        assertNotNull(serialCommands);
        assertEquals(2, serialCommands.size());
        assertEquals(serialCommands.get(0), "EJECT 020");
        assertEquals(serialCommands.get(1), "EJECT 010");
    }

    @Test
    void testCreateSerialCommands_createsToAll10Commands() {
        List<String> serialCommands = ArduinoWebController.createSerialCommands("EJECT 020 050 010 100 010 050 100 200 020 010");
        assertNotNull(serialCommands);
        assertEquals(10, serialCommands.size());
        assertEquals(serialCommands.get(0), "EJECT 020");
        assertEquals(serialCommands.get(1), "EJECT 050");
        assertEquals(serialCommands.get(2), "EJECT 010");
        assertEquals(serialCommands.get(3), "EJECT 100");
        assertEquals(serialCommands.get(4), "EJECT 010");
        assertEquals(serialCommands.get(5), "EJECT 050");
        assertEquals(serialCommands.get(6), "EJECT 100");
        assertEquals(serialCommands.get(7), "EJECT 200");
        assertEquals(serialCommands.get(8), "EJECT 020");
        assertEquals(serialCommands.get(9), "EJECT 010");
    }
    //[...]
}
Serial Communication
The other important responsibility of the application is to send commands via Serial interface.
This is accomplished using the same technique and libraries I used in Week 11 - Machine Design.
@Service
public class ArduinoClient {
    //[...]
    public String sendCommand(String command) {
        if (!enabled) return "Arduino is disabled programmatically";

        System.out.println("sending: [" + command + "]");
        if (arduino == null) {
            System.err.println("Arduino has not been initialized. Use init() before sending commands");
        }
        arduino.serialWrite(command + "\n");

        try {
            Thread.sleep(sleepDurationFor(command));
        } catch (InterruptedException e) {
            e.printStackTrace();
        }

        return "";
    }

    private long sleepDurationFor(String command) {
        if (command.startsWith("EJECT")) {
            return 1200;
        } else {
            System.err.println("Unknown command " + command + " using default speed");
            return 1500;
        }
    }
    //[...]
}
Coupling between this code and external systems
The two key pieces of design to extract from this sample code are the following:
Coupling to the servos
This code above has very strong coupling to the real-world pieces that are moving (The 5 servos that eject coins)
We can see this by the presence of functions like sleepDurationFor(). Why is that function there?
- Well, each command needs some resting time to allow real-world actuators to perform their actions.
- In our case, a servo needs to retract and then push forward to eject one of the coins in holds.
- In the case of TicTacToe, it was moving the pen to the position, lowering it, drawing the figure, and raising it.
Different operations might need different amounts of time to complete, so the sleepDurationFor(String command)
function is used to decide how long to wait for after each command.
If we were to skip this step, the commands would all be sent directly to the board, without any delay.
This would not be a deal-breaker, since the receiving microcontroller has a buffer to receive operations asynchronously, and can consume (and hold) a few bytes while the main loop is busy actuating the servos, but the buffer size is relatively small, and we don’t want to overrun it.
This forced delay effectively forcibly binds the delay from end to end, making the end user wait for the servo to finish it movement. It binds this entire sequence together - the real-world delay, cause by moving parts in the servo - to the delay in the microcontroller, which consumes CPU cycles - to the delay in the microcontroller loop(), which can only consume instructions when it reads new commands in the input buffer. - to the delay in the backend application (THIS precise delay I coded in the function above)
- which ultimately controls how long it takes for the web request to complete - and slows down the user, so they cannot send too many commands in a row.
Coupling to the syntax/commands interpreted by the microcontroller
The other key design decision to note is that we use the NEW_LINE character \n as an end-of-instruction character.
This is something we can see in the consumer of instructions (the Microcontroller that executes them)
The NEW LINE character is encoded as \n in java, but has a
UNICODE code of 10.

This is why this magic number appears in our arduino code. We use that character to split the burst of incoming bytes into easy to parse and interpret instructions (just like many apps do).
const int NEW_LINE = 10;

//[...]

void loop() {
  delay(1000);

  if (Serial.available() > 0) {
    String command = Serial.readStringUntil(NEW_LINE);
    parsePcCommand(command);
  }
}
The frontend
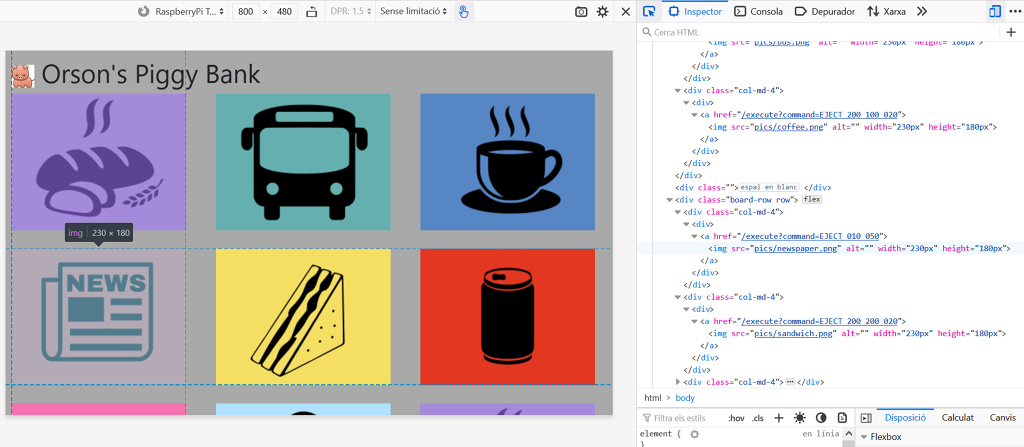
The frontend of the application is what appears on the touchscreen when the system boots up, and has a very simple interface that allows the user to tap on an icon and have a specific high-level command get set to the backend.
This high level command encodes in itself
- The operation to perform (right now EJECT is the only supported operation, but others could be added in the future)
- The sequence of coins to be ejected (not only their denominations but their order as well)
Controversial design choices?
This Frontend-loading of logic brings the responsibility of choosing which coins are needed to the requester that sends HTTP requests, instead of the backend.
This works because the system (in this current iteration) makes a fundamental (and unrealistic) assumption: all the coin-holders are full of coins, and always will be!
Future vision
In the future iterations, once the system becomes stateful (and once it knows how many coins of each type it has), this responsibility should (obviously) be moved to the backend, since that’s where this extra bit of information can be used to make better decisions. The frontend responsibility would need to be slight changed to only send the requested amount (e.g 3.60 EUR instead of 2 Eur + 1 Eur + 50 cent + cent).
This would in turn allow the backend to take on more responsibilities:
- Decide how to split this amount of money into the different coins that it has right now
- or, it could even be programmed so that it ejects less optimal coin combinations (for the user), but prioritizing its
own flexibility and autonomy (so it can keep working for longer).
- That is, to eject the requested change as 1 + 1 + 1 + 0.2 + 0.2 + 0.2 even if it has 2 eur coins and 50 cent coins, if the system knows that it has very few coins of those denominations, but it prefers to save them for other uses (for reasons that only The Algorithm knows).
Workflow and Toolchain
One of the first things to resolve during the application development workflow was: how can I reliably deploy the code to the target device.
This capability will give us a quick and short feedback loop, and also will save us from last minute integration issues and let us resolve them at the very beginning, when they are cheaper to fix.
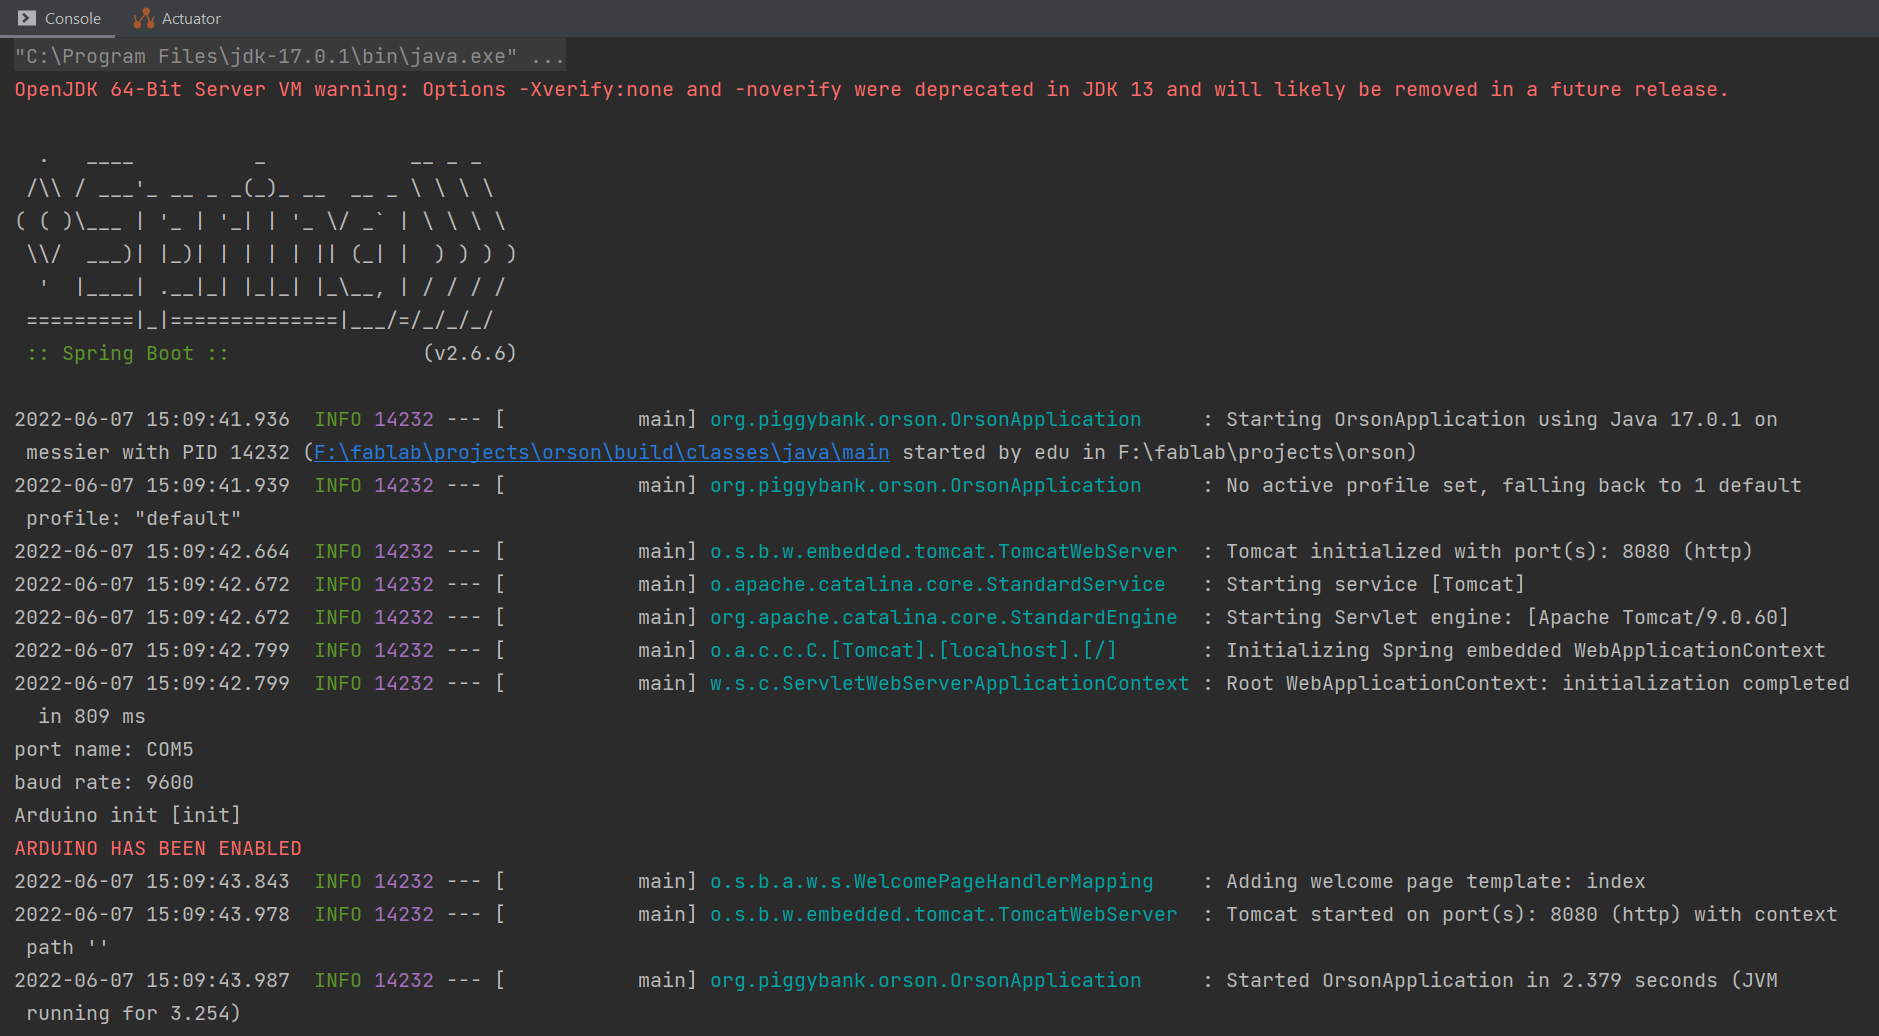
As an example, let’s just say that we want to understand how our app will work in our target device, and we want to inspect which serial ports will be available once we connect our custom-made board to the raspberryPi.
Let’s create a simple HTTP endpoint into our “work in progress” app! This port will lists all available serial ports.
Once we have this endpoint, let’s deploy and launch our app into the device in just 2 clicks, and see what comes up when we hit that endpoint.
Deploying code via SSH
In order to effortlessly deploy my app into the Pi, I used some of the built-in tools that come with IntelliJ IDEA, but if you have any fave. app that can send files via SSH, the results will be equivalent.

In my case, the configuration just requires the IP address of the Pi and some login credentials (user+password or SSH key).

A quick look at serial ports shows what we are expecting:

Controlling the RaspberryPi through VNC
Now, let’s say that we also want to be able to control our Pi from our laptop, so we can use our keyboard to type urls, and so we don’t have to navigate using the touchscreen.
We can accomplish this by enabling the VNC server inside the Pi, and then installing a VNC viewer on our laptop, and connect to it over the network.

Now we can see control the entire device, and send files to and from it, without having to look at it/touch it ever again.
Configuring splash screen app
The next thing we want to configure the user interface is to have an unattended boot sequence that loads our website when the pi boots up. This will avoid accidents, remove the requirement to have a mouse and keyboard present to use the machine, and also provide a little of obscurity as to how it all magically works behind the scenes.
This simple tutorial explains how to launch chrome on fullscreen when the pi starts up
This is how it was implemented
pi@raspberrypi:~ $ cd .config
pi@raspberrypi:~/.config $ sudo mkdir -p lxsession/LXDE-pi
pi@raspberrypi:~/.config $ sudo nano lxsession/LXDE-pi/autostart
pi@raspberrypi:~/.config $ cat lxsession/LXDE-pi/autostart
@lxpanel --profile LXDE-pi
@pcmanfm --desktop --profile LXDE-pi
#@xscreensaver -no-splash
point-rpi
@chromium-browser --start-fullscreen --start-maximized
pi@raspberrypi:~/.config $
pi@raspberrypi:~/.config $ sudo reboot
Launching the backend server on pi startup
Of course, having chrome open the website will not be enough if we don’t configure our application to be launched during system startup. Let’s do that!
Attempt 1
This unhelpful tutorial explains how to run any java program during boot
pi@raspberrypi:~ $ ls -lis
total 22220
131441     4 drwxr-xr-x 2 pi pi     4096 Apr  4 12:57 Bookshelf
529225     4 drwxr-xr-x 2 pi pi     4096 Jun  4 19:16 Desktop
529237     4 drwxr-xr-x 2 pi pi     4096 Jun  4 19:16 Documents
529234     4 drwxr-xr-x 2 pi pi     4096 Jun  4 19:16 Downloads
529238     4 drwxr-xr-x 2 pi pi     4096 Jun  4 19:16 Music
155844 22180 -rw-r--r-- 1 pi pi 22708920 Jun  5 16:19 orson-0.0.1-SNAPSHOT.jar
529239     4 drwxr-xr-x 2 pi pi     4096 Jun  4 19:16 Pictures
529236     4 drwxr-xr-x 2 pi pi     4096 Jun  4 19:16 Public
156040     4 -rw-r--r-- 1 pi pi       35 Jun  5 16:54 runorson
529235     4 drwxr-xr-x 2 pi pi     4096 Jun  4 19:16 Templates
529240     4 drwxr-xr-x 2 pi pi     4096 Jun  4 19:16 Videos
pi@raspberrypi:~ $ sudo chmod 744 runorson
pi@raspberrypi:~ $ ./runorson

  .   ____          _            __ _ _
 /\\ / ___'_ __ _ _(_)_ __  __ _ \ \ \ \
( ( )\___ | '_ | '_| | '_ \/ _` | \ \ \ \
 \\/  ___)| |_)| | | | | || (_| |  ) ) ) )
  '  |____| .__|_| |_|_| |_\__, | / / / /
 =========|_|==============|___/=/_/_/_/
 :: Spring Boot ::                (v2.6.6)

2022-06-05 16:59:31.423  INFO 1826 --- [           main] org.piggybank.orson.OrsonApplication     : Starting OrsonApplication using Java 11.0.14 on raspberrypi with PID 1826 (/home/pi/orson-0.0.1-SNAPSHOT.jar started by pi in /home/pi)
2022-06-05 16:59:31.466  INFO 1826 --- [           main] org.piggybank.orson.OrsonApplication     : No active profile set, falling back to 1 default profile: "default"
This did not work as expected because it required the user to open a shell session, either via terminal app, or through SSH.
We don’t want to have to do that, we need the app to always be running, as early as possible, without requiring the user to open a terminal.
Attempt 2
This other stackexchange post explains how to create a desktop icon to launch a custom app .
pi@raspberrypi:~ $ sudo nano /etc/xdg/autostart/startup.desktop
pi@raspberrypi:~ $ cat /etc/xdg/autostart/startup.desktop
[Desktop Entry]
Type=Application
Name=OrsonBackend
Exec=/usr/bin/java -jar /home/pi/orson-0.0.1-SNAPSHOT.jar

pi@raspberrypi:~ $
After doing that, we can see, java is running on startup, without requiring a single user click/interaction on the screen.
Chrome does need to wait a bit while the backend is starting up (it is a full spring app, running in a low-power device, after all), but eventually, the website appears as expected.
Assets
- Orson - Source Code in gitlab
- The repo includes everything:
- Backend
- Frontend
- Assets and pictures
- Run configurations
- The repo includes everything: