Project Management
1. Setting up git
WHAT:
- We need to configure git on our computer in order to work on documentation effectively.
WHY:
- Our documentation is hosted on the FabAcademy gitlab. Having git installed locally allows us to make changes and push/publish these changes without having to use the online/web editor, which is very cumbersome.
- In addition, learning how to use a version control system (git-scm, in our case) is one skill with a steep learning curve, but very useful once you master it.
Installing git locally
Git is already installed on the laptop.
- On most linux distributions (and mac), it comes preinstalled, but if not, it can be installed using the distro’s package manager (apt-get, rpm, yum, etc.)
- On Windows, you can install it from git-scm.com
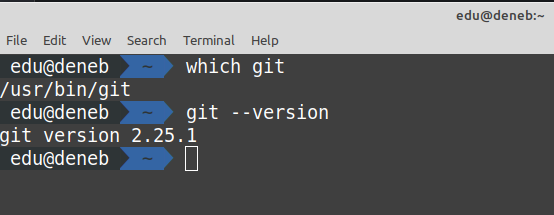
Here’s a quick way to find out if you have it installed and working properly.
Generating an SSH key
Git is a distributed (and standalone) version control system, but most people use store a copy of the code on a central server (github, gitlab, bitbucket, etc.)
Git can use HTTPS as well as SSH for authentication.
| 🔐 Protocol | 👍🏻 Pros | 👎🏻 Cons |
|---|---|---|
| HTTPS | Easy to setup, no keys required | It will make you enter your userid/password every time |
| HTTPS | Very ubiquitous. Easy to traverse proxies transparently | Proxies are fairly rare in today’s environments. This is barely an advantage! |
| SSH | Much more secure (no need to remember a password!) | You have to generate keys and configure it, but only once! |
| SSH | The de-facto standard for auth. | If your private key gets leaked, you need to revoke it and generate/upload a new one. |
Authenticating against gitlab
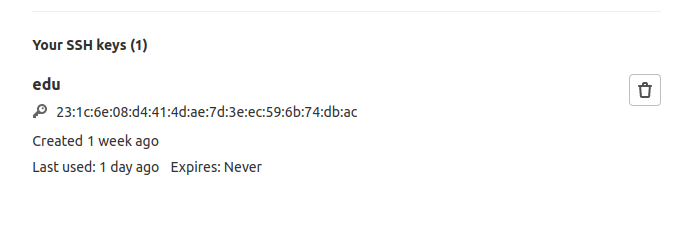
In my case, I already had a keypair that I use for other purposes (a home git server that I use for personal projects), so instead of creating a new one, I decided to copy the private key to my laptop and upload the public key to gitlab.
Once the key is imported into gitlab, we can see its hash.
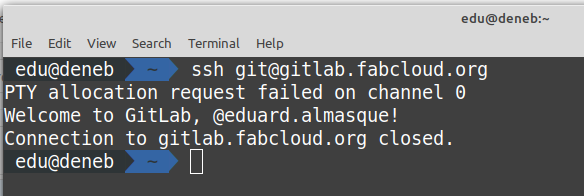
And validate that we can connect to gitlab.
Git workflow
The current git workflow is similar to the one I use as a software developer
- I use trunk-based development because helps me keep an always-working version of the documentation.
- I use a graphical interface, as it helps me more than the command-line interface.
- Side-by-side diffs
- Automatic color coding, as well as in-line diff as I edit the document normally.
- Normal code-assistance and type-ahead suggestions, even while I write commit messages.
- Easy partial-file commits, to keep commits atomic and independent.
- These are out-of-the-box features that come with IntelliJ IDEA, which I also use to edit Markdown documents, and run the scripts that compress images
- Right now, I am the only one working on this project, but I apply the same principles when contributing to the bcn-team-documentation

Small and Atomic commits help readers understand what changes were done (and why)

What git is and what it isn’t
Git is not:
- Git is NOT your friend
- Git is NOT what you think it is
- Git is also NOT what I think it is
- If you’re new to git here’s a handy way that has helped me work with git. I hope it serves you as well:
- Git does things in a way that you (and I) cannot fully understand.
- We understand an abstraction of it, and that’s good enough (for now).
- It’s better if you don’t dig deeper on the “how” for now, if you’re just getting started
- God may have mercy on your poor soul if you ever need to learn git at a deeper level, because it will mean that you are in trouble and your pristine illusion will shatter irreparably.
- Amen!
Git is:
- Git is a distributed version control system (VCS)
- Although the vast majority of people use it like a “centralized VCS + convenience sugar commands”.
- I have yet to meet someone that shares code in a peer-to-peer way (using git daemon) instead of pushing-pulling via a centralised server.
- This is because of legacy reasons, because users can reason about this workflow more easily, and also because it allows companies/corporations/teams centrally manage access and permissions as well as treat it like the golden copy of the source.
- Git is a very powerful tool that hates new users, and knows that new users are terribly confused by it.
- And git does not care about it.
- “let them suffer, let them learn” could be its motto.
- Unfortunately, there’s little you can do about it. Put on your learning&suffering pants, because you’ll need them.
- Git is harsh, but not mean.
- Once you have figured out how the basics work, git will reward you with a fundamentally different understanding of its world, and the ability to control any repo you want.
- Just be kind to yourself while you learn, and give yourself plenty of time to do, undo, mess up, try to fix, give up in frustration, learn and fix.
- Git uses the famous abstraction of Plumbing and Porcelain to try to separate its user-facing commands (git checkout, git commit, git branch…) from its low-level commands (git hash-object , git cat-file, git write-tree, git commit-tree, git update-ref, git-receive-pack, and the infamous git filter-branch among many, many others…)
- Despite this well-intentioned abstraction, it is a matter of time (sometimes weeks, sometimes hours) until a novice user makes some incorrect assumptions, encounters a problem, and makes a mess.
- This very novice user (if working alone) is now forced to plunge deep into the depths of plumbing commands to try to undo the changes they made. Maybe they committed a password that was not meant to be published, maybe they borked the branch and are panicking that someone will find out.
Here’s a 1-panel comic that explains it fairly well:
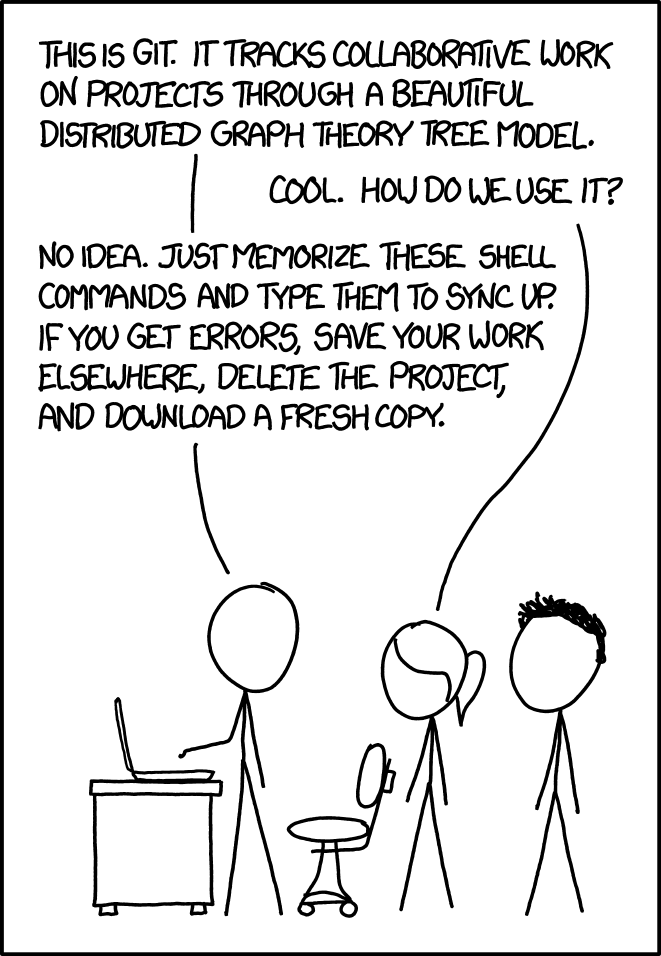
xkcd, always finding a way to explain life in a single panel.
💡 Closing thoughts
Getting setup with git/gitlab was not a hassle since it’s a process that I’ve had to do multiple times, and I’ve already been bitten in the past. However, I wanted to take 5 minutes to write down some common pitfalls that I’ve seen around the lab while helping fellow students get their PCs setup.
If you’re setting up your PC with git/gitlab, these are some common things to watch out for:
Unintuitive User Interfaces end up harming users.
Avoid copy/pasting commands you see on websites. It’s better to type them from scratch, particularly if the command fails when you copy/paste. I have seen lots of examples where unintuitive user interfaces harm users. Here are some examples:
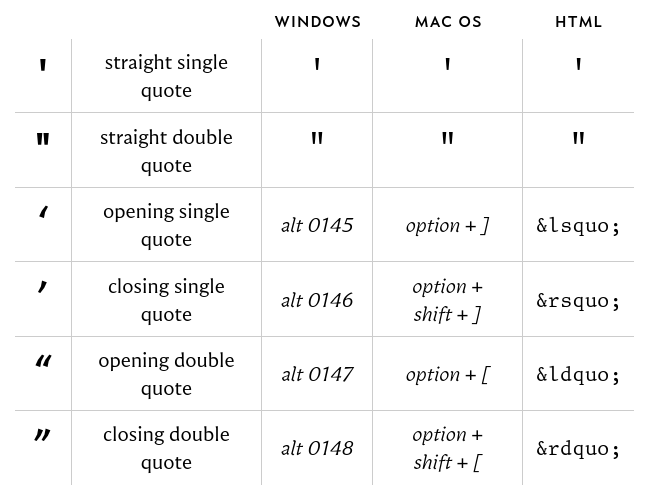
- Copy-pasting code that contains fancy-formatted characters (curved double quotes, long dashes, etc…) from blogs,
ultimately results in users pasting non-standard characters into their terminal, and the terminal being unable to
parse and interpret the command. Tip to remember: A “curly double quote” is not a “double quote”, a “long dash” is
not a “dash” and cannot be used for passing arguments to programs).
see the difference
- Copy-pasting code that ends up with hidden characters that mess up command parsers (e.g. errors
like
\0231\0213\0312ssh-keygen command does not exist)
Unintuitive default behaviours/error messages cause confusion
Sometimes, the tools we use end up hurting us by not doing the reasonable/expected thing, when it really should ( especially painful if it’s a process that a novice will have to go through!).
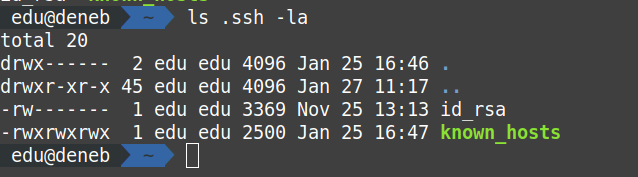
An example is during the ssh-keygen steps, where the app suggest storing the newly generated key
in ~/.ssh/whatever.pub but the .ssh directory does not exist. If the user accepts the default suggestion (which is
very reasonable) they end up with an error trying to create the file, because the .ssh folder does not exist yet! This
gets resolved by creating the .ssh directory manually and relaunching the ssh-keygen process, but it’s confusing that
the default suggestion from the tool does not try to create the directory if it does not exist. This would be so easy to
fix, and it would make the user experience a lot more smooth.
2. Setting up mkdocs
WHAT:
- We need to set up mkdocs locally in order to validate our documentation before pushing.
WHY:
- The “out-of-the-box” FabAcademy documentation is formatted using markdown, and we use mkdocs to automatically generate a static public website. We want to have mkdocs installed locally so that we can quickly validate that everything works. The ultimate goal is not to rely on the gitlab CI process to validate if our website works. The feedback look is just too long and resource intensive.
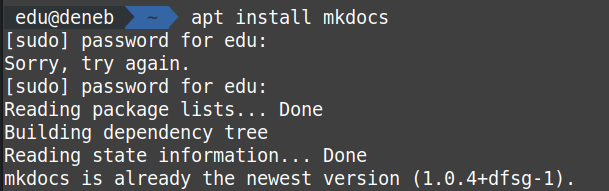
Getting mkdocs installed
On linux, just like git, mkdocs can be installed using the built-in package manager. On Windows, you can install mkdocs as a module for Python3. (I had to do it in both OSes, but I won’t include picture for both processes)
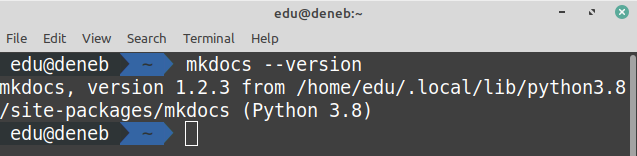
I’m currently using version 1.2.3
Running the mkdocs generation locally

This is the locally-rendered doc page.
Once we’re happy with the changes (updating the doc. contents, changing the theme, etc.), we can commit these changes and push them to gitlab to have the public-facing website re-built with the new content/look and feel.
Customizing mkdocs theme
Something we were encouraged to do was to go beyond the default theme to give our documentation a personalized flavour.
During the 2nd week of FabAcademy I decided to explore other mkdocs themes and landed on a theme called cinder-superhero, which combines the mkdocs-cinder theme and incorporates the Bootstrap-Superhero look&feel.

In true spirit of Iterative/Spiral development, I’ll leave further customizations for the future (Looking at other MkDocs themes? Maybe Jekyll? Other static content generators?), just in case I run out of things to do.
💡 Closing thoughts
- During the first week I had this recurring question on my head: why not use the local mkdocs to generate the HTML locally and completely get rid of the remote build process? I decided against it since it’s common practice to not commit files that can be re-generated or derived from stuff that’s already in the repo
Iterative development
This week, the topic of Iterative development / Spiral development has been mentioned numerous times.
I decided to slice the work to be done in this way, to always have something to show, in case I wanted to present my current progress and status.

Perfect is the enemy of Done
The benefit of this famous mantra is that, if we start with the inner-most loop and we only complete that one, we already have something we can show. Sure, it might not be perfect, but it’s ready to be presented, showcased, and used to collect feedback (most people forget that this is the most important part!).
If one of the outer iterations does not get completed, we still have a “working thing” to present on Wednesday! And we can always enrich it later, if needed, based on feedback we receive.
The other benefit is that I can drop this (stop enriching and iterating) and move on to the next urgent topic without having to bring any carryover (due to having intermediate tasks being incomplete)
Iterative development prioritizes “getting something that works” over “having a perfect idea, half implemented, that does not work in reality”
💡 Closing thoughts - During disasters
As you have already probably read, the night before the Week 1’s Wednesday presentation, my laptop 💀 ⚡ died suddenly, and with it, all the work and content I had there.
Fortunately, I had mitigations in place to contain the damage.
- Most of the work was already documented and deployed in gitlab.
- The prioritization and slicing I did, allowed me to only miss “nice to haves” (automatic image compression), etc…
- and even that is almost completed, since most of the work was also in gitlab. I just couldn’t finish in time because I had to spend time mitigating other impacts (eg. rewriting some of these sections with more lessons learned)
Nothing like a real-life reminder of the importance of iterative development to close off this exciting week.