15. Interface and application programming
This week I worked on using an user interface to control something.
Group assignment
For this week’s group assignment, me, Saskia and Kris teamed up to try a couple of different UI development programs.
You can find the group assignment page here. I tried Tkinter, and accidentally replicated the individual assignment. Oops. Read below to find my other much more complicated assignment efforts.
ESP8266
So fablab has some of these amazing ESP-WROOM chips
This thing has a microcontroller, and the hardware for both wifi and bluetooth, all packaged on a tiny SMD substrate.
The microcontroller in question is the ESP8266. A quite powerful 32-bit controller. Both it and the more advanced ESP32 are used in a wide range of IoT projects. So I should be able to make something cool.
The 8266 also has the advantage of me happening to have a devboard running the same processor. Or at least a cheap clone.

Behold: NodeMCU v3 (not actually same brand as previous nodeMCUs)
Thankfully, this thing has a builtin serial interface. For the WROOM i’ll need to use a serial programmer. Oh and wire up some buttons to force it into programming mode.
Webserver
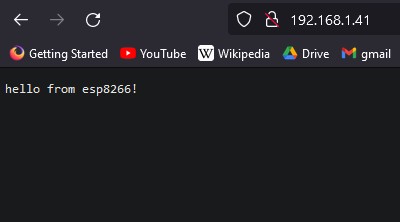
There is a pretty nice ESP8266Wifi library for running a basic webserver. You just need to give a wifi SSID and password as variables, and then the thing connects by itself. After this the ESP can host it’s own little website, accessible through it’s IP on the network
If we want to control the ESP real time through the website, we need a but more fancy tools. Namely, an async server.
An async server is cool, since the server runs in the background, while the microcontroller does it’s own thing. Then, via requests, information can be transmitted between the two.
I modified the code from this tutorial to get async to work. The code is built around the ESPAsyncWebServer library.
On a root request (when the webpage is opened or updated), the code sets up a server and a webpage by sending HTML/CSS/JS script. This page then displays a button. When the button is pressed, a JS script sends a request to either turn the LED on or off. Finally, the webpage requests the led state every second to ensure it displays correctly.
The server code, running in arduino waits for HTTP requests. These are then parsed to either send the webpage or send or change the led state.
Instead of an external pin, I had the server control the builtin LED. Funnily enough, it turns out that the builtin led is active low, which means that the site shows a reverse value than what the led is showing. This could be fixed with some not statements but for a proof of concept this is enough.
The response of the site on the other hand is impressively fast. I sometimes got the state to display wrong for a short time, but it would update itself after a couple of seconds, as the timed GET request is run.
The next step is to move away from the devboard. I’m interested in programming a sunlamp at home. I’m pretty light sensitive, so I’m hoping I can wake up by setting the lamp to turn on 30 min before my alarm clock.
Interface design.
WIth a simple interface like this, the interface is built as a webpage. Using HTML, CSS and JS, that is. For a simple switch, it turns out there are ready functions for this in HTML. In fact, with markdown I can insert one below:
Look a switch!
This switch can activate a server event once pressed. The slider has an “onchange” attribute, which can activate a JS function when the slider is pressed.
Wakeup light
My first edition wakeup light is extremely simple:
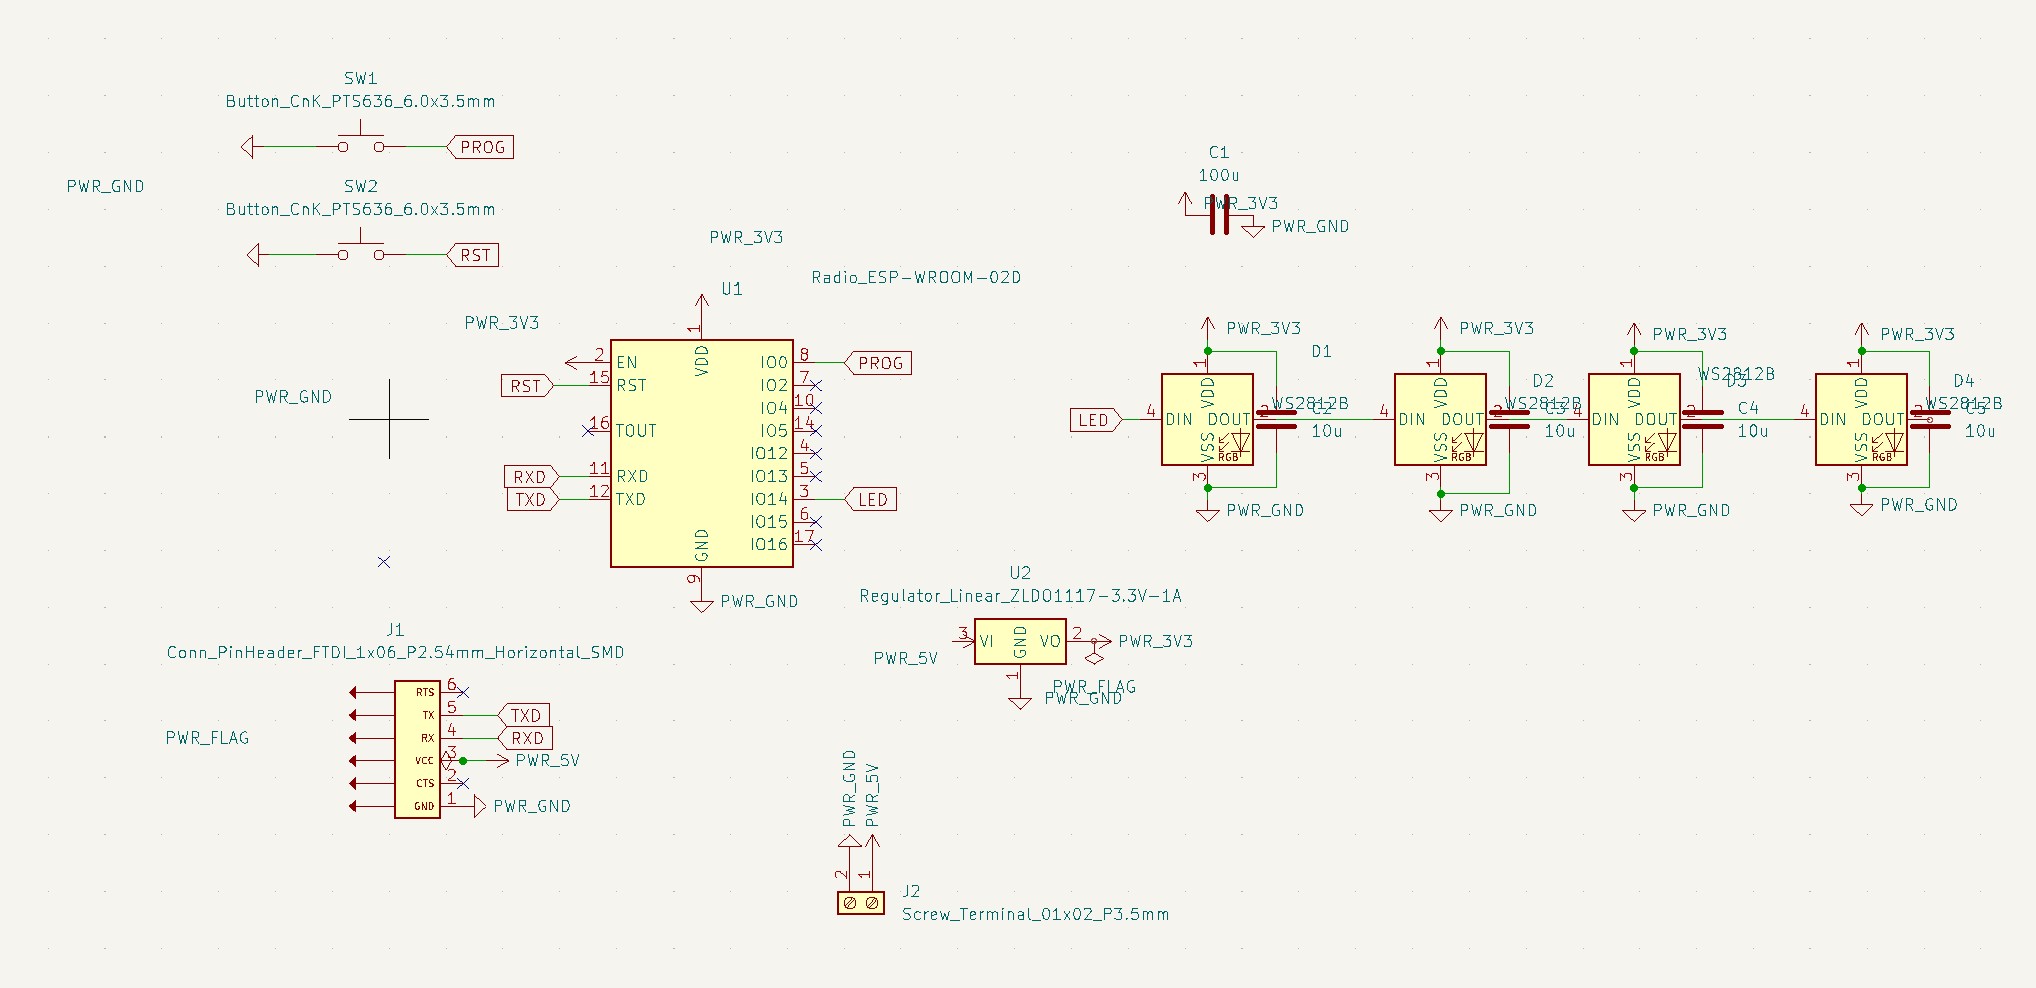
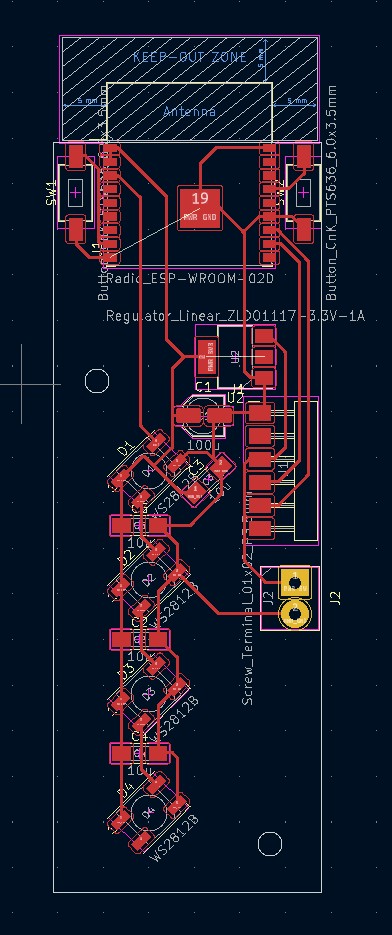
The module incorporates the ESP WROOM, and four WRGB neopixels. The neopixels are run on 3.3V, to eliminate the need for a logic level shifter (since our fablab doesn’t have buffer chips,and my experience with the mosfets has been terrible!). The neopixels are also mounted diagonally, as an experiment.
The ESP is provided with two buttons, one for reset and one for programming. Unlike my devboard, which has an automatic flash function, this board needs to manually be restarted into UART download mode, by holding the program button while resetting.
Manufacture went mostly well, except that coppercam didn’t like the diagonal pads. Fortunately, it was easy enough to manually make them large enough to function
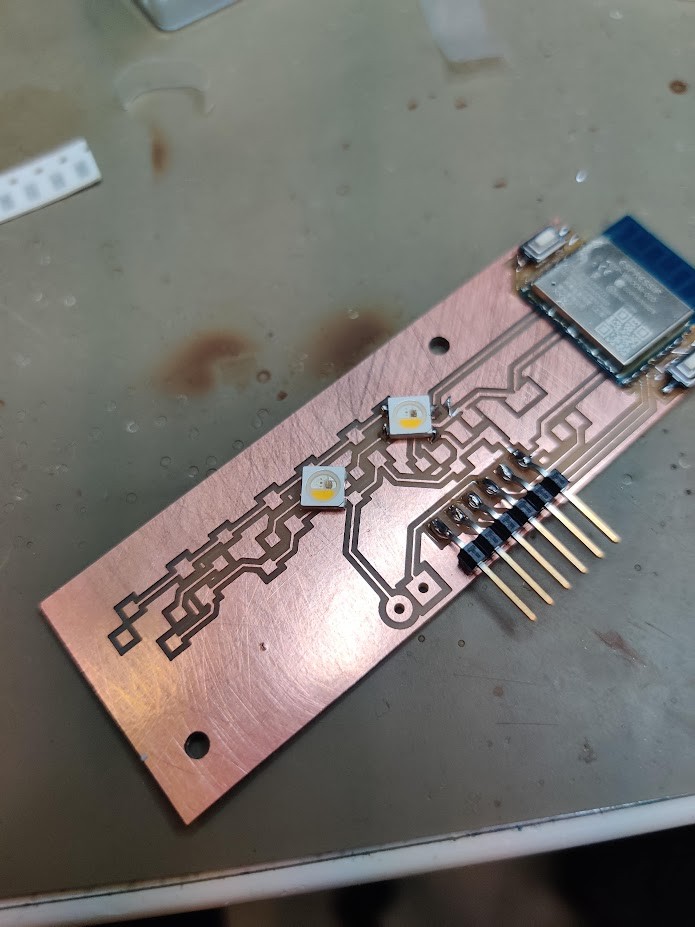
In addition to the board, I also made a USB-Serial bridge, using Kris’ design
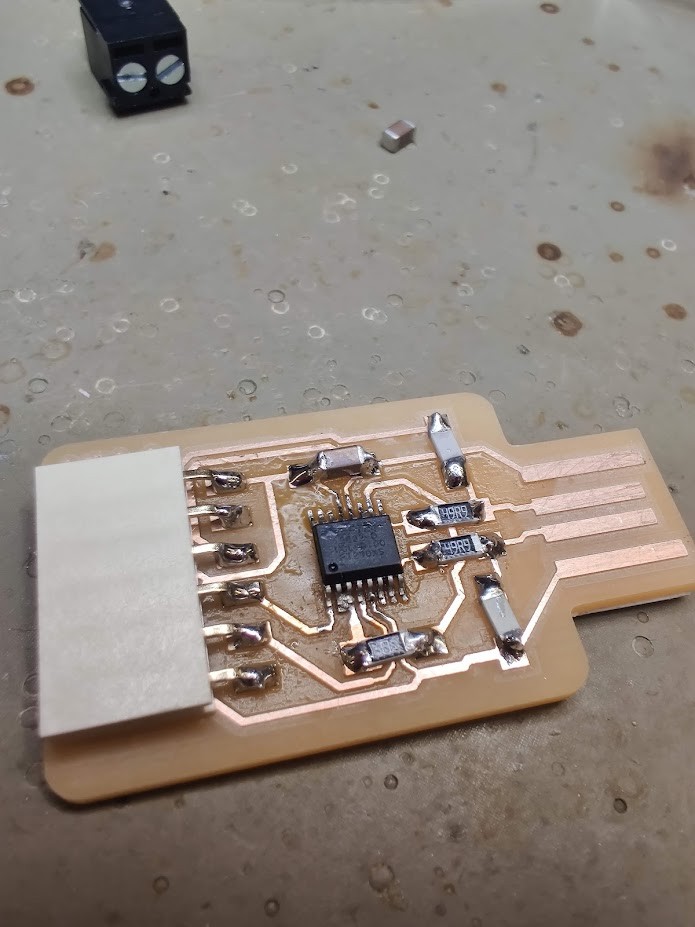
The FT230XS chip itself was a pain to solder manually, otherwise mfg was pretty straight forward.
Debugging
As can be expected at this point, nothing worked at first.
After a bit of debugging, i managed to get a boot message over serial.
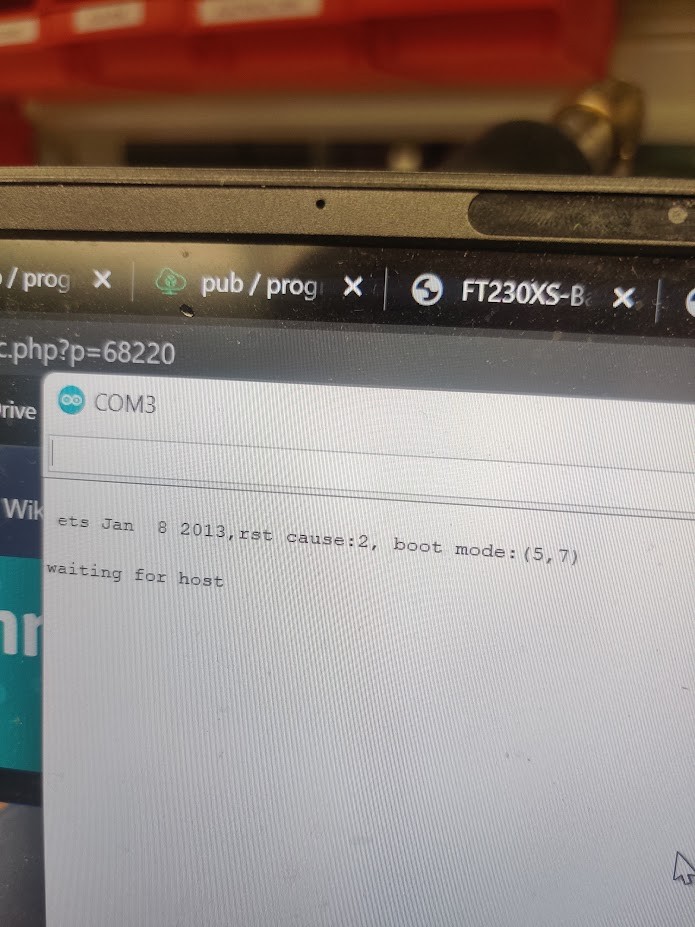
However, the ESP wouldn’t accept code. After a couple of days of messing around, I found This guide. It turns out, that I had Confused GPIO15, and physical pin 15, AKA reset. GPIO15 should also be tied to ground. After soldering in a jumper, the chip came alive!
For the wakeup light, I’m running the same code as before, but “the switch” initiates the function “sunRise”.
void sunRise(){
for (int j = 0; j<256;j++){
    for (int i = 0; i<NUM_LEDS;i++){
    strip.setPixelColor(i, j, 0,0,0);

    }
    strip.show();
    delay(DELAY/255);
}
for (int j = 0; j<256;j++){
    for (int i = 0; i<NUM_LEDS;i++){
    strip.setPixelColor(i, 255-j, 0,0,j);

    }
    strip.show();
    delay(DELAY/255);
}

}
This function first gradually turns on the red leds, and then gradually switches the color to white.
Here’s the whole code using the async server. I also wrote a function called uAwake() which simply checks if the leds are on. I removed most of the code related to using a physical button as well.
/*********
  Rui Santos
  Complete project details at https://RandomNerdTutorials.com/esp32-esp8266-web-server-physical-button/

  The above copyright notice and this permission notice shall be included in all
  copies or substantial portions of the Software.
*********/

// Import required libraries
#ifdef ESP32
  #include <WiFi.h>
  #include <AsyncTCP.h>
#else
  #include <ESP8266WiFi.h>
  #include <ESPAsyncTCP.h>
#endif
#include <ESPAsyncWebSrv.h>
#include <Adafruit_NeoPixel.h>


// Replace with your network credentials
const char* ssid = "***";
const char* password = "***";

const char* PARAM_INPUT_1 = "state";

#define LED_PIN 14                                        //pin where the led strip is hooked up
#define NUM_LEDS 4                                     //number of LEDs in the strip
#define DELAY 60*100
#define BRIGHTNESS 255

Adafruit_NeoPixel strip = Adafruit_NeoPixel(NUM_LEDS, LED_PIN, NEO_GRBW + NEO_KHZ800);

// Variables will change:
int ledState = LOW;          // the current state of the output pin

// Create AsyncWebServer object on port 80
AsyncWebServer server(80);

const char index_html[] PROGMEM = R"rawliteral(
<!DOCTYPE HTML><html>
<head>
  <title>ESP Web Server</title>
  <meta name="viewport" content="width=device-width, initial-scale=1">
  <style>
    html {font-family: Arial; display: inline-block; text-align: center;}
    h2 {font-size: 3.0rem;}
    p {font-size: 3.0rem;}
    body {max-width: 600px; margin:0px auto; padding-bottom: 25px;}
    .switch {position: relative; display: inline-block; width: 120px; height: 68px}
    .switch input {display: none}
    .slider {position: absolute; top: 0; left: 0; right: 0; bottom: 0; background-color: #ccc; border-radius: 34px}
    .slider:before {position: absolute; content: ""; height: 52px; width: 52px; left: 8px; bottom: 8px; background-color: #fff; -webkit-transition: .4s; transition: .4s; border-radius: 68px}
    input:checked+.slider {background-color: #2196F3}
    input:checked+.slider:before {-webkit-transform: translateX(52px); -ms-transform: translateX(52px); transform: translateX(52px)}
  </style>
</head>
<body>
  <h2>ESP Web Server</h2>
  %BUTTONPLACEHOLDER%
<script>function toggleCheckbox(element) {
  var xhr = new XMLHttpRequest();
  if(element.checked){ xhr.open("GET", "/update?state=1", true); }
  else { xhr.open("GET", "/update?state=0", true); }
  xhr.send();
}

setInterval(function ( ) {
  var xhttp = new XMLHttpRequest();
  xhttp.onreadystatechange = function() {
    if (this.readyState == 4 && this.status == 200) {
      var inputChecked;
      var outputStateM;
      if( this.responseText == 1){
        inputChecked = true;
        outputStateM = "On";
      }
      else {
        inputChecked = false;
        outputStateM = "Off";
      }
      document.getElementById("output").checked = inputChecked;
      document.getElementById("outputState").innerHTML = outputStateM;
    }
  };
  xhttp.open("GET", "/state", true);
  xhttp.send();
}, 1000 ) ;
</script>
</body>
</html>
)rawliteral";

// Replaces placeholder with button section in your web page
String processor(const String& var){
  //Serial.println(var);
  if(var == "BUTTONPLACEHOLDER"){
    String buttons ="";
    String outputStateValue = outputState();
    buttons+= "<h4>Output - NEOPIXEL - State <span id=\"outputState\"></span></h4><label class=\"switch\"><input type=\"checkbox\" onchange=\"toggleCheckbox(this)\" id=\"output\" " + outputStateValue + "><span class=\"slider\"></span></label>";
    return buttons;
  }
  return String();
}

String outputState(){
  if(uAwake){
    return "checked";
  }
  else {
    return "";
  }
  return "";
}

void setup(){
  // Serial port for debugging purposes
  Serial.begin(115200);
  strip.begin();           // INITIALIZE NeoPixel strip object (REQUIRED)
  strip.show();            // Turn OFF all pixels ASAP
  strip.setBrightness(BRIGHTNESS);


  // Connect to Wi-Fi
  WiFi.begin(ssid, password);
  while (WiFi.status() != WL_CONNECTED) {
    delay(1000);
    Serial.println("Connecting to WiFi..");
  }

  // Print ESP Local IP Address
  Serial.println(WiFi.localIP());

  // Route for root / web page
  server.on("/", HTTP_GET, [](AsyncWebServerRequest *request){
    request->send_P(200, "text/html", index_html, processor);
  });

  // Send a GET request to <ESP_IP>/update?state=<inputMessage>
  server.on("/update", HTTP_GET, [] (AsyncWebServerRequest *request) {
    String inputMessage;
    String inputParam;
    // GET input1 value on <ESP_IP>/update?state=<inputMessage>
    if (request->hasParam(PARAM_INPUT_1)) {
      inputMessage = request->getParam(PARAM_INPUT_1)->value();
      inputParam = PARAM_INPUT_1;
      if (inputMessage.toInt()){
        sunRise();
      }
      else{
        {
        for (int i = 0; i<NUM_LEDS;i++){
        strip.setPixelColor(i,0,0,0,0);
        }
        Serial.println("off");
        strip.show();
        }
      }
    }
    else {
      inputMessage = "No message sent";
      inputParam = "none";
    }
    Serial.println(inputMessage);
    request->send(200, "text/plain", "OK");
  });

  // Send a GET request to <ESP_IP>/state
  server.on("/state", HTTP_GET, [] (AsyncWebServerRequest *request) {
    request->send(200, "text/plain", String(uAwake()).c_str());
  });
  // Start server
  server.begin();
}

void loop() {
}

int uAwake(){
  if (strip.getPixelColor(0) == 0){
    return 0;
  }
  else{
    return 1;
  }
}

void sunRise(){
  for (int j = 0; j<256;j++){
    Serial.print(j);
    Serial.println(" sun is rising");
    for (int i = 0; i<NUM_LEDS;i++){
      strip.setPixelColor(i, j, 0,0,0);

    }
    strip.show();
    delay(DELAY/255);
  }
  for (int j = 0; j<256;j++){
    for (int i = 0; i<NUM_LEDS;i++){
      strip.setPixelColor(i, 255-j, 0,0,j);

    }
    strip.show();
    delay(DELAY/255);
  }

}
Webserver 2, Websocket Boogaloo
So evidently according to Kris, a single switch isn’t complicated enough :/. No matter! HTML can do much more!
I also switched to PlatformIO for writing code, as I should have done a long time ago! PlatformIO is packaged as an extension for VScode, the same program I use to edit this markdown document. I won’t go into that much detail here about all the advantages of PIO vs Arduino IDE, but it’s capable of far more complicated programming. And VScode is a superior editor as well..
With PlatformIO the web documents are actually separate files, handled as data files in the project. This is compared to previously, where everything has been haphazardly defined in a single main file. For a more complicated project this is definetely the way to go.
As we now have multiple assets, we need to store them into separate places on the microcontroller. The main script is still flashed in the usual way, taking up both RAM and flash. The web assets on the other hand are read only, and are thus stored in flash. This is done using a library called littleFS. Fortunately the user need not worry, as PIO has littleFS nicely integrated.
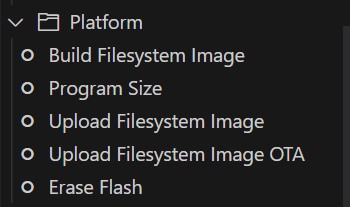
We simply define littleFS as the filesystem used in project config, and then use the platform commands to build and upload the files. In our Arduino code we then refer to the object “LittleFS” to access the server files.
Anyway, I went for a more complicated interface this time. Which finally seems to have been good enough!
For the new server I wanted three sliders to control RGB. I again used a tutorial as the base, and modified the code to suit my needs.
Three sliders are easy enough to implement in HTML. just copy the block creating one, remembering to change the name of the data variables. Sending the data from three inputs between the microcontroller and one or more clients however is a bit more complicated.
To implement this we use a protocol called Websocket. Essentially a bidirectional data channel where the client and server can send data packets to each other. Now when the slider update function is called, a string is sent using the websocket.send method
websocket.send(sliderNumber+”s”+sliderValue.toString());
For instance, “2s100” implies that slider 2 has been set to 100.
The link is bi-directional. If several clients access the server, a websocket update message will update the other clients as well.
I realized that js can also modify the style of the webpage using the document.body.style.background method. Thus, I was able to have the same function also change the background of the webpage to the same color as the led.
YOu can find the complete PIO project as an attached zip file.
And finally, video evidence.
Adafruit IO + IFTTT
To go one step further, I want the microcontroller to activate not only via it’s own website, but through an external service. In that way, I can use something like google assistant routines to drive it.
It turns out that there are no direct ways to do it without running my own server. However, there are a couple of free options available.
First off, Adafruit hosts a service called Adafruit IO this is a server where users can configure to receive and broadcast so called MQTT messages. This a simple protocol built for IoT devices to asynchronously talk to eachother, while not using too much bandwidth.
On the website one can setup a feed. Basically a channel where devices can either send, or subscribe to new data coming in.
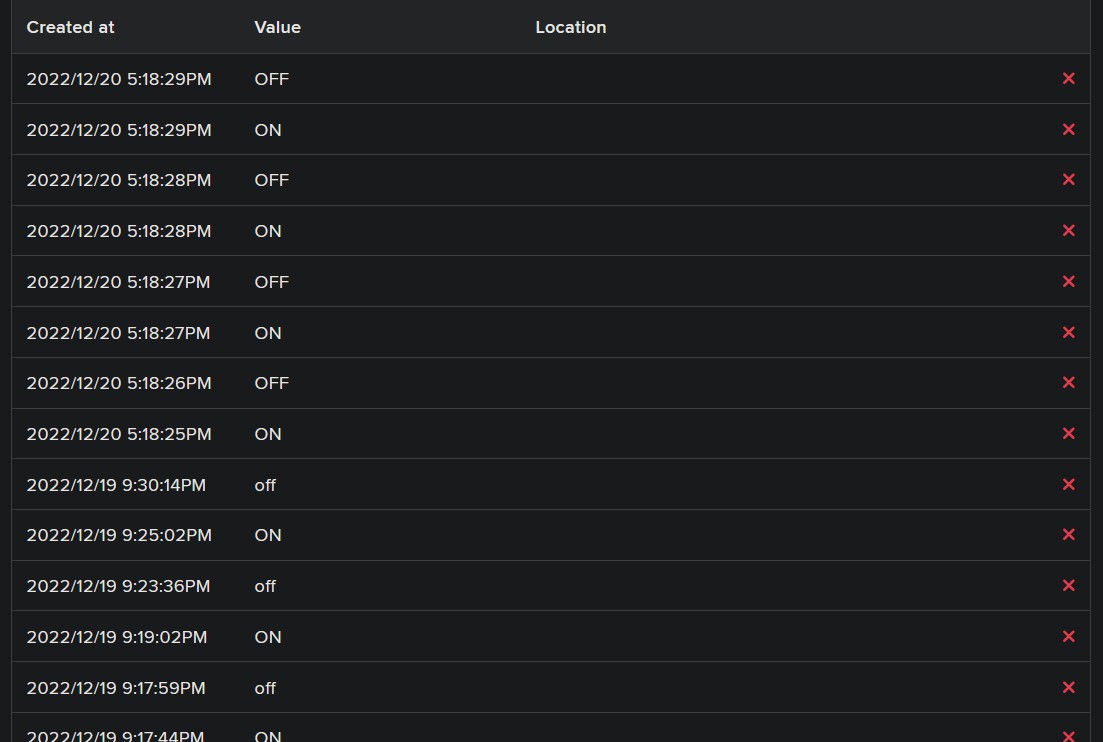
For my first test, I setup a feed to control the builtin led on the devboard with two commands, ON and OFF.
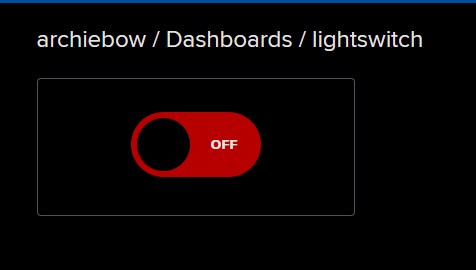
On AIO it’s also possible to setup a dashboard, to send and receive items from the Feed. For me, a simple switch was enough.
This is the Arduino code for my test:
#include <ESP8266WiFi.h>
#include "Adafruit_MQTT.h"
#include "Adafruit_MQTT_Client.h"

#define WIFI_SSID "***"
#define WIFI_PASS "***"

#define MQTT_SERV "io.adafruit.com"
#define MQTT_PORT 1883
#define MQTT_NAME  "***"
#define MQTT_PASS  "***"

//Set up MQTT and WiFi clients
WiFiClient client;
Adafruit_MQTT_Client mqtt(&client, MQTT_SERV, MQTT_PORT, MQTT_NAME, MQTT_PASS);

//Set up the feed you're subscribing to
Adafruit_MQTT_Subscribe onoff = Adafruit_MQTT_Subscribe(&mqtt, MQTT_NAME "/f/onoff");


void setup()
{
Serial.begin(9600);

//Connect to WiFi
Serial.print("\n\nConnecting Wifi.");
WiFi.begin(WIFI_SSID, WIFI_PASS);
while (WiFi.status() != WL_CONNECTED)
{
    delay(1000);
    Serial.print(".");
}

Serial.println("OK!");

//Subscribe to the onoff feed
mqtt.subscribe(&onoff);

pinMode(LED_BUILTIN, OUTPUT);
digitalWrite(LED_BUILTIN, HIGH);
}

void loop()
{
MQTT_connect();

//Read from our subscription queue until we run out, or
//wait up to 5 seconds for subscription to update
Adafruit_MQTT_Subscribe * subscription;
while ((subscription = mqtt.readSubscription(5000)))
{
    //If we're in here, a subscription updated...
    if (subscription == &onoff)
    {
    //Print the new value to the serial monitor
    Serial.print("onoff: ");
    Serial.println((char*) onoff.lastread);

    //If the new value is  "ON", turn the light on.
    //Otherwise, turn it off.
    if (!strcmp((char*) onoff.lastread, "ON"))
    {
        //Active low logic
        digitalWrite(LED_BUILTIN, LOW);
    }
    else
    {
        digitalWrite(LED_BUILTIN, HIGH);
    }
    }
}

// ping the server to keep the mqtt connection alive
if (!mqtt.ping())
{
    mqtt.disconnect();
}
}

void MQTT_connect()
{
int8_t ret;

// Stop if already connected.
if (mqtt.connected())
{
    return;
}

Serial.print("Connecting to MQTT... ");

uint8_t retries = 3;
while ((ret = mqtt.connect()) != 0) // connect will return 0 for connected
{
    Serial.println(mqtt.connectErrorString(ret));
    Serial.println("Retrying MQTT connection in 5 seconds...");
    mqtt.disconnect();
    delay(5000);  // wait 5 seconds
    retries--;
    if (retries == 0)
    {
        // basically die and wait for WDT to reset me
        while (1);
    }
}
Serial.println("MQTT Connected!");
}
For getting google to play nice with our thing however, there is no direct way, so we need an additiona layer.
IFTTT, or If This Then That, is another fairly simple cloud service. One simply defines a trigger that causes an action.

The cool thing is that both AIO and google assistant have integration.
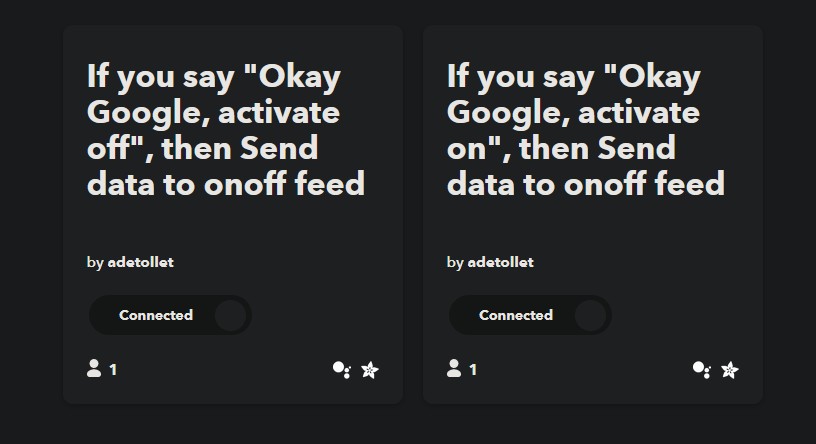
With a free user, one gets a grand total of two applets. Just enough for me to setup an off and on action.
Now, by allowing google integration, the google assistant can activate these actions. This can be done either by voice command or a routine, which can be triggered in various ways.
Despite quite the convoluted chain of events. The system actually works! Below I’ve set a timed routine to enable the light at 2125.
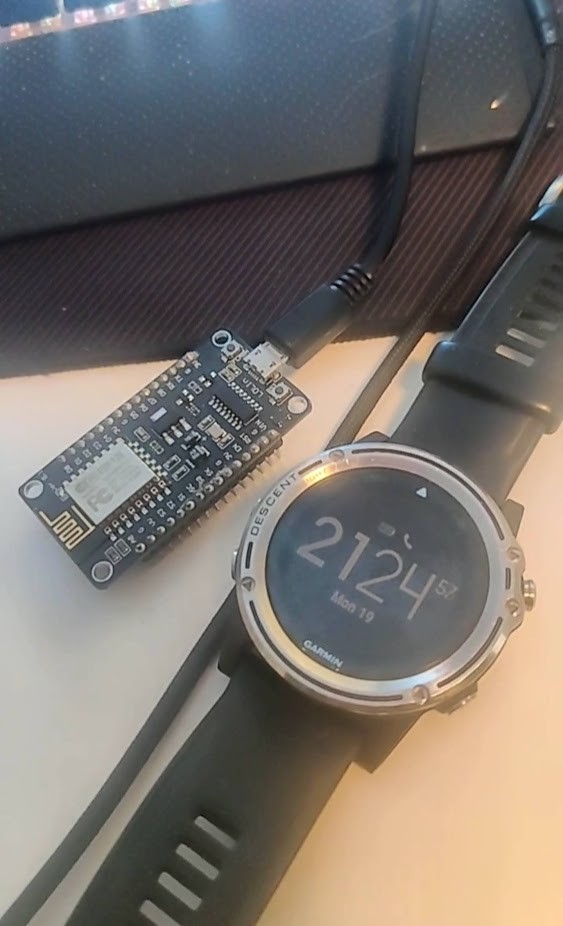
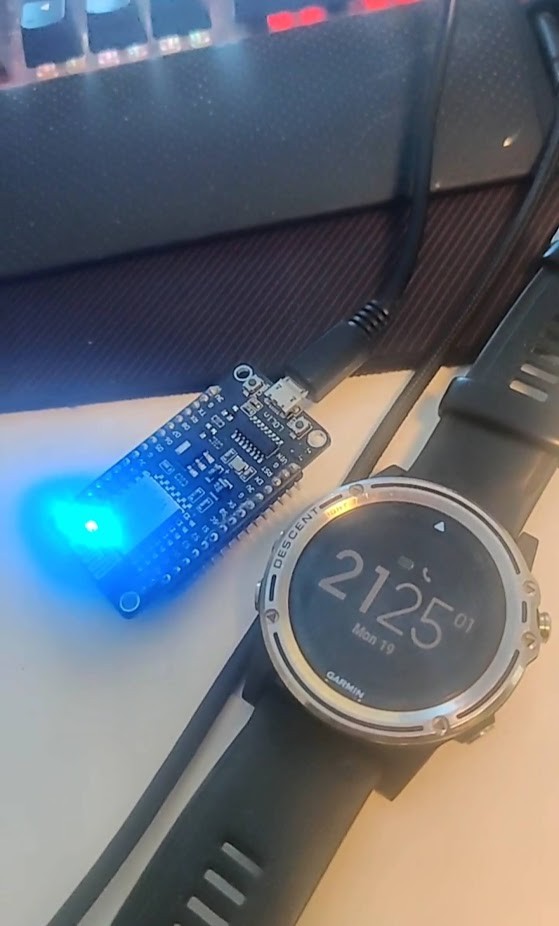
It shouldn’t be that hard to get the script to run on my custom board
Results
I actually managed to wake up to the light this morning, so I consider the prototype a success! For a followup version, the following would be nice additions:
- Automatic flashing
- connector for extendable neopixel strip
- 5V pixel voltage
- Warm white leds
Here are this week’s project files: Kicad