About me
Hi! My name is Arthur. Welcome to my page.
My background
I’m from Finland, currently living in Helsinki. I have a BTech in mechanical engineering and am currently studying for my master’s in space technology.
I have always loved creating things, and starting with 3D printing years ago, I have a special love for computer controlled manufacturing methods. There are quite a lot of these available, via my university, libraries or otherwise. and to learn them better, I enrolled in Fab Academy 2022, graduating a year later.
This site was started as a part of Fab Academy, and you can still find my documentation from that course under “Fab Academy Assignments” I also have the goal of documenting ongoing and completed projects under the “Projects” tab. My previous builds have included everything ranging from chainsaws turned instruments to wearable electronics to a cubesat reaction control system, currently in space.
Anyway, enjoy reading, and hit me up on Linkedin if you wish!
Hobbies
- Scuba diving
- Skiing
- PC gaming
- Humpsvakar
Previous work
This is a showcase of some of the projects I have previously undertaken.
VVER-1200 Nuclear reactor model, 2020
Back in 2020 I had a pretty cool summer job. I worked for Fennovoima, a nuclear power company in Finland, with the task of making an instructional model of their nuclear reactor, model VVER-1200.
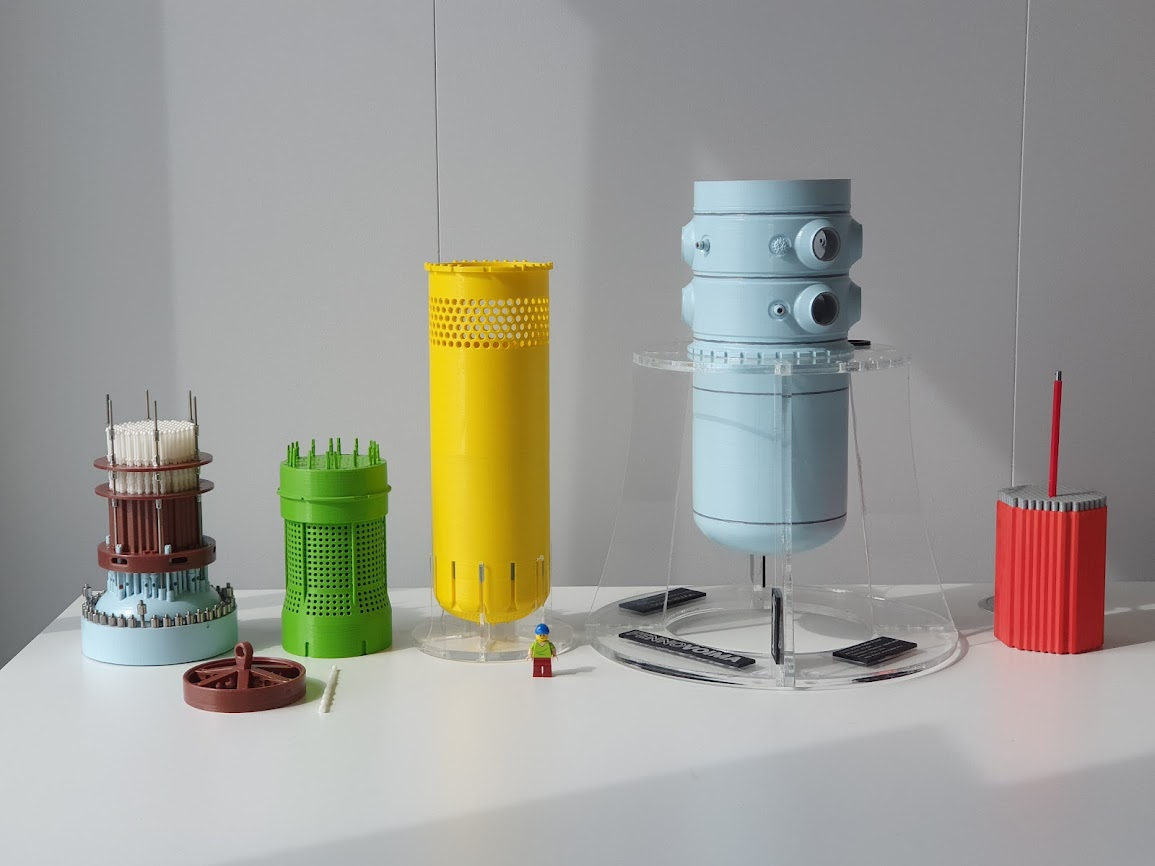
The primary goal of the project was to experiment with rapid prototyping technologies in the nuclear industry training process. It was hoped, that a model could be made inexpensive enoug to allow flexible hands-on training. Traditional models in the field are handmade, and hugely expensive and time consuming to make, and are thus usally kept away from prying hands, behind glass. With a cheap model, trainees can visualize both how the reactor itself is laid out, and various maintennance operations such as refuelling and weld checking, and even perform it themselves!
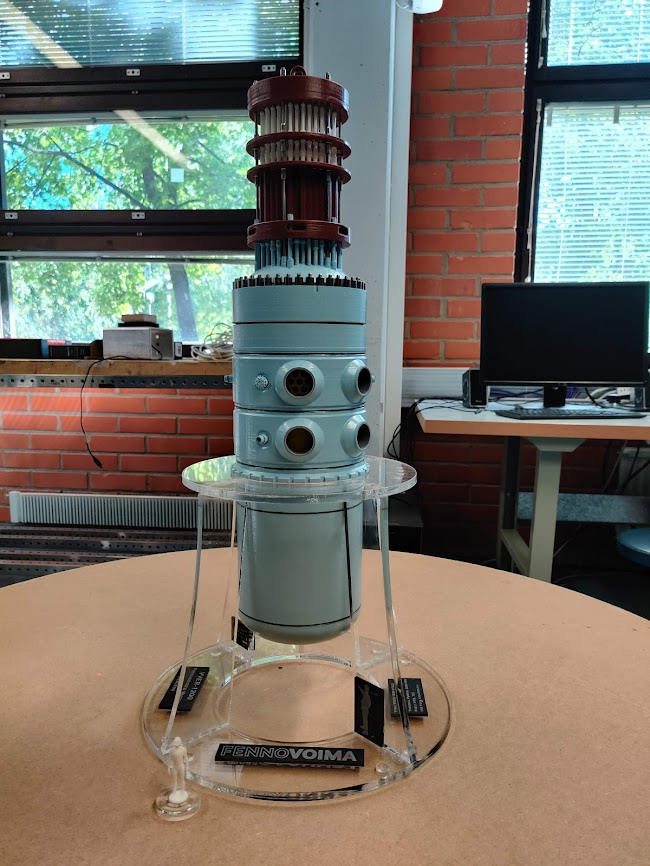
The real reactor is a pressurized water type, and is approximately 20m tall. It generates 3200MW of heat, that is used to boil water into steam and turn a 1200MW electric generator. Everything is huge! Our model is 1:35 scale, so about 40cm tall.
Modelling was done in FreeCAD, based on original design drawings. Manufacture heavily used 3D-printing, over 13 days of machine time in fact! Laser cutting was also used for the different stands.
The reactor can be dissasembled, simulating real life maintenance work. A few fuel assemblies and control rod drives are also removable.
The reactor was actually manufactured at fablab. We got a partnership deal in place, and used the Aalto fablab facilities and equipment for the project.
Led vest mk2, 2019
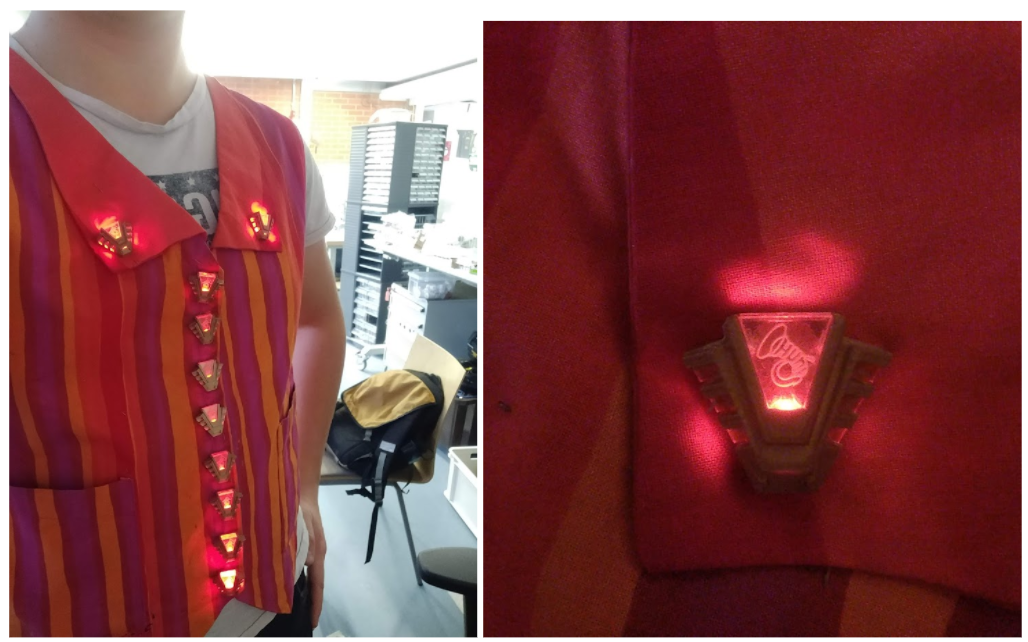
I have been experimenting for a while, with incorporating wearable LEDs to my student band uniform. The modelling was done in solid edge, using a combination of 3d printed plastic and laser cut acrylic the design is inspired by the tv show Stargate.
The system has gone trough a couple of iterations. The mk1 version used regular 5mm leds pointing straight out of the button, and connected with ordinary solder and wires.
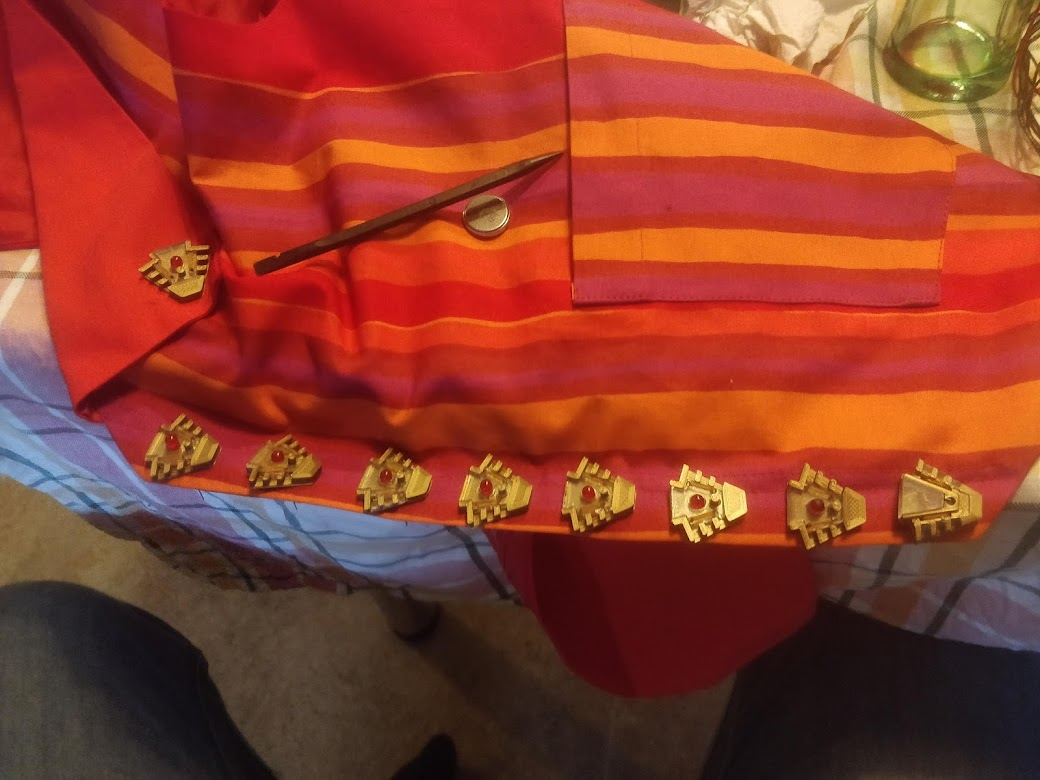
The first version had a couple of issues. First, regular wires and solder joints couldn’t take the strain, and broke constantly. second, the leds are quite directional, so the light effect was quite harsh, when pointing straight out of the button. Clearly, a better solution was needed.
I researched wearables and discovered conductive sewing thread. This silver laced thread can be sown like any other, but is also conductive. I also redesigned the buttons to have the led sideways, this would help them diffuse the light into the acrylic for a glowing effect. The mk2 version can be seen in the top image.
The current version has served me well. But even the conductive threads are straining to take the wear. I have been patching them by sewing more thread on. But thats obviously not an ideal solution. Also, the thread has quite a lot of resistance, Enough to make the parallel coupled leds lose brightness quite fast. I’ve solved the issue by running the wiring as a ring circuit to ensure that all the leds have an equal conductor length. But this has resulted in even more complexity and failure points.
I realized a clean sheet improved version during fab academy. You can find that project Here