11. Output Devices
This week revolved around microcontrollers, and making our Microcontrollers do something useful!
I am working on a LED vest button project, so iI can conveniently incorporate this week into that!.
Our group assignment can be found here
Neopixel
Neopixels are adressable LEDs. They are built around the WS2812B control chip.
THe addressing feature means that the LEDs can be chained along a single data line. Then, commands can be sent to each individual LED, containing color and brightness information. The LEDs will then repeat the signal along the line. Neat! Did i mention that the LEDs have their own voltage controllers as well, and will thus happily accept 3-5v?
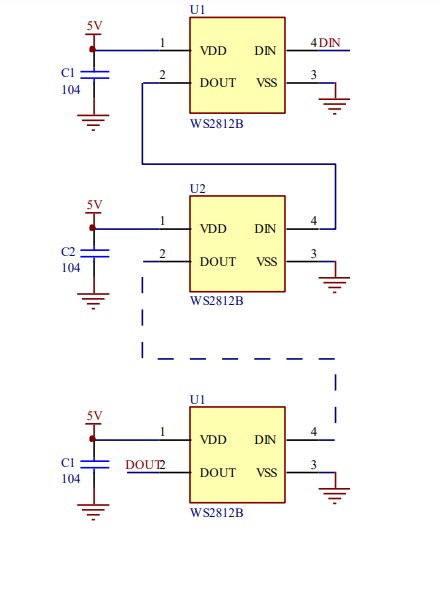
Below is an example diagram from the datasheet. As you can see, the LED package only has 4 ports, VCC,GND, data in and data out. Also recommended are individual power smoothing capacitors for the LEDs, as well as a larger capacitor for smoothing the +5V and GND rails.
These LEDs come in a bunch of sizes, even a 5mm throughhole type. I ~stole~ borrowed some of these from Aalto design factory, and built a prototype circuit on a breadboard, run using my Arduino UNO
Getting the neopixels working was very simple. I just had to install a neopixel library through the Arduino IDE library manager

I modified my own test program from one of the included examples. The included one simply cycled through 8 alternative light cycles using a button. I modified it by reducing modes to 3, making them loop forever, and using interrupt logic on the button to interrupt said infinite loops. I also added a potentiometer. In the first two modes it is used to set LED brightness (Although one of them is LEDs off, so brightness doesn’t really apply there). In the final mode, Rainbow, the potentiometer is used to set animation speed. In the final control unit I’d like to be able to control both, so i’ll need one button and two potentiometers.
Below is my code.
  #include <Adafruit_NeoPixel.h>
  #ifdef __AVR__
  #include <avr/power.h> // Required for 16 MHz Adafruit Trinket
  #endif

  // Digital IO pin connected to the button. This will be driven with a
  // pull-up resistor so the switch pulls the pin to ground momentarily.
  // On a high -> low transition the button press logic will execute.
  #define BUTTON_PIN   2

  #define PIXEL_PIN    6  // Digital IO pin connected to the NeoPixels.

  #define PIXEL_COUNT 10  // Number of NeoPixels

  #define POTPIN       A0

  volatile bool interrupt;

  // Declare our NeoPixel strip object:
  Adafruit_NeoPixel strip(PIXEL_COUNT, PIXEL_PIN, NEO_RGB + NEO_KHZ800);
  // Argument 1 = Number of pixels in NeoPixel strip
  // Argument 2 = Arduino pin number (most are valid)
  // Argument 3 = Pixel type flags, add together as needed:
  //   NEO_KHZ800  800 KHz bitstream (most NeoPixel products w/WS2812 LEDs)
  //   NEO_KHZ400  400 KHz (classic 'v1' (not v2) FLORA pixels, WS2811 drivers)
  //   NEO_GRB     Pixels are wired for GRB bitstream (most NeoPixel products)
  //   NEO_RGB     Pixels are wired for RGB bitstream (v1 FLORA pixels, not v2)
  //   NEO_RGBW    Pixels are wired for RGBW bitstream (NeoPixel RGBW products)

  int     mode     = 0;    // Currently-active animation mode, 0-9

  void setup() {
    pinMode(BUTTON_PIN, INPUT_PULLUP);
    strip.begin(); // Initialize NeoPixel strip object (REQUIRED)
    strip.show();  // Initialize all pixels to 'off'
    attachInterrupt(digitalPinToInterrupt(BUTTON_PIN), intf, CHANGE);
  }

  void loop() {
    interrupt = false;
    if(++mode > 2) mode = 0; // Advance to next mode, wrap around after #2
    switch(mode) {           // Start the new animation...
      case 0:
        colorWipe(strip.Color(  0,   0,   0), 50);    // Black/off
        break;
      case 1:
        colorWipe(strip.Color(255,   0,   0), 50);    // Red
        break;
      case 2:
        rainbow(10);
        break;
    }
  }

  // Fill strip pixels one after another with a color. Strip is NOT cleared
  // first; anything there will be covered pixel by pixel. Pass in color
  // (as a single 'packed' 32-bit value, which you can get by calling
  // strip.Color(red, green, blue) as shown in the loop() function above),
  // and a delay time (in milliseconds) between pixels.
  void colorWipe(uint32_t color, int wait) {
    while(!interrupt){  //while button isn't pressed

      for(int i=0; i<strip.numPixels(); i++) { // For each pixel in strip...
        strip.setBrightness(map(analogRead(POTPIN), 0, 1023, 0, 255)); //set brightness from 0-255, depending on the 10-bit POTPIN value
        strip.setPixelColor(i, color);         //  Set pixel's color (in RAM)
        strip.show();                          //  Update strip to match
        delay(wait);                           //  Pause for a moment
      }
    }

  }

  // Rainbow cycle along whole strip. Pass delay time (in ms) between frames.
  void rainbow(int wait) {
    // Color wheel has a range of 65536 but it's OK if we roll over, so
    // just count from 0 to 3*65536. Adding 256 to firstPixelHue each time
    // means we'll make 3*65536/256 = 768 passes through this outer loop:
    while(!interrupt){
      for(long firstPixelHue = 0; firstPixelHue < 65536; firstPixelHue += 256) {
        wait = map(analogRead(POTPIN), 0, 1023, 50, 1);  //set animation speed from 100-1ms, depending on 10-bit POTPIN value
        for(int i=0; i<strip.numPixels(); i++) { // For each pixel in strip...
          // Offset pixel hue by an amount to make one full revolution of the
          // color wheel (range of 65536) along the length of the strip
          // (strip.numPixels() steps):
          int pixelHue = firstPixelHue + (i * 65536L / strip.numPixels());
          // strip.ColorHSV() can take 1 or 3 arguments: a hue (0 to 65535) or
          // optionally add saturation and value (brightness) (each 0 to 255).
          // Here we're using just the single-argument hue variant. The result
          // is passed through strip.gamma32() to provide 'truer' colors
          // before assigning to each pixel:
          strip.setPixelColor(i, strip.gamma32(strip.ColorHSV(pixelHue)));
        }
        strip.show(); // Update strip with new contents
        delay(wait);  // Pause for a moment
      }
    }

  }

  void intf() {
    interrupt = true; //Interrupt function, set interrupt flag to true
  }
SMD neopixels.
I had the opportunity to order LEDs, so I got some 5050 package SMD ones. THese should be the smallest possible package. The plan is to directly solder these to a flexible substrate. The flexible PCB will be connected with JST cables to a control board, and two daughterboards, with a single Neopixel each.
Circuit design
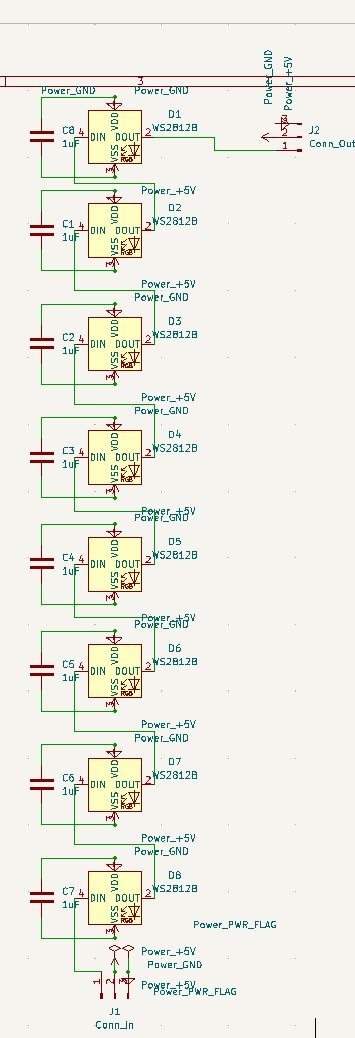
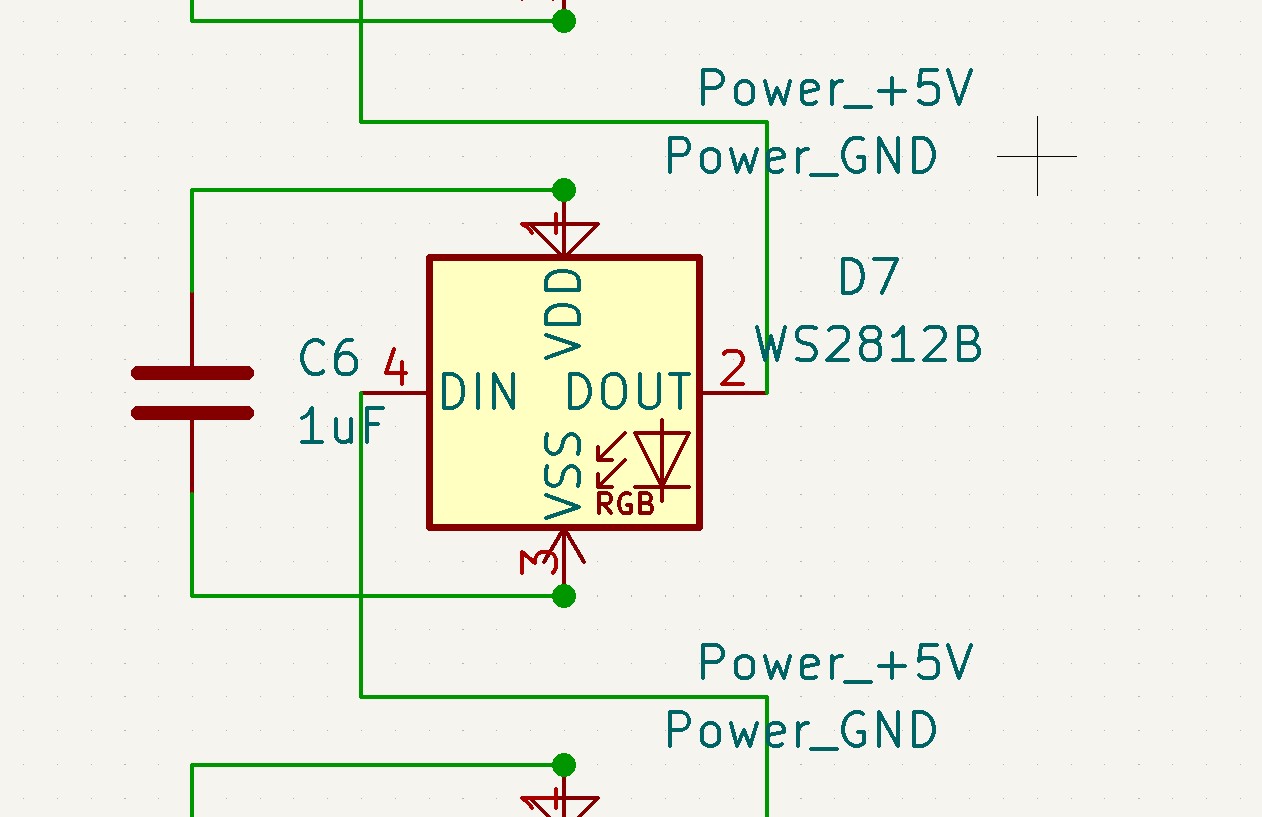
The process and model files for designing the controller board can be found on the final project page
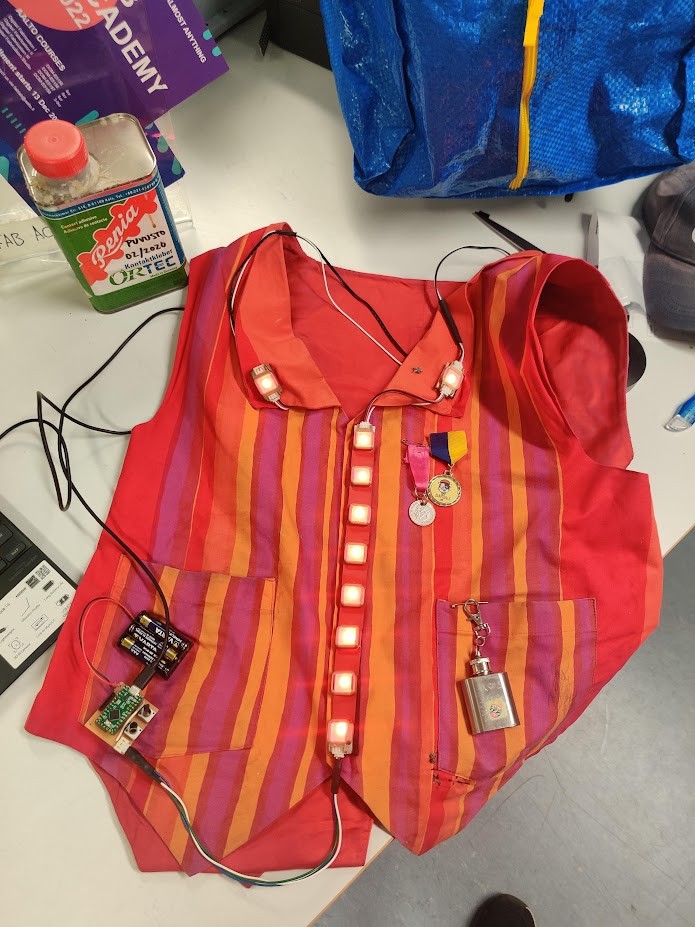
Here’s a hero shot of the leds running of a Teensy LC based board. The final board is attiny 1614 bases, but is also quite well concealed.
Design files for the button circuit can be found here
Power Consumption
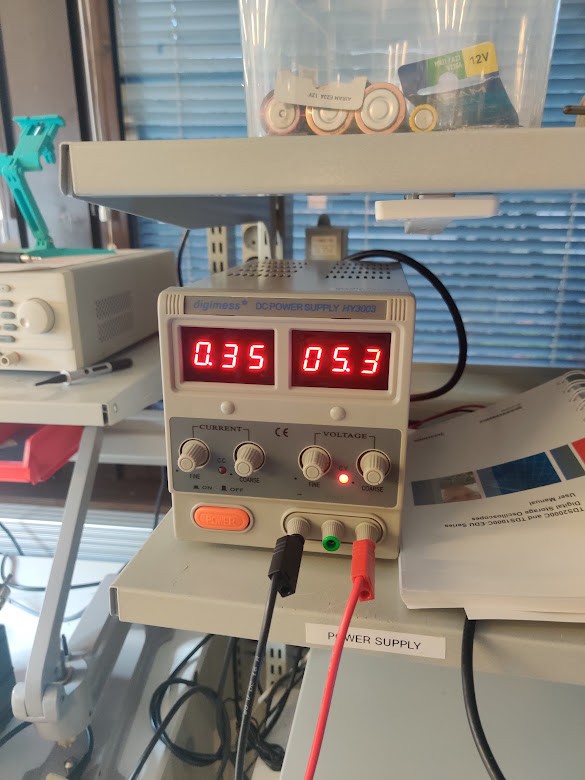
I was a bit late to measure power consumption of the LEDs, but i hooked my final project driver and leds to a bench power supply.

Some interesting observations. On max brightness, white light the system pulls 0.35A. With a 5V supply, this translates to 1.8W
On the other hand, with the LEDs turned off, current-power is 0.02A - 0.1W. Logically, this is the power draw of the electronics. The electronics draw the same amount of power no matter the mode.
We can extrapolate that in a 3.3V system, the power supply needs to provide Approx 0.5A to run the LEDs at full power. The Teensies for instance can provide max. 0.3A, so a beefier power supply is needed.
Psst! You can read even more on how neopixels work in networking week