6. 3D Scanning and printing
This week revolved around 3D-printing and scanning.
3D-printing is probably the technology I have most experience in, even owning my own 3D-printer. Thus instead of the basics I decided to try new things in that field this week. 3D-scanning however was new to me, so I was very interested in seeing that in action
Basics
3D printing, or additive manufacturing is quite different from most manufacturing methods. Instead of removing, or subtracting, material from a piece of stock, a 3D printer starts from nothing, then adds material in the desired shape. The 3D printing process is usually done in layers, using a slicing software.
Objects made this way can be highly complex, as there is no need for tools or similar to reach everywhere. Furthermore, provided a mesh model the slicing process is almost fully automatic making it simpler and quicker than traditional CAM. Finally, the materials are quite cheap
Fablab has two kinds of 3D printers:
FDM
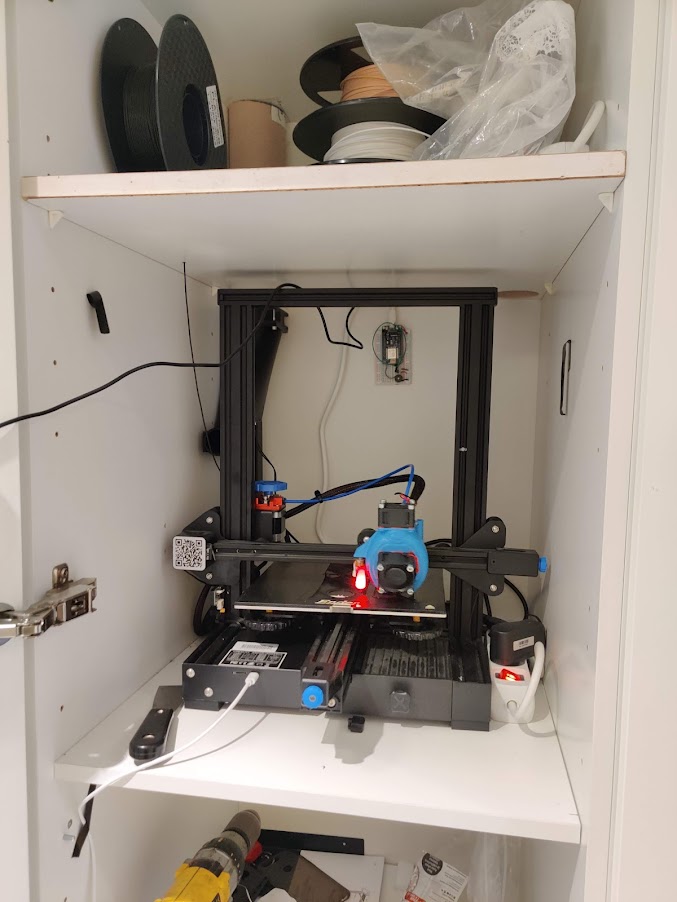
FDM, Fused Filament Fabrication (AKA FFF). Is the most common kind of 3D printer technology. An FFF printer extrudes a polymer from a movable print head, creating layers. The most common material is PLA, but other polymers are available as well. FDM is not the most precise or durable method, but its reliable and cheap. Fablab has Ultimaker and some Prusa FDM machines. And I have one at home.
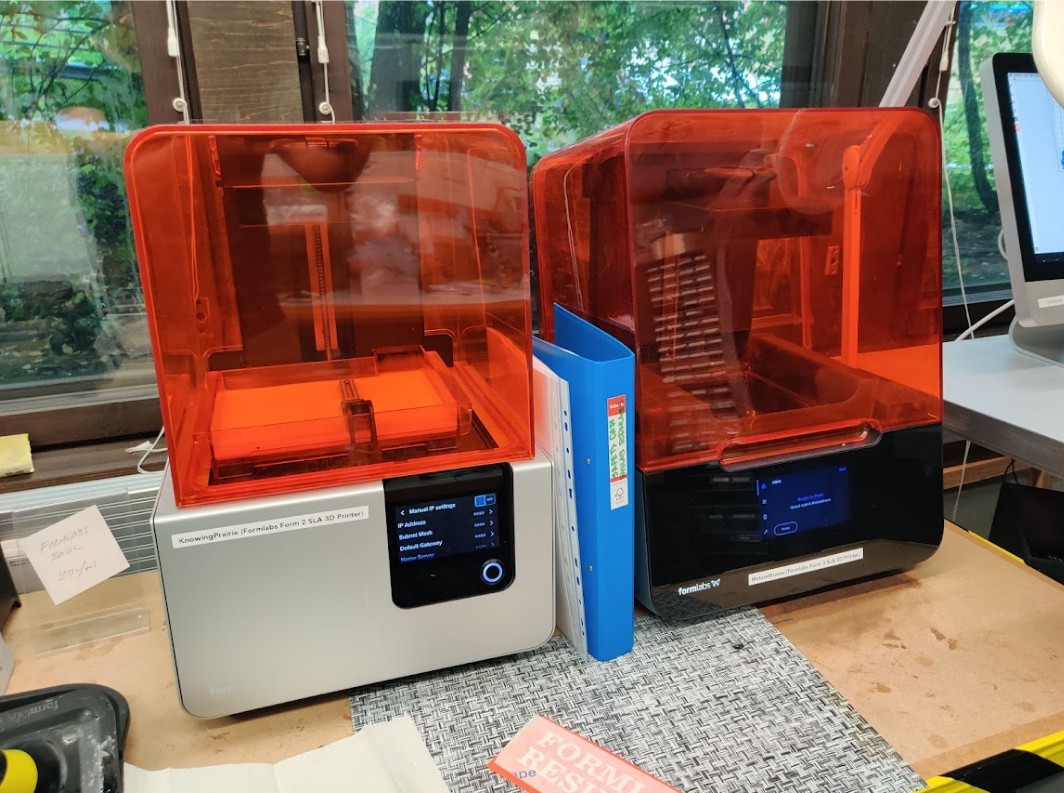
The other available technology is SLA resin printing. SLA uses a laser (or LCD screen) to harden liquid photosensitive resin. The object prints upside down, being “pulled out” of a vat of resin. SLA is more specialized, with both machines and material being more expensive than FDM. It is however precise, and material durability is often better for resin.
The main limitation of 3D printing is materials. Consumer grade printing plastics have limited mechanical, and especially thermal properties. The layer based printing means that upper parts of the model need to be supported by lower layers. This can be solved by design and the use of support materials. Design also needs to account for a certain amount of tolerance. Finally 3D printing is relatively fast compared to machining individual pieces, but is relatively slow as a mass production method.
In summary, 3D printing is ideal for rapid prototyping and light duty mechanical components.
Group assignment, 3D printing
The group assignment was very straight forward, essentially printing a test print and seeing what happens. 3DBenchy is probably the most famous and commonly used 3D printer test.
I have of course printed plenty of Benchies before, so that would have been no fun. Instead, I wanted to try the dual extrusion feature on the Ultimaker S3.
Dual extrusion is a cool feature some 3D printers are capable of. Typically it involves a duplicated hot end and feeder, which can be loaded with a separate material. Probably the most common use for this is loading a special plastic for support material, either breakaway or water soluble PVA. I used precisely this mode a couple of years back, for printing a miniature Reactor Pressure Vessel as a keychain.
As you can see, the entire part is capsulated in PVA, this ensured a really nice surface finish.
The other mode however is printing the model itself in two materials. This can be achieved in many ways, of which the simplest is simply having a separate model for each color.
I found a test print for exactly that. Meet Bunchy a very adorable test print.
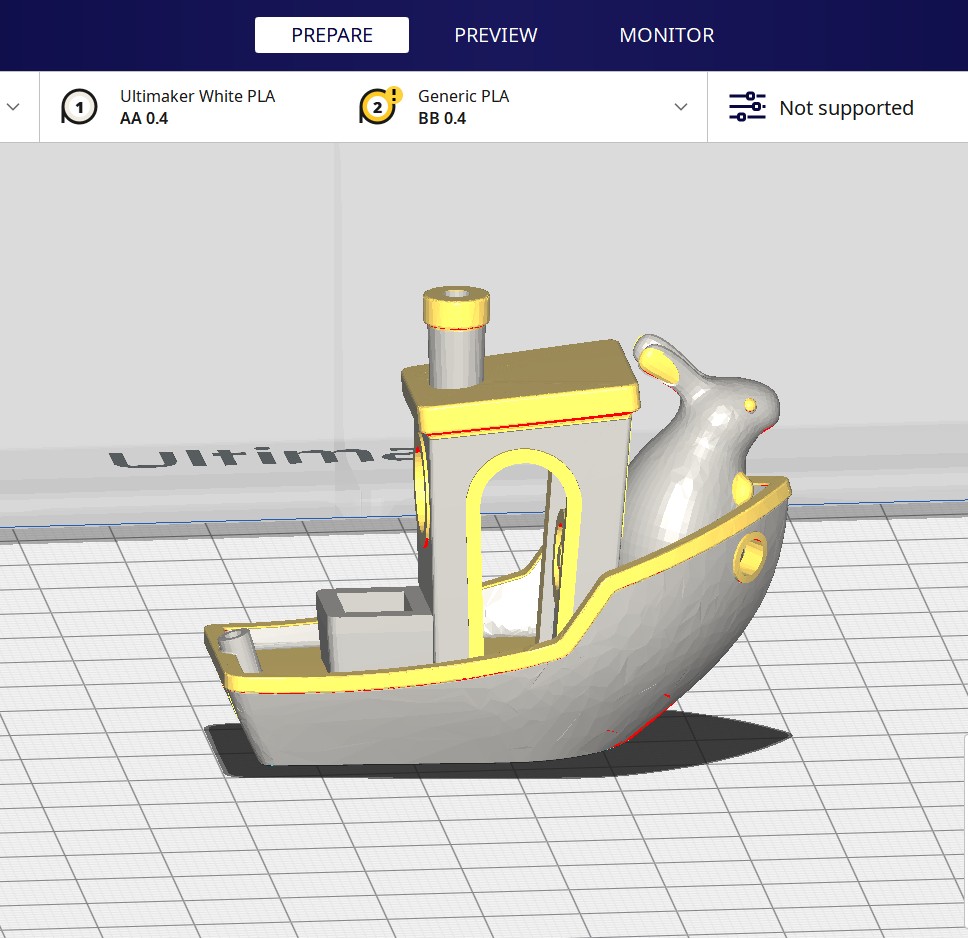
Slicing was done in Cura, which is my go-to slicer program. I’ve tried some others as well, such as prusaslicer and slic3r, but I really like Cura for it’s ease of use and plugins. As a baseline, all settings were left to ultimaker’s defaults.
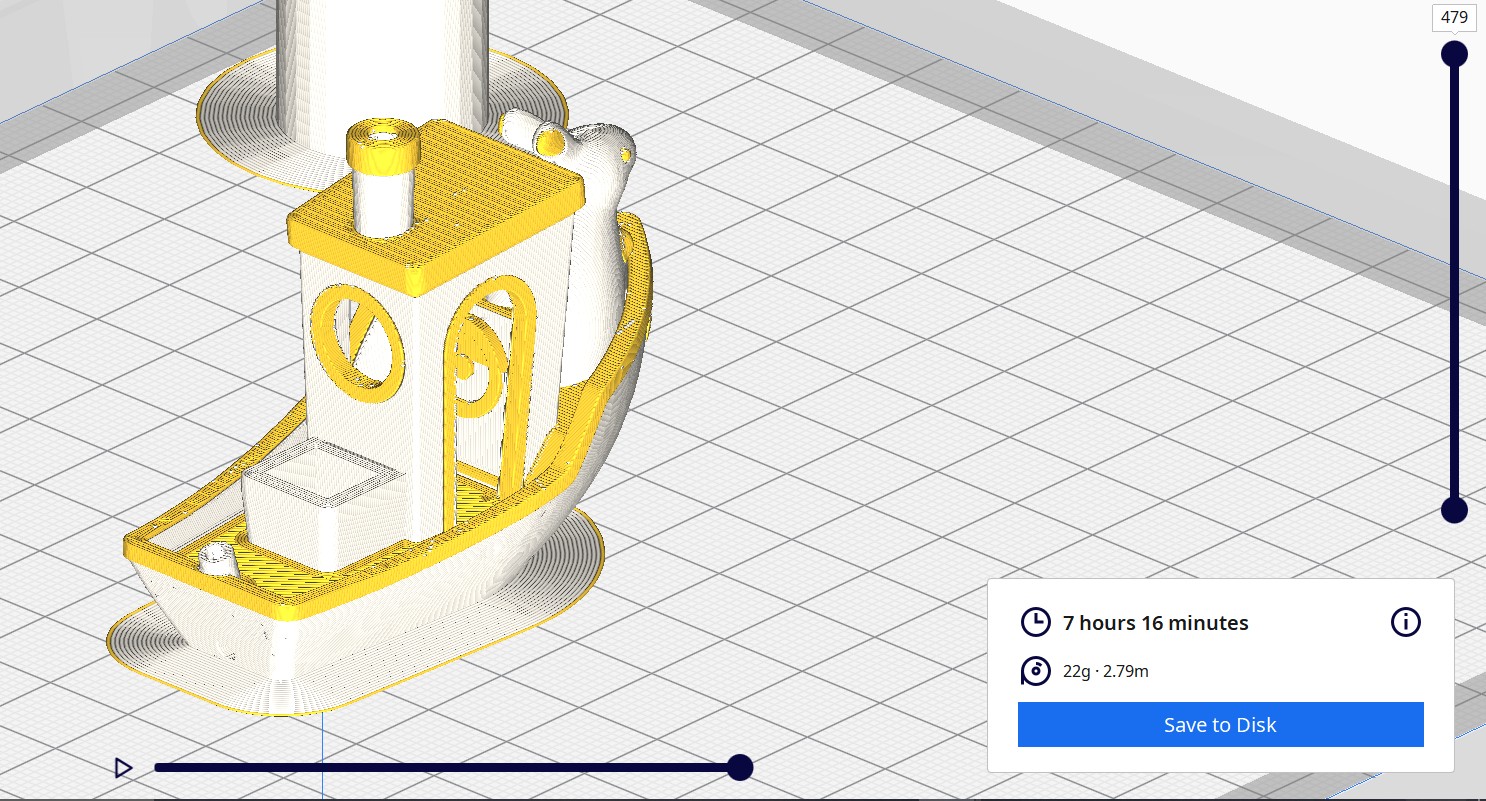
Thus, The process was as follows: 1. Open Cura 2. Set correct printer 3. Load STL model (in this case two models for the different extruders) 4. Select one model to use extruder 2 5. Configure correct materials 6. Press “Slice” 7. Save gcode file
Turns out, Ultimaker provides hot swappable print cores for the S series printers. These come in two flavors: + AA, intended for regular filaments + BB, intended for water soluble filament.
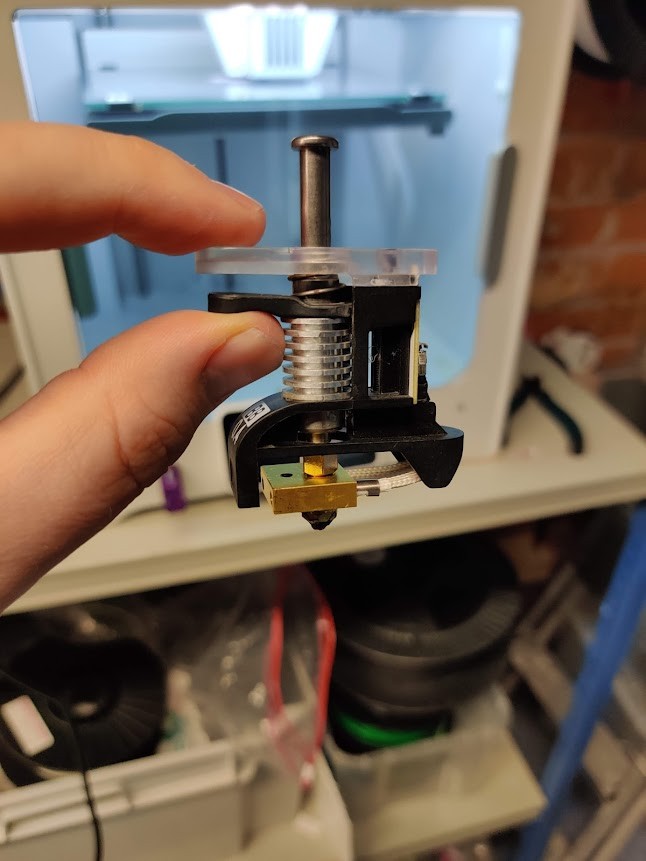
The Fablab S3 had an AA and BB core installed. I first tried running PLA through the BB core, but its evidently clogged. Fortunately, there was a spare AA provided with the machine, so I switched them out. The switching process is amazingly simple, I almost wish my Ender could do that :D
Next, the machine recommended a calibration step. The calibration was quite easy, and the machine gave instructions through the process. First a calibration print was printed, and then the entire buildplate was removed and placed on a special paper.
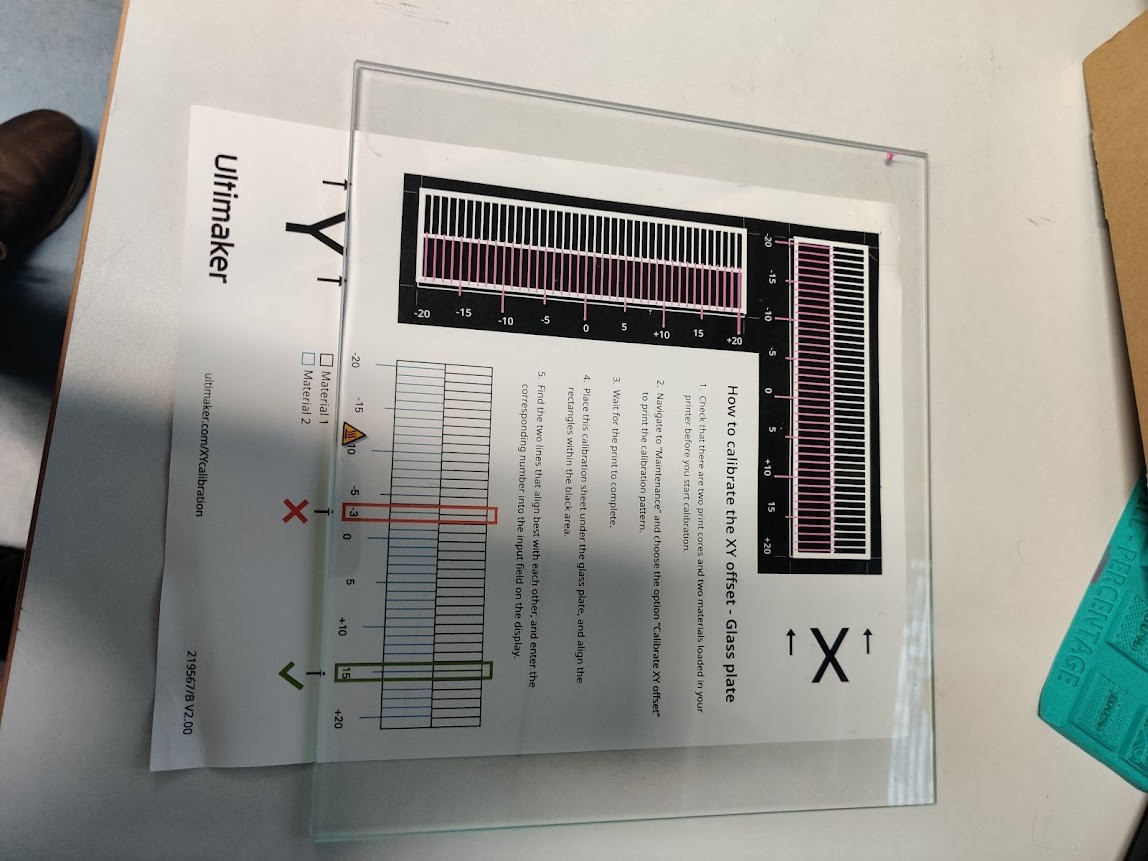
From here, one could select the appropriate offsets for X and Y. Z calibration is likely automatic, seeing that the machine’s ABL uses the nozzle itself.
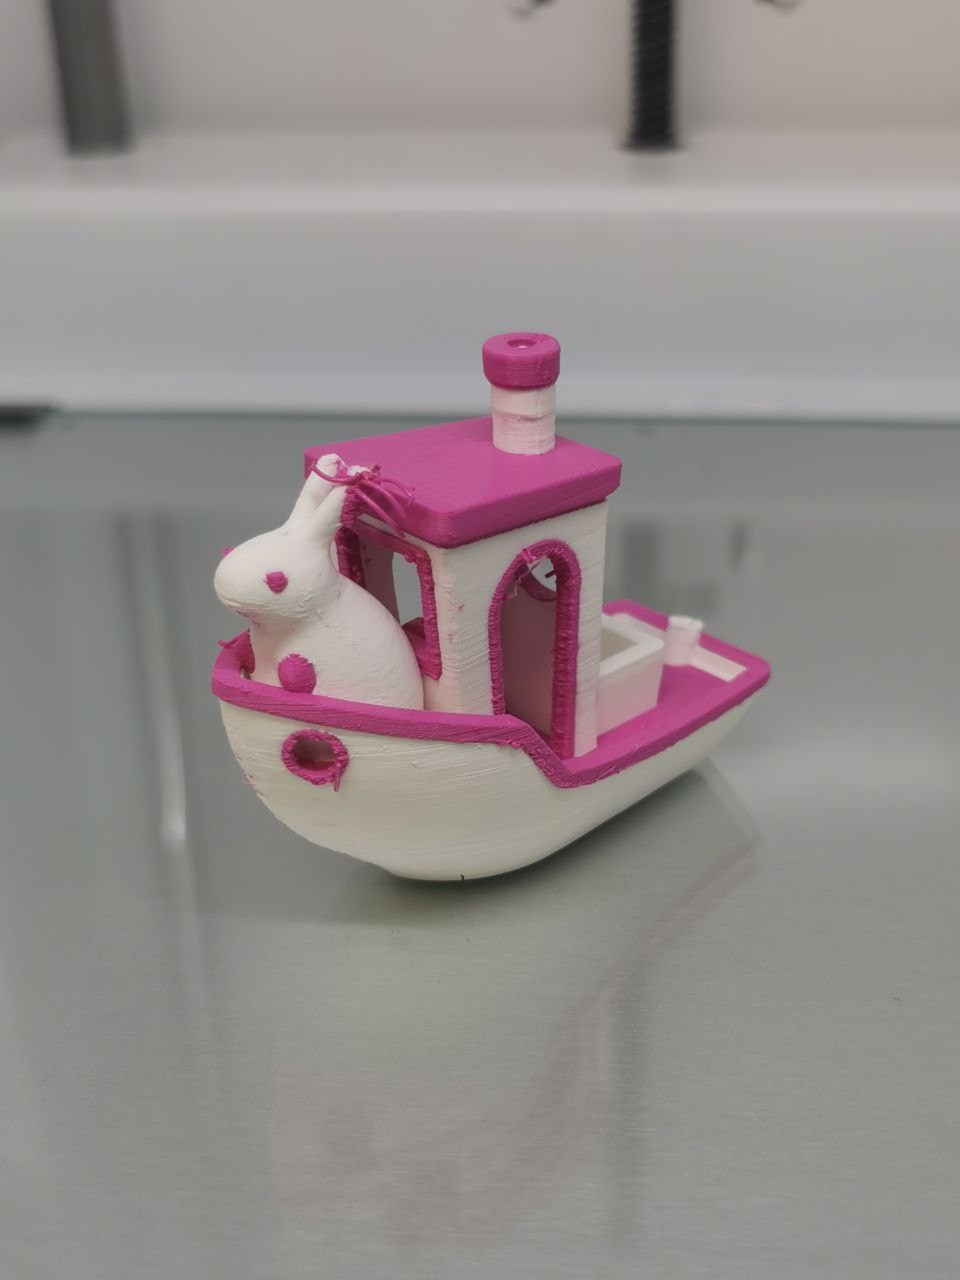
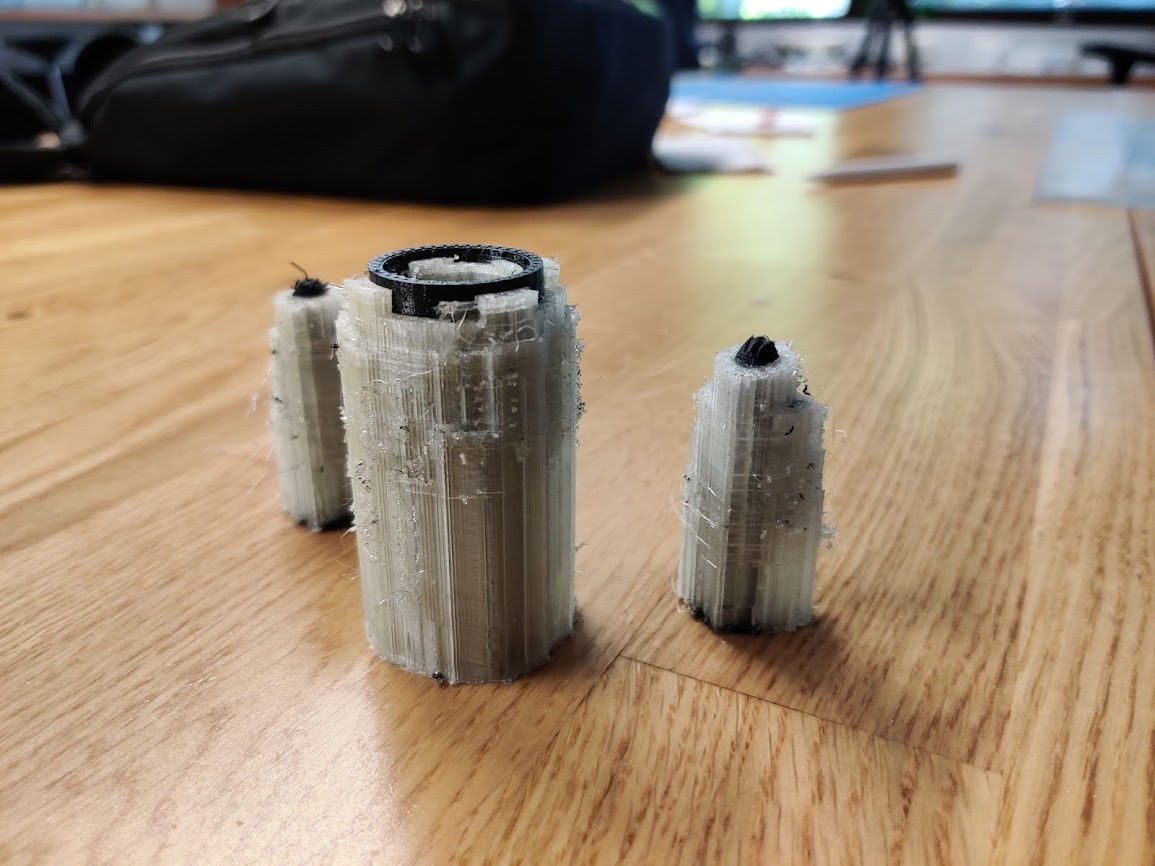
7 hours later (dual extrusion is really slow!) this is how the print came out. Stock settings worked surprisingly well. There is slight stringing ´that can be seen, and some of the really difficult dual extrusion parts have a rough surface, but otherwise I’m really impressed by the results. WIth some tuning I expect the results would be even better.
Final project: 3D printed housing
For my final project, I designed a 3D printed housing for the electronics and battery. YOu can read all about the design and manufacturing process Here
3D scanning
Fablab has a couple of different 3D scanners available. This week i used the Artec Leo
My phone case is quite beaten up, so I’d be interested in 3D printing a new one. Problem is, I haven’t been able to find ready made mesh files for my particular one. I thus wanted to try if 3D scanning is the solution.
Turns out, that the results weren’t exactly ideal.
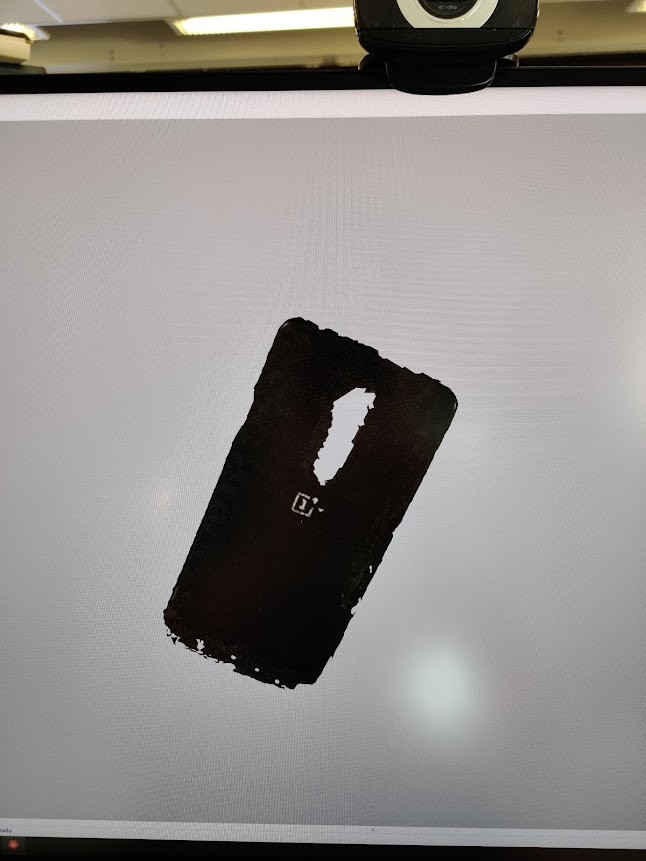
As you can see, the model is… not great. I think the case is simply too thin, and has too little contrast for the scanner to work properly. I think I’ll have to figure out another way…
For my second attempt I Tried suspending the phonecase with a thin string over a white background to create contrast.
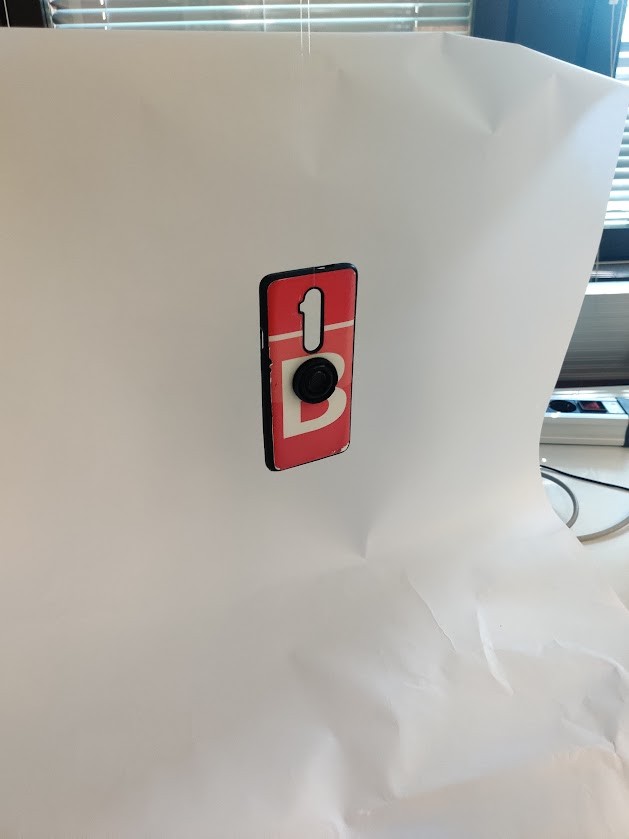
This worked even worse! The background was picked up by the scanner much more effectively this time. Also the scanner gets confused by the phone spinning on the string.
I decided that a phone case is something I don’t need anyway, and switched objects to something more solid:
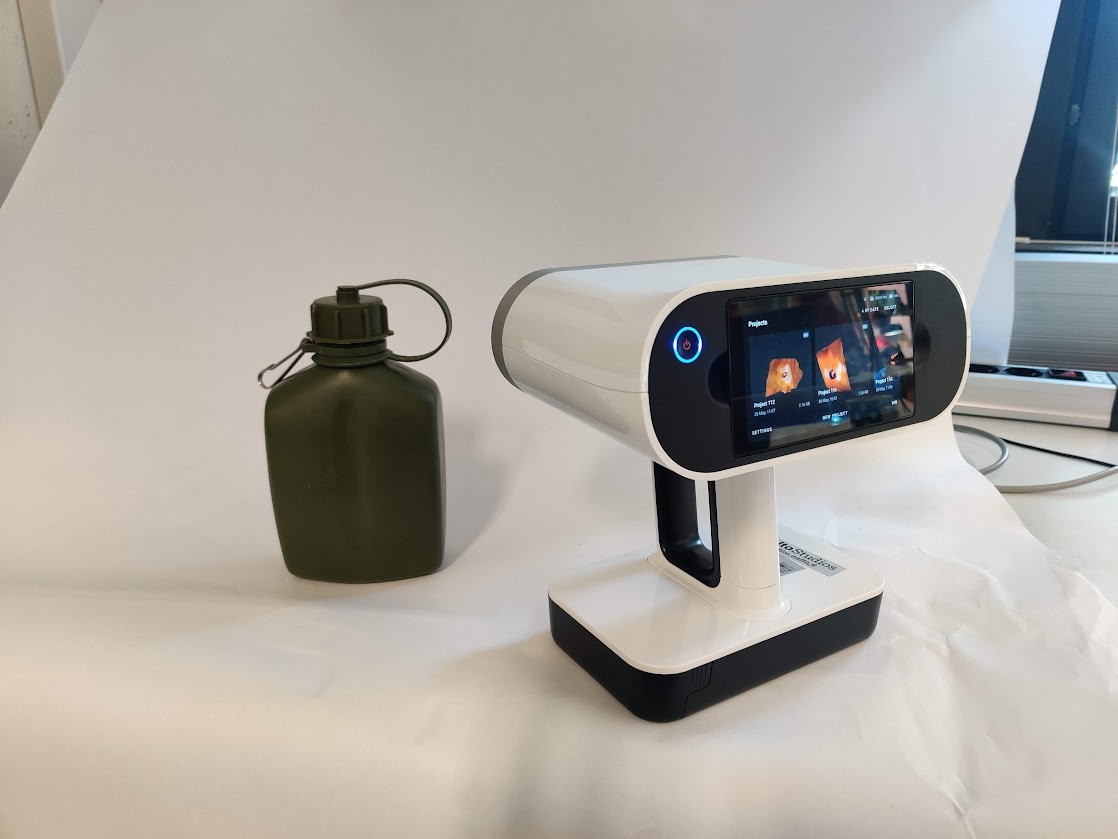
Behold my millitary issue waterbottle. Totally not the first thing I had on hand.
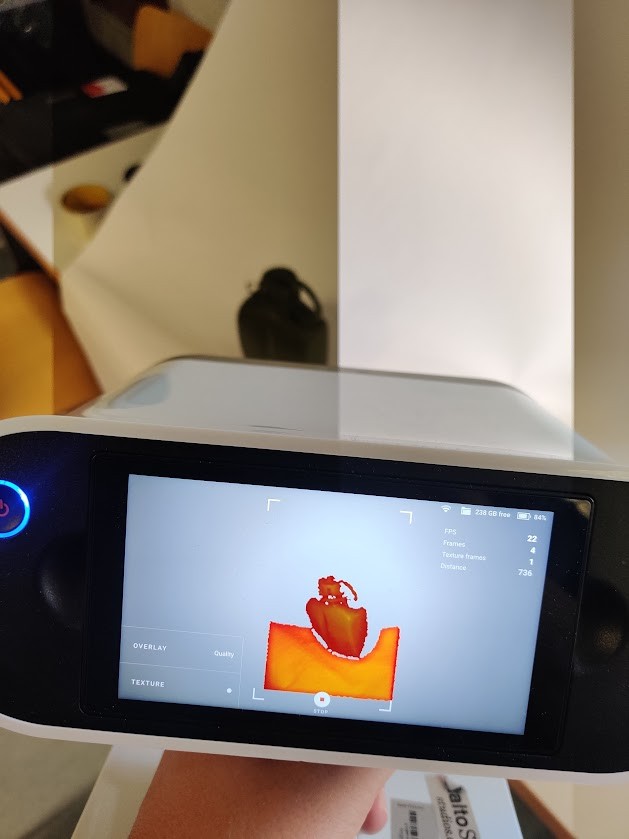
Scanning went much better this time.
Scanning process
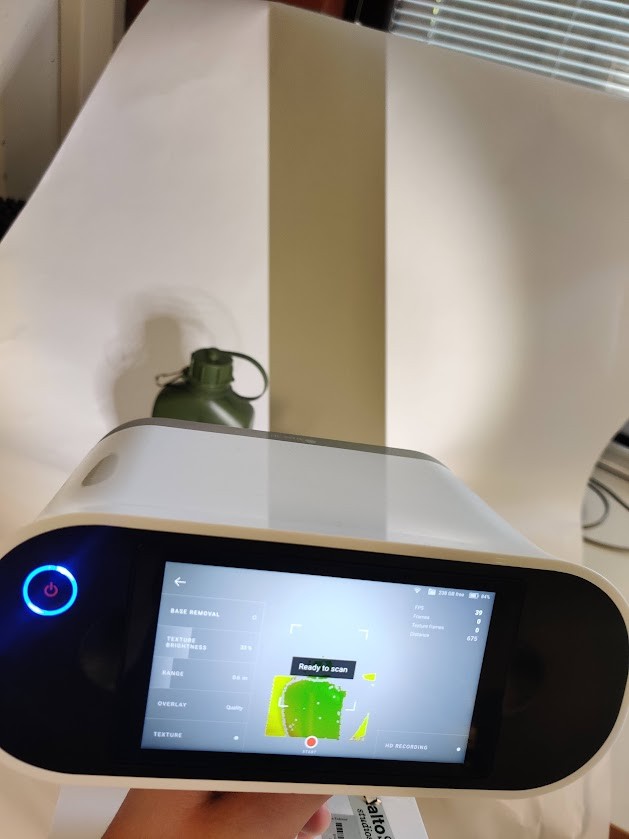
The scanning process is fairly easy to get going. First, a project is started on the Artec, which then brings up a live feed of the scanner. When the trigger on the unit is pressed it starts blinking and recording frames. The object can be scanned from multiple directions, which the scanner will then automatically splice to form the model.
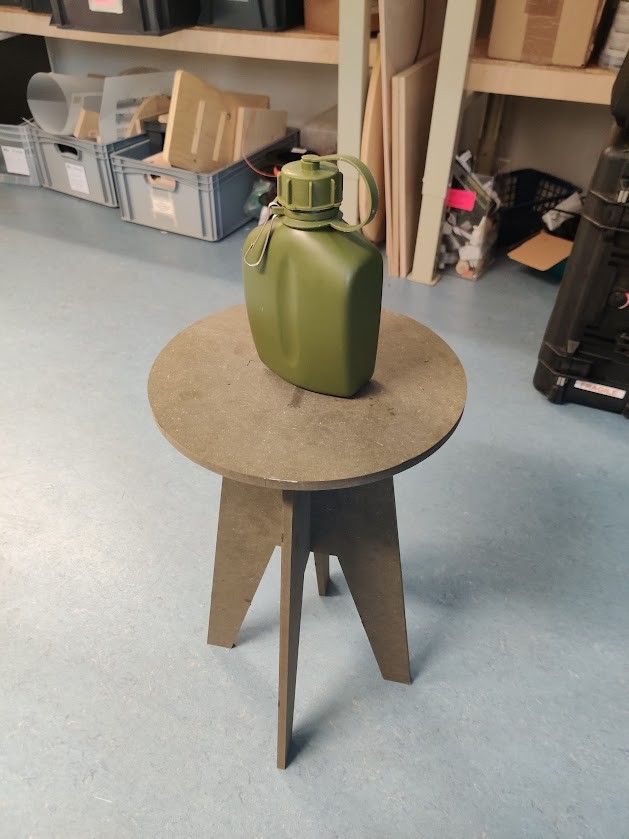
The background did not work as intended, so i switched to a freestanding table. This worked much better and allowed me to scan the bottle from all directions.
The scanner also has a feature called base removal which, as the name implies, recognizes and filters out a flat plane the scanned object is on. After a fairly short period I had my object ready.
Post Processing
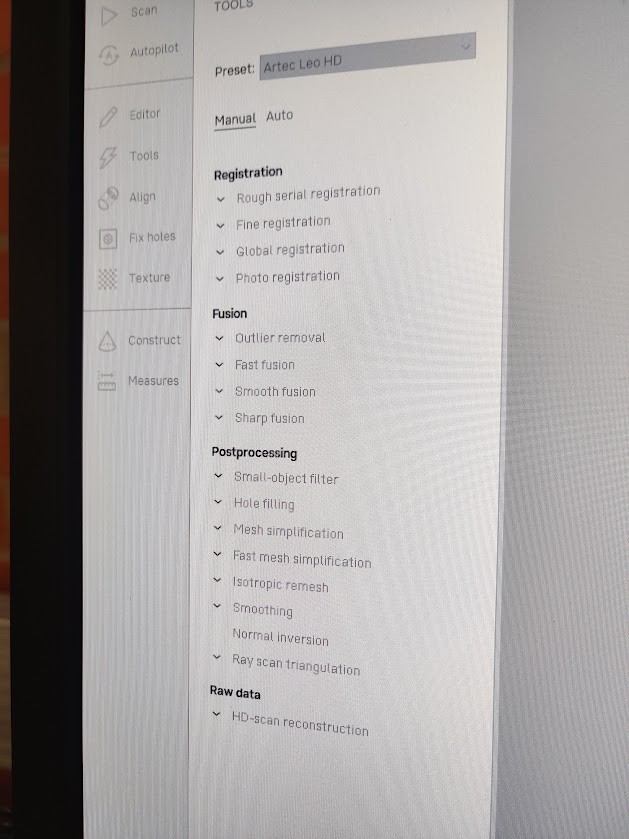
The scan itself is not a ready 3D object. For post processing we use Artecs own software on one of the workstations.
The scan can be transferred over wifi. However, this takes a while, as the scans are huge My fairly cuick scan of the water bottle was 1.7 gigs in size!

After about 5 mins of waiting our model was loaded.
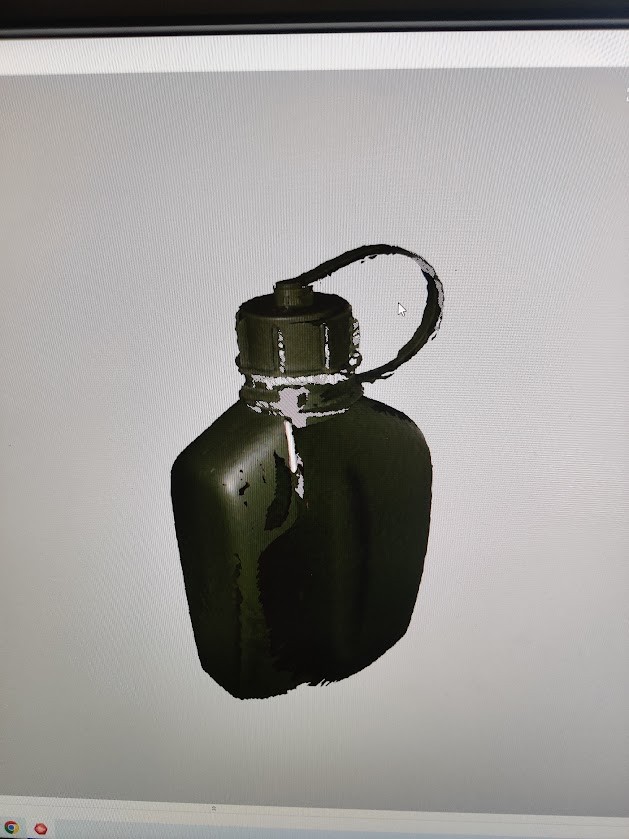
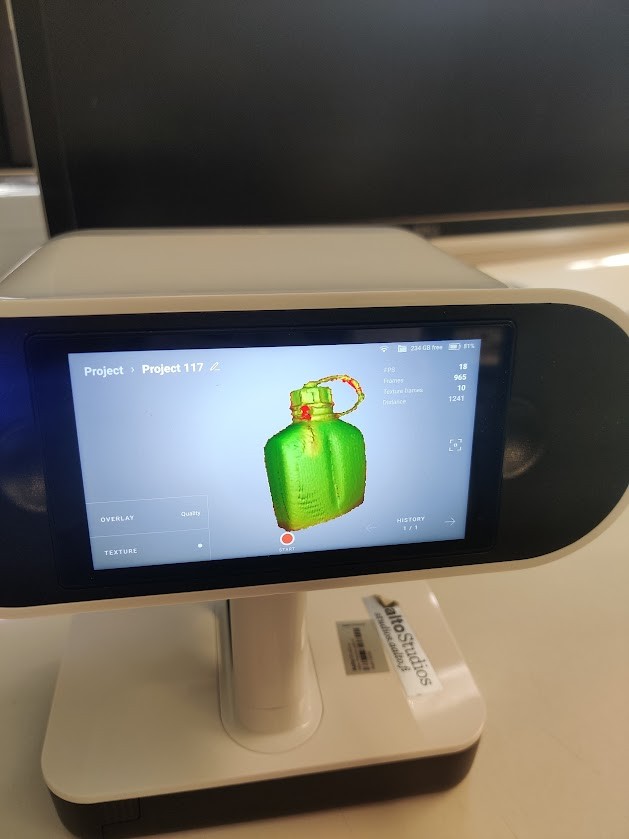
The Artec also captures texture which is pretty cool. This would probably be useful for making for instance game objects, but when 3D printing it’s irrelevant.
We can see that the model has some holes. We can also see that the glossy metal clip of the bottle didn’t capture very well. Perhaps reflective objects are hard for the scanner to see?
For making an actual mesh solid we go through a post processing workflow. This can be run automatically but i chose to go manual. Some of the routines can be run multiple times for better results.
In the end we had a 3D model, with a few holes, especially around the cap area. I used Microsoft 3D builder to insert and union a cylinder primitive to fix this. 3D builder also has a handy “extrude downward” feature, which I used to make the model stand flat.
The model is now ready to 3D print, or modify further. I’m pretty happy with how it turned out. The phonecase I’ll have to go make in CAD, I guess :D.