3D modeling:
Files to download
Blender files:
note: open them on Blender 2.79
Modeling a bloom sculpture:
Programs:
Tools that I used to model a new bloom shape:
-
Sverchok; an add on to blender that can make parametric shapes.
Steps:
-
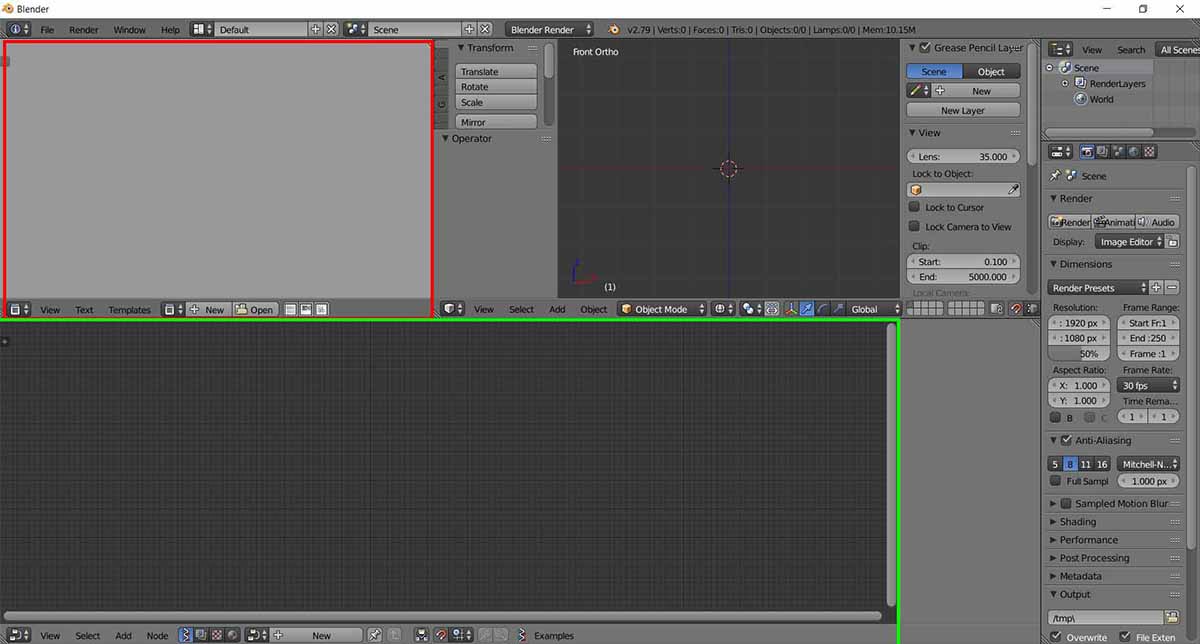
Preparing blender:
-
In the red box: is the Text editor and we will put a python code to generate a sphere that based upon the Fibonacci numbers and golden angle “137.5º”
- In the green box: is the Node editor and we will use the Sverchok addon to make a parametric shape.
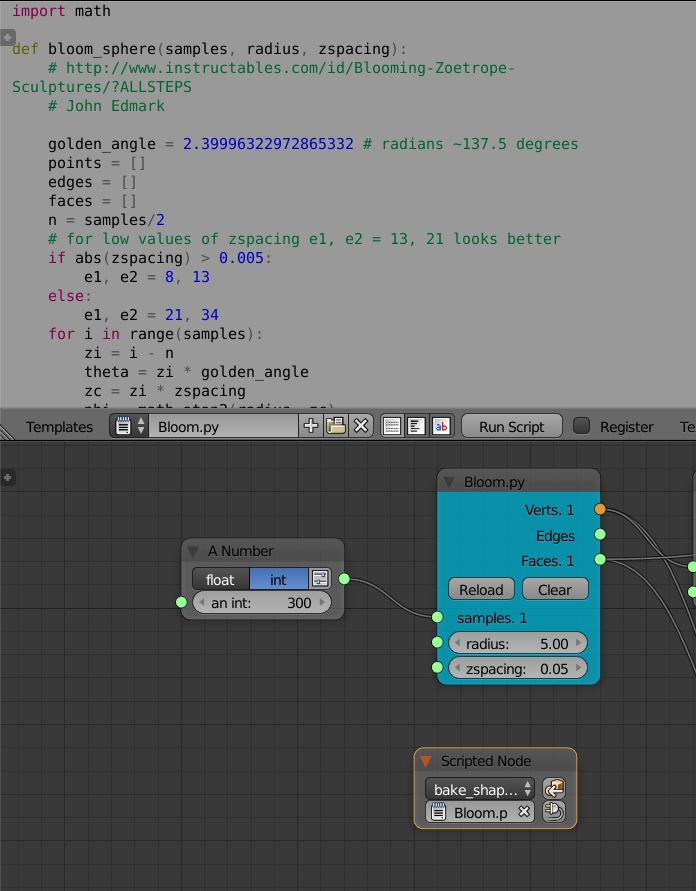
- Copy the Phyton code:
Put the python code “bloom_sphere” that elfnor generated from his github, and save it as bloom_sphere.py .
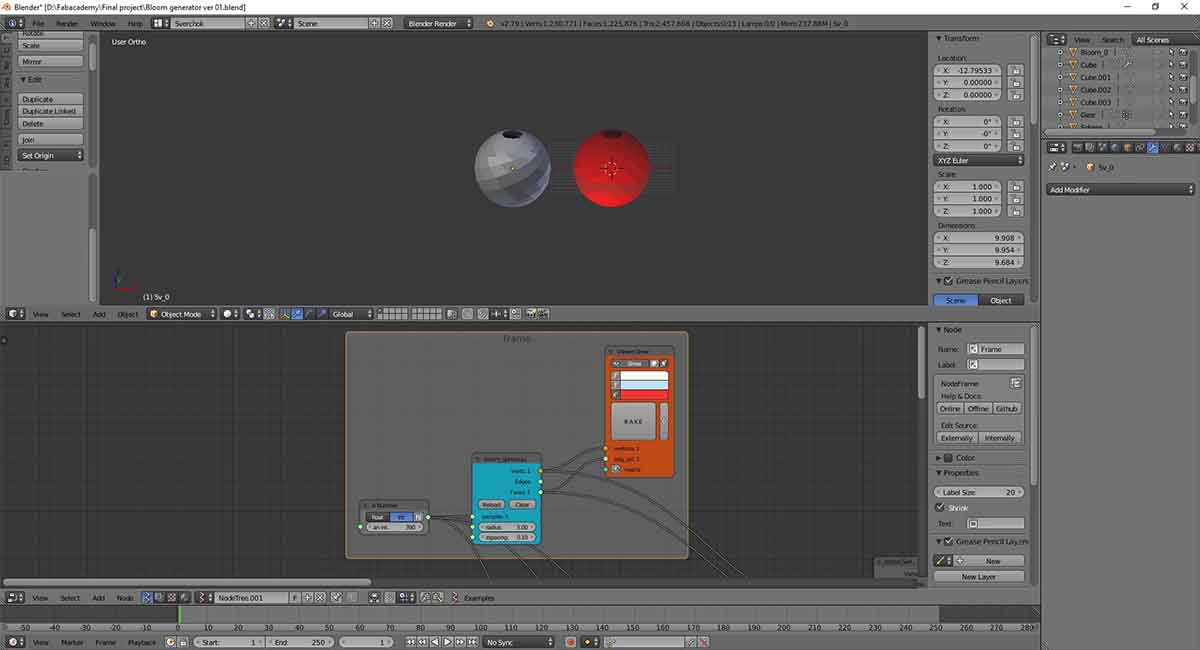
- Making the nodes:
Create a new New node tree, then press the space bar and search for Scripted Node, then inside of it load the python code then click on the plug shape to right of it, to give you the Blue node.
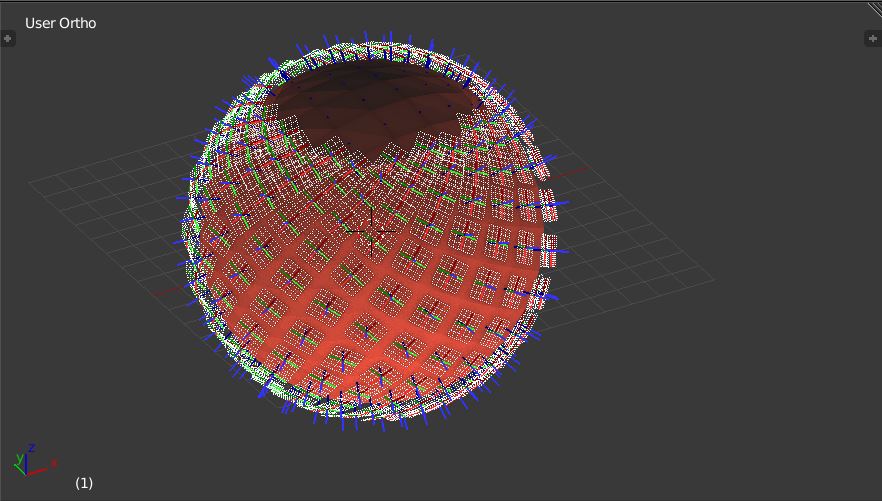
By adding the A Number node, Math node, and Viewer Draw, then connect them as show in the picture below; vertices to vertices, Faces to edg_pol (Edges/ Polygons), we can see the shape of the bloom sphere.

We calculate the center of the polygons and their normals by use Centers Polygons 3 node “Using 3 points”, the output will give us the scale, location and rotation for each center point as a matrix.
We divide the matrix using Matrix out node to separate the scale, location and rotation, the I used the Math node to multiply the scale to adjust it later if needed, then put the matrix back by using Matrix in.
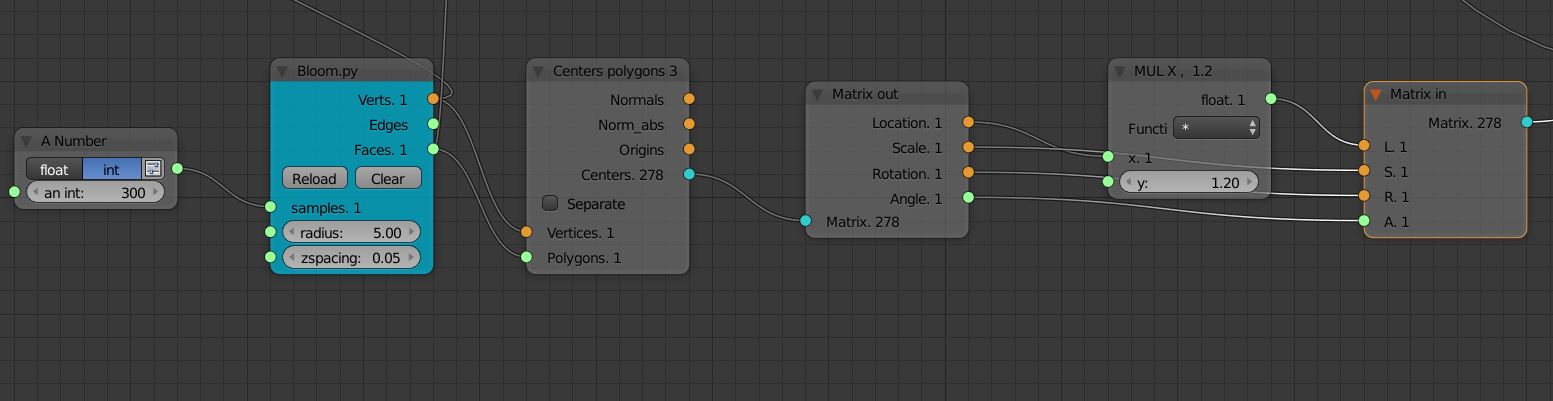
From that we got coordination points to put a shape on them.
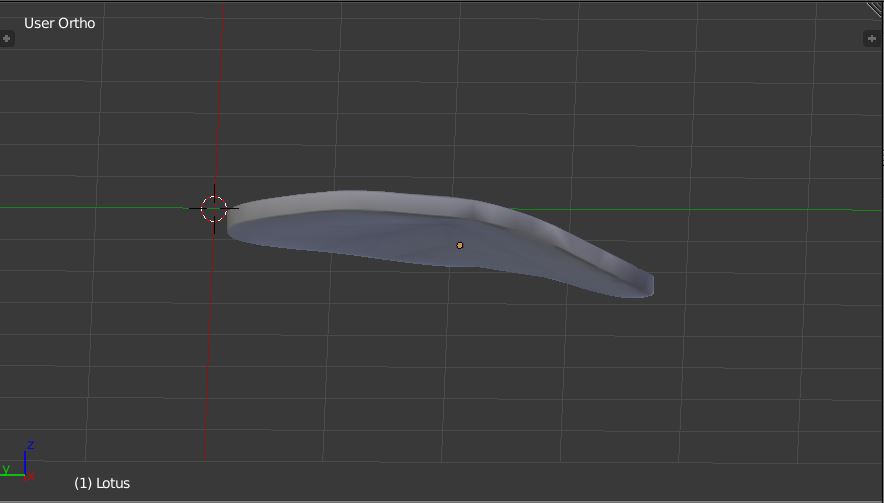
- Copy a shape on the center points:
I modeled a petal of a flower, then I insert it in the nodes tree by the node Objects in mk3, then used the Transform node Rotation, and adjust to Euler to change rotation around the axis X, Y, and Z.
For Objects in mk3 we select the model from the Blender, then click on Get selection.
Then connect the output vertices to the Viewer Draw, and the polygons from the Objects in mk3
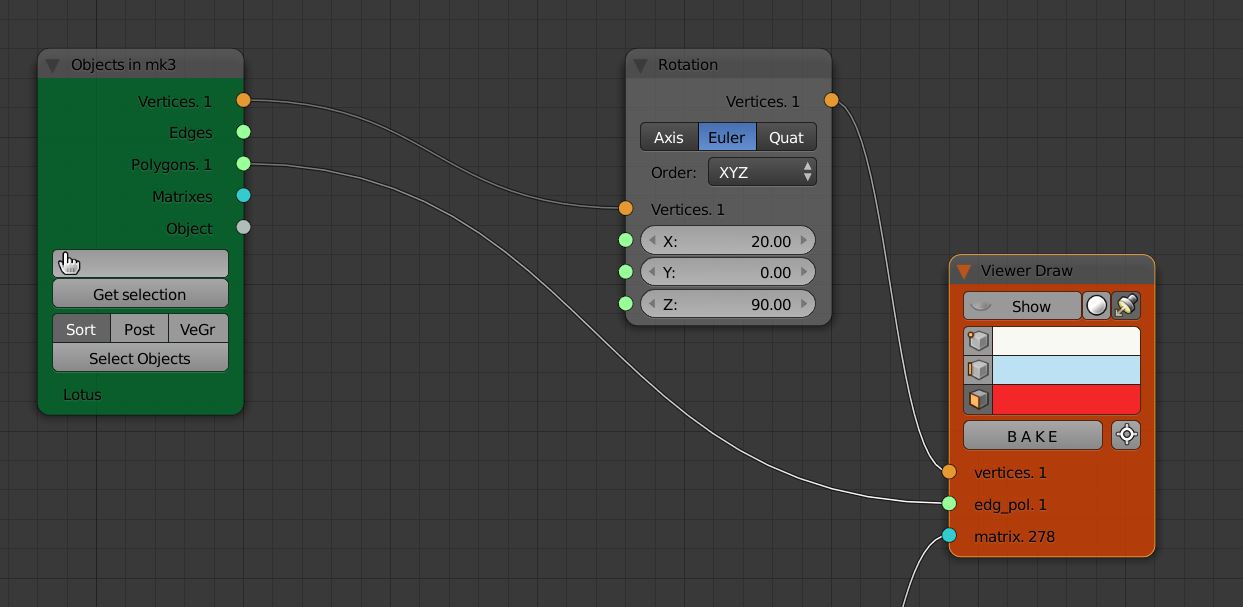
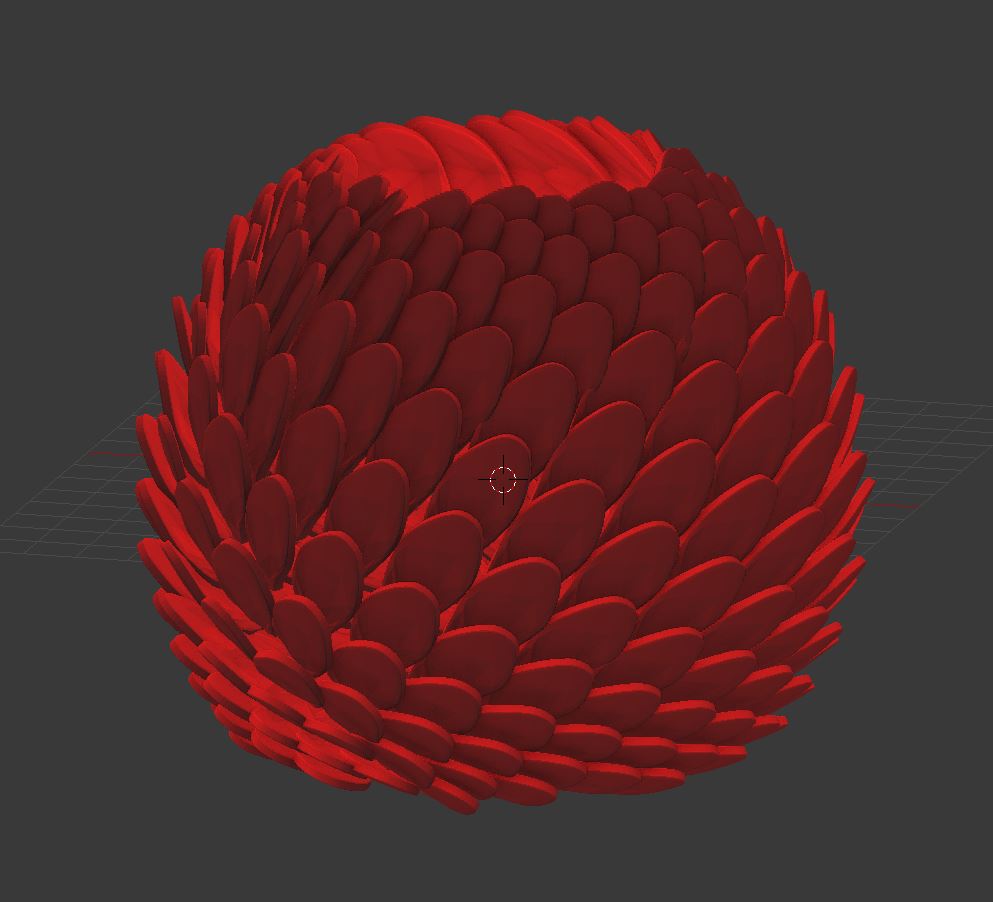
The output will look like this, then when we are satisfied with result by changing the parameters, we click on BAKE in the Viewer Draw.
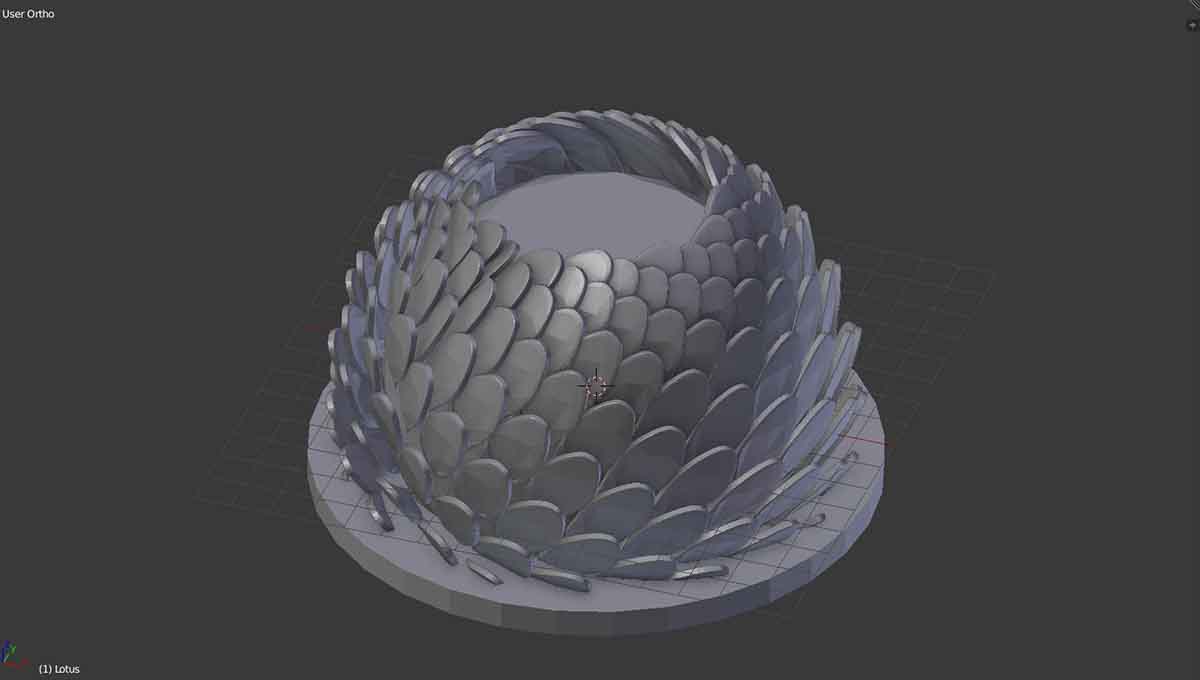
- Normal modeling:
By adding sphere inside, and cylinder as a base, by using the Boolean operation, we have a bloom model.
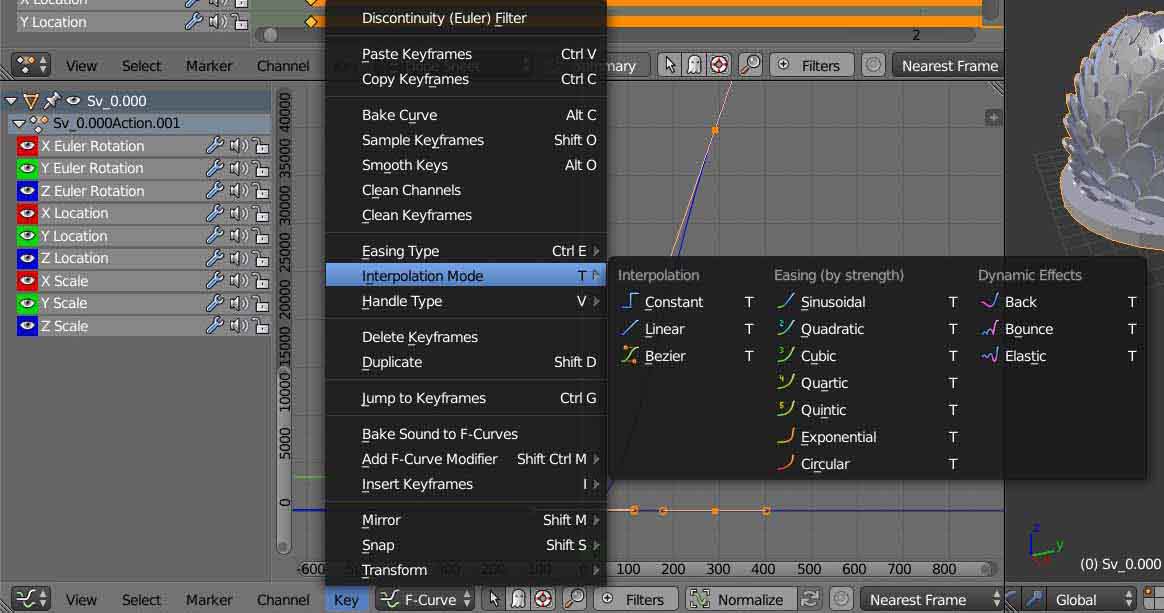
- Test animation:
First we click on the record button to save the animation keys, then rotate the object around the Z-axis with the golden angle “137.5º”.
Then jump to a new frame, and we make it big let us say frame 1000, then put the value of Rotation Z to golden angle multiply by the 1000.

Choose the Animation screen layout, then choose the Bezier Interpolation that is next to the green arrow.
Click on the Key tab next to the red arrow to change the interpolation.

Change the interpolation to “Linear” and we got the animation.
I verified that my model is right because the two models (mine and Edmark’s) have same animation loop.

- Animation result:
John Edmark’s Bloom animated:
My design, Bloom animation:
Making a simple Bloom sculpture:
From the previous first steps, just take the spiral Fibonacci sphere, and bake it.
Then using Tissue addon, I used dual mish modifier, then and add wireframe modifier, then use the subdivision surface to get the last result.
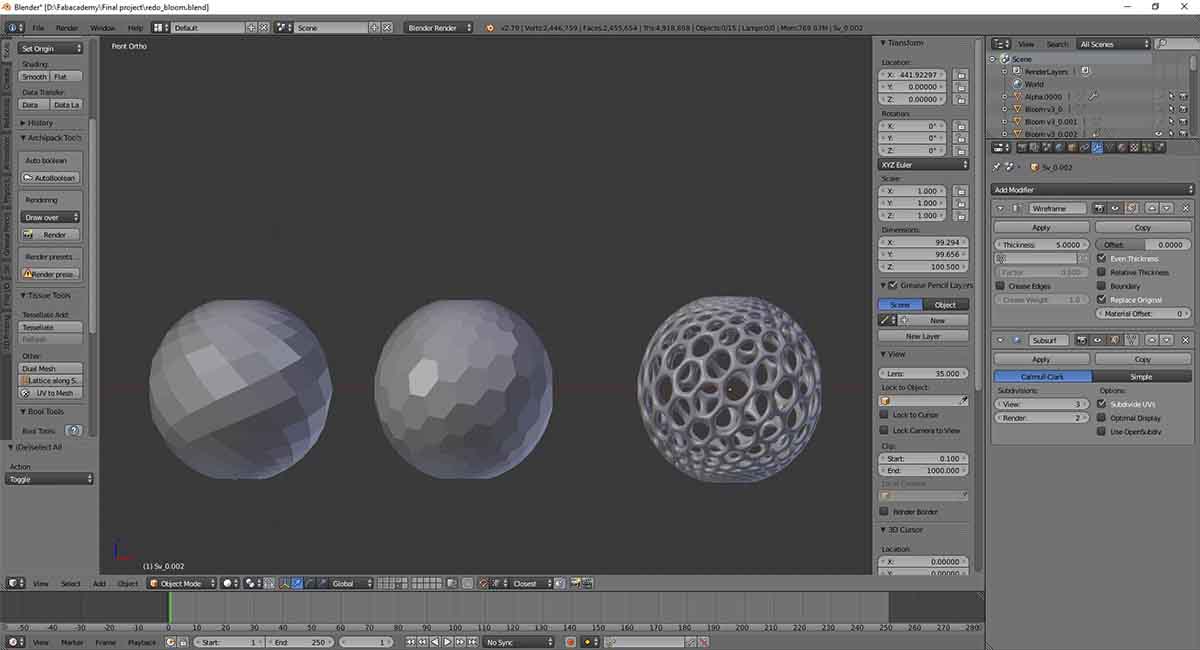
After that, I have added a base plate using the Boolean modifier.

Molding housing for the bloom:
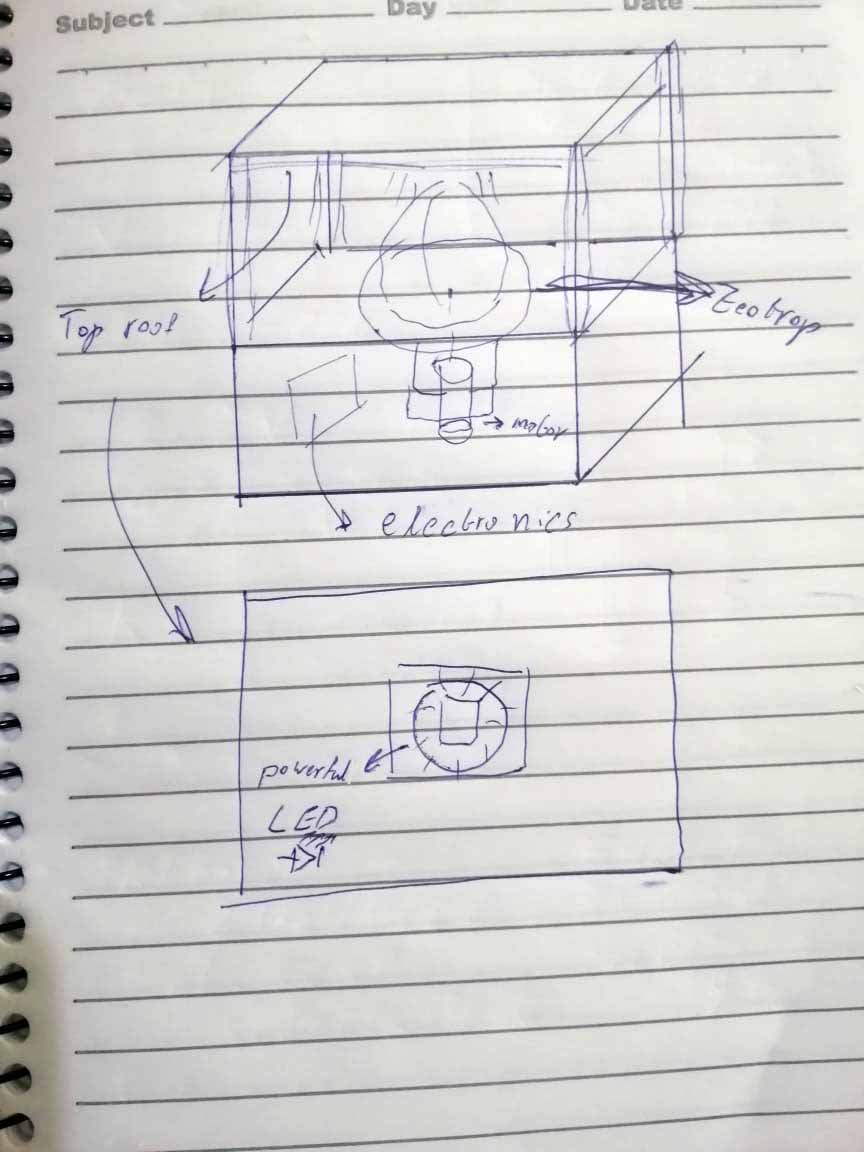
This the main sketch that I have drawn, and the idea is to:
- Under the roof, I will mount the LED to give focus the light on the zoetrope.
- The zoetrope will be showcased.
- DC motor will be mounted under the zoetrope.
- The control circuit will be mounted in the box under the zoetrope.
First idea
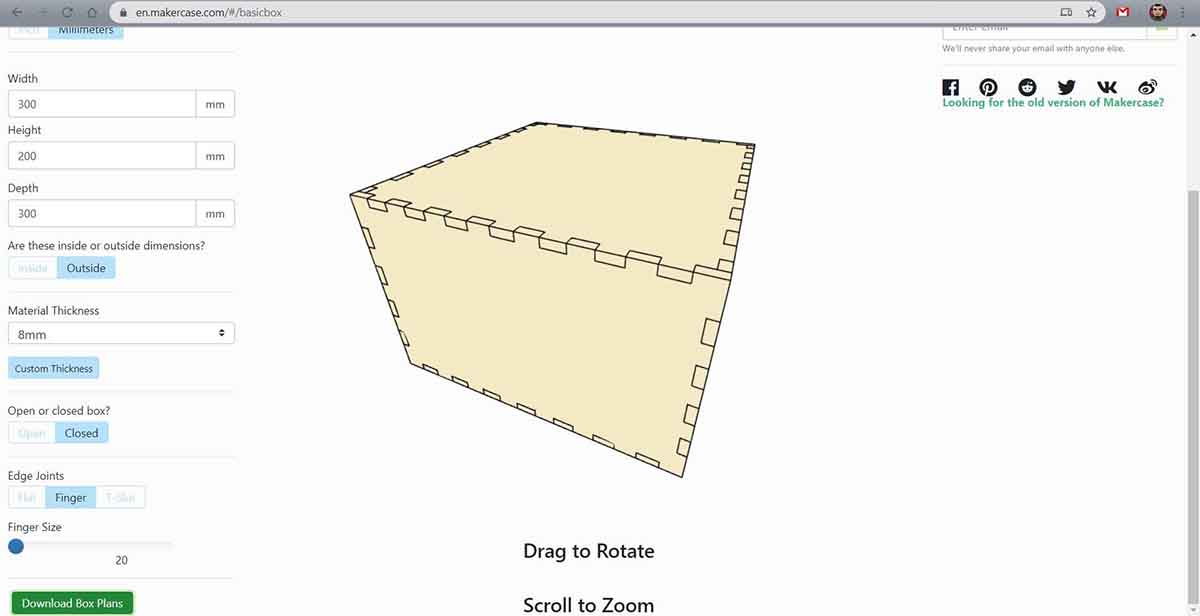
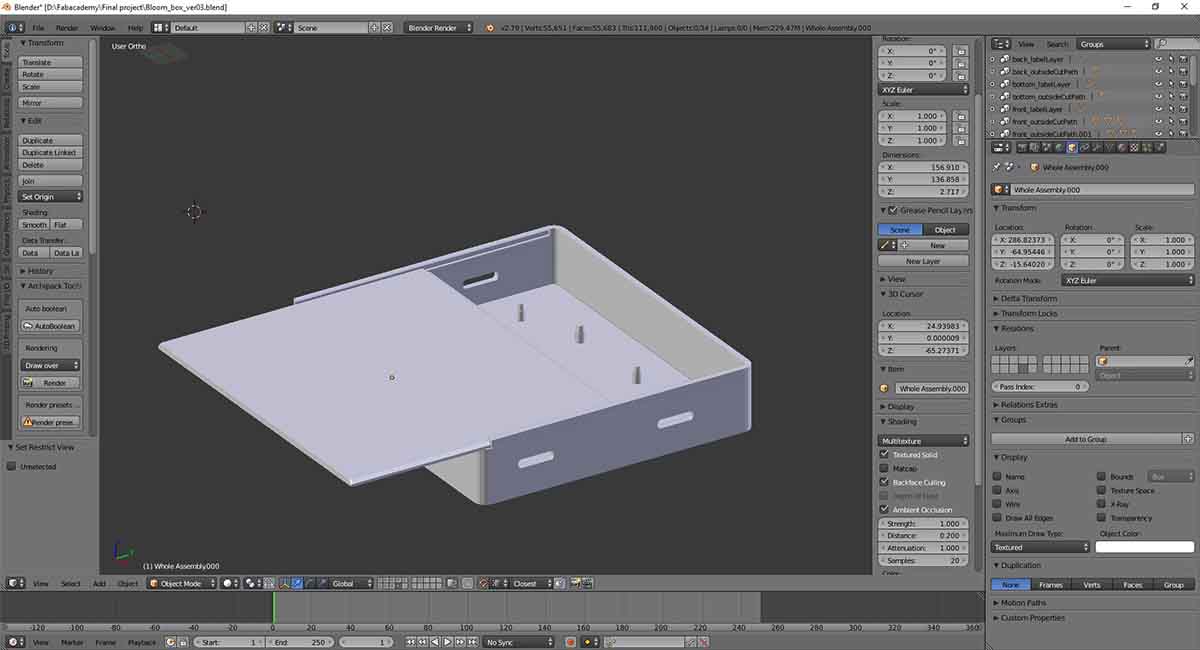
From MakerCase, I have generate the basic box design to the top part that will be modified, with wood thickness of 8mm, the height is 200mm, width is 300mm, the depth is 300mm, and the width of the finger joints are 20mm.
And for the bottom part, the same configuration, but it will be open box and the height is 150mm.
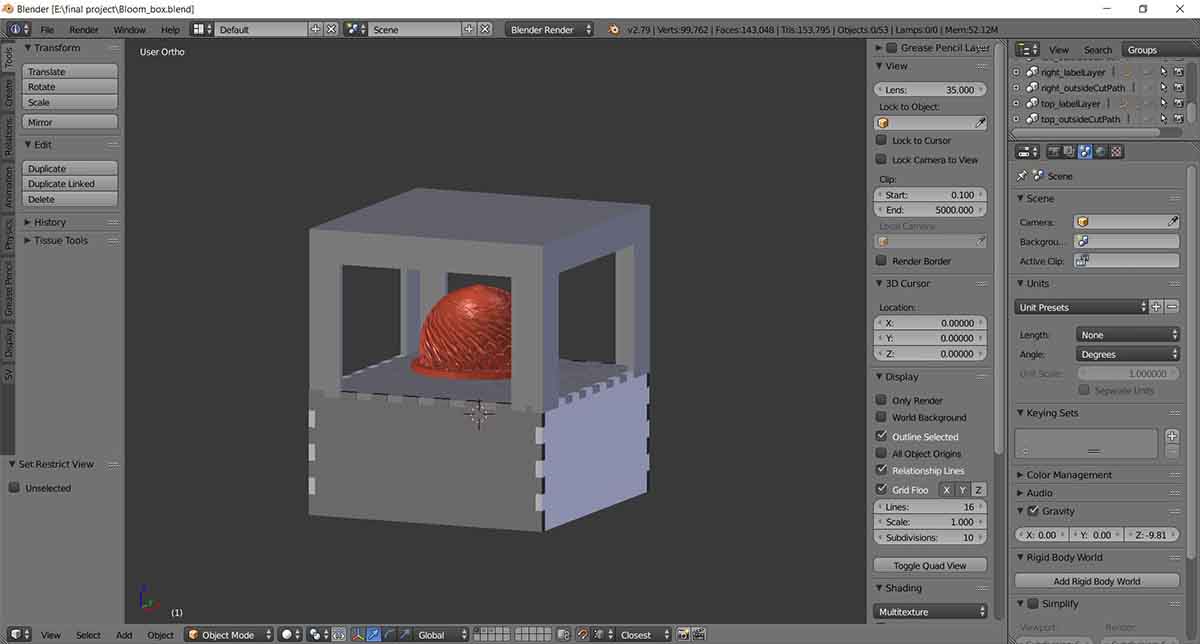
This is still work in progress, I will stack the boxes on top of each other, modify each side of the boxes to be one part, and open viewing window for showing the zoetrope inside.
Second idea
I got my hand on a beech wood from my work, and I have decided to make into two parts:
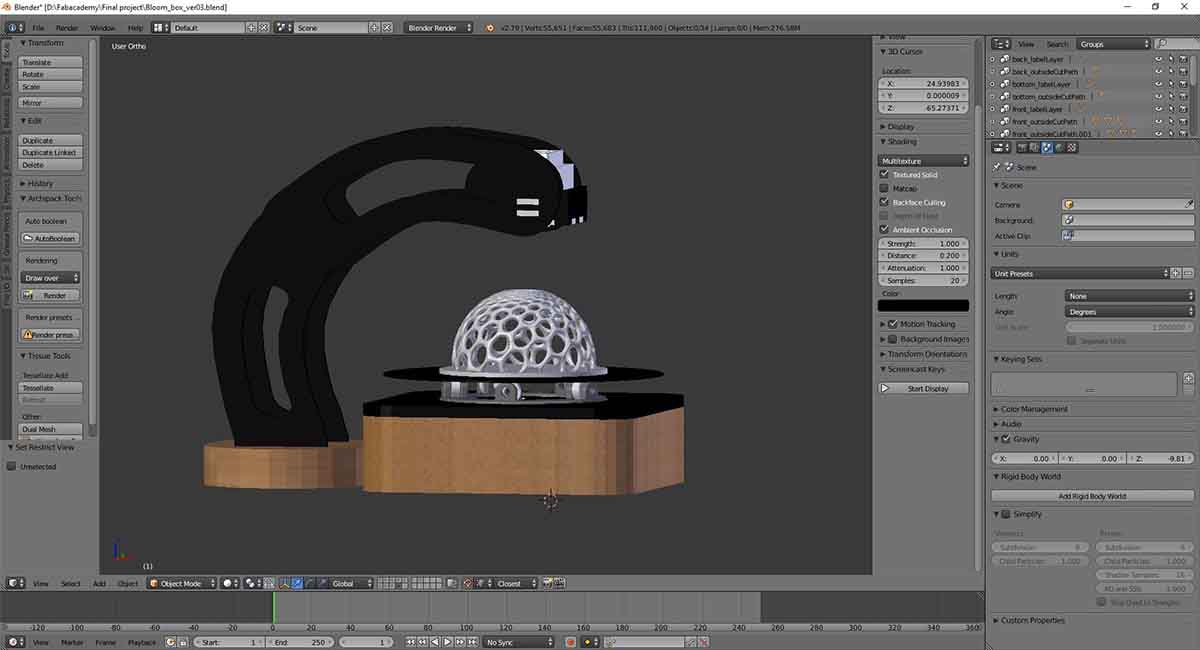
- The display box: It is made of beech wood from the bottom, and on top of it a black Acrylic, then I have designed a lazy Susan that you can find it on most of microwaves.
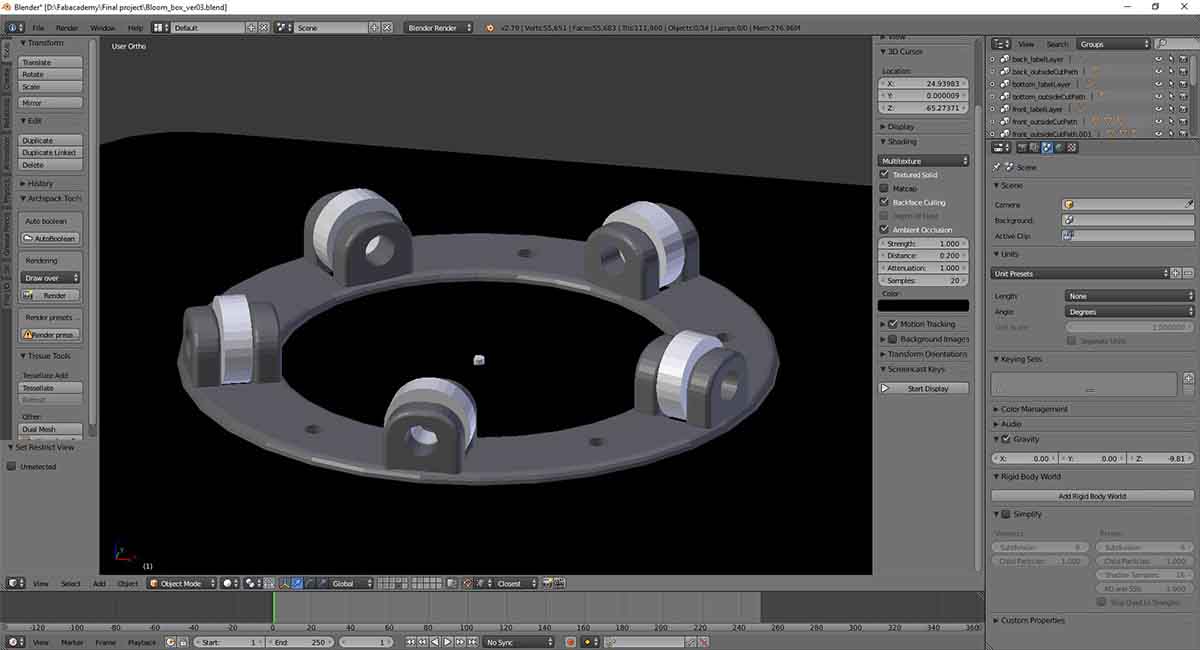
And it has ball bearing to smooth out the rotation movement.
- The Lamp: which is a lamp holder, that holds a 100 watt LED, that give strobes to make an illusion of the movement of the bloom sculptures.
And it is made up from:
1- Wood base.
2- Black acrylic to hold the LED and cooling fan.
3- A box to contain the LED and the cooling fan.

- Inside the box:
1- An Electronic case for putting all the electronic boards inside it
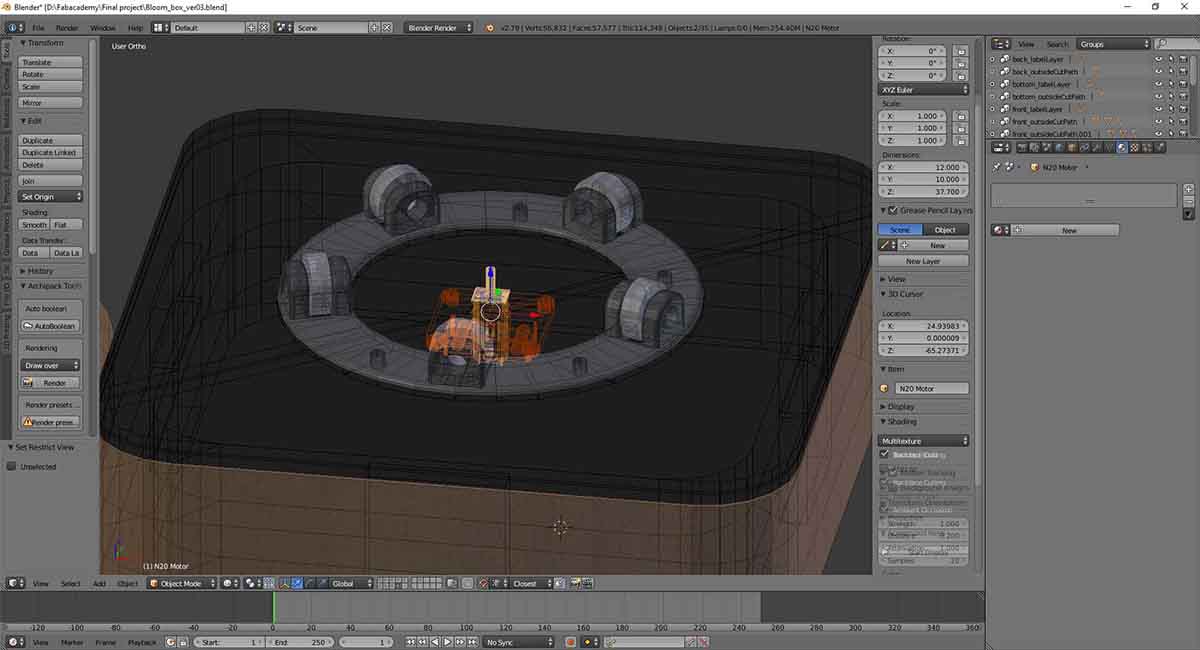
2- Motor and motor holder: It is mounted on the center of the acrylic and aligned to lazy Susan to give the best rotation.
B.O.M.:
Part name:
-
Bloom sculpture
-
Electronics case and slide cover
-
Motor holder
-
Motor coupler
-
Lazy Susan