Embroidery
Plan
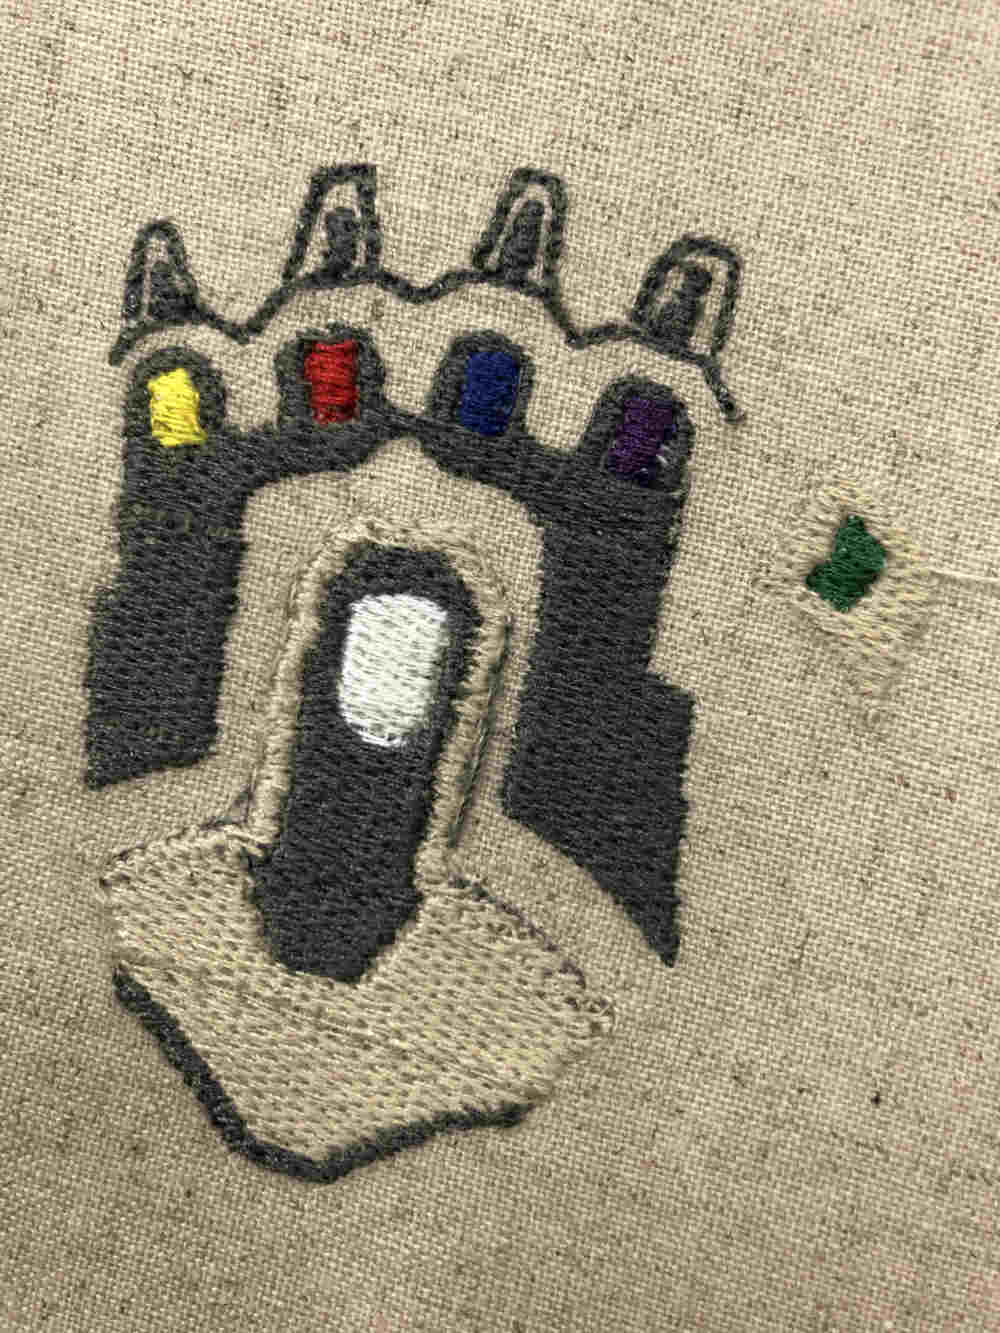
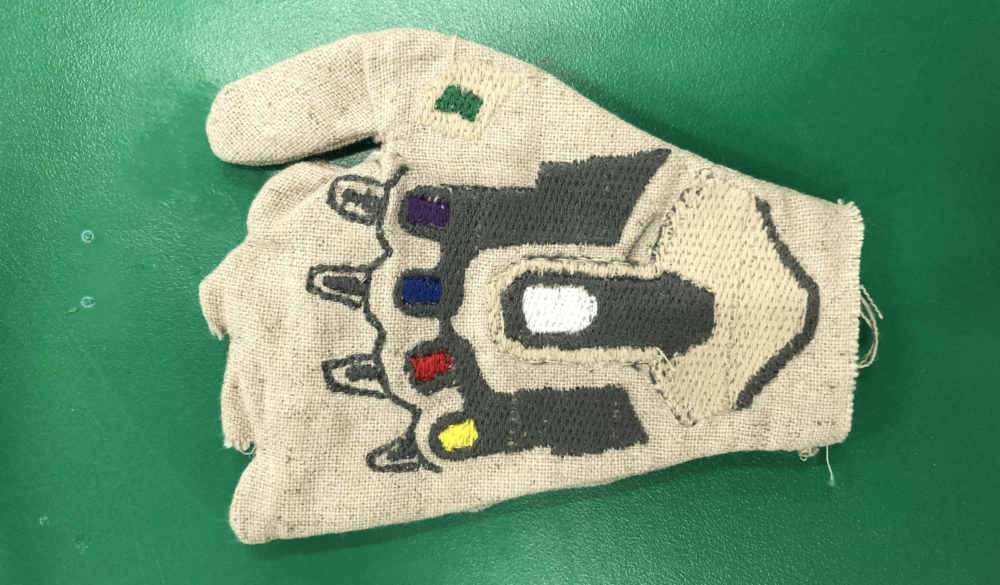
- First I decided to design the Infinity Gauntlet.

- I drew the design of the glove with an embroidery machine.
- And then planned to cut it into the shape of the glove with a laser cutter, combining the top and bottom sides with sewing.
- And if I had enough time, I was going to connect some LED to the jewelry sections using conductive thread.
Illustrator
- First, I drew my hand with a pen in my notebook.

- I found the design I wanted through Googleing.
- I saw the design and designed it to fit the shape of my hand.
- And the drawing was taken with a picture and sent to the illustrator, and the picture was overlapped with a pen tool.
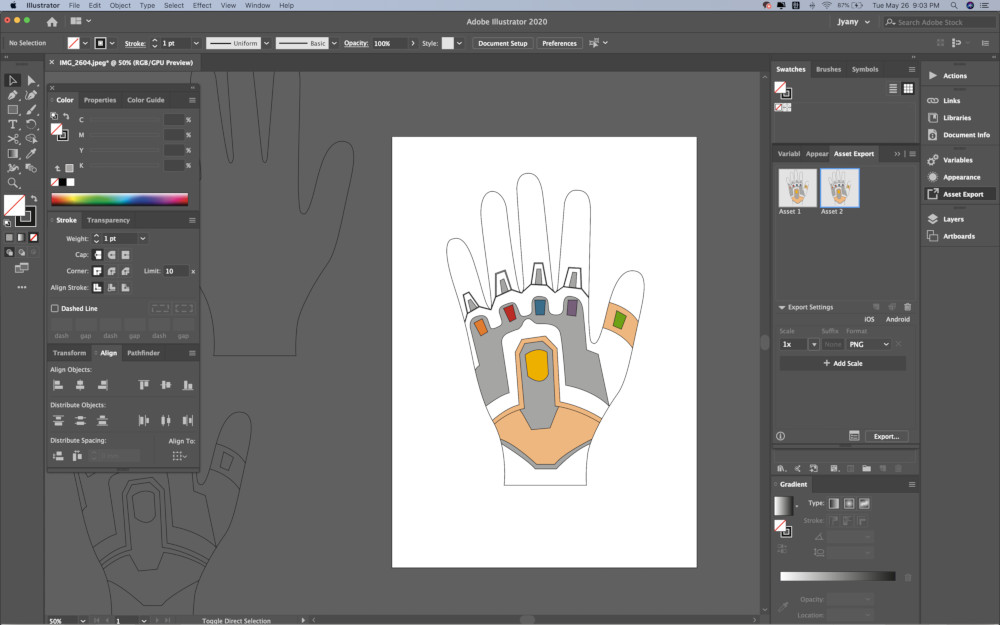
- And I exported the picture drawn with pan tool as a .svg file.
Inkscape & Inkstitch
- After downloading Inkscape, I downloaded Inkstitch.
- I referred to this site. (And Yunje helps me)
- I brought .svg file.
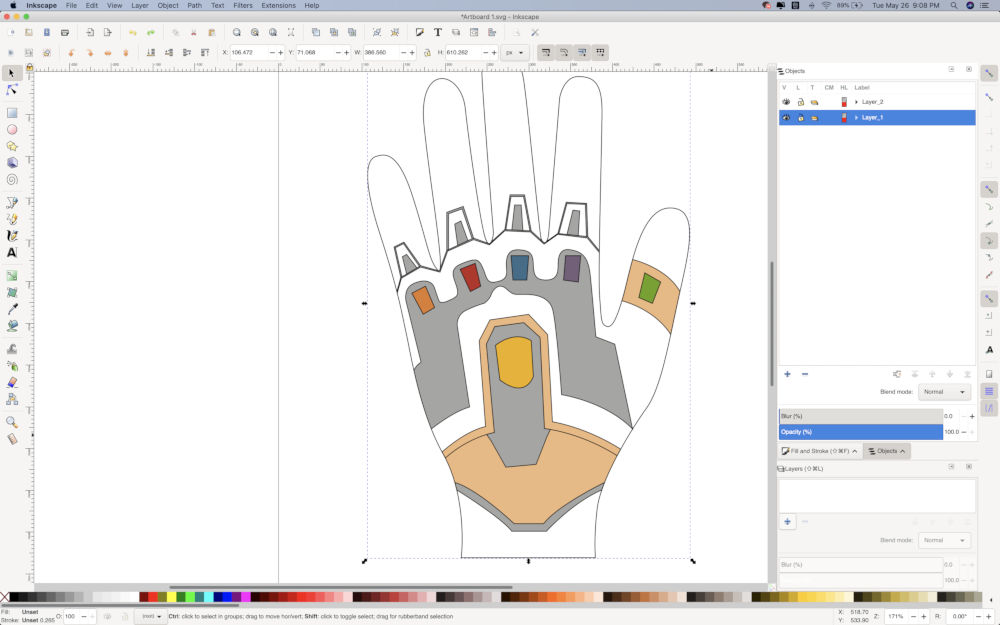
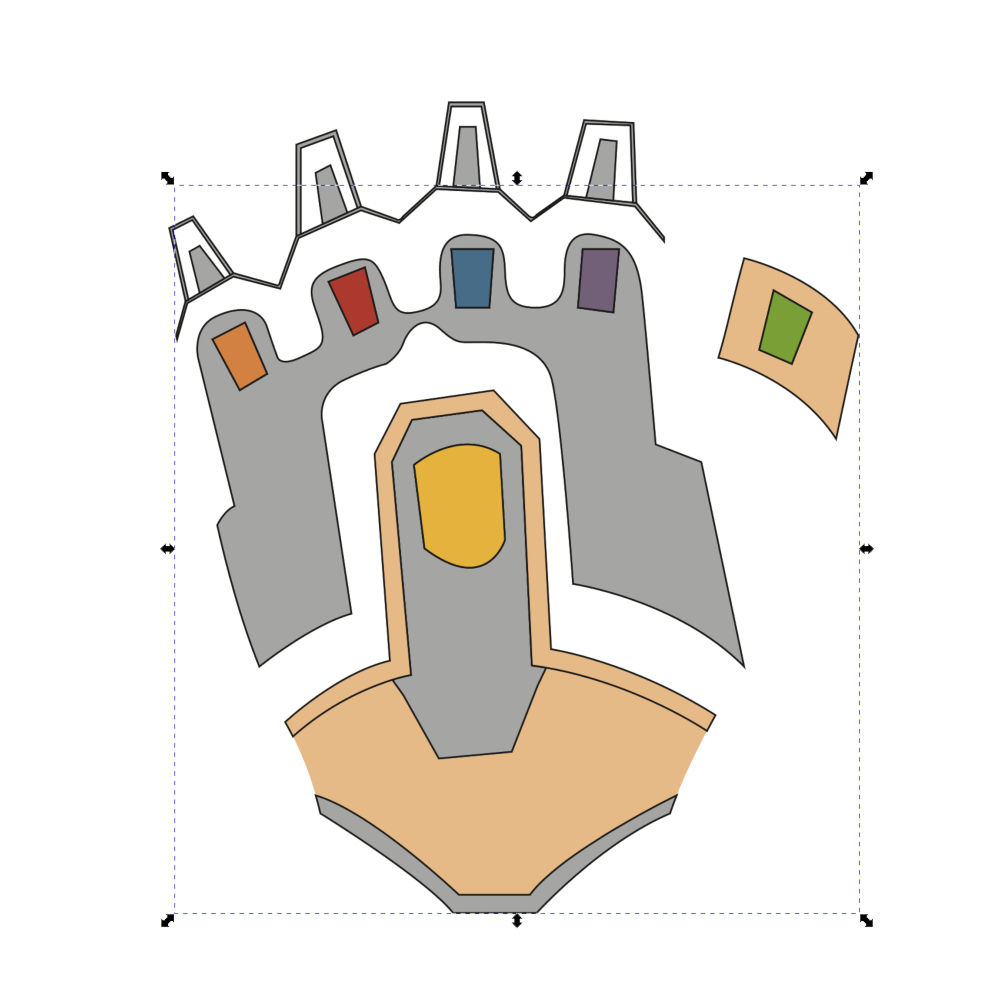
- First I opened the Objects window and removed the unnecessary part layers.
- In
Object - Fill and Stroke, Removed the outline of the colored part layers of the design.
Path - Object to Pathwas used and the paintings were made into lines.- And through
Extensions - Ink/Stitch - ParamsI was able to see how my designs were made through embroidery machines.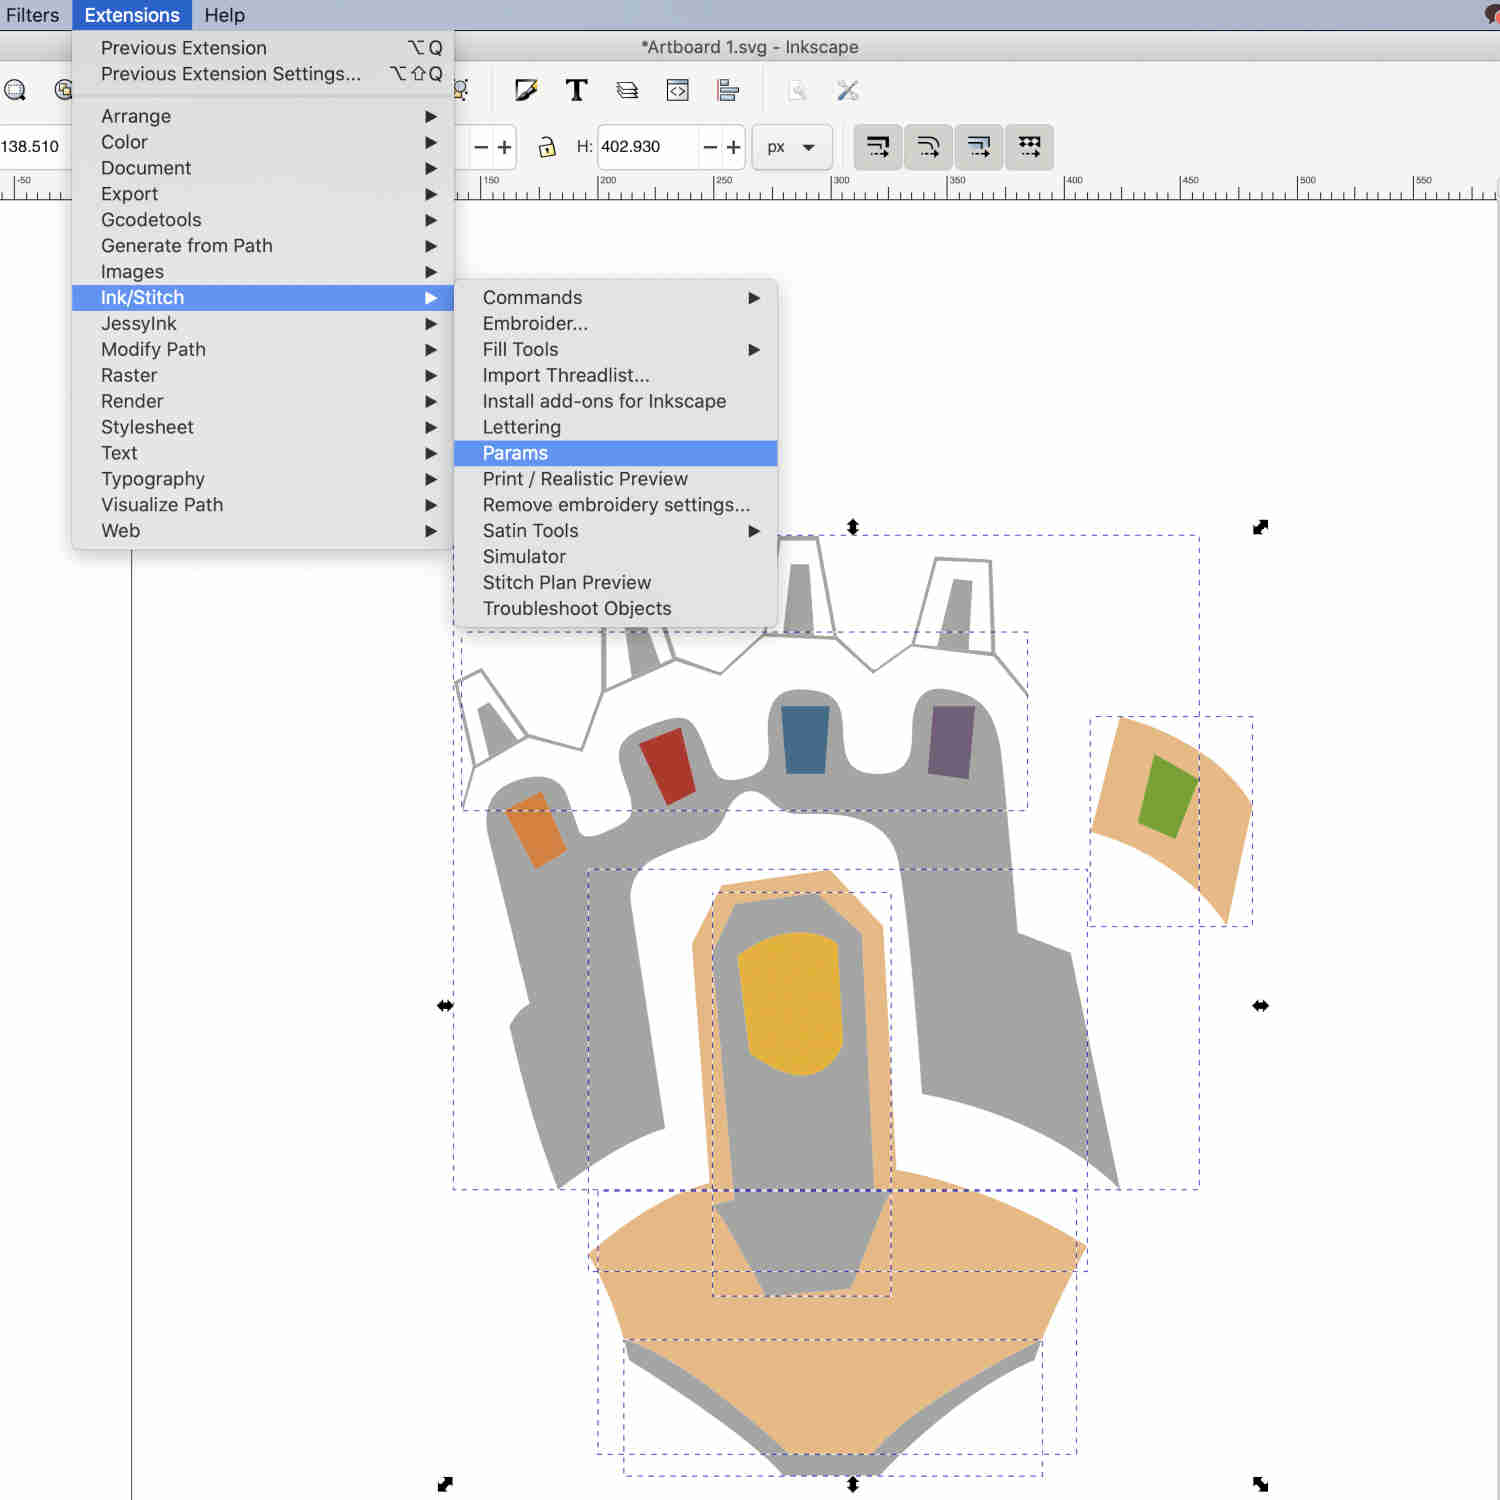 Problem
There was an error watching the simulation of my design.
SolutionI solved the problem with my instructor. One of my design parts had a problem.
I modified that part through the
Path - Unionfunction and the simulator worked well when I turned it on again.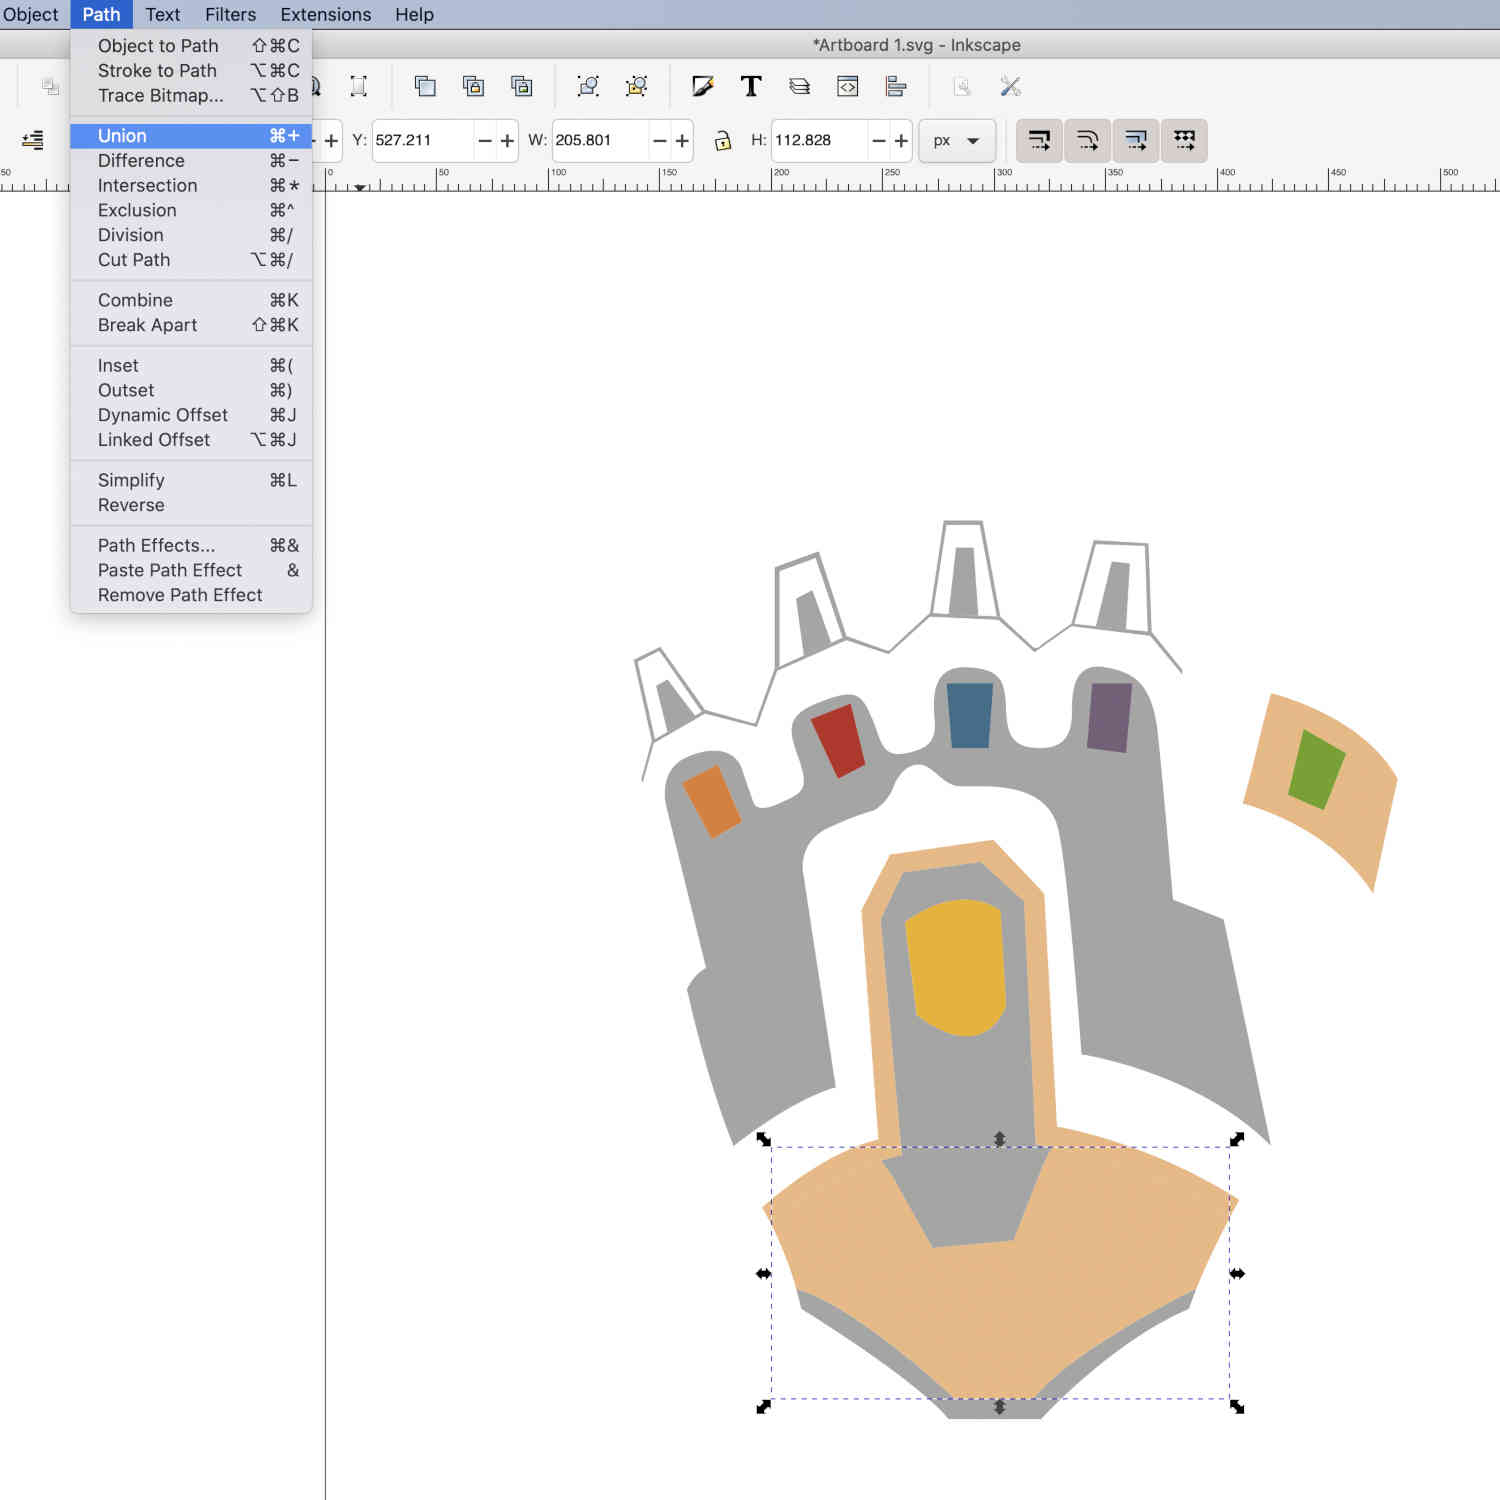
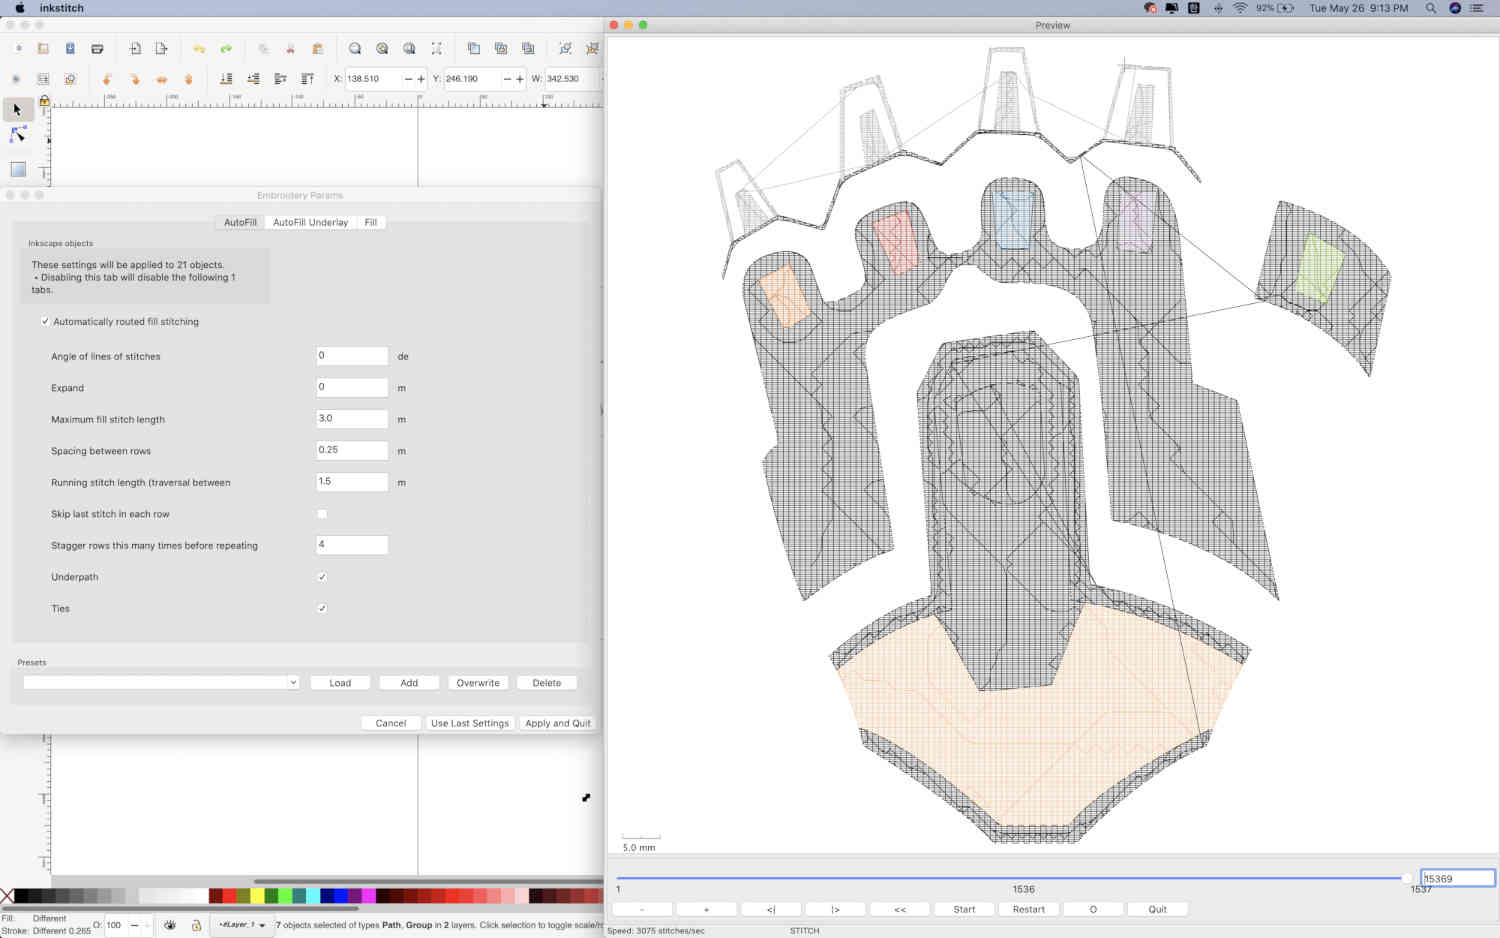
This is my final
Inkstitch - Paramssetting. I set all the design parts to the same setting. (Various settings here mean the embroidery machine's method of embroidery, and depending on the setting, the sewing method of embroidery design varies.)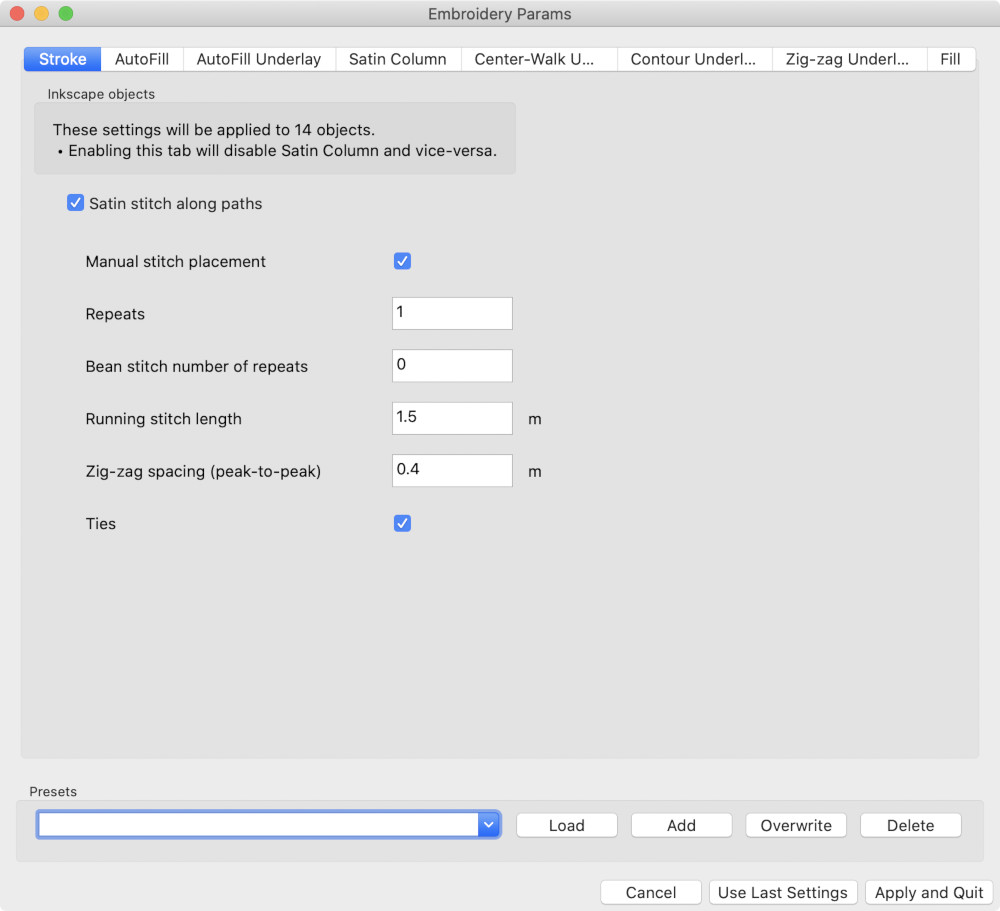
- And In
Extensions - Ink/Stitch - Embroider, Chose the extension "brother embedded format (PES)" for the file I want to save.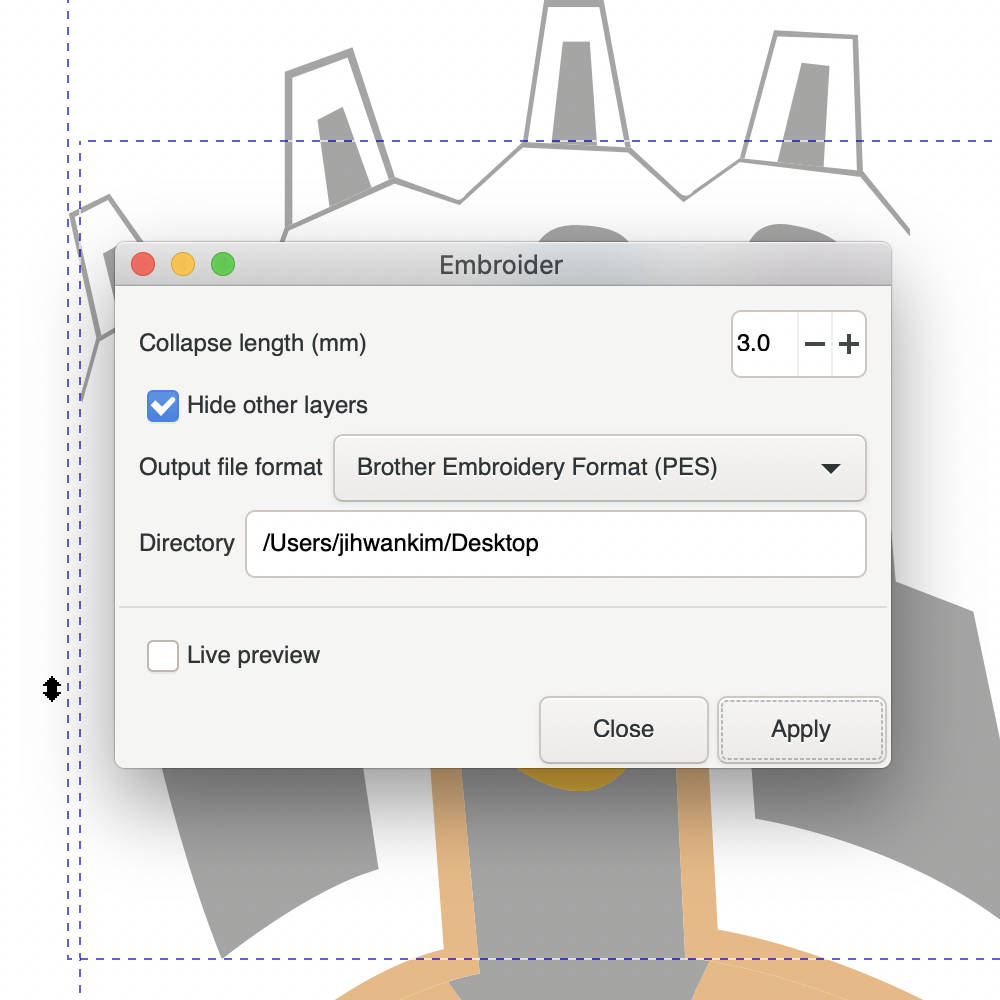
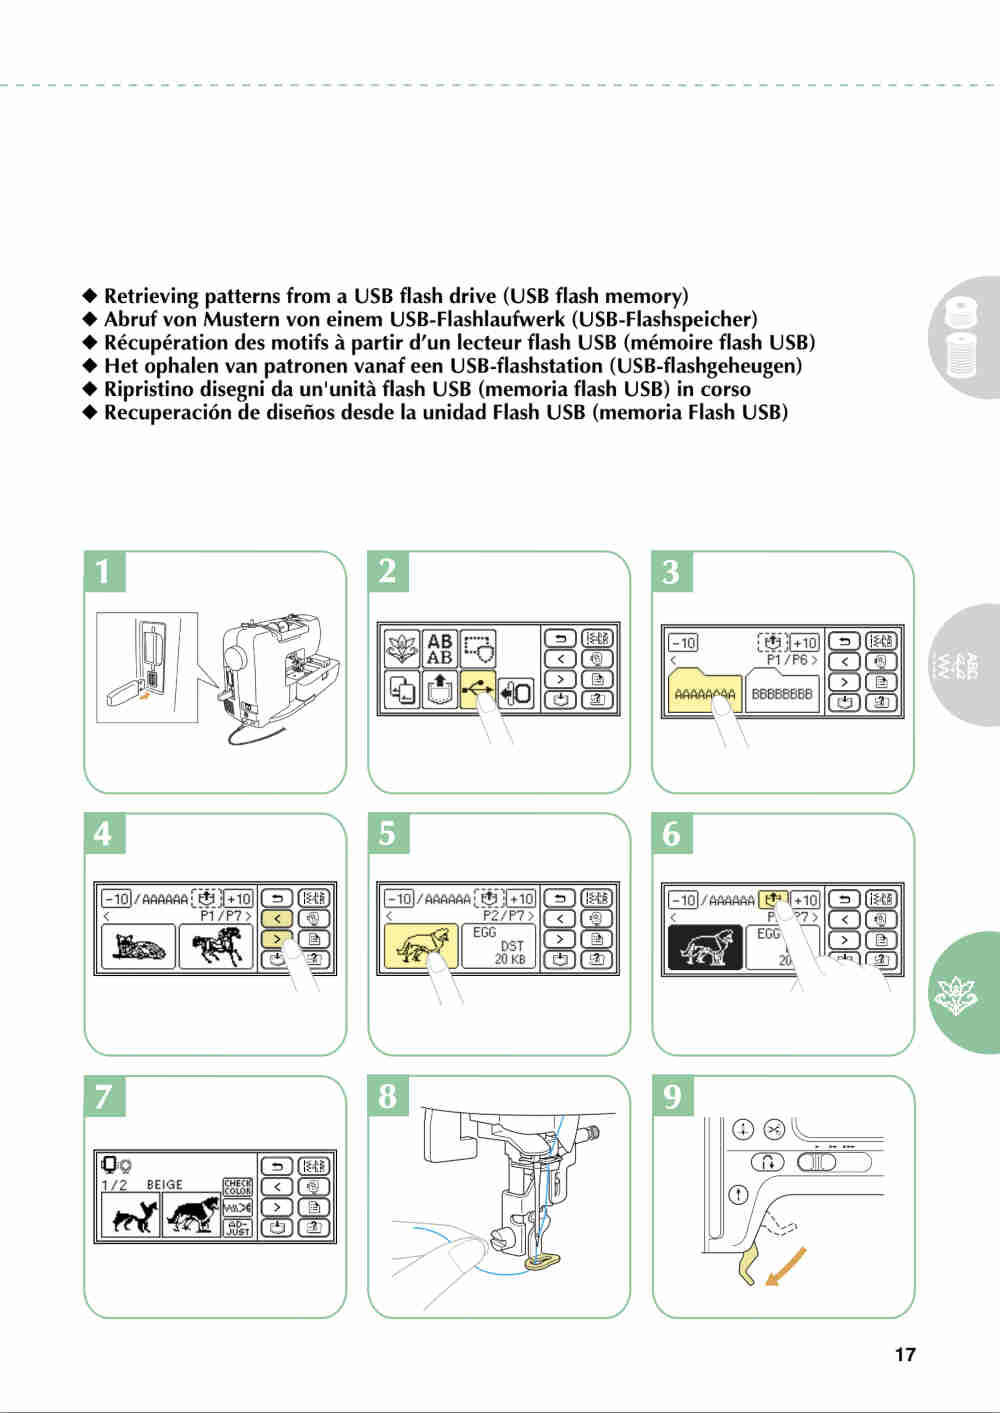
- The .pes file was moved to the embroidery machine by using my USB.
Problem
I couldn't open my .pes file in the embroidery machine. (It seemed because my USB was 3.0 USB.)
So I used Yunje's USB to move my .pes file, but the embroidery machine still hasn't read the file.
SolutionI decided to reduce the design size because I thought my design size might not fit the allowed size of the embroidery machine.
As a result, the machine recognized my design file.
LearningIf the design size is larger than the allowed size of the embroidery machine, it is not recognized by the machine.
Digital Embroidery Machine
- The embroidery machine I used was innov-is 950 from the brother company.
- There were things to prepare for digital embroidery. First, I referred to the quick setup guide book.(Reference Site)
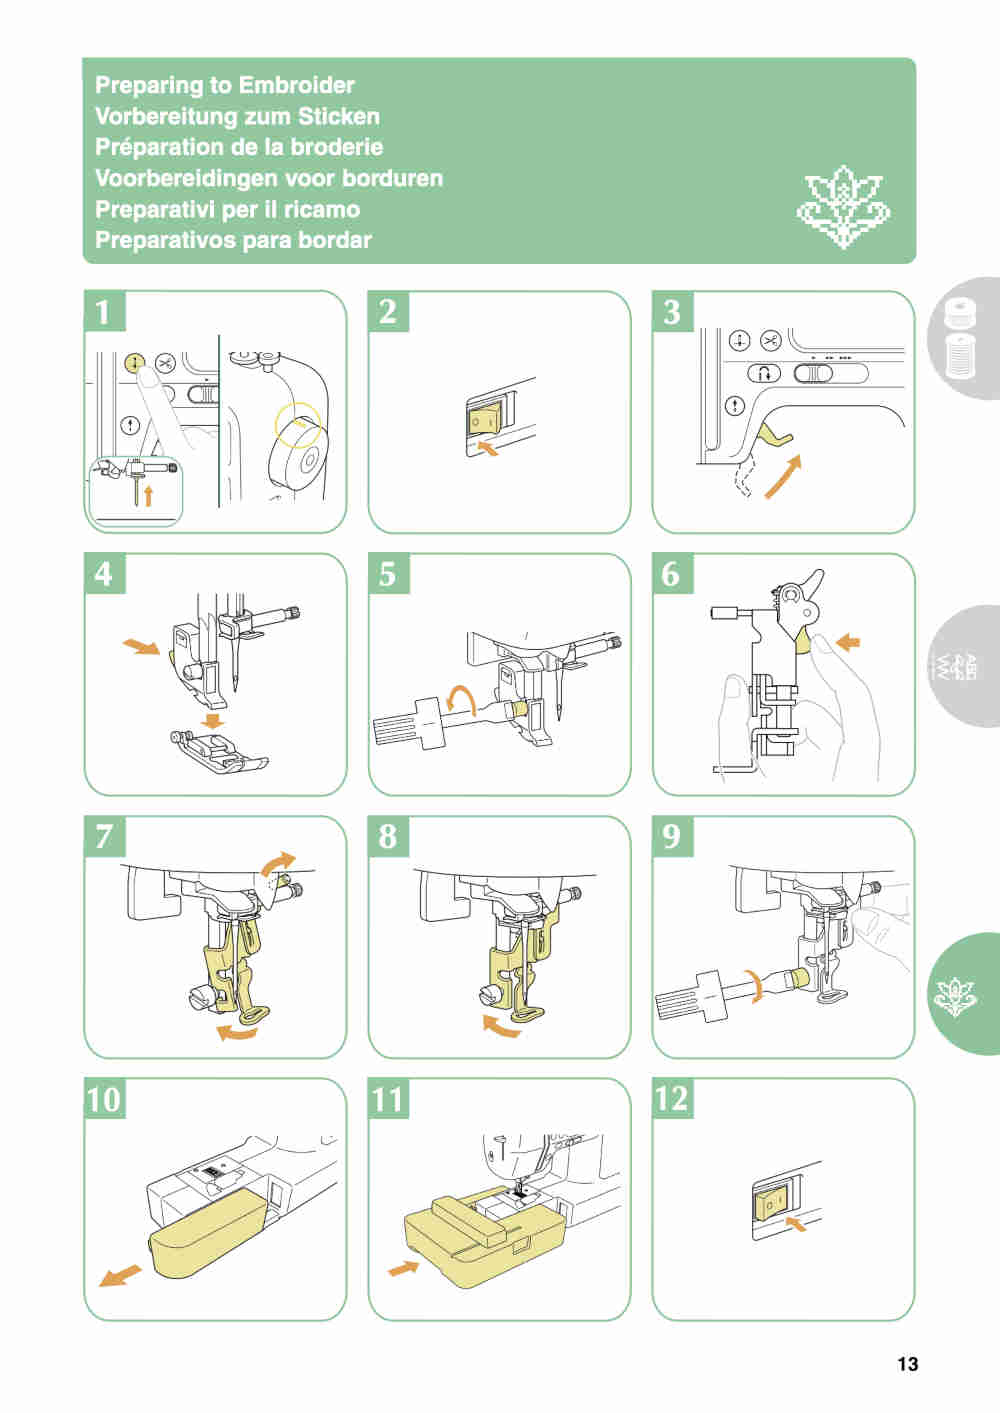
- As above, for the first digital embroidery, the embroidery foot was replaced, and the flatbed table was replaced.
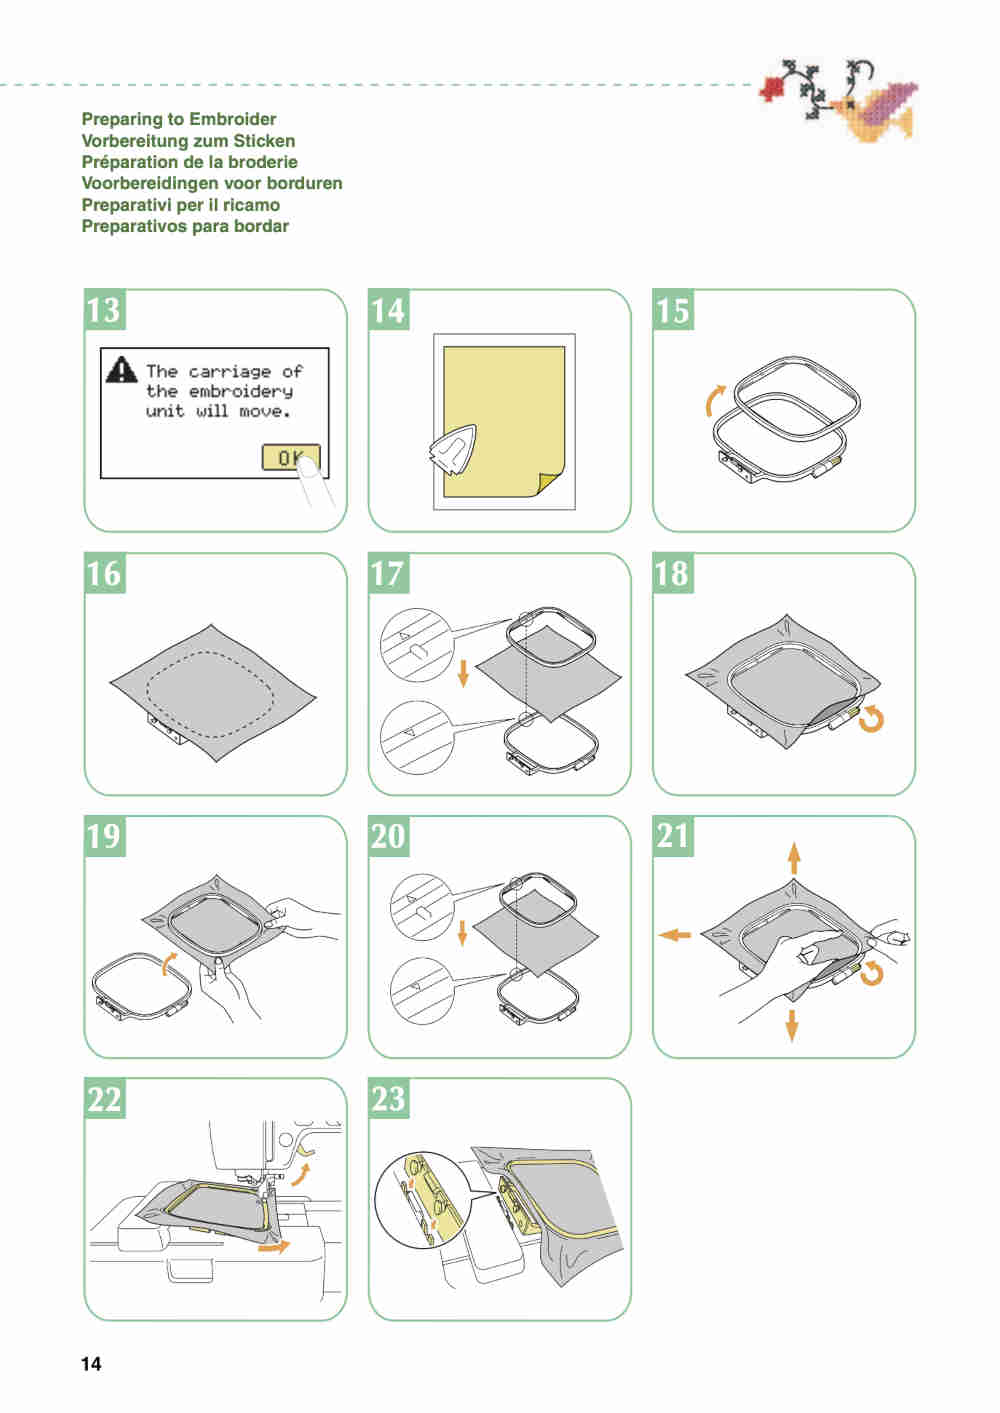
- And I set it up with a cloth for my own use on my embroidery frame.
- The prepared USB was connected to the machine and the file was loaded.
- I chose a file to use and fitted the thread.
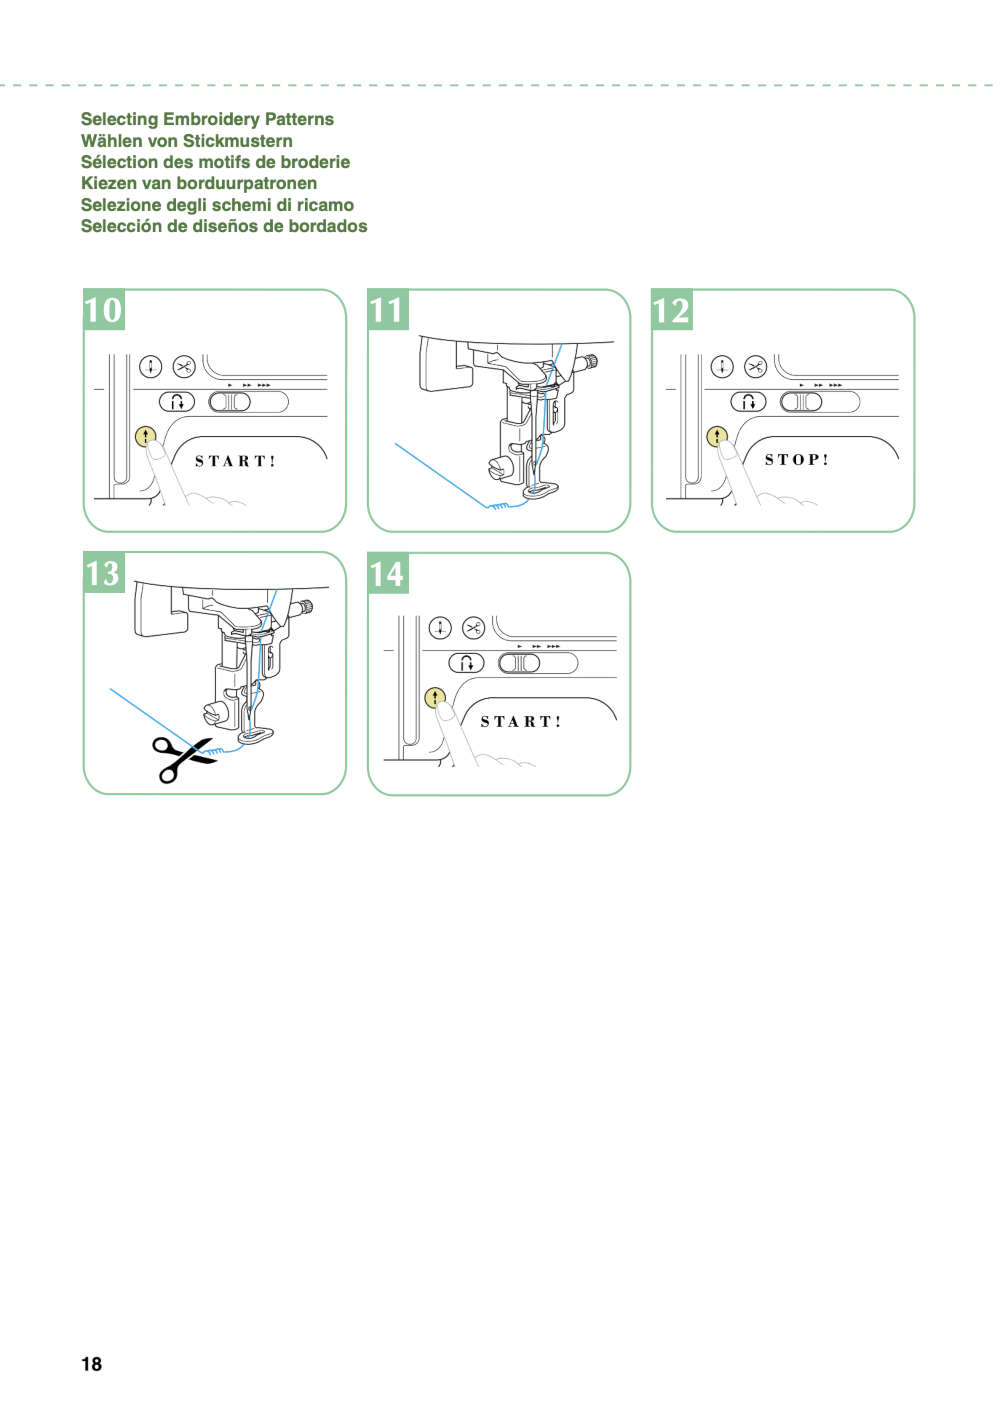
- Started
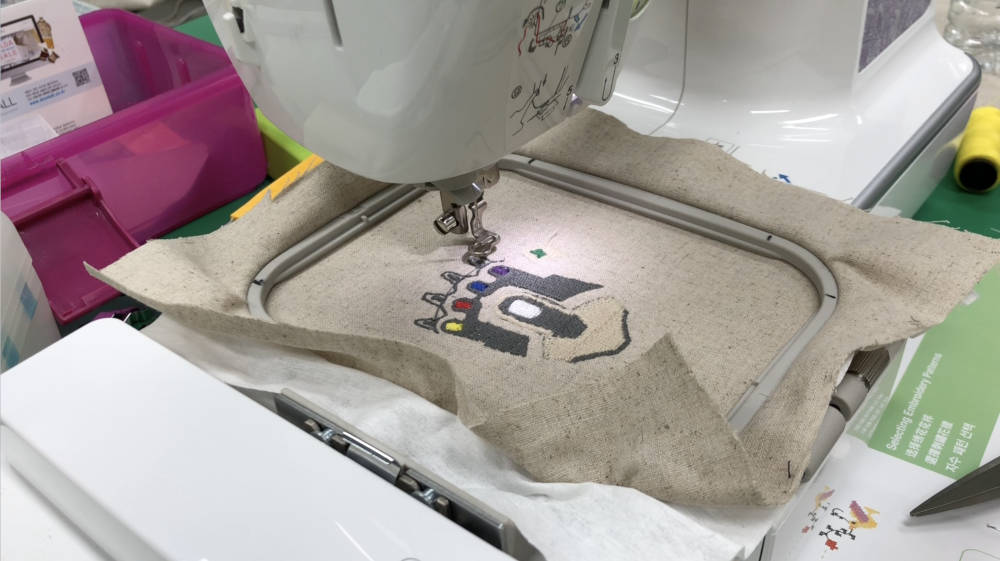 How worked with multiple colors to create design
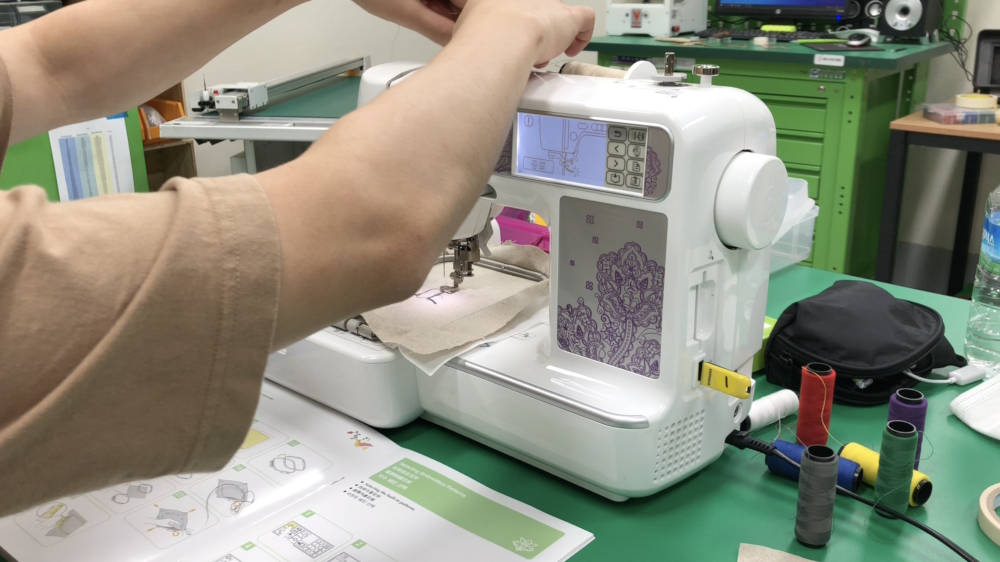
The .pes file is divided into parts of the picture, and is processed individually. (When one job is done, it stops.) So after the job, I changed the thread according to the color of the design.
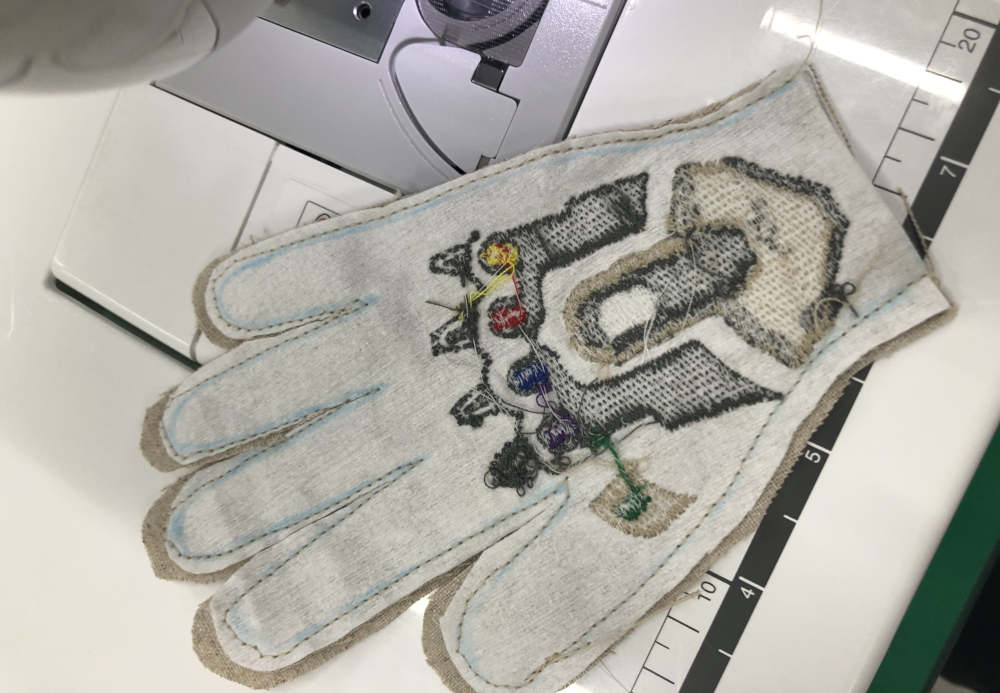
- After finishing digital embroidery, I had to sew to make gloves.
- First, I printed a hand-shaped edge.
- I cut out the shape of the hand with scissors and imitated it using a choke on the other side of the cloth I digitally embroidered. (A imitated line is a line for sewing.)
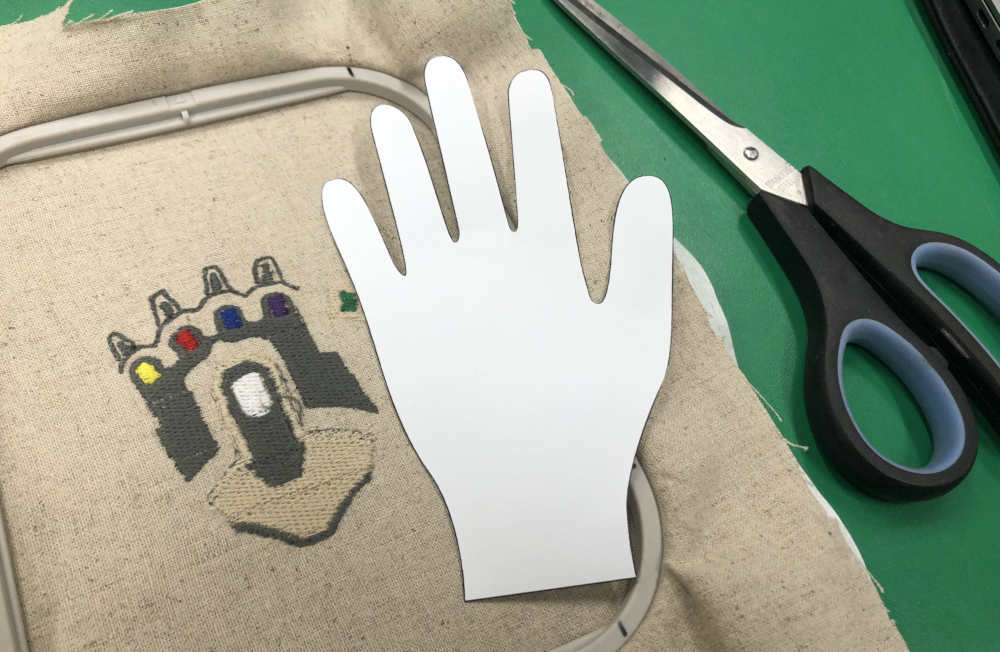
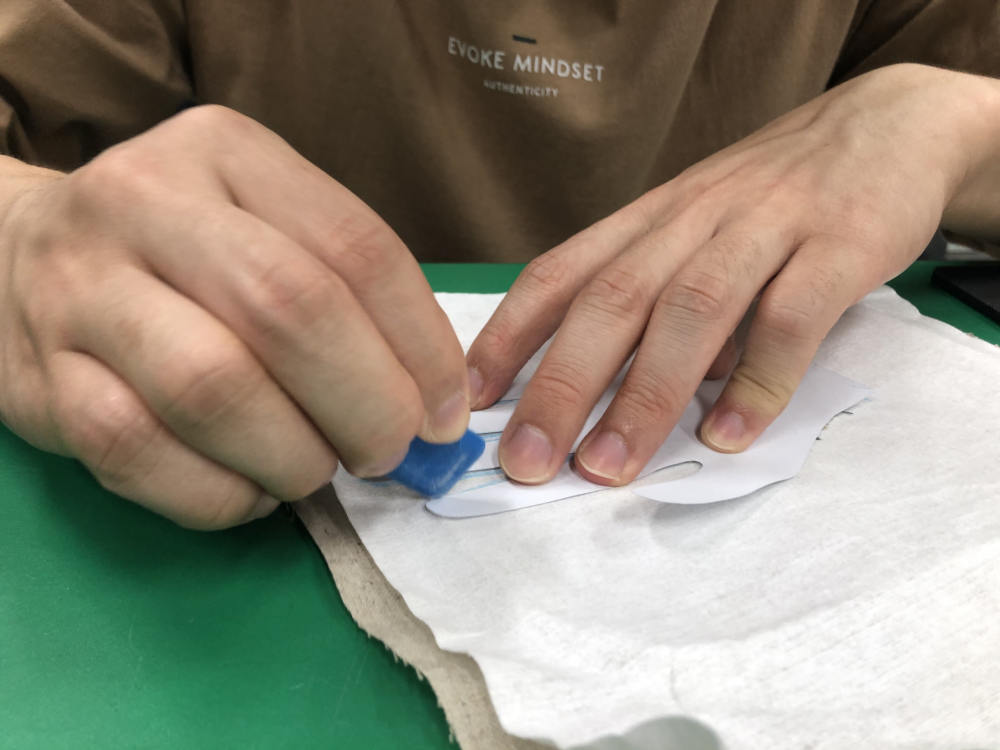
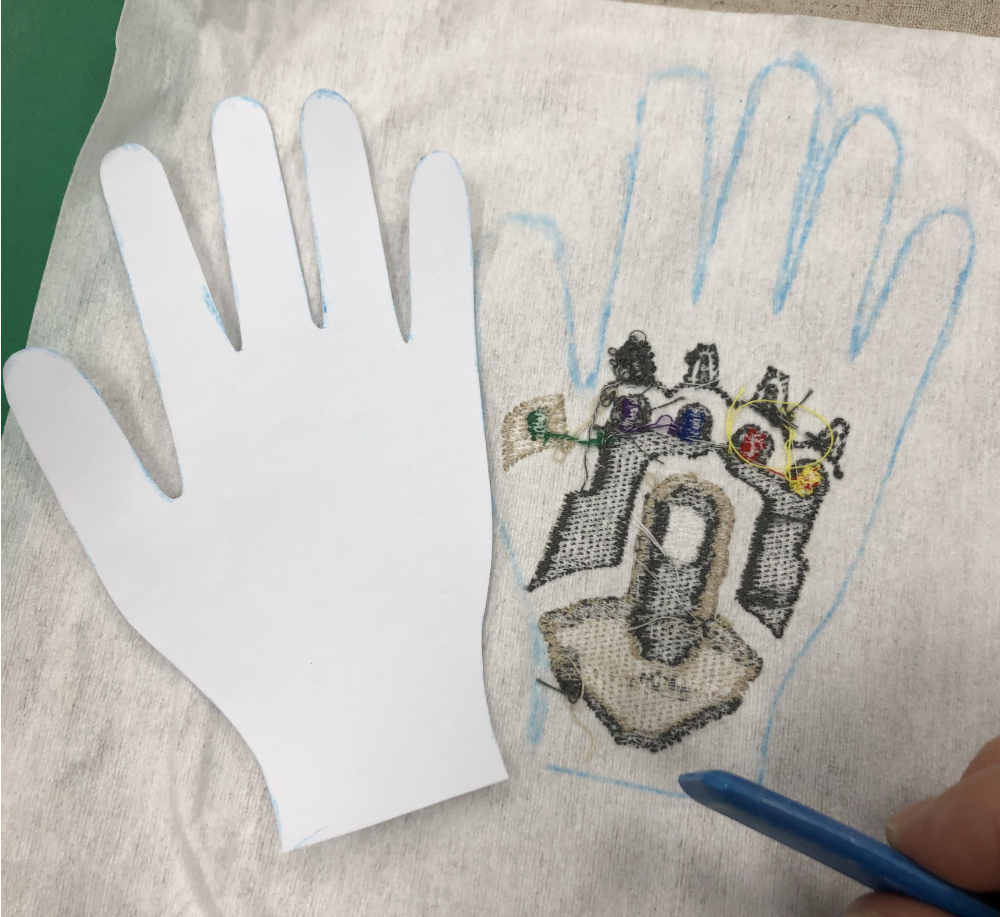
- The cloth was cut larger than the line that was imitated. Then I cut one more cloth of the same shape.
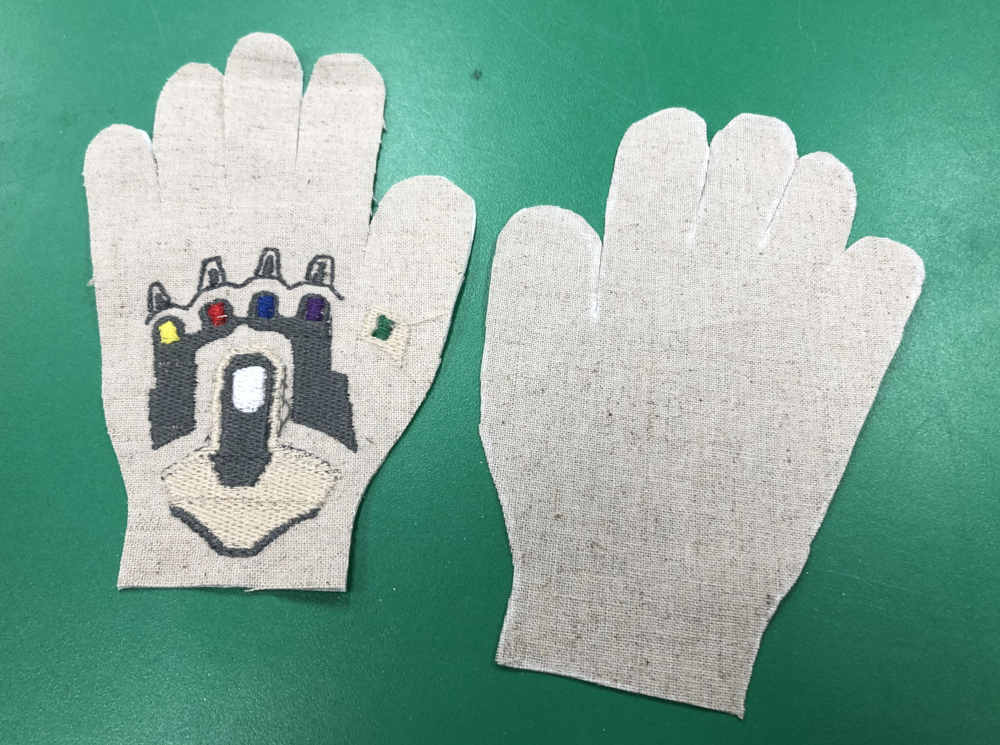
- Layered and ready to sew.
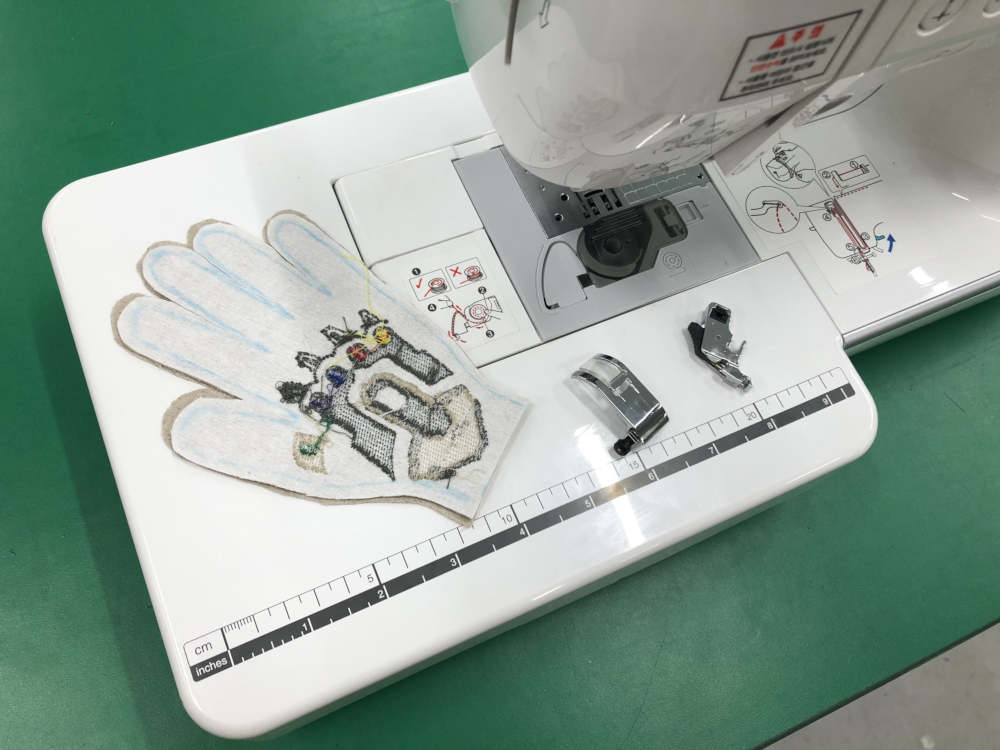
- For sewing again, the presser foot and the flat table were replaced.
- Started sewing.
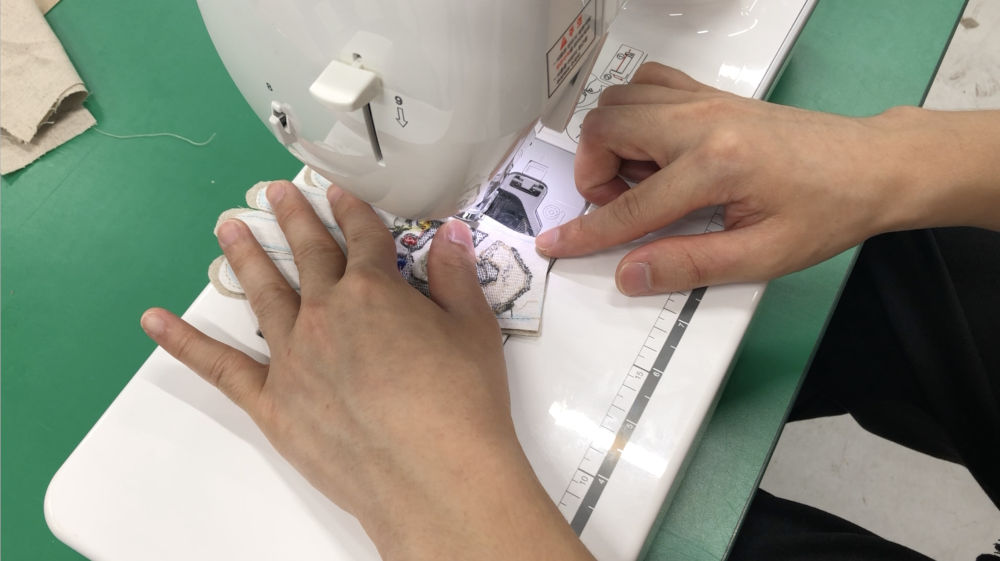
- After it was finished, I turned it over and made gloves.
 Problem
1) The size allowed by the embroidery machine is limited, so I embroidered it smaller than my hand size. I modified the shape of the edge of the hand to suit it, so I couldn't flip my finger after it was finished.
2) Also, the wrist on which the hand goes is too narrow, so it seems more difficult.
3) The type of fabric used to make gloves was burlap, and the problem was that burlap was a fabric that did not stretch well
Learning1) When making gloves, it seems to be necessary to use a fabric that stretches better.
2) And I thought that I should make it based on the size of the actual gloves.
3) The next time I use the embroidery machine to make something, I think I should check the allowable size of the embroidery machine