Upload Files Using Terminal
What is Git?
Git is a free and open source distributed version control system designed to handle everything from small to very large projects with speed and efficiency.
Why use Git?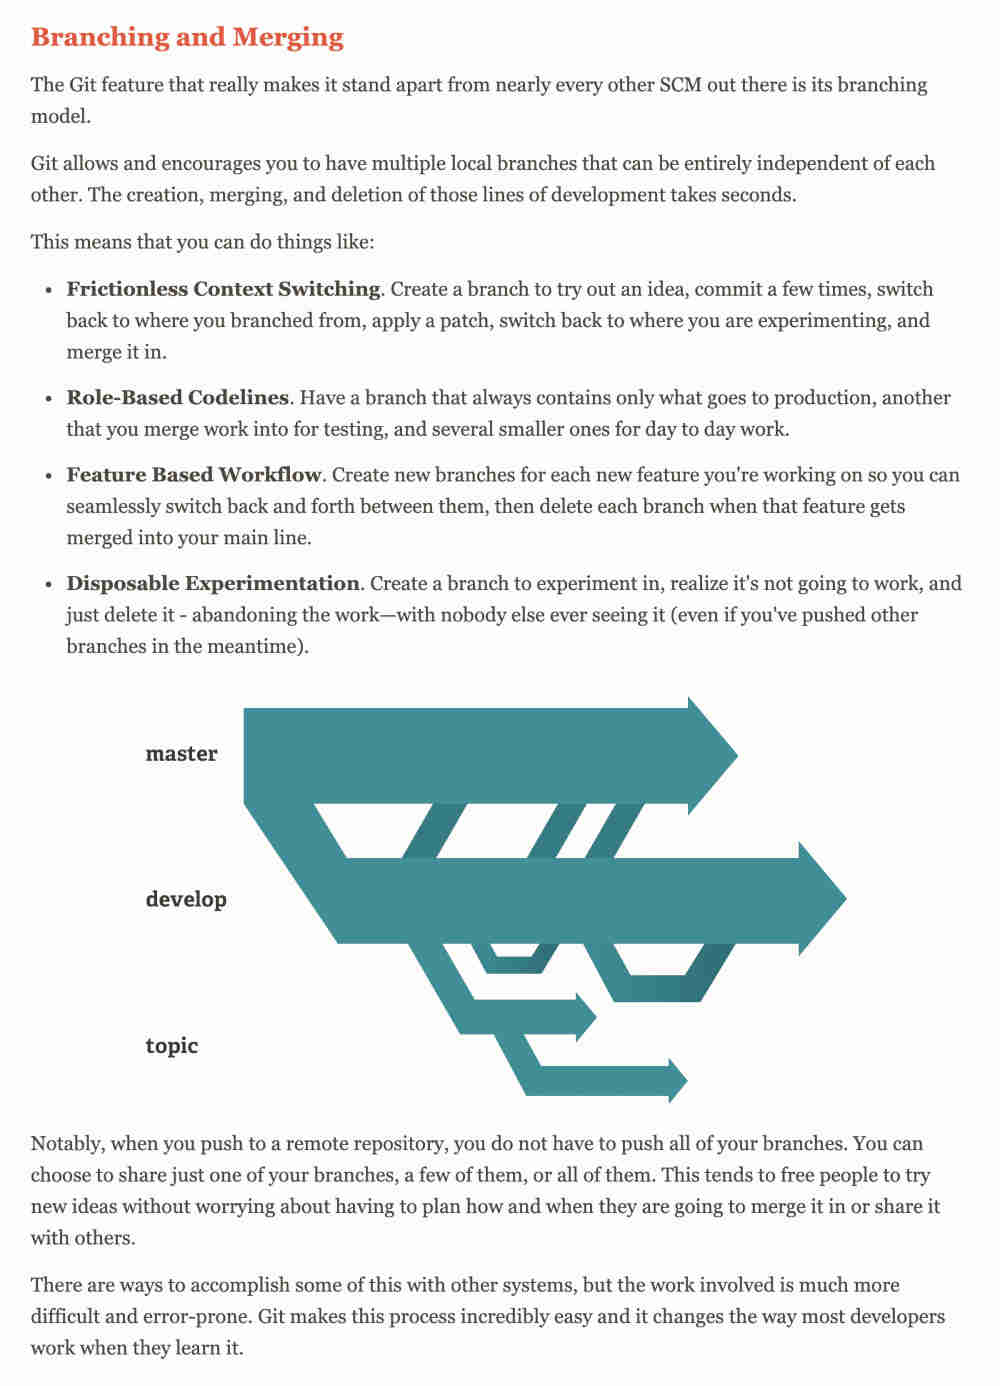
How to generate the ssh key (how I did it using a Mac in 2020)
First, our fab academy students use a site called git lab. You who become a fab academy student become a member of the git lab site. We have to create the ssh key of our computer and save it in git lab so we can upload the file on the web using the terminal.
- Opened terminal
- Created a new directory (folder) named .ssh
mkdir .ssh
- entered the .ssh new directory (folder)
cd .ssh
- Created an ssh key called "fa2020key"
ssh-keygen -t rsa -b 4096 -C "fa2020key"
- Edited the text file named config
nano config
- Entered the following: (note the three spaces at the start of line 2,3 & 4) And Exit.
Host fabacademy HostName gitlab.fabcloud.org User git IdentityFile ~/.ssh/fa2020 - Copied the contents of my fa2020.pub key (I could use `cat fa2020.pub` from terminal)
- Pasted my new key into your gitlab profile at https://gitlab.fabcloud.org/profile/keys
- And checked if the ssh key is registered well.
ssh -T git@gitlab.fabcloud.org
- And I received a message.
Welcome to GitLab, @jihwan!
How to setup the link between the central repository and your local archive
- Navigate to the folder where you want to put or create your repo. (Using the command "cd")
- Clone your student repository
git clone git@git.fabacademy.org:fabacademy2020/yourlabname/yourstudentnumber.git
- Then you can edit your files in the folder where git clone is connected.
Upload Files Using Terminal
- Open terminal.
- Navigate to the folder where you created your repo.
cd/your_repository
- To download the last copy from the repository.
git pull
- Add the new files you added to git. (to upload all the files at once)
git add -A
- To see what changed.
git status
- Now name your update, so you know what you changed with this push.
git commit -m "change you did"
- Upload to the Repository.
git push
- Open terminal.
- Navigate to the folder where you created your group repo.
cd/your_group_repository
- Switch to master branch for get files from the master branch.
git checkout master
- To download the last copy from the repository.
git pull
- To make a "branch name" branch.
git branch branchname
- Switch to "branchname" branch.
git checkout branchname
- Add the new files you added to git. (to upload all the files at once)
git add -A
- To see what changed.
git status
- Now name your update, so you know what you changed with this push.
git commit -m "change you did"
- Upload to the Repository.
git push origin branchname
Make Homepge
Code Editors
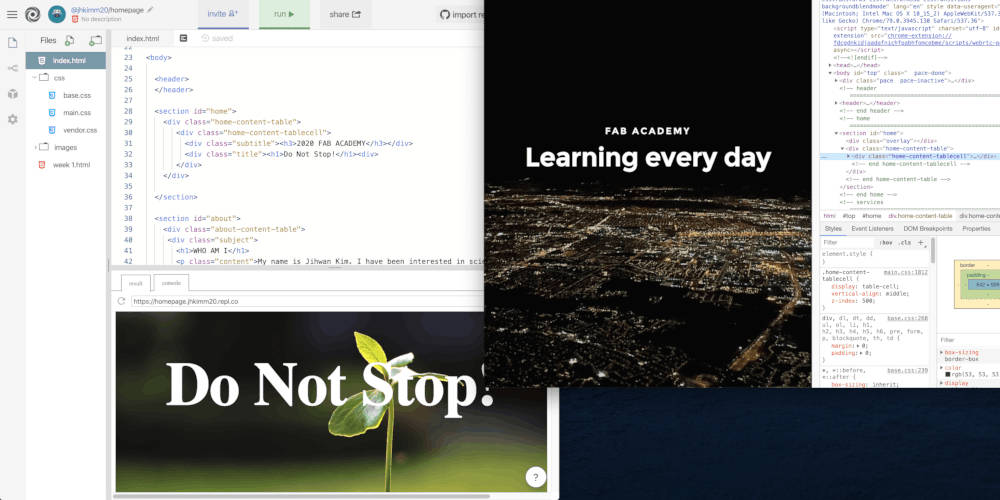
- Repl.it - The collaborative browser based IDE ((I used it for the first time.))
There is no need to install the program.
Sign up process is required
Files are stored online. (I was uncomfortable with this process.)

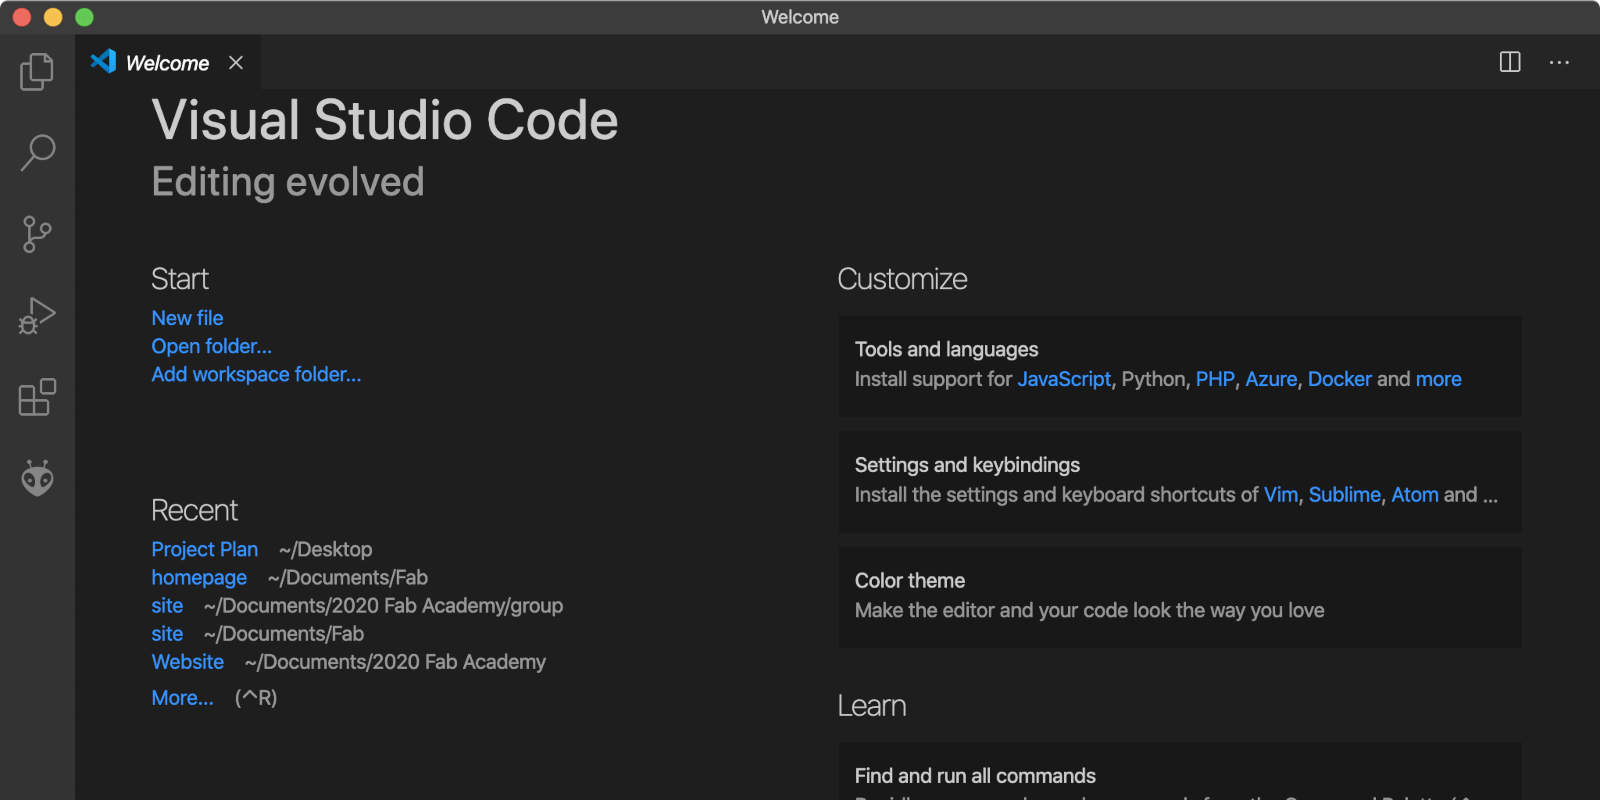
- Visual Studio Code - Code Editor ((I used it mainly later))
The program must be installed
Manage files on your personal computer (this was good)
Additional programs can be installed and used.
Workflow
- First of all, I chose one of the students' homepages last year. (Annie Ferlatte's site)
- And I downloaded the template that the student referred to. (In Free CSS Site, Downloaded INFINITY 1.0 TEMPLATE.)
- I made my homepage by modifying the template on repel it site.
- But the first html of my life was not easy. I didn't know what to fix or how to fix it.
- So I studied through a Korean YouTuber's channel where I can learn about coding. (Insung Yoon's channel)
- And this YouTube channel was great at helping me understand the basics of coding. (Life coding)
- I looked up the html video of the function I wanted.
- And I added a feature one by one.

Change My Website
First (Before) & Second (After) Version

The first site was very clumsy and uncomfortable to look at the information I recorded. So I modified the homepage. The parts that I revised are first, people who look at the homepage can find information well, second, made a little more clear.
Reference- CSS Smooth Scrolling Effects (Youtube)
- Sticky, Smooth, Active Nav (css-tricks)
- CSS @media Rule (w3schools)
Reference Site
Useful Source Code
If you want to create a navigation bar located on the left side of this page you see now, check out this article
- I'll show you a part of my html code
<nav> <ul> <li><a href="#part1">part1</a></li> <li><a href="#part2">part2</a></li> <li><a href="#part3">part3</a></li> <li><a href="#part4">part4</a></li> <li><a href="#part5">part5</a></li> <li><a href="#part6">part6</a></li> <li><a href="#part7">part7</a></li> <li><a href="#part8">part8</a></li> <li><a href="#part9">part9</a></li> </ul> </nav> - And this is my JavaScript code
let mainNavLinks = document.querySelectorAll("aside ul li a"); let mainSections = document.querySelectorAll("article section"); let lastId; let cur = []; window.addEventListener("scroll", () => { _.throttle(doThatStuff, 1000); }); window.addEventListener("scroll", event => { let fromTop = window.scrollY; mainNavLinks.forEach(link => { let section = document.querySelector(link.hash); if ( section.offsetTop <= fromTop && section.offsetTop + section.offsetHeight > fromTop ) { link.classList.add("current"); } else { link.classList.remove("current"); } }); }); - These two lines are the code that connects the navigation and the specified part
let mainNavLinks = document.querySelectorAll("aside ul li a"); let mainSections = document.querySelectorAll("article section"); - And in this part, the number is the code that adjusts the moving distance.
window.addEventListener("scroll", () => { _.throttle(doThatStuff, 1000); }); - And I understood the above parts a bit, but my understanding was insufficient to modify the formula.
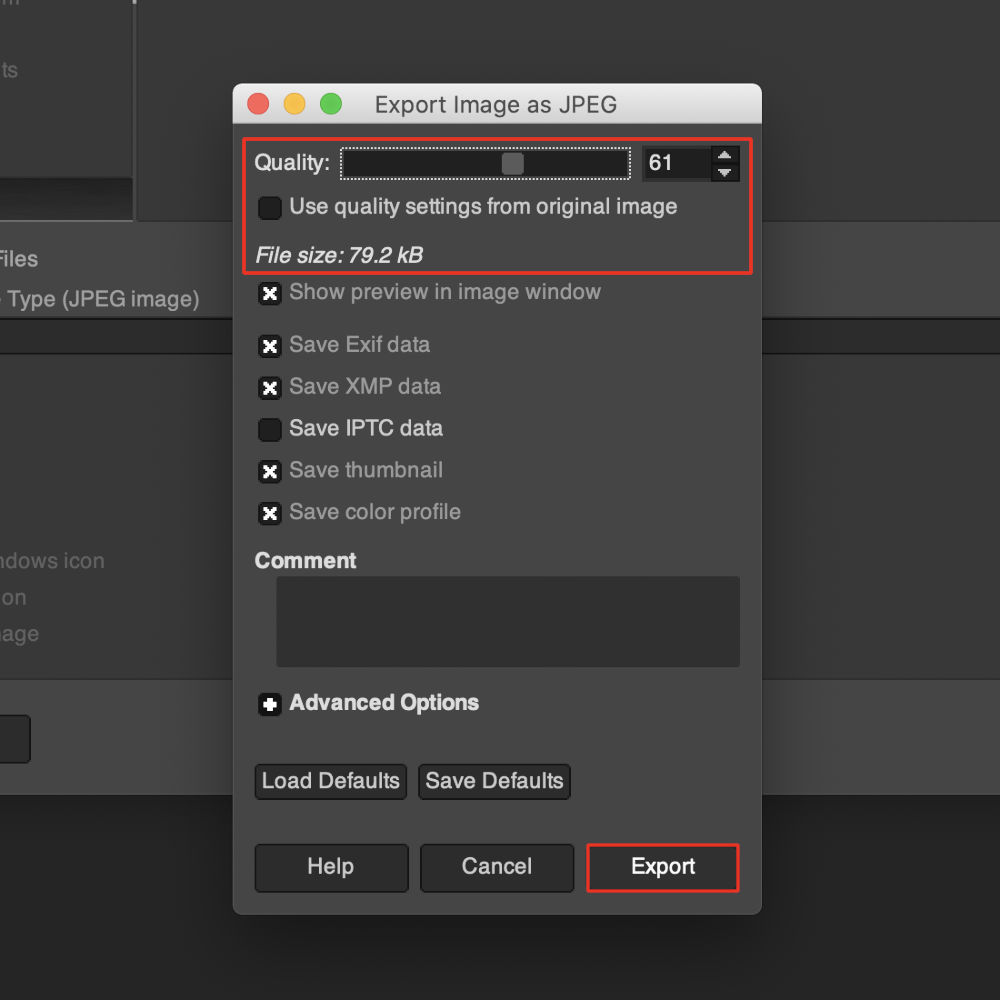
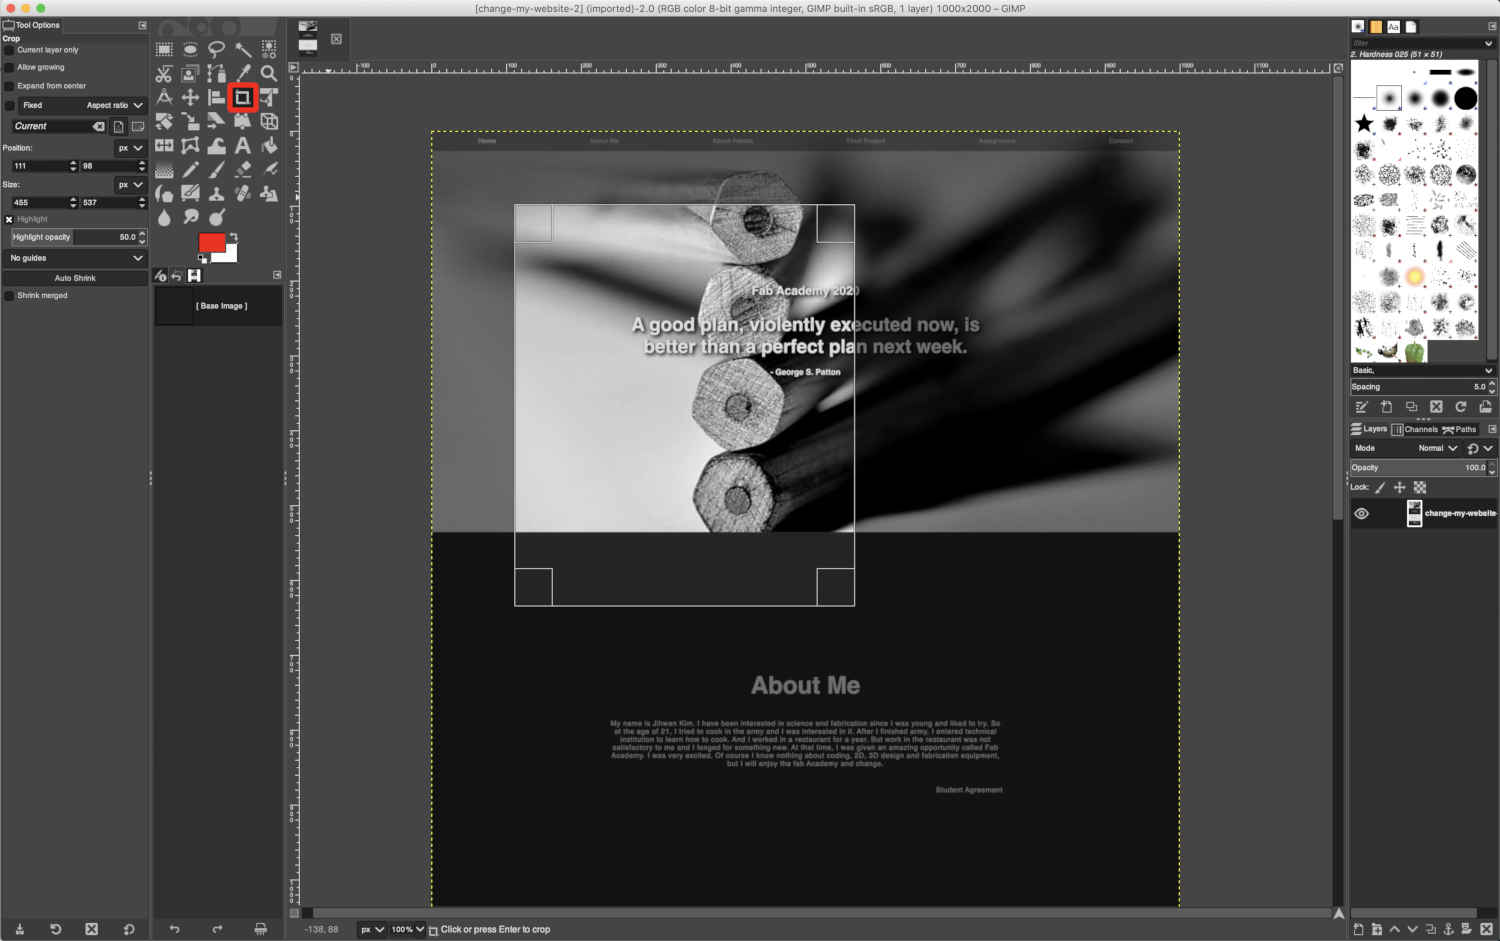
How to Resize Images
My instructor designated the image as 800x600 in size and 80KB in size. I used a program called GIMP, which is a Layer-based raster 2D design program similar to PhotoShop.
- Download the GIMP first.
- Drag and drop images to open in GIMP
- Use the Crop Tool on the left to cut only the part you want
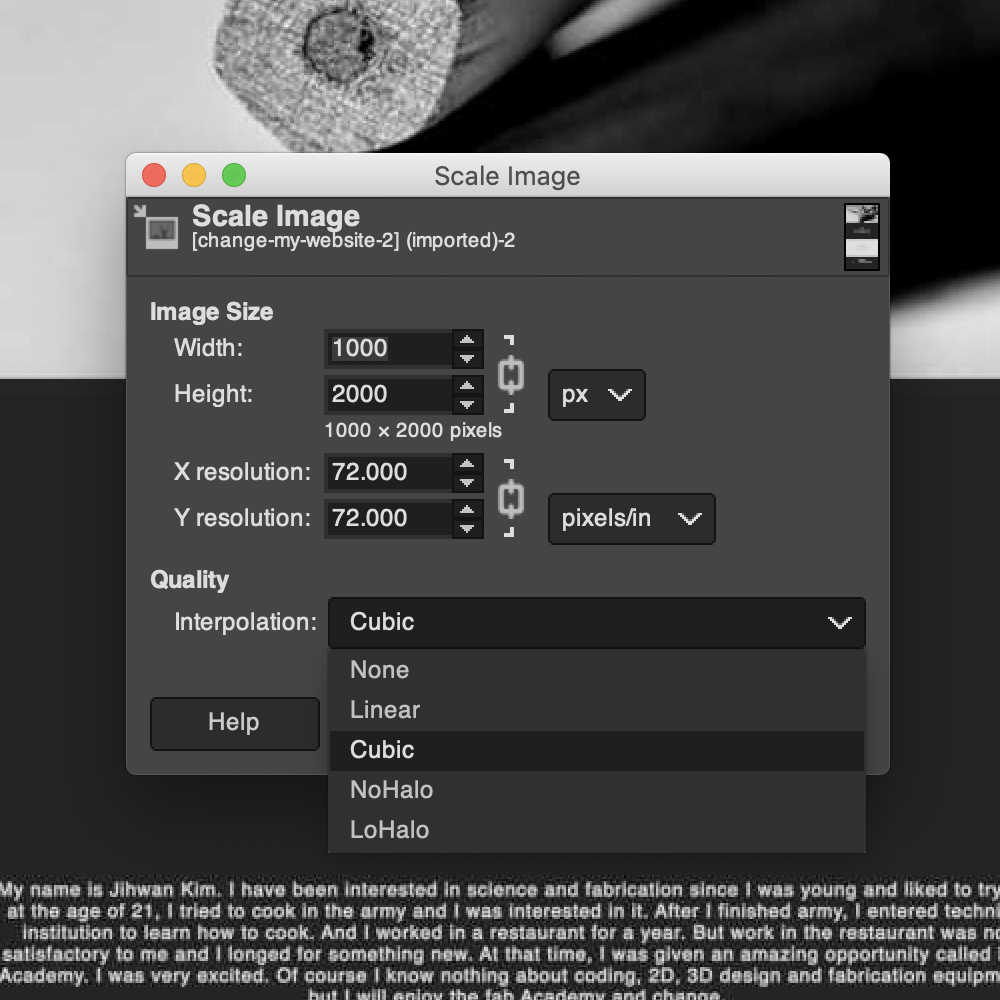
Right-click > Image > Scale ImageThen set the image size and quality and press the scale button.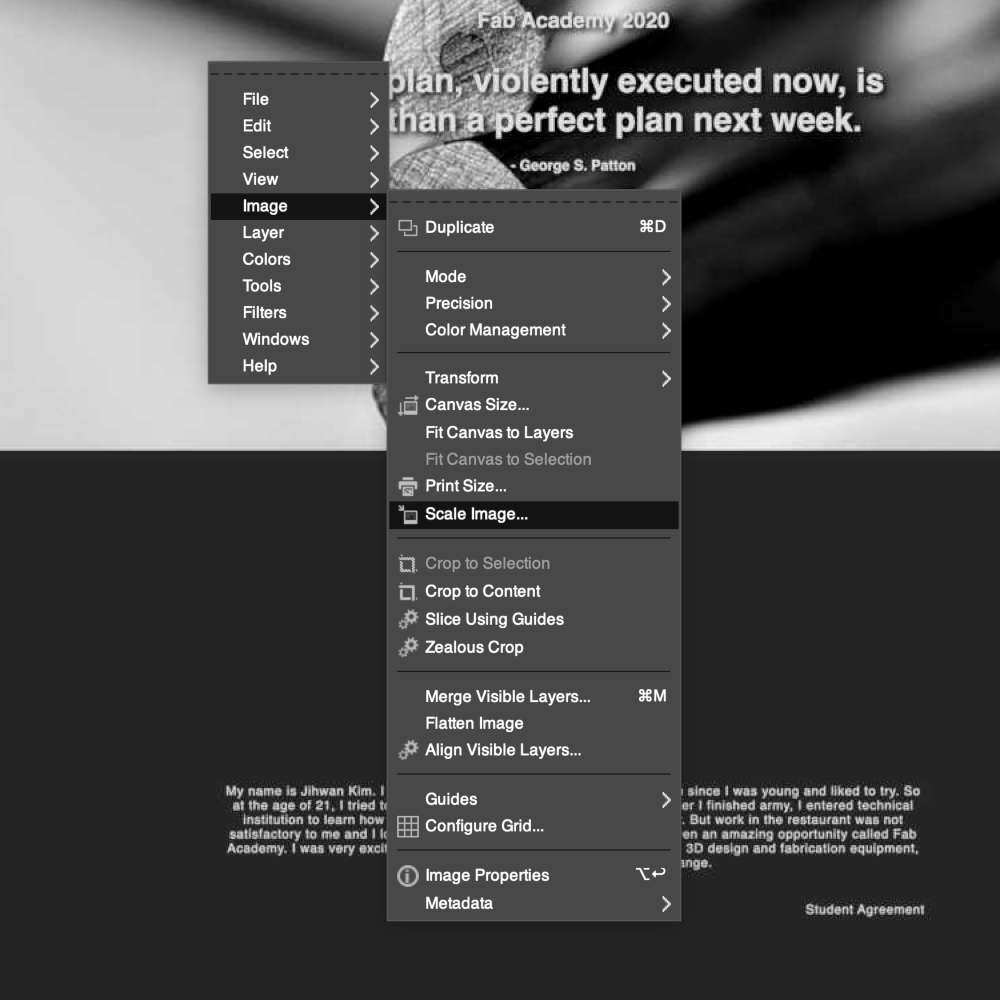
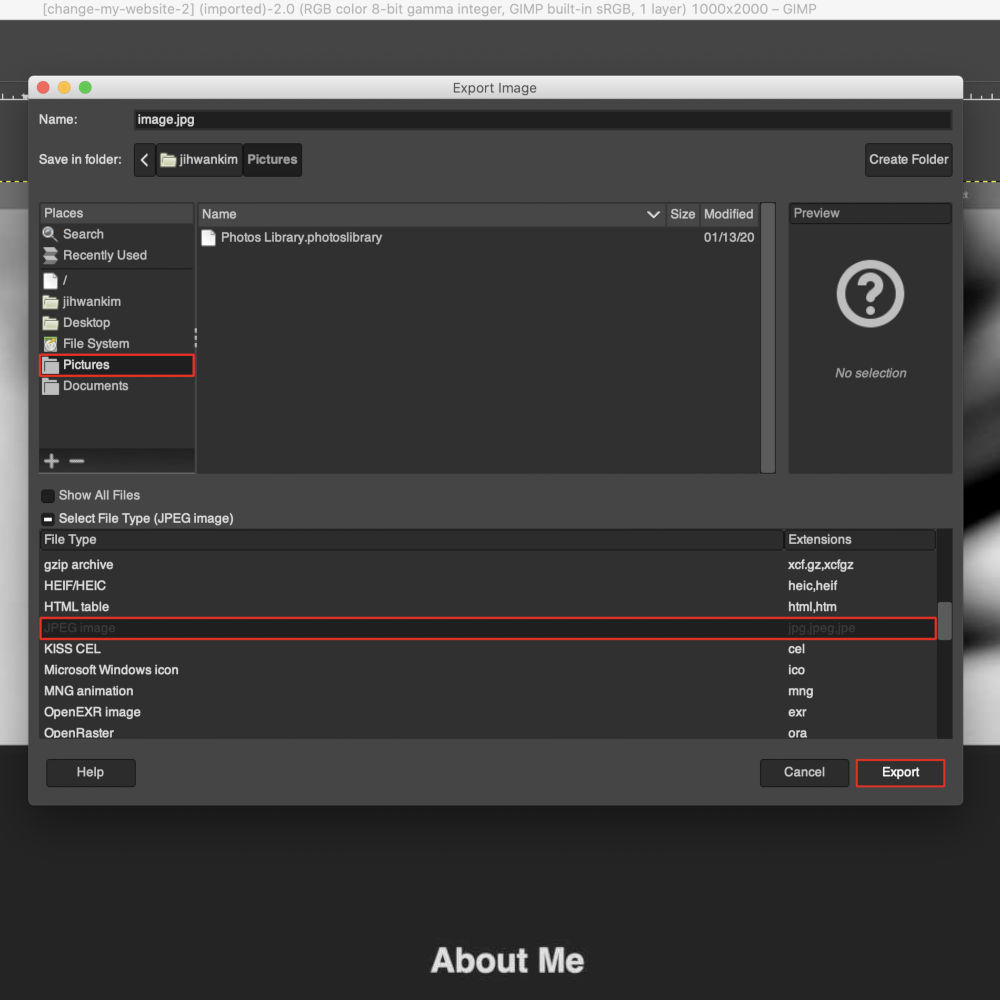
Right-click again > File > Export AsSpecify the location and extension to save the image. (I saved almost all files in .jpg format.)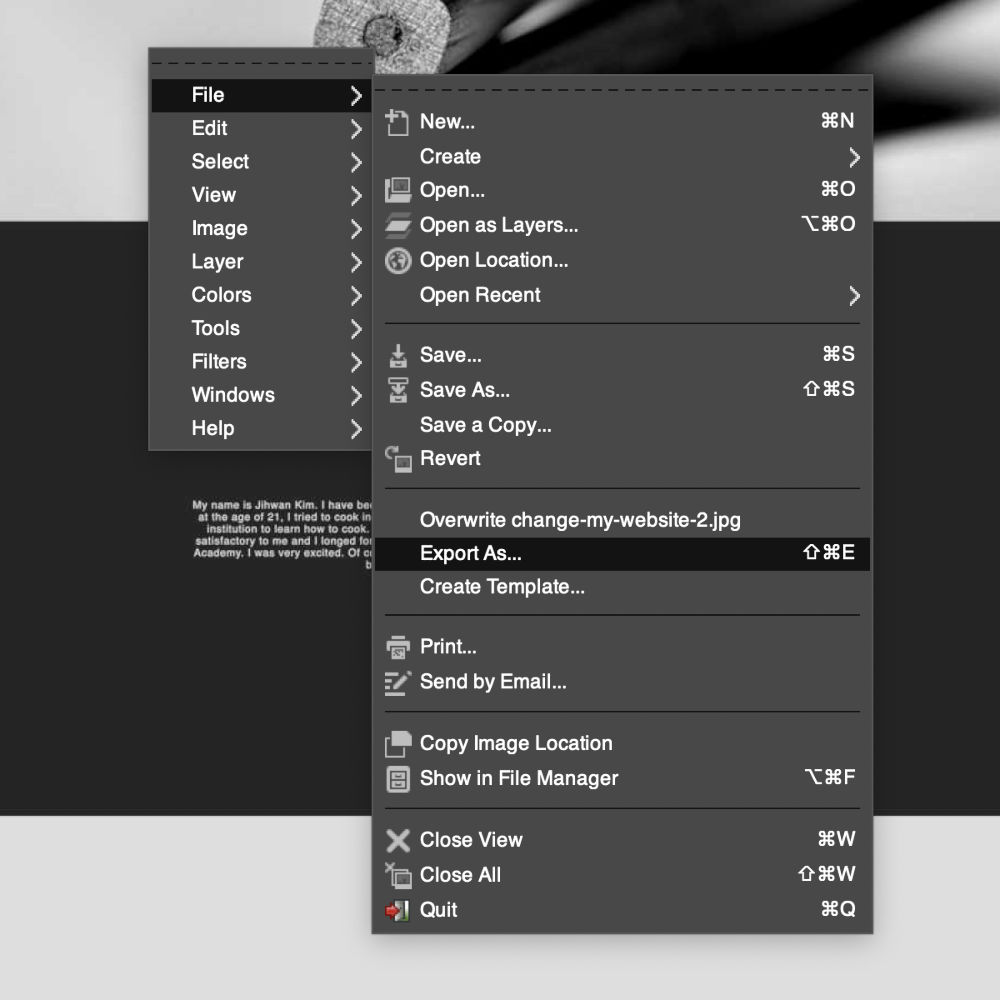
- Use the scroll to reduce the capacity to the desired size.