I2C (Inter-Integrated Circuit)
What Is I2C Communication? (Reference Site)
Briefly, it is a networking composed of a line (SDA) for sending and receiving data and a clock line (SCL) for synchronizing transport timing. Also, after each address is determined, information can be exchanged through the address.
INTRODUCTION TO I2C COMMUNICATION
I2C combines the best features of SPI and UARTs. With I2C, you can connect multiple slaves to a single master (like SPI) and you can have multiple masters controlling single, or multiple slaves. This is really useful when you want to have more than one microcontroller logging data to a single memory card or displaying text to a single LCD. (www.circuitbasics.com)
Workflow
I did an I2C test using two UNO boards and Atiny85 board (made in electronics design week) and Atiny44 board (made in input devices week).
1 Step
First, I assigned an address to each board so that the board I made and the Unoboard could communicate.
Master Board (UNO Board)
              #include <Wire.h>

              //const int SDA = A4;
              //const byte SCL = A5;
              const int myAddress =74; // 01001001 0x4a

              const int myFriends[] = {33, 4, 7, 1, 44, 55};
              int message = 1;
              byte error;

              void setup() {
                 Serial.begin(9600);
                 Wire.begin(myAddress);
              }
              void loop() {
                 Wire.beginTransmission(myFriends[0]);
                 Wire.write(message);
                 Serial.print("Contacted: ");
                 Serial.print(myFriends[0]);
                 Serial.print(" Sent:");
                 Serial.println(message);
                 error = Wire.endTransmission();
                 Serial.print(error);
                 delay(1000);
              }
Slave Board (ATtiny44 Input Board)
              #include <Wire.h>

              const int myAddress =33;

              void setup() {
                 // put your setup code here, to run once:
                 Wire.begin(myAddress);
              }

              void loop() {
                 // put your main code here, to run repeatedly:

              }
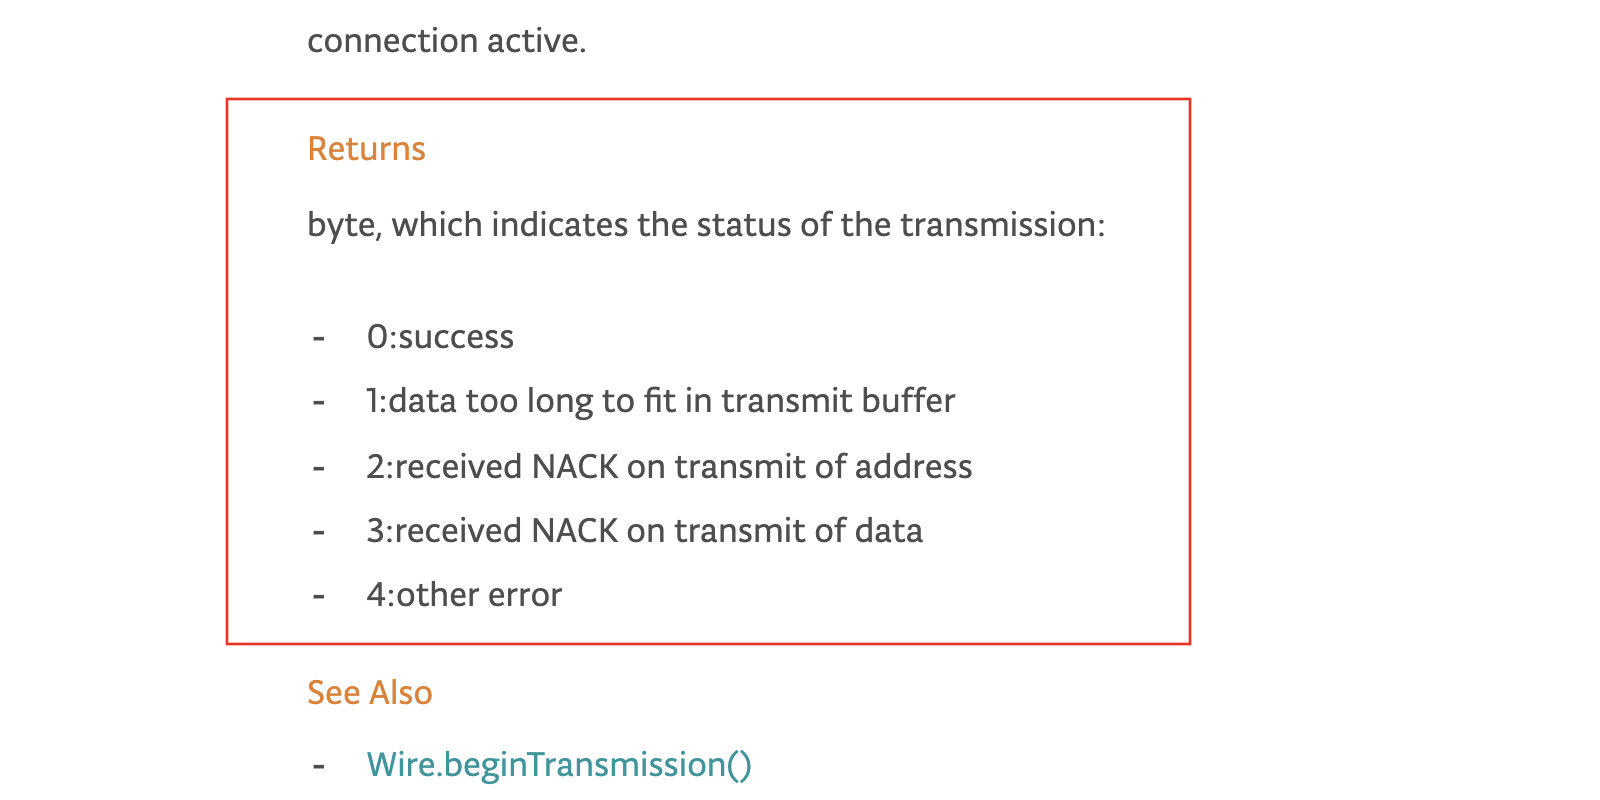
3 of the numbers shown in the picture above were found. So I had to modify the code to change 3 to 0.
2 Step
To change 3 to 0, I added some codes to send a message from the Slave board.
Slave Board (ATtiny44 Input Board)
              #include <Wire.h>

              const int myAddress =33;
              int message = 1;

              void setup() {
                 // put your setup code here, to run once:
                 Wire.begin(myAddress);
              }

              void loop() {
                 // put your main code here, to run repeatedly:
                  Wire.beginTransmission(74);
                  Wire.write(message);
                  Wire.endTransmission();
                  delay(2000);
              }
I had some problem. when I put the code into my board, So i test the other uno board. Slave Board (ATtiny44 Input Board ---> Other UNO Board) As a result, the problem was solved.
Later the problem turned out to be that my board's clock speed didn’t match with my fuse settings. Because I put the code into an 8MHz clock but my board was a 20MHz clock.
3 step
"Wire.onReceive(handler)" was used to print messages received from the slave board to the serial monitor.
Master Board (UNO Board)
              #include <Wire.h>

              //const int SDA = A4;
              //const byte SCL = A5;
              const int myAddress =74; // 01001001 0x4a

              const int myFriends[] = {33, 4, 7, 1, 44, 55};
              int message = 1;
              byte error;

              void setup() {
                 Serial.begin(9600);
                 Wire.begin(myAddress);
                Wire.onReceive(myHandler);
              }
              void loop() {
                 Wire.beginTransmission(myFriends[0]);
                 Wire.write(message);
                 //Serial.print("Contacted: ");
                 //Serial.println(myFriends[0]);
                 //Serial.print(" Sent:");
                 //Serial.println(message);
                 error = Wire.endTransmission();
                 Serial.println(error);

                 delay(178);
              }
              void myHandler(int numBytes) {
                 Serial.print("some");
                 //while(Wire.available())    // slave may send less than requested
                 //{
                   int c = Wire.read();    // receive a byte as character
                   Serial.print(c);         // print the character
                 //}
                }
Slave Board (Other UNO Board)
                #include <Wire.h>

                const int myAddress =33;
                int message = 4;
                byte error;
                void setup() {
                   // put your setup code here, to run once:
                   Serial.begin(9600);
                   Wire.begin(myAddress);
                }

                void loop() {
                   // put your main code here, to run repeatedly:
                    Wire.beginTransmission(74);
                    Wire.write(message);
                    Wire.write(5);
                    Wire.write(8);
                    Wire.write(3);
                    error = Wire.endTransmission();
                    Serial.print(error);
                    Serial.print(message);
                    delay(200);

                }
When tested with two Arduino boards, the master Uno Board received a message from the Slave Uno Board and printed it well on the serial monitor.
4 Step
Now I have tested the Slave Unoboard without changing the code, replacing it with the one I made. Slave Board (Other UNO Board ---> ATtiny44 Input Board)
Problem
When i connected my board, serial monitor was freezing. I had no choice but to search Google and Fab Academy Archive. I found Filipa Silva from fab lab fct who also had the same problem and solved it in 2017.
Solution
The first information I got from this site was that SDA and SCL needed pull-up resistor, and secondly, wire library for ATtiny. So I found the TinyWire Library SiteTinyWire Library Site. And I connected the pull-up resistor 2K ohm to each SDA and SCL following the information on the library site. And I changed the code of the slave board to fit my attiny board.
              #include <Wire.h>

              //const int SDA = A4;
              //const byte SCL = A5;
              const int myAddress =74; // 01001001 0x4a

              const int myFriends[] = {33, 4, 7, 1, 44, 55};
              int message = 1;
              byte error;

              void setup() {
                 Serial.begin(9600);
                 Wire.begin(myAddress);
                Wire.onReceive(myHandler);
              }
              void loop() {
                 Wire.beginTransmission(myFriends[0]);
                 Wire.write(message);
                 //Serial.print("Contacted: ");
                 //Serial.println(myFriends[0]);
                 //Serial.print(" Sent:");
                 //Serial.println(message);
                 error = Wire.endTransmission();
                 Serial.println(error);

                 delay(178);
              }
              void myHandler(int numBytes) {
                 Serial.print("some");
                 while(Wire.available())    // slave may send less than requested
                 {
                   int c = Wire.read();    // receive a byte as character
                   Serial.print(c);         // print the character
                 }
                }
Slave Board (ATtiny44 Input Board)
              #include <TinyWire.h>

              const int myAddress =33;
              int message = 4;
              byte error;
              void setup() {
                 // put your setup code here, to run once:
                 //Serial.begin(9600);
                 TinyWire.begin(myAddress);
              }

              void loop() {
                 // put your main code here, to run repeatedly:
                  TinyWire.beginTransmission(74);
                  TinyWire.write(message);
                  TinyWire.write(5);
                  TinyWire.write(8);
                  TinyWire.write(3);
                  error = TinyWire.endTransmission();
                  //Serial.print(error);
                  //Serial.print(message);
                  delay(200);

              }
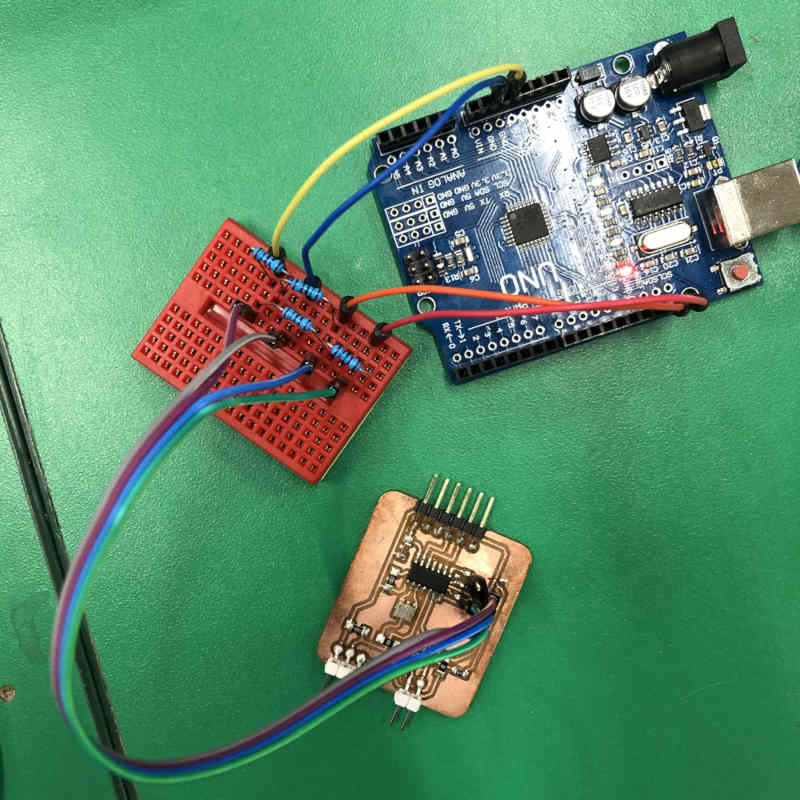
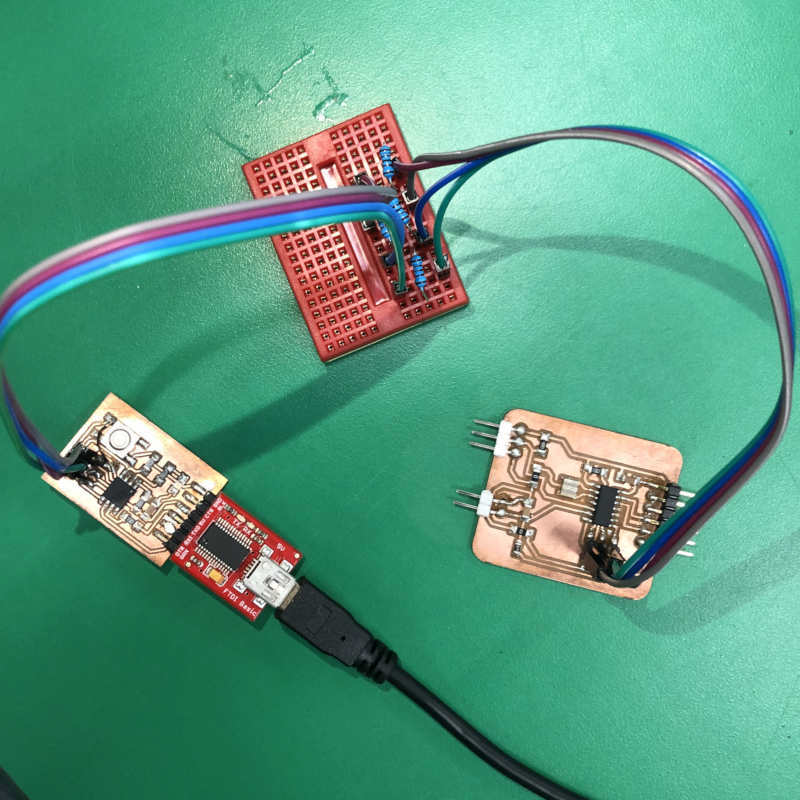
Connection Image
5 Step
Finally, if I change Master Board from UNO Board to Atiny Board which I made, my homework would be finished this week. Master Board (UNO Board ---> ATtiny44 Input Board) The ATtiny85 board I made was not able to use Hardware Serial, so I used Software Serial Library.
The following code was used to check software serial availability.
              #include <Wire.h>
              #include <SoftwareSerial.h>

              SoftwareSerial mySerial (2, 1);
              int message = 1;
              int error;

              void setup() {
                 // put your setup code here, to run once:
                 mySerial.begin(9600);
                 Wire.begin(74);
              }

              void loop() {
                 // put your main code here, to run repeatedly:
                  Wire.beginTransmission(33);
                  Wire.write(message);
                  error = Wire.endTransmission();
                  mySerial.print(error);
                  mySerial.print(message);
                  delay(200);

                 mySerial.print("cake");
                 delay(1000);

              }
When the above code was inserted, the Serial Monitor was able to output normal characters, not broken ones. But when I put the master code on my board, my board didn't seem to receive a message from the Slave board. As for Wire.endTransmission(), the Seiral monitor continued to print the message "4".
6 Step
So I decided to look for a new example. And I found a site that explains I2C in Korean. And I added SoftwareSerial Library to fit my boards. (Reference Site)
Master Board (ATtiny85 Hello Echo Board)
                #include <SoftwareSerial.h>

                #include <Wire.h>

                SoftwareSerial mySerial(2, 1); // RX, TX


                void setup() {
                  Wire.begin();
                  mySerial.begin(9600);
                }

                byte x = 0;

                void loop() {
                  Wire.beginTransmission(1);
                  Wire.write("good ");
                  Wire.write(x);
                  Wire.endTransmission();

                  delay(500);

                  Wire.requestFrom(1, 4); //Request 4 byte to Slave (1)
                  while (Wire.available()) {
                    char c = Wire.read();
                    mySerial.print(c);
                  }
                  x++;
                  if(x==6)x=0;
                }
Slave Board (ATtiny44 Input Board)
                #include <SoftwareSerial.h>

                #include <Wire.h>

                SoftwareSerial mySerial(0, 1); // RX, TX

                void setup() {
                  Wire.begin(1); //slave address
                  Wire.onRequest(requestEvent); //Invoke requestEvent function on demand
                  Wire.onReceive(receiveEvent); //Call the reciveEvent function when data is sent

                  mySerial.begin(9600);
                }

                void loop() {
                  delay(500);
                }

                void receiveEvent(int howMany) { //Read Transfer Data
                  while (Wire.available()>1) {
                    char ch = Wire.read();
                    mySerial.print(ch);
                  }
                  int x = Wire.read();
                  mySerial.println(x);
                }
                void requestEvent() { //On-demand action function
                  Wire.write("ok!\n");
                }
Connection Image
 Communicate Video
The Codes From The Workshop
UNO board (Master)
            #include <Wire.h>

            const int UNOAddress = 10;
            const int myBoards[] = {8, 9};
            int message = 1;
            byte error;

            void setup() {
              // put your setup code here, to run once:
              Serial.begin(9600);
              Wire.begin(UNOAddress);
            }

            void receiveEvent(int bytes) {
              incomming = Wire.read();
            }

            void loop() {
              // put your main code here, to run repeatedly:
              for(int x = 0; x < 1; x++) {
              Wire.beginTransmission(myBoards[x]);
              Wire.write(message);

              error = Wire.endTransmission();

              if(error == 0){
                Serial.print("Contacted: ");
                Serial.print(myBoards[x]);
                Serial.print(" Sent: ");
                Serial.println(message);
              } else {
                Serial.print(myBoards[x]);
                Serial.println(" wasn't home");
              }
             }
               if(incomming == 0){
                digitalWrite(13, LOW);
               } else {
                Serial.print("Got mail; ");
                Serial.println(incomming);
                digitalWrite(13, HIGH);
               }
              delay(1000):
            }
Code for ATtiny44 (Slave)
            #include <Wire.h>

            const int myAddress = 4;
            const int myFriends = 74;
            int message = 1;
            byte error;

            void setup() {
              // put your setup code here, to run once:
              Wire.begin(myAddress) ;

            }

            void loop() {
              // put your main code here, to run repeatedly:
              Wire.beginTransmission(74);
              Wire.write(message);

              error = Wire.endTransmission();
              delay(1536);
            }
Code for Attiny412 (Slave)
              #include <TinyMegaI2CMaster.h>
              int Address = 7;
              void setup() {
                TinyMegaI2C.init();

              }
              void loop() {
                TinyMegaI2C.start(Address, 2);
              }