Laser Cutter (+ Safety Considerations When Using the Lasers
safety considerations when using the lasers
1) Wear safety glasses to avoid exposure to lasers
2) Do not operate the laser system without supervision as there is a possibility of fire.
3) Make sure that the air-assist and extraction work well.
why air-assist and extraction are important.
1. Air-Assist (Reference Site)
1) To improve the efficiency of the laser cutting process. Generally, this works by the positive air keeping vaporised debris away from the path of the beam in order that all of the laser energy is applied to the material.
2) To improve the quality of output. This works by the positive air helping to keep vaporised debris away from the surface or the edge of the material being laser cut so that contamination of the material is minimal.
3) To reduce the requirement for maintenance (cleaning) and prolongue the life of optical elements. This works by positively pressurising air at the focus carriage (the laser head) so that contaminants are kept off of the sensitive surfaces of the optical elements.
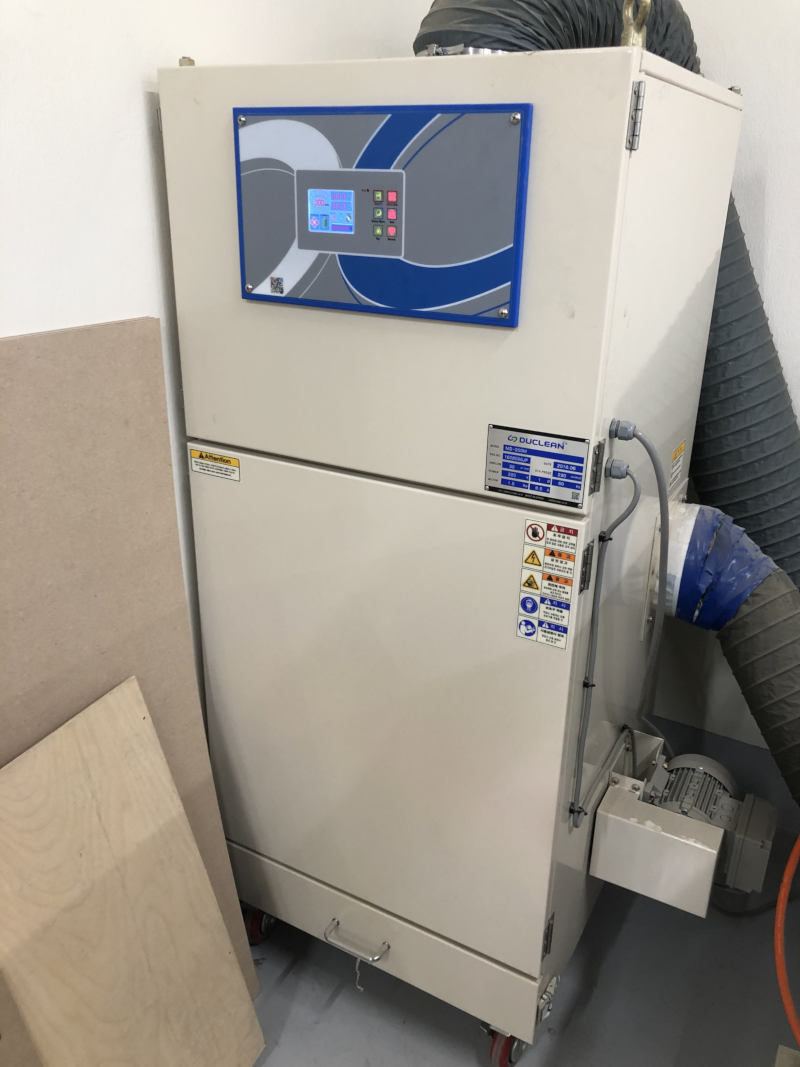
2. Extraction
Extraction protects the operator from inhaling harmful fumes and dust from laser marking, cutting or engraving materials.
Design
What is parametric design?
The design that can control the design using variables is called parametric design.
Reference
1) Parametric design is a process based on algorithmic thinking that enables the expression of parameters and rules that, together, define, encode and clarify the relationship between design intent and design response. - from Wikipedia
2) Scalable design while maintaining shape - from Hyebin Goo
Process
- Search for images about parametric design with Google and Pinterest.
- When I find the design I want, start designing with Fusion360.
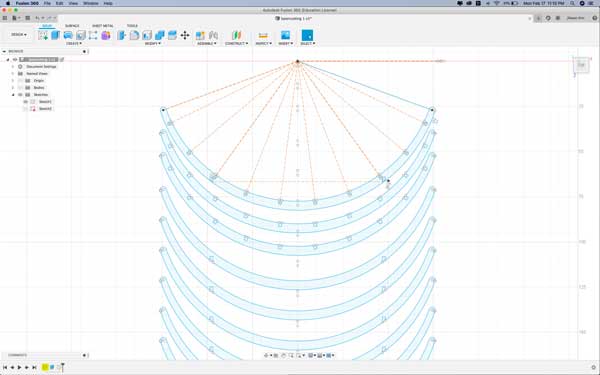
- Finish design and save as dxf. {select parts - mouse right - sketch - project - ok - save as dxf (this setting is very useful when I select parts of something extruded)}
- Open the dxf file as Illustrator. (Artwork-scale-option set original-size)
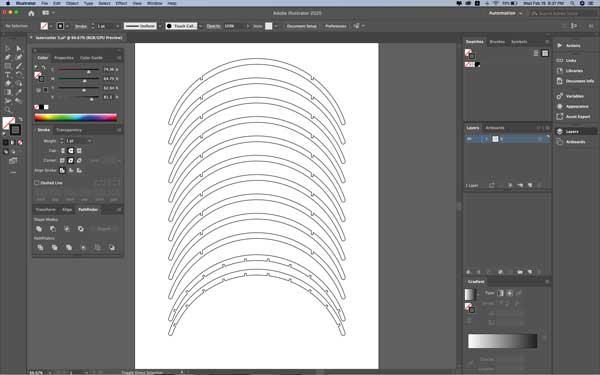
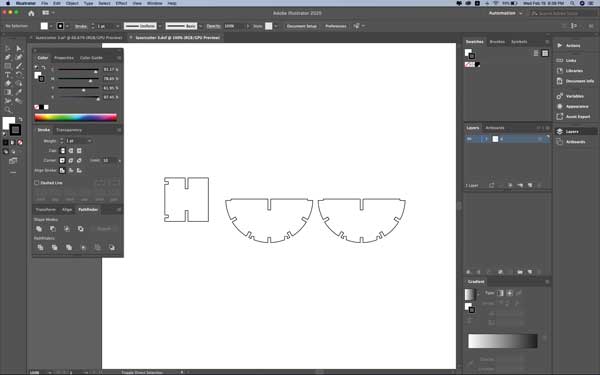
- Save as ai.
However, the design made during the Computer Controlled Cutting week was not a parametric design. This is because the design is not controlled by the variables.
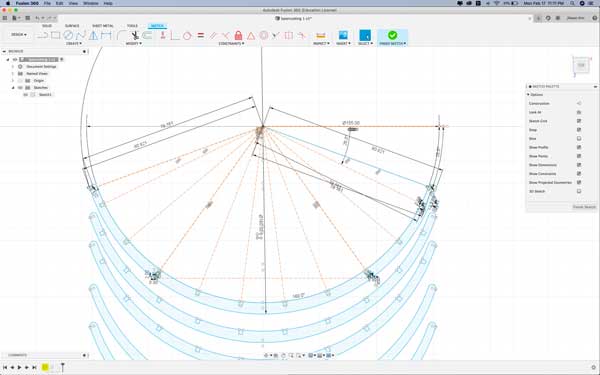
How to Make a Parametric Design in Fusion360 (This part was added later.)
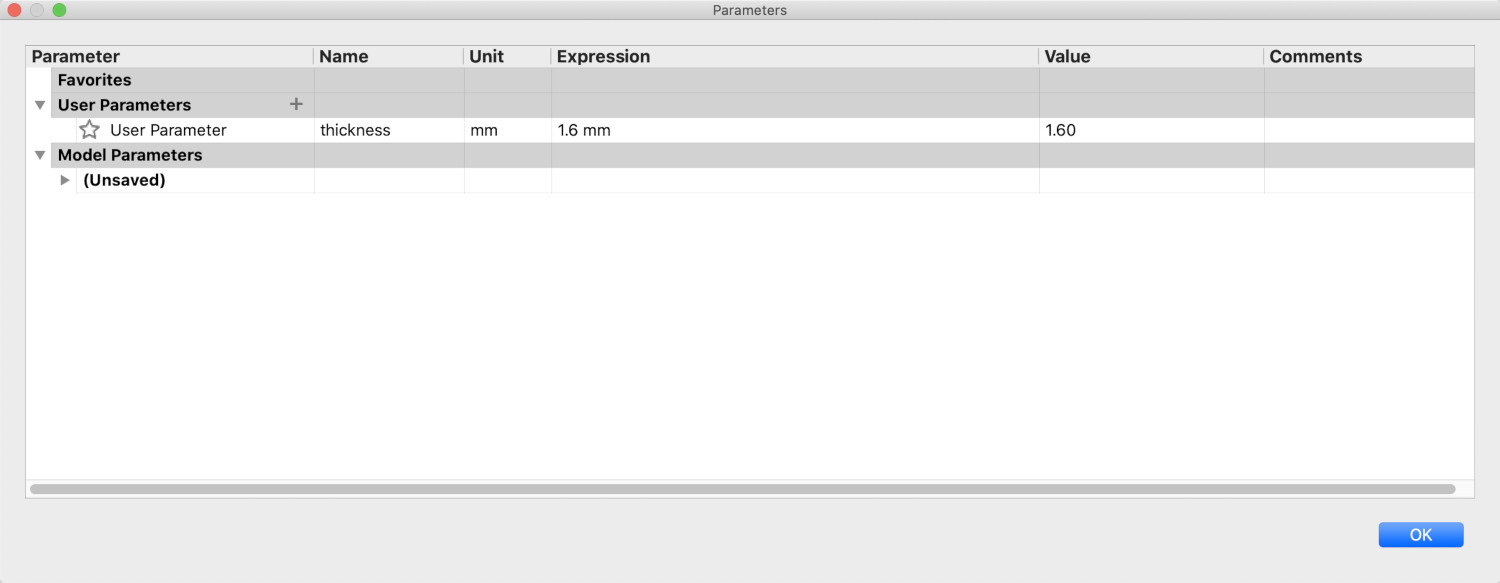
- Specify the variable. (That variable = thickness)
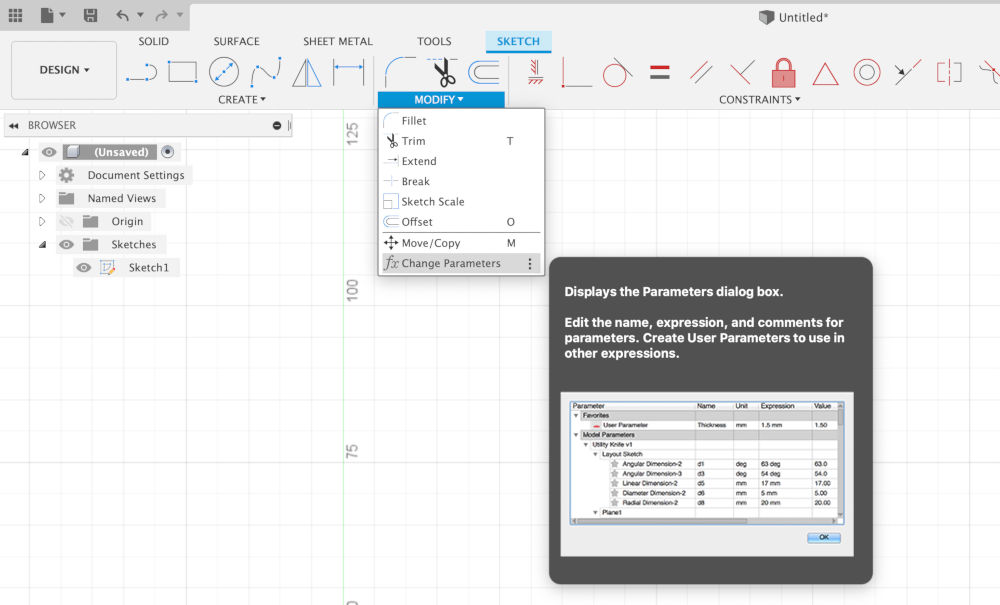

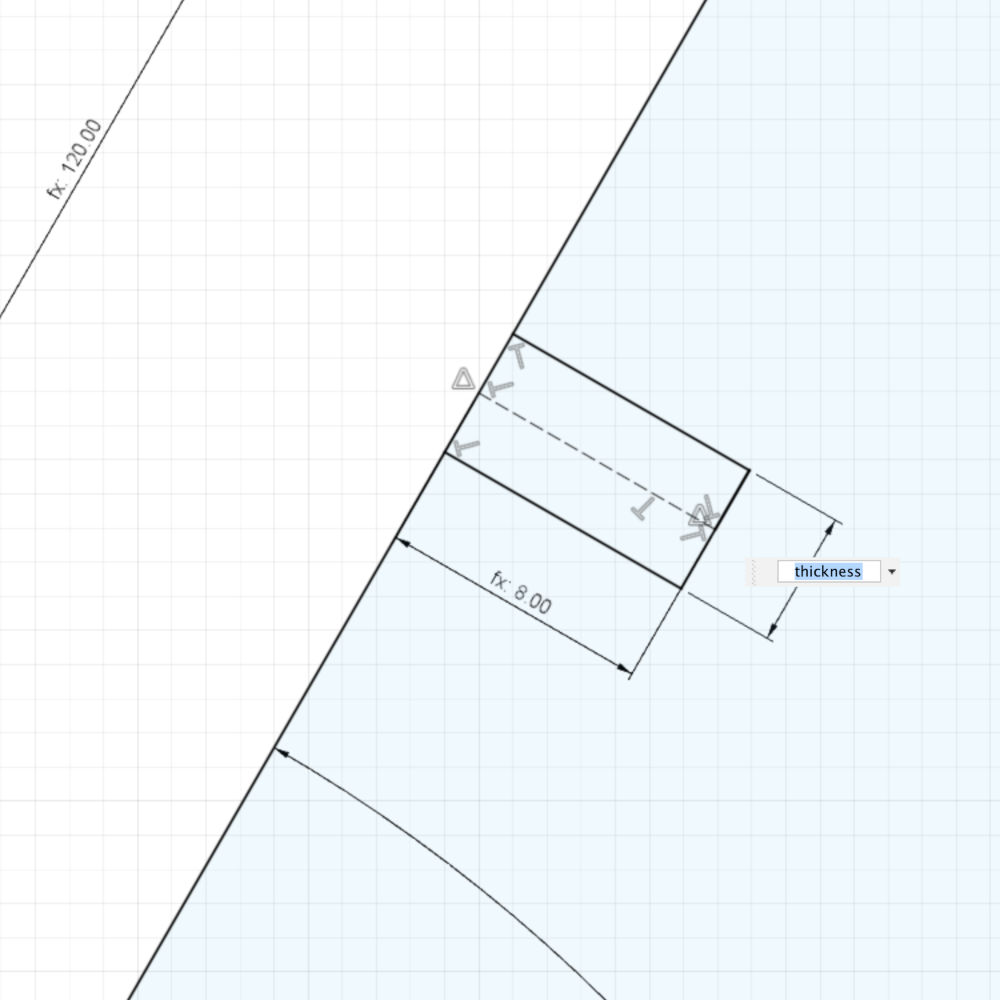
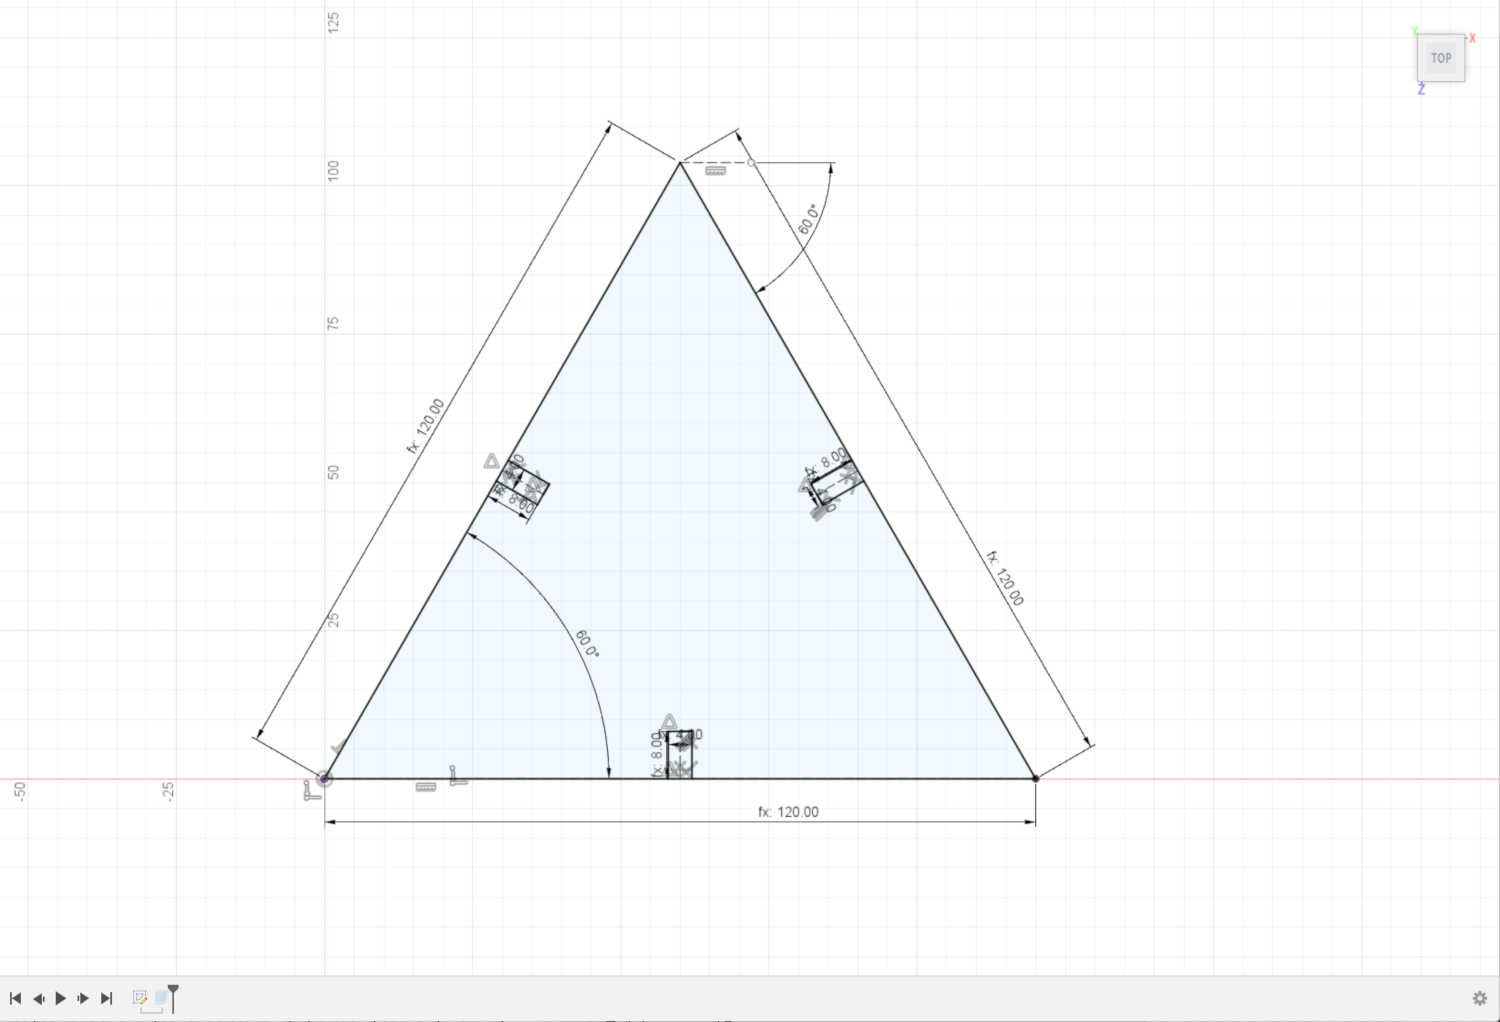
- Create a sketch using variables.
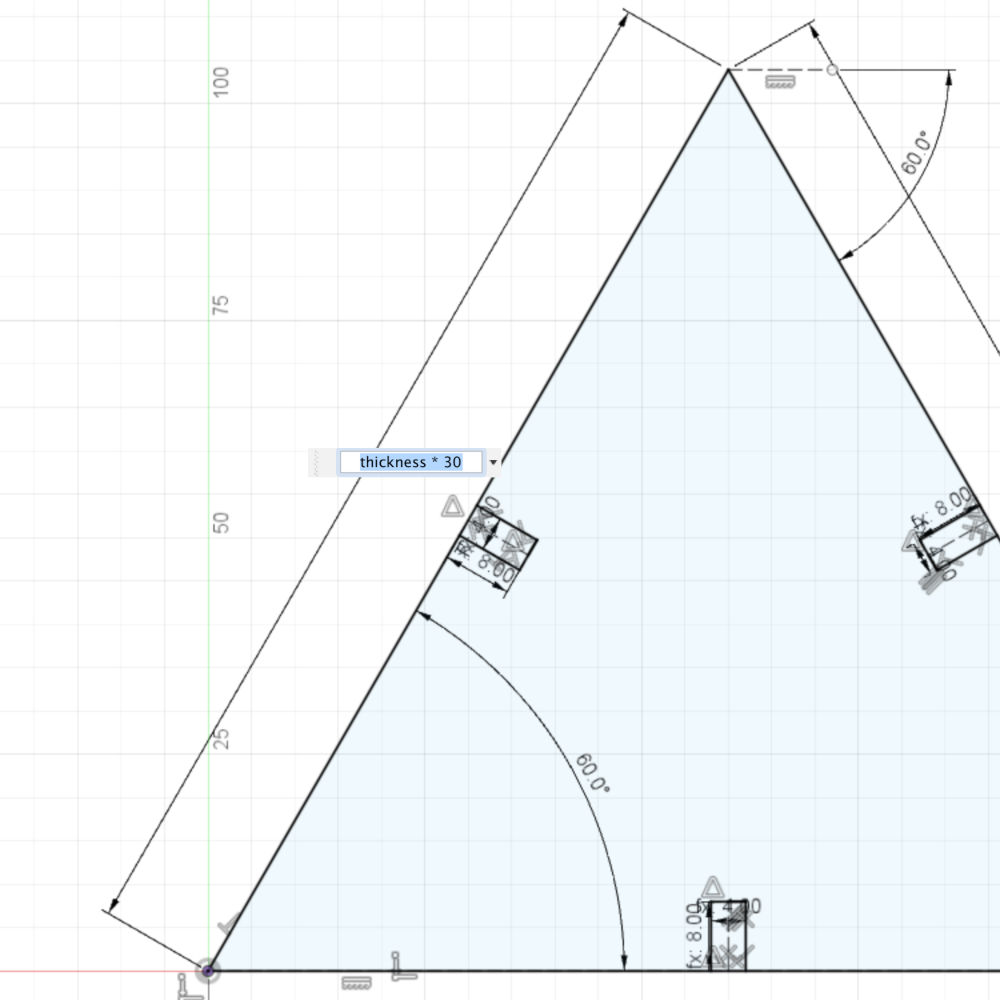
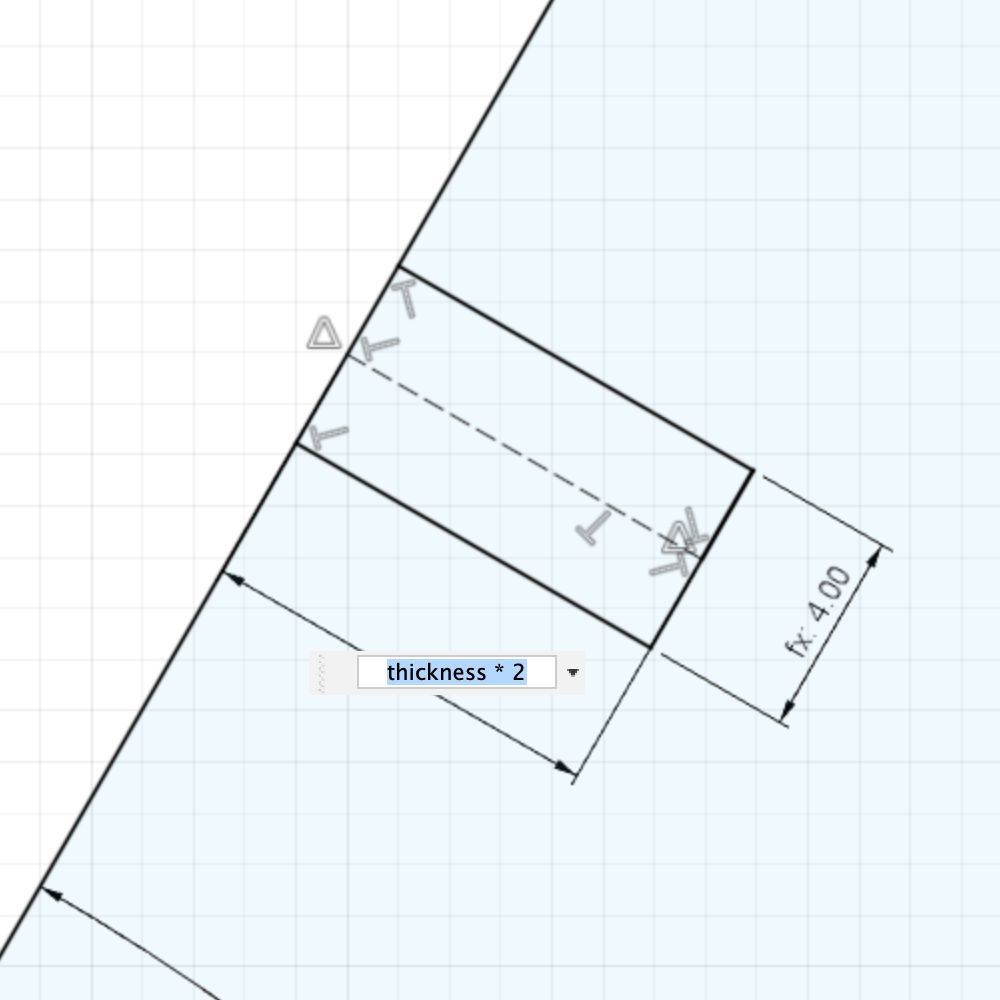
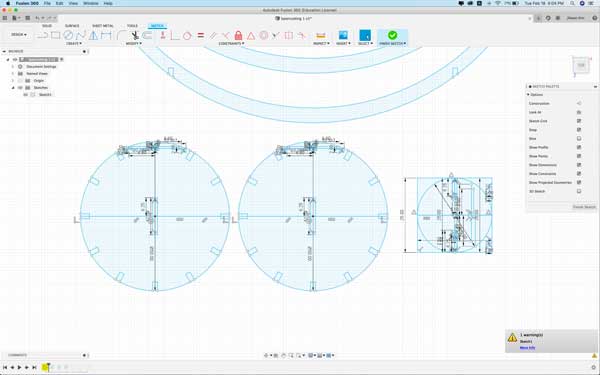
- When the size of the variable is 4mm
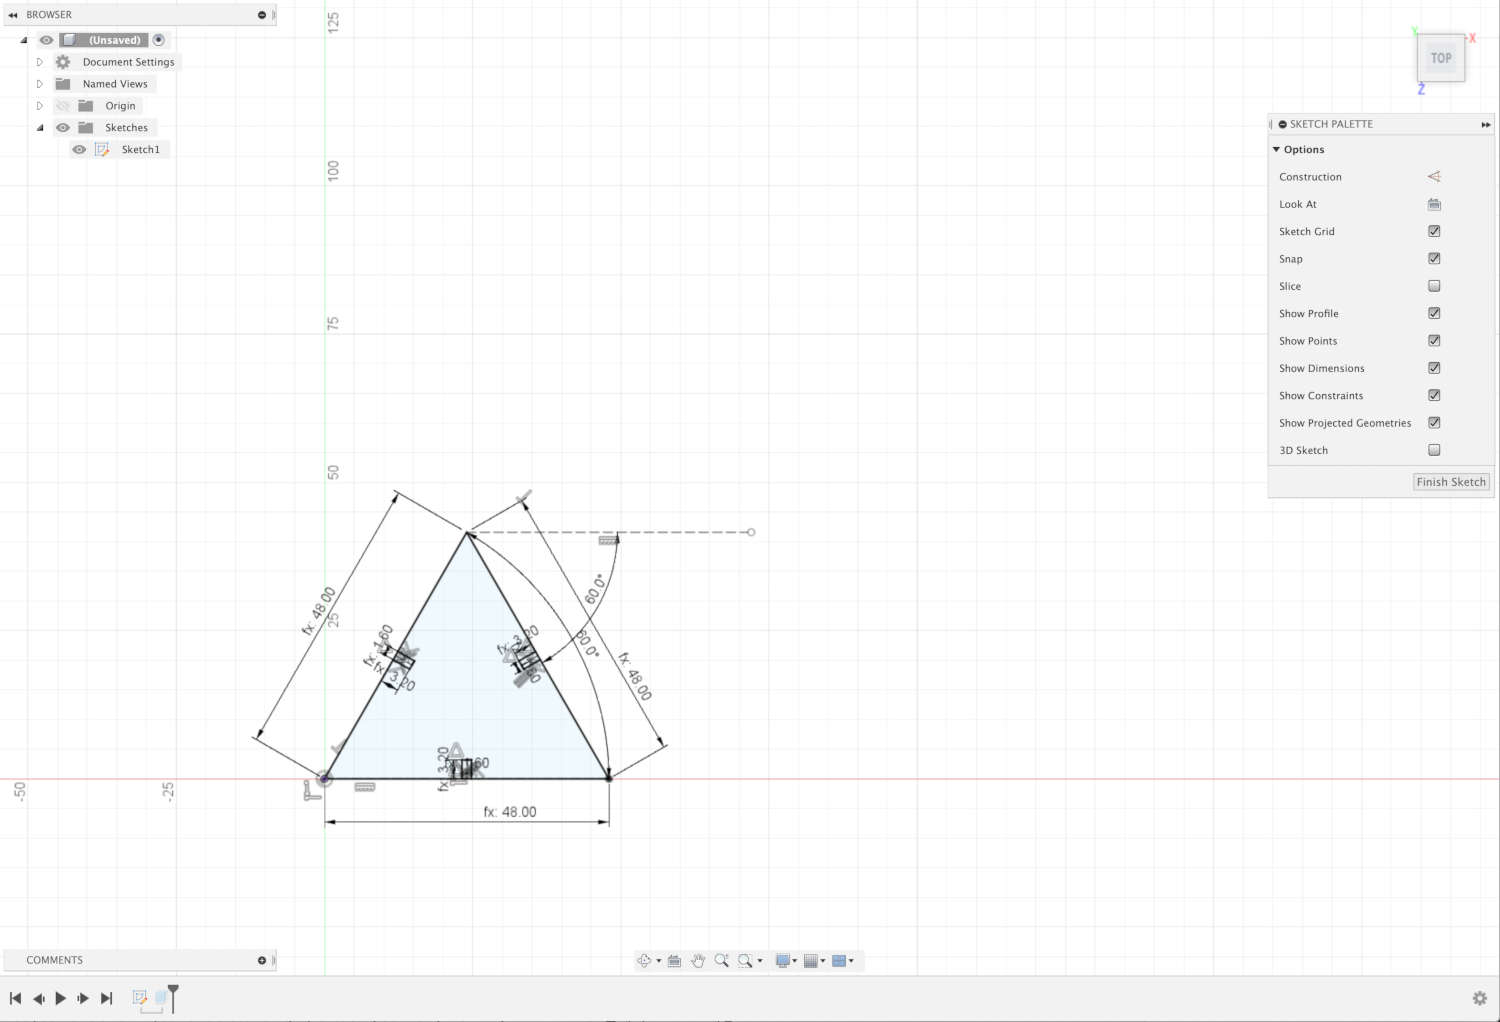
- When the size of the variable is changed to 1.6mm
Understanding the "kerf" of the laser
The laser burns away a portion of material when it cuts through. Kerf is determined by material properties and thickness. But other factors also have an impact on how much the laser takes away. The focal length of the lens, pressure of compressed air both have an impact. Kerf widths can vary even on the same material sheet, whether cutting a straight line or a curve line or from laser cutting in the x or Y dimension. The manufacturing tolerance of the material can also impact the kerf.
Through the group work, we learned that using 2mm cardboard on K2 laser cutter produces 0.2mm kerf. So when designing parametric design for cardboard, the width of the slots was made 1.6mm wide.
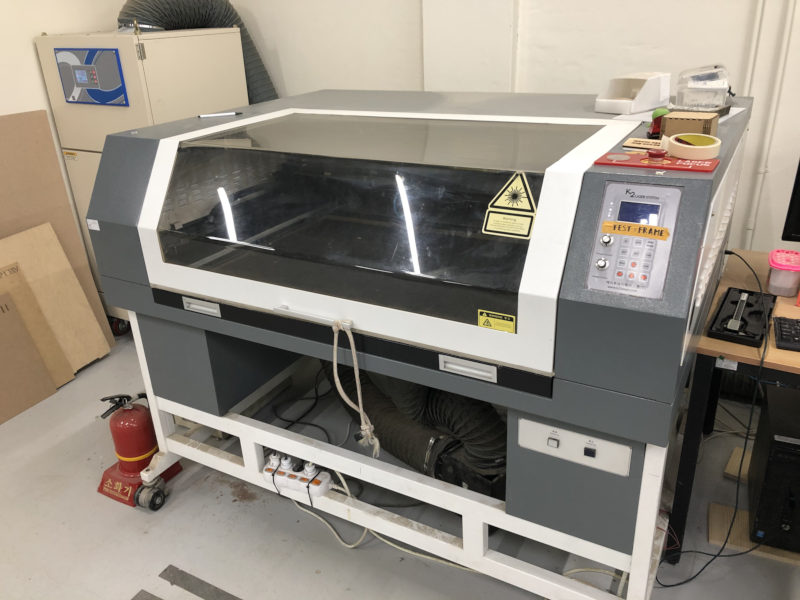
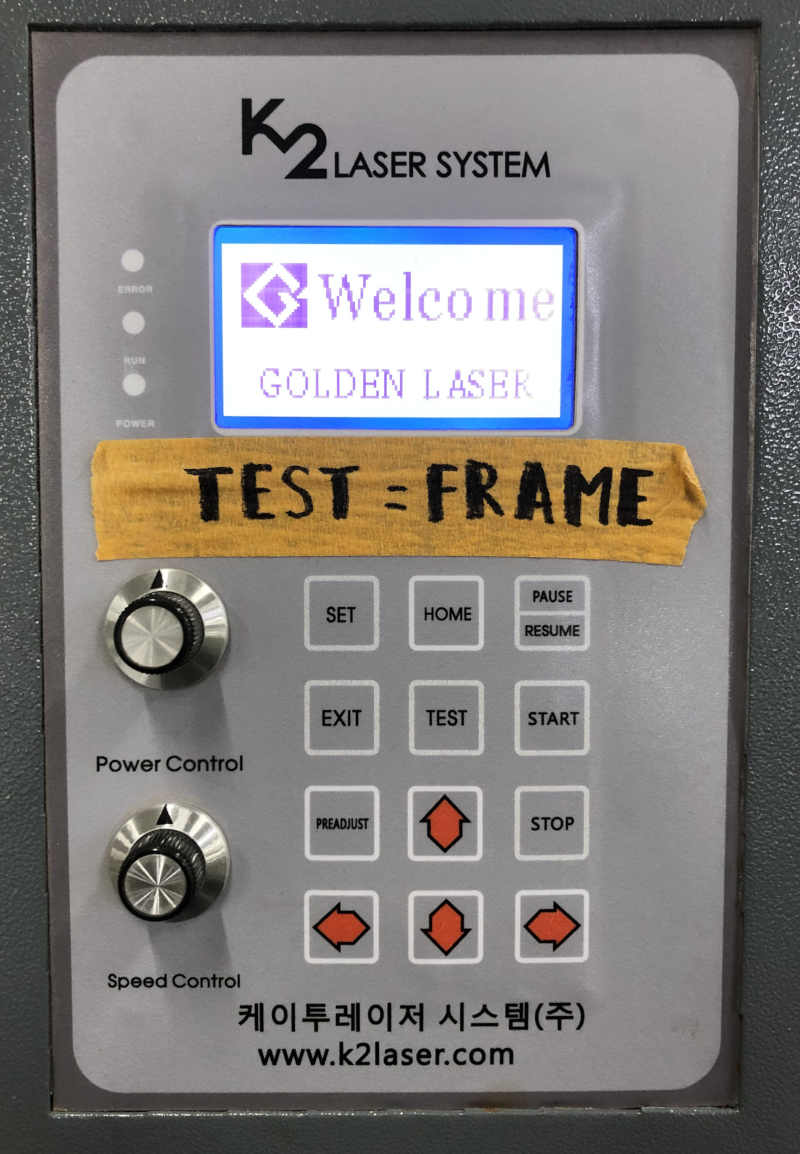
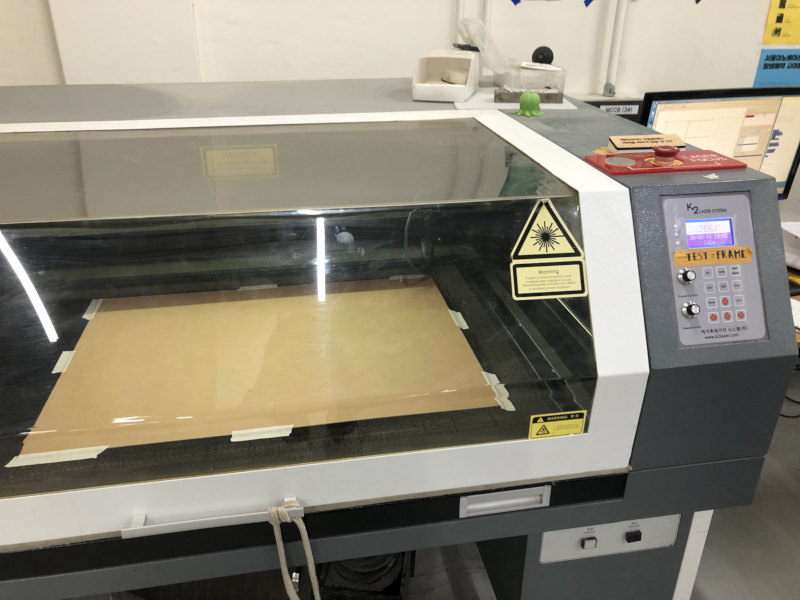
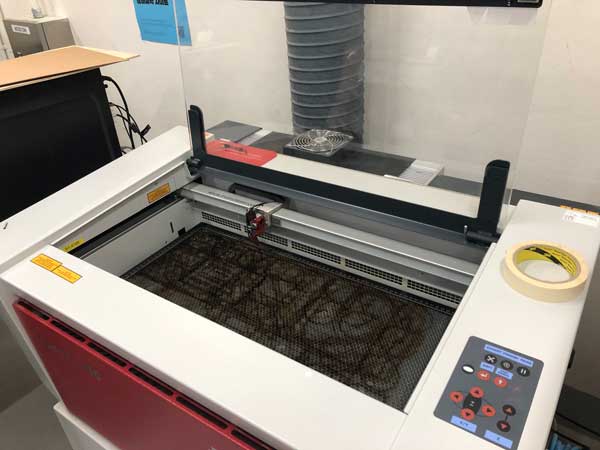
K2 LASER SYSTEM(JG-10060)
Computer setting
- Open old version illustrator.

- Open .svg files in old version illusrator.
- Set the line thickness to 0.01 point and the line to be cut to black and the line to be engraved to red. And then, save as .dxf files.
- Open Golden Laser program.

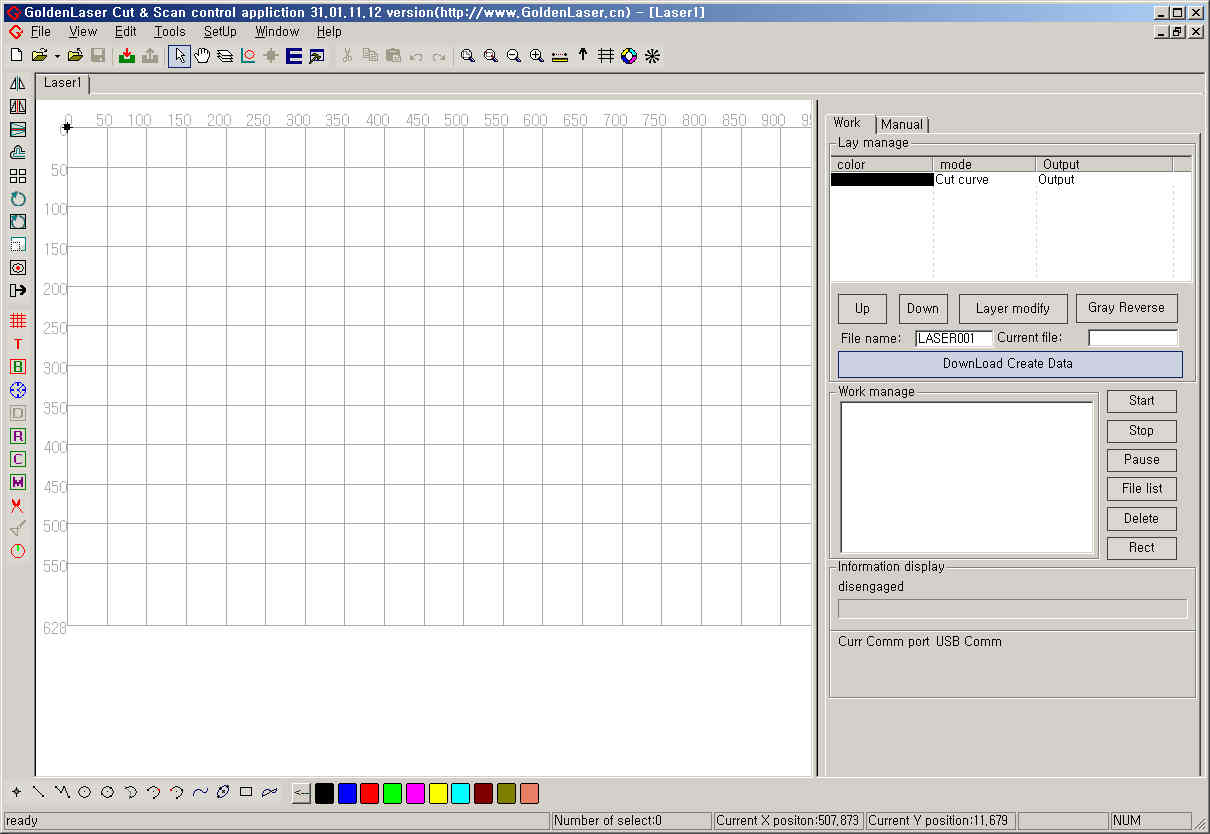
- Open .dxf files. Replace the floor plan.

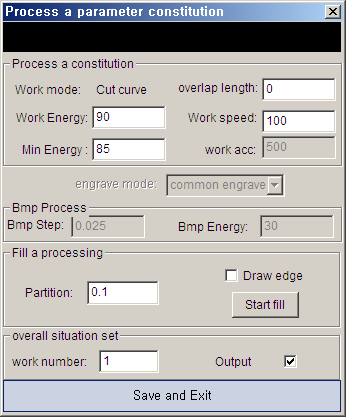
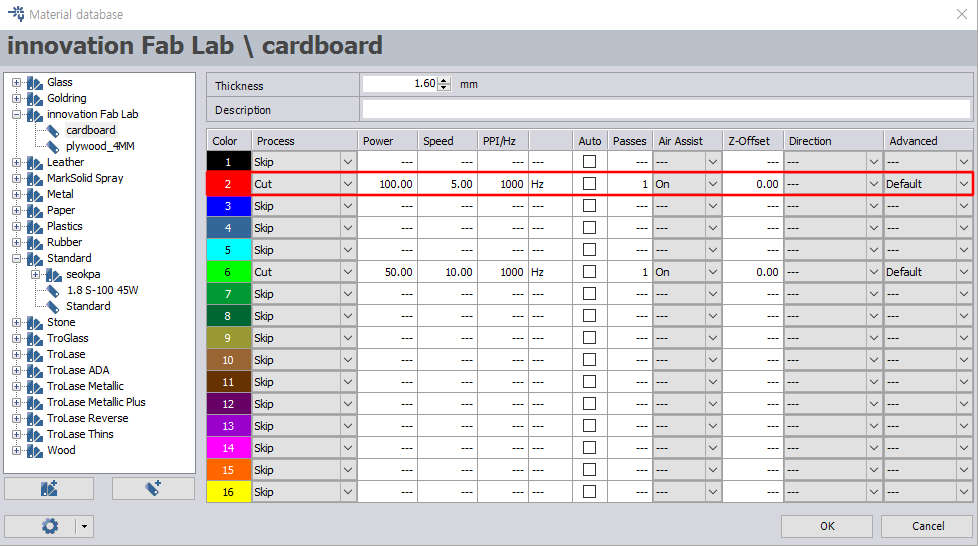
- In right side, Work - Lay manage - color box double click. Set Work speed, Work energy, Min energe. If you want to cut, Set Work speed = 100, Work energy = 90, Min energe = 85. Click Save and Exit. Enraving setting is Set Work speed = 100, Work energy = 60, Min energe = 55.
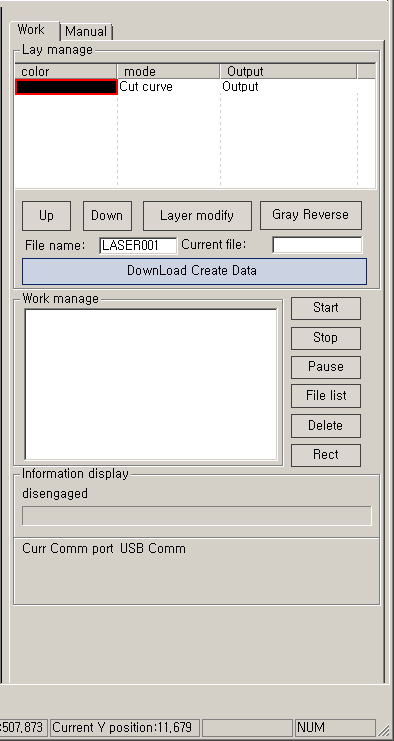
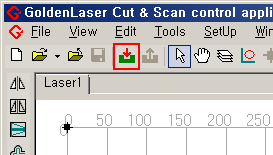
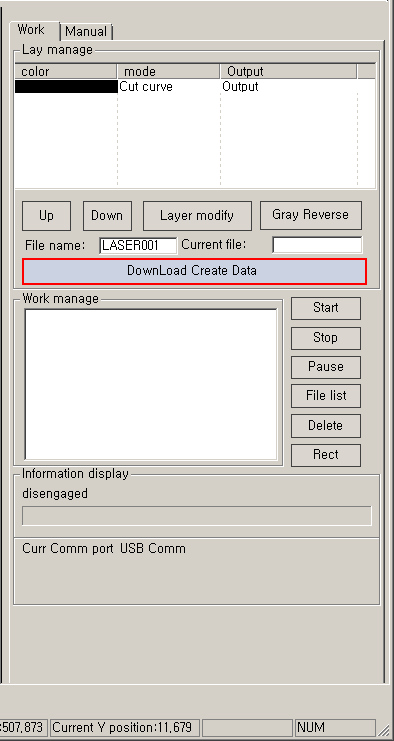
- Change file name and click Download Create Data. (After Turn on the laser cutter.)
- Go to the machine.
Laser cutter setting
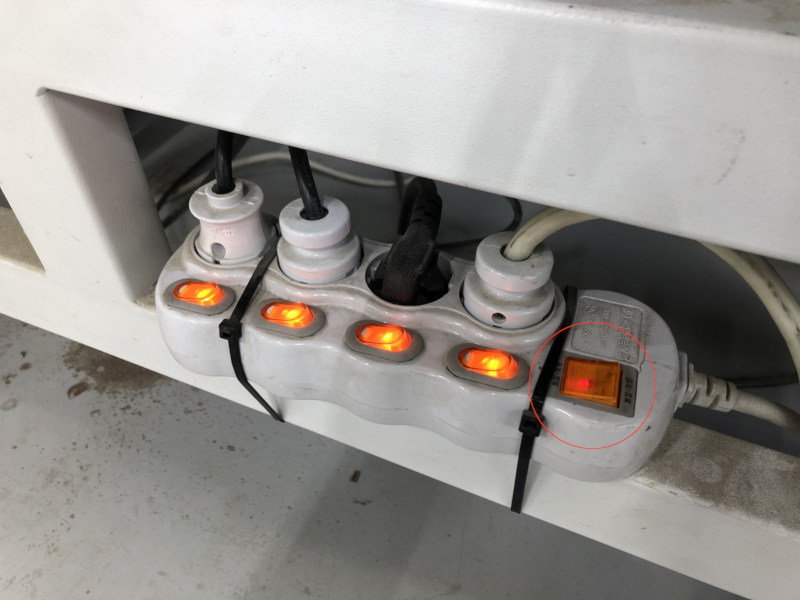
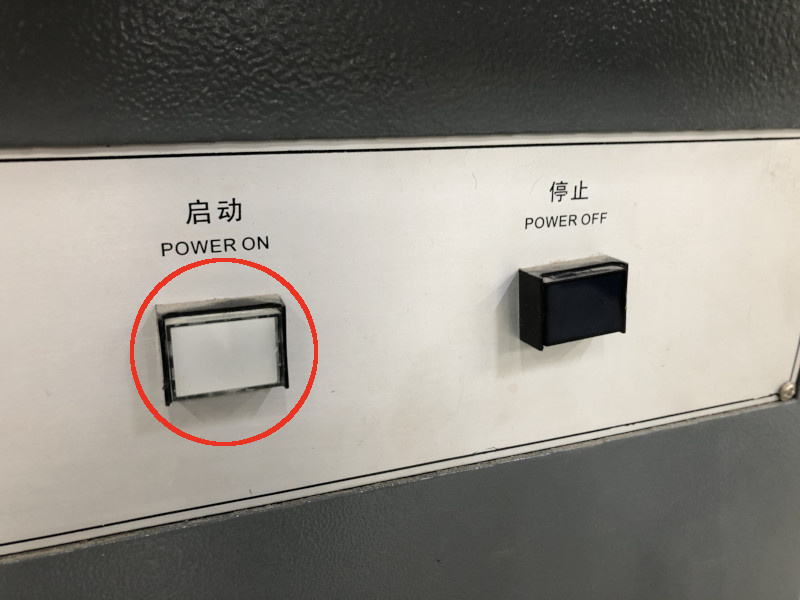
- Turn on the switch.
- Push POWER ON button in machine. Then the monitor turns on.
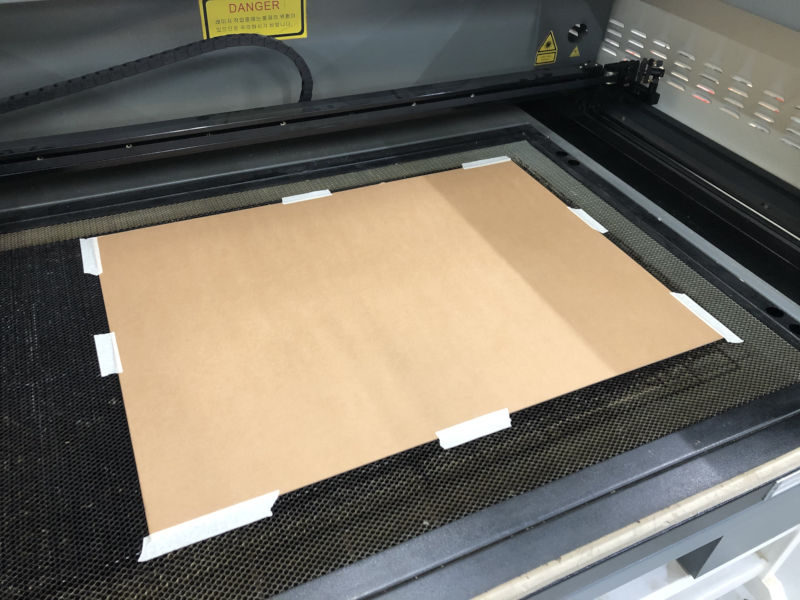
- Open the lid. Set material and attach tape to keep it stationary and to keep it from floating.
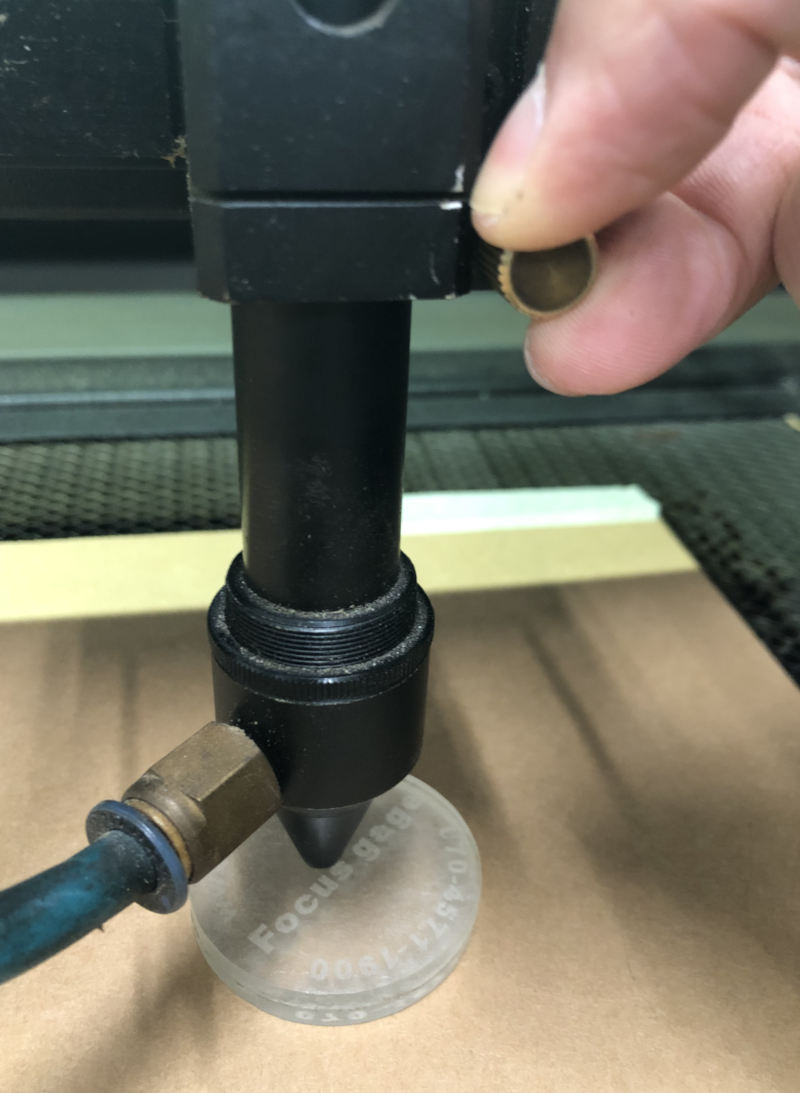
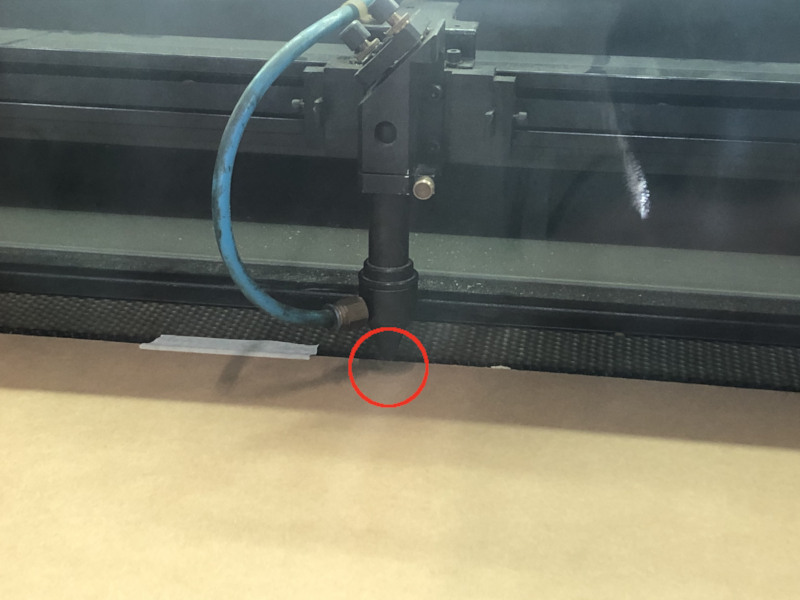
- Set height of laser cutter focus and close the lid.
- Position the laser cutter focus by using arrow buttons. Click SET - Save Position. Press the home button to make sure it is set up well.
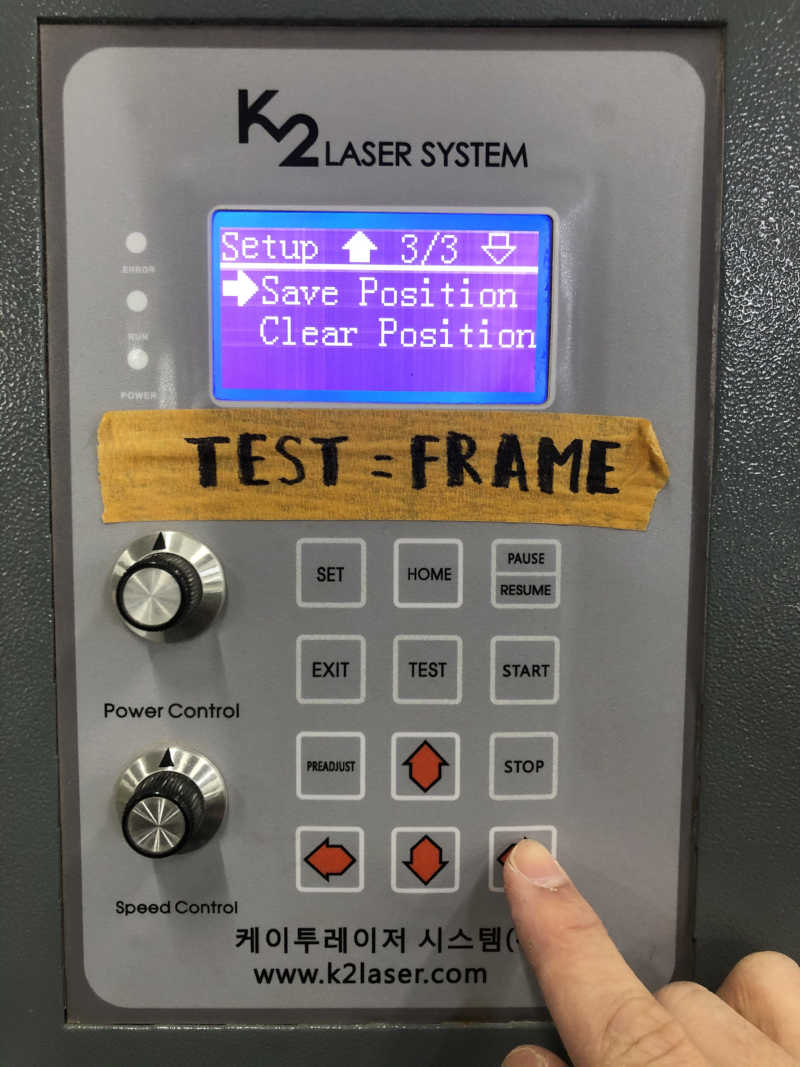
- Check the size by pressing the TEST button.
- After Turn on the ventilator, Click START.

- When the work is complete, wait for the bad gas to escape before opening the lid. Check if it's cut well and if not, cut it again.
- Turn off the ventilator. Power off laser cutter. Turn off the switch.
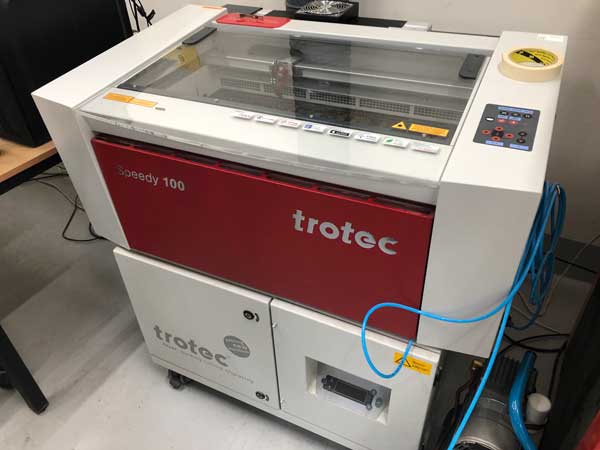
Trotec Speedy 100
Laser cutter setting
- Turn on the laser cutter. (trotec Speedy 100)
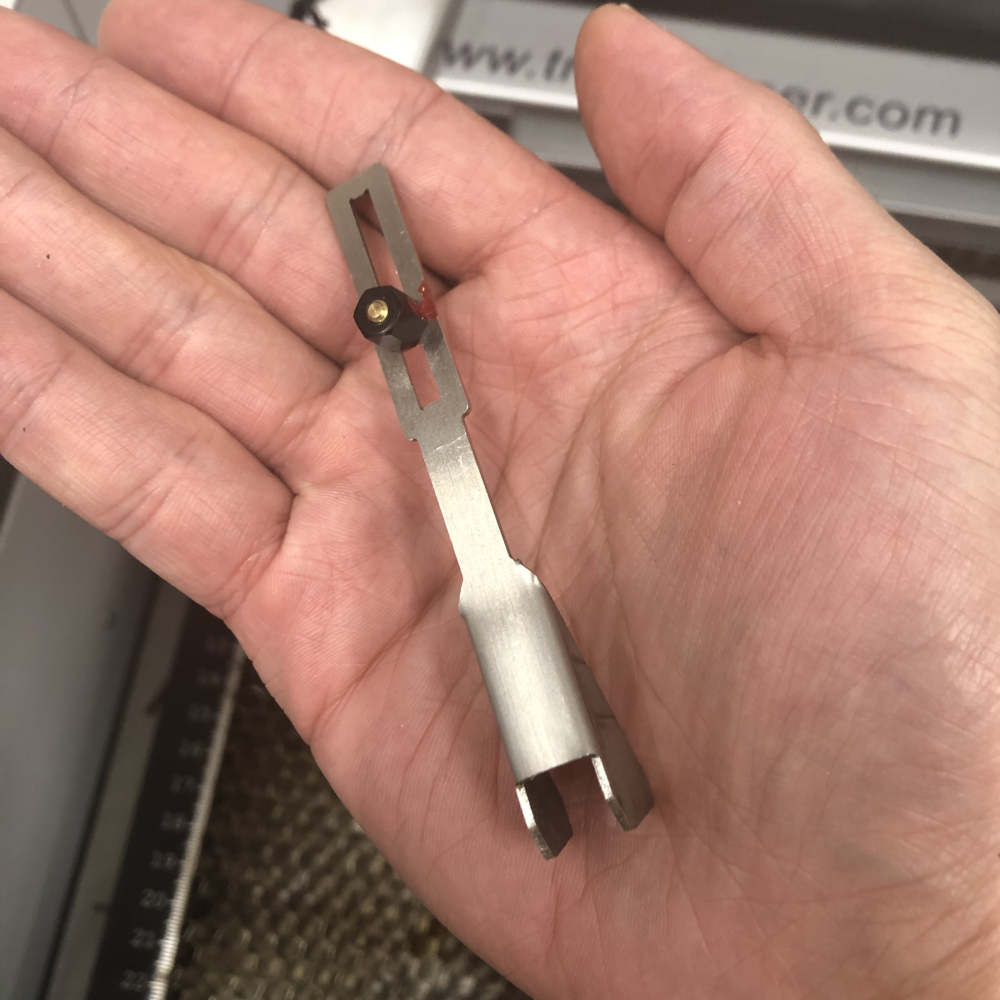
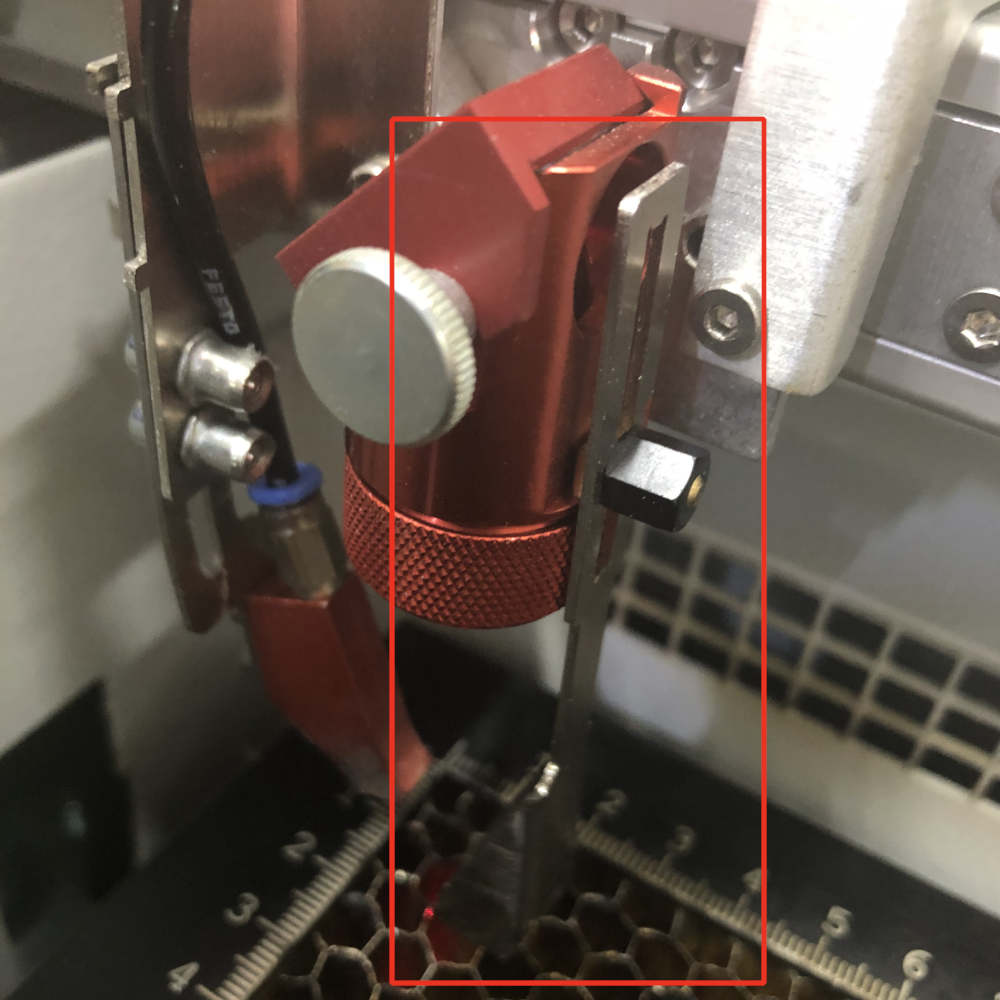
- Focus the machine. (Using a tool to focus the laser cutter, place the material and move the field up on the Z-axis.)
- Set material on the work surface and tape.
- Adjust air pressure.
Computer setting
- Open the ai file to illustrator.
- Change line color to red and line weight to 0.01pt.
- Print the file (print option ignore artboard)
- Click job name and setting click - Material Template Setup - select setting value.
- Start.


Construct & Evaluate

1) First result is too small because this file is not original size. so I must set Artwork scale to original size.
2) Second result is not cutted because laser power is little weak.
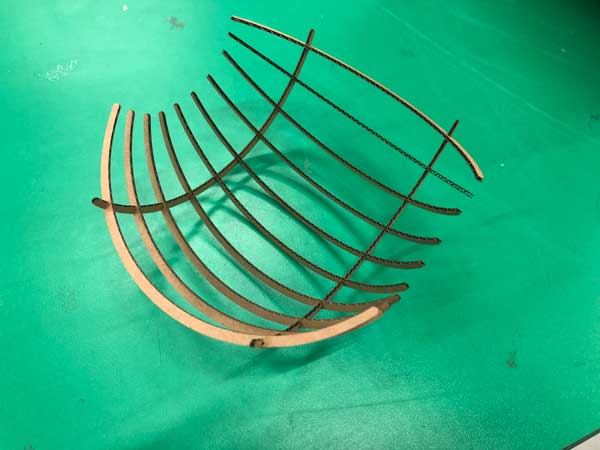
3) Final result is good.
Width is so narrow. Therefore, Construction is easy to be broken.
Next time, I will make thing more widely.
files
Vinyl Cutter
Design
- Design typographic sticker with illustrator.
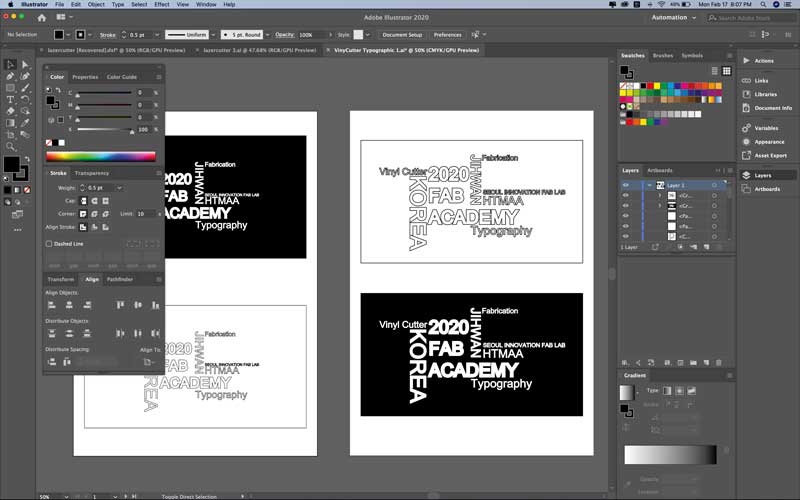
- Save file as dxf.
PRO FC2250-60
Vinyl cutter setting
- Turn on the vinyl cutter.
- Turn on the vacuum adsorber.
- Put material on the cutting plotter and tape.
- Set a starting point.
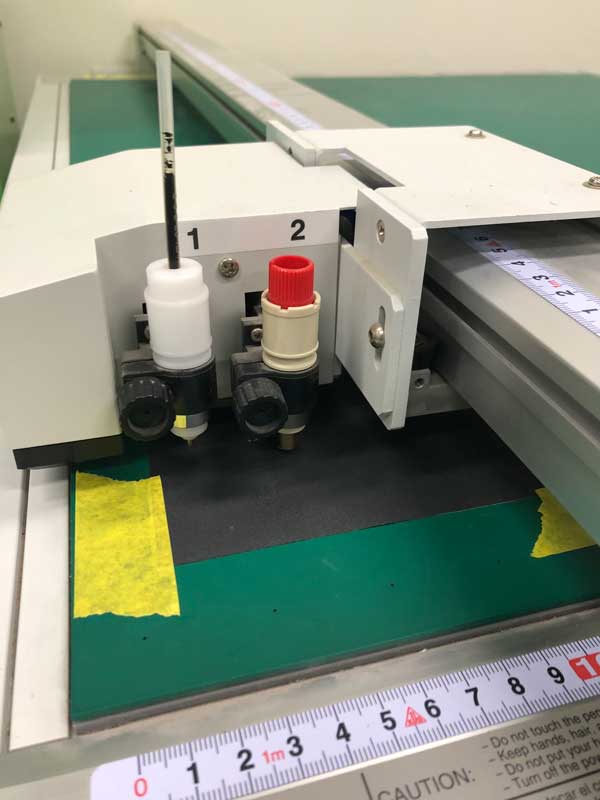
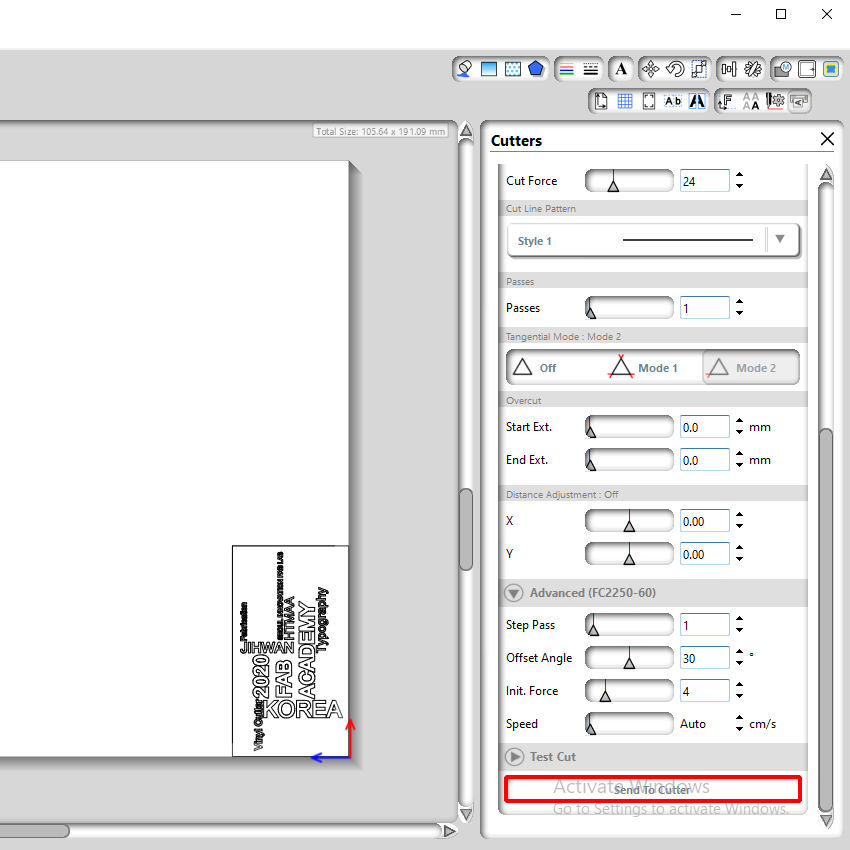
- Test several time to find the right power and speed for the material.
Computer setting
- Open dxf file with Graphtec studio.
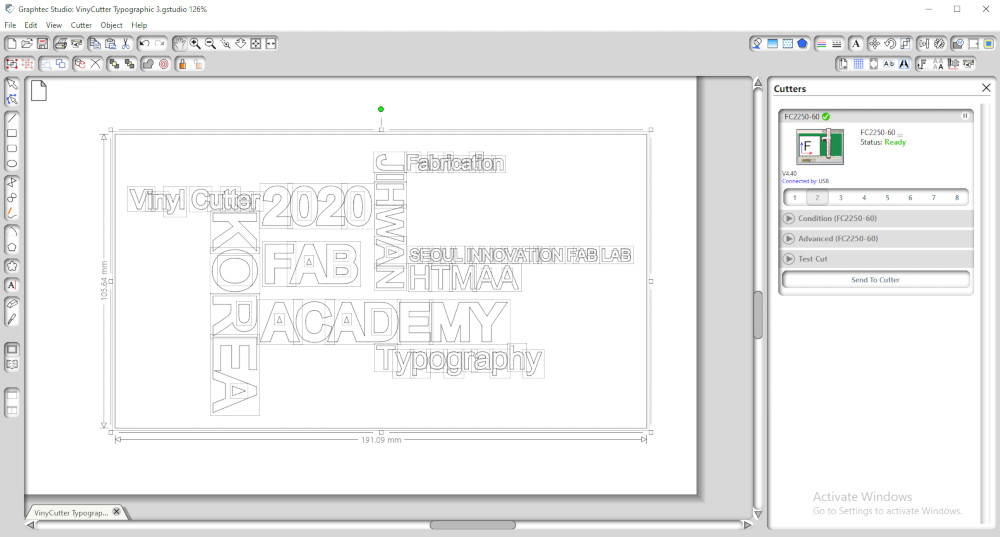
- Set size of my design.
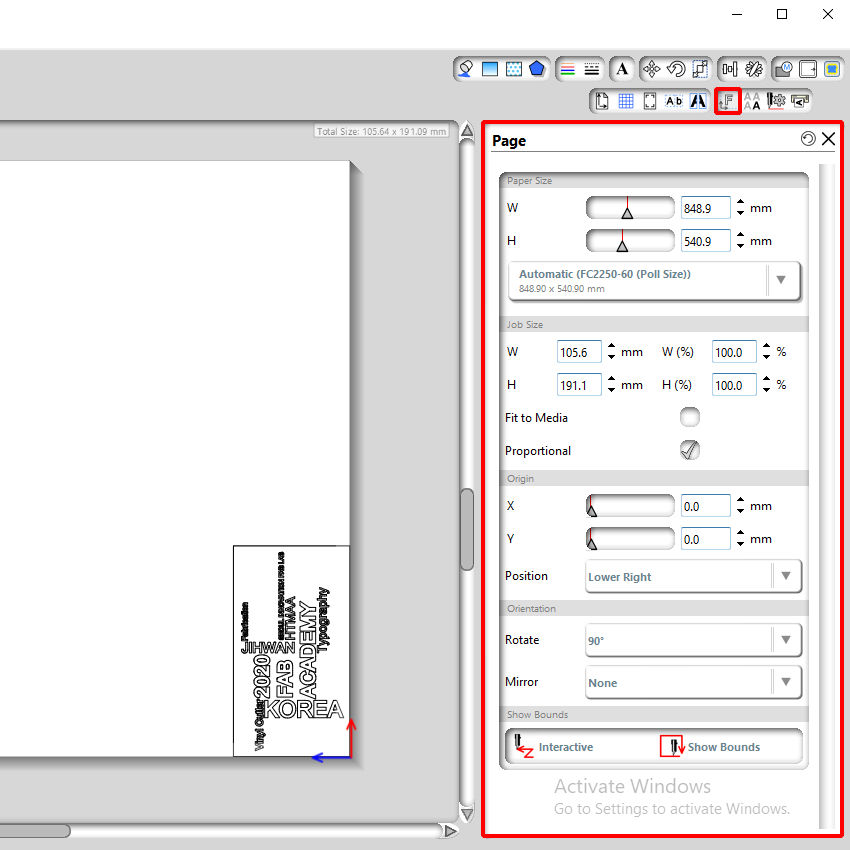
- Start.

Construct & Evaluate
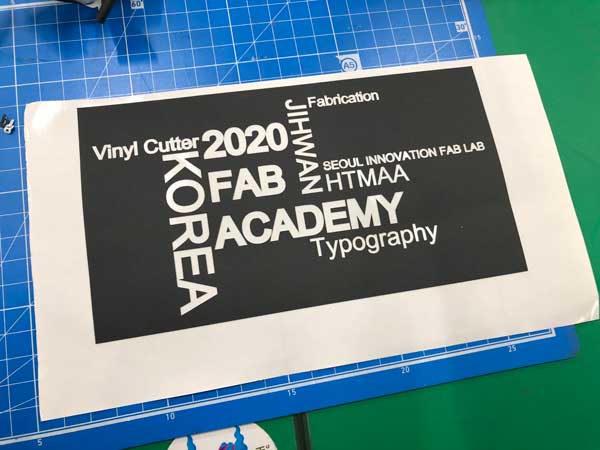
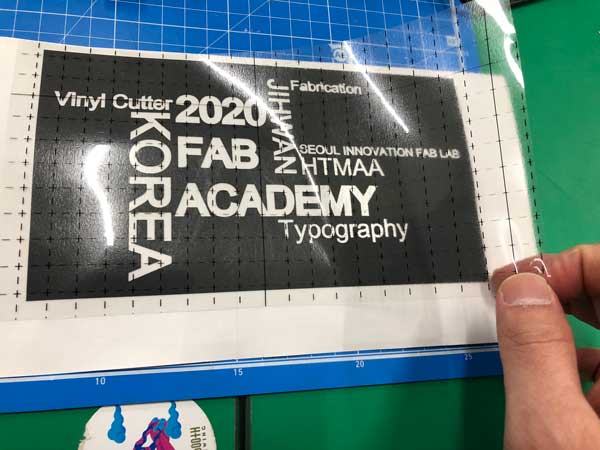
Cutted words are too small to trim. So I have to grow size.