2D Design Tools
Illustrator
Used in computer controlled cutting week and wildcard week.
I have a background on the illustrator program. Although it is short, I decided to complete the project with my friends before taking the Fab Academy class. The design in Illustrator below is the initial design of my final project.
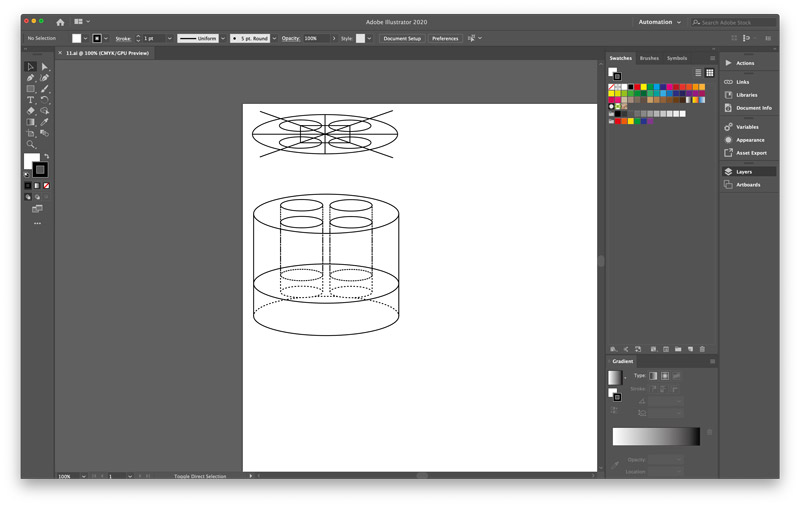
I mainly used the pen tool on the left toolbar. And in addition, I used the Ellipe tool.
I haven't had a lot of experience using computer 2D programs, so compared to drawing on paper with a pencil, it was difficult to draw the curves and straight lines I wanted.
And I felt that it was hard to draw pictures more computationally than I thought.
Gimp
I used this video from YouTube.
Layer-based raster 2D design program
After watching the tutorial, I felt like it was a program suitable for editing photos and making posters, etc. rather than a 2D program for design.
I'm going to use it a lot when editing the photos that go up in my document.
3D Design Tools
Fusion360
Used in computer controlled machining week and molding and casting week.
This is my first 3D design program. Having used 2D designs made it easier to access low-line programs. I refered to the tutorial of fusion360 through youtube.
Workflow
- Create a sketch using
Create Sketch > Line. (Press the shortcut key "r" to draw a rectangle and press "c" to draw a circle.)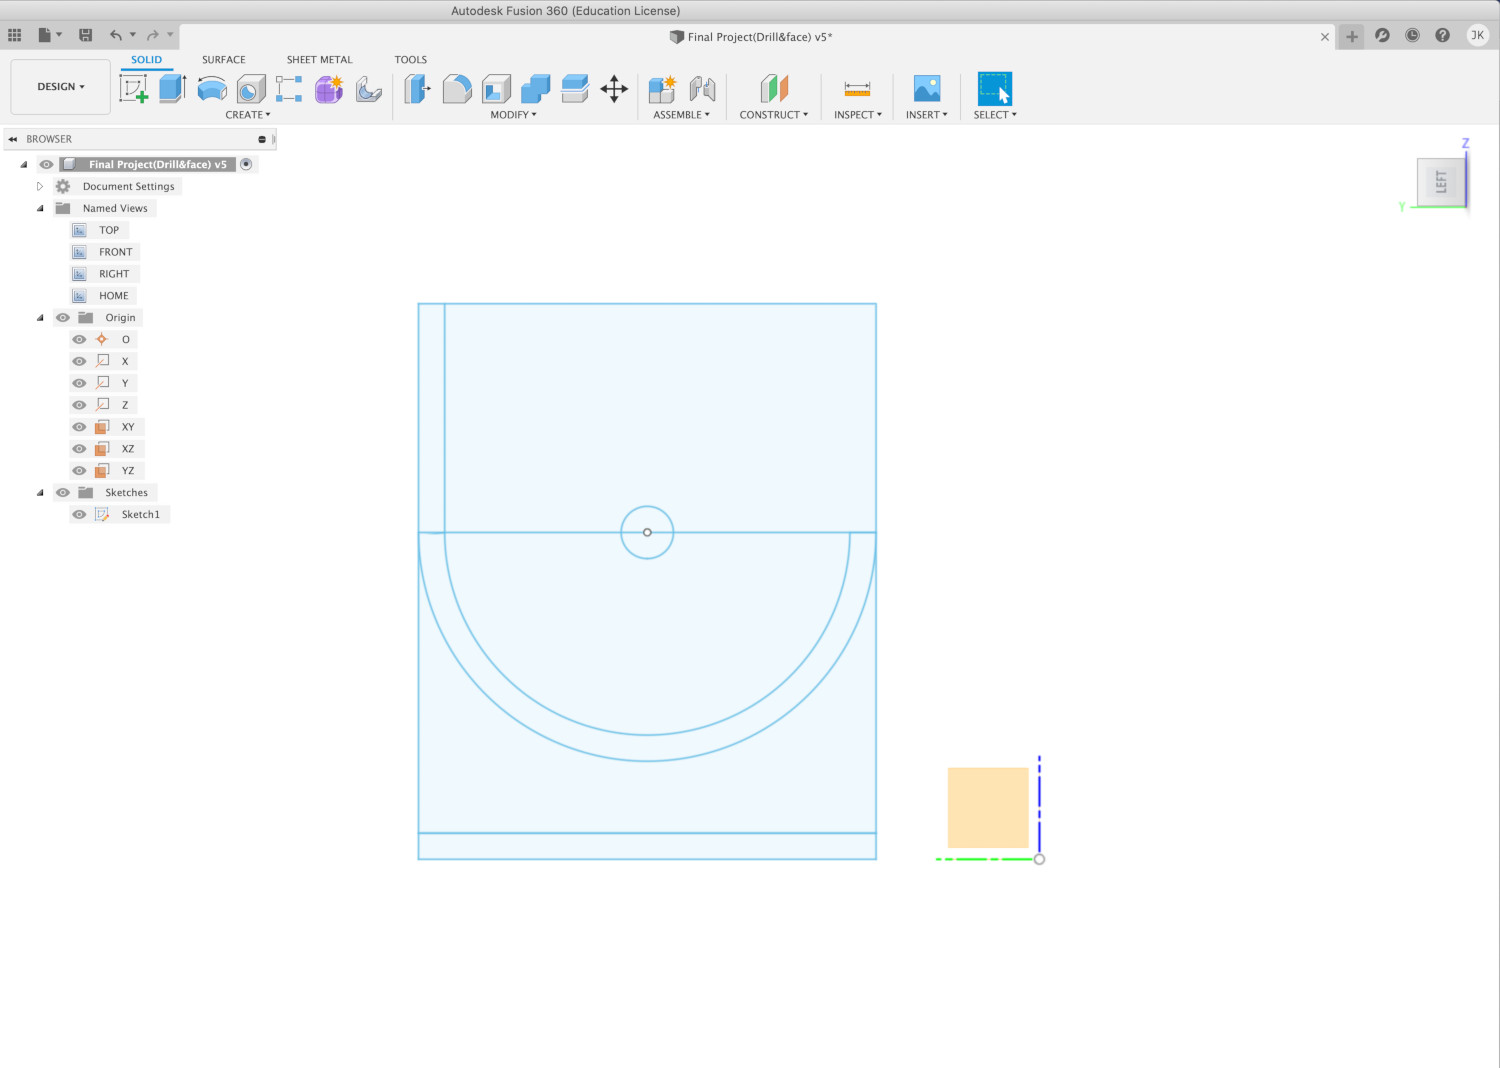
- Select the desired section of the sketch, press right and press
Extrudeto create a column of the selected section.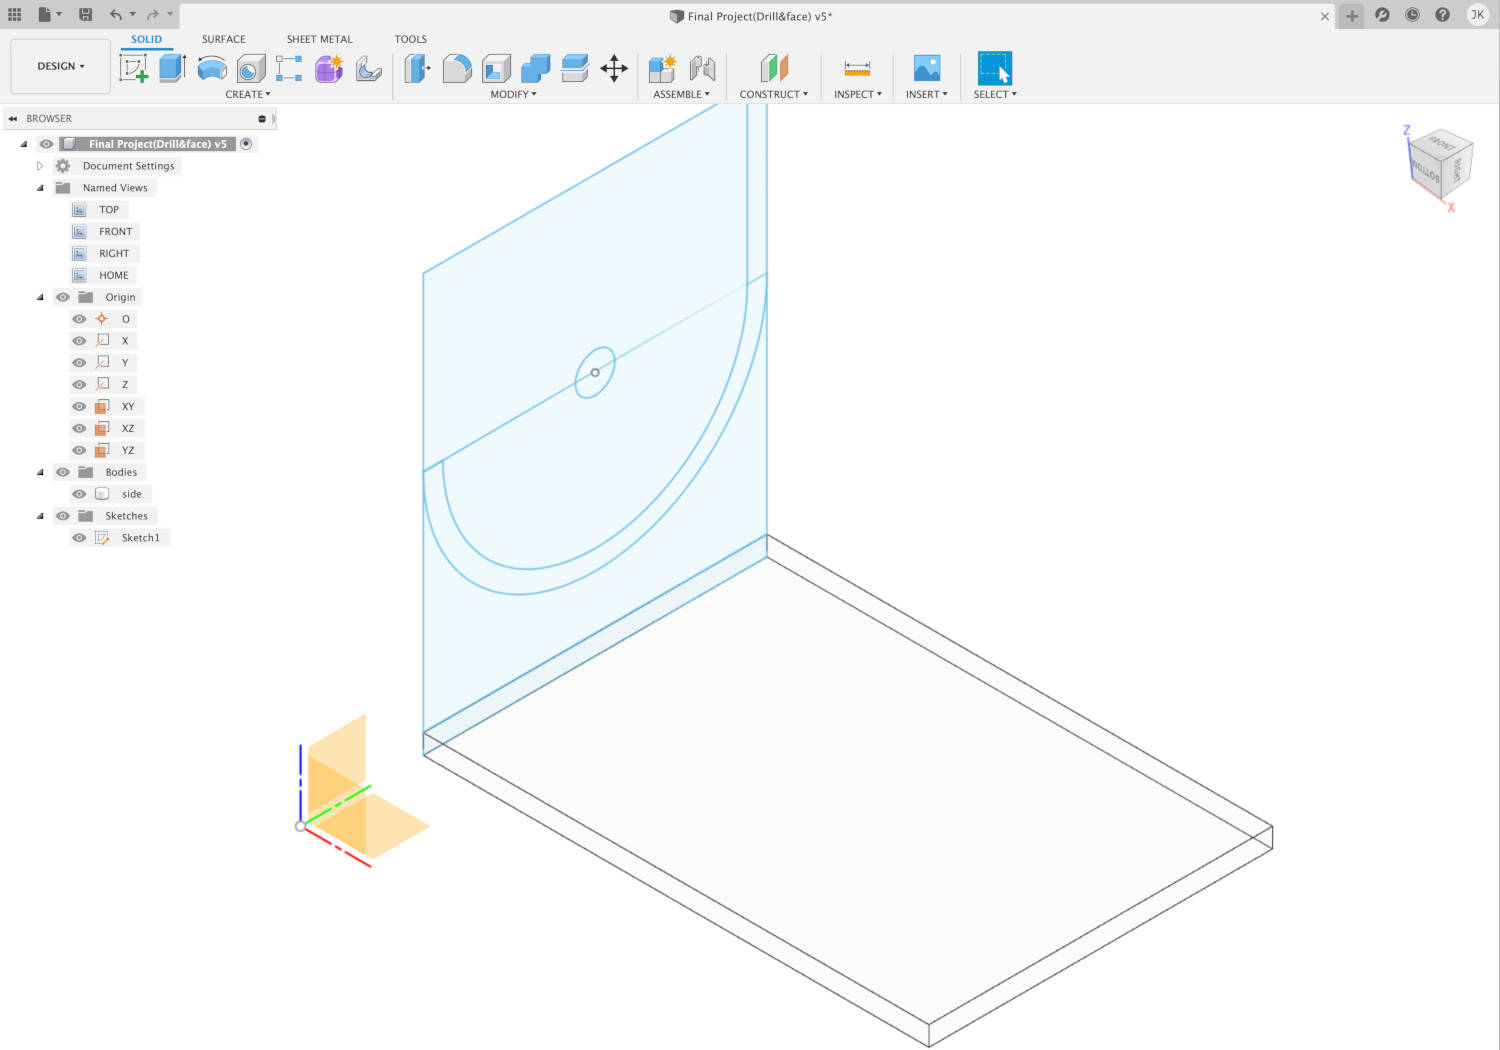
- When you finish sketching, select
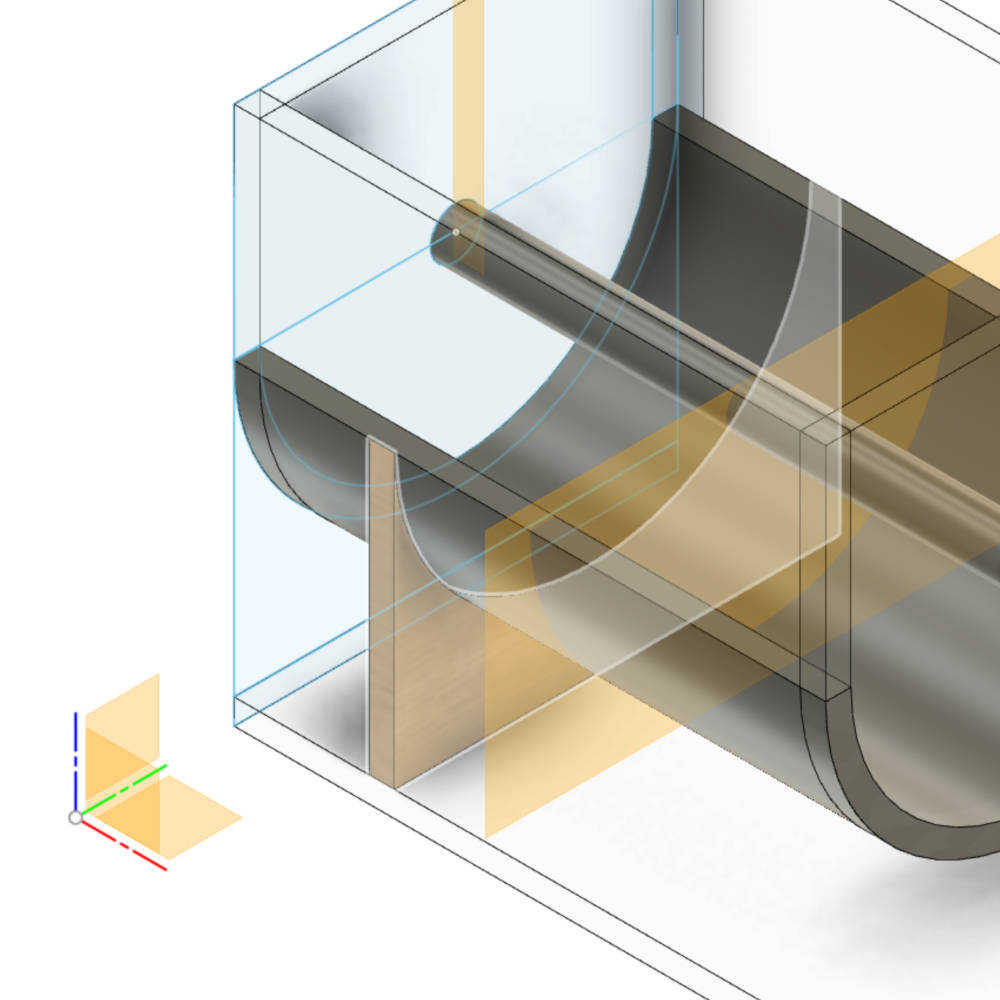
CONSTRUCT > Midplane, and then select two sides of body, a plane is created in the middle of it.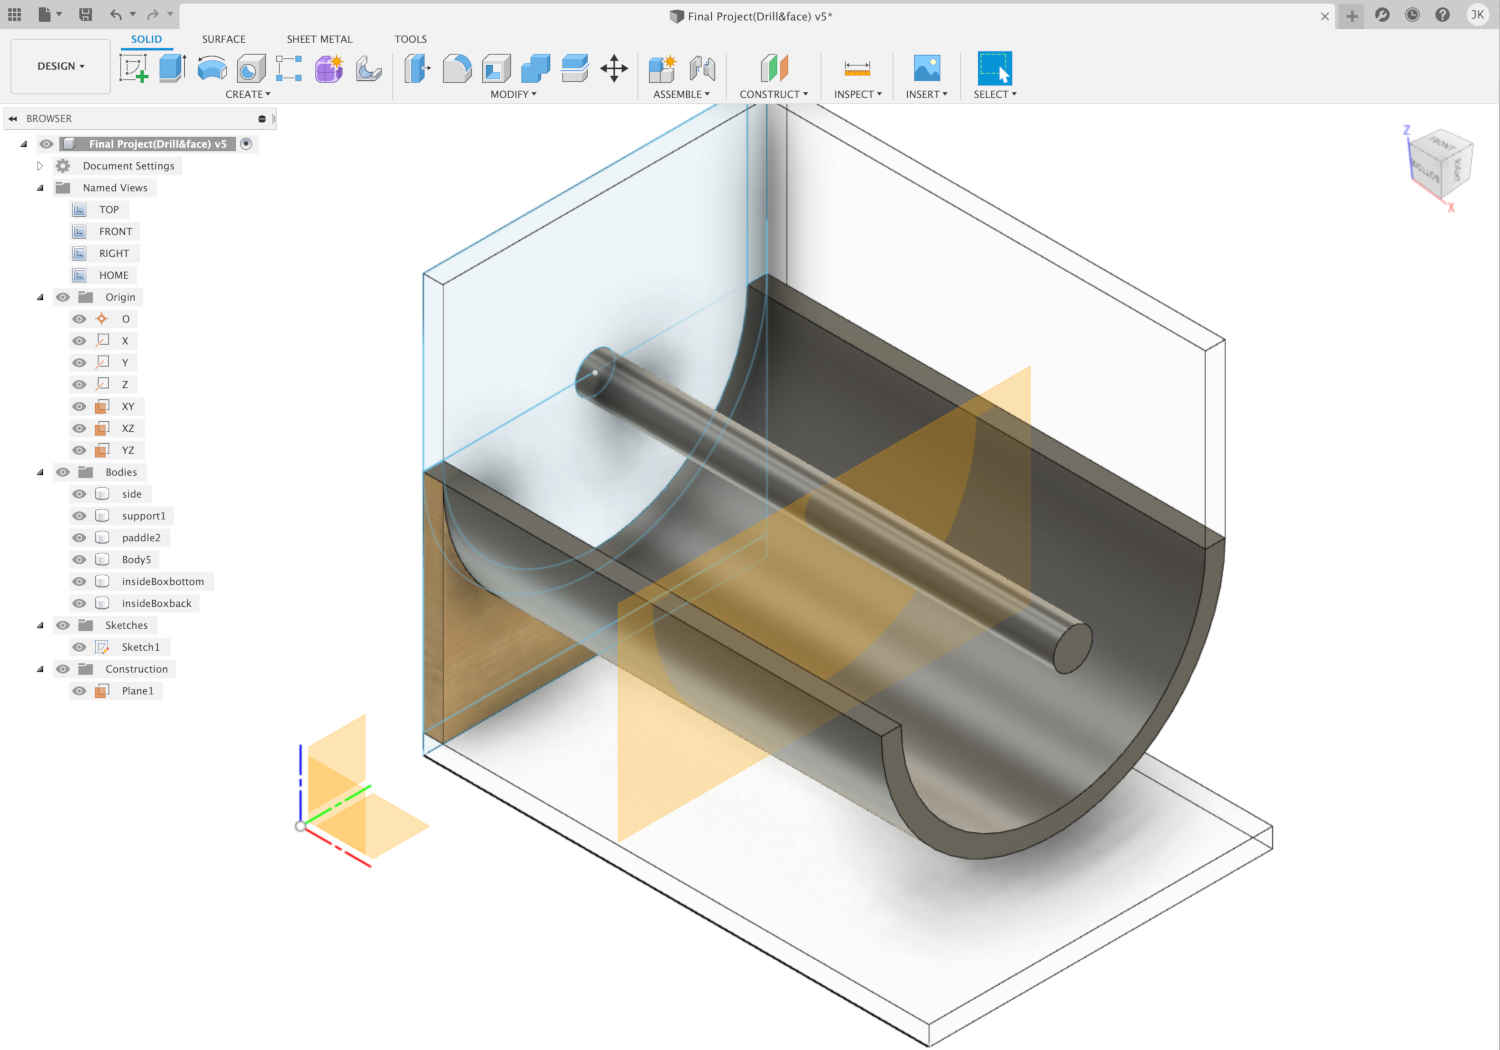
- Select the body you want to copy using
CREATE > Mirrorand select the plane to create another body that is about the same distance from the plane as a mirror.
- Select the body in the left category, press the right mouse button and press the
move/copybutton to move in the desired direction and distance.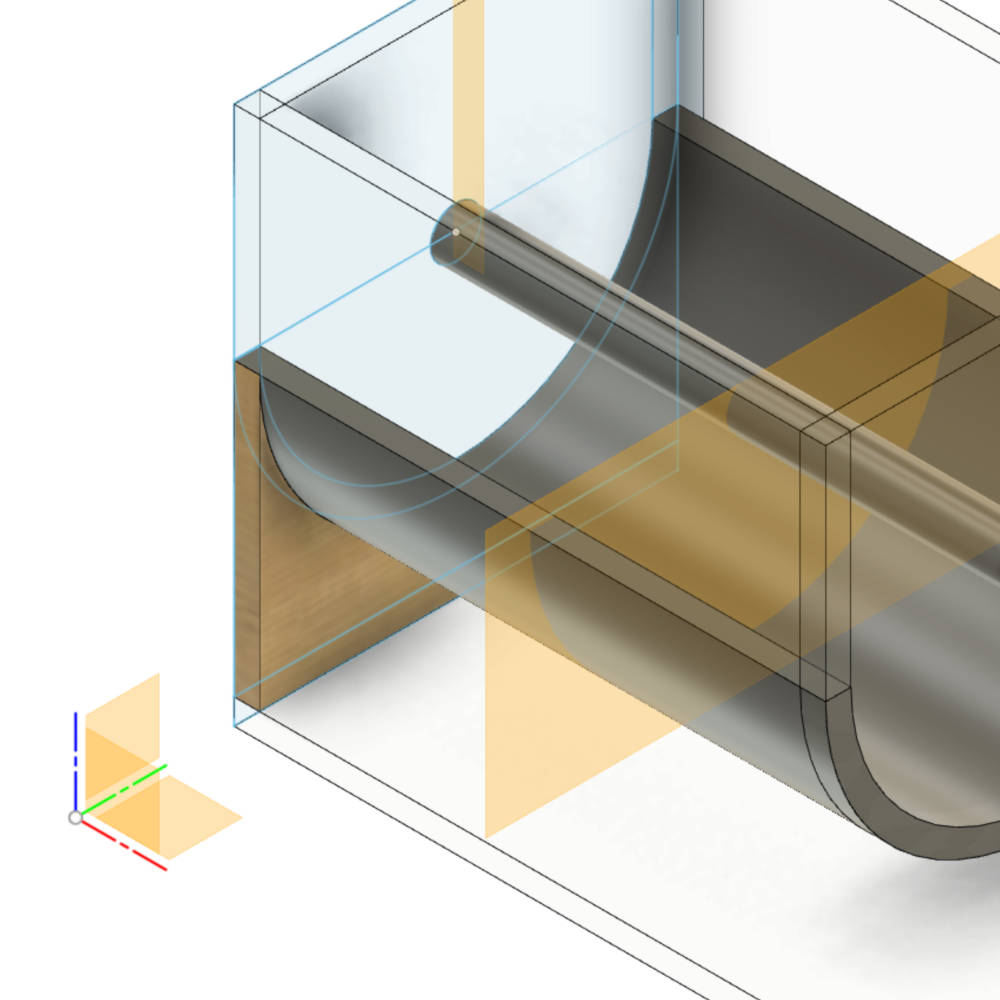
- You can sketch the body by selecting the plane of the body and pressing
Create Sketch. Created usingExtrudefunction and modifying sketches.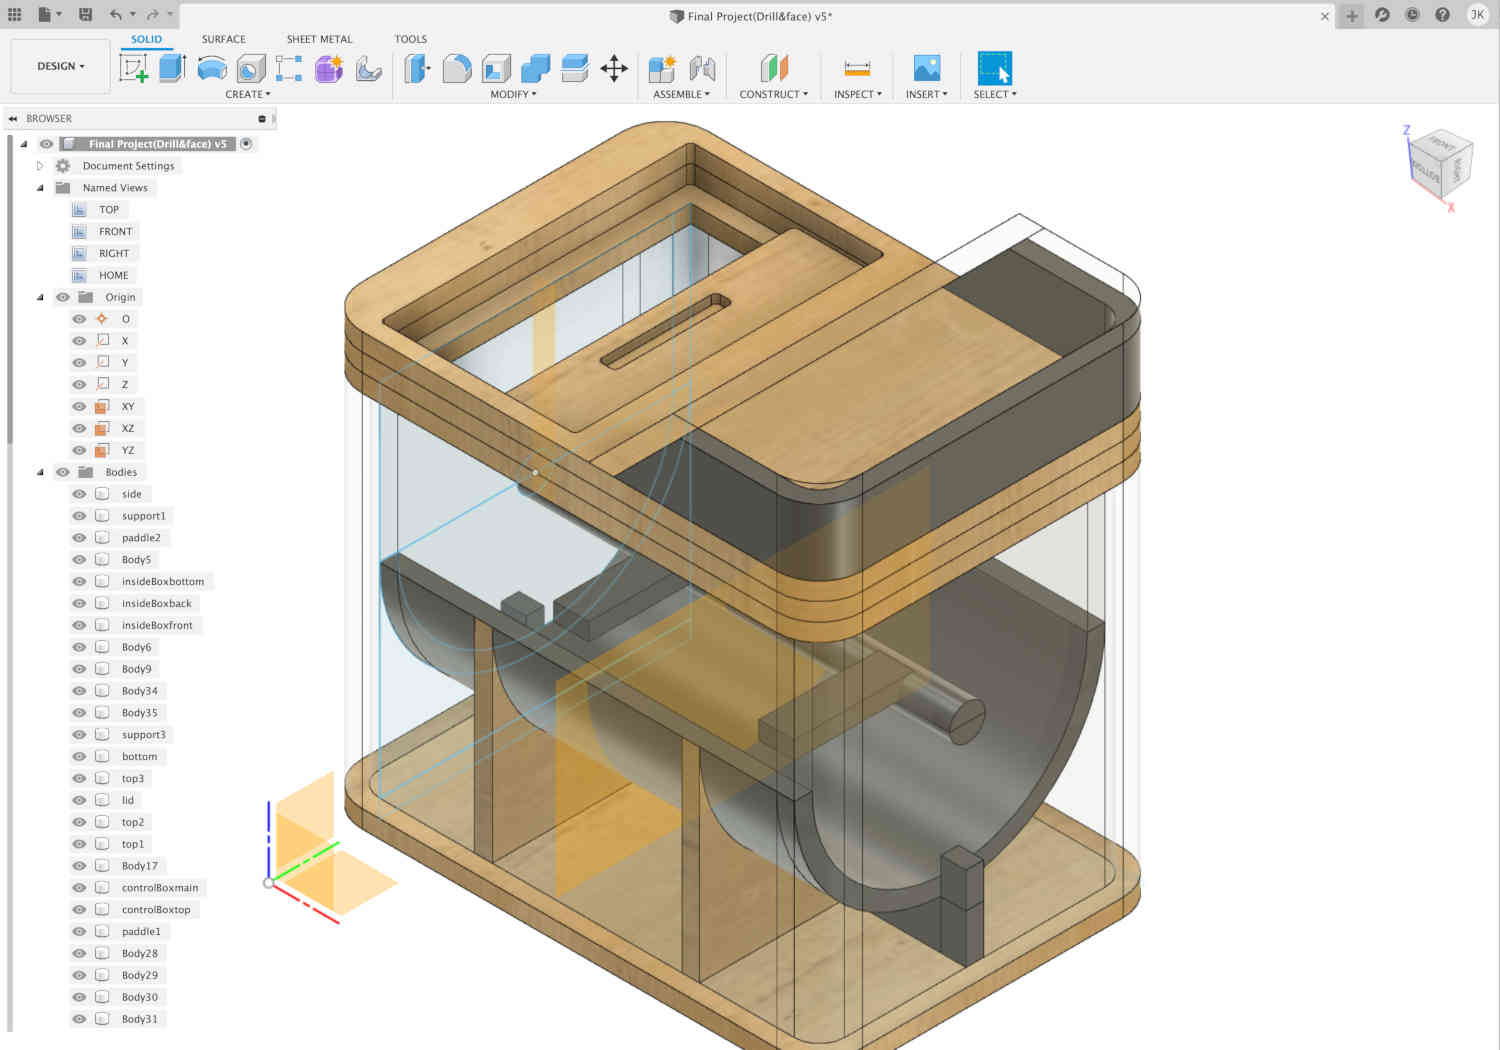
MODIFY > Appearancefunction can be used to change the material of the body. (You can drag and drop the material you want.)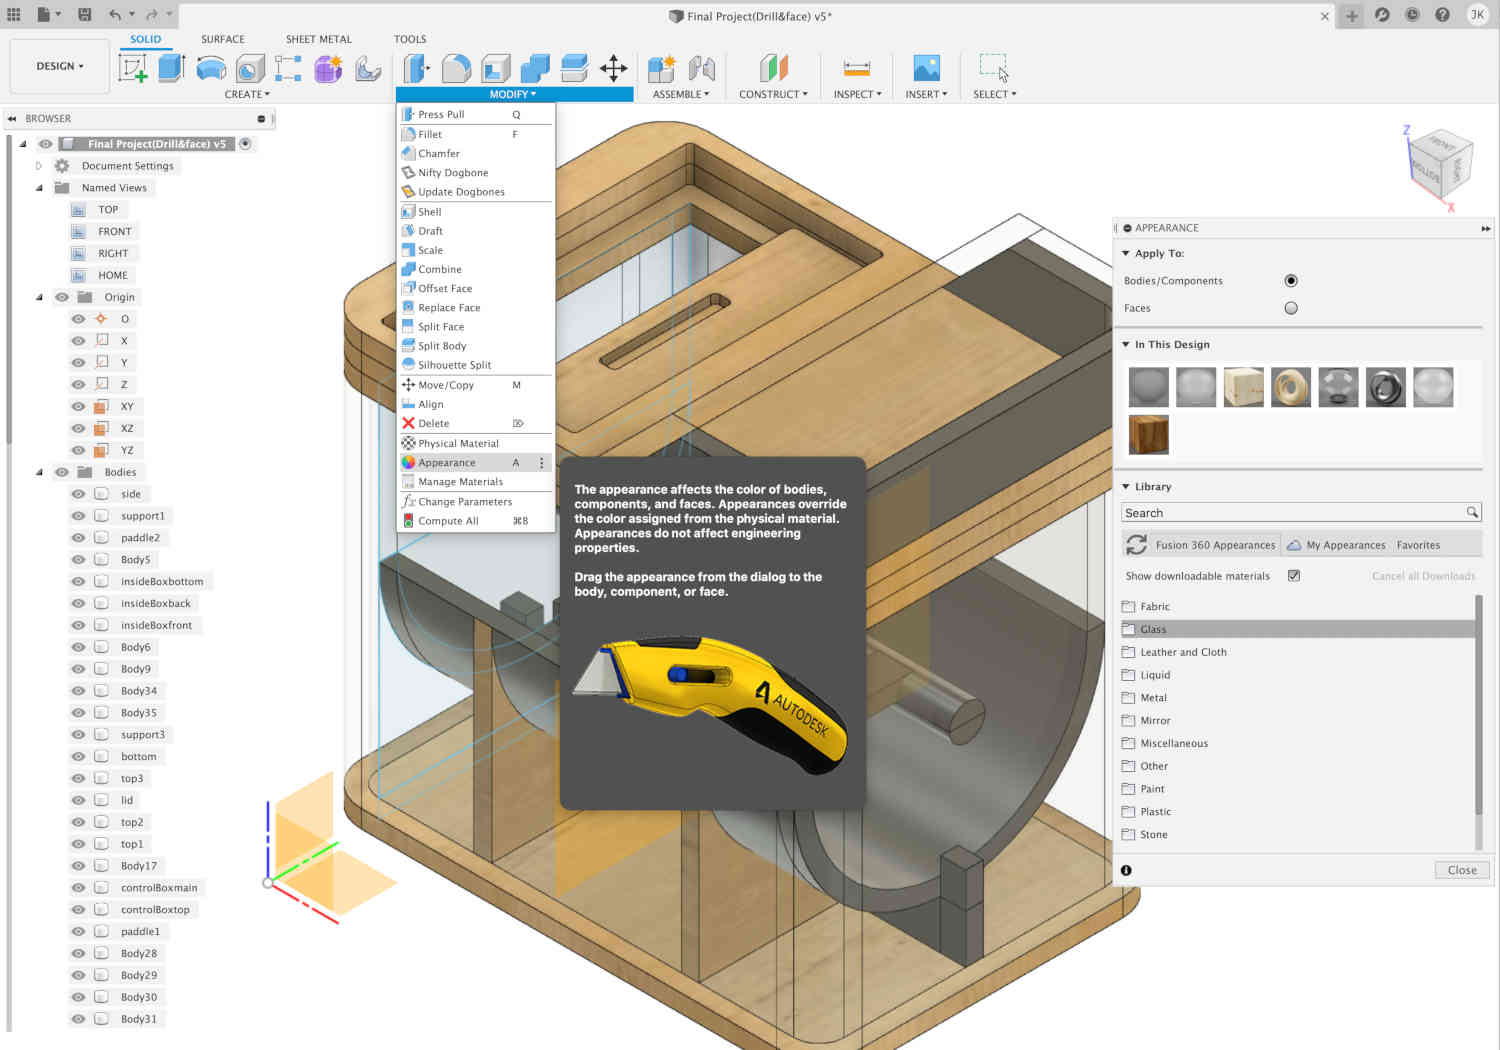
- The
ASSEMBLE > Jointfunction allows you to combine the bodies you want. (I made a stock for CNC, then spread out my parts and put them in place.)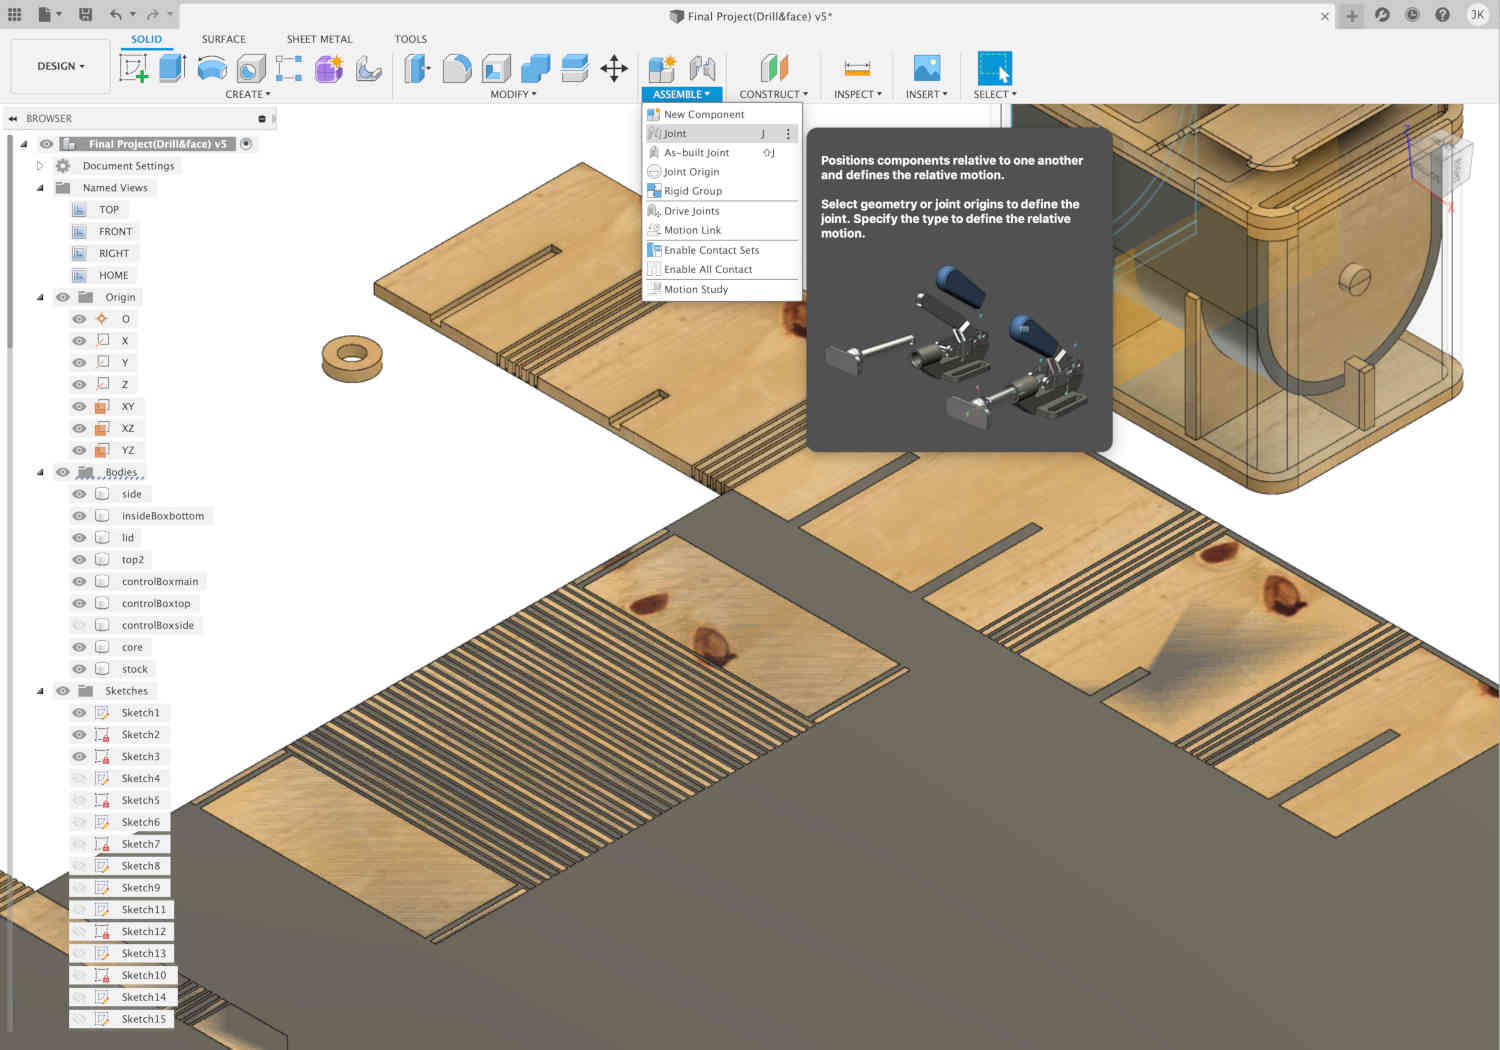
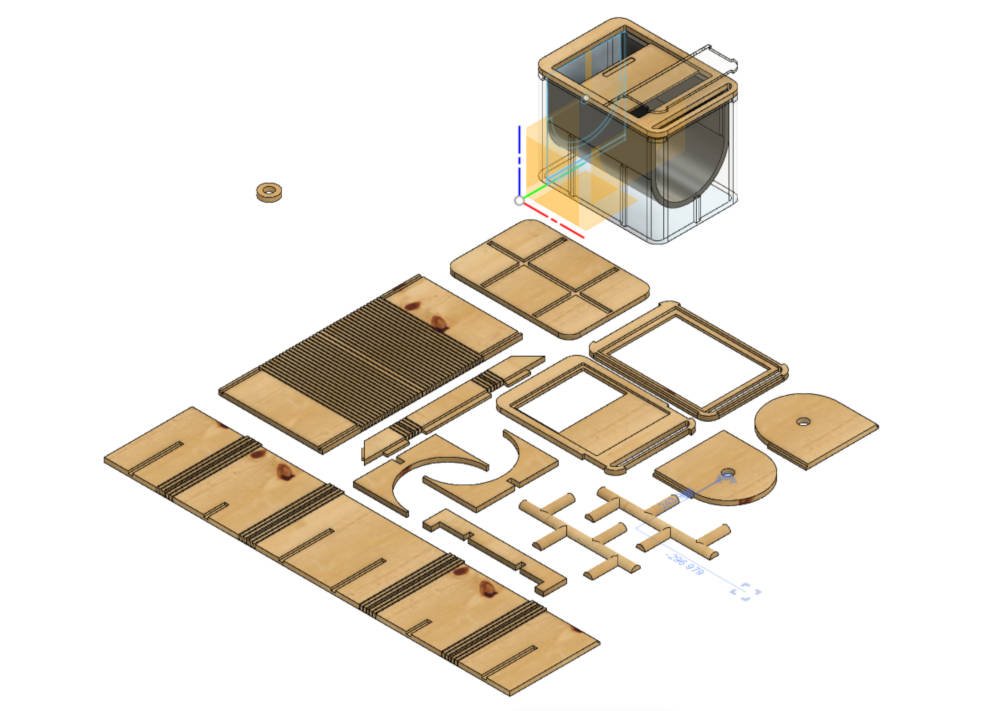
I was able to design almost exactly the same as the real thing using the correct dimensions.
I think it's an advantage that I can design and check what I want.
The interface was not too difficult either.
There are many functions that require learning, but it seems very useful when used in a timely manner.
Reference Site
Fusion 360: Bookshelf Tutorial : This is a YouTube video that will really help you with the Fusion360 design for the shotobot.
Meshmixer
The program was free to download and use as an open-source program, and had the advantage of creating 3D models like clay. And the simple interface was good to see when I first entered. I referred to the tutorial video of AutoDesk.
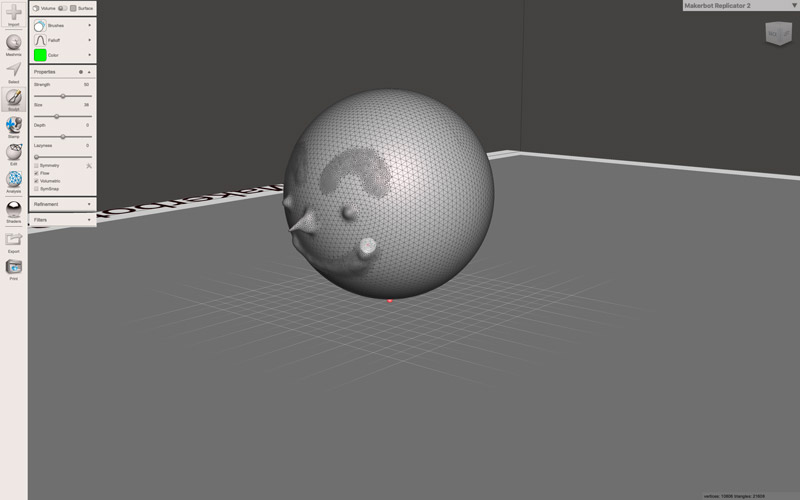
I tried the Stencil Tool. (Reference Site)
When referring to video clips of lectures, there were many contents that used sculptures that had already been made.
It didn't seem like a program with many functions.
Files