review the safety data sheets for each of your molding and casting materials, then make and compare test casts with each of them
design a mold around the stock and tooling that you'll be using, mill it (rough cut + (at least) three-axis finish cut), and use it to cast parts
I first started working with our 3-axis CNC milling machine. First of all I had to repair it because it did not
run in a straight line. After I disassembled it 3 times completely, I finally found out how it works and also
found all the screws I needed to tighten.
It took me a whole day just to find out that we only have one cutter and no one is delivered on time. Because I
would like to cast the standard block of my robot system to find out if this works well. Since this would be a
different production waitiante than printing all the parts.
So another solution had to be found.
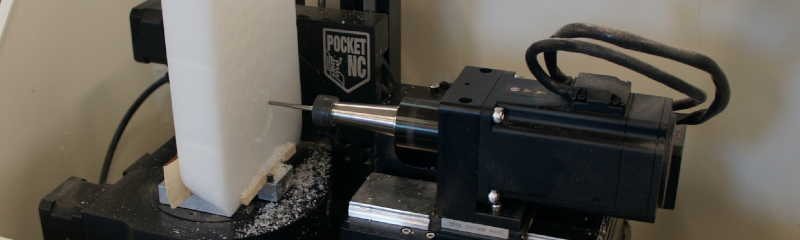
We now have a second milling machine, the PocketNC, which is a little more difficult to operate because it has 5
axes.
But maybe I will get some promising results.
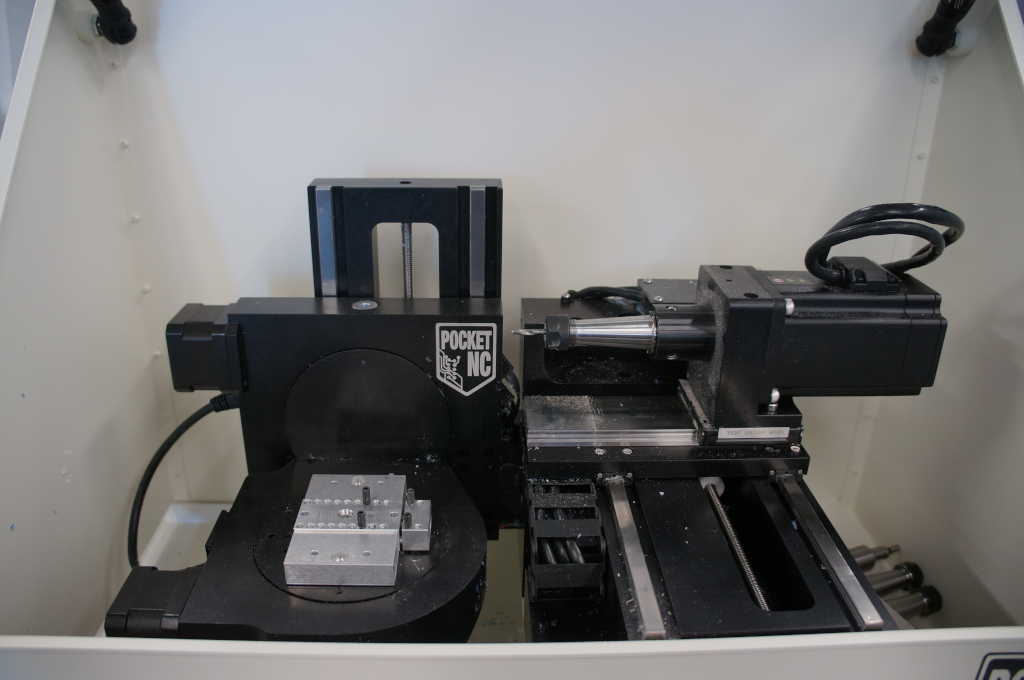
PocketNC is a 5-axis milling machine for the desk. It can be used to mill wood, wax and soft metals.
| Spindle Speed | 2,000-10,000RPM |
|---|---|
| Tool Diameters | Up to ¼” (6.35mm) |
| Spindle Runout | 0.0005 in (12.7 µm) |
First, I disunited a casting mold in fusion. This took me some time until I knew what had to be cut away and what
should remain.
Then I wanted to do my first test freshening. I found out that I ordered the wrong wax, it was
much too soft and melted during the milling process.After I cleaned the milling cutter I did some research and
ordered new wax.
I will now make my first tests with wood and as soon as the wax is there I will make the forms.
This has also given me the opportunity to work my desein more times over until I was satisfied with the goods as
it is put together.
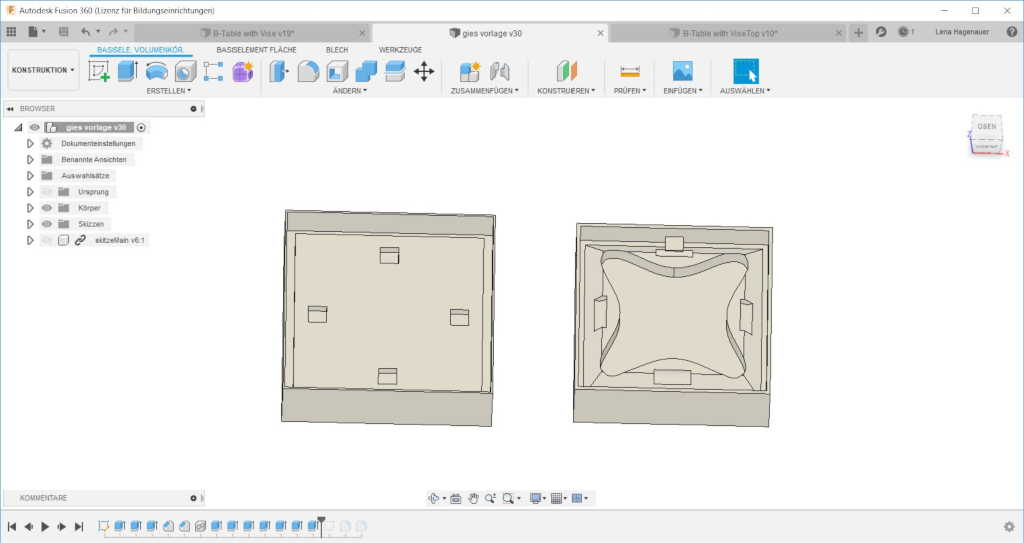
Here you can see my final design for my casting mould.
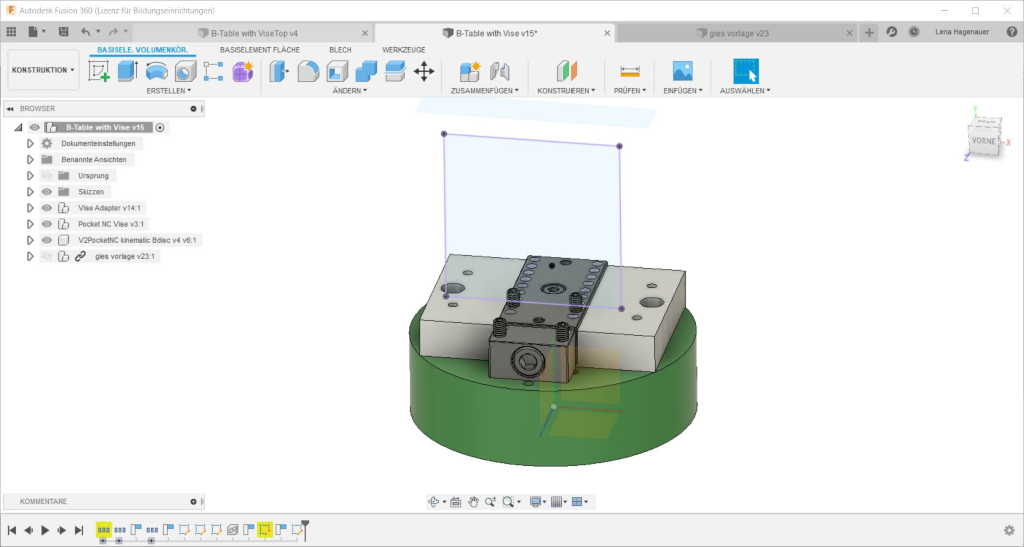
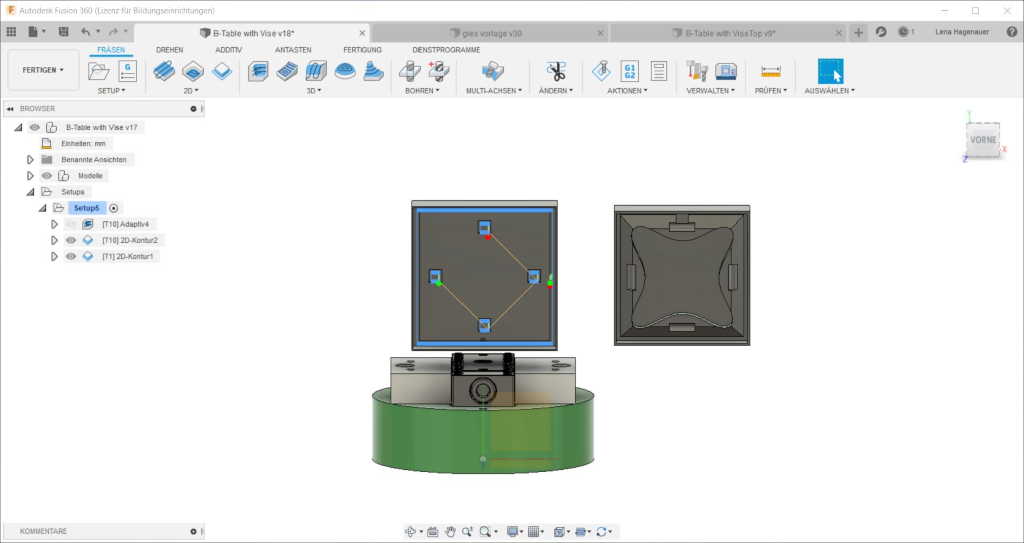
To mill with the PocketNC you start by downloading the B-Table. To align the workpiece correctly.
Next you have to check if the distance from the nll point to the machine ground surface is the same as the distance of the real machine. If not you have to move the platform accordingly. The corked distance of the B-table is noted in the instructions of the machine.
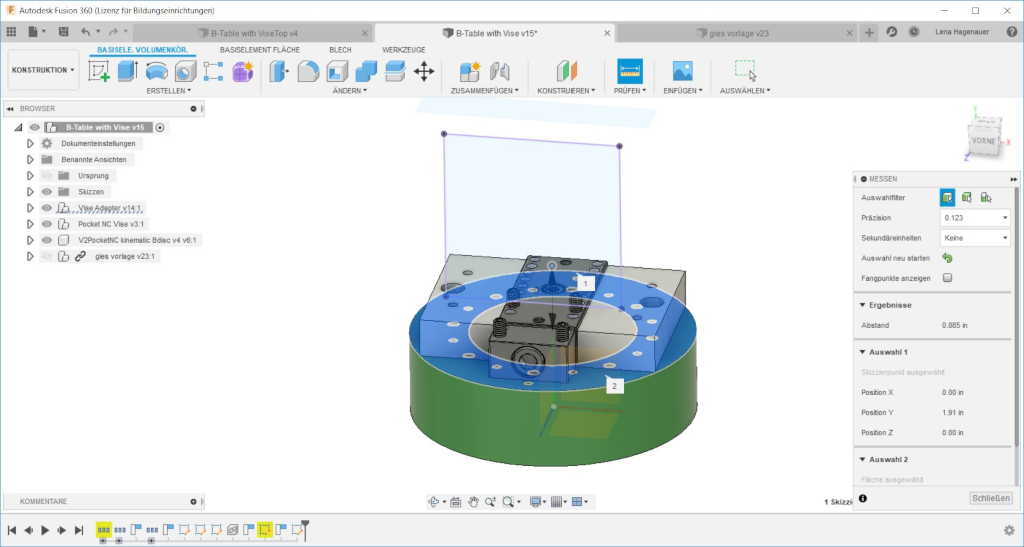
After this is done we can load our casting template into the file. To do this, we will look for our template in the right menu, click on it with the right mouse button -> load it into this skitz. To continue I have to go from ... to manufacture.
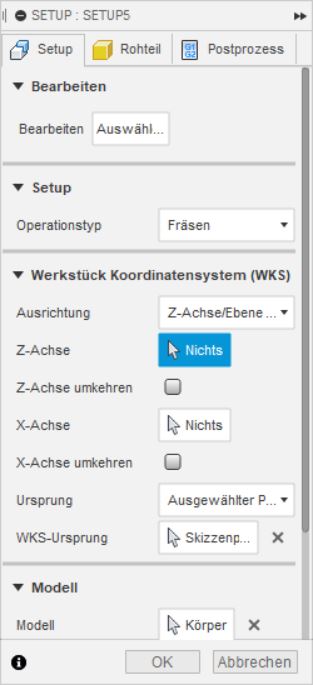
Now we have a new menu bar similar to the other I start on the left and work my way through the steps. First we create a setup. Then we set up our coordinate system Z axis/level & 6 X axis. Below that I choose the model I have created. And finally I choose my holding materials so that I don't mill into them later.
On the 2 side of the setup you can adjust the size of the workpiece if you want to mill at a certain position.
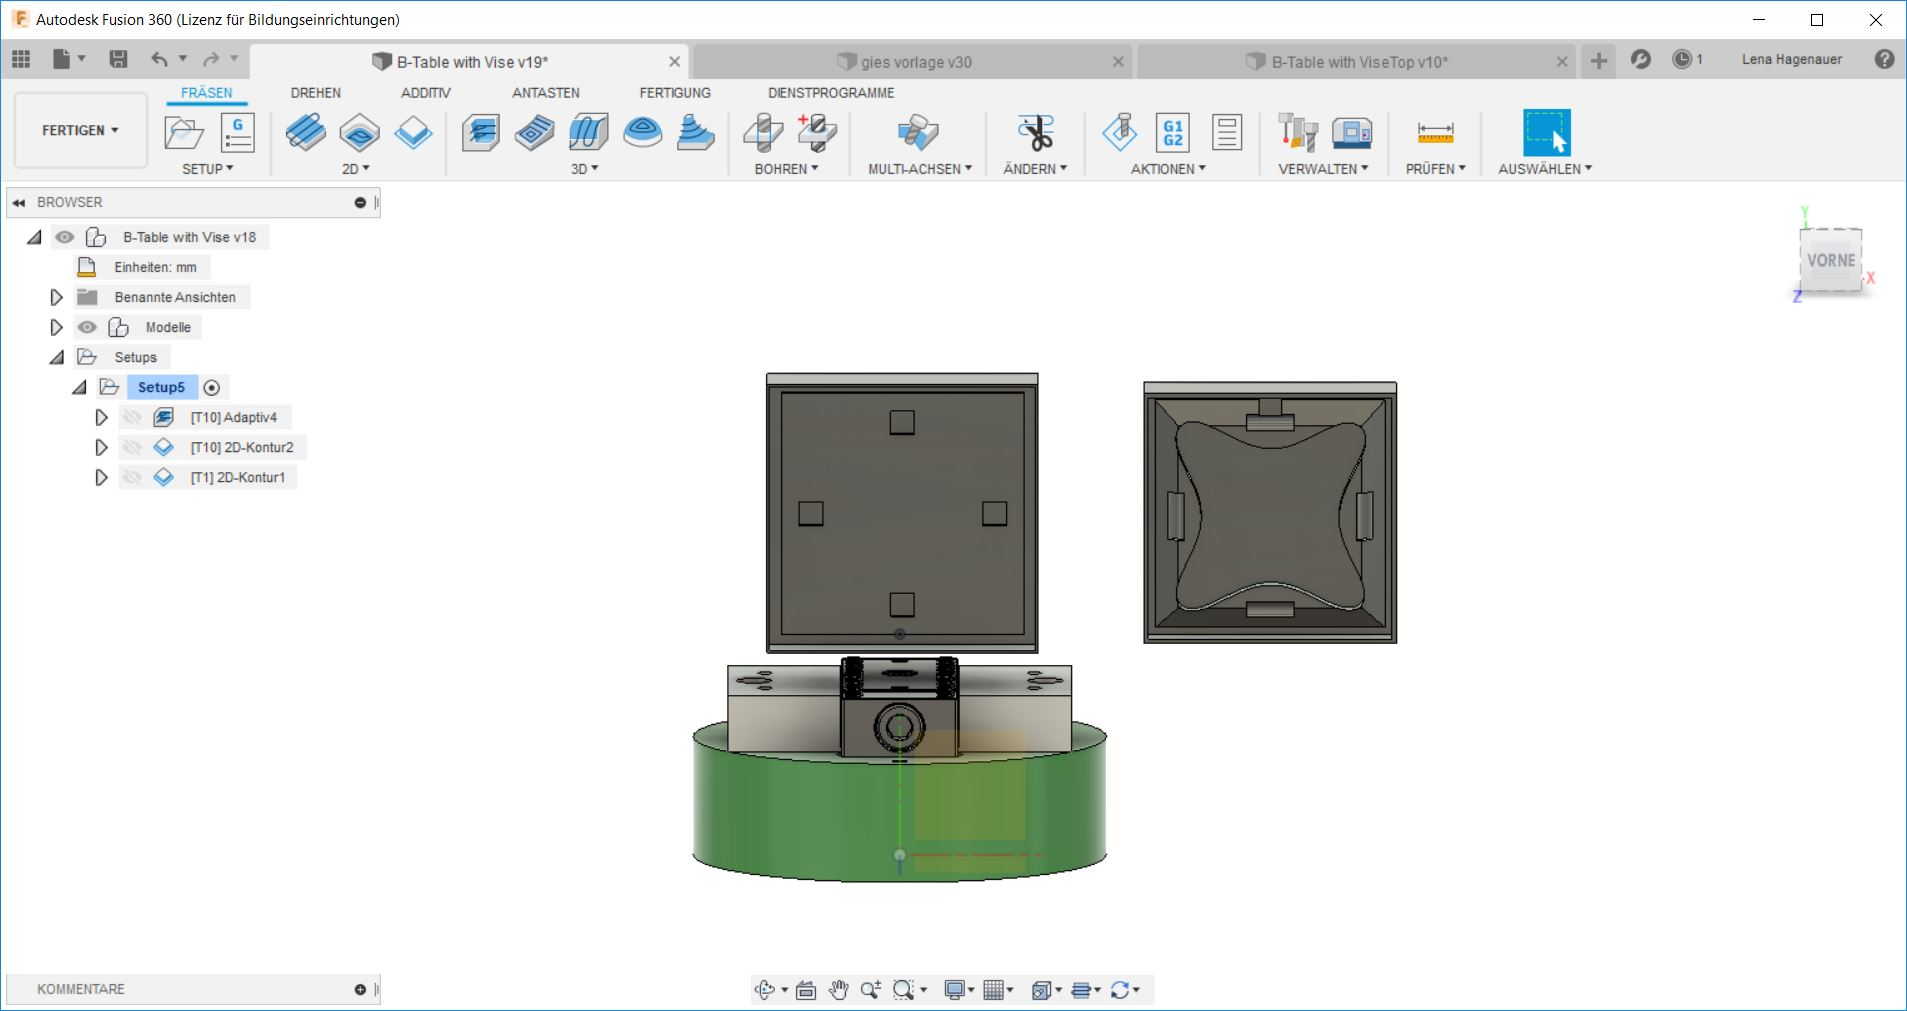
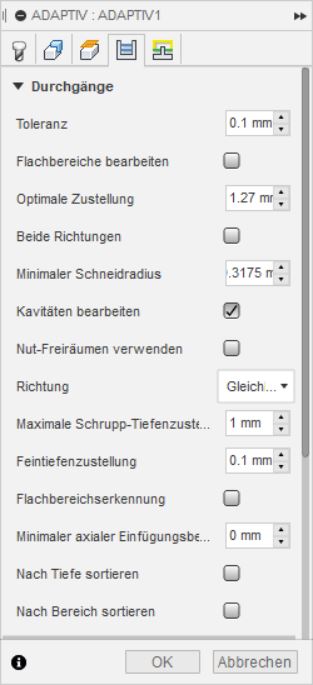
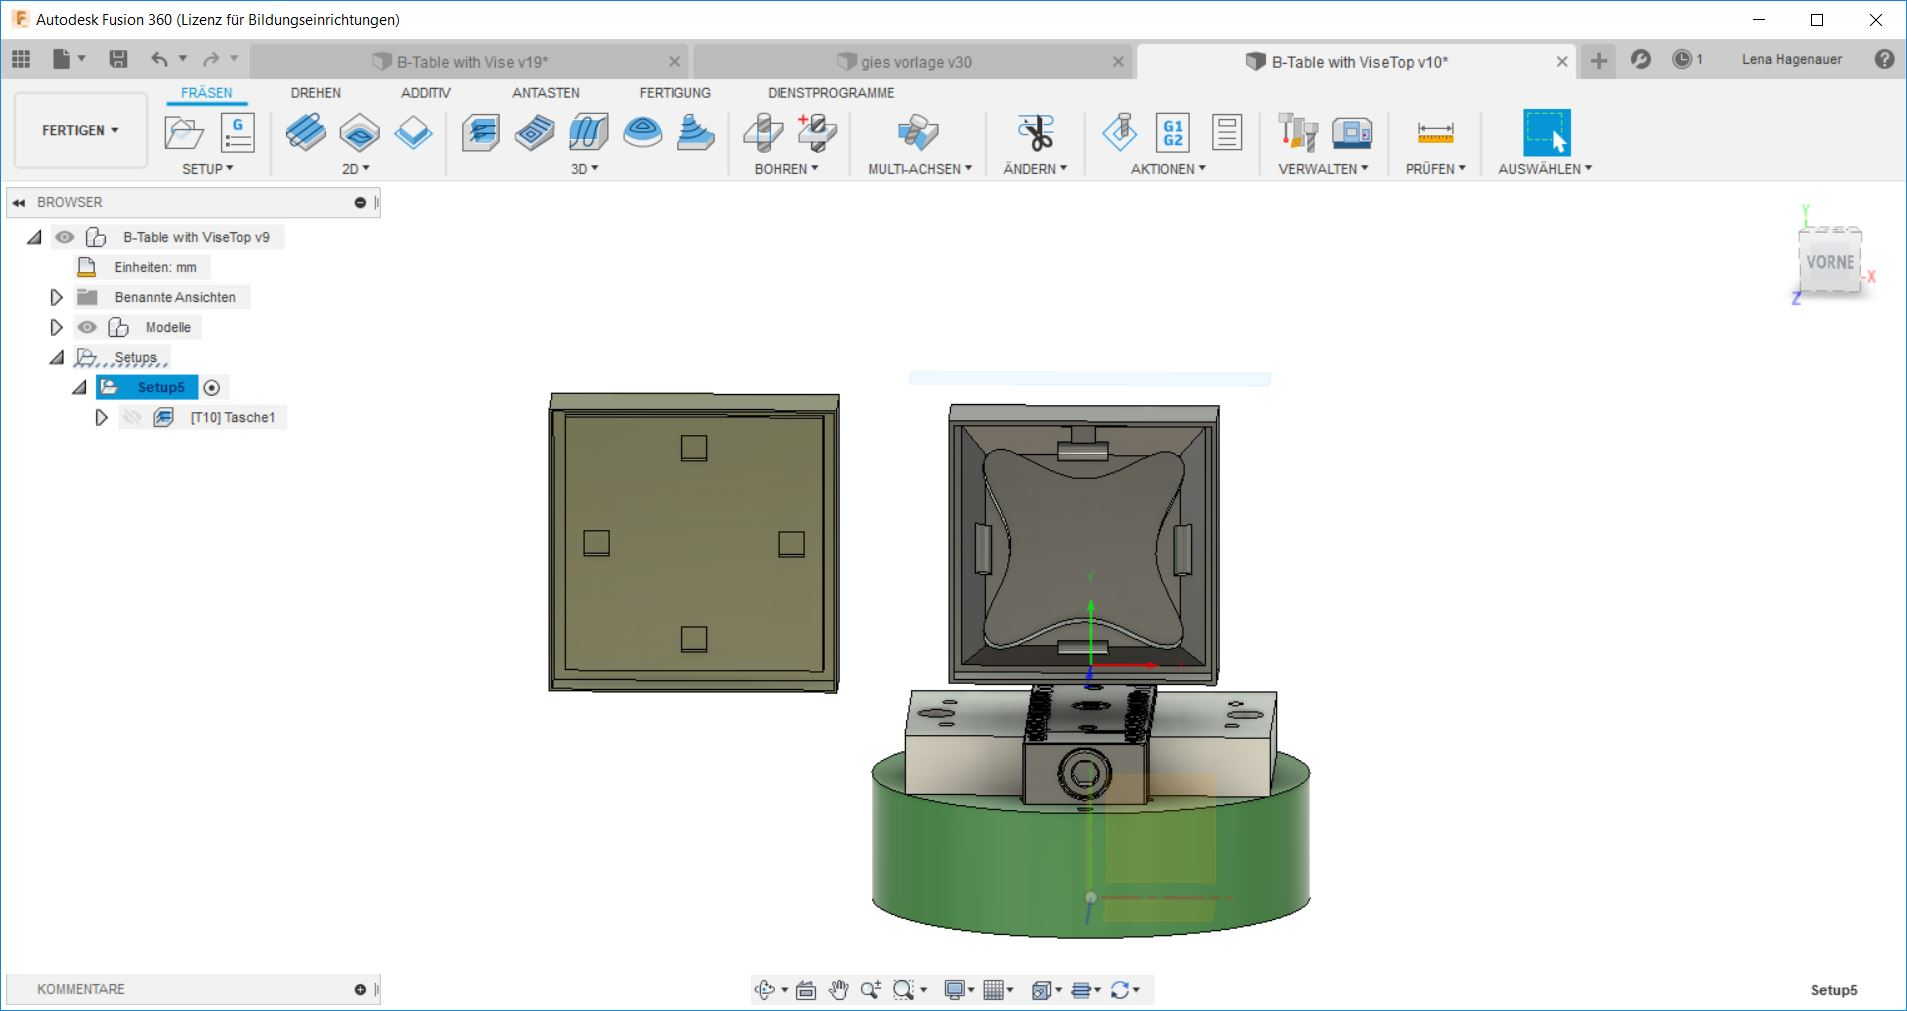
Now we come to the next tab in the menu bar. First we take off some material. For this we go to 3D Adaprive.
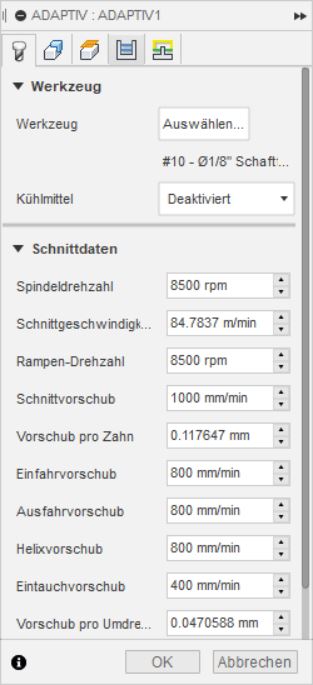
Thereupon a fixed one opens again. First of all, the milling cutter is adjusted here. Then the spindle speed and feed rate must be set for the corresponding material.
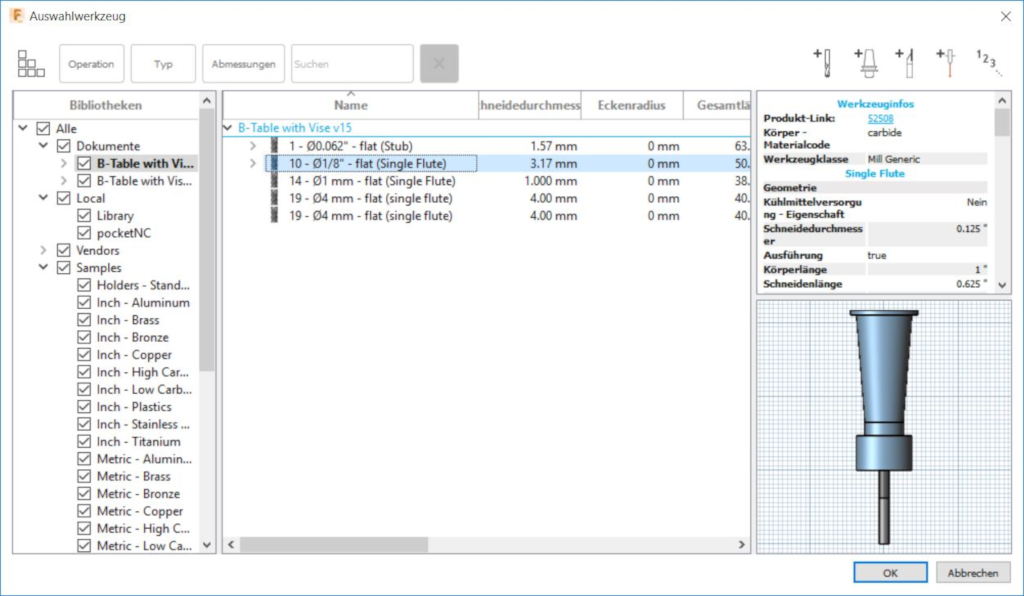
If you go to select the milling cutter, it will open more firmly and you can choose the right milling cutter. If you use the PocketNC milling cutters, you can download a library of milling cutters from their site.
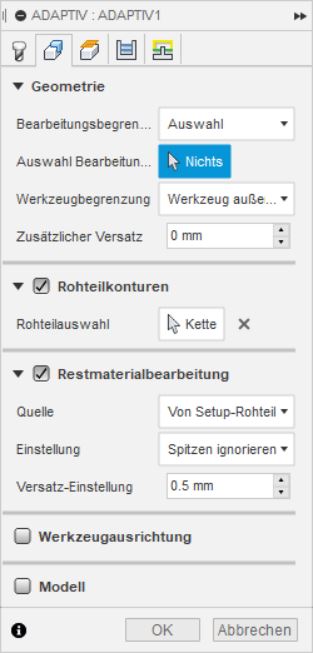
In the second tab of the settings you can define what is to be cut.
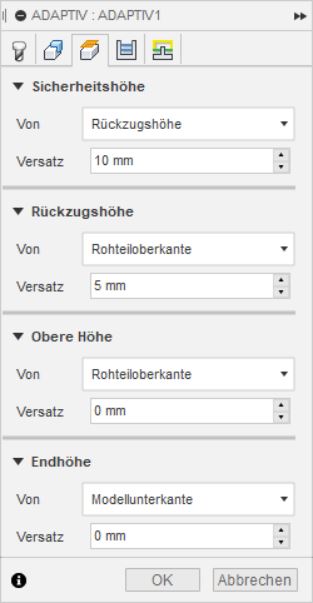
In the third tab you set the safety height, the retreat height the surface and the final height.
In the third tab you set the safety height, the retreat height the surface and the final height.
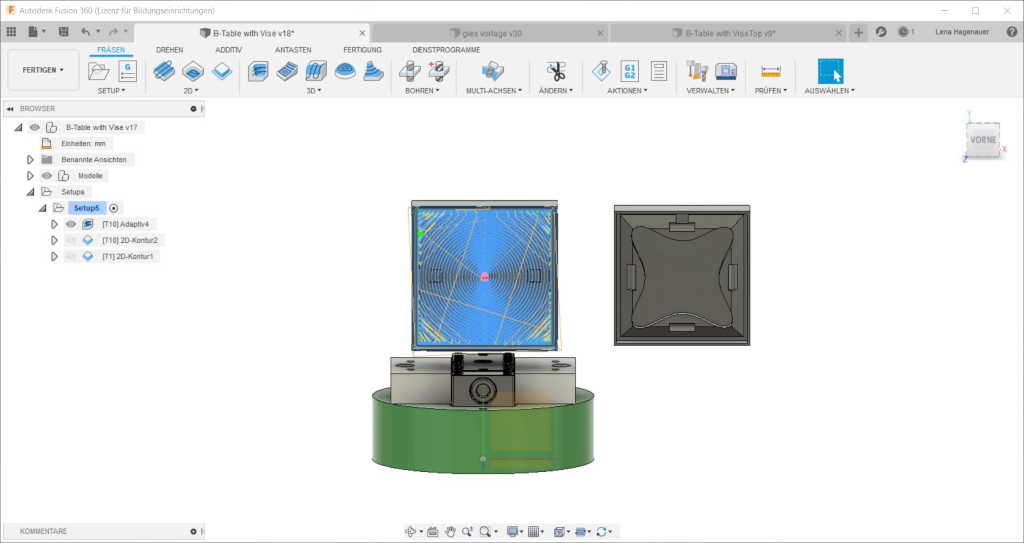
We make these settings once for the big box.
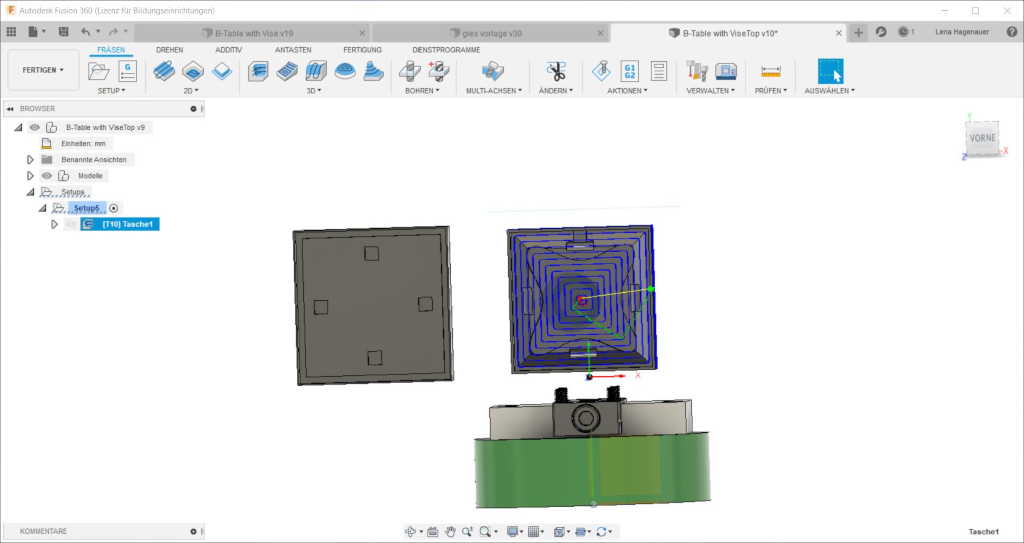
Then we select contour, make the same settings and follow the contours.
We do the same for the 2 part of the object. As the cutter can only cut about 5.8 cm ishc will cut the object in 2 parts.
Here you can see the fäs fade of the 2 file here I proceed in small steps to get rid of my rain.
Now I have to send the file to the milling machine. To do this I connect it via usb cable and first of all I install the driver. Afterwards I can reach the milling machine under the ip address http://192.168.7.2/.
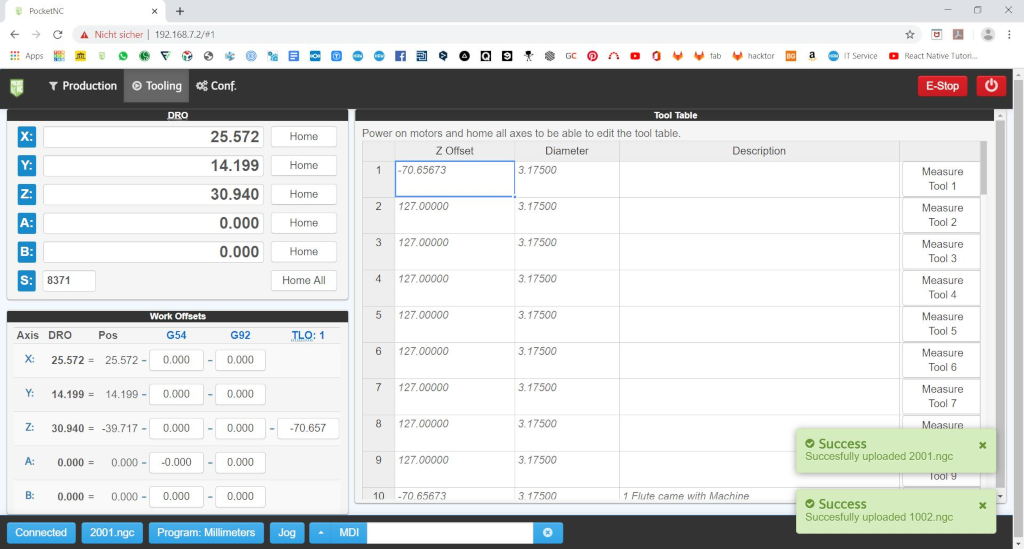
After I have clamped my tool with which I want to mill, I measure the distance to the middle point and enter the offset at the corresponding position of the selected tool.
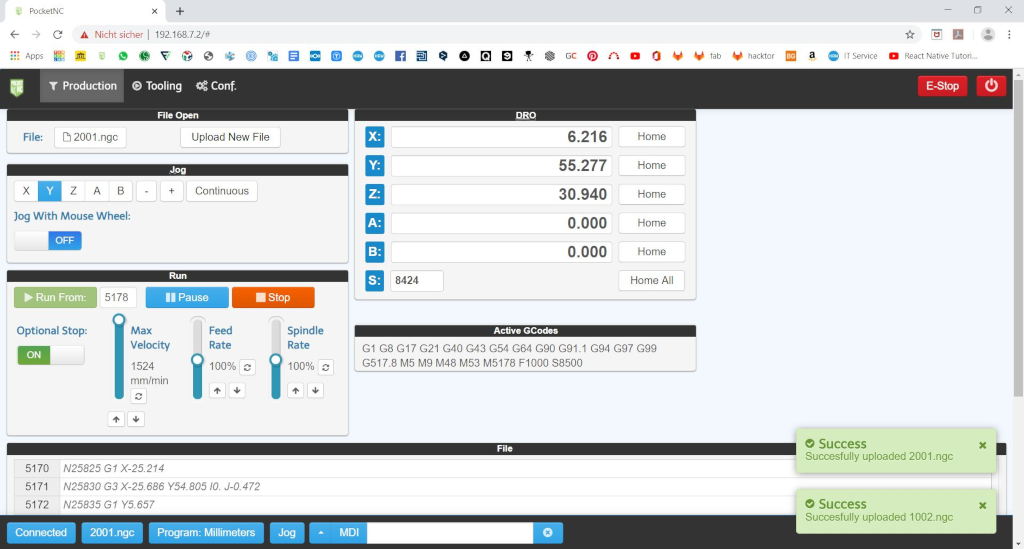
Now I can upload my file by pressing load and selecting the appropriate file. Then I release the estop so that the motors can move and it can start. Press start again and shortly after that resume to confirm th
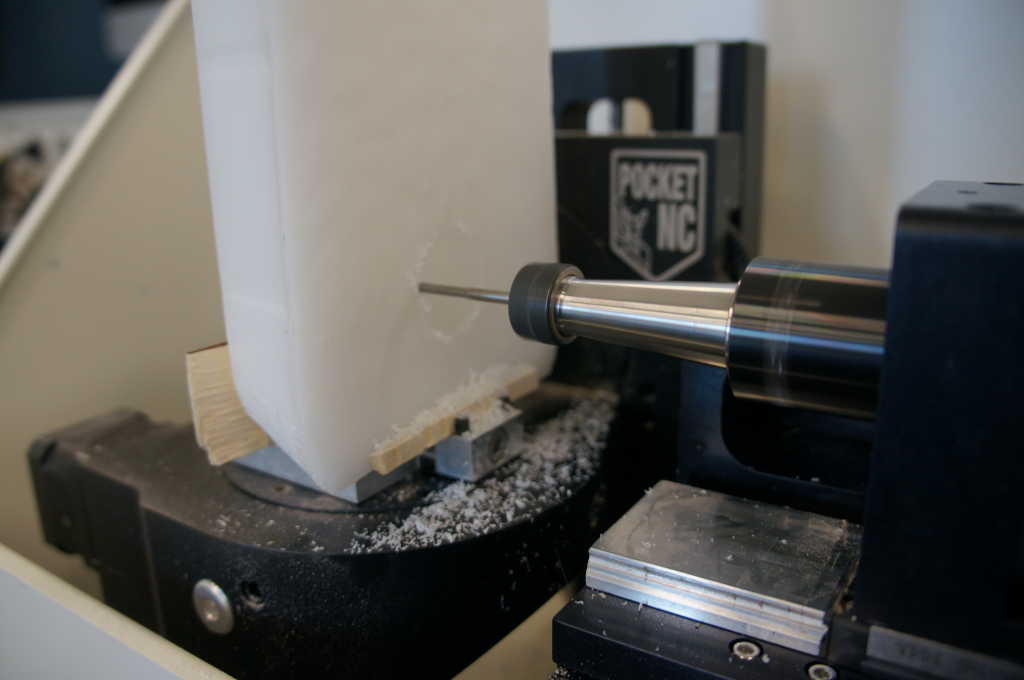
As above, I have done my first experiments with wood. That was good as I first had to learn how to use the machine and which settings are best for which surface. Enough wood rests in the right size we had in our box.
First I had to clamp the wood. But the wood was a bit too narrow to be clamped so I used a small wooden batten and then it worked fine.

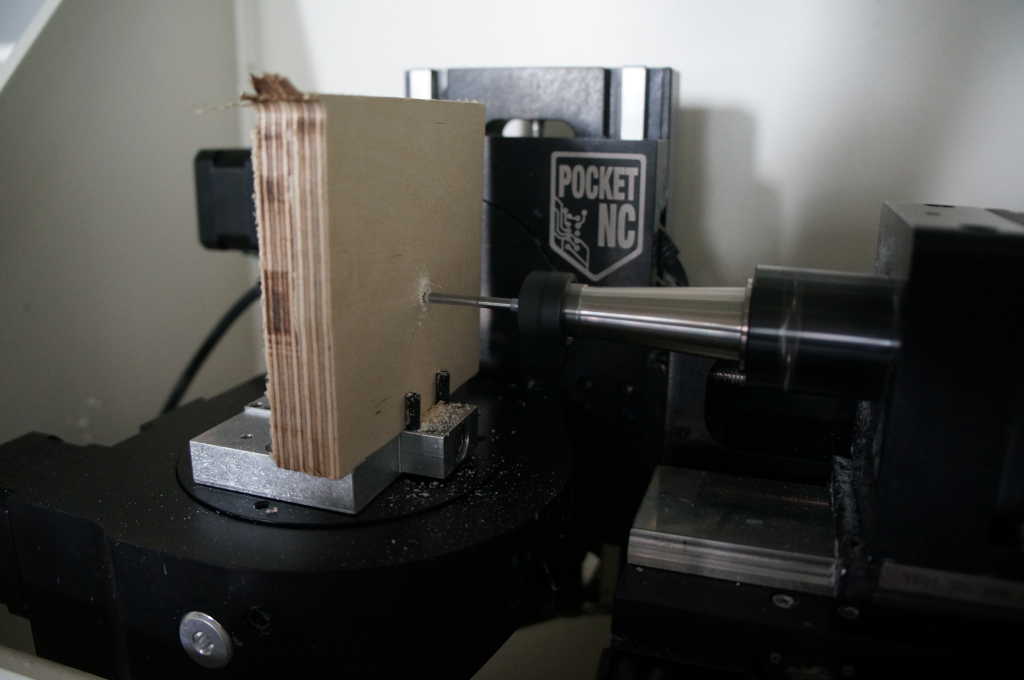
Here you can see the first cut of the bottom side.
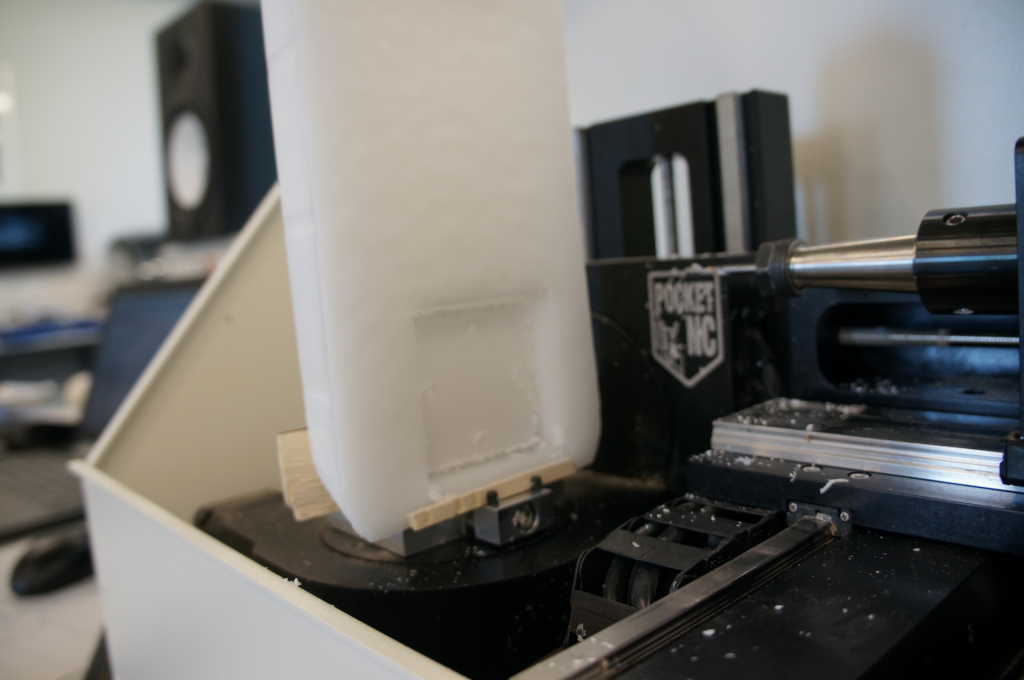
Here you can see the upper side of the upper part of the body after I first took a rough look at the material.
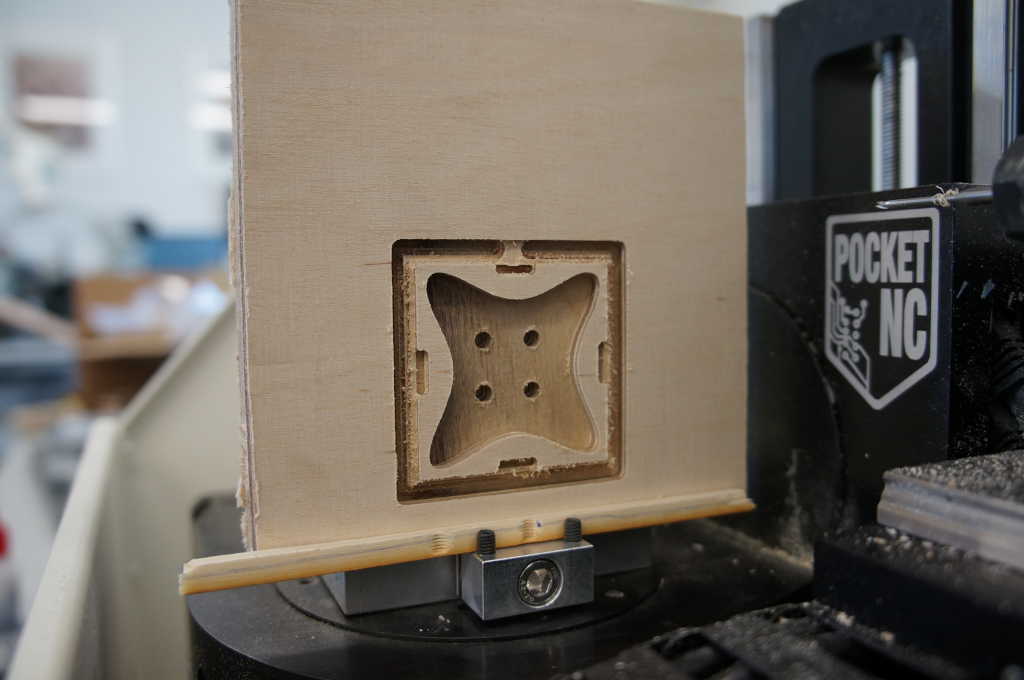
In the following, the milling machine went over the surface another time in spirals to re-mill it again exactly.
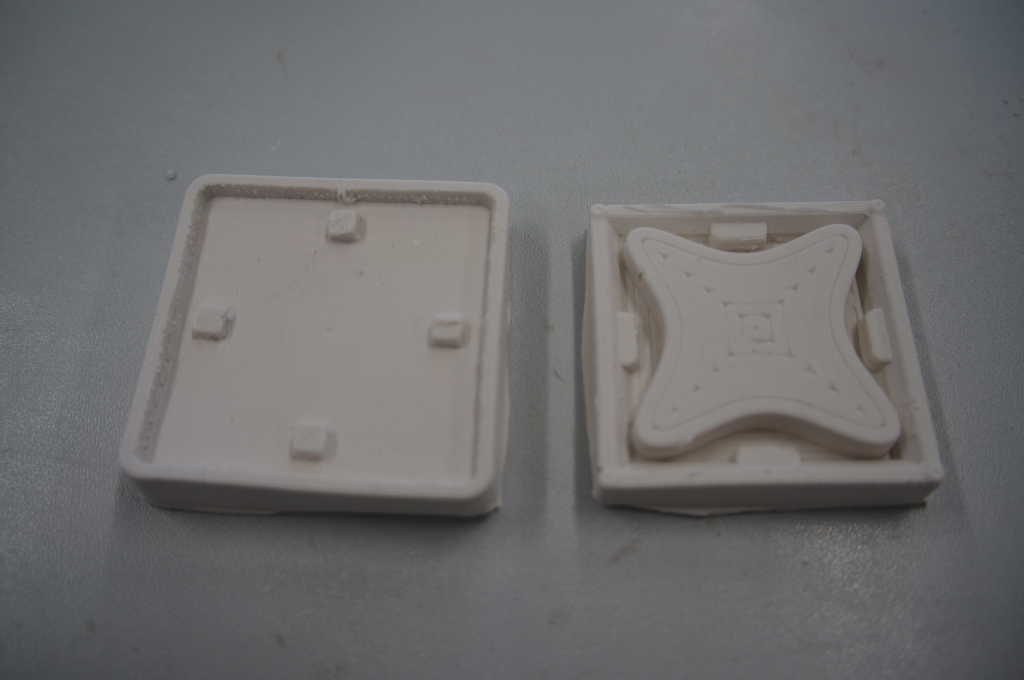
The wax is there.Before I milled the form I reworked it because the pins in the middle don't work
very well to bring the forms together so I made one of them bigger to put the other one in.
Hopefully I will get more precise results now and have no more wood spiliter in my silicone.
I ordered the casting wax from hear.
To clamp it I had to help myself with wood pieces again, the material was thick enough this time but the small screws below did not hold the wax.
The wax can be milled very well and unlike the others it does not fuse around the milling cutter.
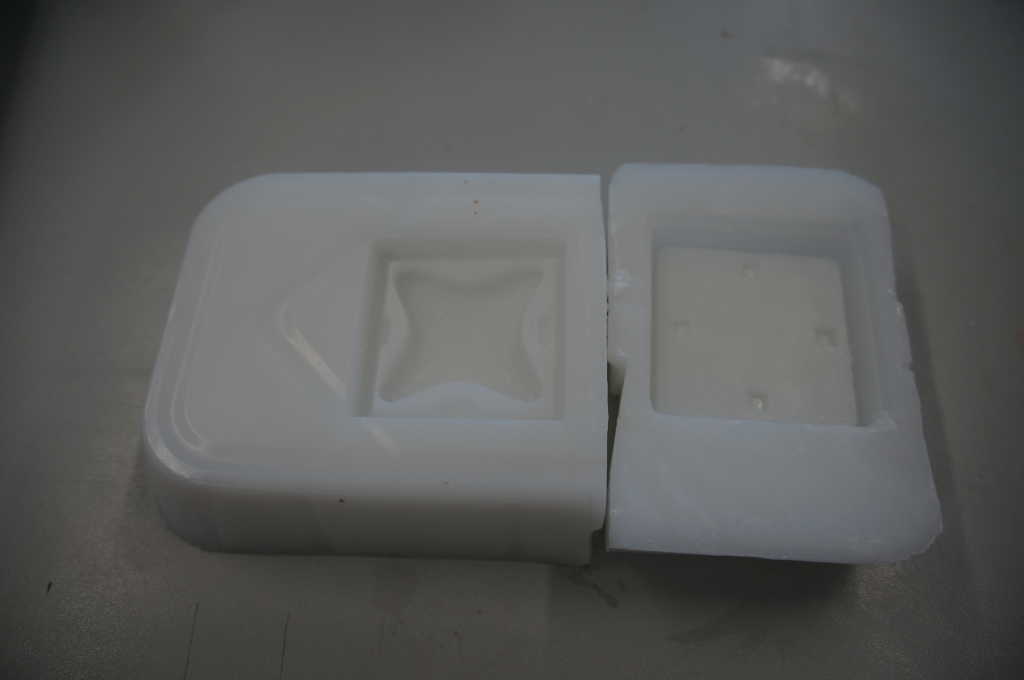
Now both moulds are ready.
Now we come to the second step of the Selikon form.
I have ordered 2 Verschiednen silicone crosslinkers.
One has a drying time of 2h the other one of 24.
The one that takes longer to cure is stronger and more resistant.
I ordered the Silikon and the rong wax from hear.
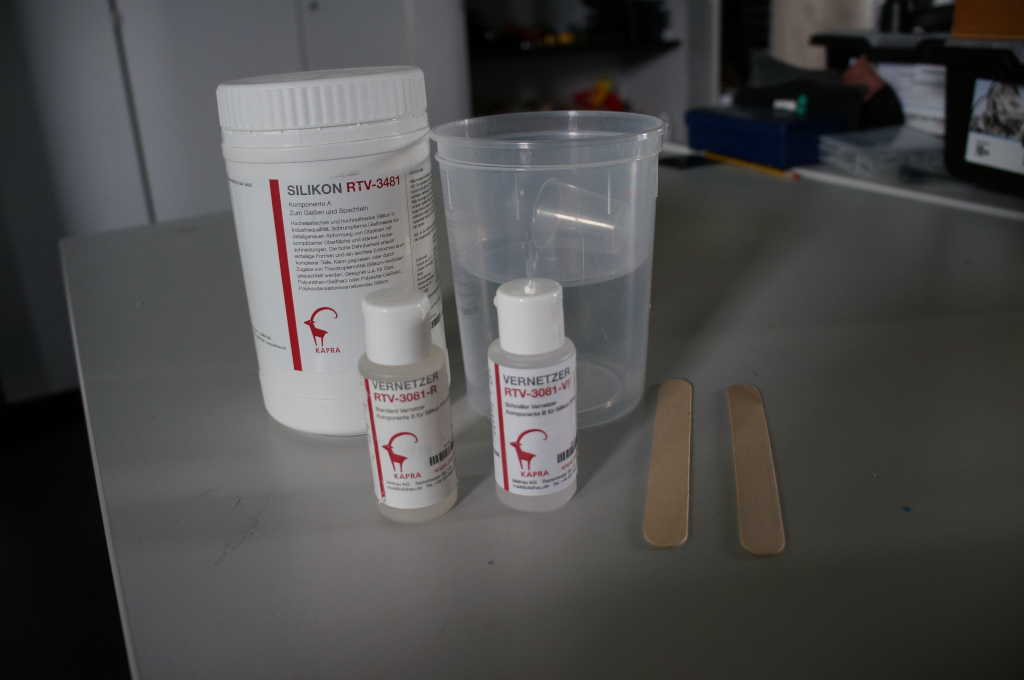
First of all I looked out my materials, the silicone and mixing equipment.
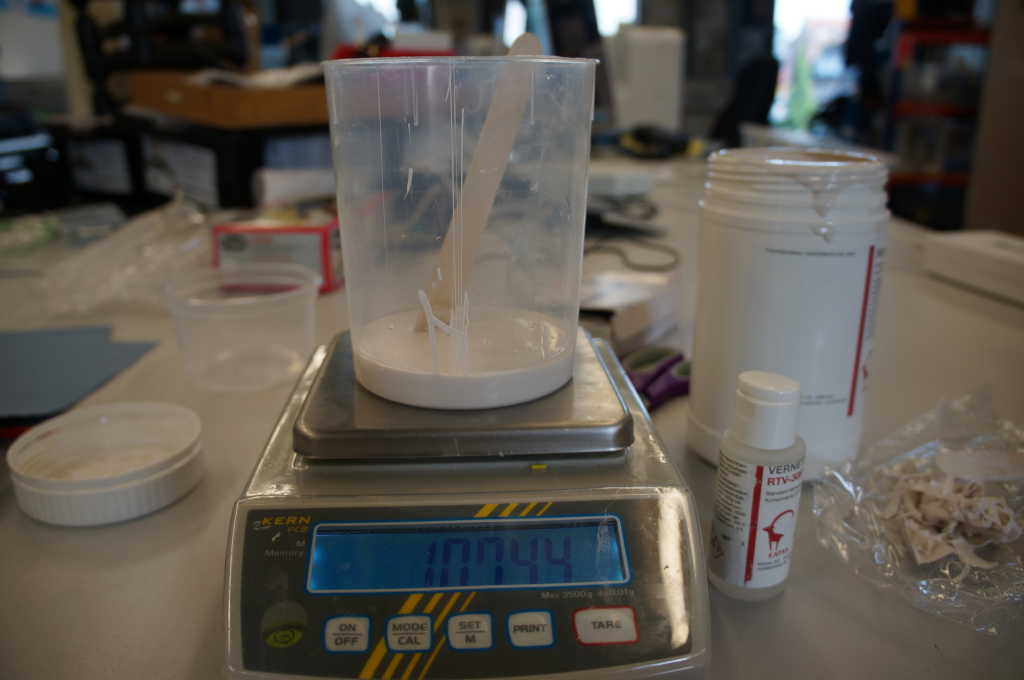
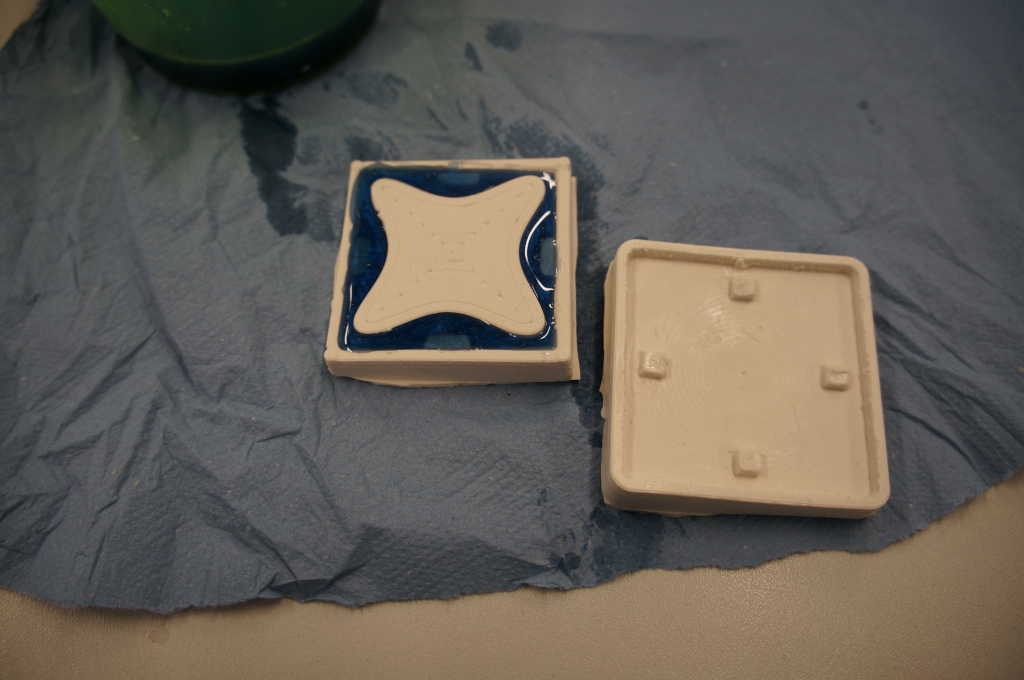
The silicone and hardener must be mixed in a 100:5 ratio. For this purpose I used a digital vage.
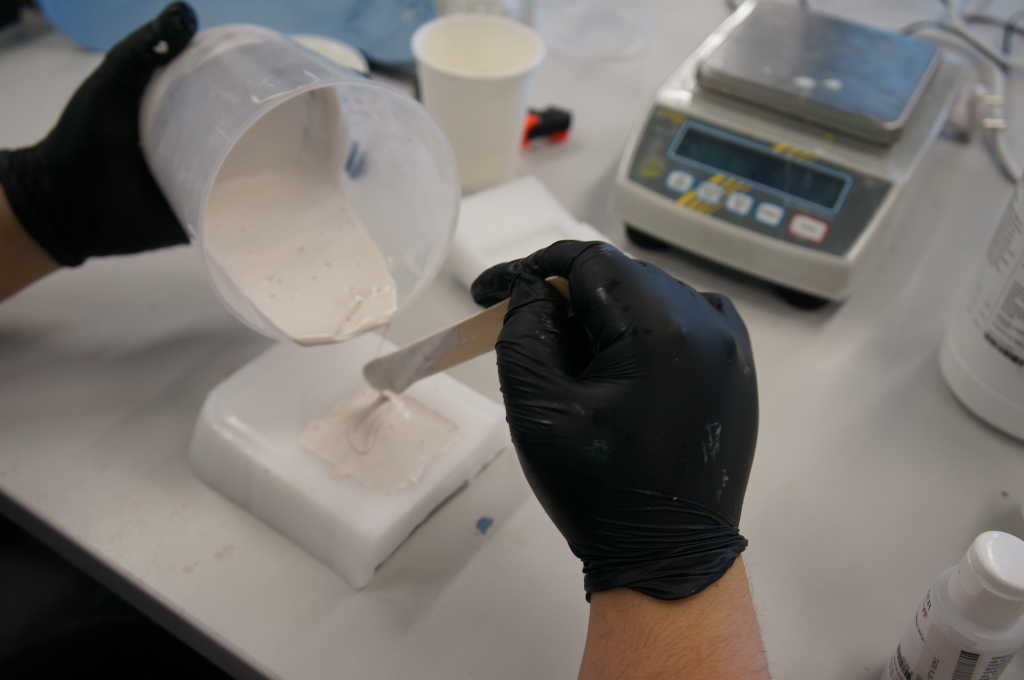
The two liquids must be stirred very carefully to trap as little air as possible. Then I have poured them into my wax moulds.
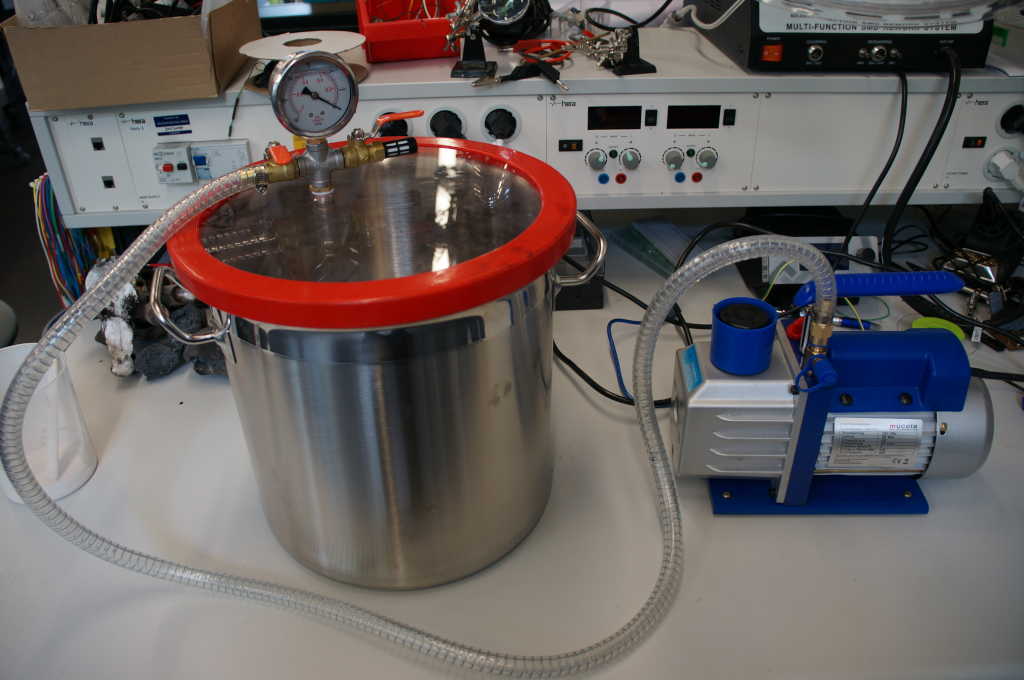
To remove the air from the silicone we use a rubber chamber and a vacuum pump.
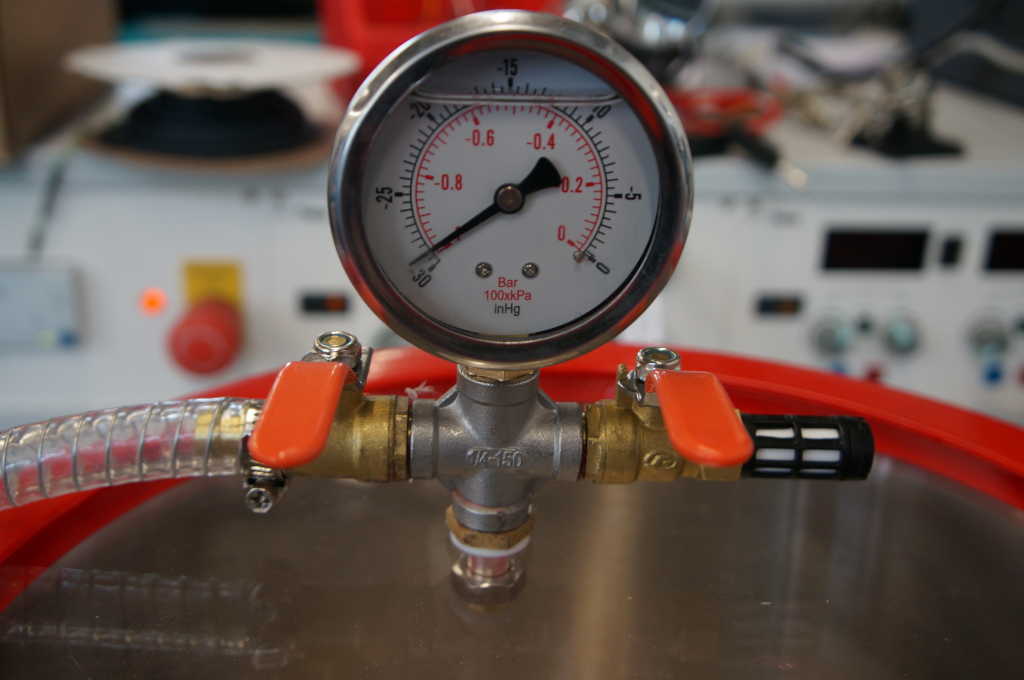
I let the Punmpe run until I reach 1 k Paskal and then close the valve and turn it off again.
If you watch the silicone you can see how the air bubbles rise. I leave the mould in there for 5 - 10 minutes.
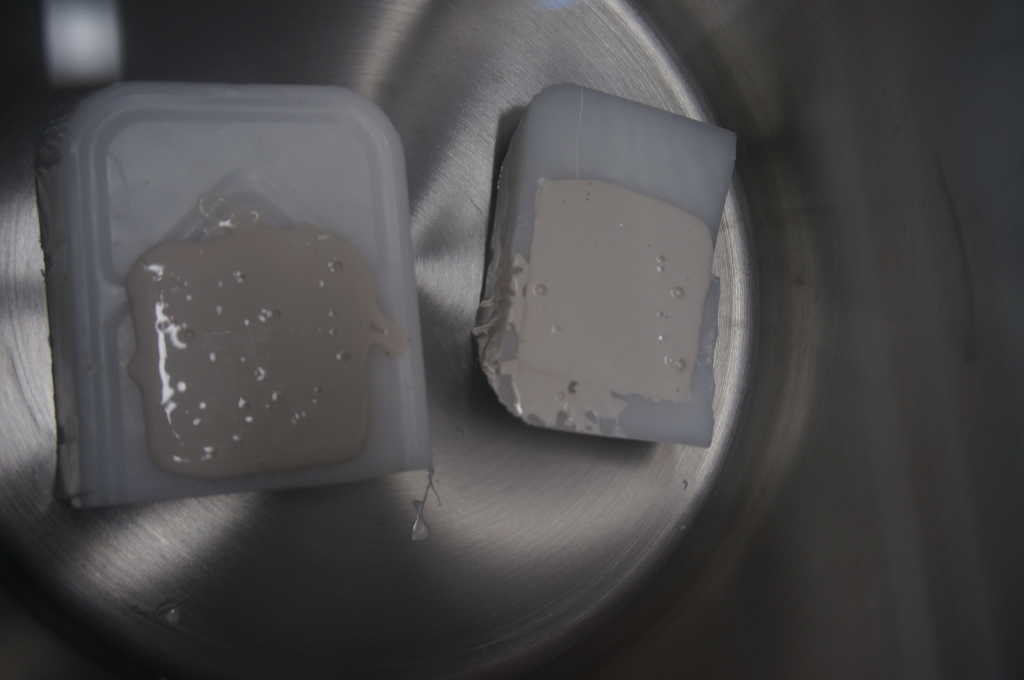
After 2 hours my form is firm and you can make more.
The last step is now with the silicone form my workpiece to cast. For this I use the casting ahrz of the company Toolcraft which I purchased hear.
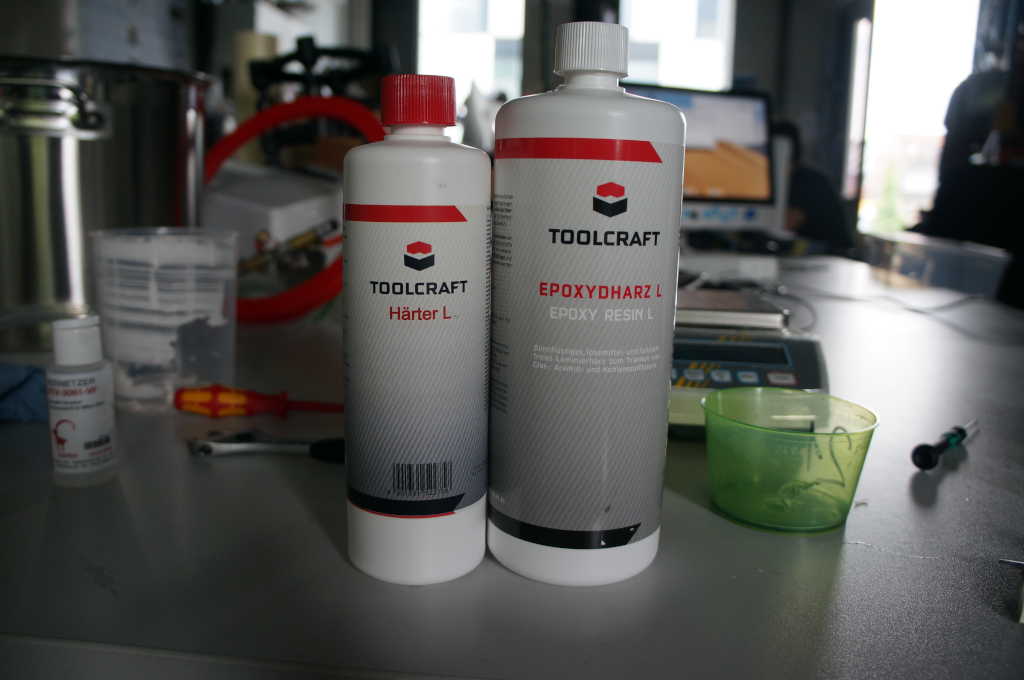
First I have to mix the resin, which I do in a ratio of 2:1. 2 parts resin and one part harder. To get a colored object later, I mixed in blue color powder.
Then I cast one side of my mould with resin and put the 2 halves over it.
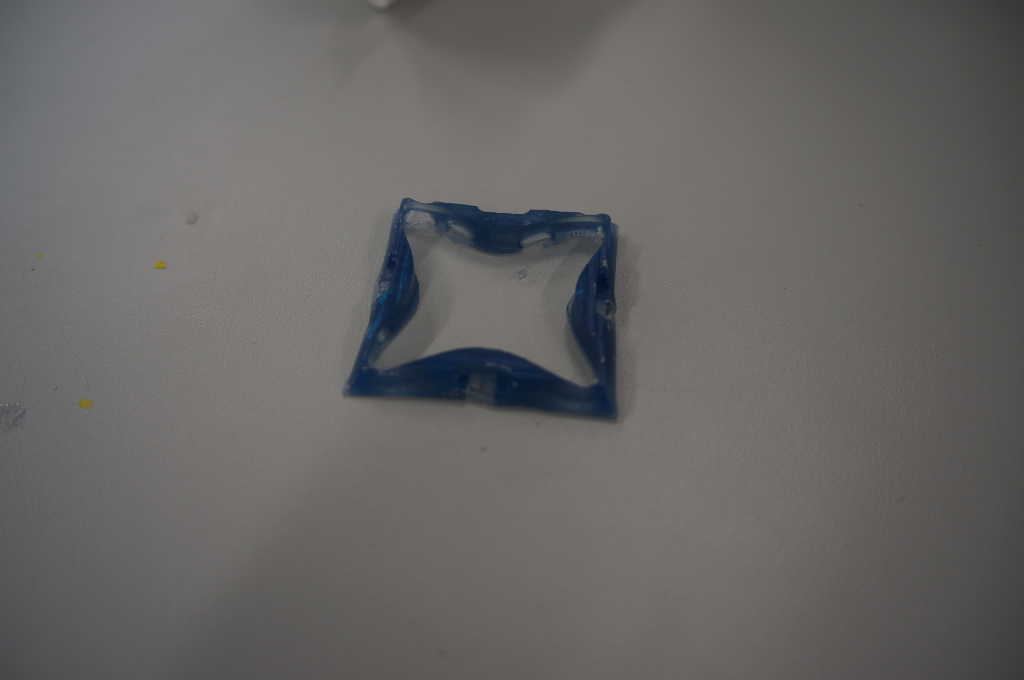
Then I let it harden. The next day I carefully took the shape apart, I still had a couple of bubbles in the object but on the whole it turned out well.
Since half a year we have an open fablab with which you can melt aluminium. I wanted to try it out imma but unfortunately I didn't have the time. The theme of this week gives me the chance to try it out. I haven't really thought about what I want to do yet, so I'll only do some demonstration pieces to understand the process. The process is a little bit different than the process I planned for this week so I just added it.

This is our oven, it is operated by prophecy.

We have already filled the Tigel with aluminium.
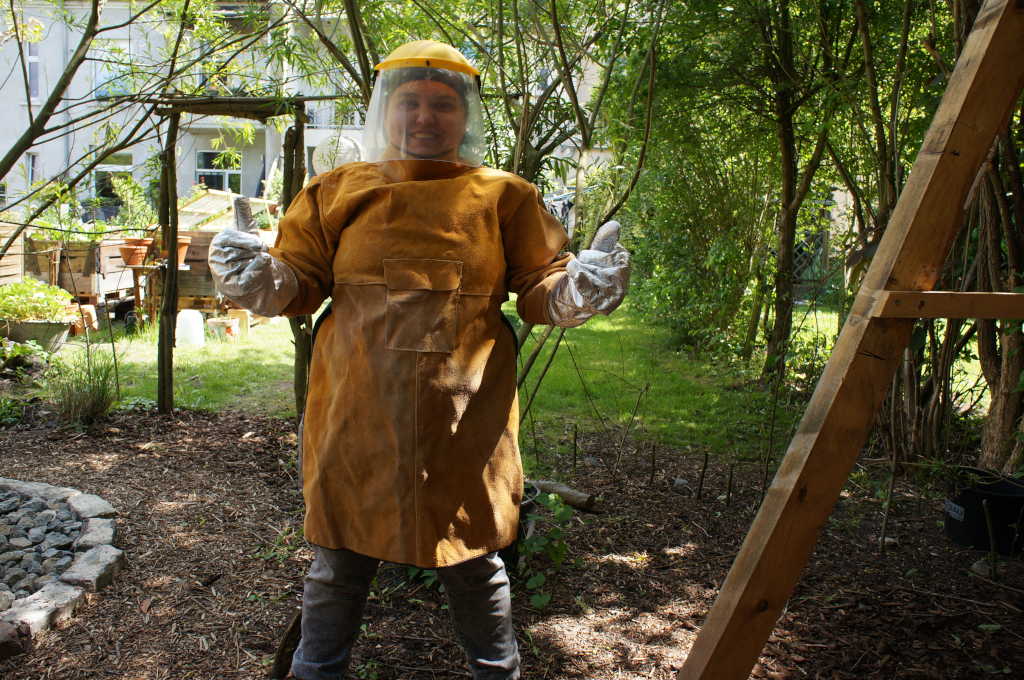
Of course the protective clothing is a must have, because the oven has to be very hot for the aluminuim about 650°C. A face shield, a safety coat, safety gloves and safety shoes.
Now of course the mould must be prepared.
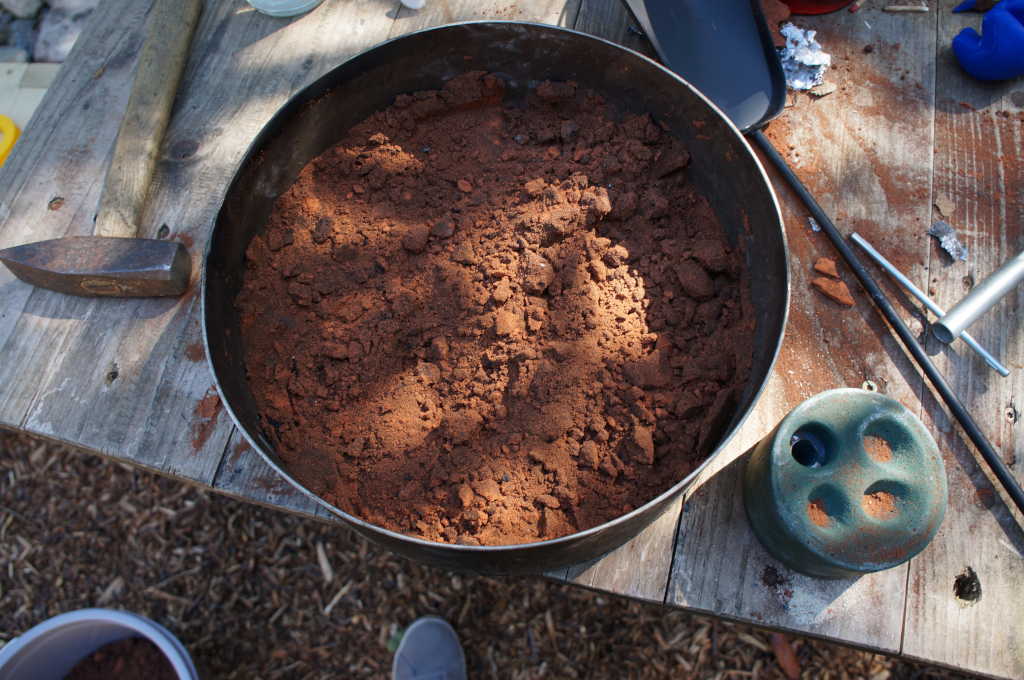
To create a mould we use mould sand to cover our 3D printed object.

The sand must be tamped as hard as possible so that the aluminium can only flow exactly where our shape is.
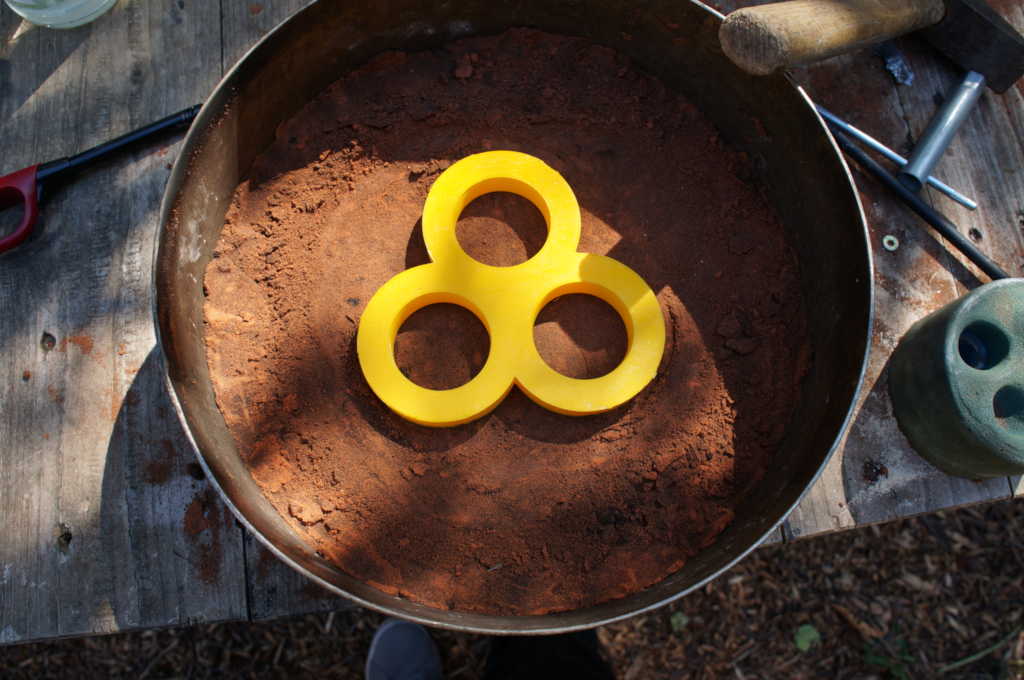
Now we put our 3D print on the underlaid sand. It is important to choose a container with a melting point above that of the aluminium, otherwise it will melt.
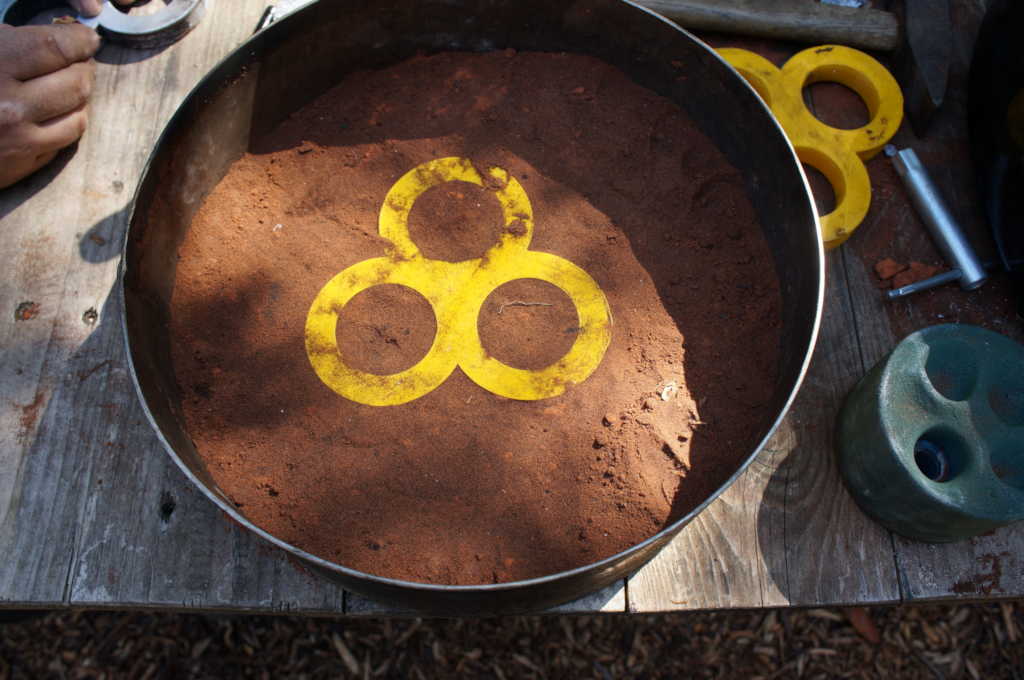
Around which before around and also in the inside parts sand comes this also again is stamped down.
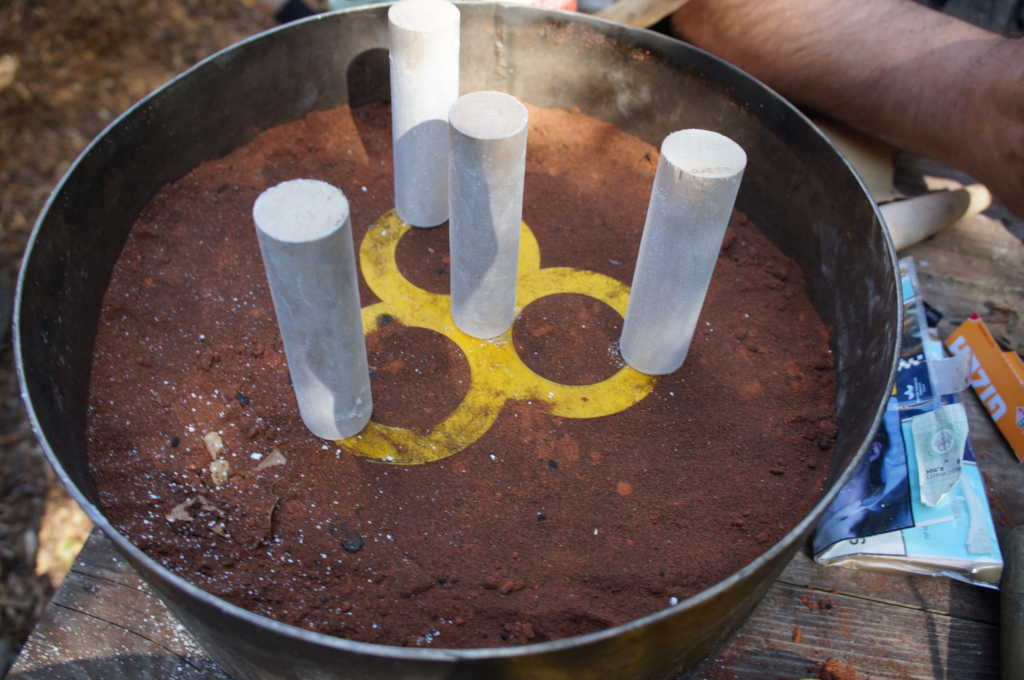
Now I have placed three wooden blocks on my object which become the casting channel and the air channels through which the air can escape. These can also be disintegrated directly to the moulds.
These are also enclosed again with sand and stamped firmly.
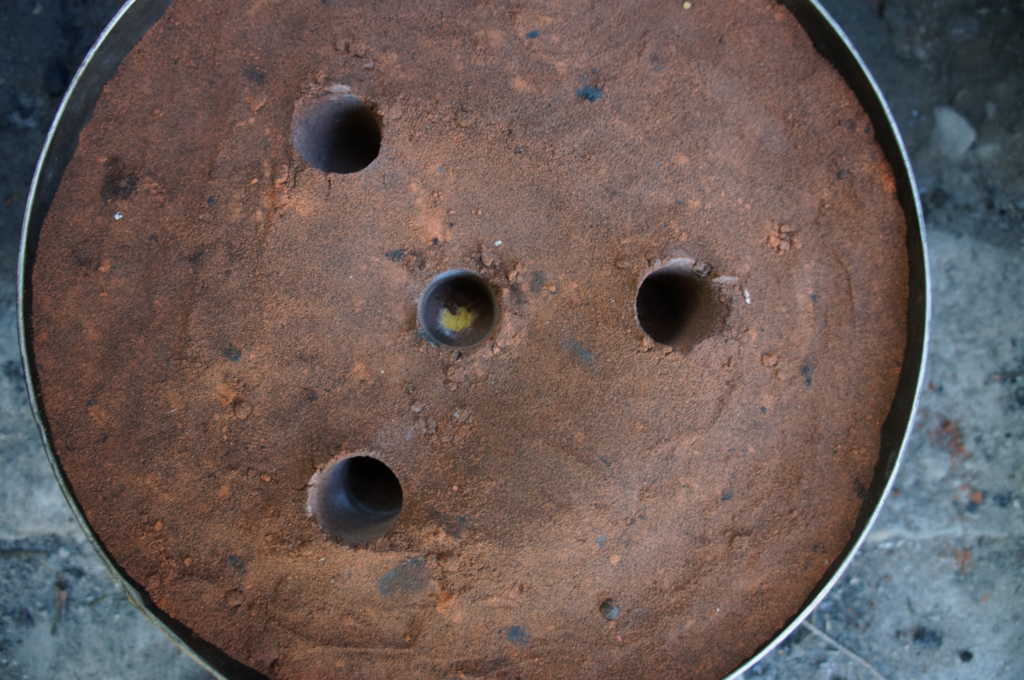
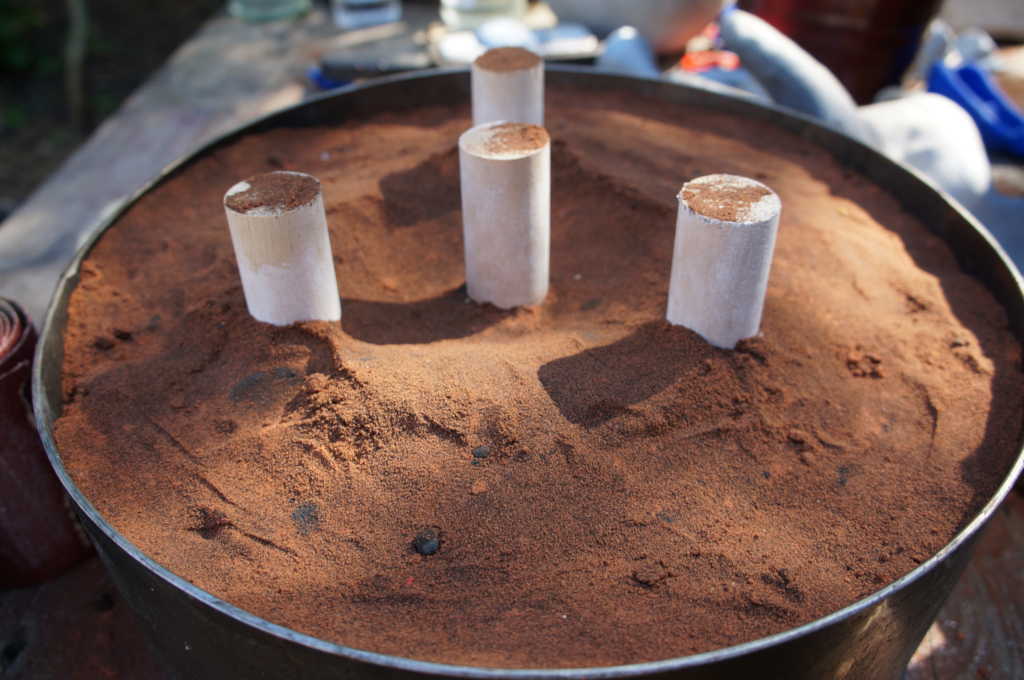
Now that the container is in the right place we remove the pieces of wood.
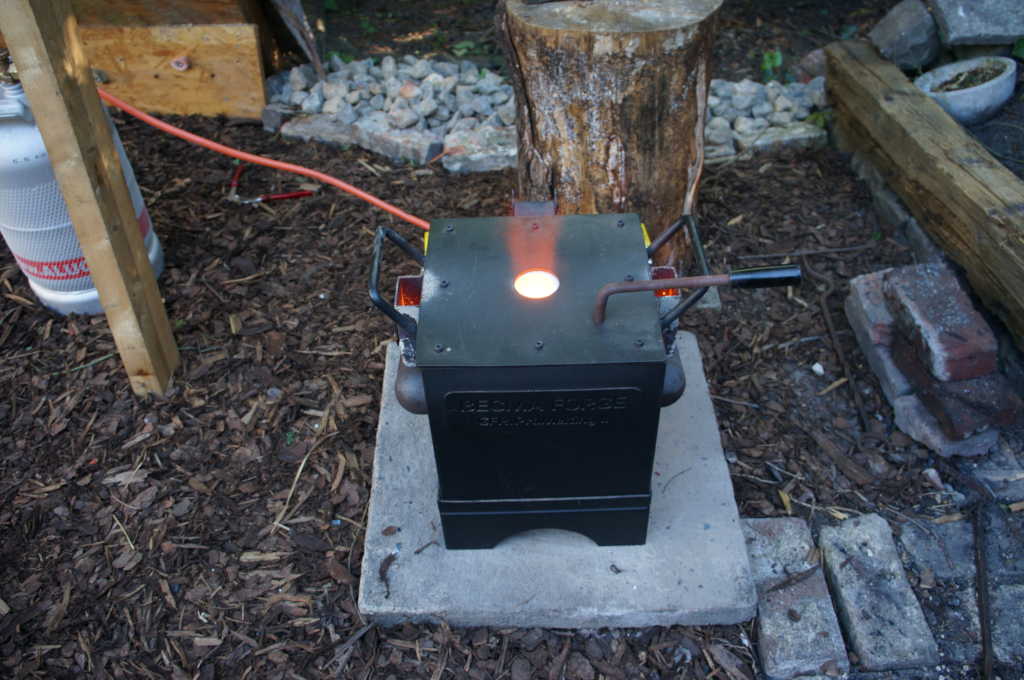
When lighting the stove it is important that you first check that everything is tight and that you do not hear any gas leakage. Then you can light one side with a lighter, the other side will ignite automatically as soon as you turn on the gas.
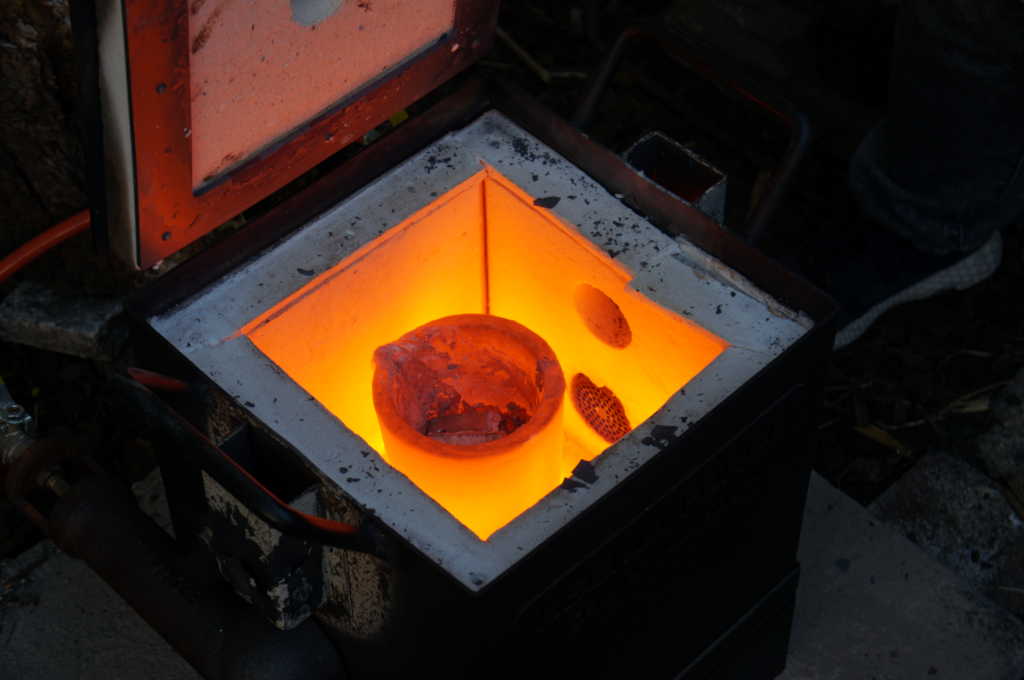
As soon as the aluminium has melted you can carefully take it out of the oven with the right tool.
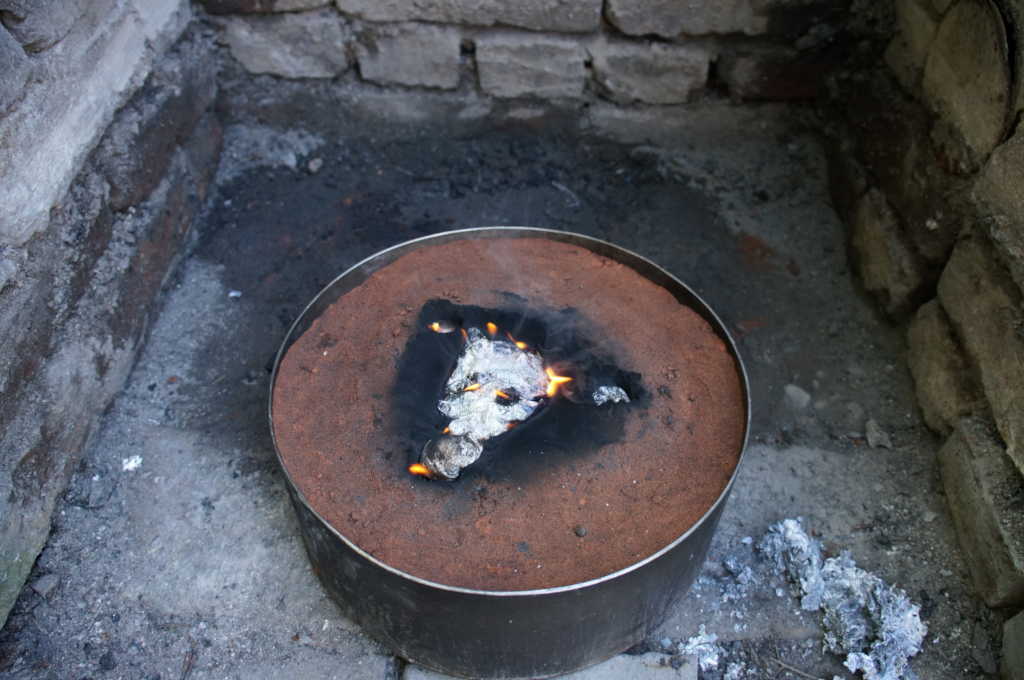
Then you can very carefully pour the aluminium into the casting channel. This can cause small fires as the material that is used to make the mould burns.
Now it is time to wait. It takes a moment for the aluminum to set. Then you can carefully take the object out of the sand and let it cool down further.
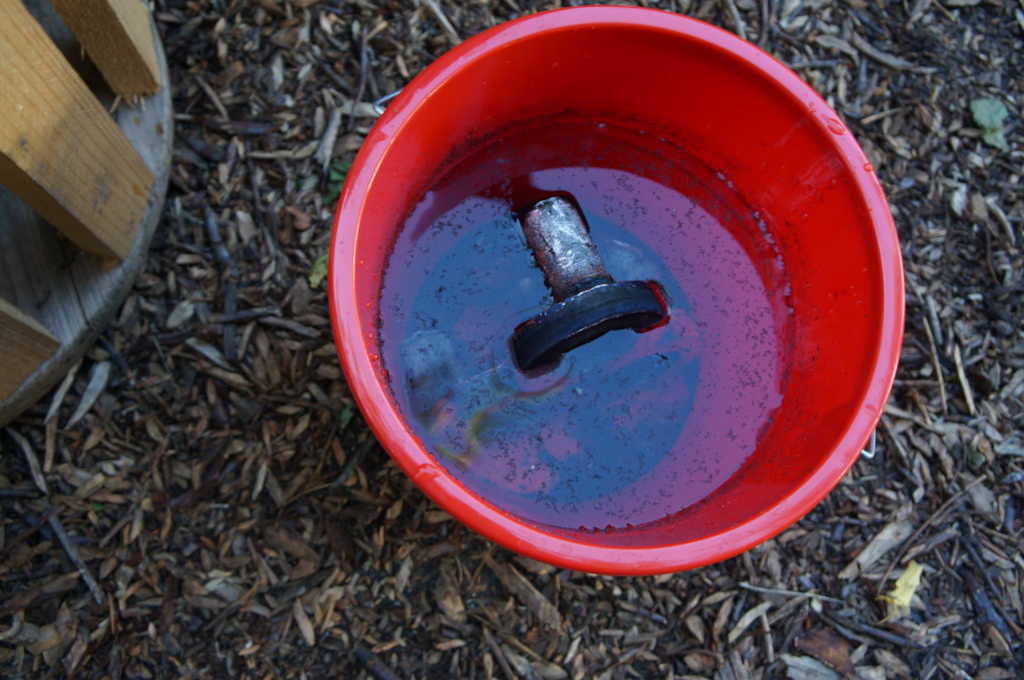
To speed up the cooling process you can put the already slightly cooled down aluminium object in a small amount of water.
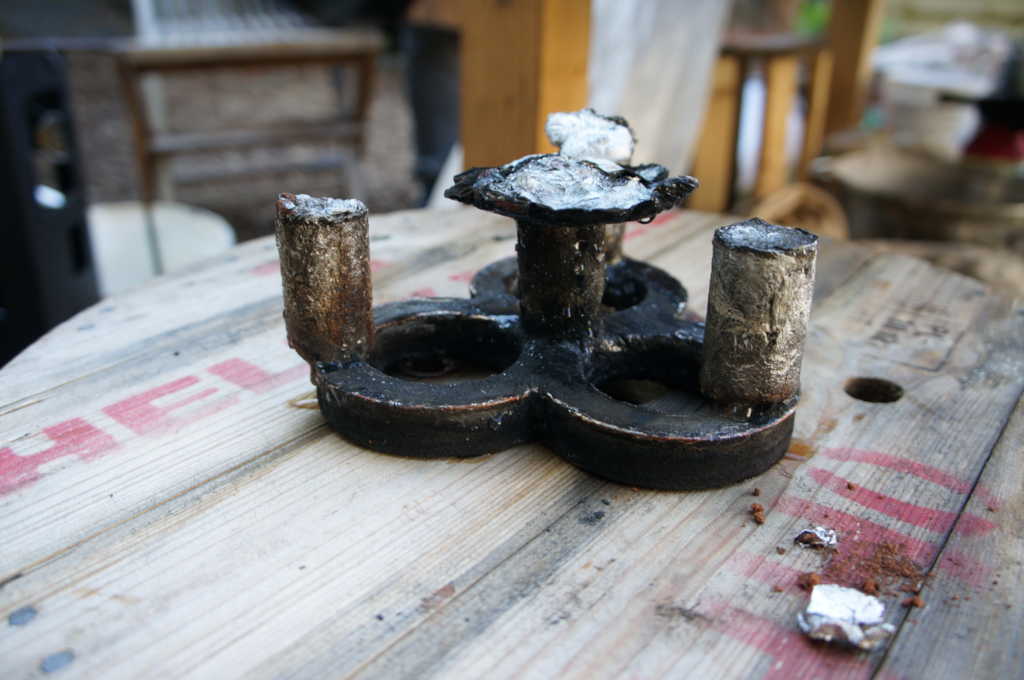
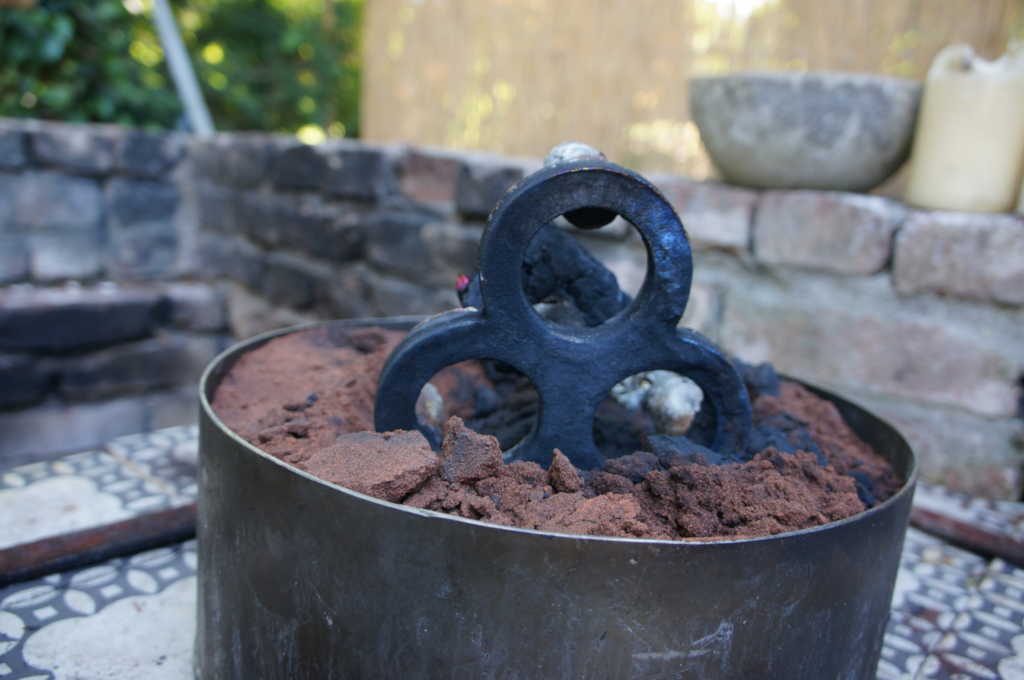
The first cast aluminium is finished.
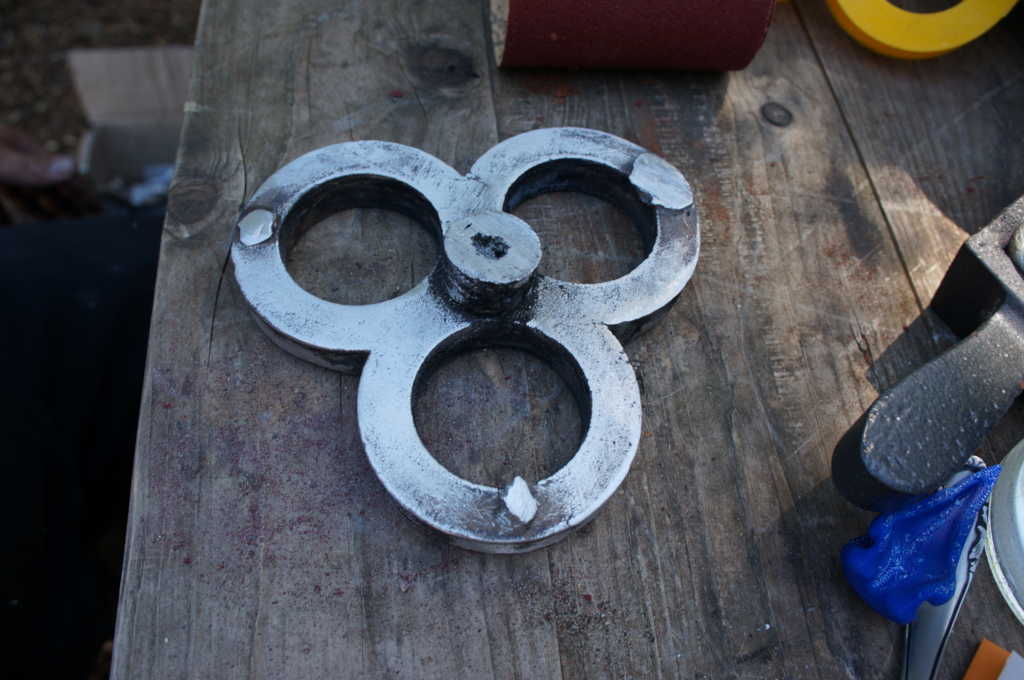
Now comes the post-processing. First of all we have to remove the air and water channels and grind the surface.
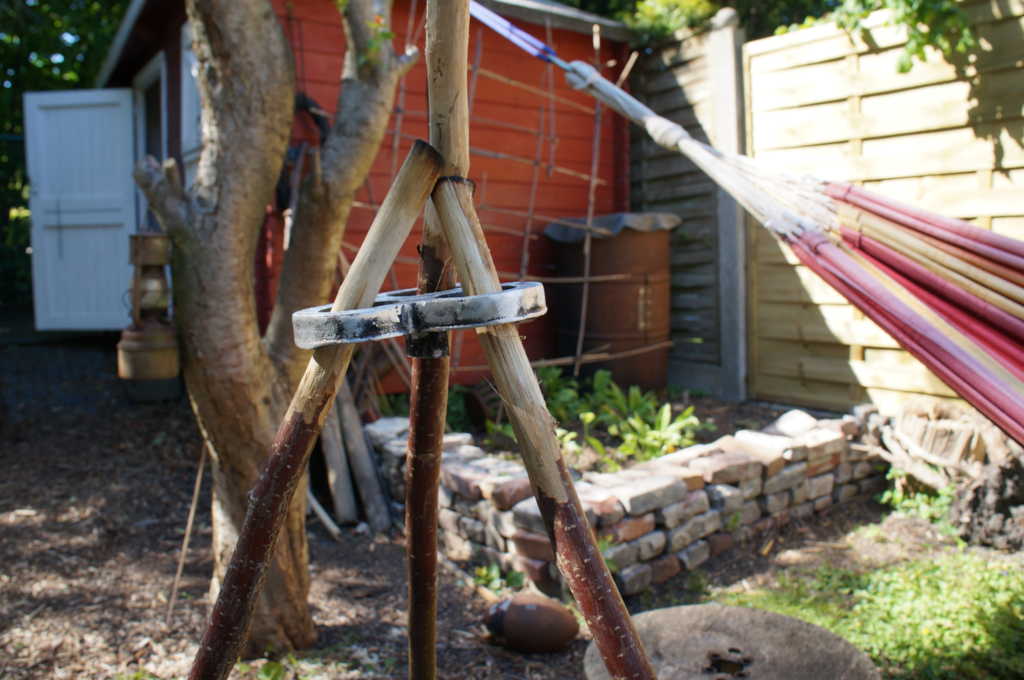
And ready is the 3-legged holder to quickly build a swivel grill on the way.