characterize the design rules for your PCB production process

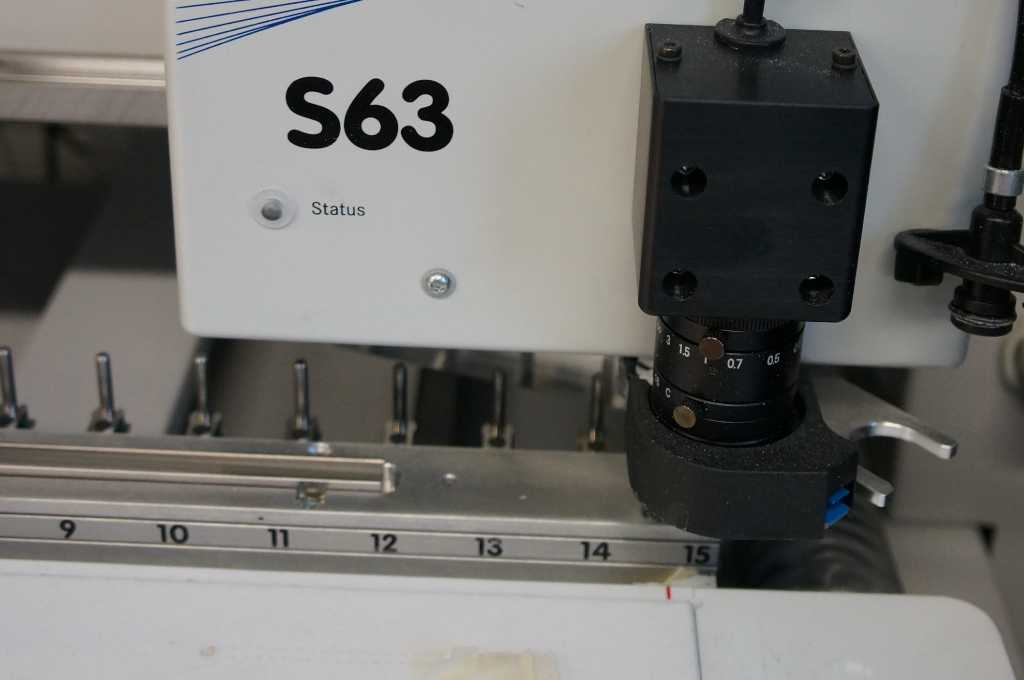
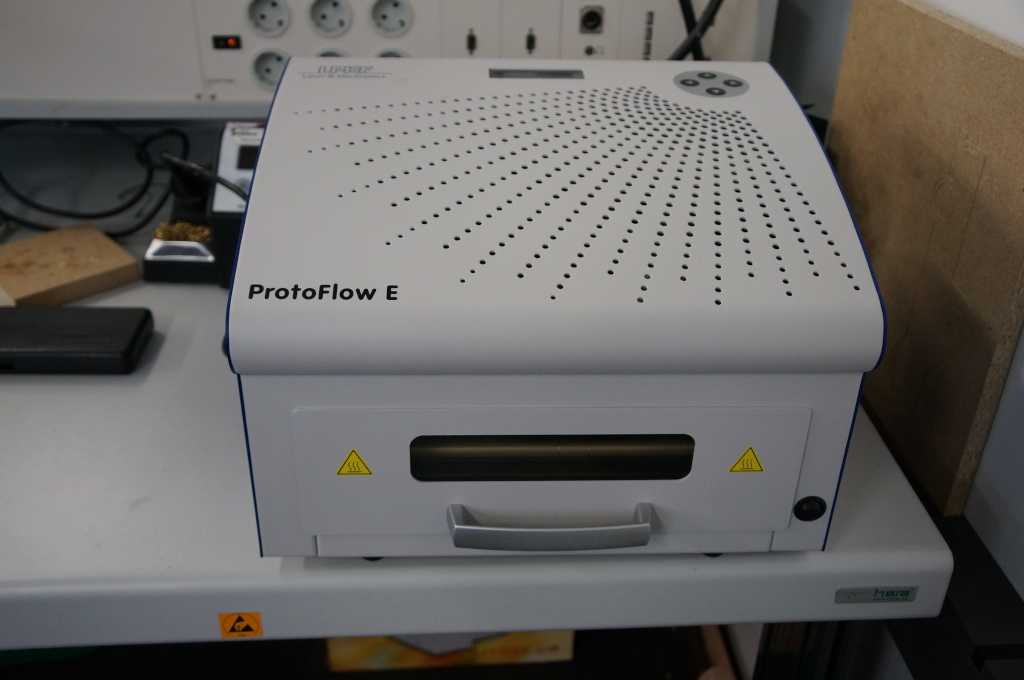
The machine enables blanks to be milled. It is possible to mill structures that are 100 µm fine. The machine is able to adjust the milling width automatically. It has an optical edge recognition (camera) to create 2-sided boards.
| workspace | 229 mm x 305 mm x 35/22 mm |
|---|---|
| automated tools | 15 |
| milling and drilling spindle | 60.000 rpm |
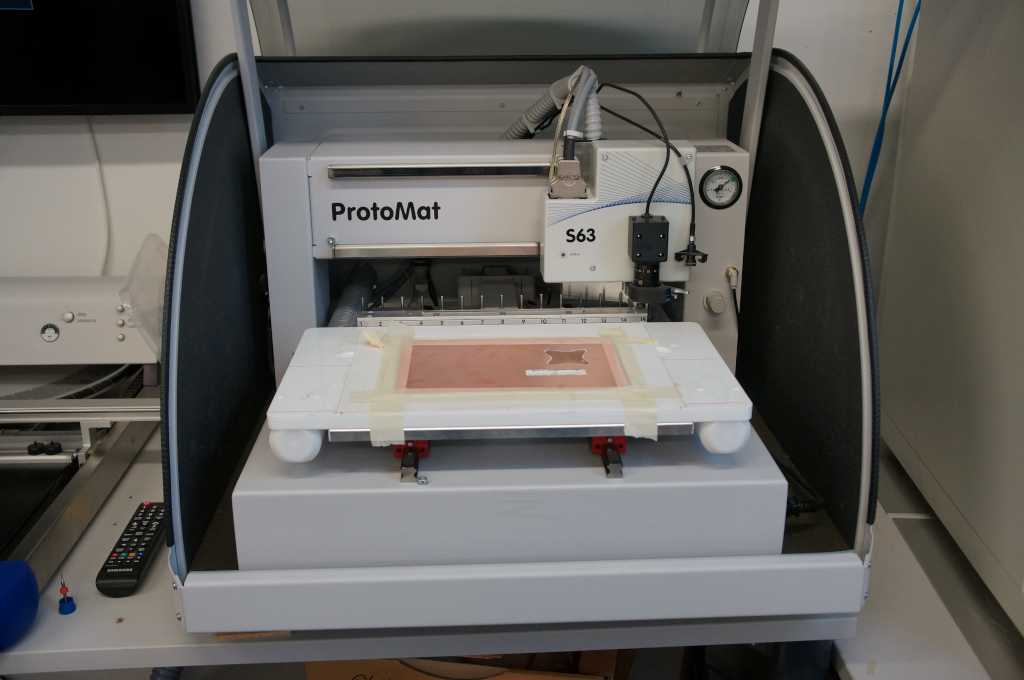
We have a LPKF in our fablab for milling circuit boards. It can change its milling heads automatically.
Once you have set the milling depth, it remembers this for the individual milling cutters.
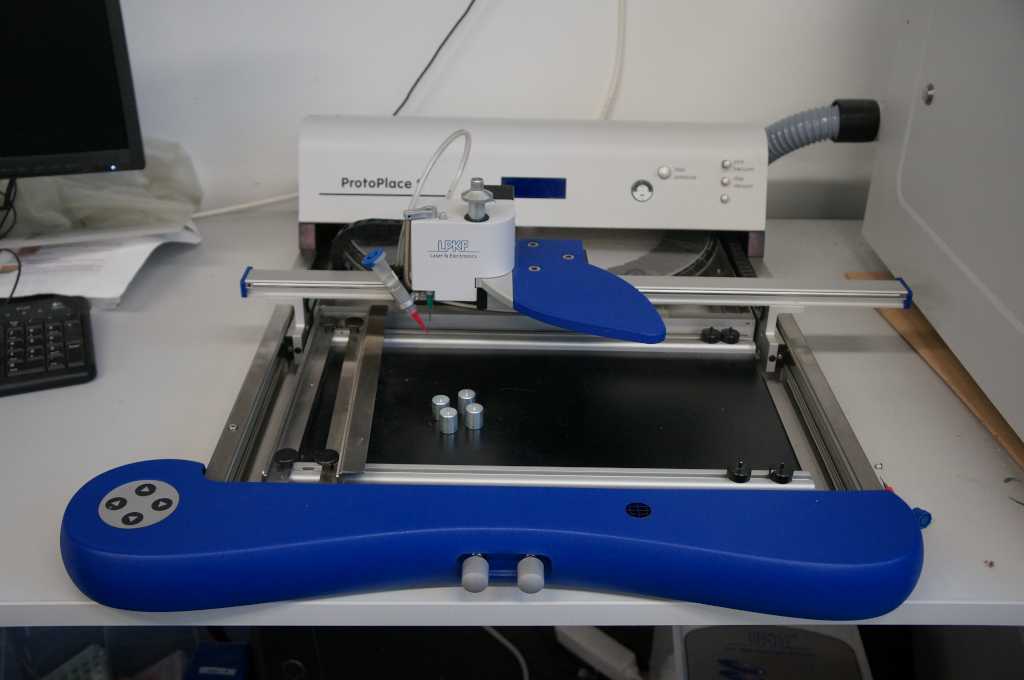
With the placer I can first apply soldering paste to place the electronics afterwards.
In the last step the assembled board is put into the soldering oven.
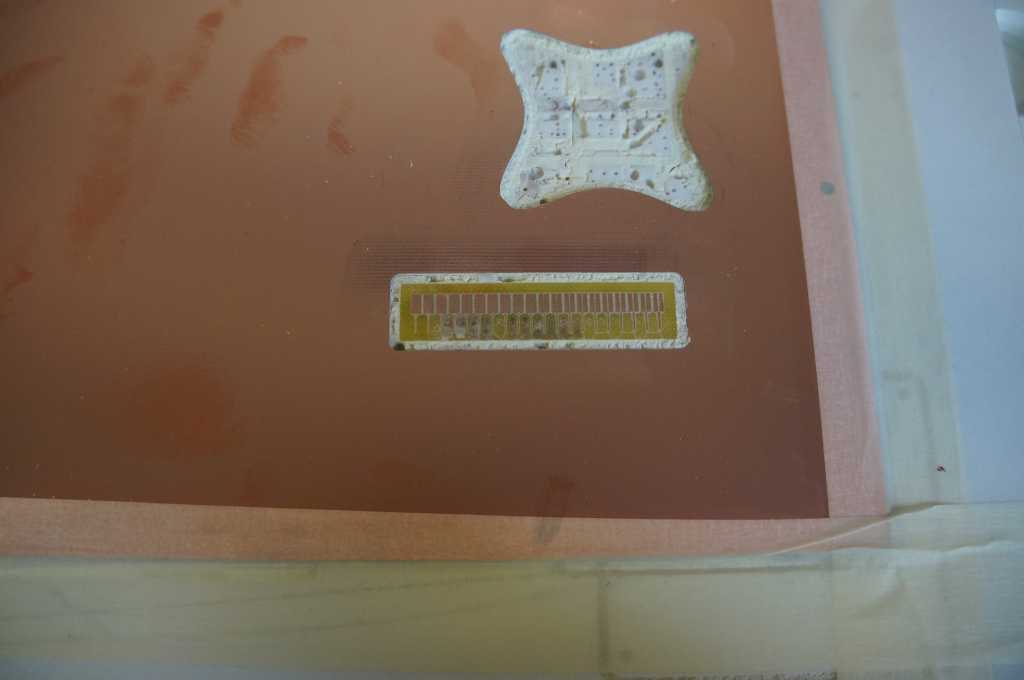
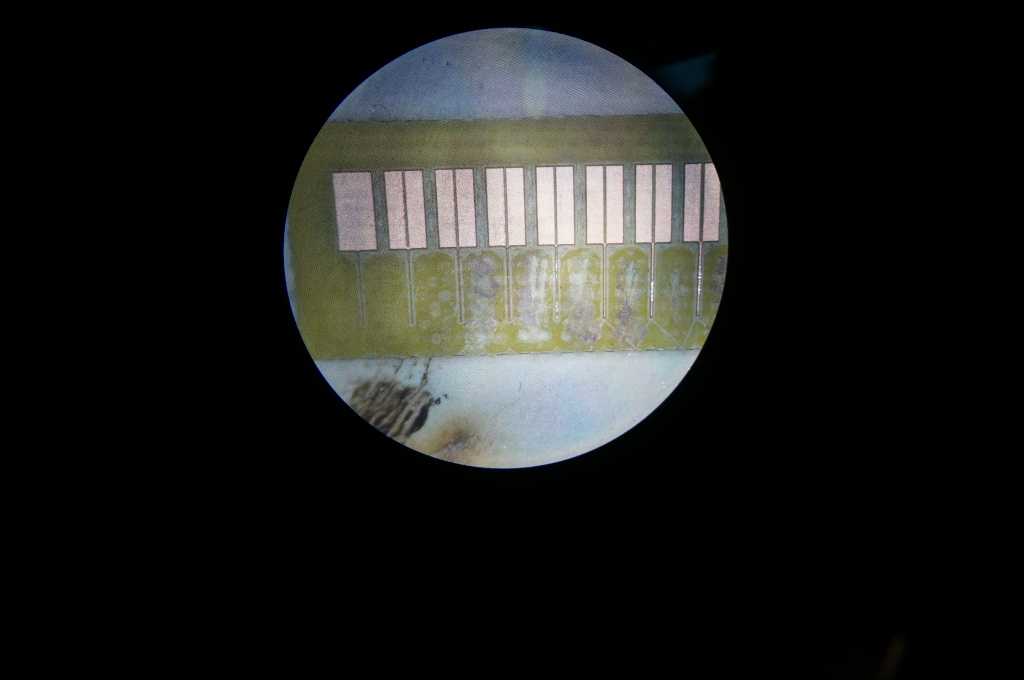
I tested the design rules for our milling machine.
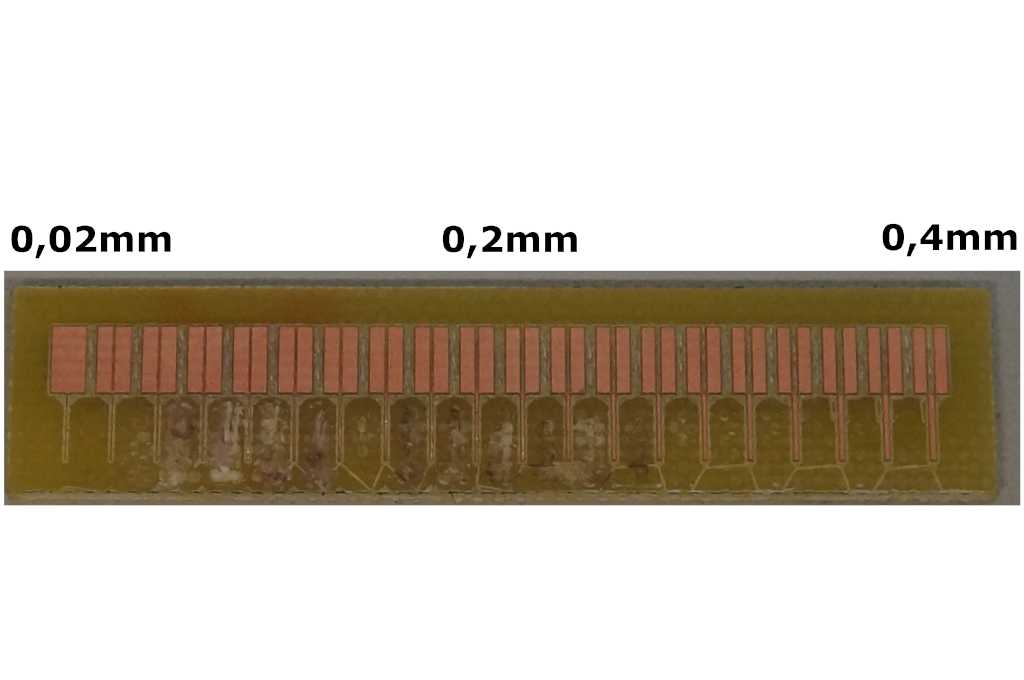
For this I have created a test piece in mm, you can find it here: Download
It starts at a thickness of 0.02 mm and goes in 0.02 mm steps up to 0.4 mm.
Material was milled, the remaining 0.02 mm thick part was neither lined nor does it
conduct.
The other fine lines are all conductive, which means that I can theoretically produce conductors up to a
thickness of 0.04 mm with this milling machine.
But this is very fine and can be destroyed quickly during soldering so I will work with a thickness
between 0.1 - 0.3 mm.
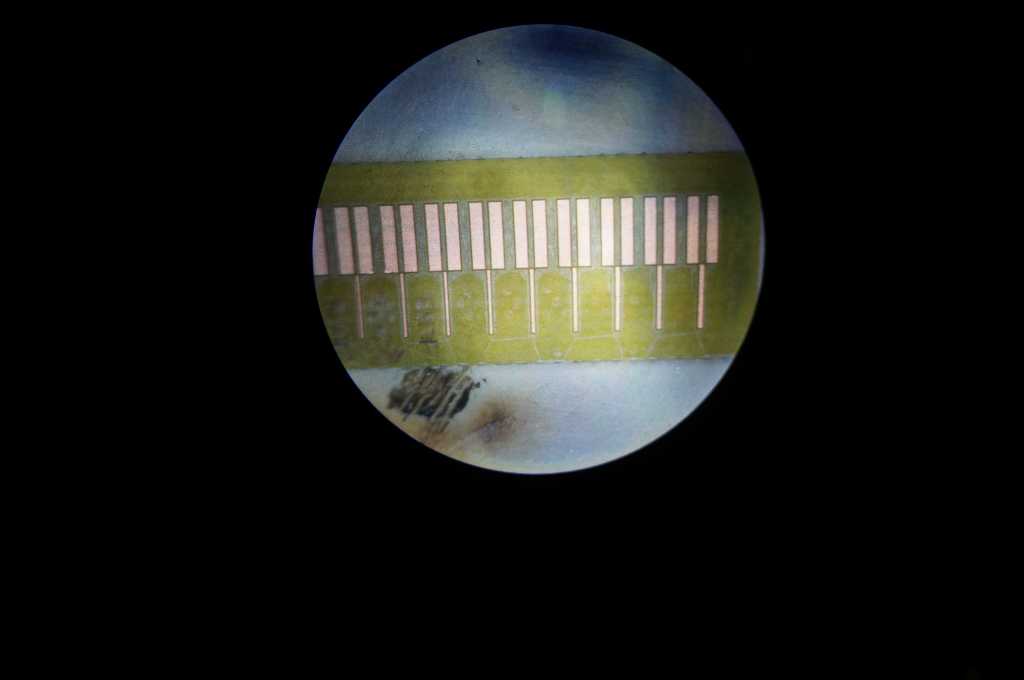
Also with the upper separation between the two sides I get acceptable results from
0.02mm which is our thinnest cutter. For the separation between the tracks I will choose a thickness of
0.2 mm or more, as this corresponds to the next larger cutter, which is much more stable.
For the boards I want to solder later I will make the distance even bigger to make it easier for me to
solder by hand.
With this knowledge I can now create my first circuit board.
make an in-circuit programmer by milling and stuffing the PCB, test it, then optionally try other PCB processes
I am testing the programmer from
Brain
which is a variation on the one from
Zeracs.
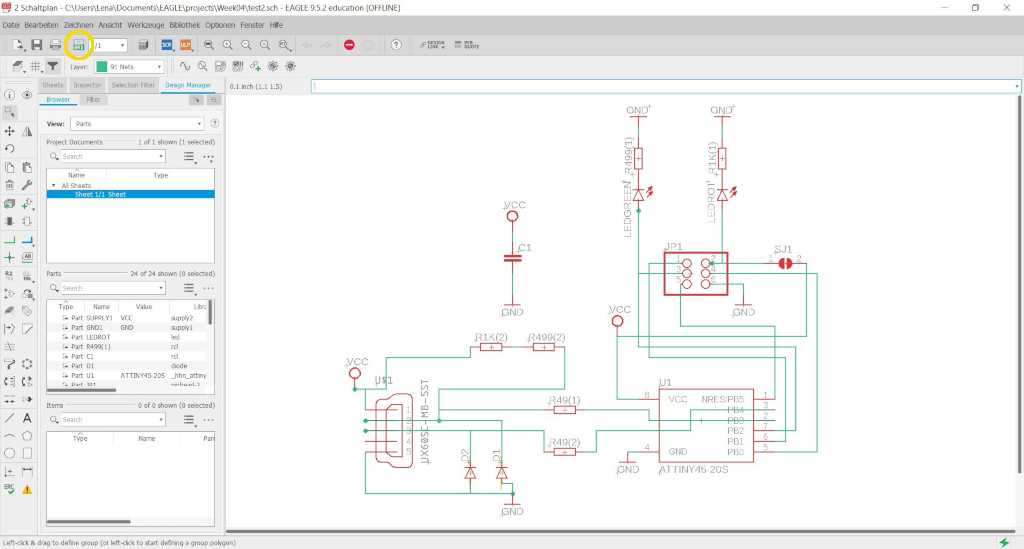
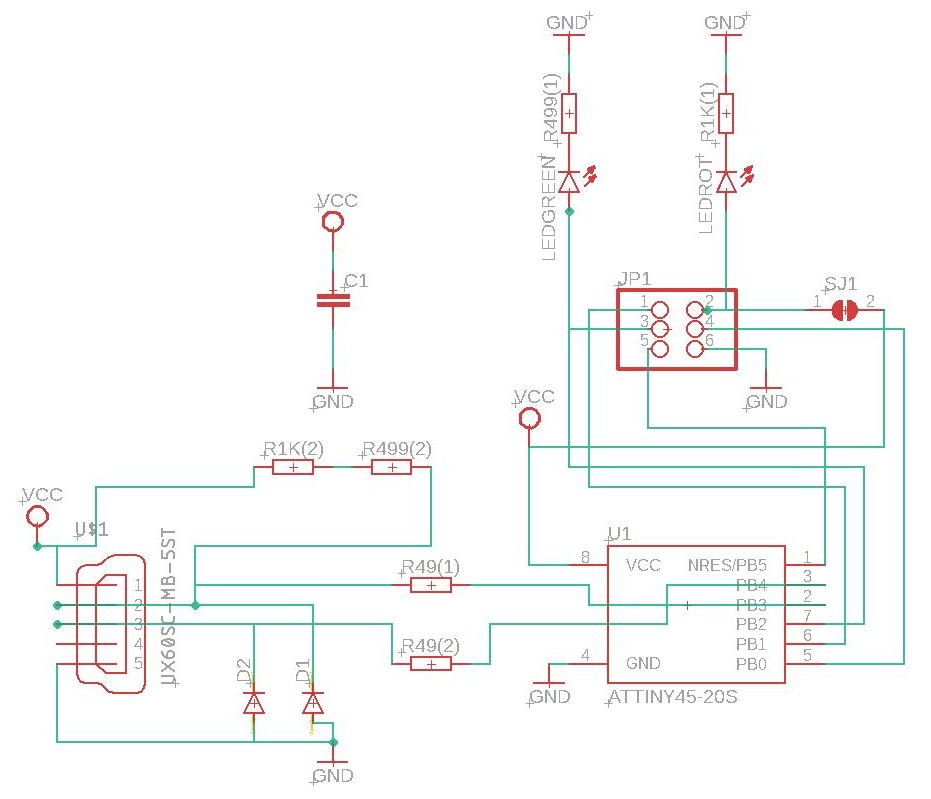
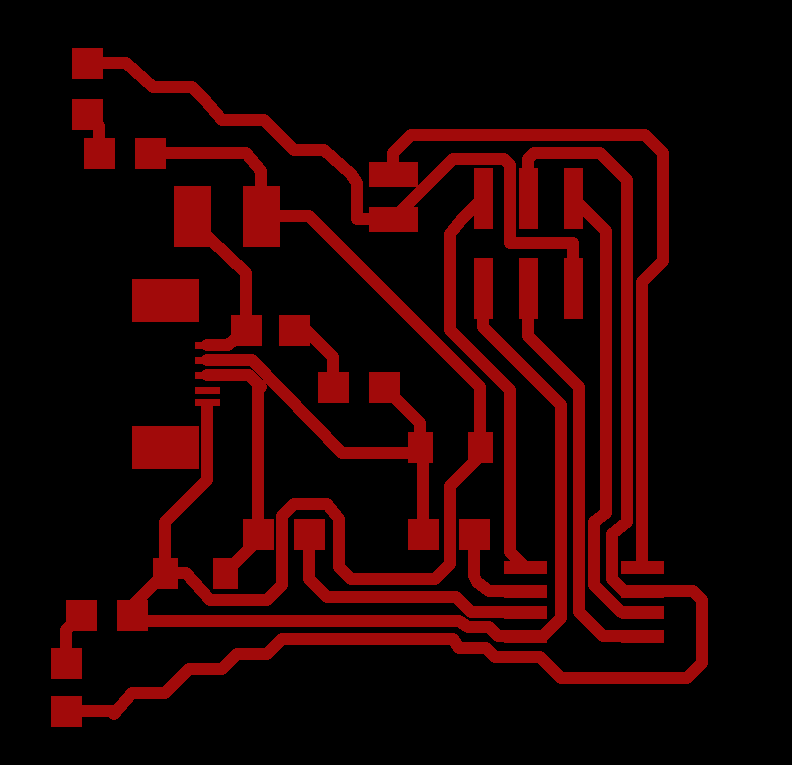
I used the schematic but designed my own circuit board.
| Parts | Type | Value | In Eagle |
|---|---|---|---|
| ATtiny45 | SOIC8_EIAJ_208MIL | - | ATTINY45-20S |
| Mini-USB 2.0 Typ B | UX60SC | - | UX60SC-MB-5ST |
| Capacitor | C1812 | 100nF | C1 |
| Resistor | 1206 | 49Ω | R49(1), R49(2) |
| Resistor | 1206 | 499Ω | R499(1), R499(2) |
| Resistor | 1206 | 1KΩ | R1k(1), R1k(2) |
| LED red | 1206 | - | LEDRAD |
| LED green | 1206 | - | LEDGREEN |
| Pin Header 2x3 | 2X03SMD | - | JP1 |
| Diode | MINIMELF | - | D1, D2 |
First I create a new circuit.
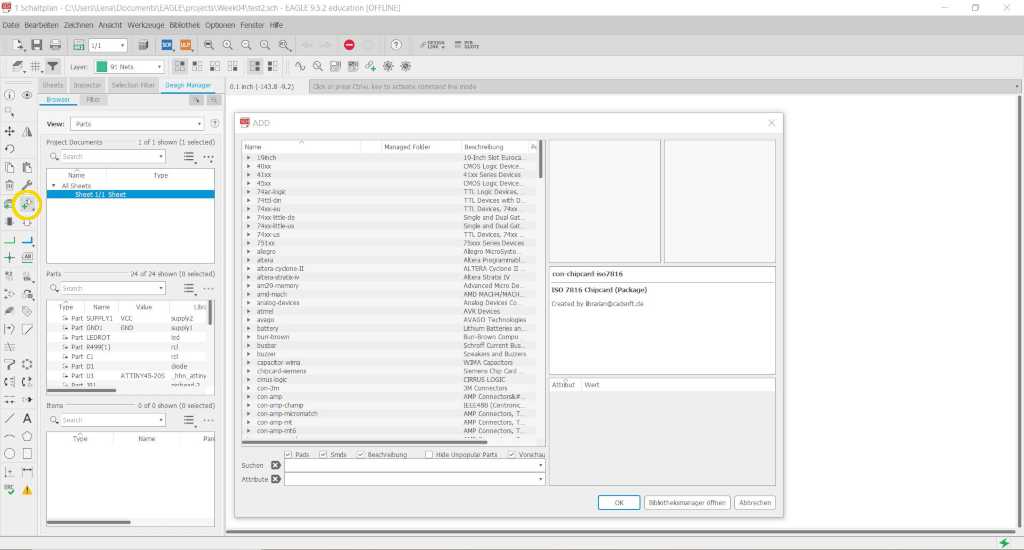
Now I can add my components by clicking on the marked symbol in the left menu bar. To do this I have to look up which components I have and add them. Not all of my parts were in the library. I searched them on the internet and added them.

Since not all parts are included in eagle, I can also add libraries. To do so, open this menu and you can add an external parts library.
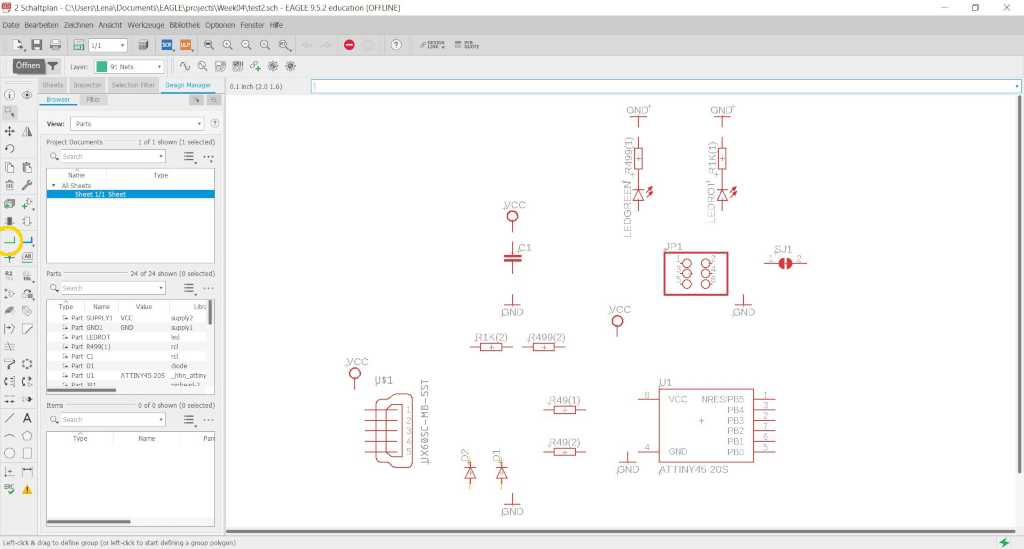
Next I have to connect my components with each other. For this I have to select the marked area in the left menu.
Now I can start building the actual board. All my components and connections correspond to the schematic.
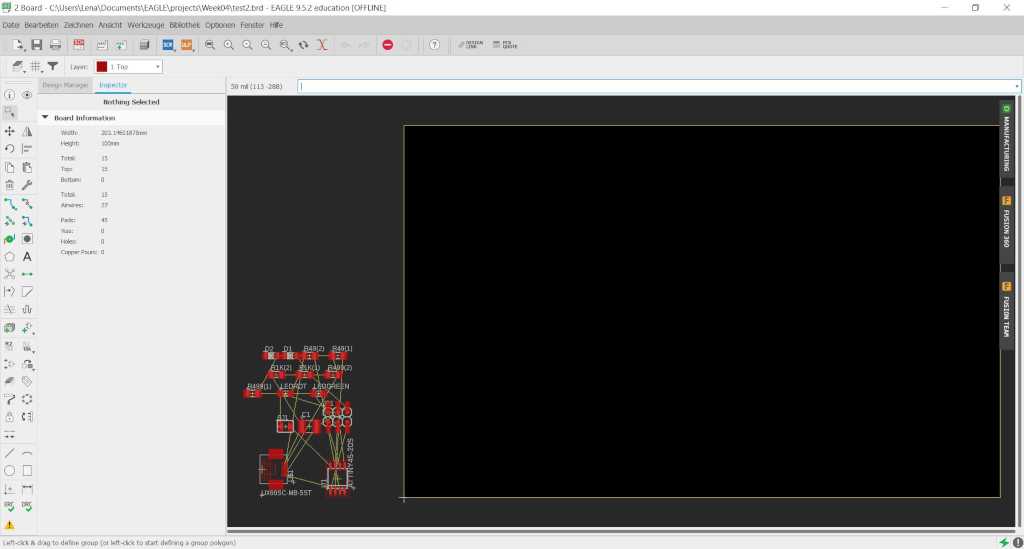
First I move all my components onto the building plate.
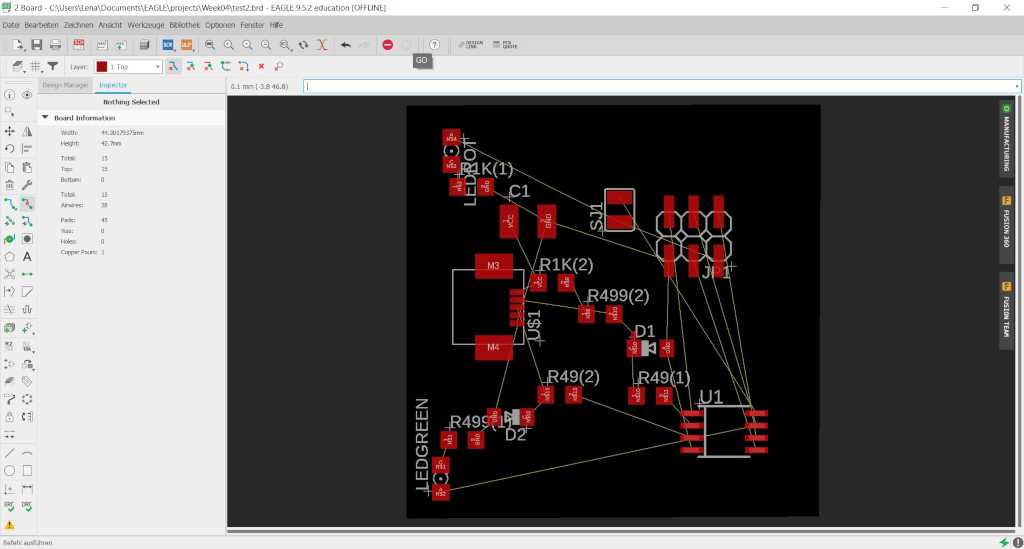
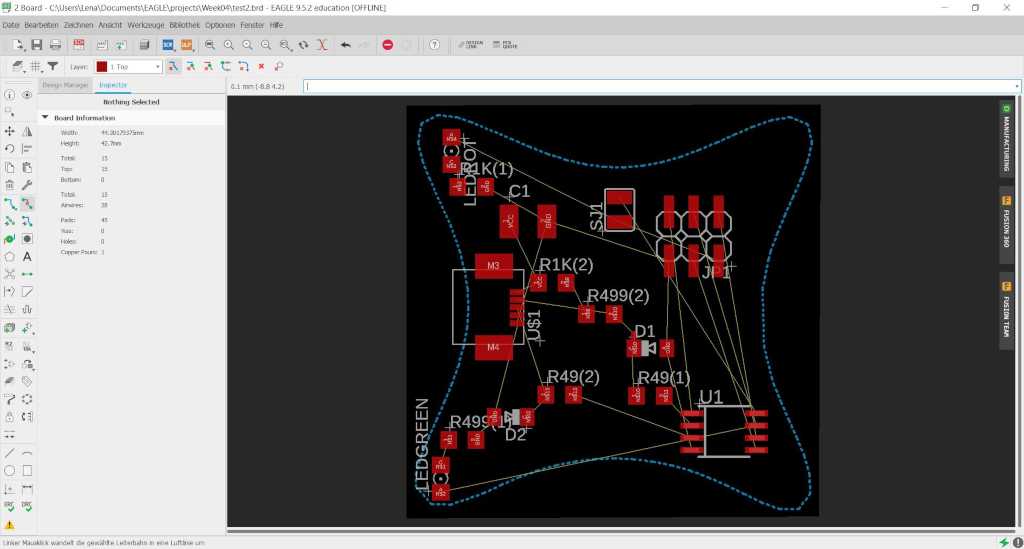
Since I want to have a special shape I converted my shape with SVG to Eagle into a polygon.
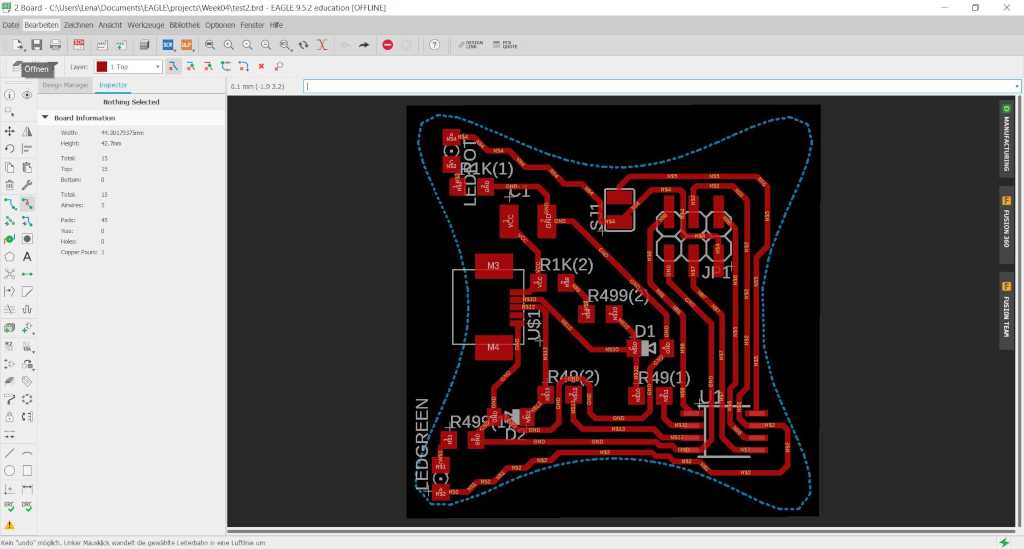
After I got my components I have to draw the tracks. I have to make sure that the tracks do not overlap each other.

Now I turn off all irrelevant components and can export the finished sketch.
Now I have to choose settings for the milling machine.
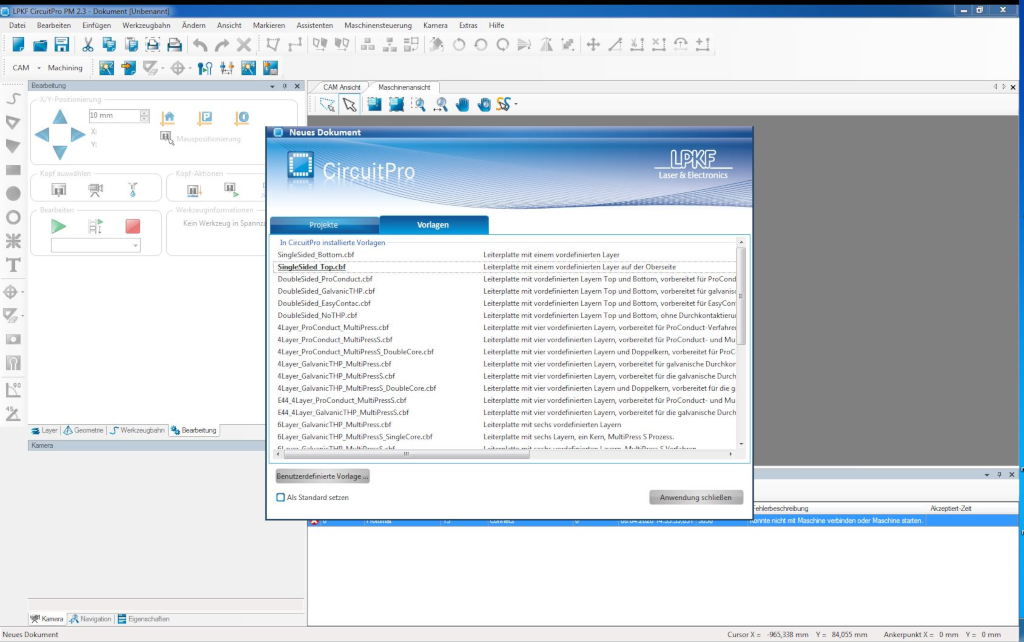
First I choose the template. Since my board is one-sided I choose SingalSided_Top.
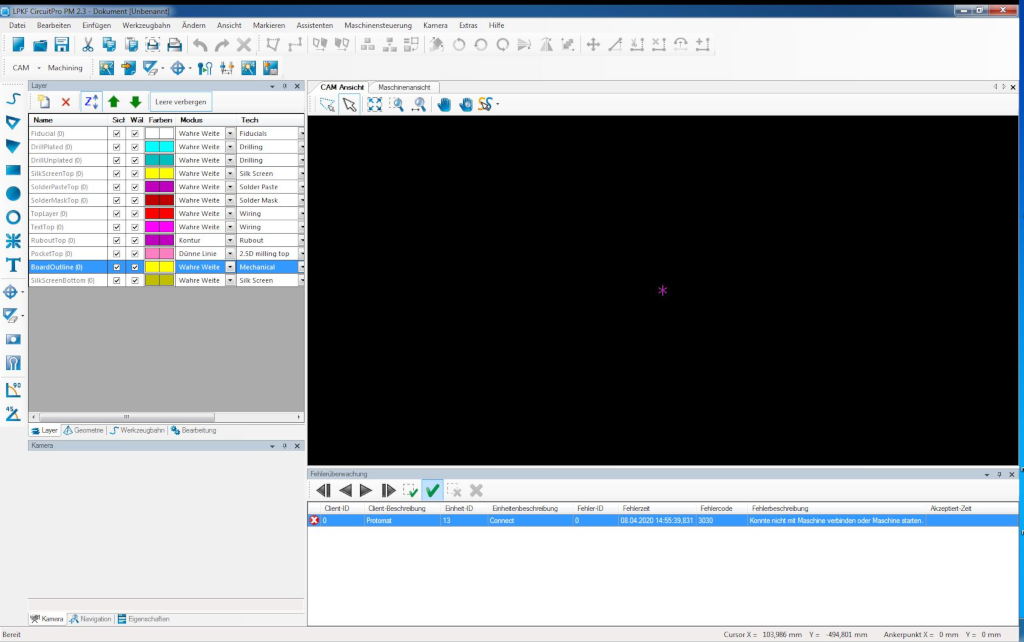
Since I designed my board in Eagle I have to import it here as a foreign part. I need the files that end in BOA for the outside cut and top for paths to be milled.
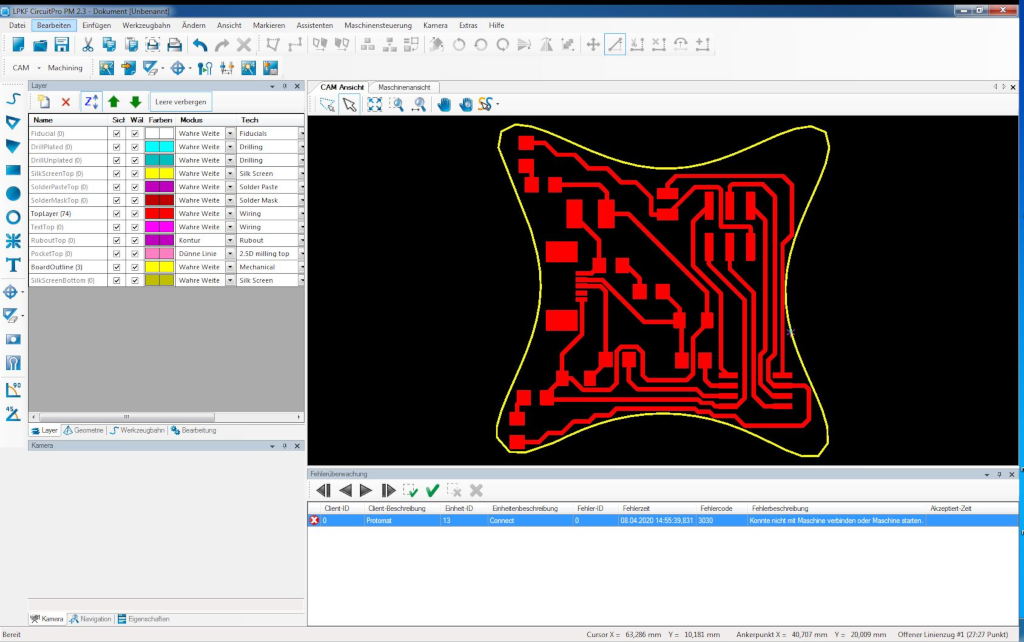
The yellow line is my outer cutting edge and the red lines are my circuit.
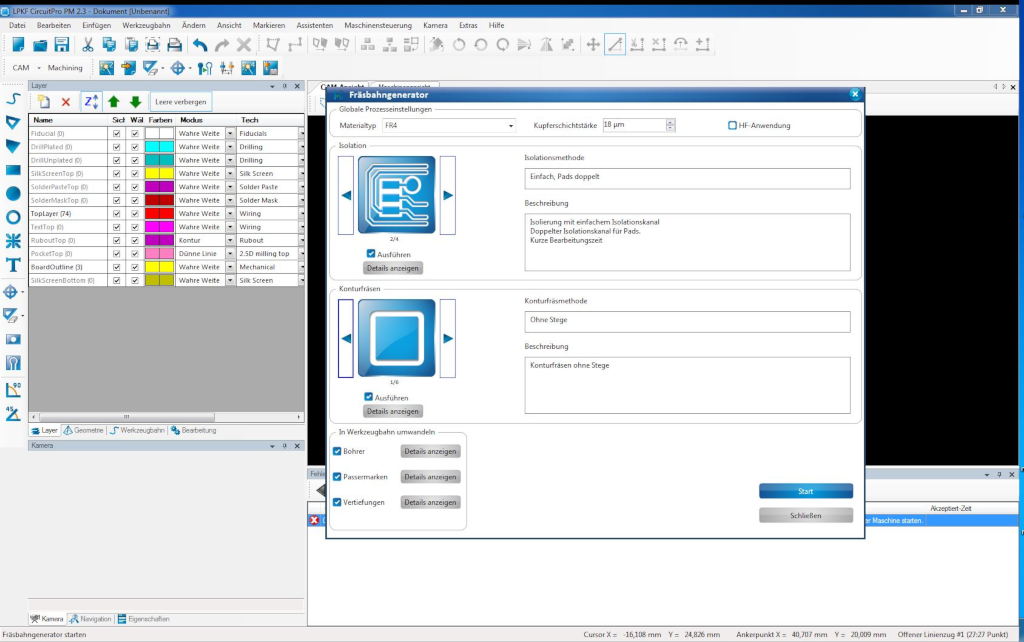
Now I have to make the toolpath settings.
For easier soldering later on I choose single around the lines and double around the pads.
You could also mill away everything you don't need but this has two disadvantages: the first one is that
the cutters wear out faster, the second is that you can use the surface as a ground connection area.
The lower settings are how much material remains when the board is milled out, in my case, no material
remains.
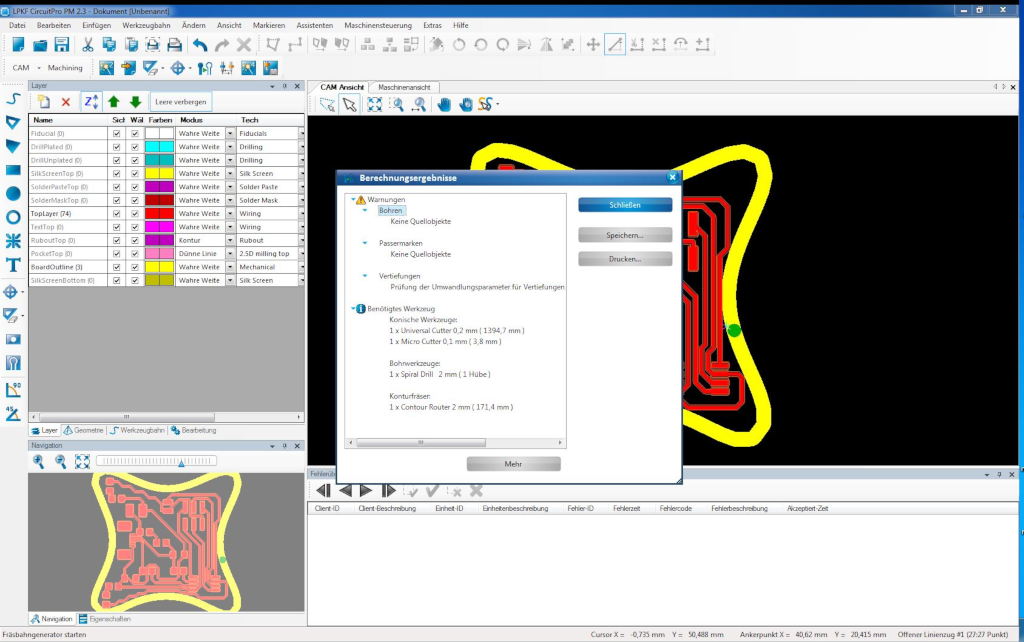
Now I let the software calculate which cutters to use, so I can check if they are there. I also check if everything is possible the way the programm suggests.
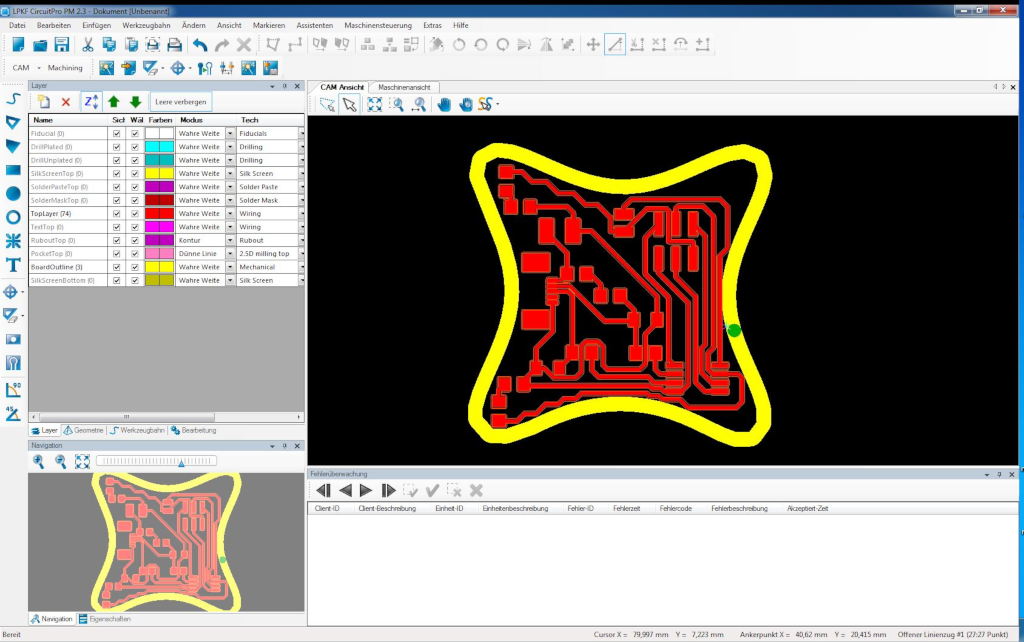
After that my board looks a little bit different, since the milling paths are now visible.
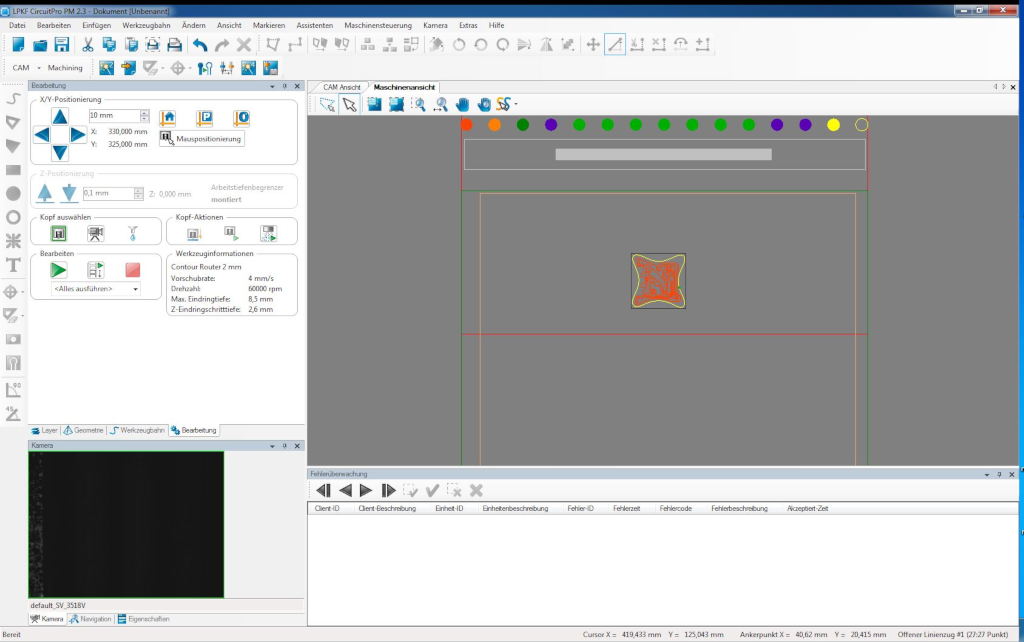
Now I place my board on the material.
Next I have to assemble and solder circuit boards.
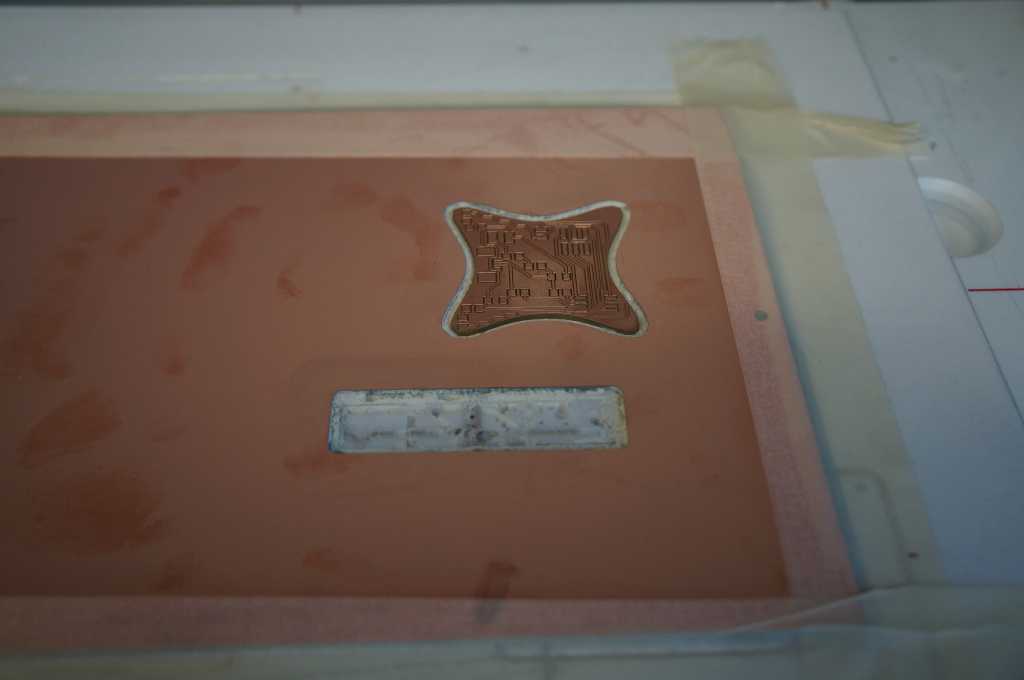
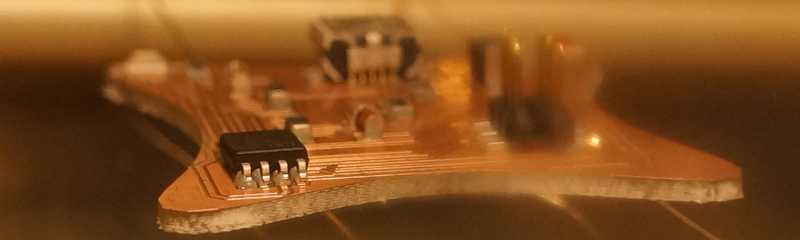
My design after millig.
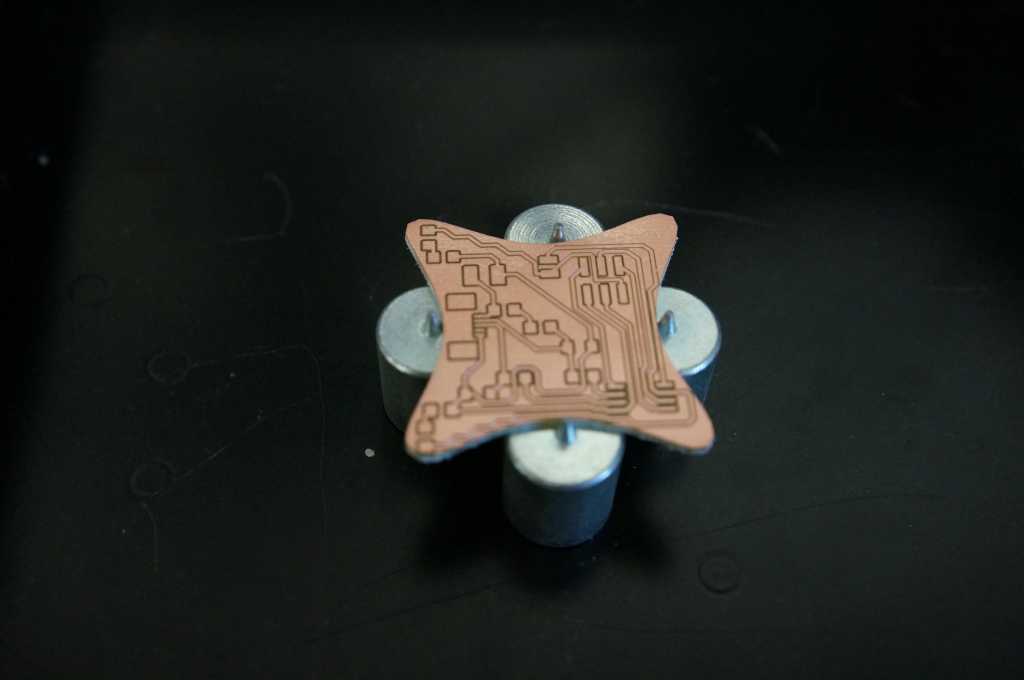
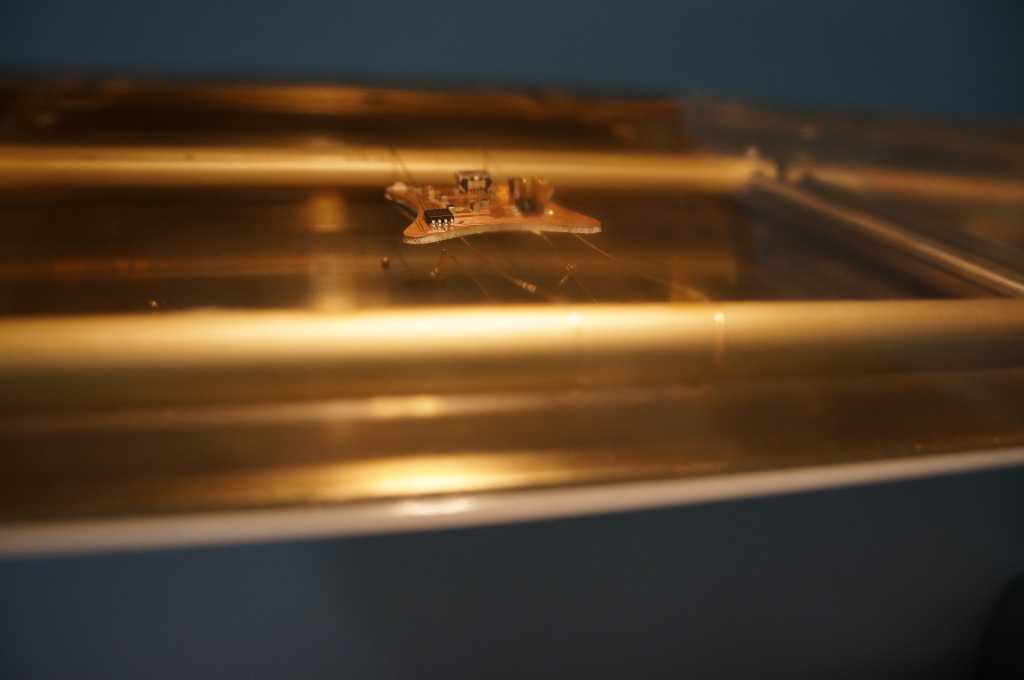
I fixated my circuit on the next machine.

The first step is to apply the soldering paste.
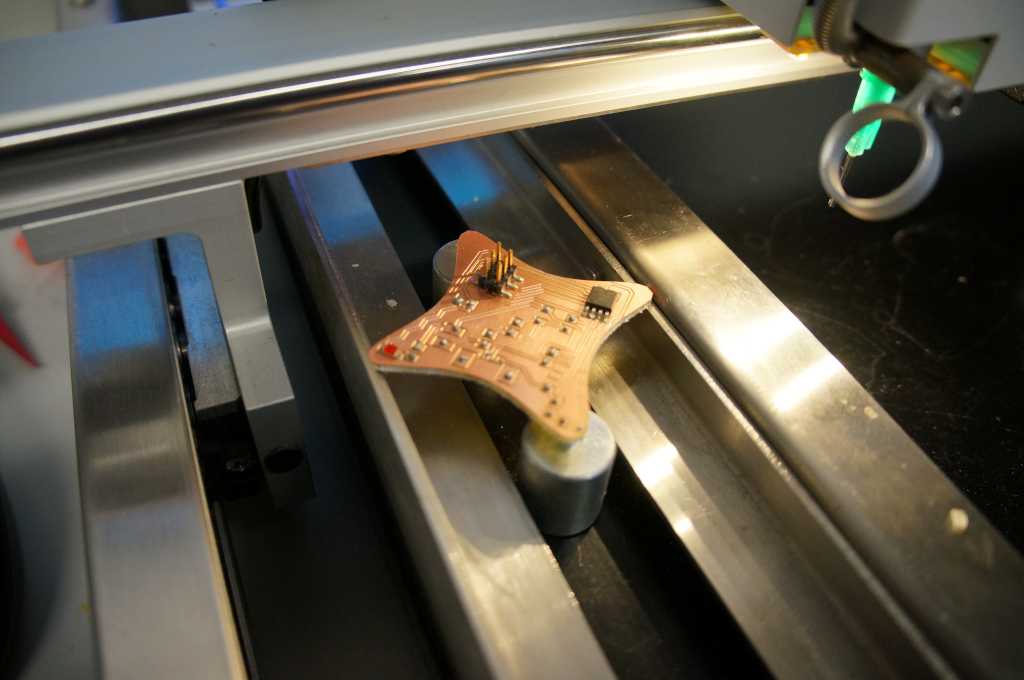
Now the components can be placed on top.
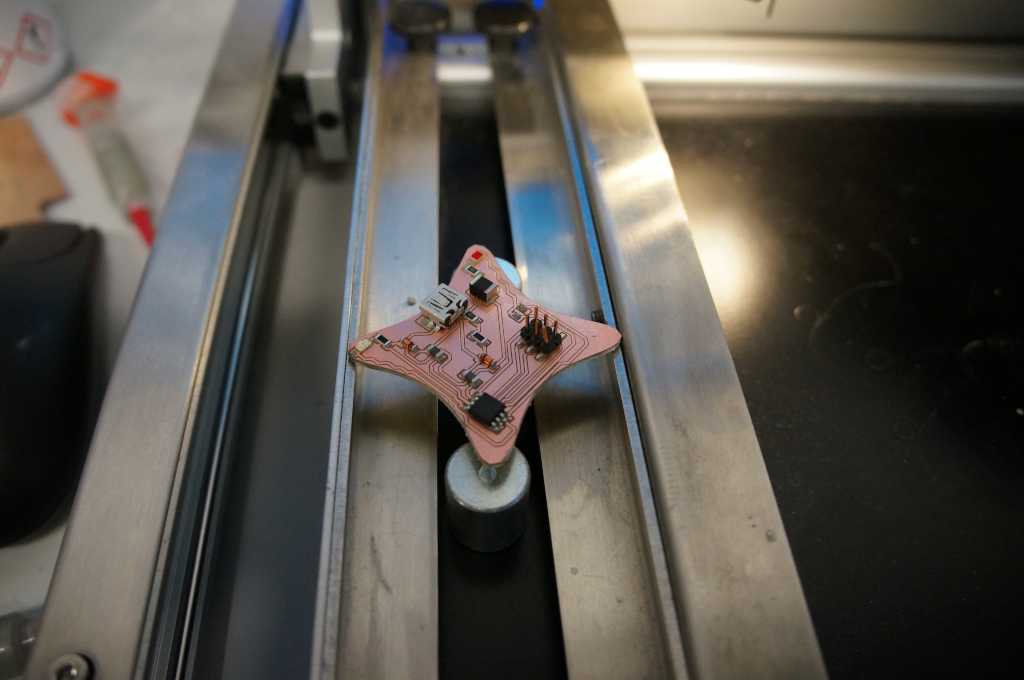
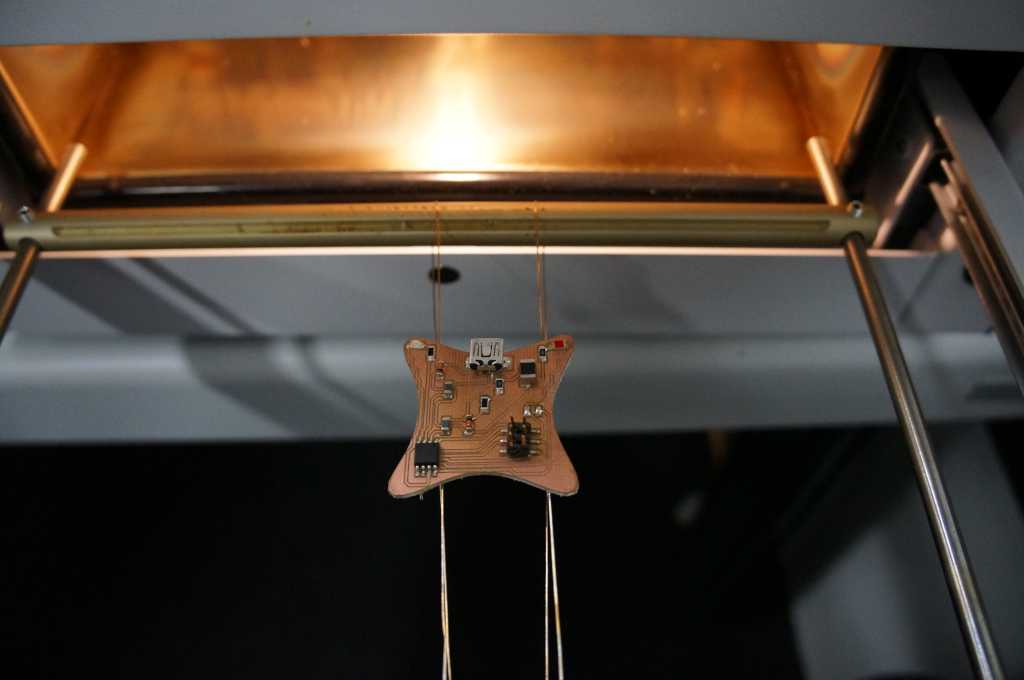
All components have been placed.
Now everything is put into the soldering oven.
Now I can start with the programmer.
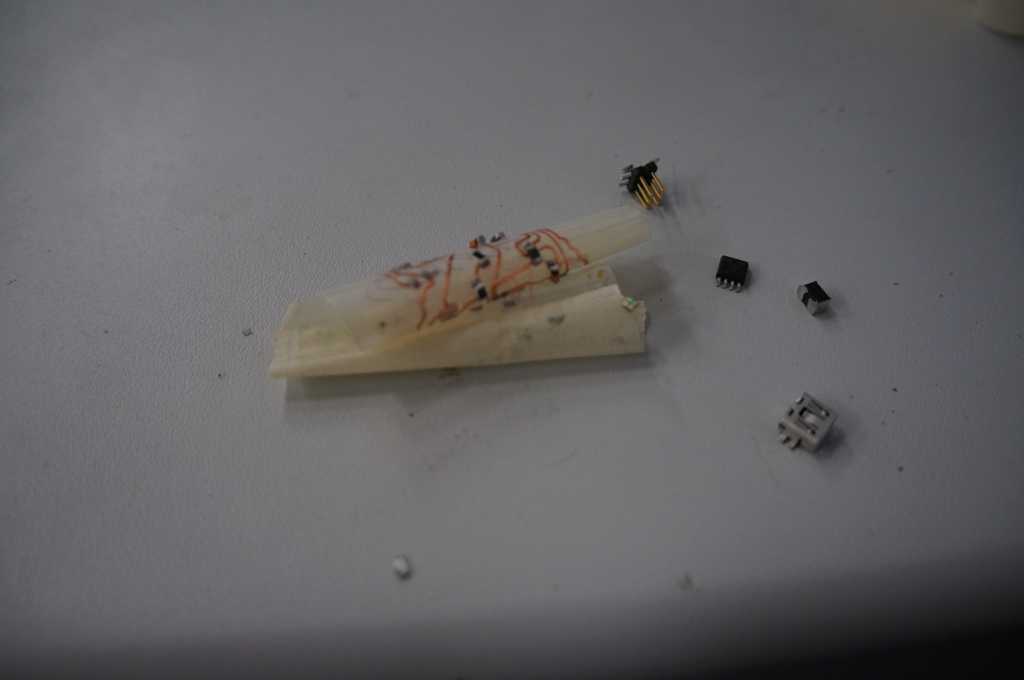
Next I tried to create my board with the Vinylcutter, but encountered many problems.
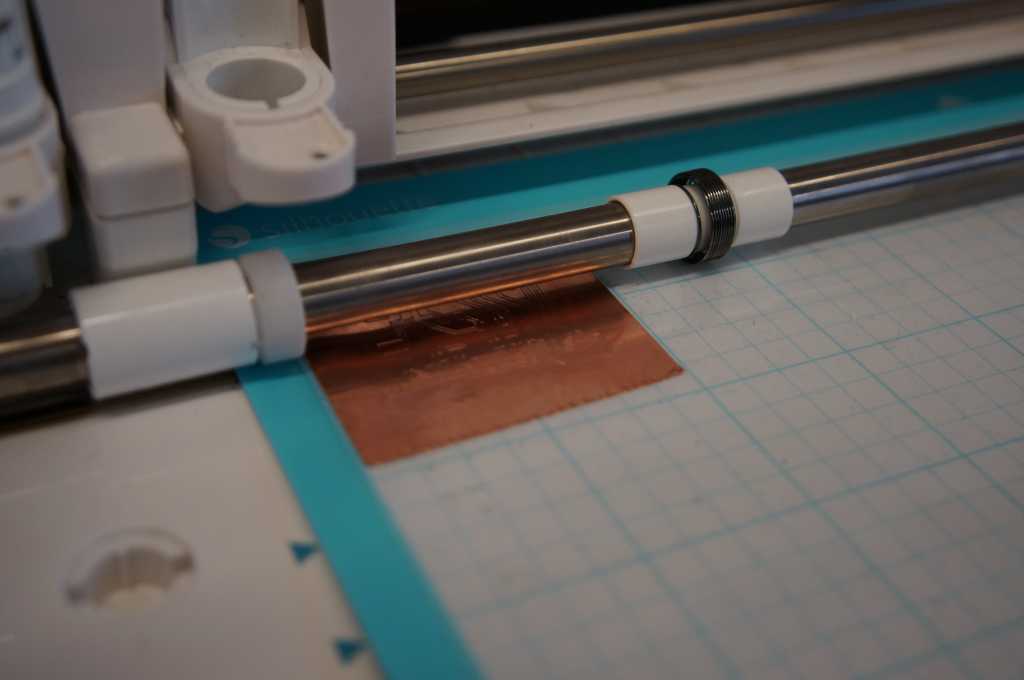
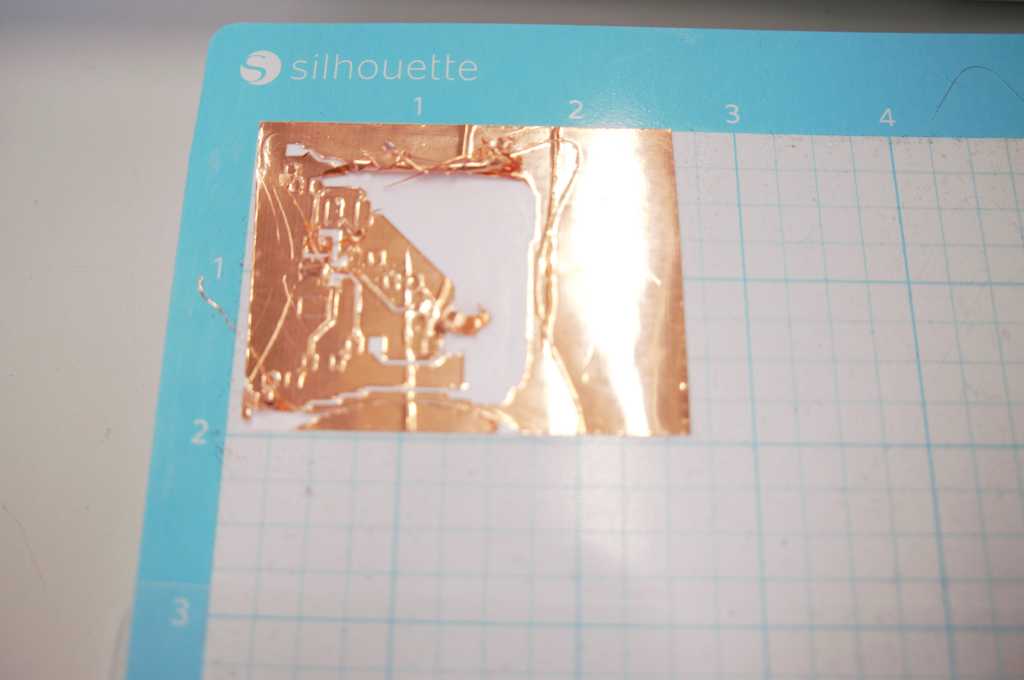
During the first cut the copper tape did not stick properly to the underground and got tangled up.
At the next one I glued the copper tape on the cutting foil, and put a cover on top. But this time, it stuck too well so I could not transfer it without destroying the thin lines.

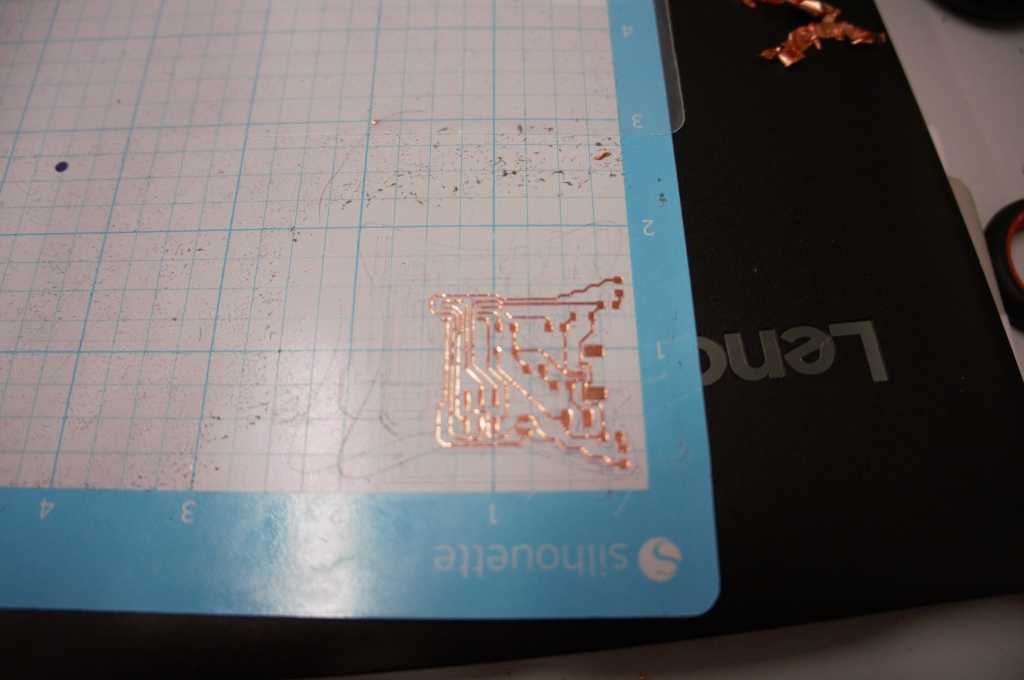
Next I used a foil which is intended to be printed with silver ink and glued the copper band on it, which worked well.

So I applied the soldering paste as on the other board.
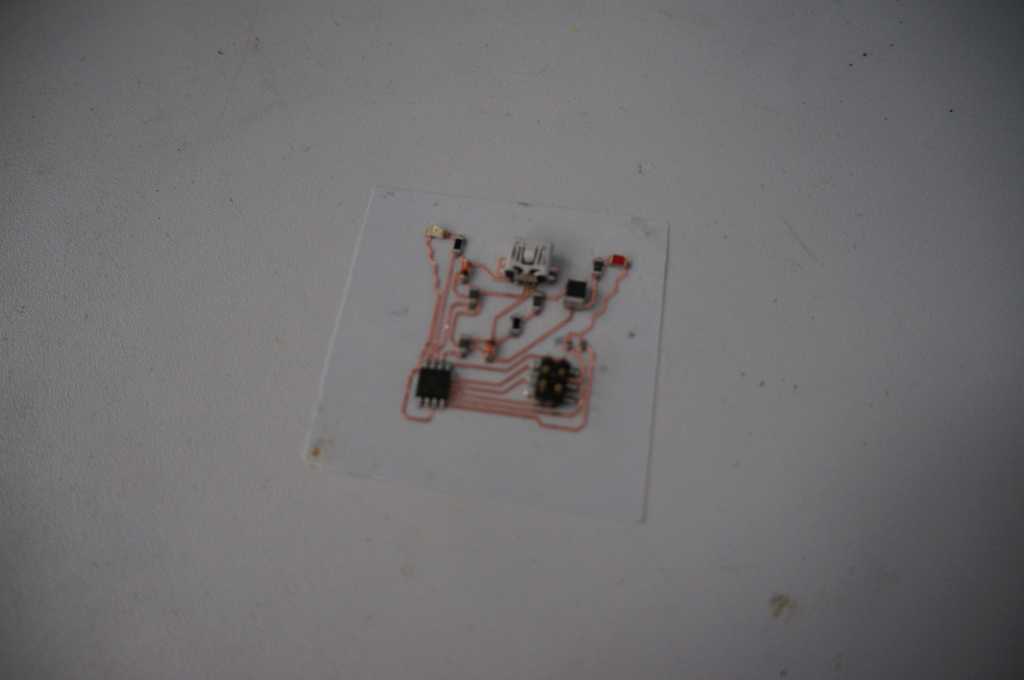
And then added the electronic components.
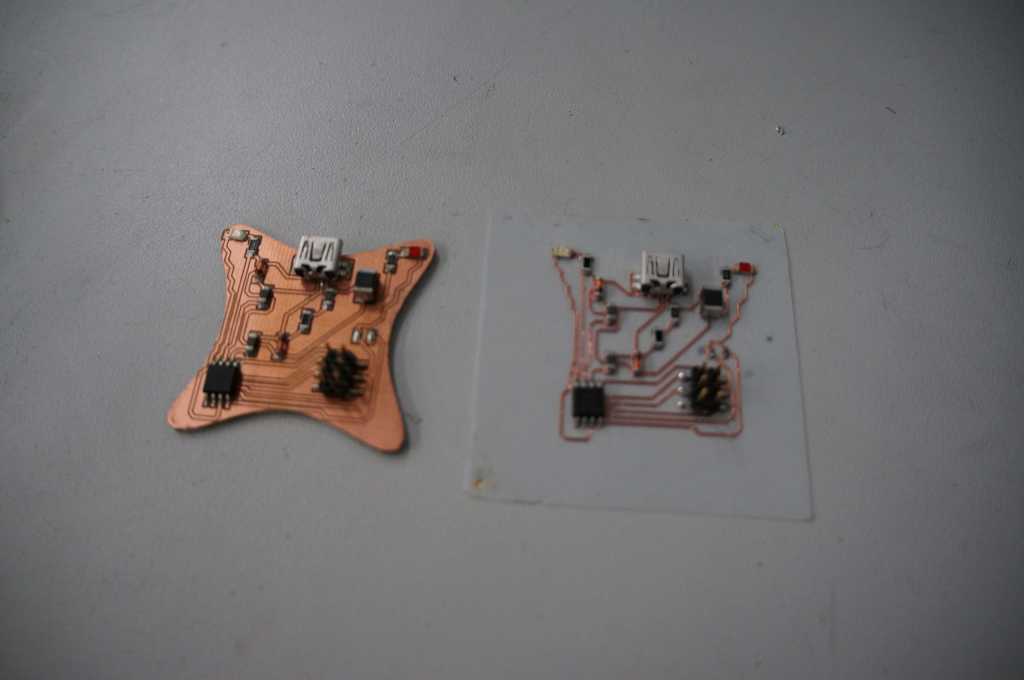
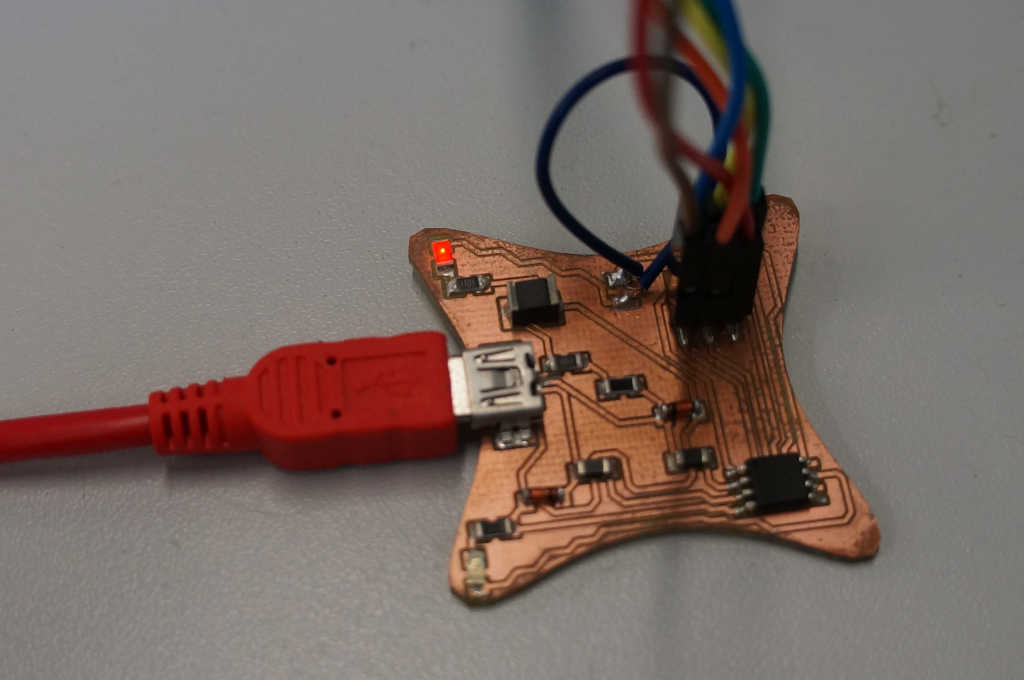
The final cutted and mounted board, made with the silhouette cutter.
The flexible material on which I placed my board did not tolerate the temperature and curled up. I'm afraid that didn't go too well. The week is over now, maybe I have some more time in another week to test the Vinylcutter again. And maybe I will find a material which works well as a base.
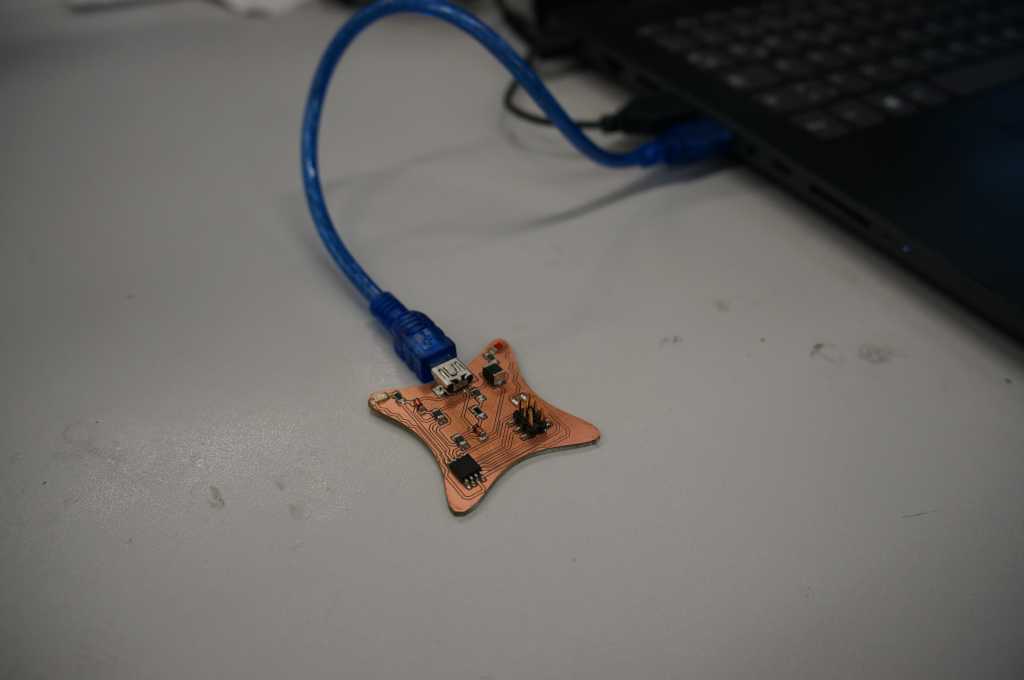
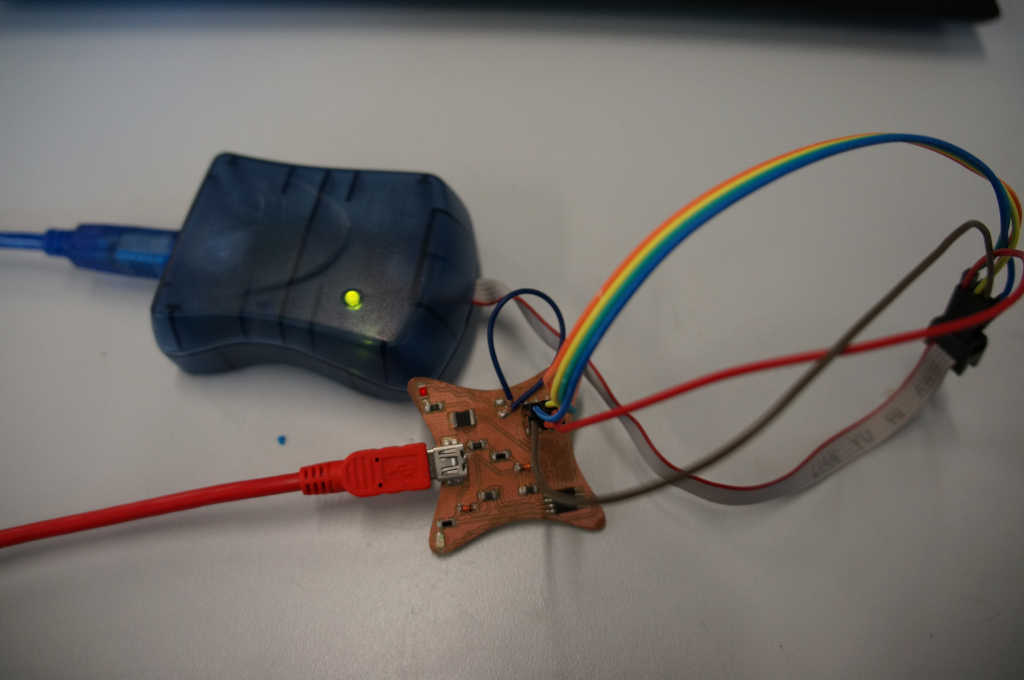
I had a few problems with testing the circuit board. It didn't work on my computer so I ended up using one of the Macs from the lab, they are a bit slow but in the end it worked.
First I closed the jumper with a cable.
First I had to download and install CrossPack AVR. It is a toolchain to program Atmel's AVR microcontroller.
Then I followed Zaerc`s
instructions.
Then I connected the board to the computer with a USB cable.
As soon as I connect it to the PC, the red light comes on.
Now I can connect the programmer.
Since this is my first self-designed board I made a few mistakes in the design. To make sure that everything fits
on the board I put the pin header upside down and couldn't just plug in the connector and had to connect them
separately.
Then I have to start flashing with the command make flash in the console.
        avrdude -p attiny45 -c avrisp2 -P usb -e \
        -U flash:w:fts_firmware.hex
Everything was successfully installed.
