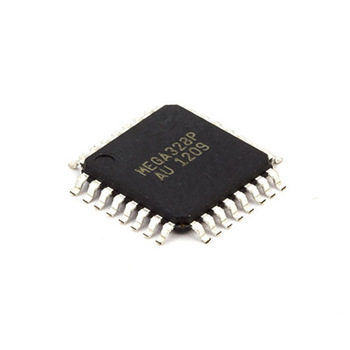
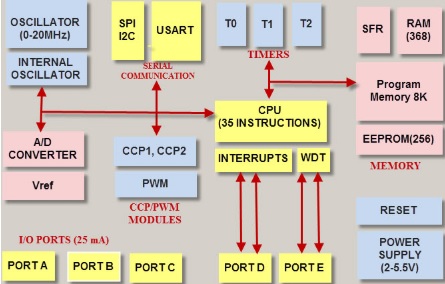
It is a 8-bit AVR Microcontroller created by Atmel. I decided to use this datasheet because it is the chip I
used in the electronics design week.
There is a lot more information in the data plate than the ones I have described in the pictures below but
these are some of the most important ones at the moment.
Operating voltage
2.7V to 5.5V
ISP Flash memory
32K bytes
EEPROM memory
1Kbyte
SRAM memory
2Kbytes
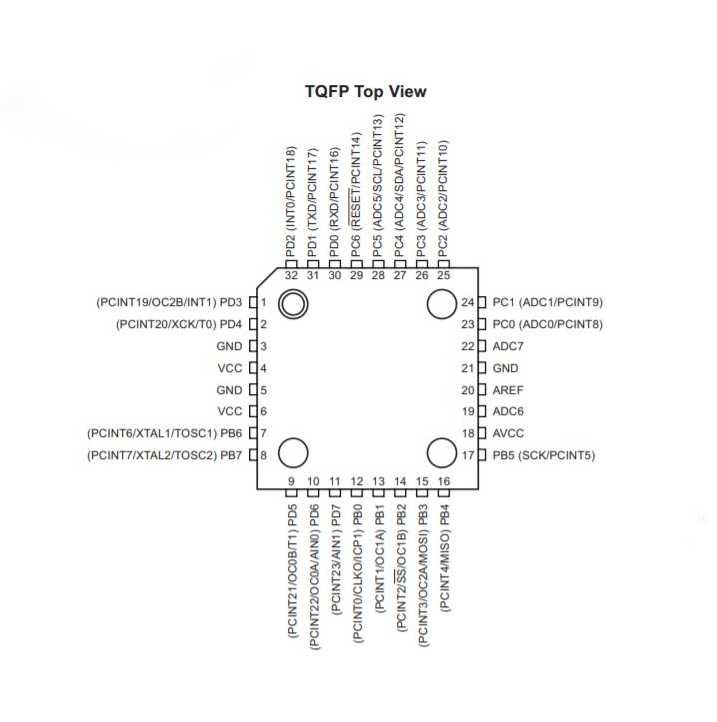
Pin layout
The first thing of interest in datasheet is of course the pin layout because you can
see where each pin is and what functions it has.
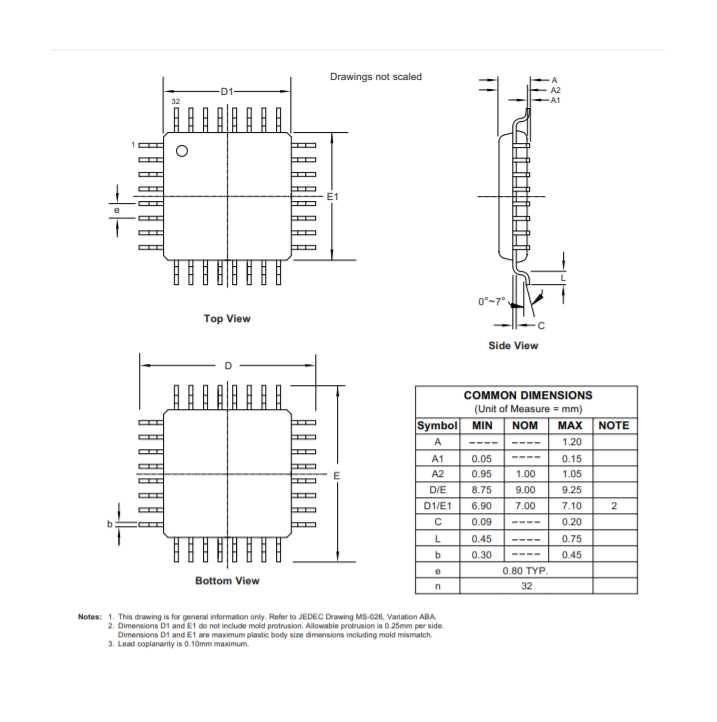
In this picture you can see the size of the component. You can either paint the skits
for your program yourself or check if the one from the library fits.
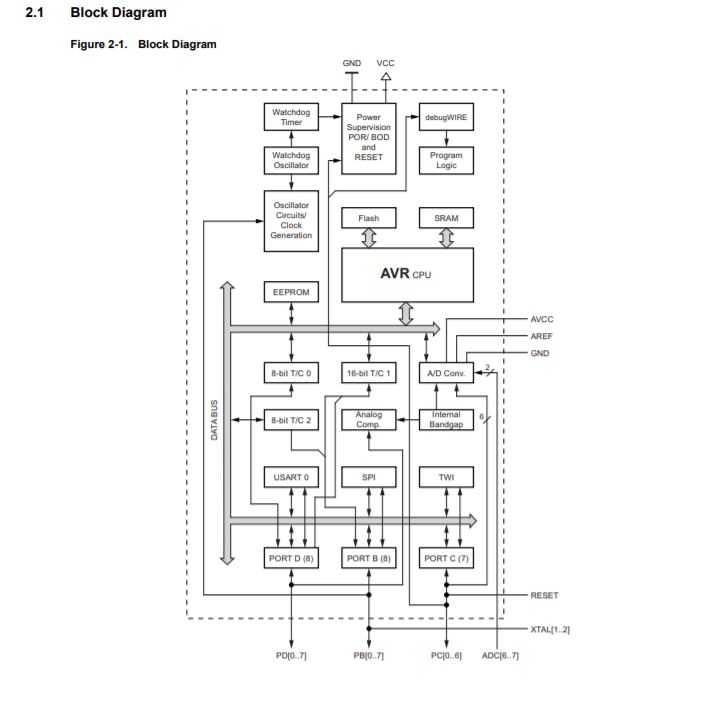
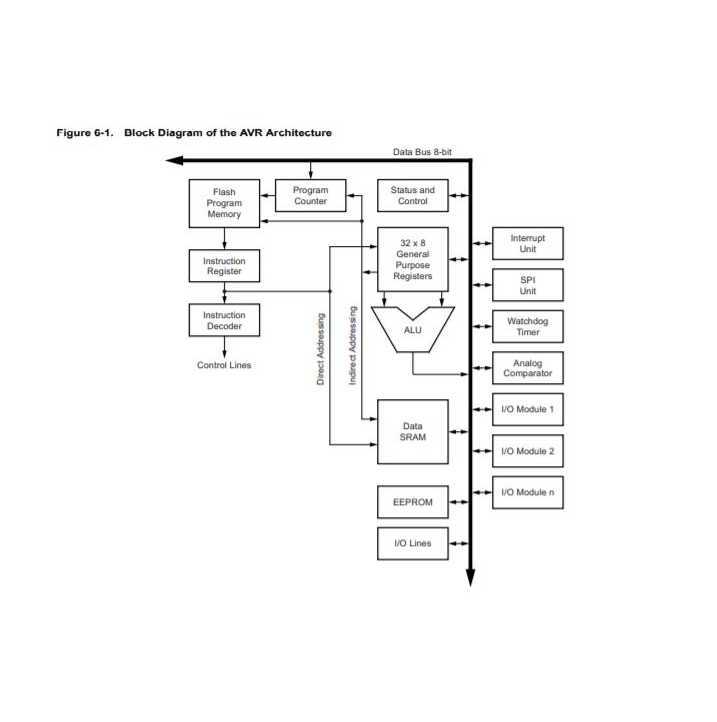
Block diagramm
Here you can see that we have different groups of outputs: digital, analogue and
those with PWM signal.
AVR architectures
Here you can see that we have different groups of outputs: digital, analogue and
those with PWM signal.
The Arduino IDE is an Open-Sorce development environment for writing code and uploading it to the board.
Write code
To create a new code go to File-> New. Then a new window
appears which already has a setup() and a loop().
The setup() is executed once when the microcontroller is
started and there you can set in and outputsets and
everything else that should happen before the start.
In the loop() you can write your own program which
will be fetched again until you disconnect the power or reset or overwrite the program code.
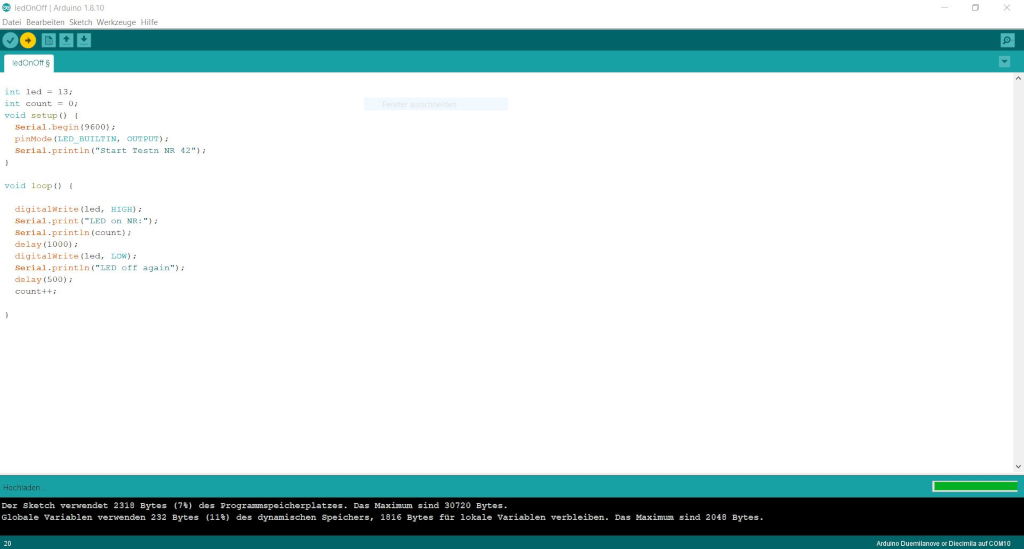
The code I wrote was just a
small extension of the standard blink sketch with
a serial monitor output. You can download the
code in the download area or look at the pictures below.
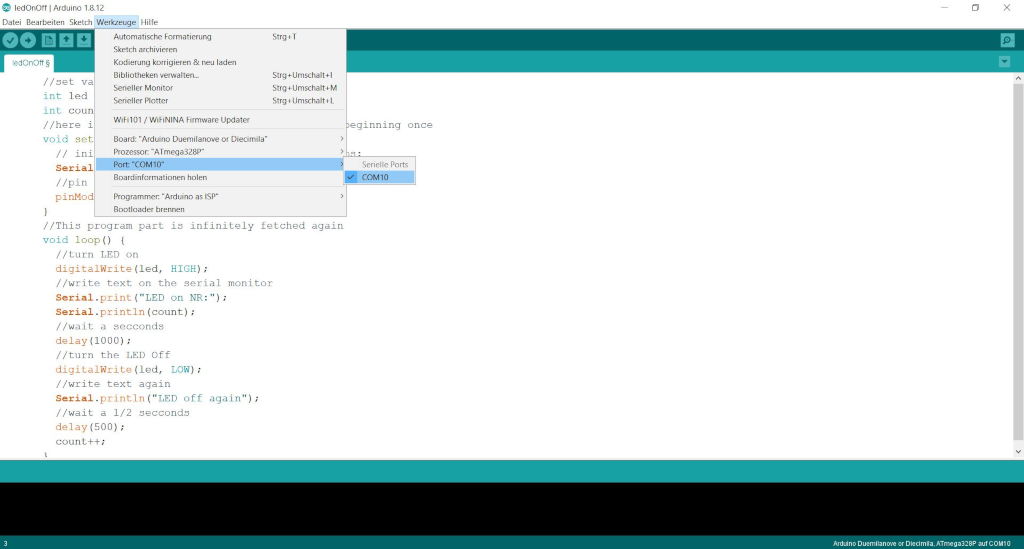
Downloading the code
Now we can download the sketch to our board.
First we have to set the right controller. In my case, my board is
the Arduino Duemilanove or Dieicimila with the processor ATmega328P.
The port my board is connected to has to be set as well.
Test it
Now I can have the sketch checked
once by pressing the check mark in the upper left corner.
If my code syntayx error is free I can then download it by pressing the butten Download right beside
it.
Now I have to press the reset butten again until the white text below appears, telling me
that the code has finished downloading.
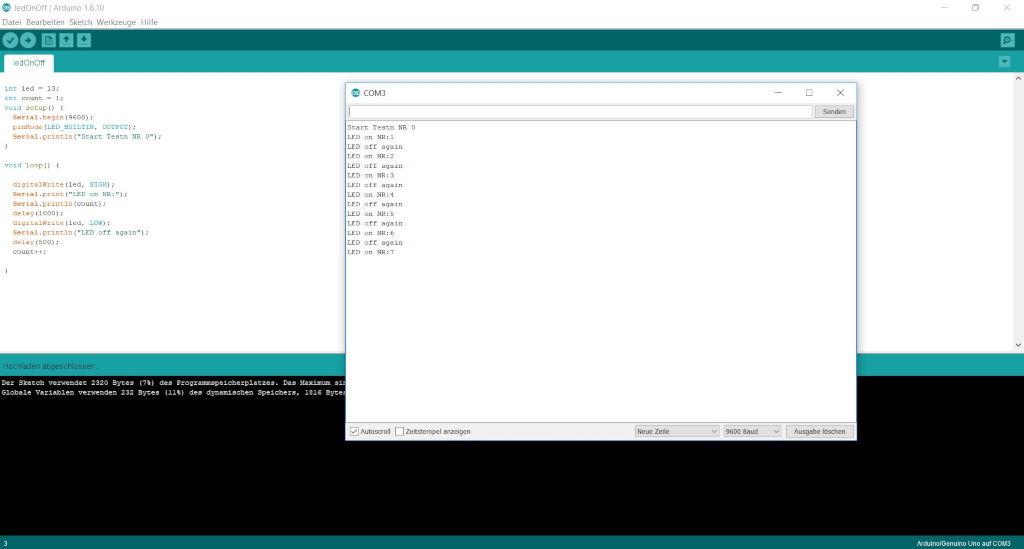
If everything works, my LED should be flashing now.
In addition I can display my output on the serial monitor which I find quite useful.
The created program switches an LED which lights up when connected to pin 13 -> digitalWrite(led, HIGH); then wait 1 second ->delay(1000);
and then switches them off -> digitalWrite(led, LOW); and then waits 0.5 seconds -> delay(500);
Parallel to this it shows on the serial screen of the computer how many times the LED has been switched on. As long as the microcontroller is connected via a serial interface.
      //set variables for a better overview
      int led = 13;
      int count = 1;

      //here is the setup code it is executed once at the beginning
      void setup() {
        // initialize serial communications at 9600 bps:
        Serial.begin(9600);
        //pin 13 is declared as output
        pinMode(13, OUTPUT);

      }

      //This program part is infinitely fetched again
      void loop() {
        //turn LED on
        digitalWrite(led, HIGH);

        //write text on the serial monitor
        Serial.print("LED on NR:");
        Serial.println(count);

        //wait 1 second
        delay(1000);

        //turn the LED Off
        digitalWrite(led, LOW);
        //write text again
        Serial.println("LED off again");
        //wait 1/2 seccond
        delay(500);
        count++;
      }
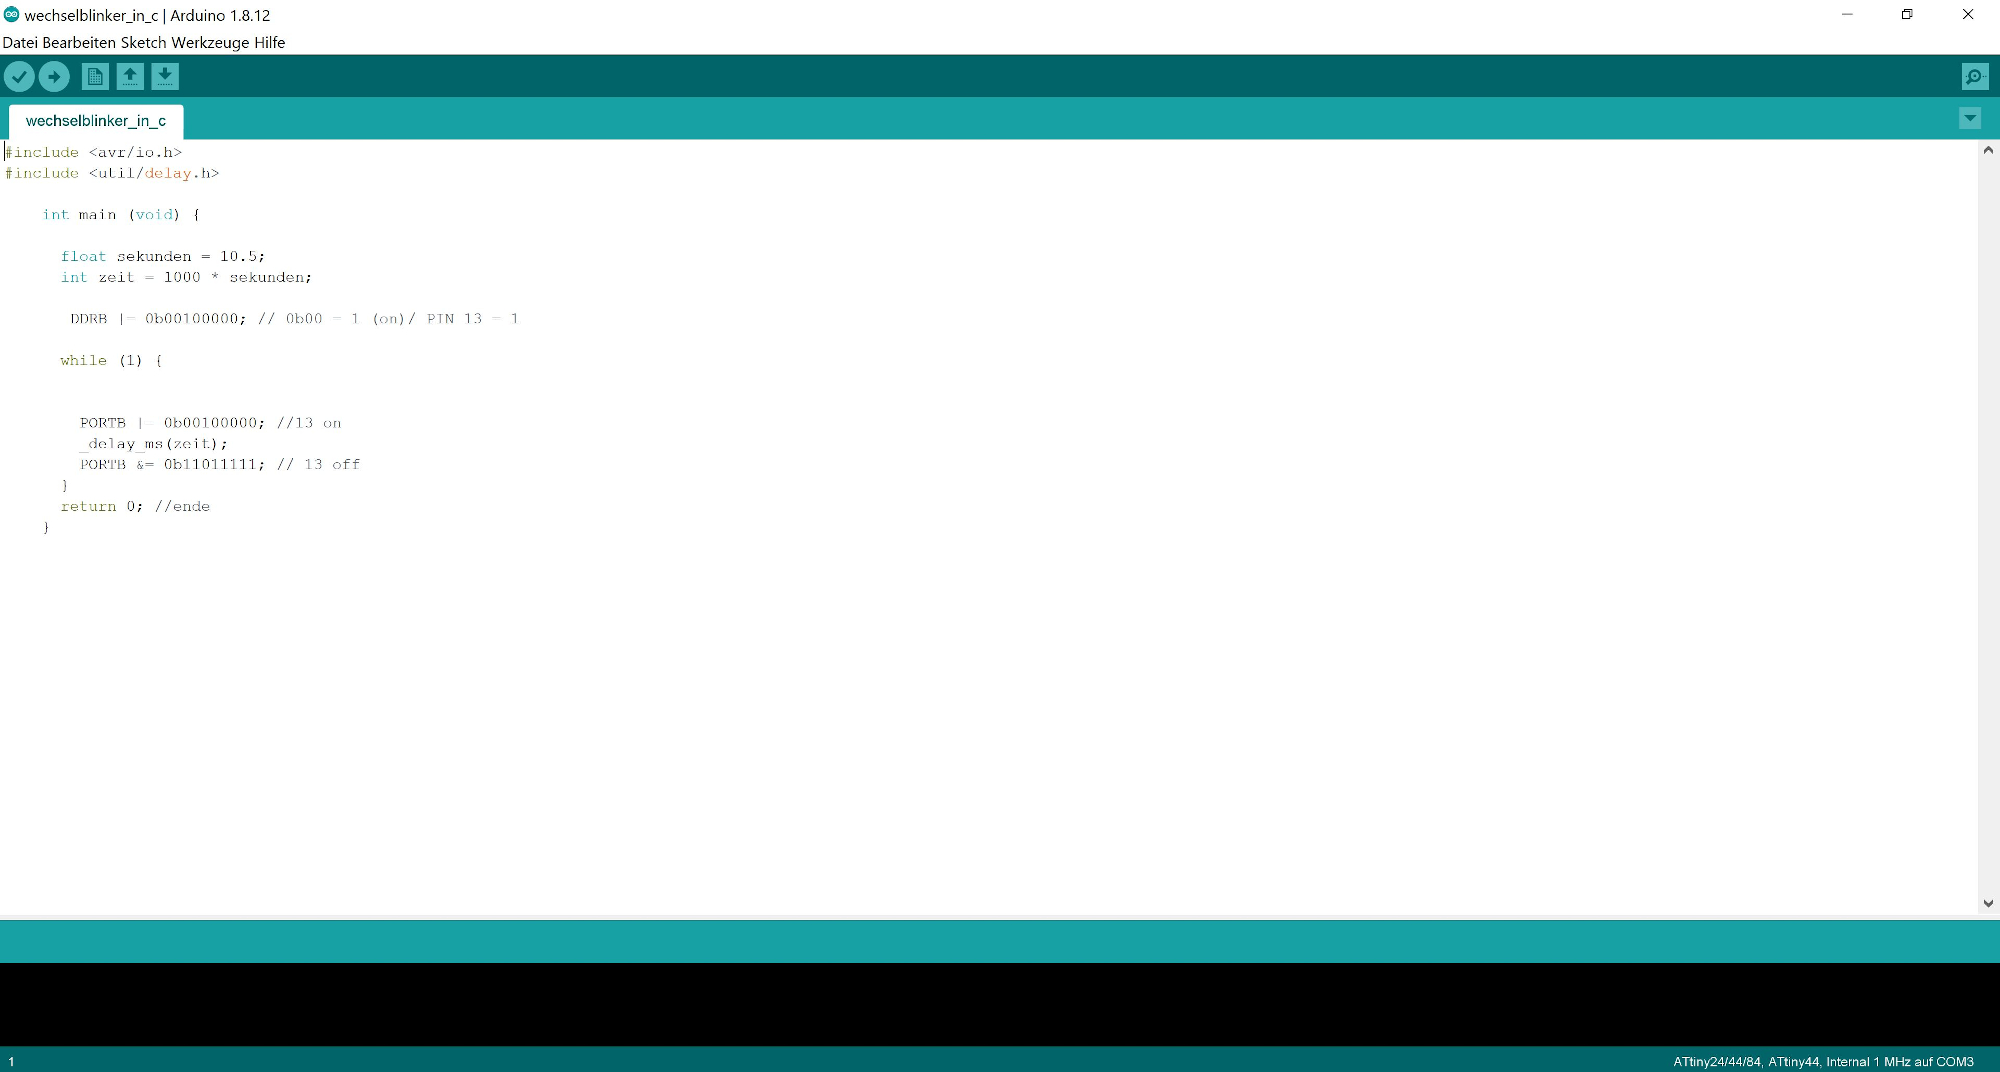
Example with c
Blocks and C/C++ with Tinkercad Circuit
Next I thought about who the user group of my final project is. I want to address children especially.
A simple block based programming is a good way to get started.
In Circuit you can see the text based code while putting the blocks together which makes it easier for futher
work.
Tinkercad Circuits is a website where you can build and test circuits.
There you can program an Arduino microcontroller of a blockprogram error or with C.
Login
First you have to register
to use the autodesk account for fusion 360 or if
you are a student of a class you can simply participate with your previously assigned username.
3D Software
Tinkercad was developed to get an easy start in drawing 3D files. Here we see a
pair of drawings from the kids from my robotics club.
Circuits
Later they had the opportunity to build and test control panels. For this we select
circuits in the left menu. To start a new sketch we click on new sketch.
Add Arduino
Now we come into a new menu in the middle is user building platform where
we can build our electronic components together. On the right side we have a selection of
electronic components which we can use.
First of all we only need one Arduino.
But it has many other possibilities and actuators and sensors.
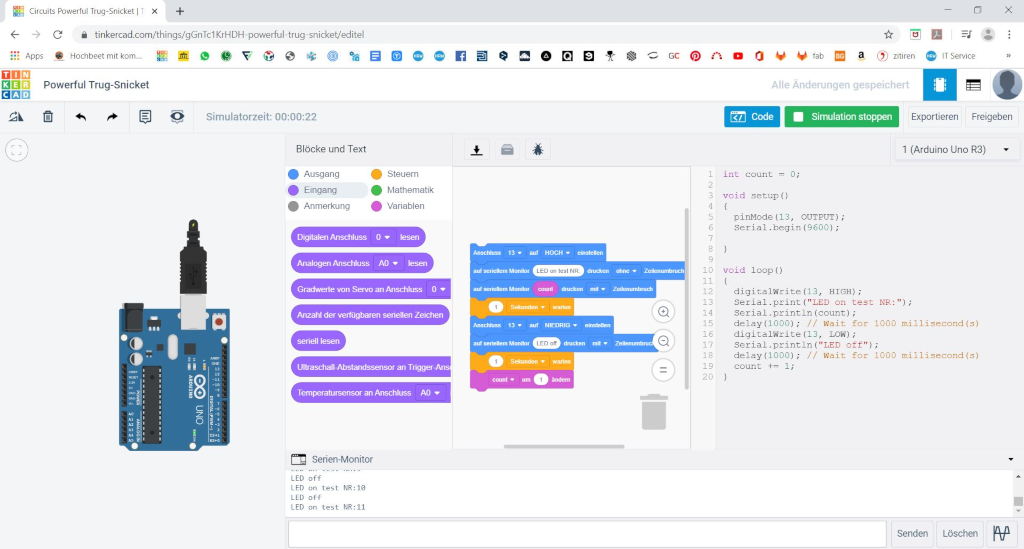
Test it
Now I can put my code together
with the blocks which is fast and easy. At the same time I see how the
same code looks like in C.
Now I can test it right here. Or download it and
put it on my board, which has a LED on the same pin. After downloading the sketch, I can test on the
Arduino same as before.
Python is an interpreted higher programming language. It is written without brackets and is therefore easier
to read.
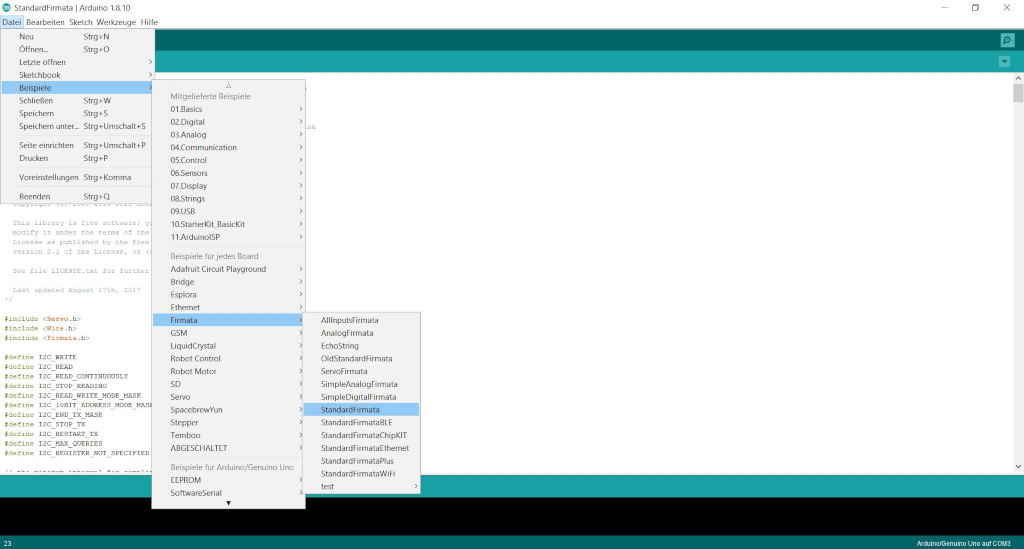
Preparation
Before we can start programming in python we have to load the Firmata sketch sketch
on the arduino. You can find it under File > Examples > Firmata > FirmataStandard.
Python
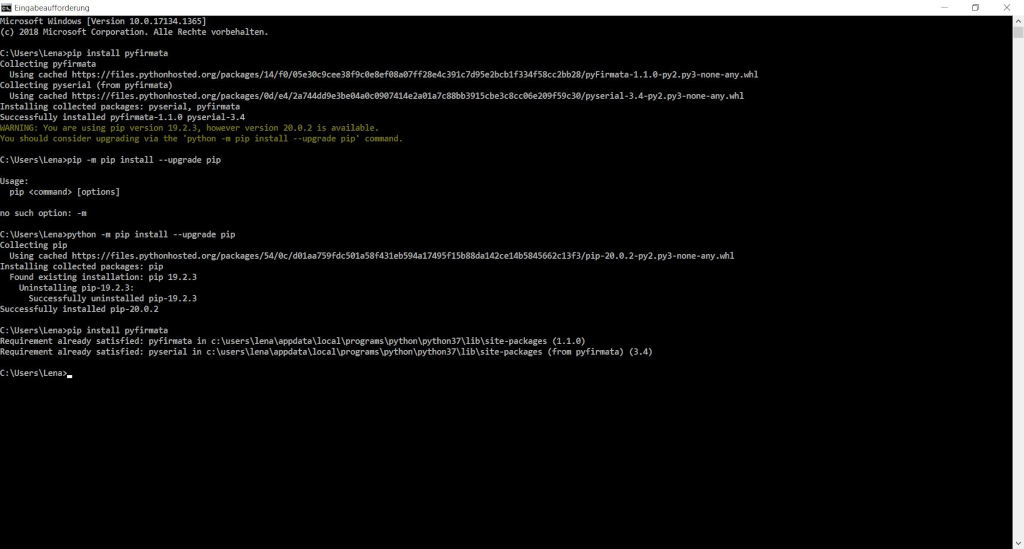
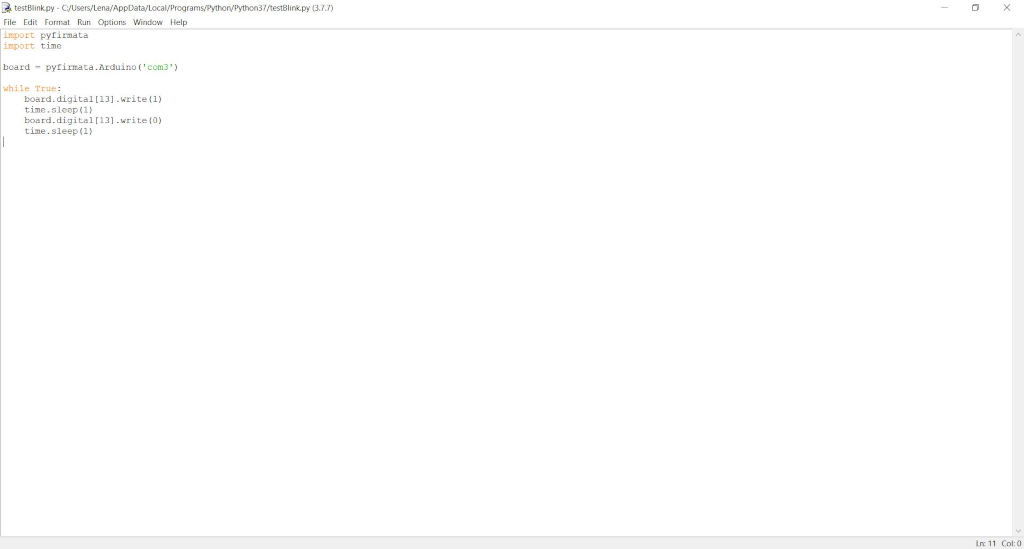
To run everything, we need a version of Python and Pip. pip install pyfirmata
Write code
The last step is, again, to write code.
It is important to choose the right port for the Arduino which you can look up in the device manager.
As in the program code above I switch on the LED at pin 13 ->board.digital[13].write(1)
then wait 1 second -> time.sleep(1) and switch off the LEd -> board.digital[13].write(0)
and wait 0.5 seconds.
In principle the program works the same way as the others in C/C++, only different commands are used and you create the infinite while loop yourself.
            #import libarys
            import pyfirmata
            import time

            #set usb Port
            board = pyfirmata.Arduino('com3')

            #infinite loop
            while True:
                #turn LED on
                board.digital[13].write(1)

                #wait 1 second
                time.sleep(1)

                #turn LED off
                board.digital[13].write(0)
                #wait 1/2 second
                time.sleep(0.5)
It works good with all of this. Here is just one on video, since all the programsm do the same. -?????????? (I'm
not sure what my cat want to say but I think she still has some questions)
group assignment
compare the performance and development workflows
for other architectures
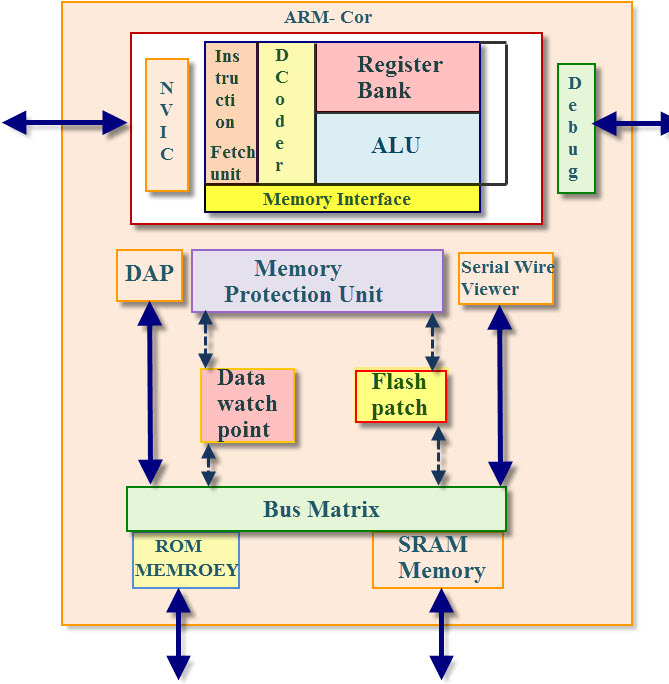
ARM Microcontroller Architecture
Advanced Risc Maschine is a microprocessor design which was developed in 1983 by the British computer company Acorn.
The company ARM itself does not manufacture microcontrollers but issues licenses.
This architecture is used in mobile devices, stand PCs, servers and also in the rasbery pi.
There are different versions of the architecture as ARMv1, ARMv2 etc and each one has its own advantage and disadvantages.
ARM Coretex-M3 Microcontroller Architecture
The ARM Coretex-M3 Mikrocontroller is a 32-Bit-processor, which provides separate data and command busses for communication with the ROM and RAM memory.
Features
32-bit high performance CPU
3-stage pipeline and compact one
It has THUMB-2 technology
Optimal merges of 16/32 bit instructions
High performance
It supports tools and RTOS and It has core Sight debug and trace
JTAG or 2-pin serial wire debug connection
Support for multiple processors
Low power Modes
Low power Modes
Control the software
Multiple power domains
Nested vectored interrupt controller (NVIC)
Low latency, low jitter interrupts response
No need for assembly programming
PIC Peripherical Interface Controller
PIC Microcontrollers were developed in 1993. They are very fast and it is quite easy to execute a progrom, compared with other microcontrollers. the architecture is based on on the Harvard architecture.
Features
8-,16-,32-Bit CPU
32-612kB Flashmemory
8kB-128kB RAM
8->64 Pins
various I/O-ports
33-70 commandwords
based on product following features can be supported:
Timer<7li>
A/D-converter
analog-comparators
capture/compare-entities
pwm
SPI, RS232, I^2C, EnhacedUART
USB
CAN 2.0
LCD-display-driver
ethernet-controller
Programs can be written in Assambler , or in a higher language like C
high range of possible specifications
connectivity
security
graphics
ultra-low-power
motor-control
automotive
functional safty
Cpmparison
Regarding the architectures, we compare a von Neumann with Harvard, which leads to the commen discussion which of them is better.
The von-Neumann is way cheaper than its counterpart, since no redundant parts have to be installed. But this structure, leads to its biggest problem,
the von-Neumann bottle neck. An data-traffic-jam is inevitable, since a command has to run through each bus and others have to wait for the bus to be free again.
The Harvard arichtecture seperates programs and data in different storage locations, which creates a higher material cost, but allows higher speeds while perfoming,
since commands and data can be managed parallel.