Week 14: Interface and Application Programming
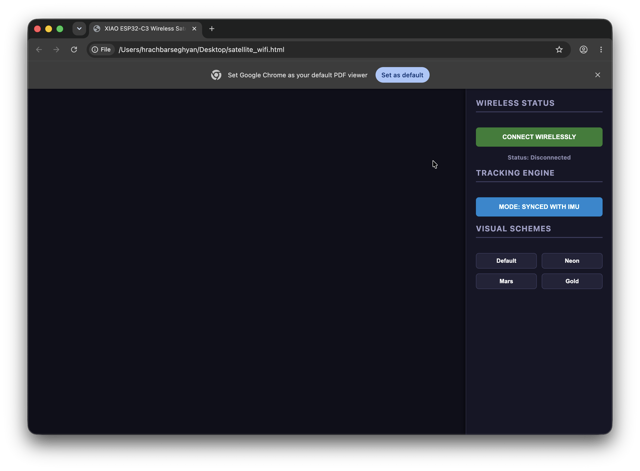
*Week 14’s UI
Group Assignment
This week Mairam and I explored a new way of bridging the physical and interface worlds using TCS3472 color sensor. To keep things interesting, we decided to start with a classic approach: objects’ color detection displayed live on a webpage. Since this required Wi-Fi capabilities, we went for the known route – the familiar ESP32 C3 microcontroller. However, lacking a free standalone board, we get creative. Mariam suggested repurposing her custom RC PCB, manually tapping wires to the back pins and securing them with tape to
Understanding logic was more critical than writing raw syntax, so we used LLMs to generate a base script, which we then customized and refined. The final code coordinates things quite well: it connects the ESP32 C3 to our local network, sets up a web server, and uses a built-in color palette set to translate the sensor’s raw data into color names understandable to humans. Now, the main loop constantly updates the live webpage with a glowing color preview while streaming the real-time RGB data for broader digital interactions. And thanks to Mariam, and her knowledge in programming made this project work more swiftly.
Individual Assignment
To make the communication fast, I went with a native USB serial protocol using the browser’s Web Serial API [Chrome and Firefox have a built in Serial Port driver pipeline]. This protocol lets the microcontroller stream data directly into Google Chrome. When I click connect, the browser opens a secure popup menu, lets me select my board, and establishes connection over the USB cable. It pushes new coordinates at 60Hz so there is zero noticeable lag between moving the board and seeing the reaction on screen.
In order to make the page layout concise I will not have the HTML code block here, so please refer to the Resources section.
For the actual interface, I coded a web page using HTML and Three.js [WebGL] to handle the 3D rendering. I asked Claude to designed a 3D shape, which it suggested to be a aerospace satellite that tilts and rotates to match the exact physical position of my board. I also asked for it to added a sidebar with interactive buttons so I can switch up the color themes on the object or toggle the tracking mode. When I turn off live syncing, the UI ignores the sensor and uses the last logged momentum to send the satellite into a slow, smooth orbital drift.
PCB Design
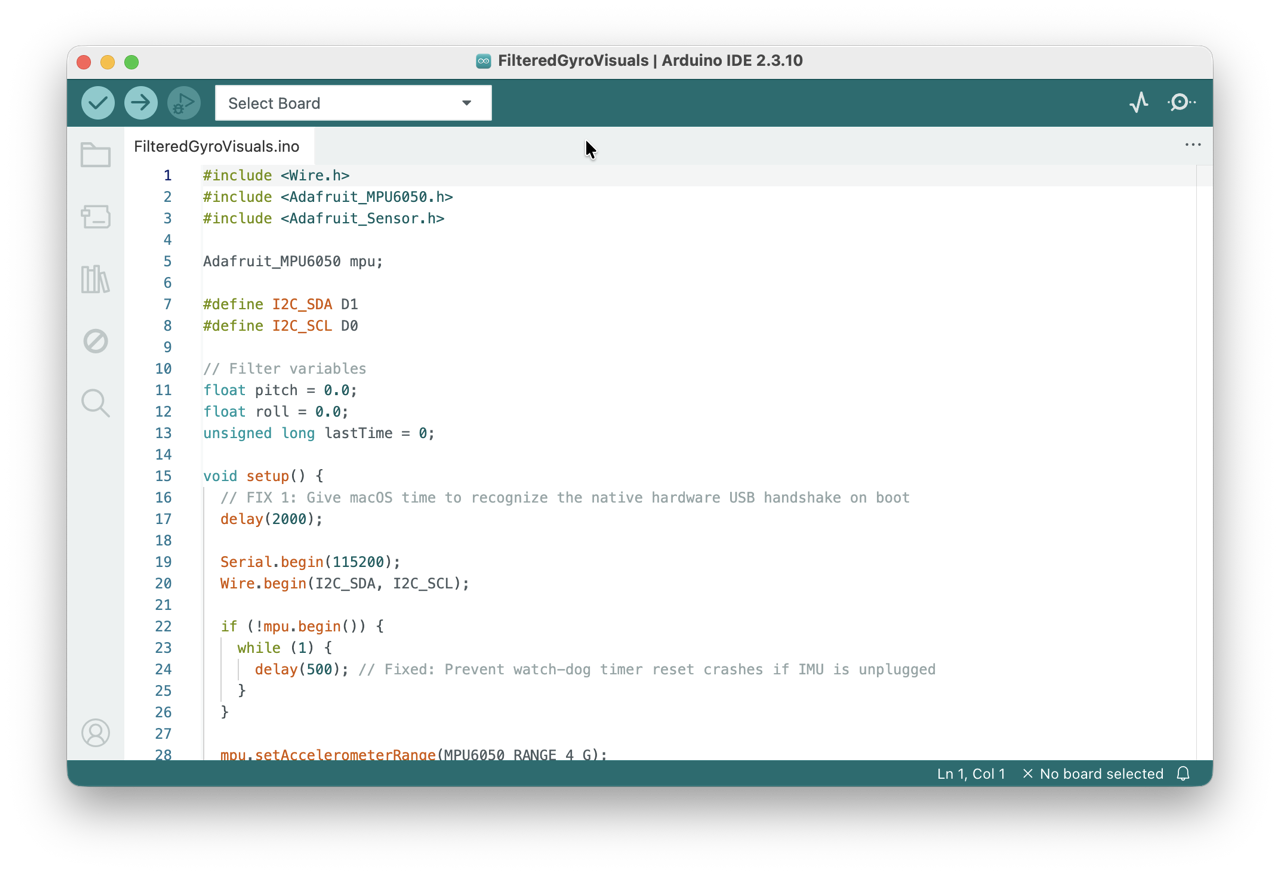
During week 9 I had used OpenGL, but now I have changed the method and instead, this time I decided to focus on building a local user interface that talks to board in real time. It reads data from the MPU6050 motion sensor. To keep the movements clean and get rid of any annoying sensor jitter, I set up a complementary filter right on the chip. If you refer to week 9’s conclusion, I shared how I did not like the presence of noise. This version combines the quick responsiveness of the gyroscope with the stability of the accelerometer before sending any data out.
*Prompt14.1
Tools I used
- AI platform: Claude, I used it for code generating, and for it to walk me through why my board wouldn’t pair
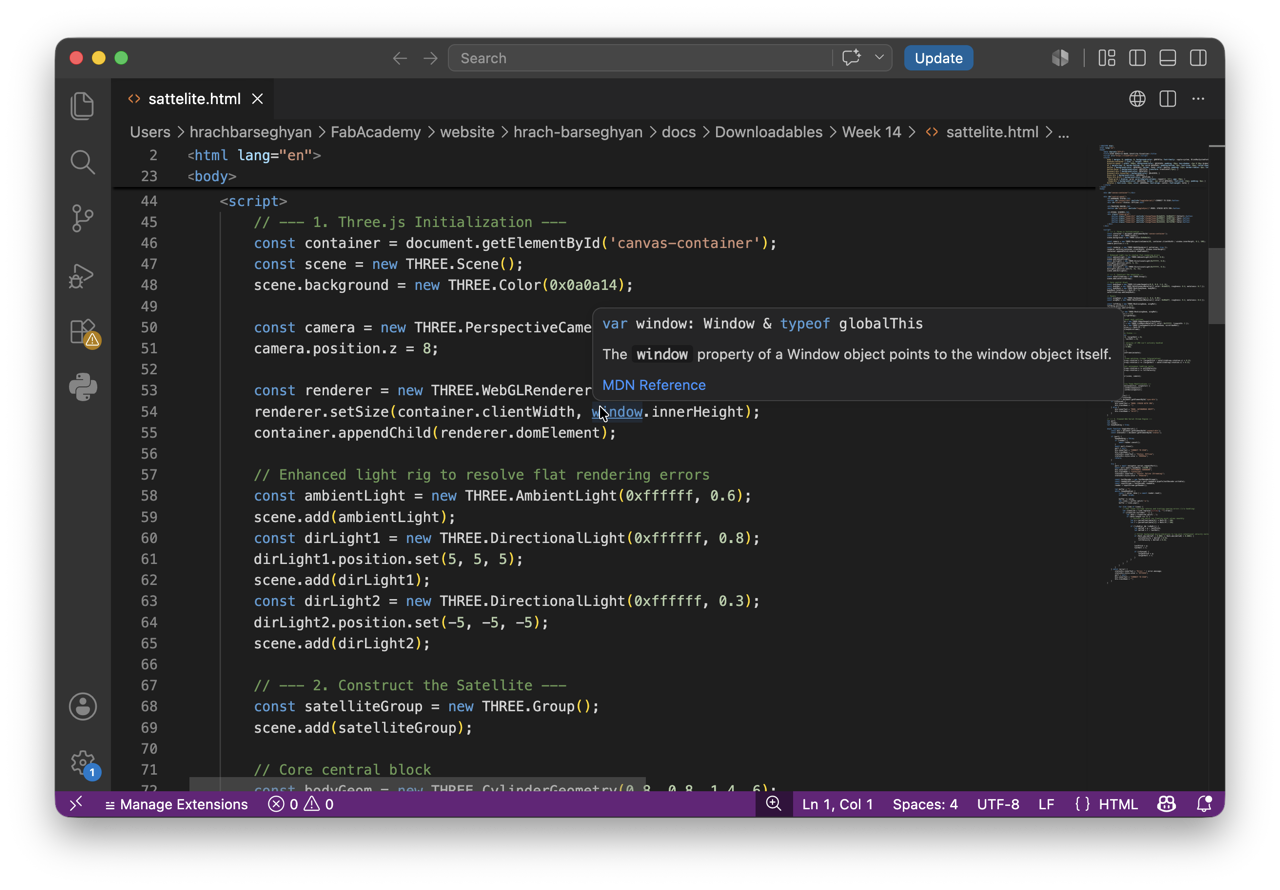
- Code editor:
VS Code
- Firmware IDE: Arduino IDE [ESP32 board package by Espressif]
- 3D library: Three.js, loaded from a CDN
- Browser API: Web Serial.
The hardware week
The board and sensor come from my input devices’ week, where I built and programmed the board around a Seeed XIAO ESP32 C3 with an MPU6050 6-axis IMU on I2C.
Wiring summary [for reference in this write-up]:
| MPU6050 | SDA | SCL | VCC | GND |
|---|---|---|---|---|
| XIAO ESP32 C3 | D1 | D0 | 3V3 | GND |
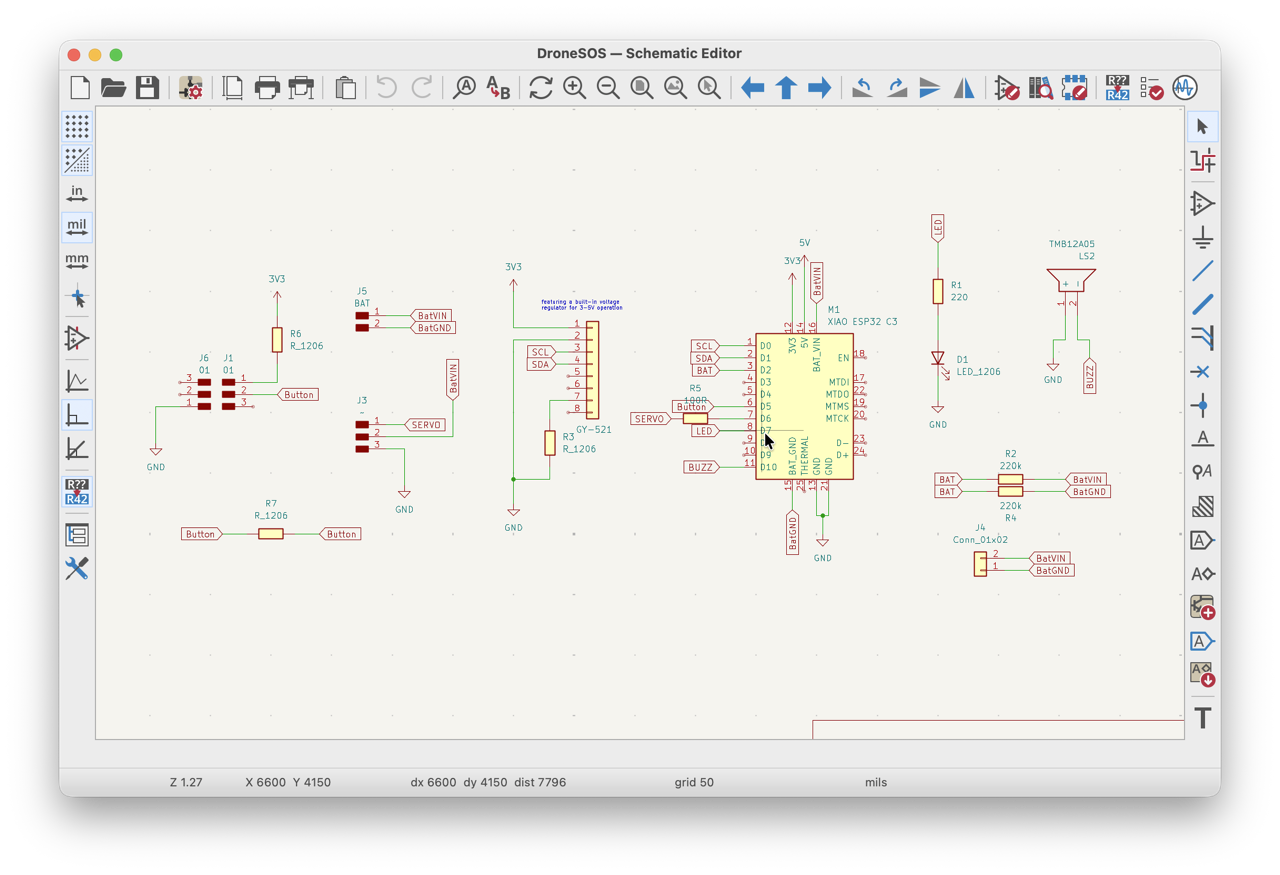
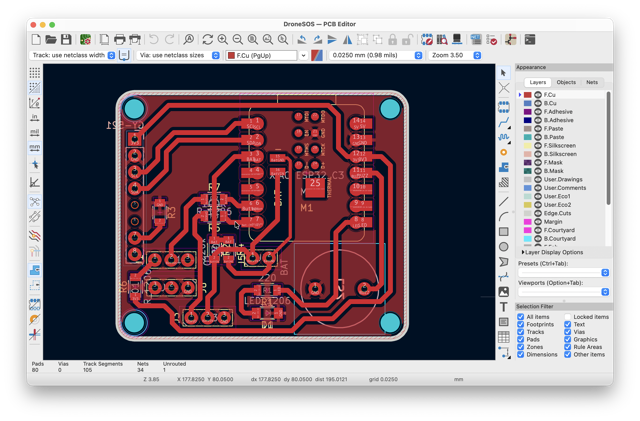
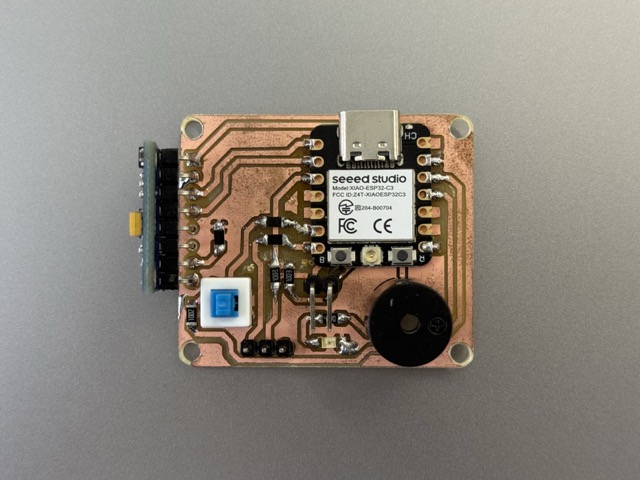
*PCB with Accelerometer
The UI
The interface is a single self-contained HTML file. On the left is a WebGL canvas with the 3D satellite; on the right is a control panel.
What each control does:
- CONNECT TO XIAO: opens the Web Serial port chooser and starts reading the stream.
- MODE: SYNCED WITH IMU / AUTONOMOUS DRIFT: switches between following the live sensor and a self-running tumble animation [also useful as a “is the 3D engine even working?” test].
- Visual schemes: recolor the satellite body and solar panels.
- A live
pitch / rollreadout so I can confirm data is arriving even before the model moves.
Code Structure
I organised the JavaScript into clear stages so it’s easy to follow:
- Robust loader: loads Three.js, trying three CDNs in turn, and shows a visible error if all fail (instead of a silent blank page). It also checks whether the browser supports Web Serial at all.
initApp(): builds the Three.js scene: camera, lights, and the satellite (a hexagonal body cylinder, two panel “wings”, and a wireframe outline), grouped so they rotate together.animate(): the render loop. In synced mode it smoothly interpolates the model toward the target angles from the sensor; in drift mode it spins on its own.- UI handlers:
toggleSync(),changeTheme(). - Web Serial engine:
toggleSerial(), which handles connect, read, parse, and disconnect.
UI-to-Board
Communication is Web Serial, browser → USB → board. The flow is: request a port, open it at the matching baud rate, then continuously read text, split it into lines, and parse each pitch,roll pair.
The core communication segment of the UI:
await port.open({ baudRate: 115200 });          // must match the firmware's 115200

const textDecoder = new TextDecoderStream();     // bytes -> text
readableStreamClosed = port.readable.pipeTo(textDecoder.writable).catch(() => {});
reader = textDecoder.readable.getReader();

let buffer = "";
while (keepReading) {
    const { value, done } = await reader.read();
    if (done) break;

    buffer += value;
    let lines = buffer.split("\n");   // a read() chunk may contain partial lines
    buffer = lines.pop();             // keep the leftover for the next chunk

    for (let line of lines) {
        const clean = line.replace(/[\r\n]/g, "").trim();   // strip \r\n from println
        const data = clean.split(",");
        if (data.length !== 2) continue;

        const pDeg = parseFloat(data[0]);
        const rDeg = parseFloat(data[1]);
        if (isNaN(pDeg) || isNaN(rDeg)) continue;

        // degrees -> radians for Three.js
        if (isSynced) {
            targetPitch = pDeg * Math.PI / 180;
            targetRoll  = rDeg * Math.PI / 180;
        }
    }
}
Deployment & running
Because this uses Web Serial, it only runs in Chromium-based browsers [Chrome, Edge, Brave, Opera] on desktop — not Firefox or Safari.
Web Serial also needs a secure context. Two ways to run it:
- GitHub/GitLab Pages: because Pages serves over https, Web Serial works directly. I put the HTML in my repo and enabled Pages, so the live app is here.
- Locally: opening the file directly [
file://] can be blocked depending on Chrome version. The reliable local method is to serve the folder:python3 -m http.server, then openhttp://localhost:8000/satellite.html.
Result
Other attempts
Not long ago, I had ordered a XIAO RGB LED matrix, a very small one – 6x10 pixels. It was a very cool component I qanted to experiment with, and so I had tried giving it cool light effects and all, but I wanted to make it work through an interface.
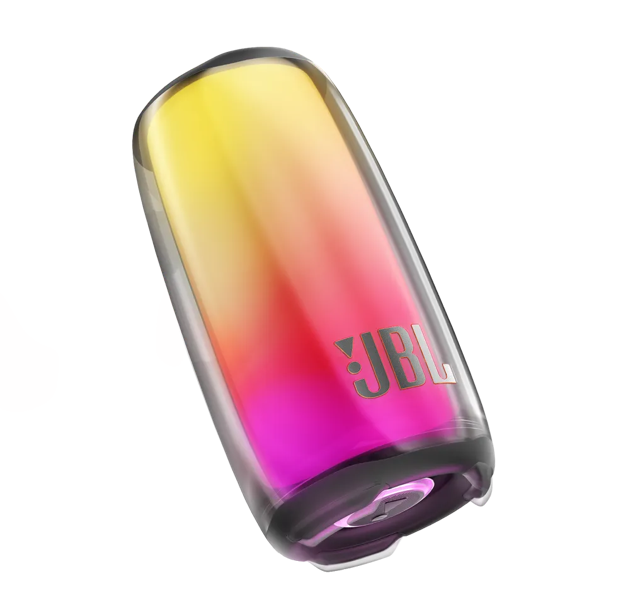 This idea came to me from my wireless speaker – JBL Pulse series. It features an RBG matrix covered by a diffuser and you can control the animations using either a dedicated button, or the phone app for more complex adjustments [brightness, patterns, colors, etc].
*Link to the speaker
This idea came to me from my wireless speaker – JBL Pulse series. It features an RBG matrix covered by a diffuser and you can control the animations using either a dedicated button, or the phone app for more complex adjustments [brightness, patterns, colors, etc].
*Link to the speaker
The LED Matrix
Next, I soldered the matrix to a XIAO ESP32 S3 Plus. Its identical footprint makes it compatible across the XIAO lineup. I then used Claude to build a macOS app in Swift. We began with basic features based on my initial guidelines, gradually extending the application’s functionality as the foundation proved stable.
I first uploaded the .ino code onto the XIAO, and then proceeded to running the interface. As Claude’s credit usage is very high, I decided to skip an app icon completely. That did not seem like a priority, so instead, once I had changed to the correct directpry I ran the following code in Terminal:
*Prompt14.2
swift run
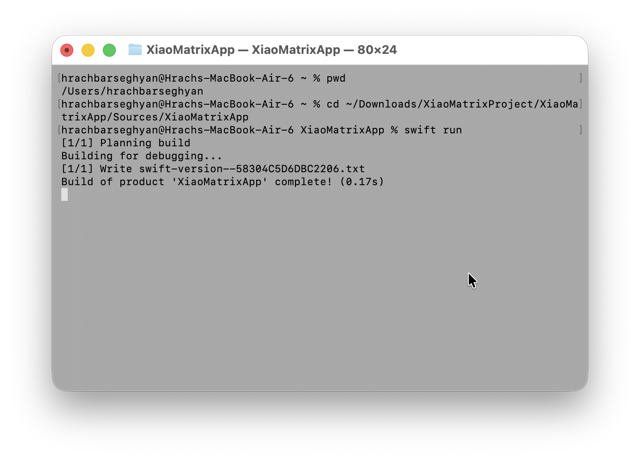
The app has port connectivity with a dedicated dropdown menu to select the device, and a button to connect, or disconnect to it.
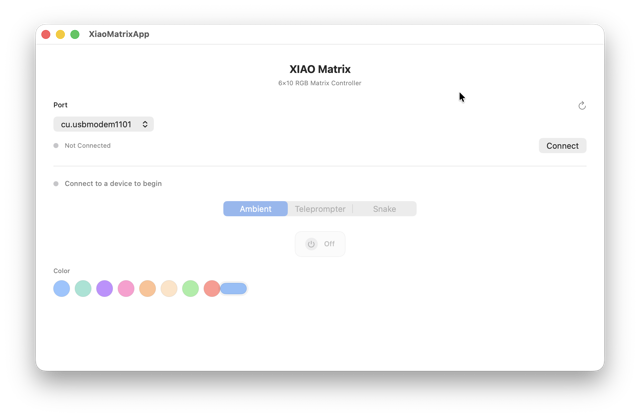
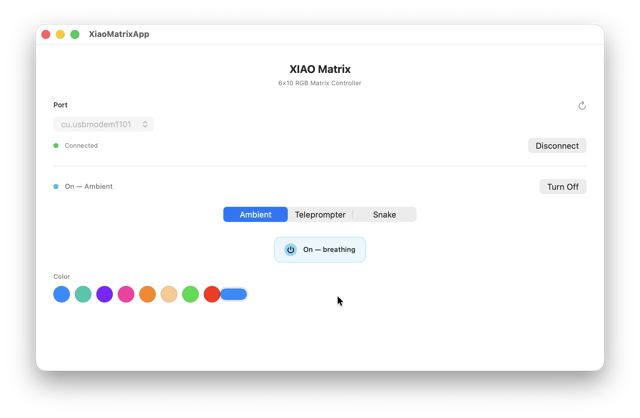
Screen Saver Mode
In the center, there’s a button which boots the screen up, and acts like a screen saver or puts the screen on a standby mode. Basically the screen oscillates from bright to dim resembling a sinusoid graph. You can pick your desired color, or change from a color wheel where you can also change the brightness.
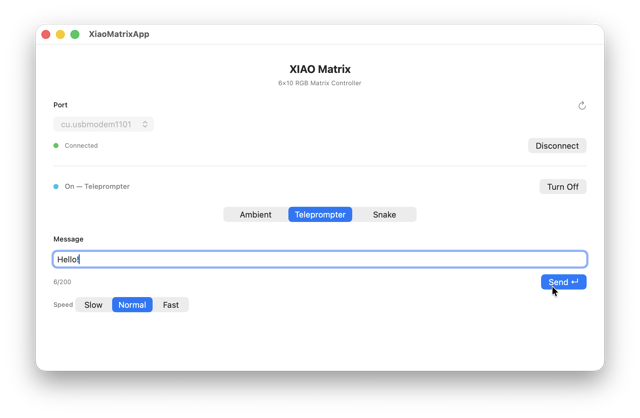
Teleprompter
I found teleprompter to be a cool usecase for this component, especially considering the challange of such minimal pixel height and width. For readability purposes, I considered having a monospaced font, meaning the height and the width of all the letters should be the same, e.g. 5x5 px.
You type in some text, and the matrix outputs it by sliding the text from right to left. You can change the color of text, and also adjust the wpm [words per minute] speed.
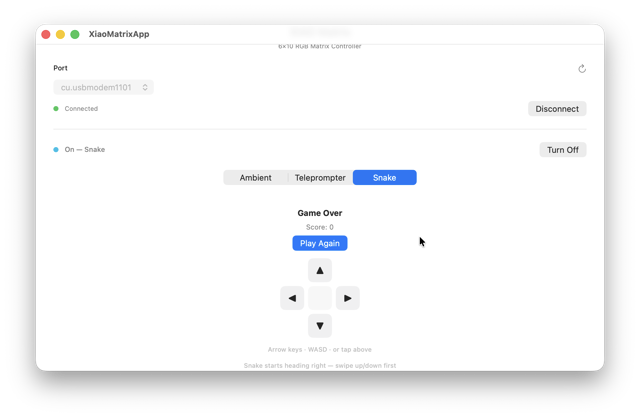
Finally, the classic snake game. A green array of pixels should chase a red solo pixel. Both the screen buttons and keyboard are funtional.
Results in the video below.
How do they talk?
The XIAO ESP32 S3 has a built-in USB controller that presents itself to macOS as a CDC serial device [Communications Device Class] — essentially a virtual serial port at /dev/cu.usbmodemXXXXX.
The Mac app opens that path with raw POSIX calls [open, tcsetattr, read/write], no drivers needed. Both sides send plain newline-terminated text at 115200 baud — the Mac writes commands like ON or TEXT:HELLO, the board writes back lines like STATE:ON or SCORE:3. That’s the entire protocol.
The key Arduino setting that makes it work: USB CDC On Boot → Enabled in the board config, which tells the ESP32 S3 to expose its native USB port as a serial interface rather than just a flashing target.
Problems
I have not yet figured out how this array works, but to try to understand it, I had written a simple code which would first tested if all the pixels worked correctly.
How does a pixel behave?
As a single RGB pixel is made up of 3 small LEDs – Red, Green, and Blue - each pixel is supposed to fully function in each of those individual colors. By mixing these red, green, and blues you get different colors, and once they all work at equalt levels they produce the white color. So that simple test itereated over each pixel, and finally lit the whole matrix in red, green, then blue.
C++

#include <Adafruit_NeoPixel.h>

// Define the digital pin connected to the LED matrix data input
#define PIN        D1

// Total number of pixels in the XIAO matrix (typically a 6x10 grid)
#define NUMPIXELS  60

// Initialize the NeoPixel library
Adafruit_NeoPixel matrix(NUMPIXELS, PIN, NEO_GRB + NEO_KHZ800);

// Delay times in milliseconds
int pixelDelay = 50;   // Speed of the individual pixel chase
int colorDelay = 1000; // How long full colors stay on screen

void setup() {
  matrix.begin(); // Initialize the matrix
  matrix.setBrightness(30); // Set brightness low (0-255) to protect eyes and save power
}

void loop() {
  // --- PART 1: Individual Pixel Test ---
  // Iterates through every pixel one by one in white
  for(int i=0; i<NUMPIXELS; i++) {
    matrix.clear(); // Turn off previous pixel
    matrix.setPixelColor(i, matrix.Color(255, 255, 255)); // White
    matrix.show();
    delay(pixelDelay);
  }

  matrix.clear();
  matrix.show();
  delay(200);

  // --- PART 2: Full Matrix Red Test ---
  fillMatrix(255, 0, 0); // Red
  delay(colorDelay);

  // --- PART 3: Full Matrix Green Test ---
  fillMatrix(0, 255, 0); // Green
  delay(colorDelay);

  // --- PART 4: Full Matrix Blue Test ---
  fillMatrix(0, 0, 255); // Blue
  delay(colorDelay);

  // Clear at the end of the loop cycle
  matrix.clear();
  matrix.show();
  delay(1000);
}

// Helper function to light up the whole matrix at once
void fillMatrix(uint8_t r, uint8_t g, uint8_t b) {
  for(int i=0; i<NUMPIXELS; i++) {
    matrix.setPixelColor(i, matrix.Color(r, g, b));
  }
  matrix.show();
}
*Prompt14.3
Conclusion
Back in the “old” days, before the rise of LLMs I had hand coded a couple of games using Java’s GUI framworks – Swing and JavaFX. Java’s GUI was not the easies, but it was fun!
I cannot say that “vibe coding” is not fun, but it does not feel rewarding. At least not in these small projects. One thing that I loved about this week, and the assistance from AIs, is that I can program in any language, or for any OS I desire. Just like using Swift, which I have never ever used before…
Resources
Gyroscope Satellite
• Part 1, Firmware
• Part 2, UI
LED Matrix
Prompts
Prompt14.1 Create a real time 3D orientation visualizer using an MPU6050 IMU connected to XIAO ESP32 C3 via pins D1 [SDA] and D0 [SCL]. The board runs an independent Kalman Filter on its pitch and roll axes, merging gyroscope and accelerometer data to eliminate vibration and electrical noise. The stabilized coordinates are streamed over a native USB connection at 115200 baud. The UI is a self-contained index.html file running locally in Google Chrome or Firefox. It uses the Web Serial API to open a secure browser port menu and read incoming telemetry, automatically cleaning trailing carriage returns. A hardware-accelerated 3D aerospace satellite with a hexagonal body and solar panels is rendered at 60 FPS using Three.js [WebGL], smoothly matching the board’s real-world movements. A sidebar control panel features interactive buttons to instantly change the satellite’s color scheme. It also includes a toggle to switch from live tracking to an autonomous drift mode. When clicked, the UI freezes incoming sensor data and forces the satellite to spin continuously using its last logged rotation speed.
Prompt14.2 You built a macOS app that controls a physical LED matrix over USB, covering hardware, firmware, and software end-to-end.
Hardware: A Seeed Studio XIAO ESP32S3 microcontroller stacked onto a 6×10 RGB matrix of 60 WS2812 LEDs, powered entirely over a single USB-C cable from a MacBook.
Firmware (Arduino/C++ on the ESP32S3): A multi-mode state machine that receives plain-text serial commands and drives the LEDs. Modes include ambient breathing (with a runtime-adjustable color), a teleprompter that scrolls pixel-font text across the matrix, and a playable Snake game. Includes a hard brightness safety ceiling to prevent overheating, a watchdog that auto-shuts the matrix off if the Mac app stops responding, and a calibration command to verify the physical pixel wiring order.
Mac App (SwiftUI + POSIX serial, no external dependencies): A native macOS app that opens the board by its USB bus address, sends mode/color/text/game-input commands, and receives live state back (power state, score, game over). Snake captures keyboard input via a custom NSViewRepresentable that sits in the responder chain. The app builds into a proper double-clickable .app bundle with a generated icon.
The system satisfies the assignment requirement: wired node (XIAO ESP32S3) addressed by USB bus path, local input (MacBook keyboard), local output (LED matrix), with bidirectional communication over the serial bus.Prompt14.3 A simple testing script for a XIAO RGB LED matrix connected to a XIAO ESP32-S3 microcontroller to check for dead or damaged pixels. The code needs to first iterate through every single pixel one by one by illuminating them in white, and then transition to lighting up the entire matrix simultaneously in three solid color phases: first red, then green, and finally blue.