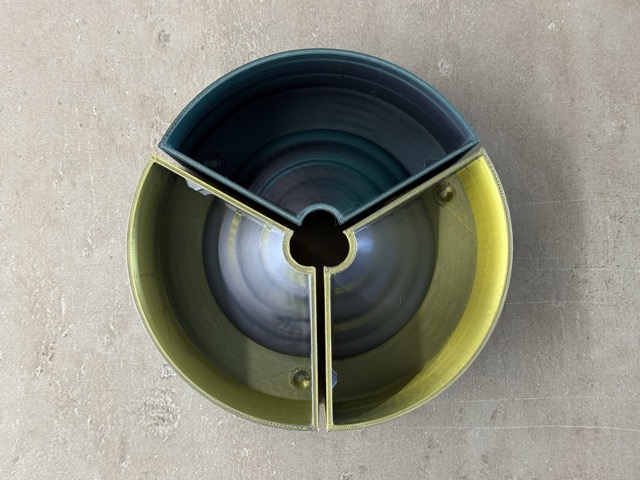
Week 13: Molding and Casting

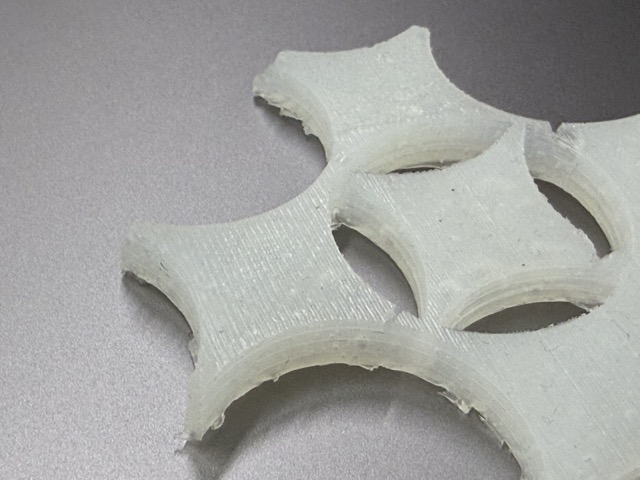
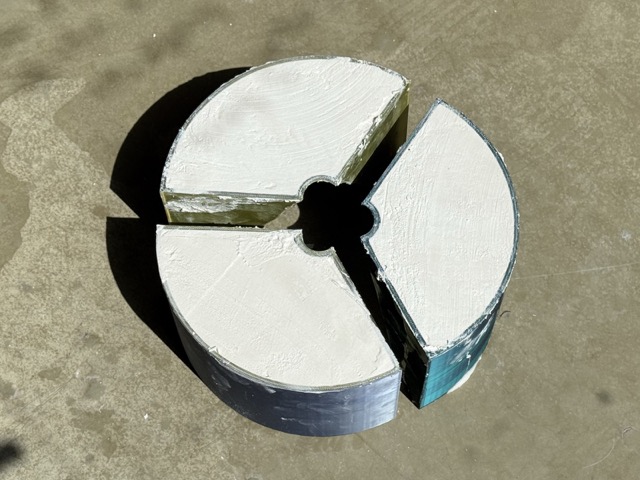
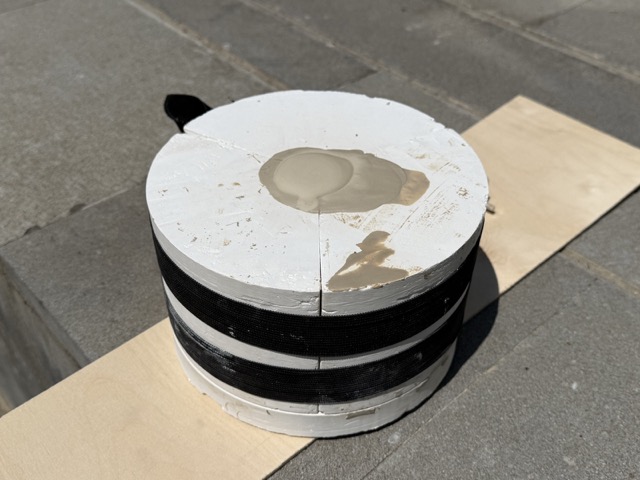
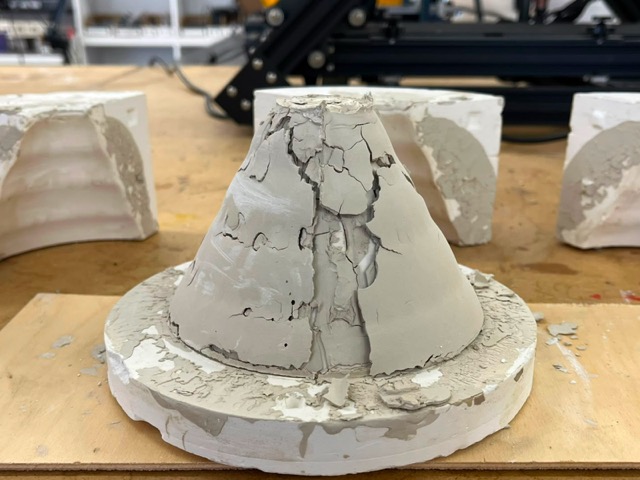
*The final four-part gypsum mold
Group Assignment
For the group assignment it was Mariam, Ani, Gevorg, and Hrach [me]. Ani and Gevorg are the students from Gyumri node, but to conduct the stafety training, and on-sight lecture we worked all together.
Safety Training
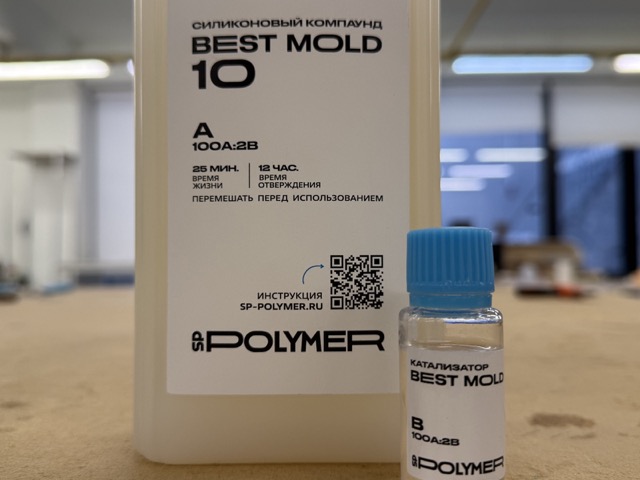
The Cold Shock: if the bottles get cold, the material separates and will not cure. You must let them sit in a warm room [above 23°C] for a few days, then stir each bottle individually for 10–15 minutes before mixing them together.
The Banned List: never use vaseline, WD-40, silicone sprays, or vegetable/motor oils as release agents. They will permanently melt or bond the silicone to your master model.
The Vacuum Chamber: if degassing, use a massive mixing cup. The vacuum causes the silicone to expand up to 3 to 5 times its original volume, creating mess if the container is too small. Keep vacuum time under 2 minutes.
Refer to the producer’s manual here.
Methods
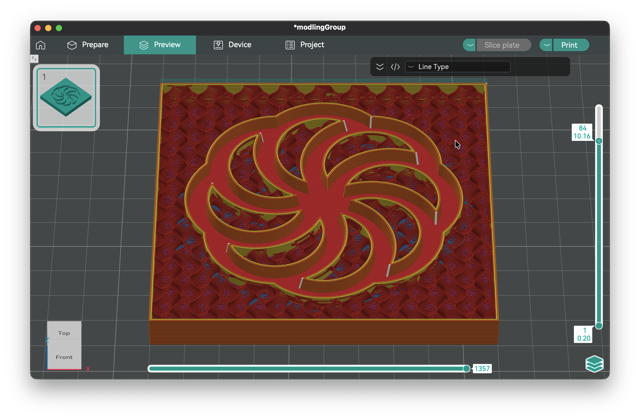
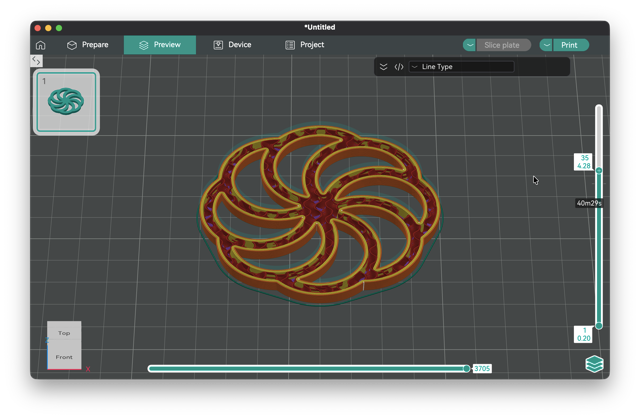
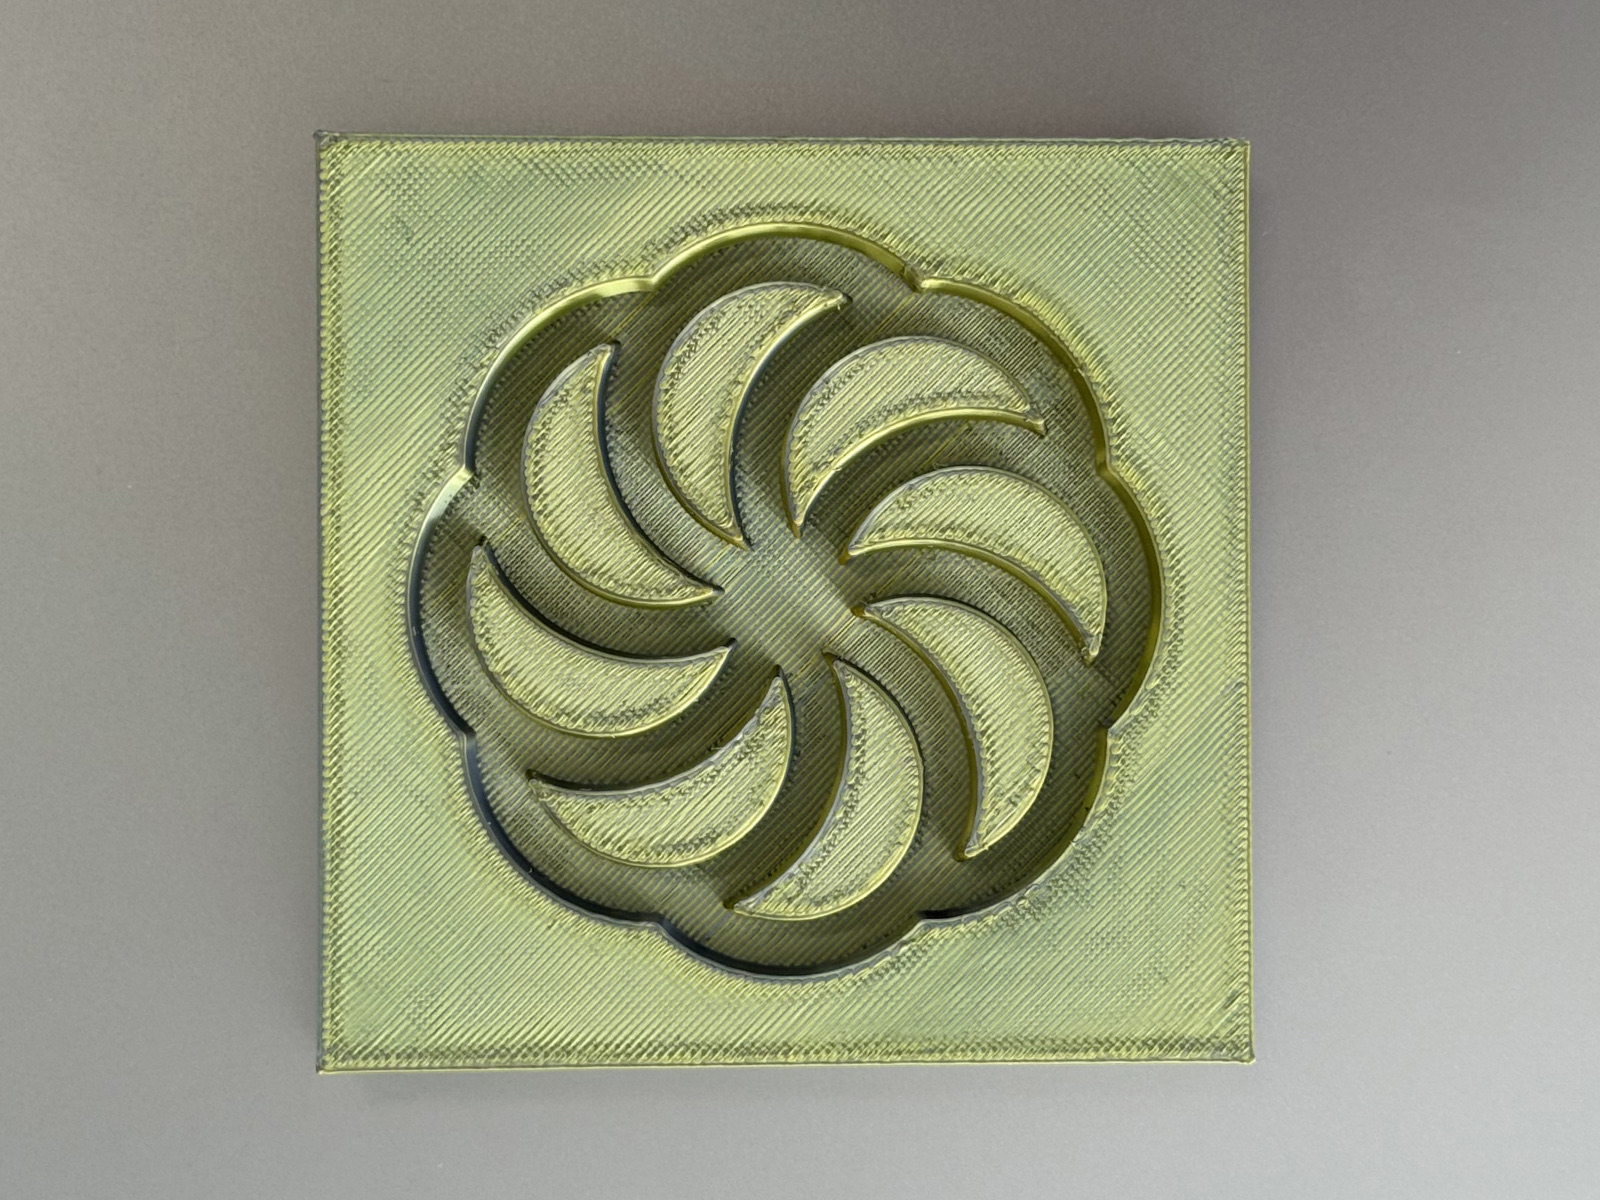
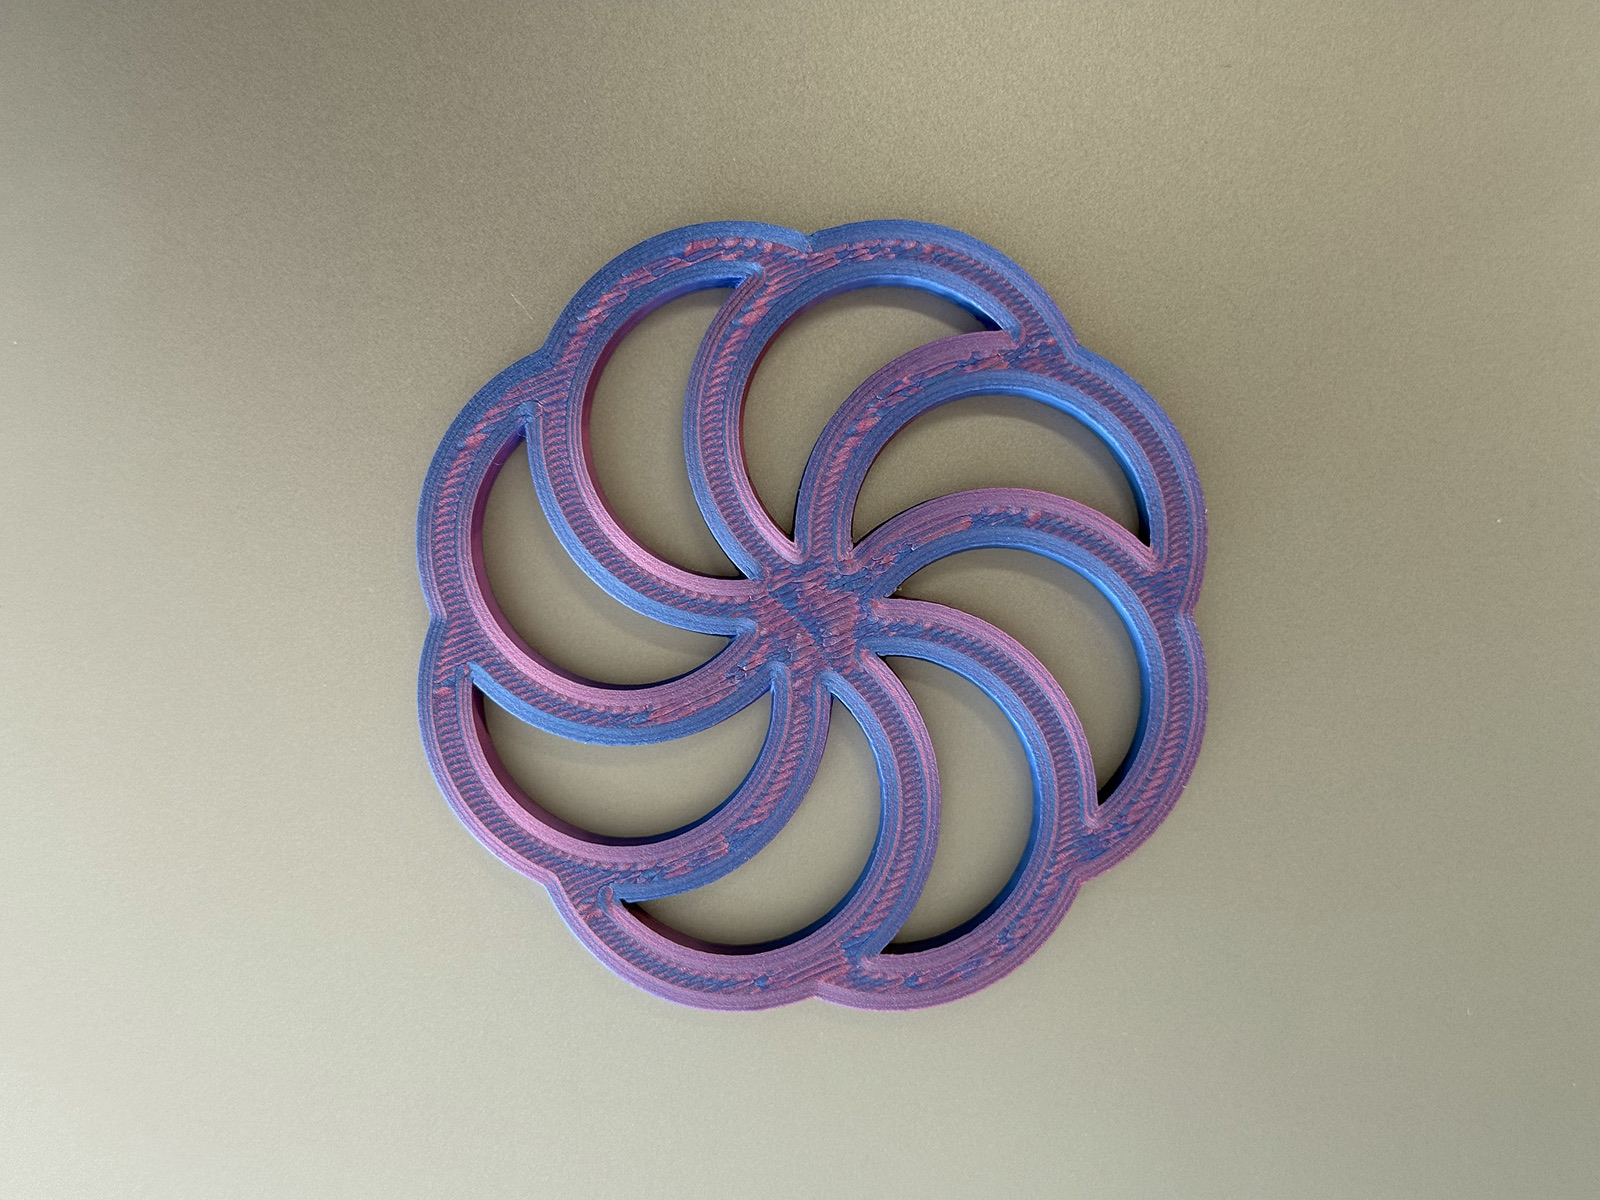
For this task we had quickly designed an Armenian Eternity [known as Arevakhach or “sun cross”]. This eight leaved wheel is an ancient national symbol representing everlasting celestial life, the sun, and the cyclical nature of time.
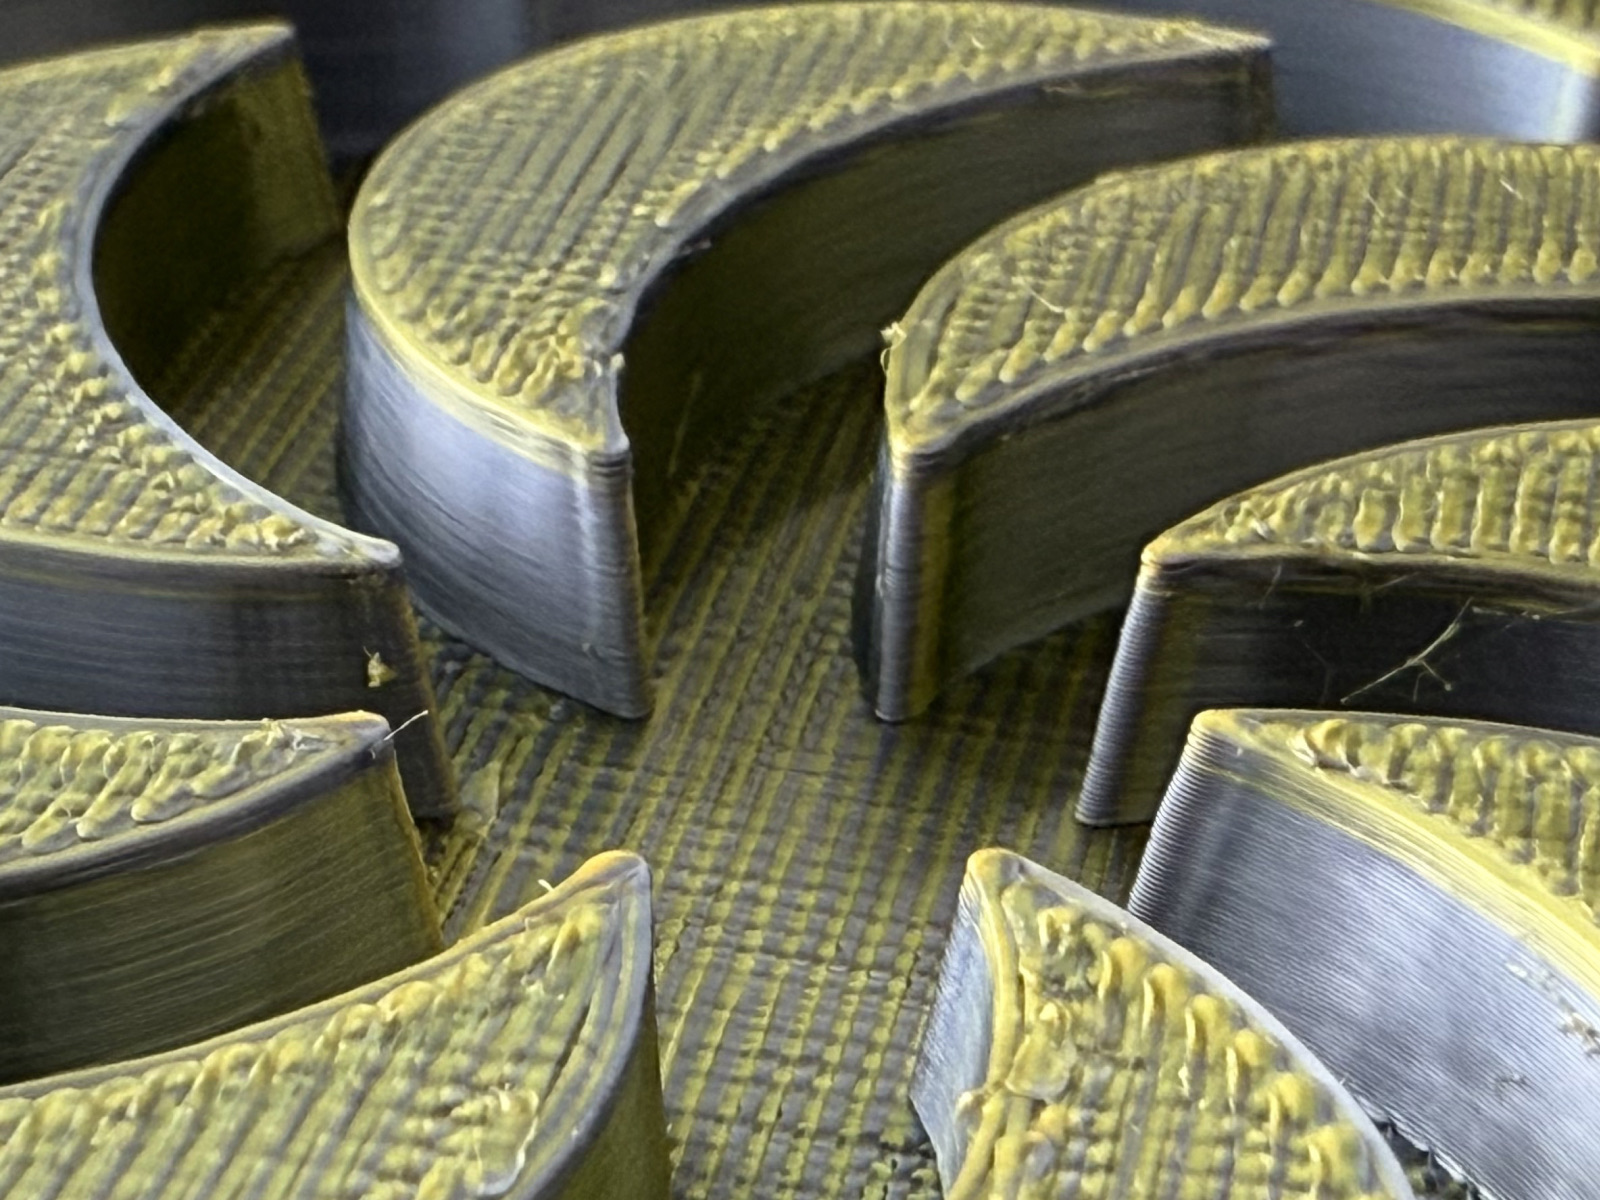
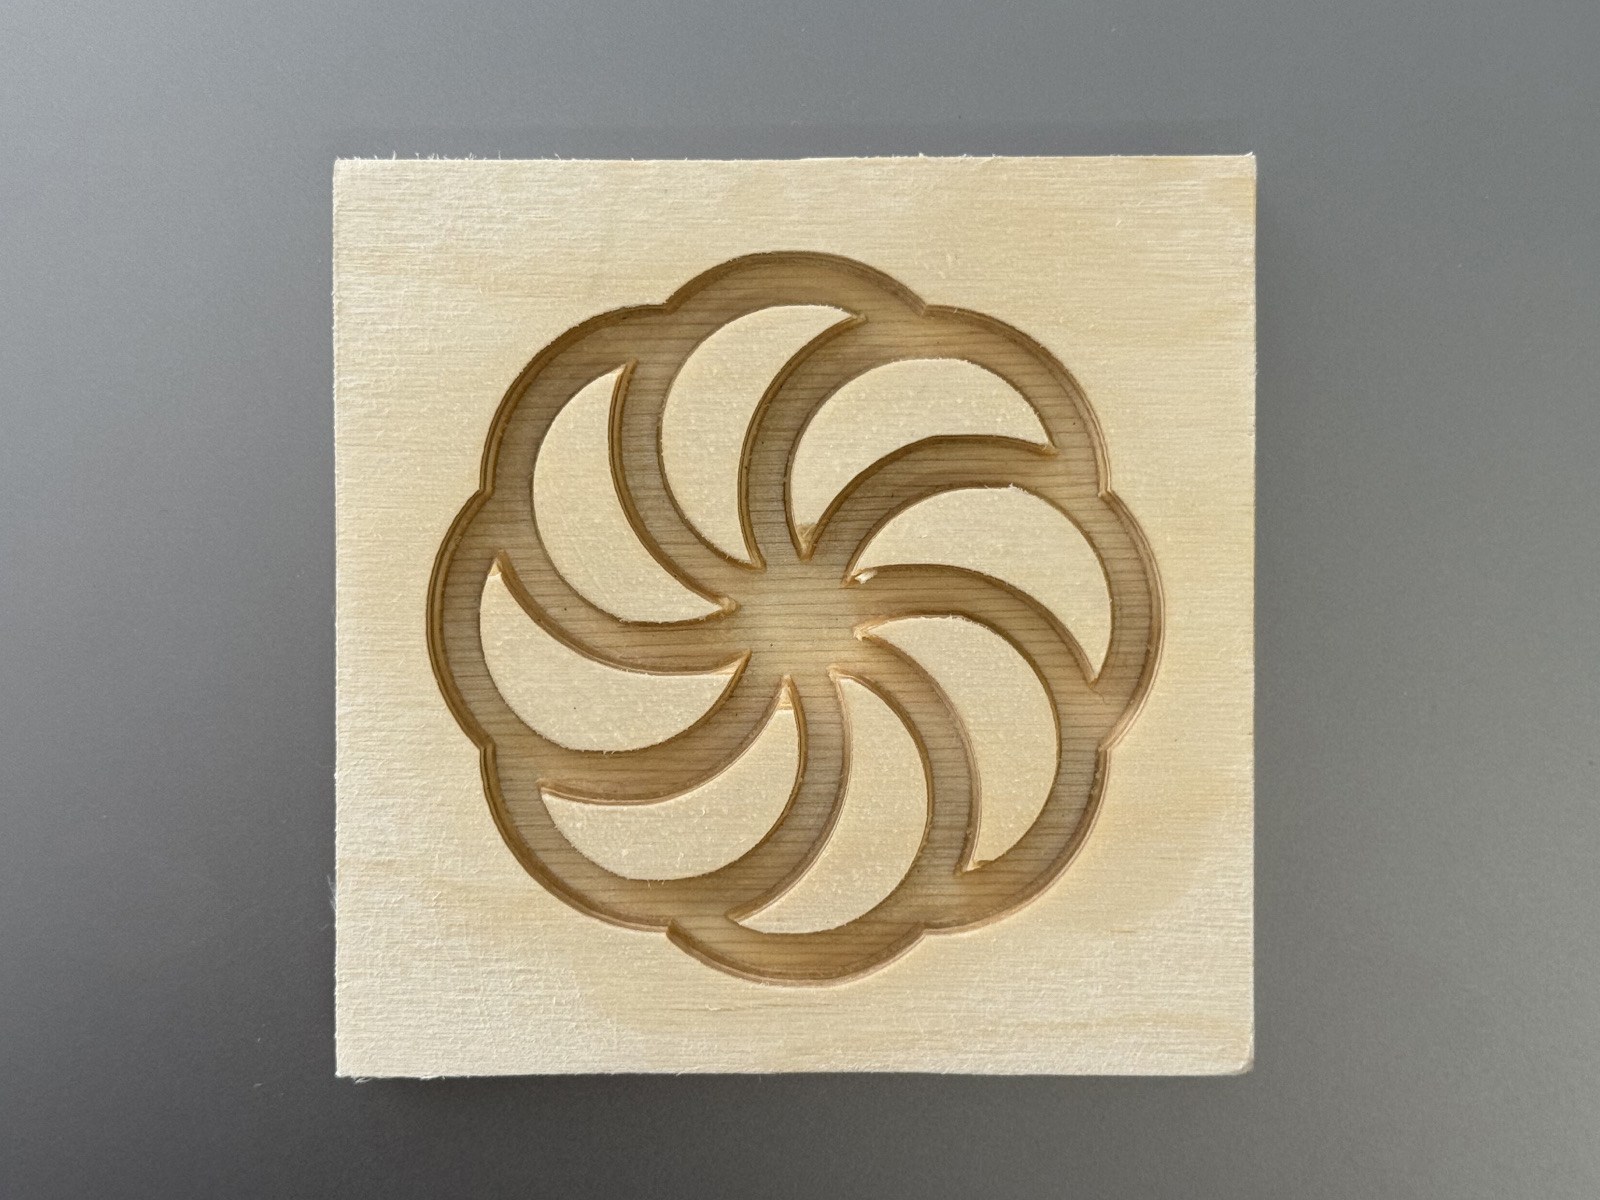
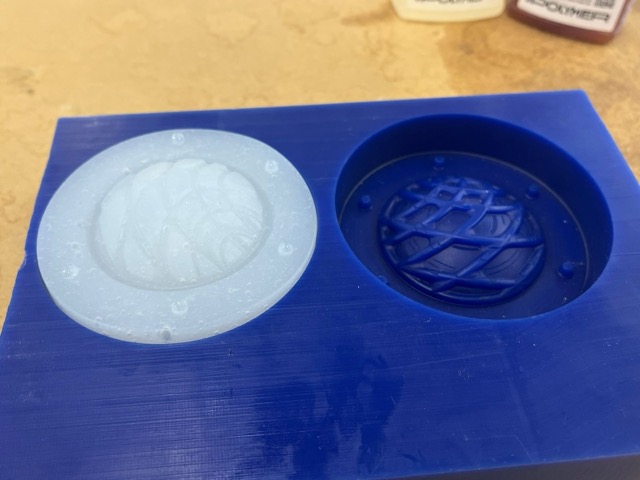
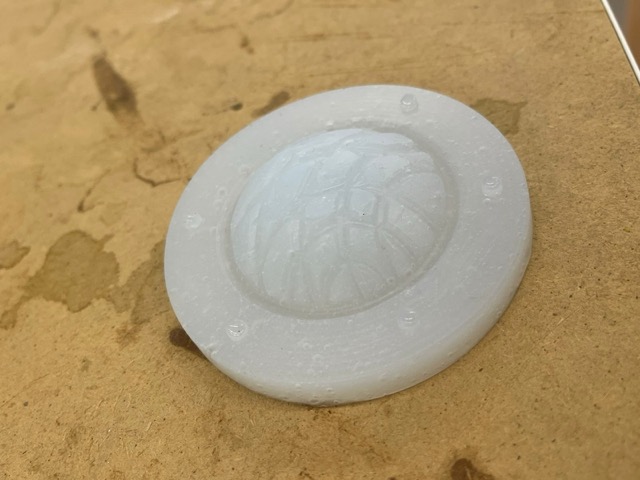
We made two versions of this – a negative mold [left image], and a piece to make a master mold [right image]. The infill for both were set to 15%, and the wall thinkness to 2 layers.
3D Printed
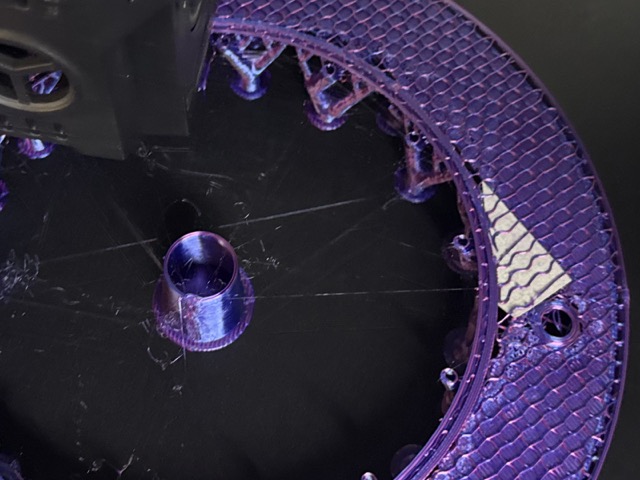
The most important feature of any mold is that the walls are sloped [right image]. This helps the cast slip out from the mold easily, probably any mold has the slope considered into its design, if there is nothing pushing/pulling it out.
Casting
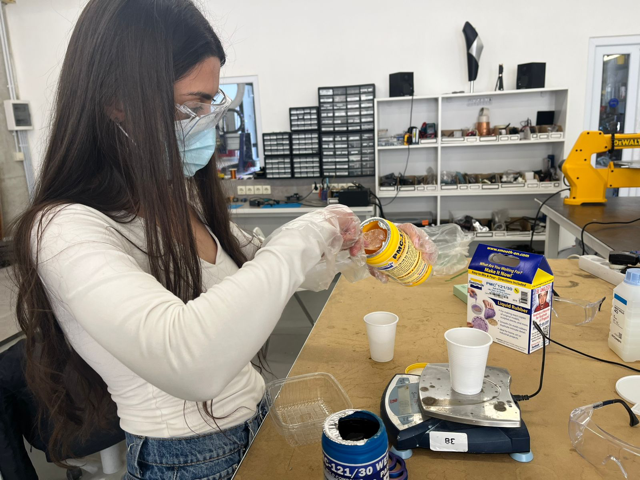
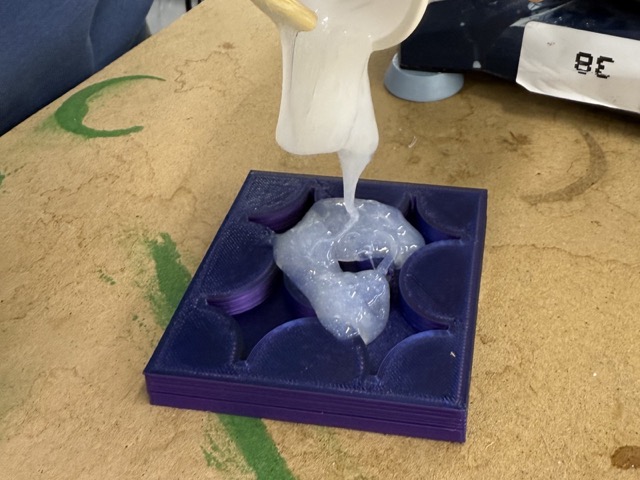
To make a mold with Smooth-On, spray your object with a release agent inside a container, then measure equal amounts of Part A and Part B. Stir the two liquids together thoroughly for at least three minutes, making sure to scrape the bottom and sides of your mixing cup to prevent unmixed sticky patches.
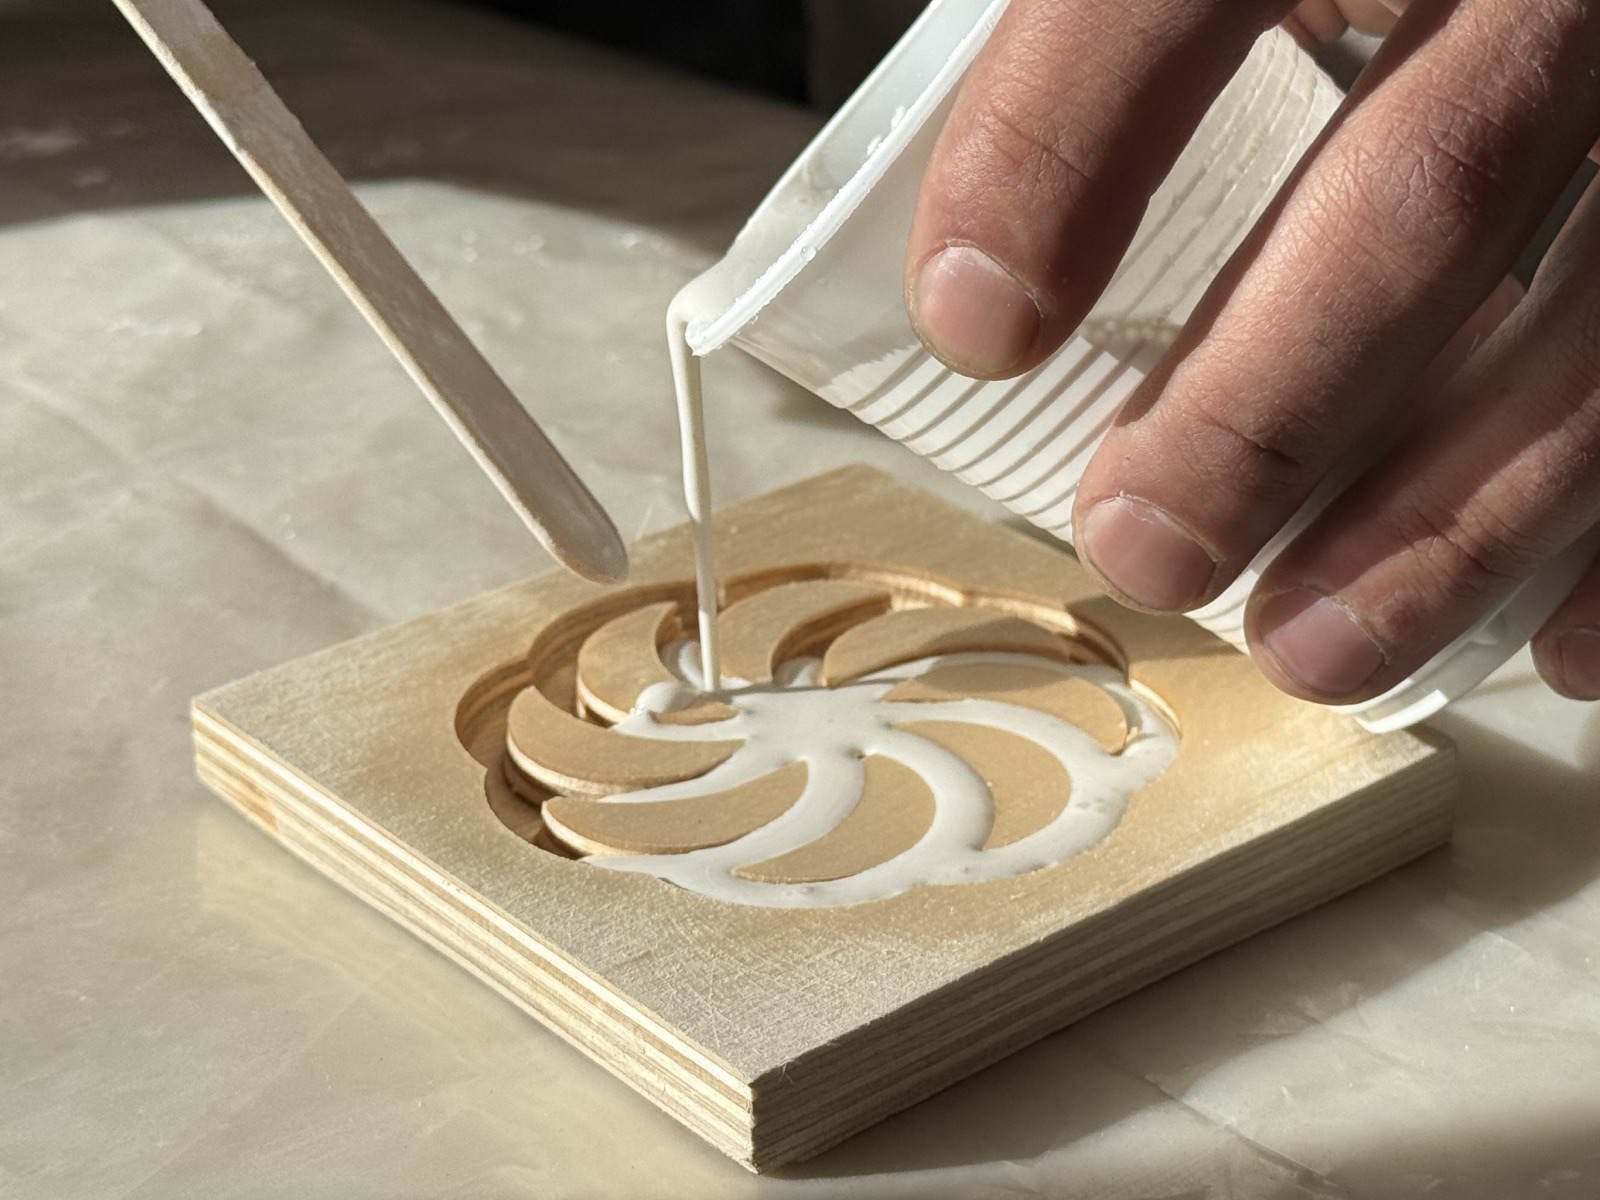
Pour the liquid slowly into the lowest part of the container so it rises naturally over the model to minimize bubbles. At last, leave the material undisturbed to cure at room temperature. In just 10 minutes the mold cures.
CNC
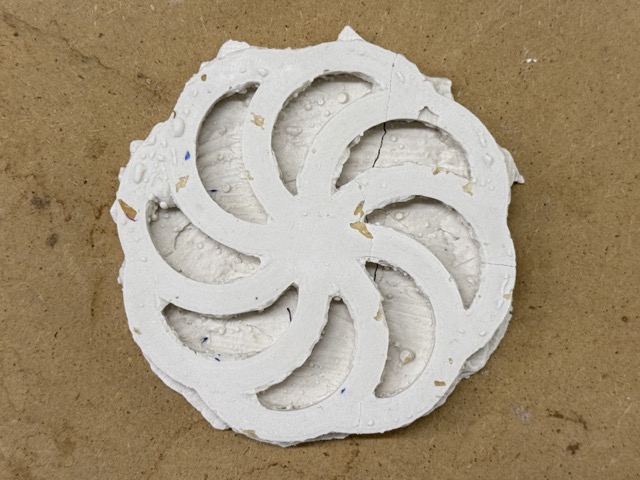
The negative mold was not only printed, but also milled on the ShopBot [bottom left image]. We mixed a small cup of gypsum with water, and poured it into the wooden mold. Same as the print [we used the same file], the walls were slightly sloped for the cast to come out.
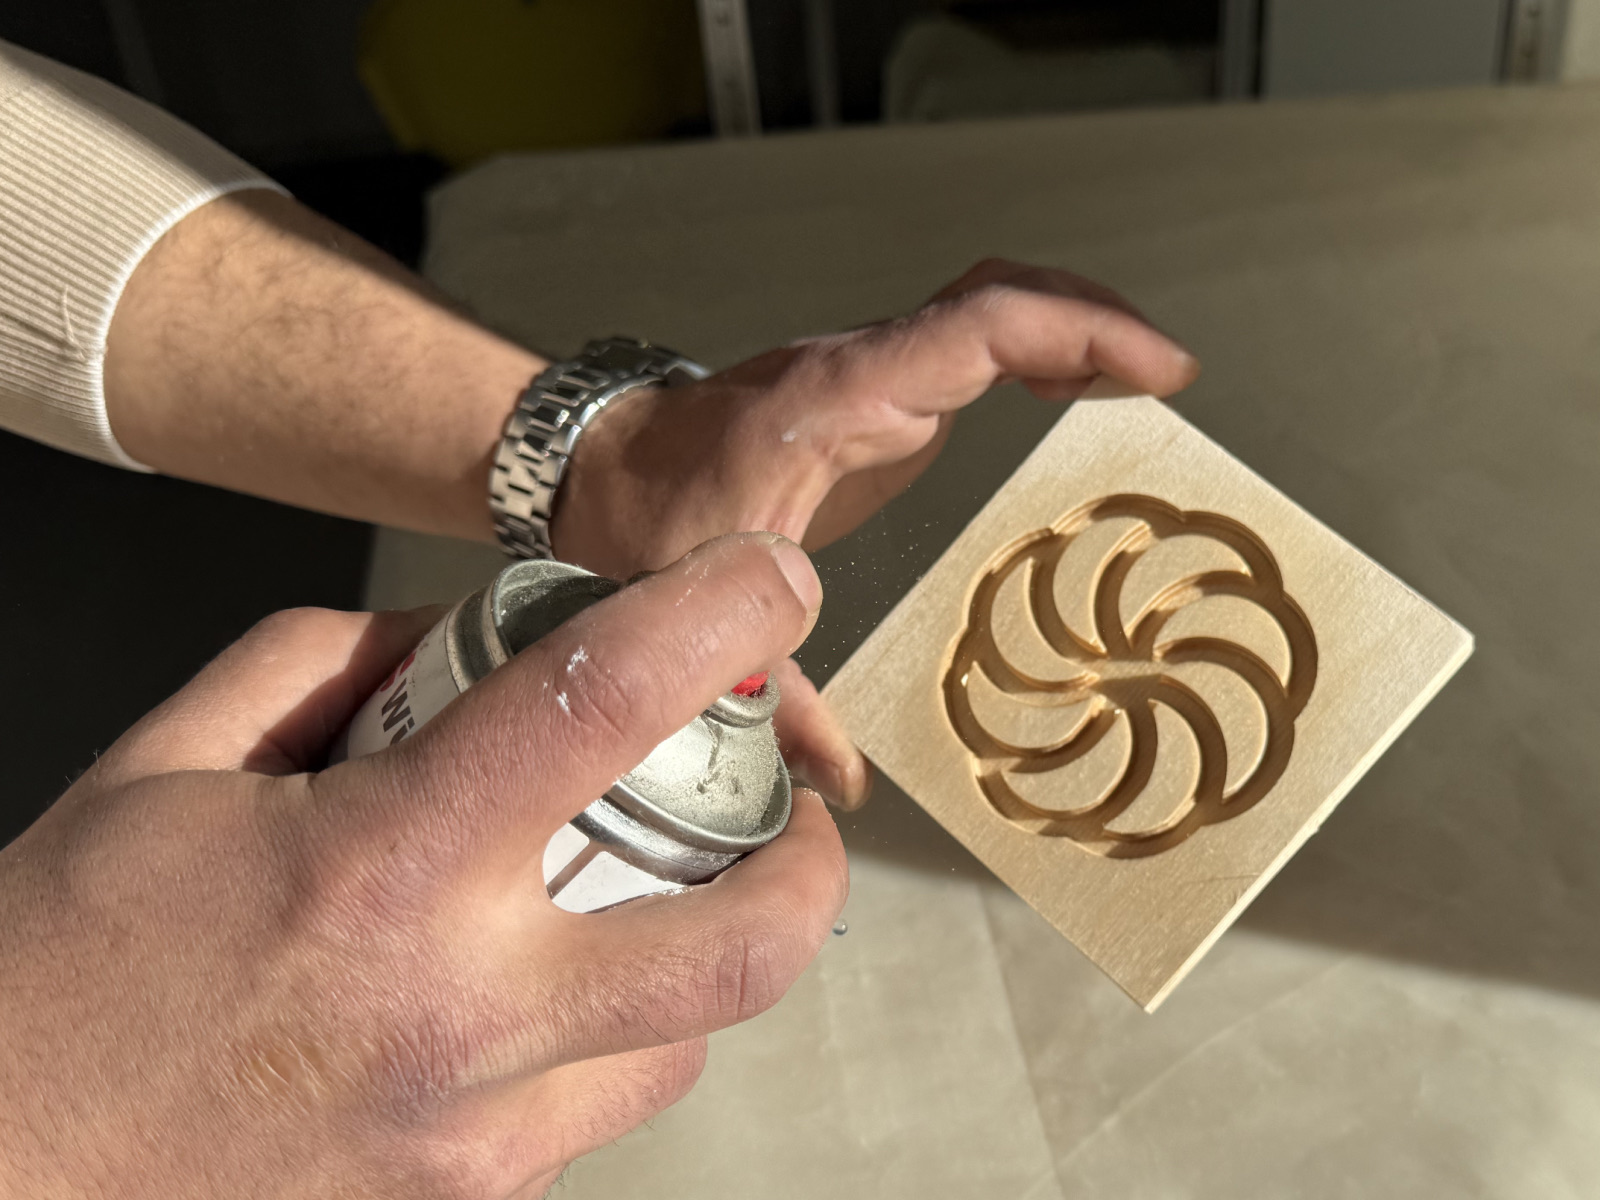
It was still difficult to get the cast out, and indeed we failed. Unlike a more flexible material, wooden molds of this shape do not seem to be working. We tried to both pry it, and hit the mold onto a flat surface. Nothing really work, and even as a second try we spraied the wood with some lubricant [top right image], but it still did not work. We ended up digging the remainings out with a knife.

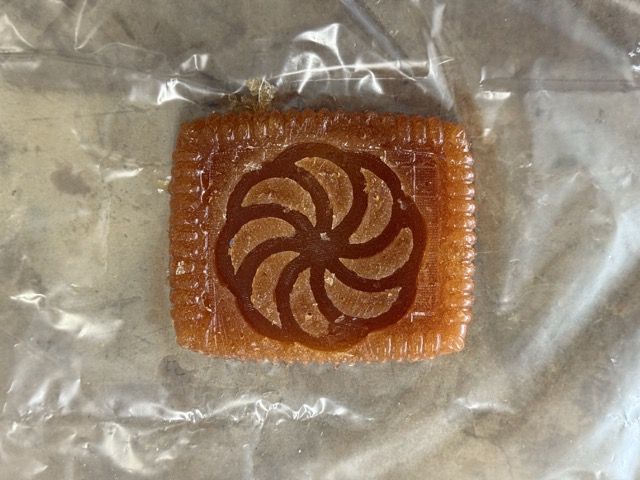
Wax Molds
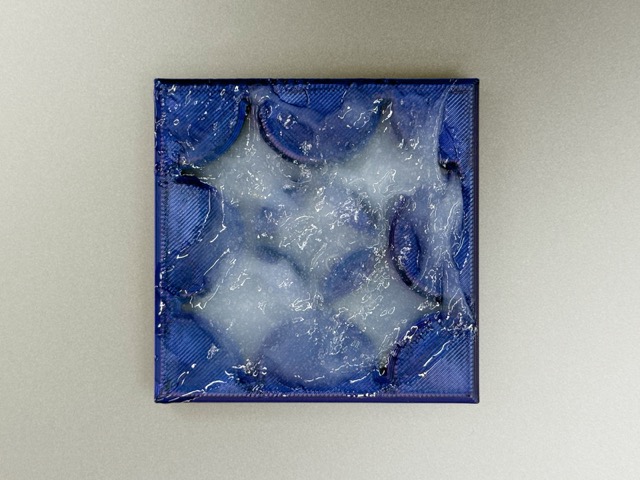
For observational purposes, we also used one of the wax molds we had at the lab. The same silicone we had mixed to optain the resin mold’s cast, we also poured it into the wax one.
Individual Assignment
Negative Mold
Achieving this form was quite simple. I first imported the .svg file of my favicon. Then I extruded the shape to a desired thickness, and cut it out of a extracted square with slightly titlted walls.
As we had used the same silicone base during the group assignment, everything was fairly easy, and I simply needed to pour the mixture into the print mold.
Why did I choose to printed the mold?
Again, as this is a learning project, I try to be more resourceful! Beside, printing was much faster, and less laborious compared to wax milling, or plywood milling. The major flaw were the layerlines, but again, as this was for experimental purposes, I did not seem to mind it.
The Idea
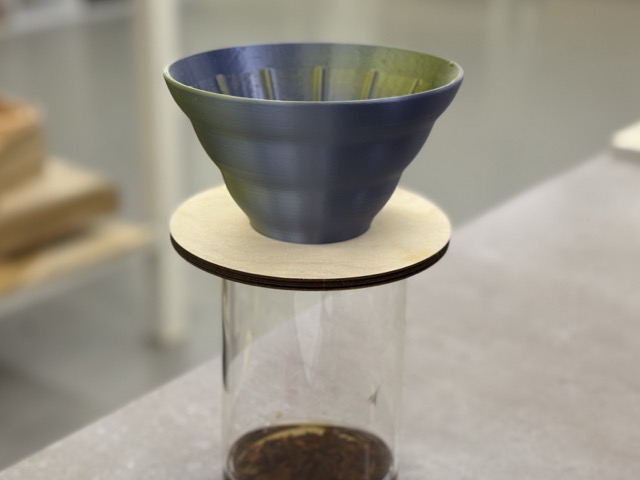
I drink coffee everyday! I make my coffee using various tools, gadgets, methods and recepies. In fact, in my home section you can also find an interesting poster on a research I conducted studying coffee bean changes during roasting. So naturally, I dedicated an individual project to making something related to coffee, in this case a cofee dripper.
Not to complicate the design, or spend time on developing prototpes, I decided to trace the design of the funnel I am using to prepare my daily filter – a Hairo V60.
The Method
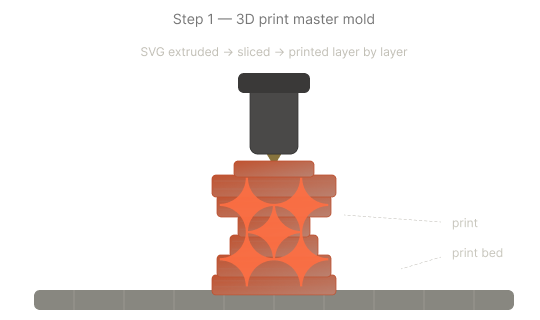
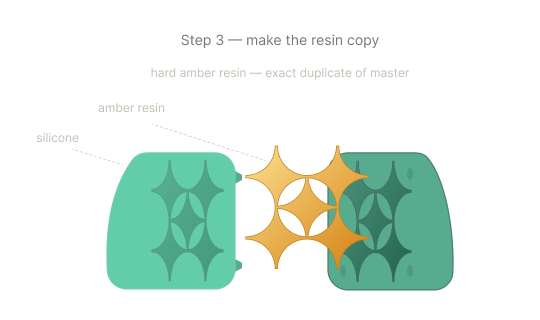
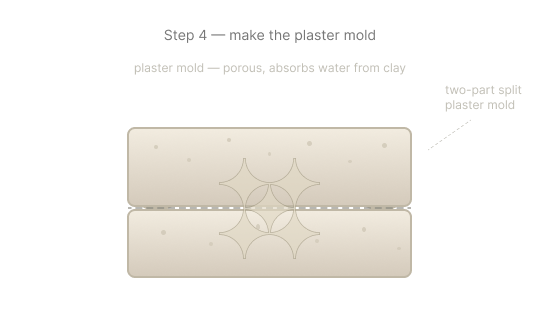
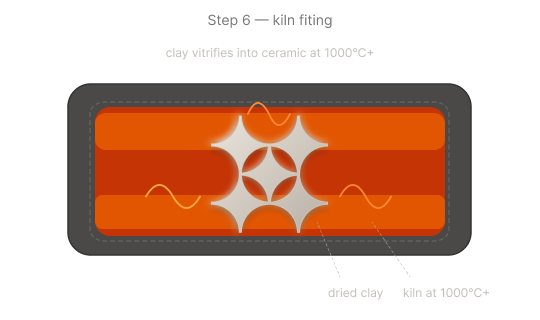
In the infographics below, as an example you can see my favicon turning into a finished ceramic piece. This requires a multi-step casting and molding workflow. The steps begin with a printed master. From there, a flexible silicone mold is made to cast a resin copy. This resin copy is then used to form a rigid plaster mold, where liquid clay is slip casted, dried into a hollow shell, and prepared for final step – kiln firing.
The infographics below illustrate each step of the fabrication pipeline.
NOTE: I initially planned to create a silicone mold from a 3D printed master. However, I realized that using such a large volume of silicone for a first-time experiment was resource inefficient and costly. To save materials, I switched methods and designed a printed negative mold instead.


*Prompt13.1, involves a lot of fixing in Figma
Designing
I began by uploading the profile image of the funnel, and started tracing the profile curves. After obtaining the desired shape, I proceeded to revolving the sketch around the y-axis to create the 3D cone shape.
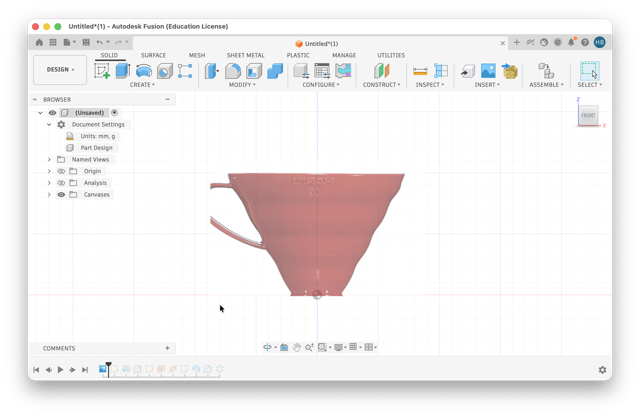
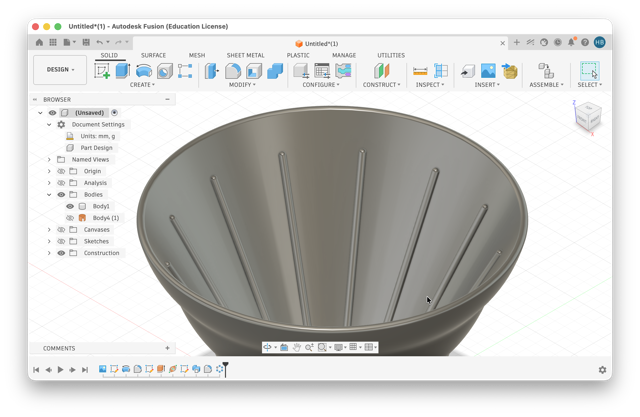
This is what the end result is supposed to look like. The funnel should also have a cone-like paper filter for coffee to be filtered.
Gypsum Mold
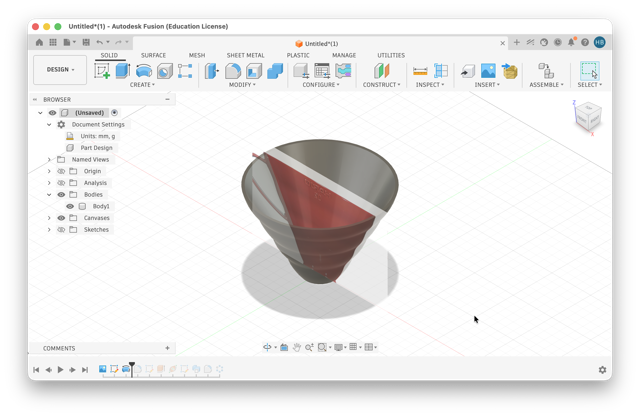
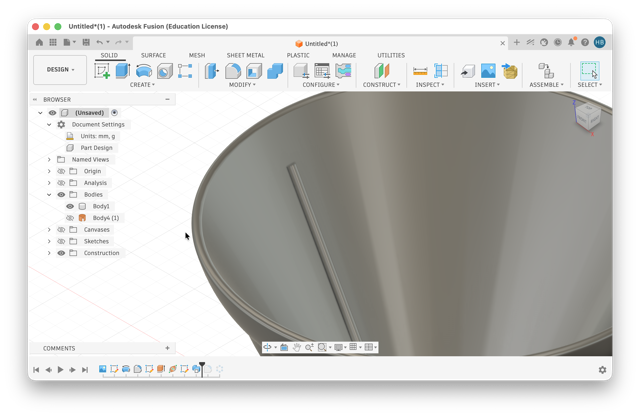
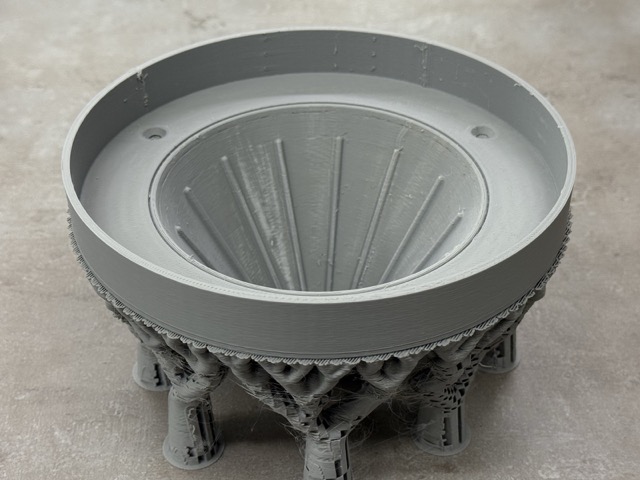
After having achieved the final form, I started subtracting the funnel from more simple solid bodies, which after I started printing using PLA.
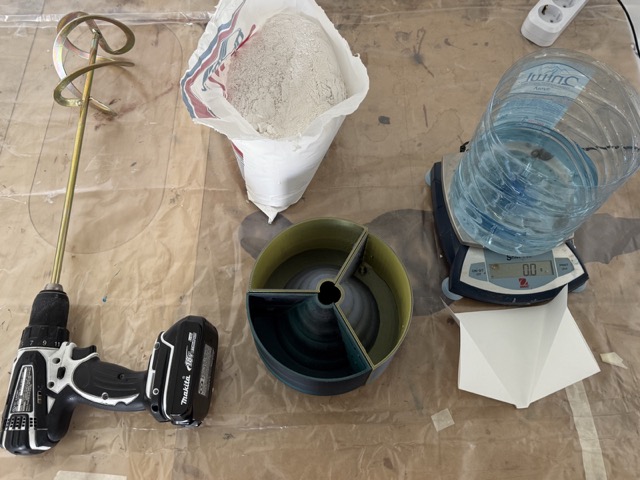
Once the prints were ready, I checked the total volume of the objects in Fusion and filled a container with the corresponding amount of water. I mixed the gypsum and water at a 7:10 ratio and immediately began pouring the molds. Because gypsum sets within minutes, you must work quickly. It is also highly recommended to wear eye protection, as the mixing process triggers a chemical reaction that causes the material to heat up.
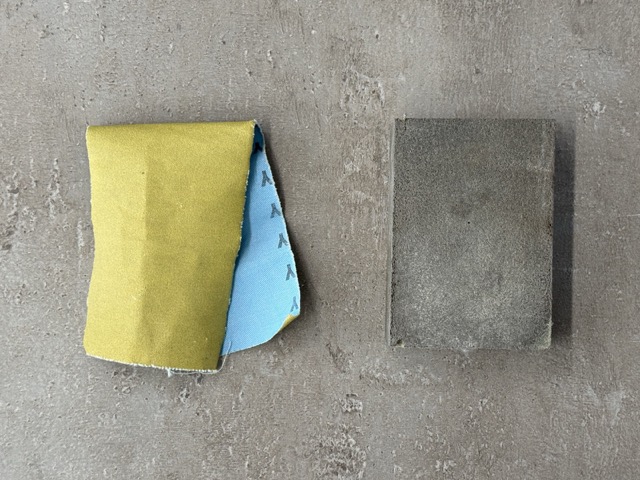
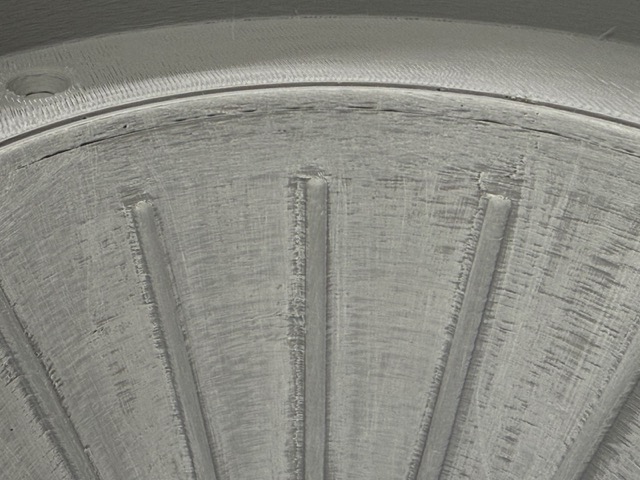
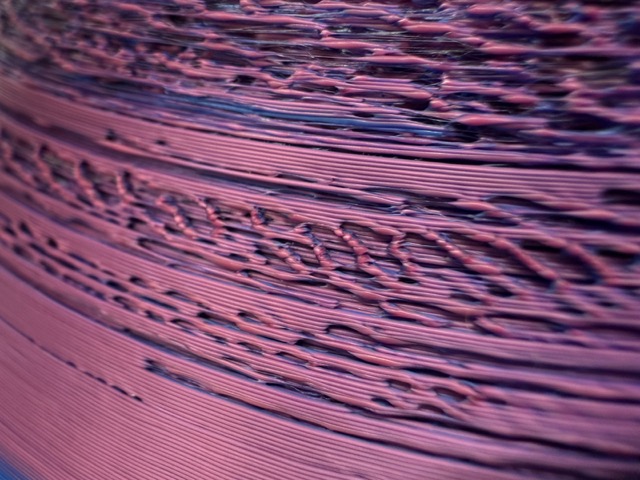
To eliminate any visible toolpaths and ensure a perfectly smooth surface for casting, I sanded the prints with fine sandpaper. I had actually anticipated this step during slicing by using a thiner layer setting than normal. By this I mean “Fine” 0.12 mm layer height, whereas normally I use “Draft” 0.24 mm to test out models.
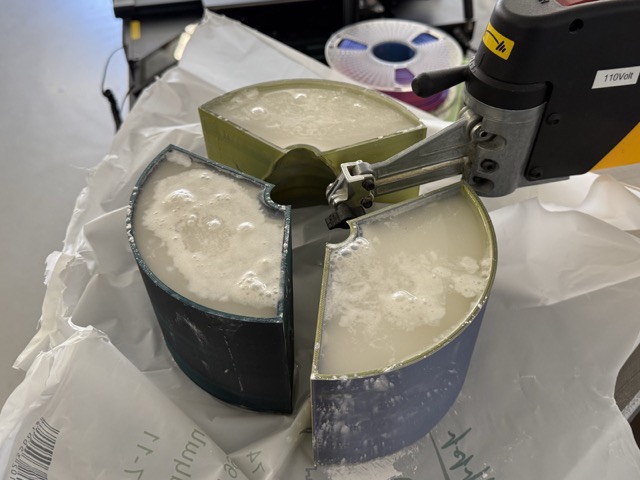
Unfortunetly, I probably had miscalculated the water-to-gypsum ratio, likely mixing it at 6:10 instead of the recommended 7:10 [with 10 representing water]. This gypsum deficiency caused the mixture to separate [left image below], leaving excess water at the top. To fix this, I used a syringe to suck out the water and topped it off with a thicker mixture. However, this patch resulted in a visibly distinct layer in the final piece.
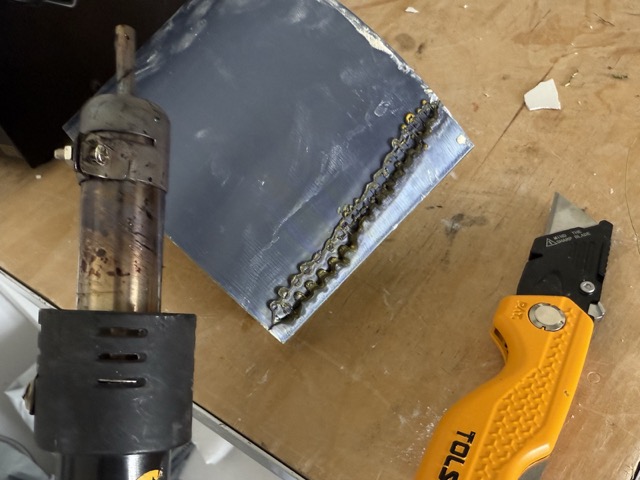
To remove the gypsum molds from the 3D-printed shells, I scored a thin line using a utility knife and used a heatgun to widen the gap [left image below]. This opened up a seam, allowing me to grip the layers with pliers and peel them away.
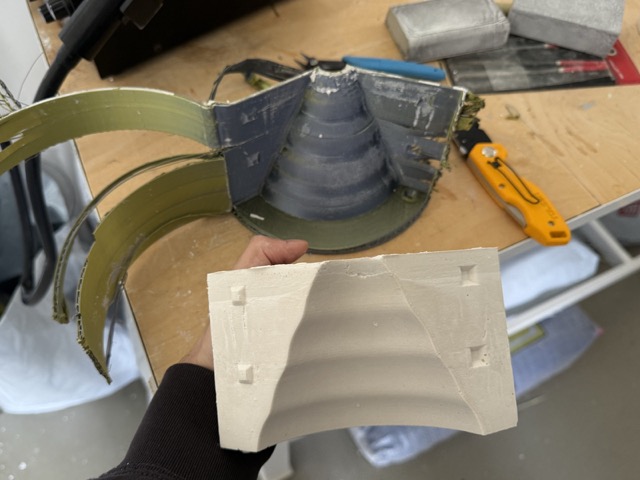
The print was already 15 minutes in [9 hrs total] when I had realized the mold might become unstable and risk tipping over once the gypsum was poured. Fortunately, the layout of the supports helped balance the weight evenly, so I intentionally left them attached until the gypsum had fully dried [left image below].
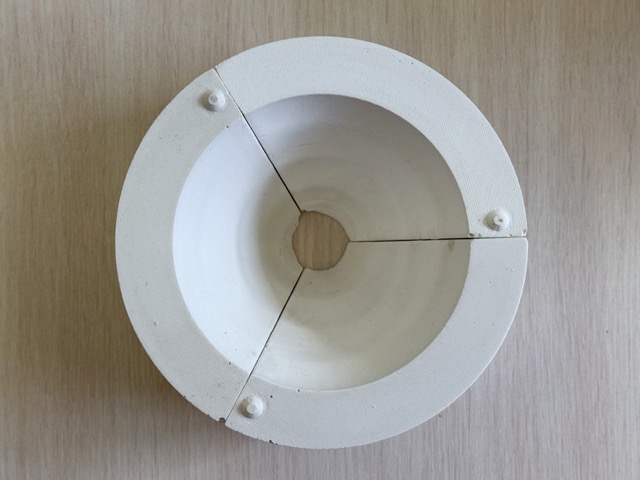
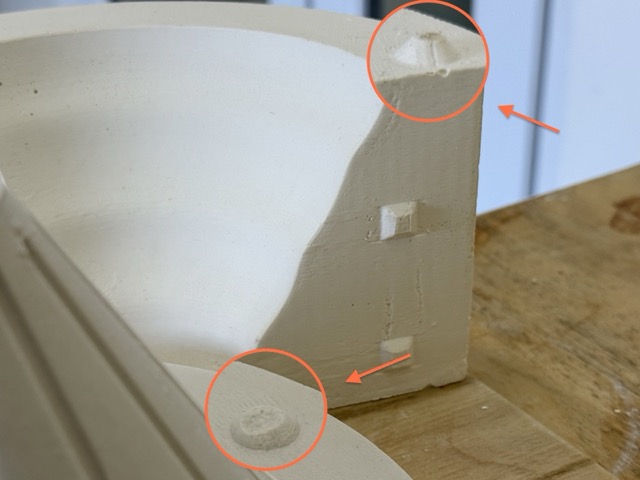
The alignment features contained a design error, resulting in two male knobs rather than a male-female pairing. Since cured gypsum is easily machined manually, the error was corrected by removing one male knob and carving a corresponding registration hole with a utility knife [image below].
Knowing that the corners of the printed mold would be hard to reach, I planned to handle the final sanding and finishing after demolding the pieces. In the video below, I am smoothing out the larger areas where I previously tried to clean up gypsum break-offs using a knife.
Molding
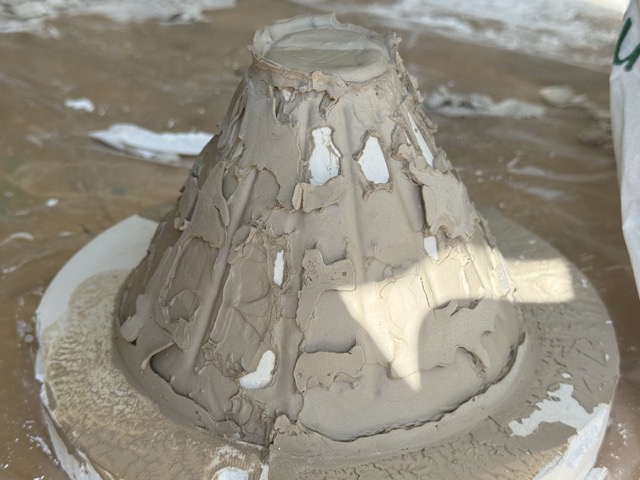
The first attempt to fill the mold with liquid clay did not go very well. There were major air cavities inside, which I though would occur anyway, but as I did not have a vibrating bed to level the clay, I had to improvise.

During my second attempt, I used a large 50ml syringe to inject the liquid very slowly. Because the master mold walls are so thin, the clay simply slid down the sides. Additionally, the porous gypsum mold instantly absorbed water from the clay, preventing it from spreading evenly.
Once I poured in the maximum amount of clay, I placed it under the sun so both the clay and the gypsum mold could dry out. This helped ensure an easier demolding process.
Results
The results did not come out as expected. If it were a one sided mold, meaning I would pour the clay, let it sit for a while, absorbe, and gradually create a wall thickness that would have worked out fine, but this situation requires more experience, skill and perhaps patience.
One assumption I have is that I did not let the clay dry well enough [due to time constraints], which could be the reason behind the final demolding also failing.
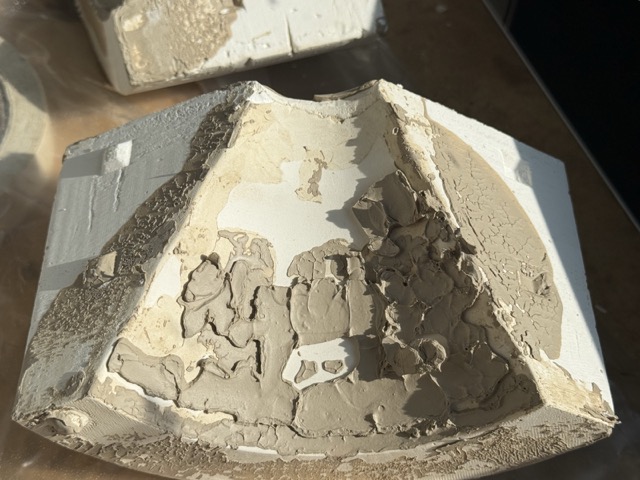
In the image below you can see a third or fourth attempt, this time I had let the gypsum dry for days. But I also let the clay dry… too much.
P.S. Mariam helped me with the demolding, and video!
Why did it fail?
I strongly believe that the mold failed because at first I overused it, so the gypsum became too damp to absorb more moisture from the clay [this is because I tried back to back 3 times]. And the gypsum mold dries very slowly, days if not a couple of weeks [depends on the weather]. The time when I poured the gypsum into the mold I let it dry for 2 weeks, out of which the first 3 where in-front of an infrared tube heater.
So I did let it dry for about 5 days until I could hear it ring like a porcelain when I would flick with my finger. I poured once again, this time I used a lot of swinging and showing for the air cavities to fill in as well. This would have probably been avoided if we had a vibrating table, although I tried to use our DeWalt saw table, the shaking axis was not compatible for leveling the clay.
On the other hand while the opening is so small, the liquid clay simply slides down the walls, and by the time it reaches the bottom it is quite dry to level out itself. And also there is also some sort of the Coandă effect.
So this is the reason I think I could not achieve the aimed results. But interestingly enough, this last attempt had worked out the best. Only know I had left it to dry for way to long, which results in cracking when demolding. I basically was overdue the demolding equilibrium.
Failed Print
When slicing the biggest piece of the mold to print, I wanted to cut the time and use little to no supports. That would have worked out if not for the alignment knobs. These printed midair, and started deforming the base of the future cast. So to try to save the print, I decieded to fix the holes by placing masking tape on the failed areas. Indeed this worked out, and the orinter soon covered the damages, and the tape was not to be seen anymore.
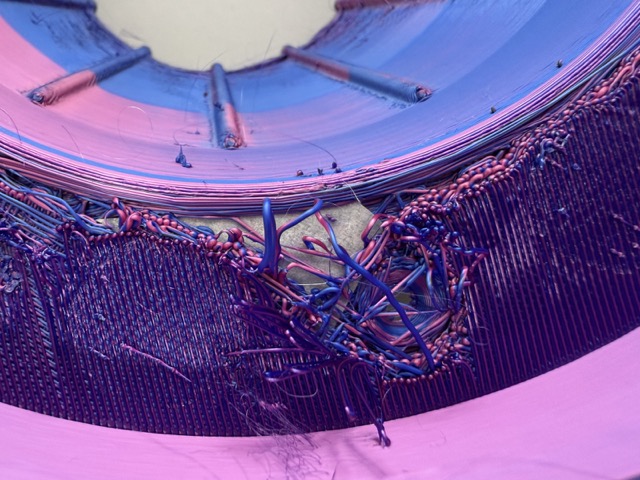
The fix did not last long… I believe that printing with minimal supports would work, as I had printed the funnel with no support anyway, at the end of the day it was the same shape, only inversed out. It failed, but not because of lack of supports. I assume the nozzle got clogged, but this fail had no DIY fixing.
What would I change?
In the beginning, I did not want to spend much time on the design of the molds, and I was well aware of what I would face — edge chip offs. Having chamfers over all the edges was something I should have incorporated in the design, but that’s for another project now. I was quite concerned about the gypsum chipping off when damp, and indeed it began chipping after having poured clay repeatedly. In reality, this would have been avoidable if I had let the molds dry out.
Conclusion
Once again, I experimented with a process I had been wanting to try for a long time. While I already had experience with pottery and slip casting, advancing from simple shapes to more complex forms – especially making the molds myself – was a completely new discovery. Making a four-part mold was an interesting puzzle for me.
I still want to try sand casting, metal block milling, and glass blowing with wooden molds. However, out of all these methods, wax milling is the one I will definitely come back to.
Resources
STL
• Eternity
• Eternity Negative
• Favicon
• Funnel Mold – top
• Funnel Mold – bottom
• Funnel
3MF
• Favicon
• Funnel Mold – top
• Funnel Mold – bottom
• Funnel
F3D
• Favicon
• Funnel Mold – top
• Funnel Mold – bottom
• Funnel
Prompts
Prompt13.1 Create a clean, technical infographic showing the 6 step industrial process of transforming a 2D logo into a ceramic piece. First, 3D printing an extruded plastic master shape. Second, pouring liquid silicone over the print to make a flexible mold. Third, casting liquid resin into the silicone mold for a durable copy. Four, pouring plaster over the resin copy to create a ceramic slip mold. Fifth, filling the plaster mold with liquid clay [a slip cast] to create the final ceramic form. And as final, sixth, step firing the dried clay form in a kiln. Minimalist isometric style, clear arrows, labeled steps.