Week 16: Wildcard Week
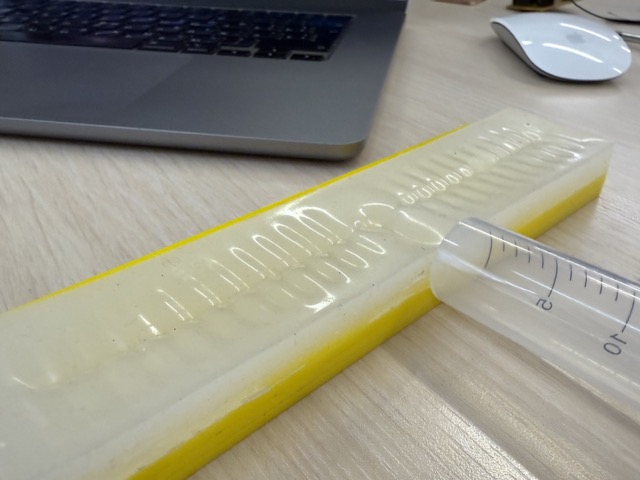 *The result of wildcard week
For the wildcard week I wanted to try out soft robotics. As in my node we also have Fabricademy instructors – Erika and Anoush, I always had someone to go to if I had any questions.
Did we cover this before?
To make sure my project satisfies the week’s task, we looked up the list of possible projects on the lecture page. Under robotics there’s a list containing the following keywards: soft, actuation, pneumatic, and inflatable. These all seem to make the soft robot a valid project for wildcard week.
The Design
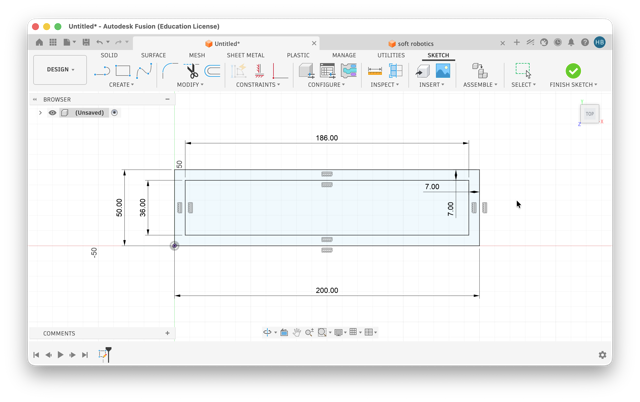
I started designing in Fusion. As the idea was simple I did not extrude or perform other voluminous manipulations. I simply sketched out the 2D design. I began by inserting two rectangles, the outer one 50x200 mm, and the inner one 7 mm smaller across all the sides.
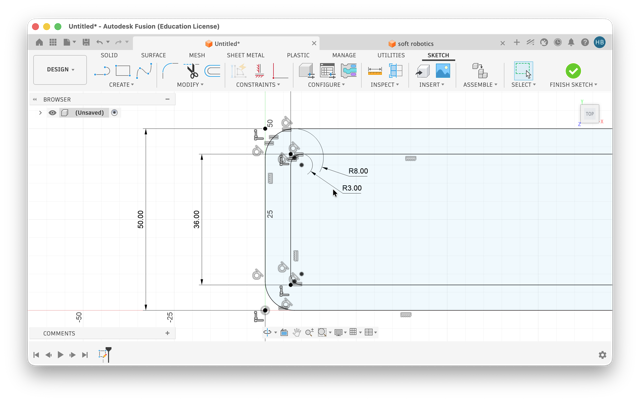
I then rounded all the edges so that the acrylic would not have poking corners. There is a simple calculation you can perform to get perfect frame corners. Although, this time I did not bother with it.
Then I placed a 3 mm thick air channel in the middle, again keeping the same 7 mm buffer. Then with the rectangual pattern tool I streched the smaller air channels across the main “artery” from both its ends.
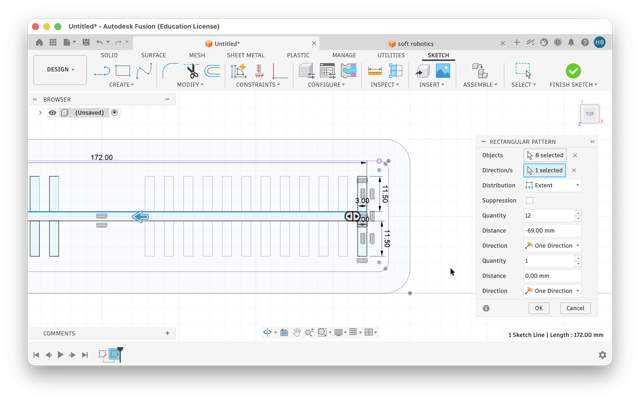
I also added a distribution chamber, the circular part in the middle, which will be fed with air through a syringe.
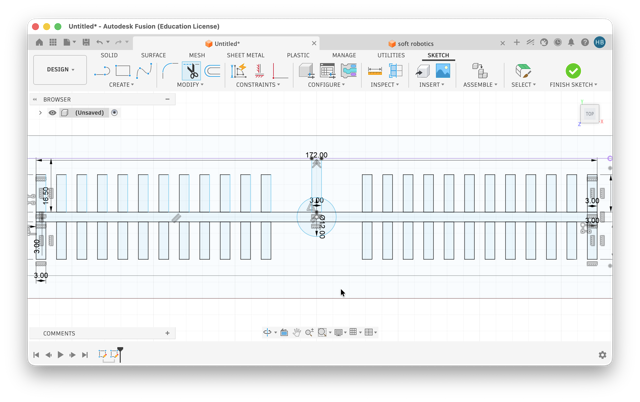
Finally, using the sketch trim tool I cleared away all the unnecesary lines [shown in the video below].
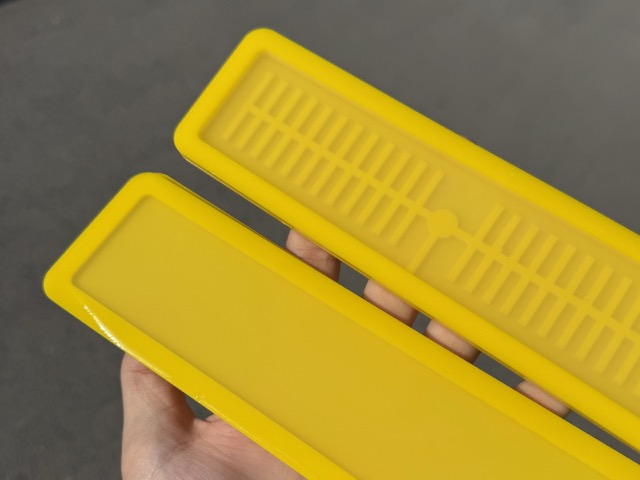
The Mold
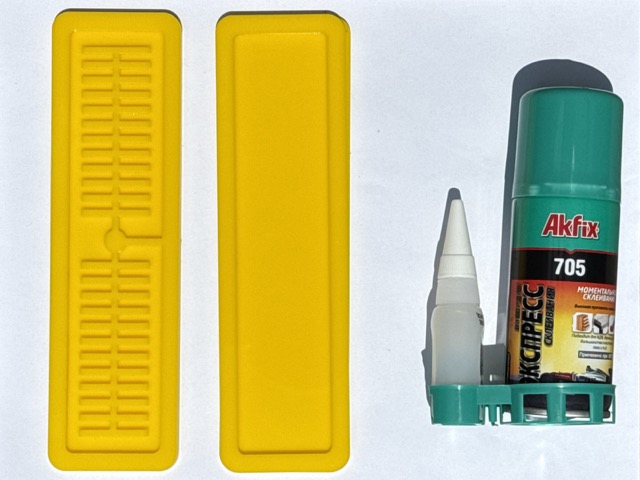
I quickly sketched this design in Fusion, and exported as a .dxf file, and proceeded to cut on the laser cutter. For the 2D parts of the mold I used 3mm acrylic sheets. The laser cutter settings I used were: speed of 10mm/s, and 90-95% power. Once the shapes were cut I used Akfix 705 to glue them together – a strong super glue that hardens instantly using aerosol activator spray [left image below].
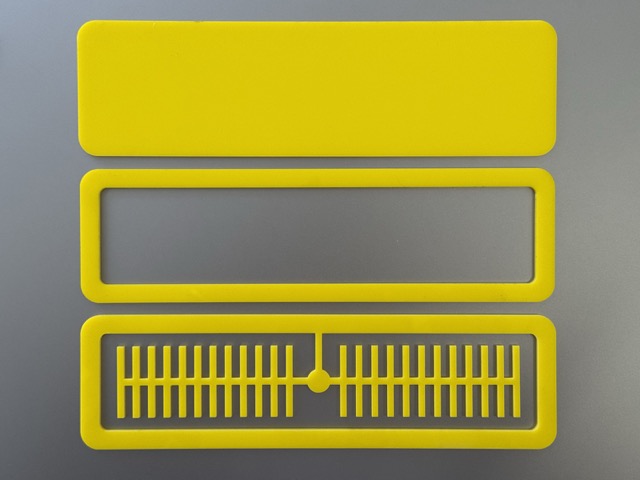
The image on the right shows the total five 3mm-thick acrylic layers, grouped into sets of two and three. The two-layer mold creates a 3mm cast [left mold], while the three-layer block creates a 6mm cast [right mold]. Combining these two casts makes up a total thickness of 9mm [on paper] – back side 3mm, air channels plus their backing 6mm.
Why an extra frame?
If I only covered the comb-like part with a thin layer of silicone when inflating I could risk damaging the robot. So an additional 3mm thickness was considered to make safe inflations – I glued another acrylic frame over the two layers.
This indeed has its downsides! I was concerned that the channels could simple inflate, and cause no curling as there is no thinner or thicker side that could take on the movement.
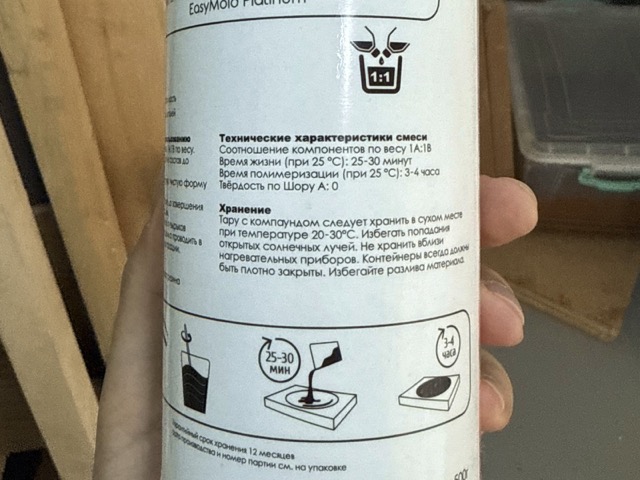
Producer’s Datasheet
Technical characteristics of the mixture:
Ratio of components by weight 1A:1B
Pot life [at 25 °C]: 25-30 minutes
Curing time [at 25 °C]: 3-4 hours
Shore A hardness: 0
Storage:
The containers with the compound should be stored in a dry place at a temperature of 20-30°C. Avoid exposure to direct sunlight. Do not store near heating appliances. The containers must always be tightly closed. Avoid spilling the material.
More information about the product on epoxymaster.ru
Material Hardness
Material hardness is quantified using a durometer to read a specific Shore scale value. To find this value, a durometer presses a standardized, spring-loaded needle into a material. The harder the substance, the less the needle penetrates, resulting in a higher number from 0 to 100 on the Shore scale.
When working at the absolute bottom of the Shore A scale, 0A is a super-soft [the one I am using], gel-like rubber that feels almost like marshmallow or human flesh, meaning the durometer needle meets virtually zero resistance.
Moving up slightly, 5A provides a bit more skin-like elasticity and incredible stretchiness. Once you reach 10A, the silicone transitions into a highly flexible but distinct mold rubber, followed by 30A which provides a medium-firm rubber balance, and finally 60A which behaves like a tough car tire to prevent thick casting materials from deforming the mold walls. More examples in the image below.

Chart source: smooth-on.com
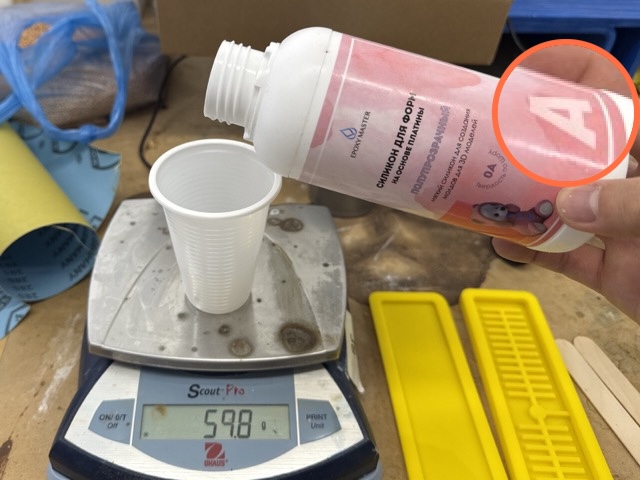
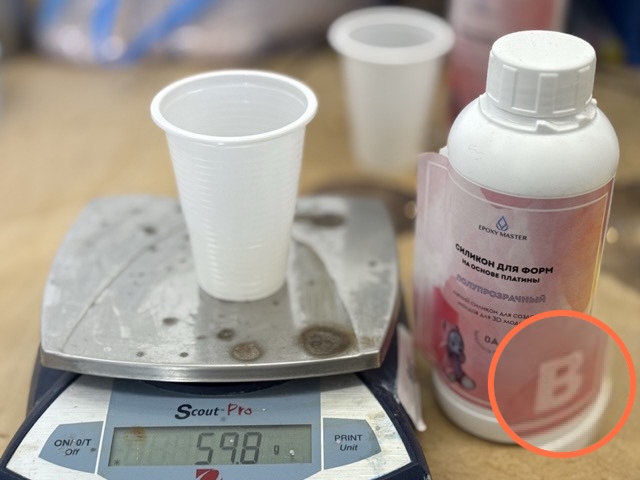
Mixing
I weighed out 59.8g of each part for the mixture. Why such an odd number? Well, I didn’t want to waste time adjusting the amounts back and forth to hit an exact target. I just went with my first pour, as there was no real reason to aim for a round number. As for the total volume, it simply looked like the right amount when poured into the plastic cup.
After mixing the two parts, I walked in circles for 10 minutes while slowly stirring it [proof in the video below].
Pouring
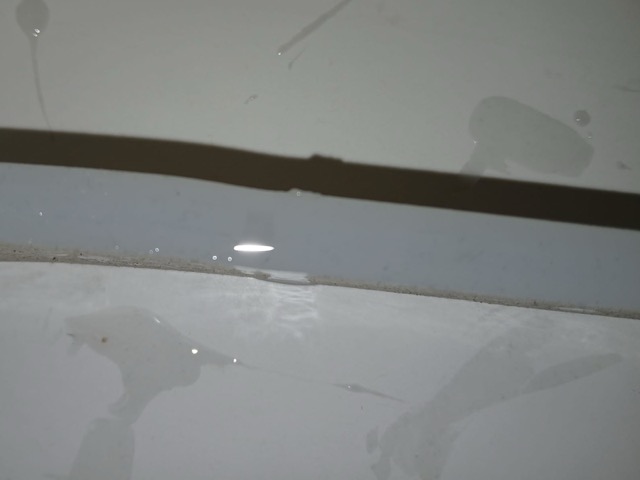
I was very happy to see no bubbles in the compound, and the viscosity of the mixture was very complimentary for this detailed mold. The thin stream helped also, so I intentionally poured over the “shaft” of the “comb” so that it could spread without trapping any bubble in the corners. Unfortunately, my phone ran out of storage, and this part was not recorded.
This image might seem redundant, but it is in fact the result of a bubbleless pour.
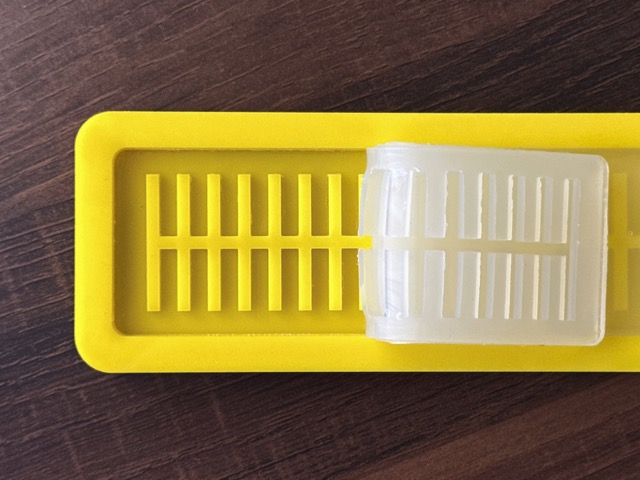
Demolding
It was quite easy to take the cured silicone out. As the mold was made of smooth acrilic the cast had no crevices to slip into, hence the easy removal.
Regardless, I was quite cautios when pulling the silicone out, as the mixture was very soft. The smooth side, it was straightforward. Whereas for the second mold, I used left and right pulling motion to help the antena-like structure release.
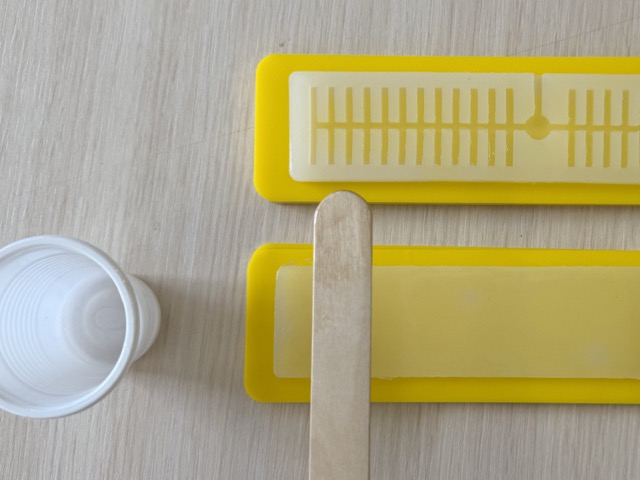
Adhering
I mixed another small batch of silicone to join the two parts together, and took a popsicle stick to spread a thin film of silicone. Initially, I thought I could get by using Akfix, but I realized it might fail to bond the pieces securely. Even though Akfix seemed like the simpler solution, I did not want to risk it.
You might wonder why I didn’t just use leftover material from the main pour or mix an extra amount ahead of time. Simply put, any extra silicone would have cured simultaneously with the main cast, leaving it completely unusable by the time I’d need it.
Inflating
First attempt to inflate the robot I used a 20ml syringe. I did not want to make things more compicated, and found it usless to fetch a pump, or a compressor. But that did not work well, so to illustrate the function of the air channels, I instead sucked the air out.
I did not want to risk tearing the seams, or puncturing the material, because an air compressor might have been less controlable. But I ended up finding a small portable and less powerful compressor, but unfortunetly the robot soon started leaking air [video below].
The Compressor
I used a portable air pump, purchase link here.
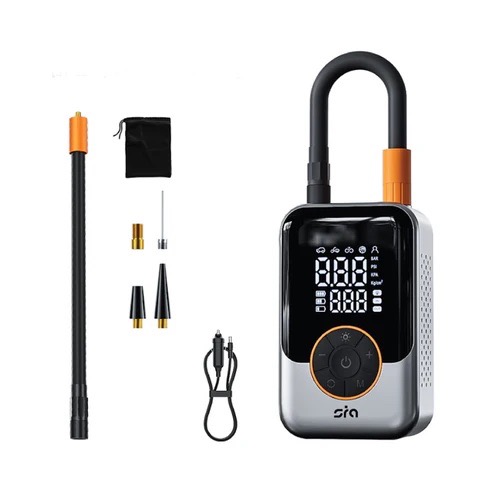
Some of its characteristics:
• Digital display: smart display clearly shows pressure in PSI/bar/kPa units
• LED flashlight: built-in white light for nighttime and emergency use
• Maximum pressure: up to 150 PSI
• Battery capacity: 4000 mAh
• Operating voltage: 12V DC
Fixing
As the inflation did not go according to plan, I also tried to repair the leaking edges. Actually, the whole parameter of the silicone body [left image]. I again used the same 1:1 ratio of the same silicone. I also stuck a screw tip into the air tube so that I would not accidently cover the hole.

Conclusion
In reality, after having covered molding and casting week this one did not differ much; therefor I cannot say I faced any problems. Neither was my design complex enough to face major issues. The key distinction was adhering the two cast parts together. In fact, we had already worked with silicone, so another [yet crucial] difference was having proper air channels for inflation.
Second Thoughts
I truly wish I was not rushed [due to the sumbmission deadline], otherise I would love to try out both different methods and designs for the soft robot. Both the mechanical and optical [in this case it being transparent] properties of a soft robot seem extraterrestrial and full of gaze.
The idea of having a wild card week was quite something. On the one hand it’s liberating, on the other it simply ensalves you to making a choice out of endless possibilites. Reflecting back on other’s works, such as visiting a metal shop, had me thinking what other options I had. But as I was slacking on time, I needed to act both fast and efficiently, hence a 2D soft robot design.
Resources
From this project I have included .svg files, but you are welcome to set your desired sizes. Personally, I made the mold 196 x 56 mm big, which casts out a 180 x 40 mm robot.
• Airways
• Walls
• Back Plate
Prompts
No AI assistance this week.