Assignment 5: 3D Scanning and Printing
This assignment focuses on documenting my learning experiences in 3D scanning and printing. It covers the differences between additive and subtractive manufacturing, the constraints and design rules for 3D printing, various materials and processes used, different types of 3D printers, relevant software, and 3D scanning techniques. I have also recorded my hands-on experience with both a 3D printer and a 3D scanner for my individual and group assignments. Additionally, I successfully 3D-printed my own scanned model. As a longtime 3D printing enthusiast, I’m excited to apply this technology to fabricate parts for my final project. In my documentation, I also reflect on what worked well, the challenges I faced, how I would approach things differently in future assignments, and my key learning takeaways.
Highlight Moments of the Week
3D Printing :
3D printing is an additive manufacturing process that creates objects layer by layer from a digital 3D model. Unlike subtractive manufacturing, which removes material to shape an object, 3D printing builds up material to form the desired structure. There are various 3D printing technologies, including Fused Deposition Modeling (FDM), Stereolithography (SLA), and Selective Laser Sintering (SLS). FDM printers use thermoplastic filaments like PLA, ABS, and PETG, melting and extruding them to form objects. SLA printers, on the other hand, use liquid resin that hardens under UV light, producing highly detailed prints, while SLS printers use a laser to fuse powdered materials like nylon, creating durable and complex parts.
3D printing is widely used in prototyping, manufacturing, medical applications, aerospace, and education. It also integrates with 3D scanning, allowing real-world objects to be digitized and reproduced. Designing models requires software like Fusion 360, Tinkercad, Blender, and Cura. Each 3D printer comes with specific design constraints, such as layer height, print speed, and temperature settings. Features like supports and infill are essential for printing overhangs and strengthening models, while bed leveling ensures a successful print. However, challenges like warping, layer shifting, and stringing require proper calibration and adjustments.
Advanced 3D printers support multi-material and multi-color printing, and post-processing techniques like sanding, painting, and vapor smoothing enhance final prints. The technology enables customization, allowing users to create unique designs tailored to specific needs. Engineers, hobbyists, and artists leverage 3D printing for functional and creative projects. With continuous advancements, innovations such as bio-printing, food printing, and metal 3D printing are emerging. While sustainability concerns exist due to plastic waste, biodegradable filaments and recycling methods are being developed. Overall, 3D printing is transforming manufacturing, making production more accessible, efficient, and innovative.
For more information on 3D printing, click here.
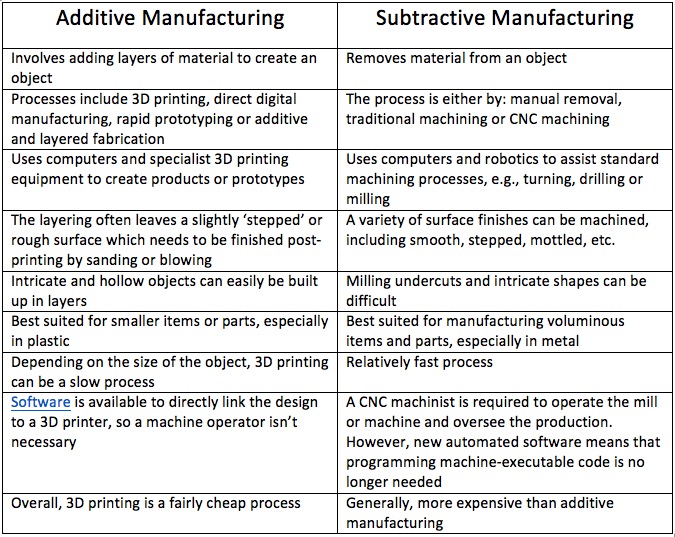
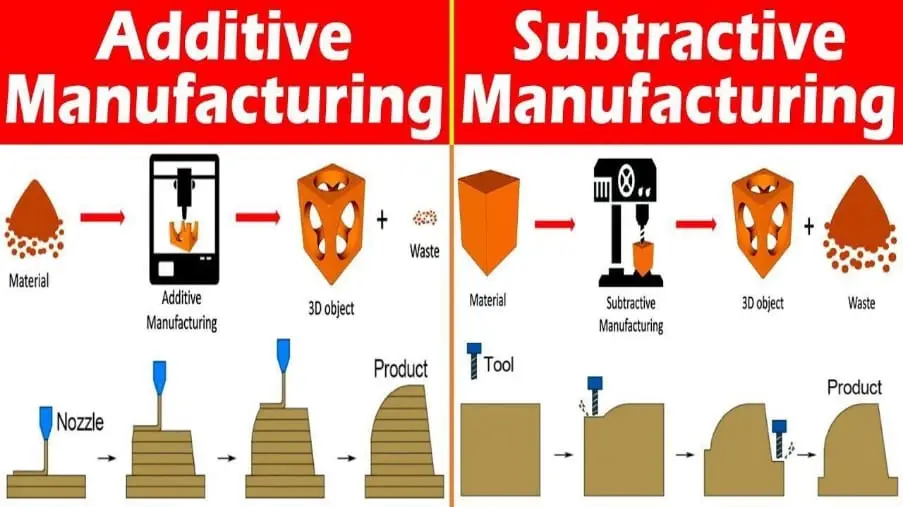
Additive vs Subtractive manufacturing
References: Reference
References: Reference
3D Printing Processes
3D printing processes can be classified based on how they build objects and the materials used. The most common methods include:
1.Fused Deposition Modeling (FDM) –
Uses a heated nozzle to extrude thermoplastic filament (e.g., PLA, ABS) layer by layer. It is cost-effective and widely used in prototyping.
Fused Deposition Modeling (FDM) is a 3D printing process that builds objects layer by layer using a heated nozzle to extrude thermoplastic filament such as PLA, ABS, or PETG. The filament is melted and deposited onto a print bed in a precise pattern controlled by a computer. As each layer cools and solidifies, the next layer is added on top, gradually forming the final object. FDM is widely used due to its affordability, ease of use, and ability to create functional prototypes. However, it may require support structures for overhangs and has limitations in surface smoothness compared to other 3D printing methods.
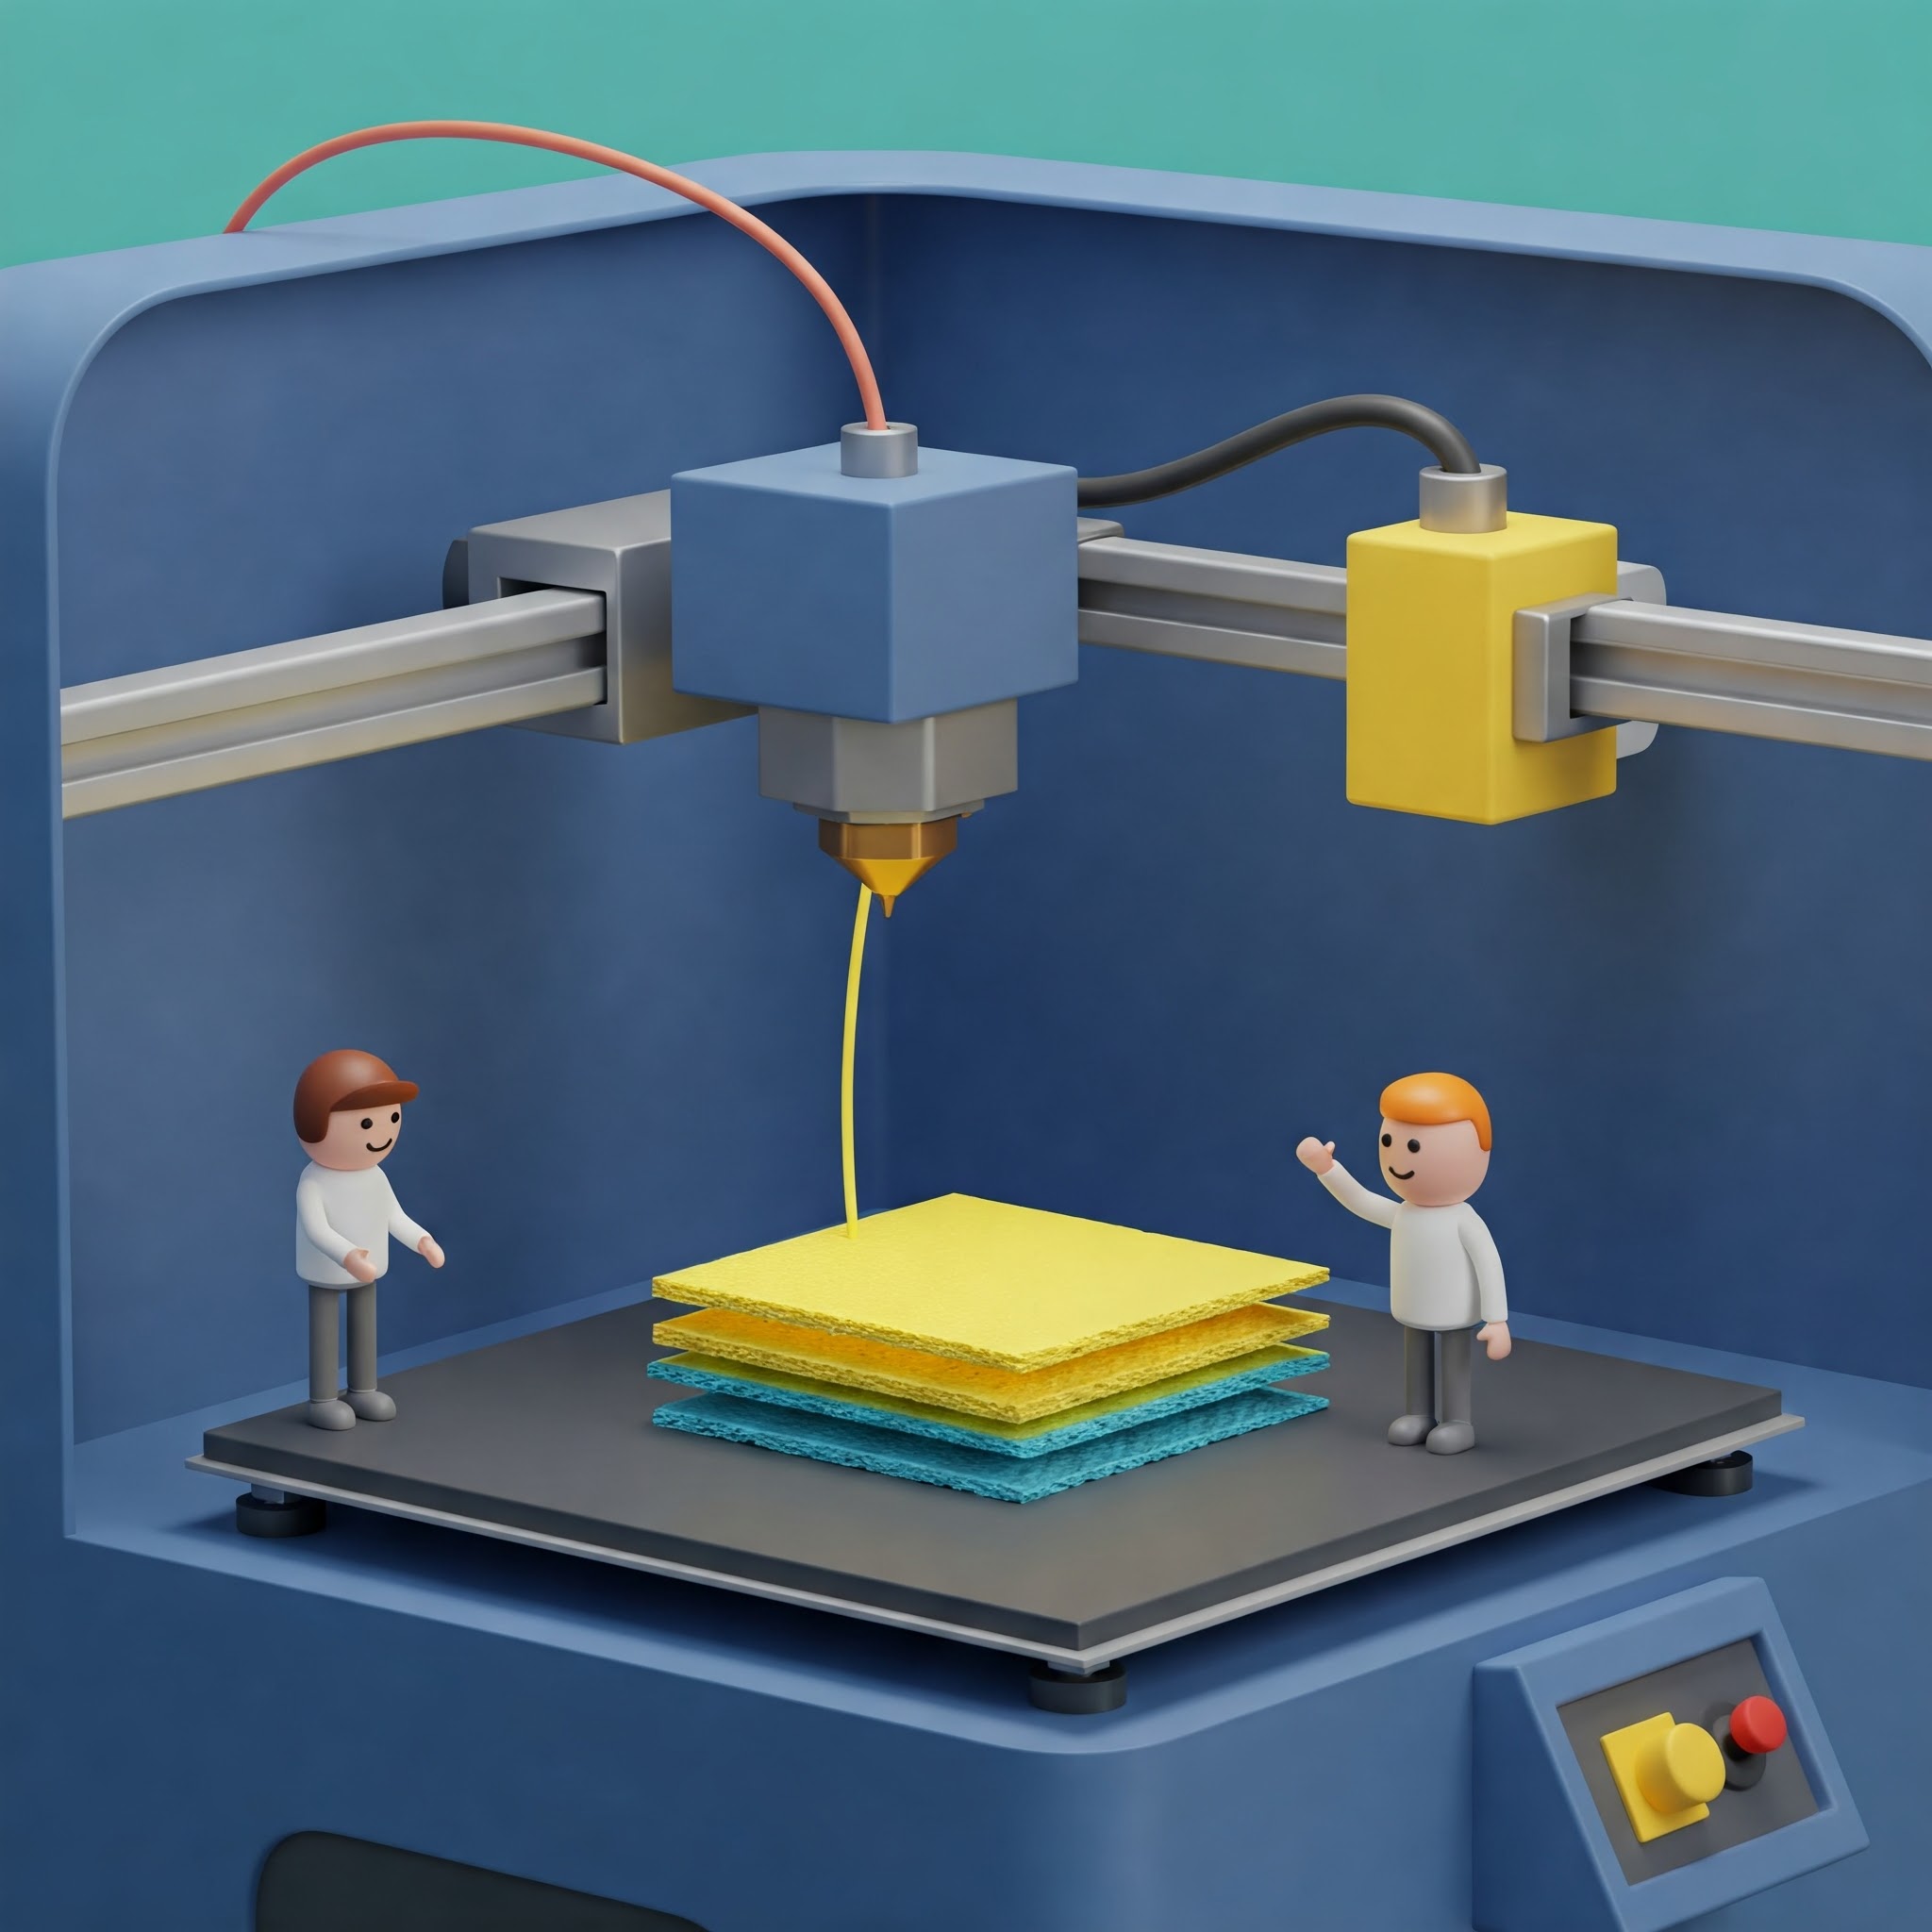
Advantages of Fused Deposition Modeling (FDM)
1.Cost-effective – One of the most affordable 3D printing technologies.
2.Wide material compatibility – Supports thermoplastics like PLA, ABS, PETG, and more.
3.Ease of use – Simple setup, minimal maintenance, and user-friendly operation.
4.Rapid prototyping – Ideal for quick design iterations and functional prototypes.
5.Large build volume – Capable of printing bigger objects compared to other methods.
2.Stereolithography (SLA) –
Utilizes UV light to cure liquid resin layer by layer, producing highly detailed prints with smooth surfaces.
Stereolithography (SLA) is a 3D printing technology that uses a laser to cure liquid resin layer by layer into a solid object. It provides high precision and smooth surface finishes, making it ideal for detailed prototypes and intricate designs. The process involves a UV laser selectively hardening photopolymer resin in a vat, building the model from the bottom up. After printing, the part requires post-curing under UV light to enhance its strength and stability. SLA is widely used in industries like dentistry, jewelry, and engineering for high-detail and functional prototypes.
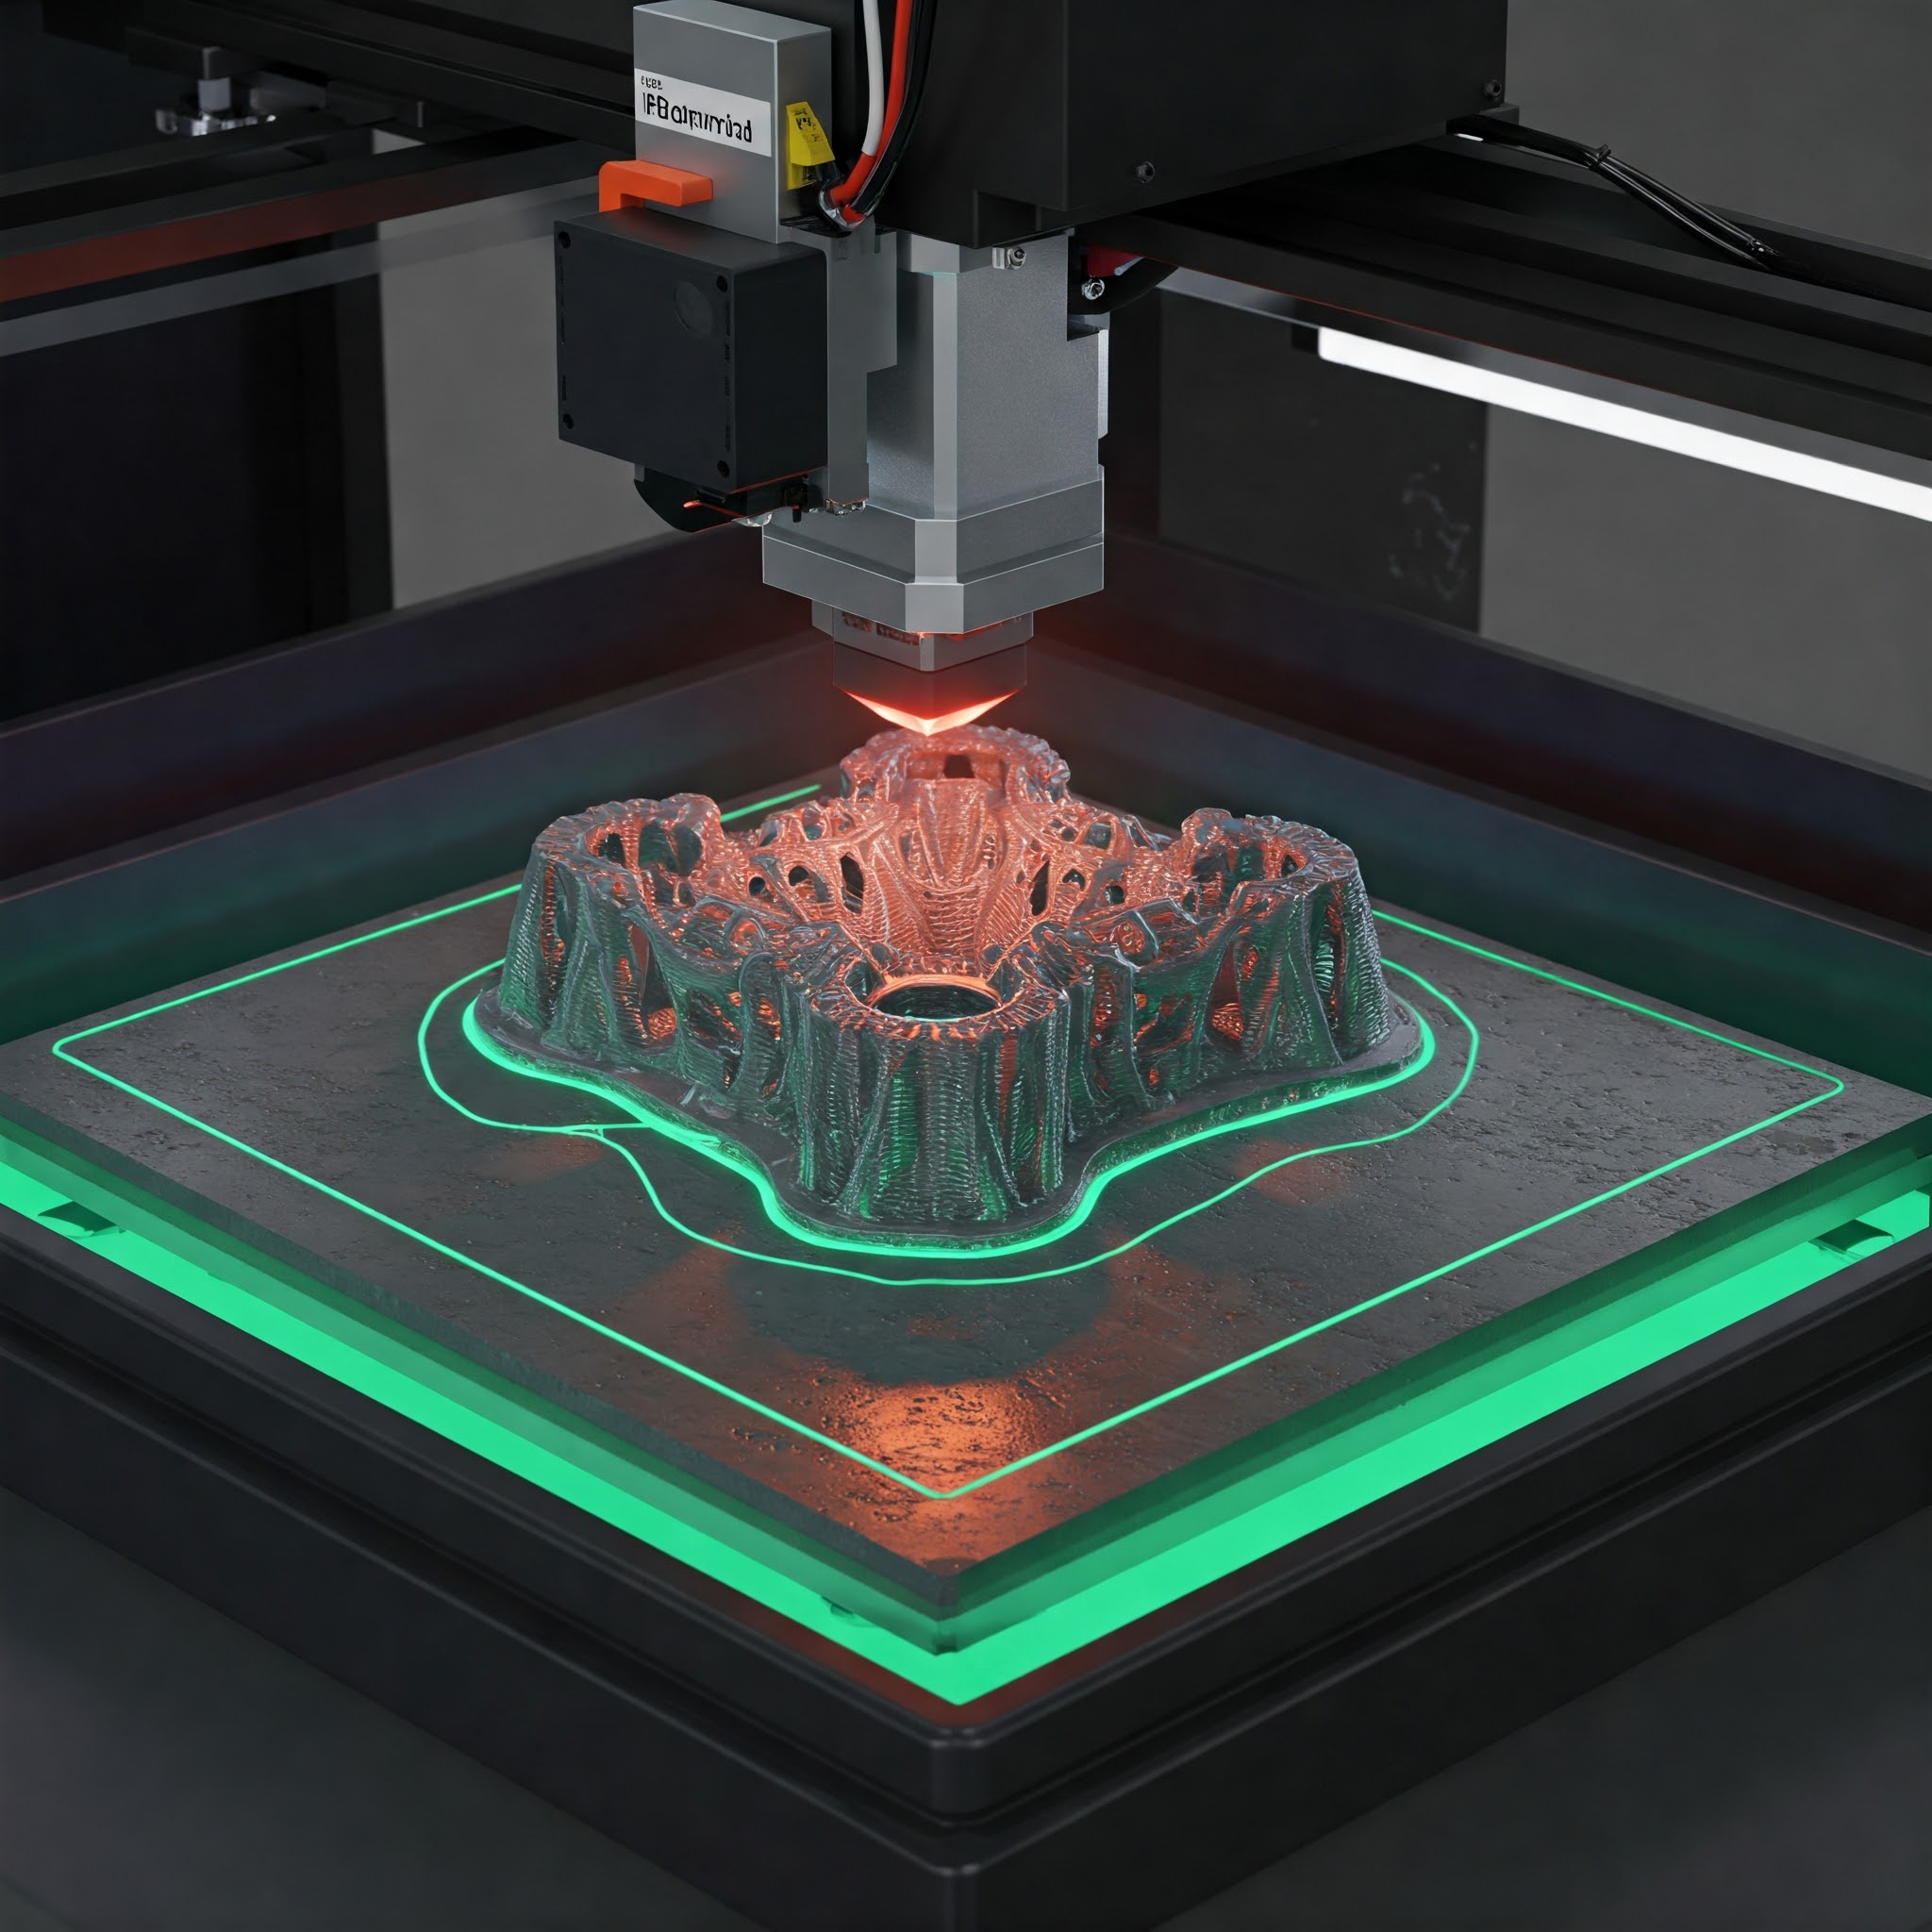
Advantages of Stereolithography (SLA)
1.High Precision & Detail – SLA produces highly detailed and smooth parts with fine features, making it ideal for prototypes and intricate designs.
2. Excellent Surface Finish – The resin-based process results in smooth surfaces that require minimal post-processing compared to other 3D printing methods.
3. Versatile Material Options – SLA resins offer various properties like transparency, flexibility, heat resistance, and biocompatibility for different applications.
4. Fast Prototyping – SLA can quickly produce complex parts, reducing development time and allowing rapid design iterations.
5. Water-Tight & Functional Parts – SLA prints are highly dense and can be used for applications requiring fluid or air-tight components, such as medical and engineering prototypes.
3.Digital Light Processing (DLP) –
Similar to SLA but uses a digital light projector to cure entire layers at once, making it faster.
Digital Light Processing (DLP) is a 3D printing technology that uses a digital light projector to cure liquid resin layer by layer into a solid object. It works by projecting a UV light pattern onto a vat of photosensitive resin, hardening specific areas based on the digital design. DLP printers can produce highly detailed and precise prints with smooth surfaces, making them ideal for dental, jewelry, and engineering applications. Compared to Fused Deposition Modeling (FDM), DLP offers faster print speeds since entire layers are cured at once instead of being built line by line. However, DLP requires post-processing, such as washing and UV curing, to achieve the final strength and quality of the printed object.
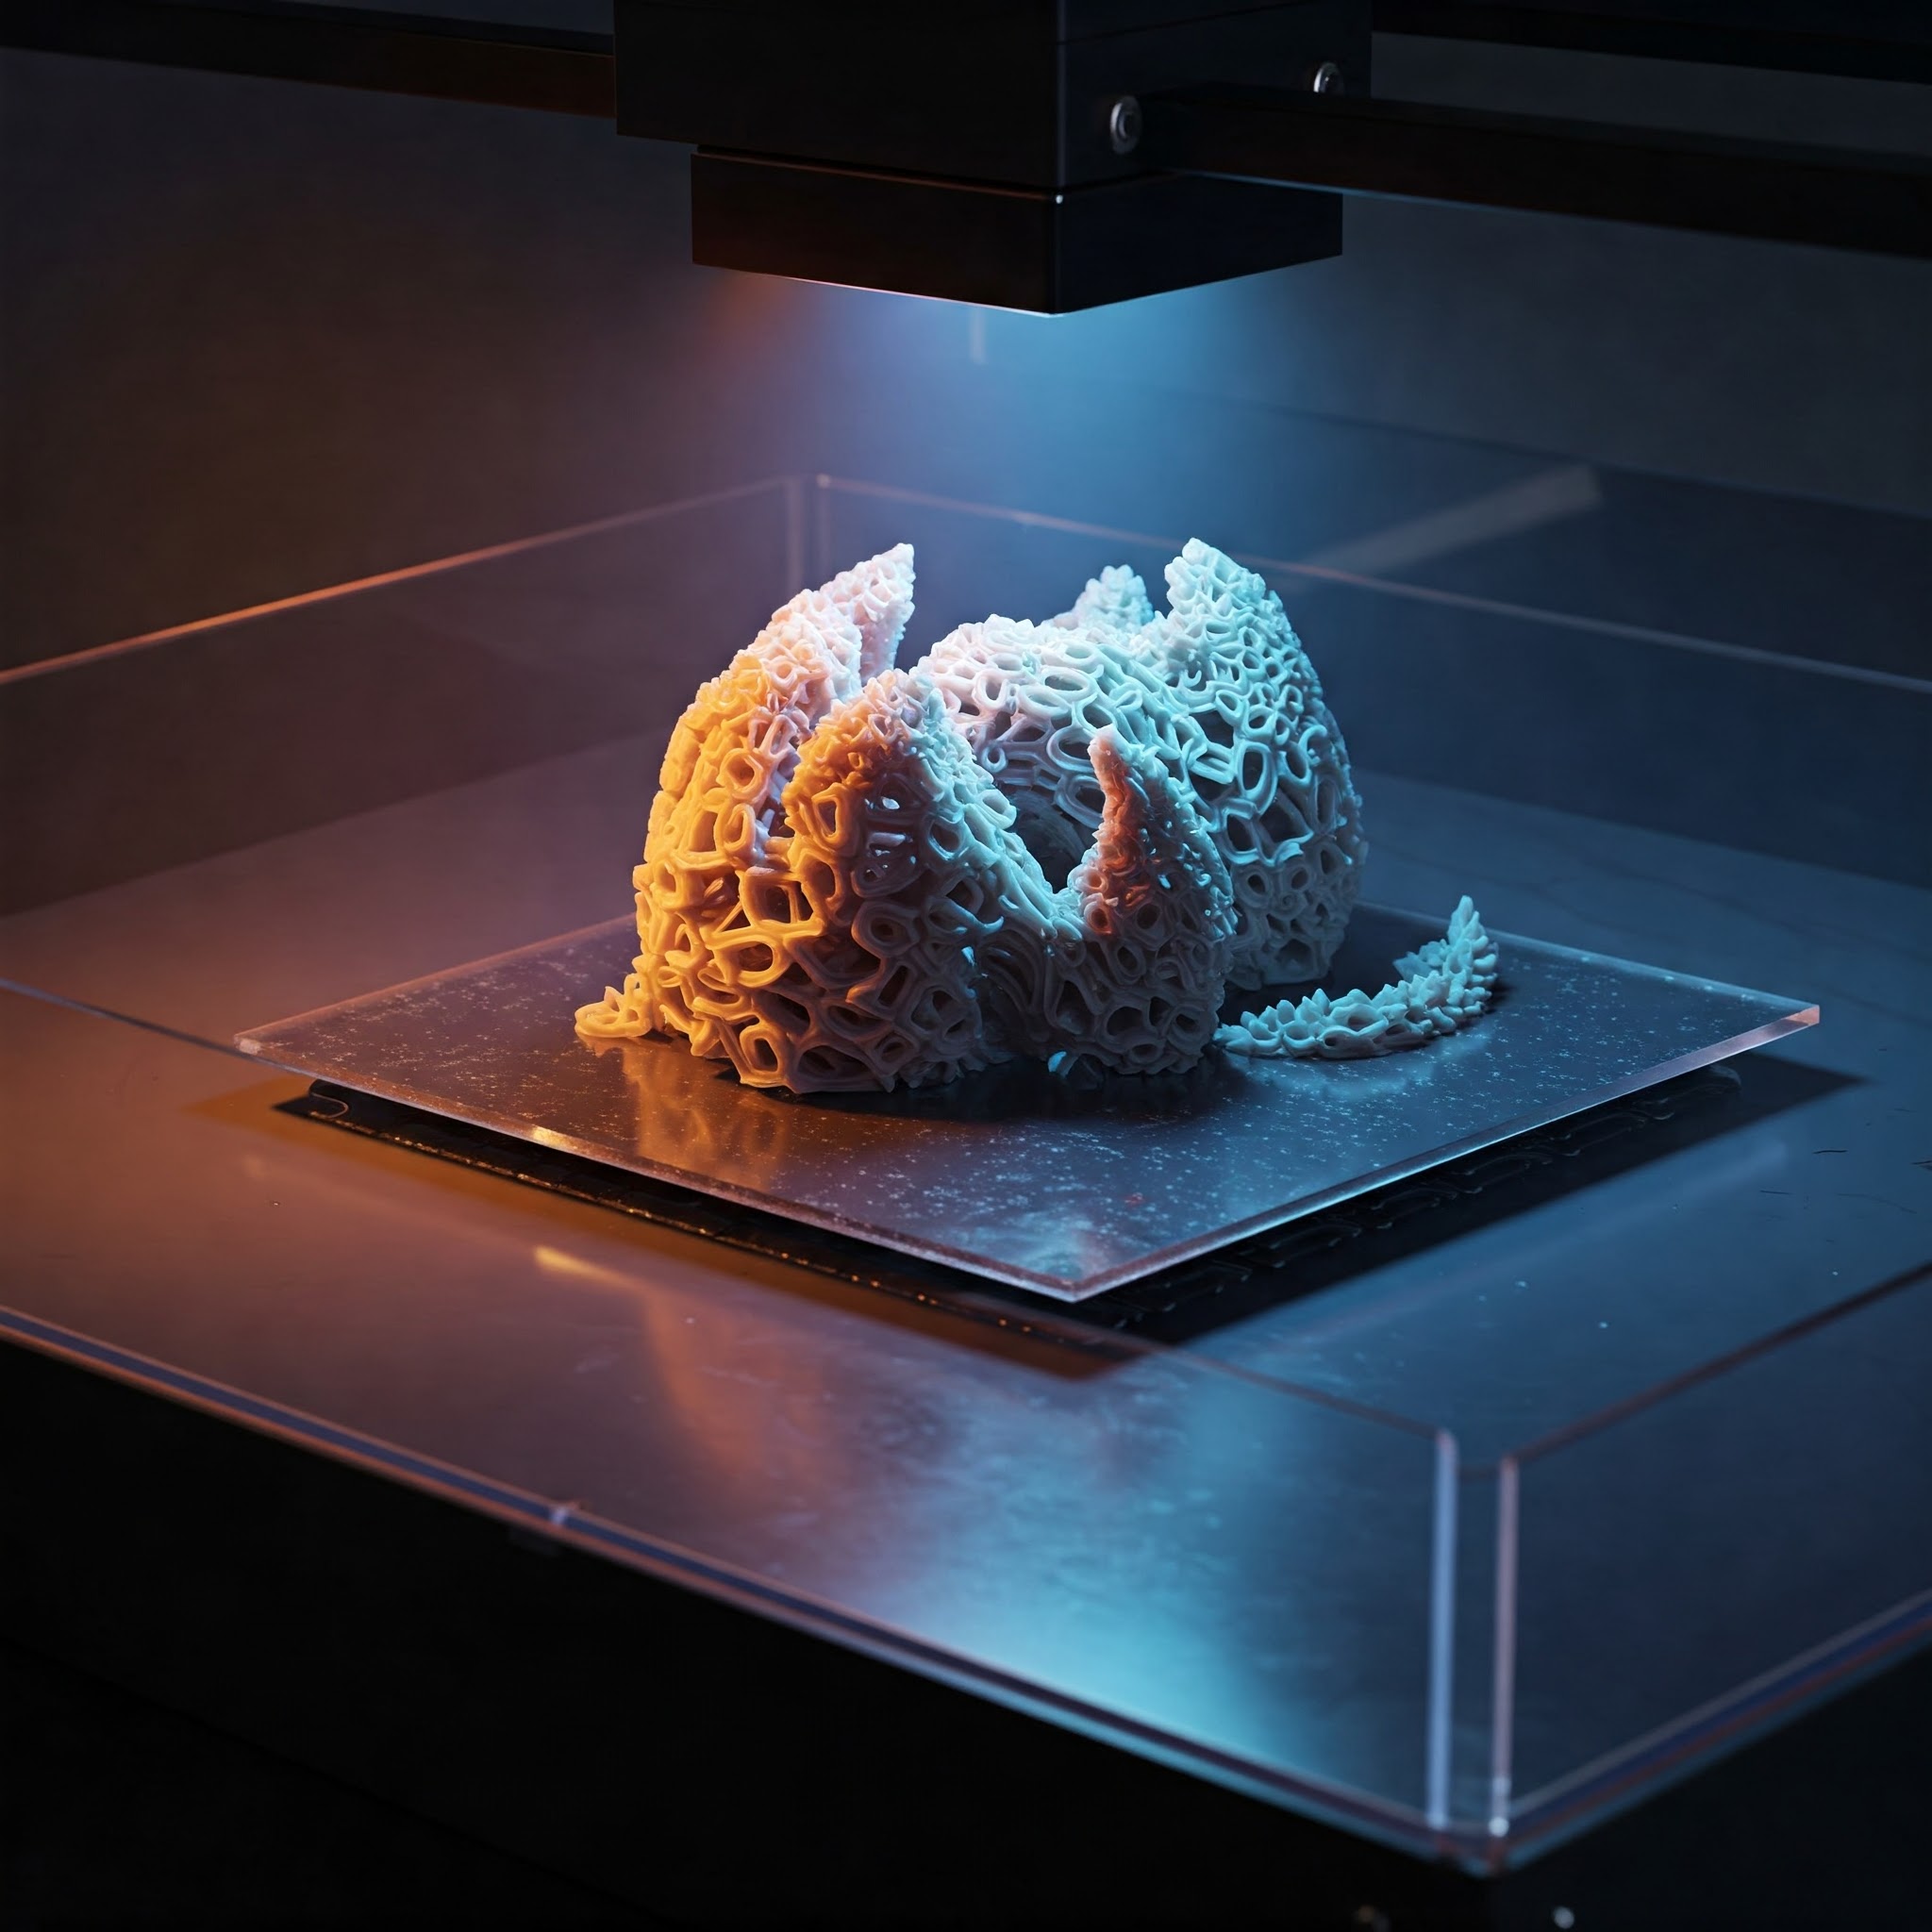
Advantages of Digital Light Processing (DLP)
1.High Precision & Detail – DLP technology produces highly detailed prints with smooth surfaces, making it ideal for intricate designs in dental, jewelry, and engineering applications.
2. Fast Printing Speed – Since DLP cures entire layers at once using a digital projector, it prints much faster than Fused Deposition Modeling (FDM) and some other 3D printing methods.
3. Strong & Durable Prints – The resin materials used in DLP printing offer excellent mechanical properties, including strength, flexibility, and resistance to environmental factors.
4. Minimal Material Waste – DLP printing is efficient because it uses only the required amount of liquid resin, reducing material wastage compared to subtractive manufacturing methods.
5.Supports Complex Geometries – DLP technology can create complex structures, overhangs, and intricate lattice designs with high accuracy, making it suitable for a wide range of applications.
4.Selective Laser Sintering (SLS) –
Uses a laser to fuse powdered materials (e.g., nylon) into solid objects, ideal for durable and complex parts.
Selective Laser Sintering (SLS) is an advanced 3D printing technology that uses a high-powered laser to fuse powdered materials layer by layer into solid objects. It works without the need for support structures, allowing for complex geometries and intricate designs. SLS is widely used in industrial applications due to its ability to produce strong, durable, and heat-resistant parts. The process is compatible with various materials, including nylon, polyamide, and metal powders, making it suitable for functional prototypes and end-use products. Its high precision and efficiency make it ideal for aerospace, automotive, and medical applications.
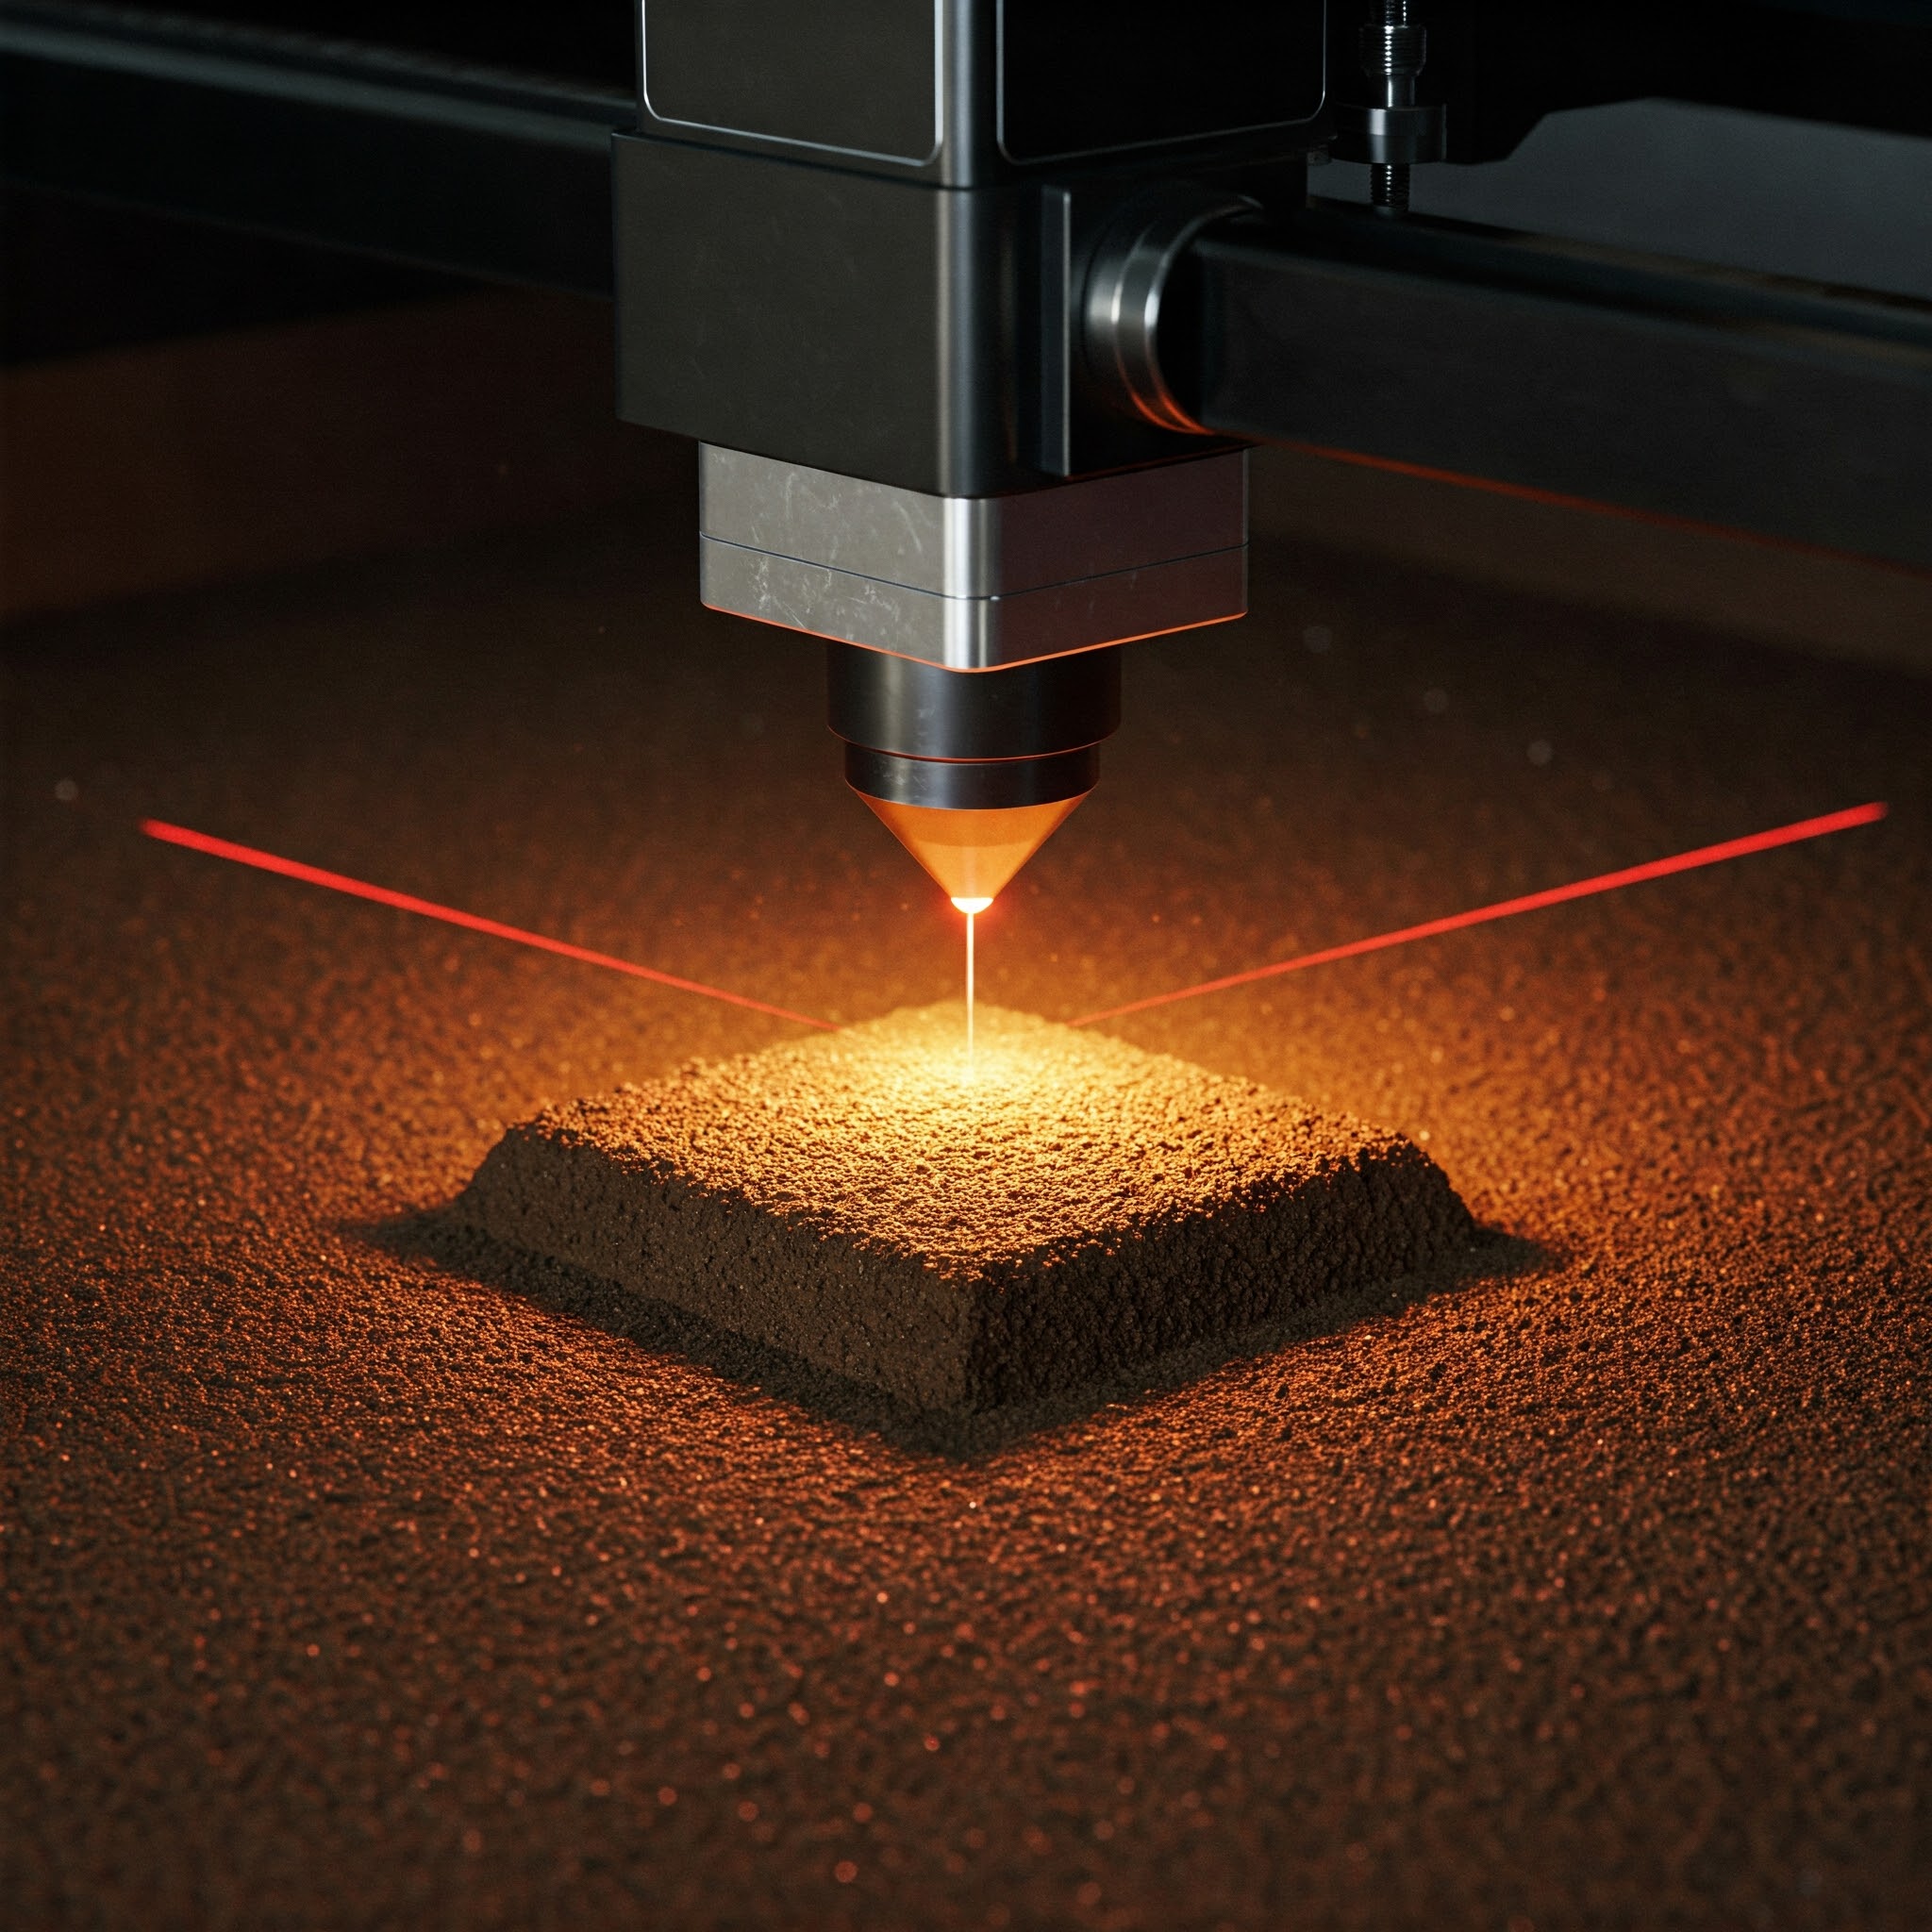
Advantages of Selective Laser Sintering (SLS)
1.No Need for Support Structures – The unsintered powder acts as a natural support, reducing material waste and post-processing effort.
2.Complex Geometries – SLS can produce highly intricate and detailed parts that would be difficult with traditional methods.
3.Strong and Durable Parts – SLS parts have excellent mechanical properties, making them suitable for functional prototypes and end-use applications.
4.Wide Range of Materials – It supports various materials, including nylon, glass-filled composites, and even metal powders.
5.Batch Production Capability – Multiple parts can be printed simultaneously, improving efficiency and reducing manufacturing costs.
5.Selective Laser Melting (SLM) / Direct Metal Laser Sintering (DMLS) –
Melts metal powders layer by layer using a high-power laser, commonly used for aerospace and medical applications.
Selective Laser Melting (SLM) and Direct Metal Laser Sintering (DMLS) are advanced 3D printing technologies used for metal additive manufacturing. Both processes use a high-powered laser to fuse metal powder layer by layer, creating complex and highly detailed parts. SLM fully melts the metal powder, resulting in dense and strong components, while DMLS sinters the particles, making it suitable for a wider range of metal alloys. These techniques are widely used in aerospace, automotive, and medical industries for producing lightweight and high-performance metal parts. Their ability to create intricate geometries without traditional machining makes them highly valuable in modern manufacturing.
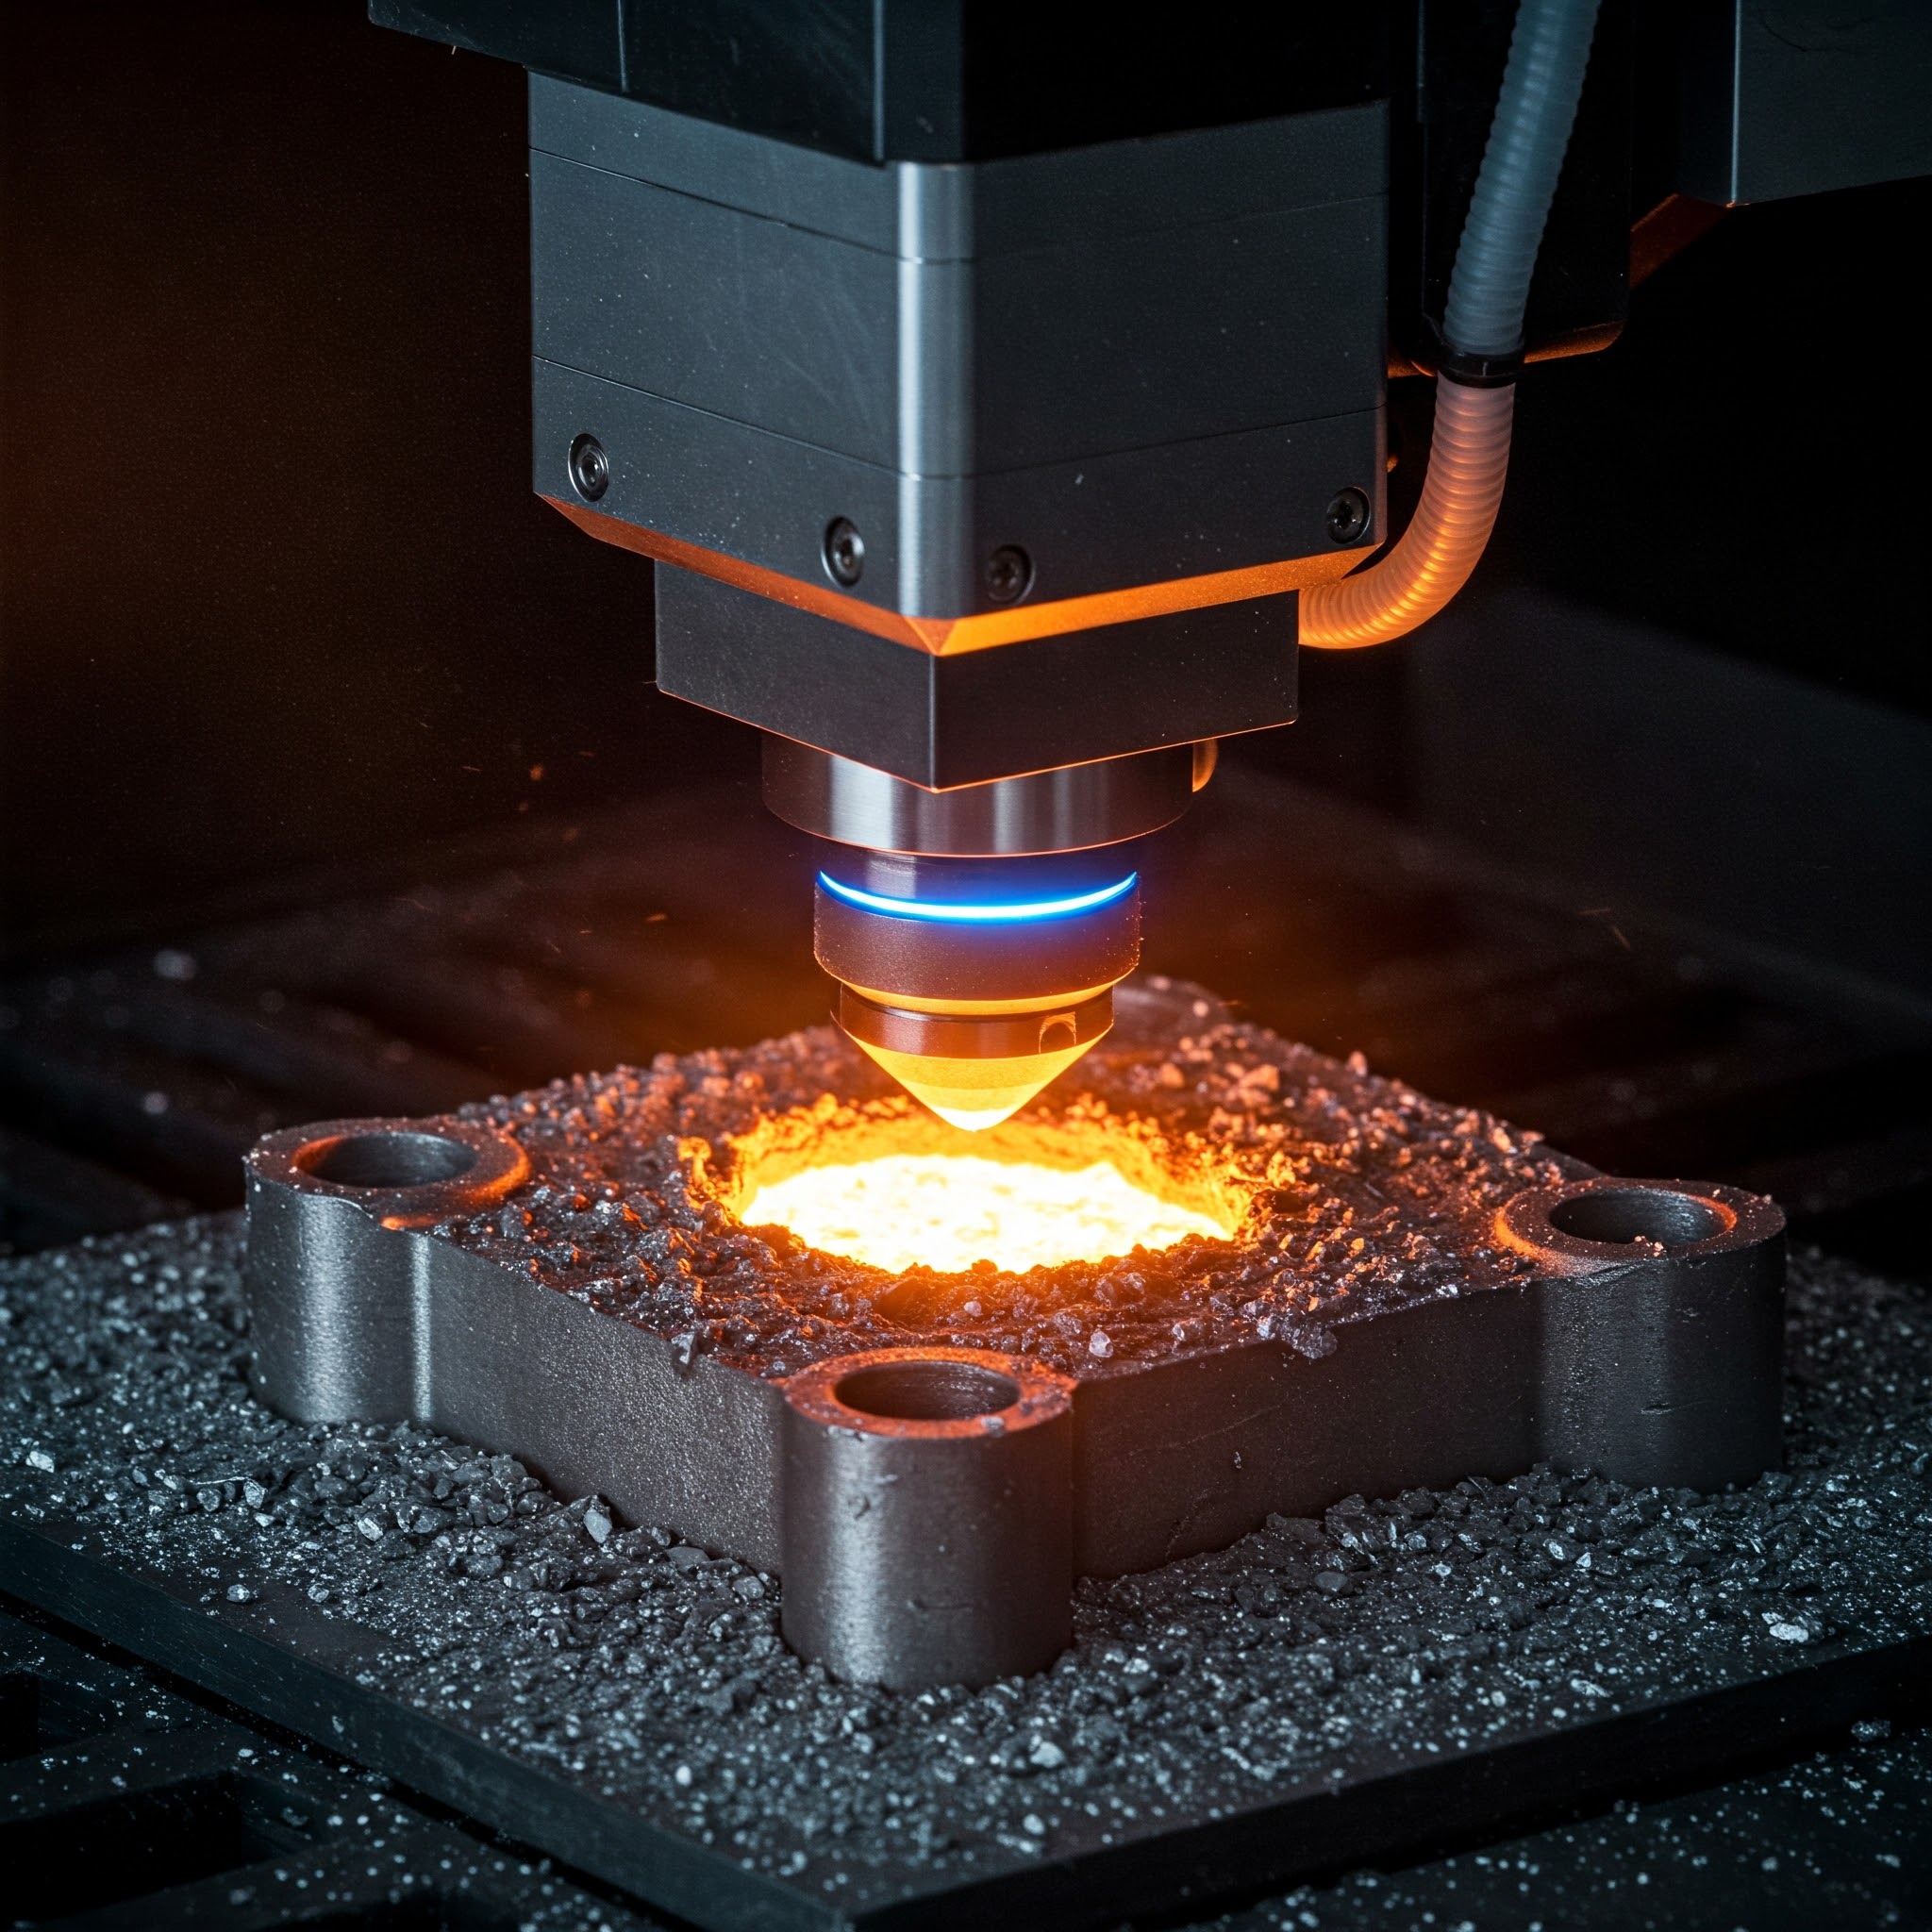
Advantages of Selective Laser Melting (SLM) / Direct Metal Laser Sintering (DMLS)
1.High Strength and Density – SLM fully melts metal powder, producing parts with mechanical properties similar to or better than traditional manufacturing methods.
2.Complex Geometries –Enables the creation of intricate and lightweight designs that are difficult or impossible to manufacture using conventional techniques.
3.Material Efficiency – Minimizes material waste by using only the required amount of metal powder, making it cost-effective and sustainable.
4.Wide Material Compatibility – Supports various metal alloys, including titanium, aluminum, stainless steel, and cobalt-chrome, suitable for aerospace, medical, and automotive industries.
5.Reduced Assembly Requirements – Allows for the production of single, consolidated components, reducing the need for multiple parts and post-assembly processes.
6.Binder Jetting –
Deposits a liquid binder onto a powder bed (metal, sand, or ceramic) to create objects, often used in full-color printing and metal casting.
Binder Jetting is an additive manufacturing process that uses a liquid binder to bond powdered materials layer by layer to create 3D objects. Unlike other metal 3D printing methods, it does not require high temperatures during printing, making it energy-efficient. This process is capable of producing complex geometries with high precision and is commonly used for metals, ceramics, and sand casting molds. Post-processing, such as sintering or infiltration, is often required to enhance the mechanical properties of the final product. Binder Jetting is widely used in industries like aerospace, automotive, and medical for cost-effective, high-volume production.
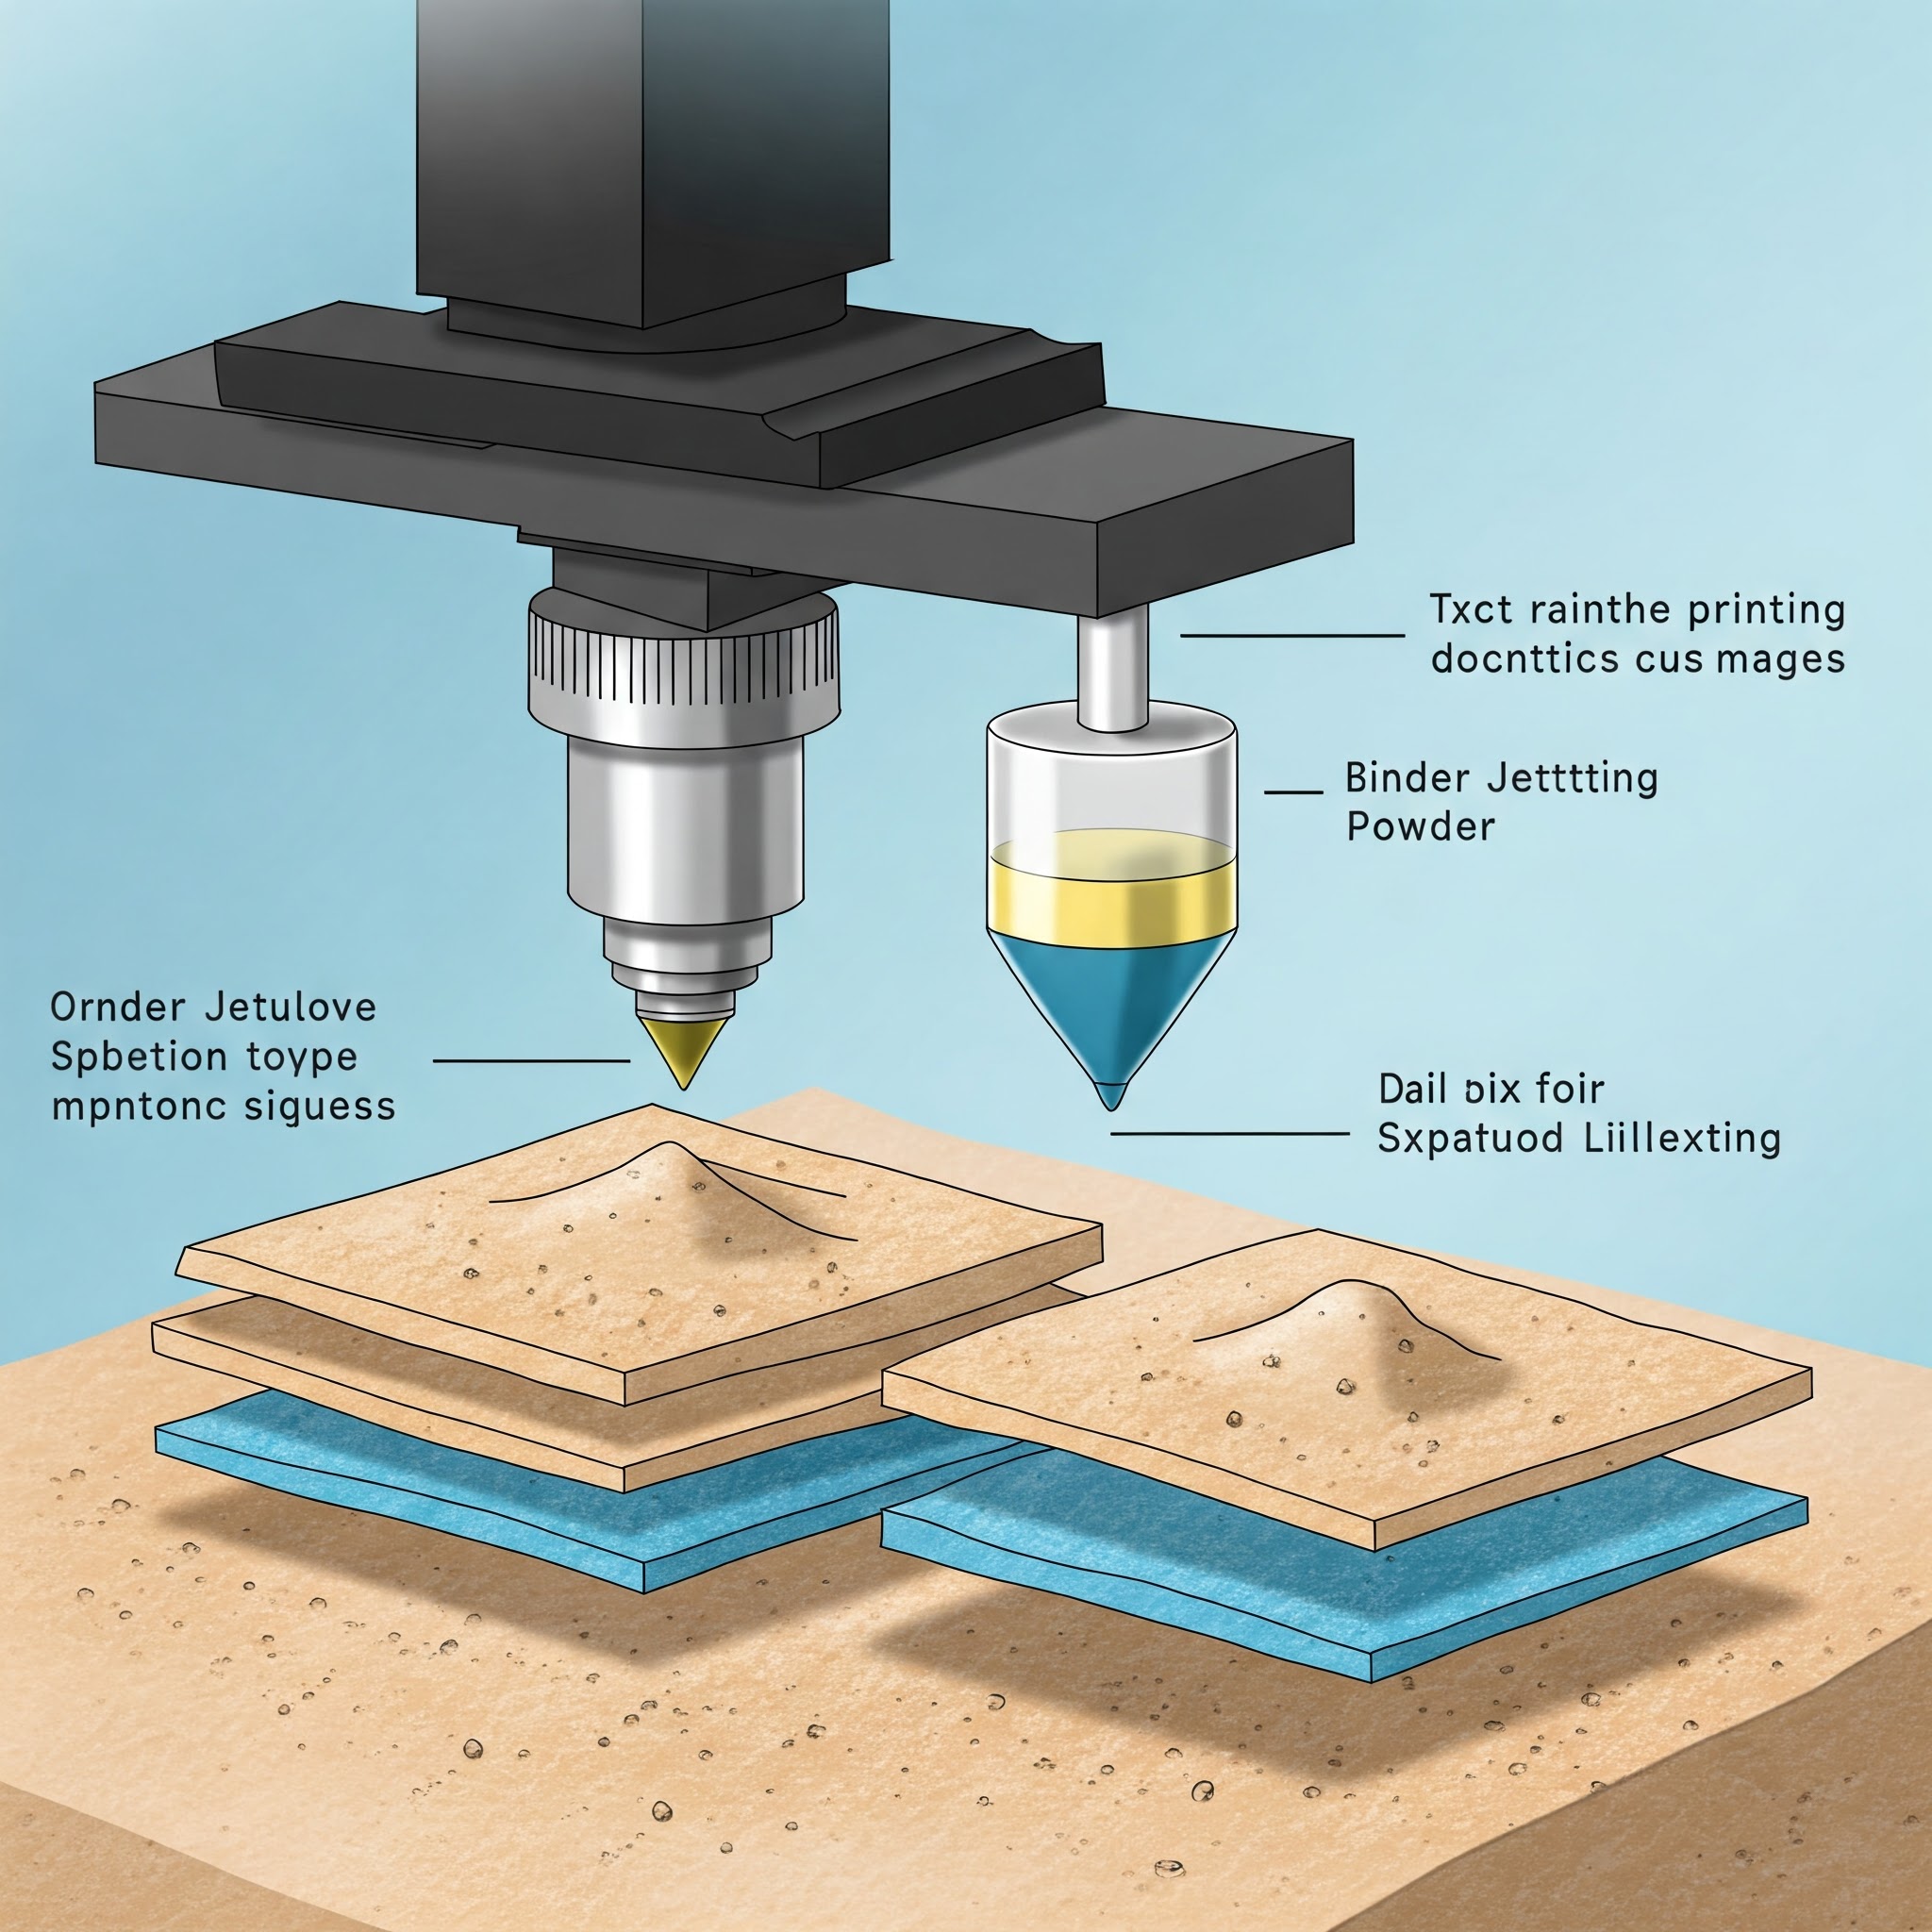
Advantages of Binder Jetting
1.Cost-Effective – Uses less material and energy compared to other metal 3D printing methods, making it more affordable for large-scale production.
2.High-Speed Production – Capable of printing multiple parts simultaneously, increasing efficiency and reducing lead times.
3.No Support Structures Needed – Since the powder itself acts as support, complex geometries can be printed without additional structures.
4.Wide Material Compatibility – Works with a variety of materials, including metals, ceramics, and sand, making it versatile for different industries.
5.Smooth Surface Finish – Produces detailed parts with a relatively smooth surface, reducing the need for extensive post-processing.
7.Laminated Object Manufacturing (LOM) –
Layers of adhesive-coated material (paper, plastic, or metal) are cut and bonded together, useful for large models.
Laminated Object Manufacturing (LOM) is a 3D printing technology that builds objects by layering and bonding sheets of material, such as paper, plastic, or metal. A laser or blade cuts each layer into the desired shape before stacking and gluing them together to form the final object. LOM is known for its low cost and fast production speed, making it suitable for prototyping and large models. It does not require support structures since the excess material remains in place during printing. However, post-processing is often needed to enhance strength and surface quality.
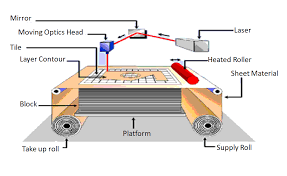
Advantages of Laminated Object Manufacturing (LOM)
1.Low Material Cost – Uses inexpensive materials like paper, plastic, and metal sheets, making it a cost-effective 3D printing method.
2.High-Speed Production – Faster than many other additive manufacturing techniques due to its sheet-based layering process.
3.No Need for Support Structures – The surrounding material acts as natural support, reducing waste and simplifying the printing process.
4.Large Object Printing – Can create large-scale prototypes and models without significant material or cost constraints.
5.Easy Post-Processing – Objects can be enhanced through sanding, painting, or coating to improve durability and appearance.
I took the help of ChatGPT to understand the above expansion for my own learning and further exploration.ChatGPT
3D Printing Materials
3D printing materials vary based on the printing technology and desired properties of the final object. Here are some commonly used materials:
Types of 3D Printing Materials:
1. Plastic
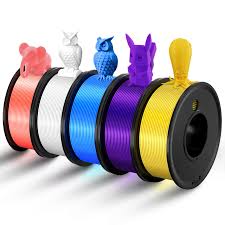
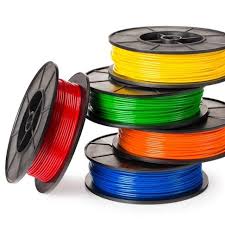
Among all the raw materials used in 3D printing today, plastic remains the most widely utilized. Its versatility makes it an ideal choice for producing 3D-printed toys, household items, and decorative objects such as vases, desk accessories, and action figures. Plastic filaments come in a variety of colors, including vibrant shades like red and lime green, and are available in both transparent and opaque forms. These filaments are typically wound on spools and can have either a matte or glossy finish.
Plastic is favored for its combination of strength, flexibility, smooth texture, and wide range of color options, making it a highly attractive material for 3D printing. Additionally, it is one of the more cost-effective choices, making it accessible to both creators and consumers. Most plastic-based 3D prints are produced using Fused Deposition Modeling (FDM) technology, where thermoplastic filaments are heated, extruded, and layered to form objects. The plastics commonly used in this process include various types of thermoplastics known for their durability and ease of printing.The plastics commonly used in this process typically include the following materials:
PLA- Polylactic Acid (PLA) is one of the most commonly used materials in 3D printing due to its biodegradable nature and ease of use. It is derived from renewable sources like cornstarch and sugarcane, making it an environmentally friendly alternative to petroleum-based plastics. PLA is known for its low melting point, which allows for smooth printing with minimal warping and reduced chances of nozzle clogging. It does not require a heated bed, making it ideal for beginners and desktop 3D printers. The material is available in a variety of colors, including transparent and glow-in-the-dark options, allowing for creative and visually appealing prints. PLA prints have a smooth finish and are often used for prototypes, decorative items, toys, and educational models. While it is a versatile material, PLA is not very heat-resistant and can deform under high temperatures, limiting its use for functional parts exposed to heat. It is also relatively brittle compared to other plastics like ABS, making it less suitable for mechanical or impact-resistant applications. Despite its limitations, PLA remains a popular choice in the 3D printing community due to its affordability, ease of handling, and sustainability. Overall, it is a great material for those looking to create detailed and aesthetically pleasing prints with minimal hassle.
References: Reference
ABS- Acrylonitrile Butadiene Styrene (ABS) is a strong and durable plastic commonly used in 3D printing for its impact resistance and toughness. Unlike PLA, ABS has a higher melting point, making it more heat-resistant and suitable for functional parts that need to withstand stress and wear. This material is widely used in industries such as automotive, consumer goods, and engineering due to its ability to create long-lasting and sturdy prints. ABS is known for its flexibility and can endure bending and physical impact better than PLA, making it ideal for mechanical parts, tools, and enclosures. However, ABS requires a heated print bed to prevent warping and layer separation during printing, which can make it slightly more challenging to work with. It also emits fumes during the printing process, so proper ventilation is recommended when using ABS filaments. The material can be post-processed easily by sanding, painting, or using acetone vapor to achieve a smooth and glossy finish. ABS is commonly used in FDM 3D printing and is the same plastic used to make LEGO bricks, making it a trusted material for strong and durable applications. Although it is less environmentally friendly than PLA, its strength, flexibility, and heat resistance make it a preferred choice for professional and industrial 3D printing.
References: Reference
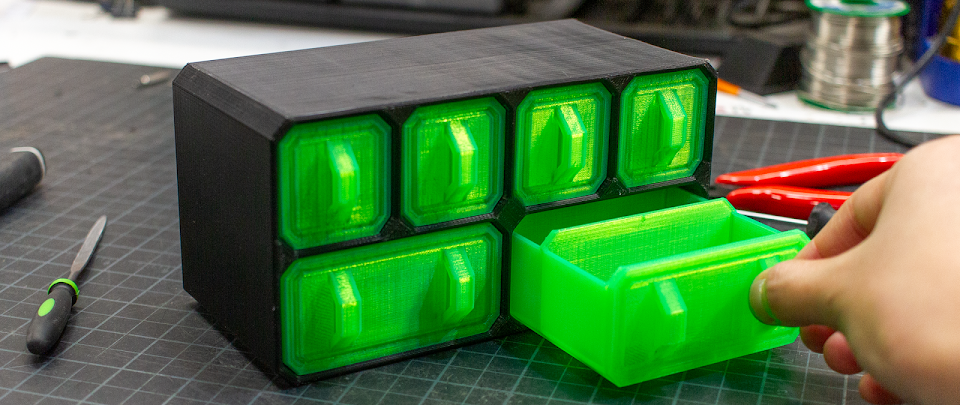
PETG- Polyethylene Terephthalate Glycol (PETG) is a popular 3D printing material known for its strength, durability, and flexibility. It is a modified version of PET, the plastic commonly used in water bottles, but with added glycol to improve its printing properties. PETG offers a balance between the ease of use of PLA and the durability of ABS, making it an excellent choice for functional prints. It is resistant to impact, heat, and chemicals, making it ideal for mechanical parts, protective cases, and food-safe containers. Unlike ABS, PETG does not require a heated enclosure, and it has minimal warping, making it easier to print. It is also more flexible than PLA, reducing the risk of cracking under pressure. Additionally, PETG has good transparency, allowing for the creation of clear or semi-transparent prints. It adheres well between layers, resulting in strong and durable final products. PETG is also recyclable, making it a more environmentally friendly option compared to ABS. Due to its high strength and resistance, PETG is widely used in prototyping, medical applications, and outdoor tools where durability and weather resistance are essential.
References: Reference
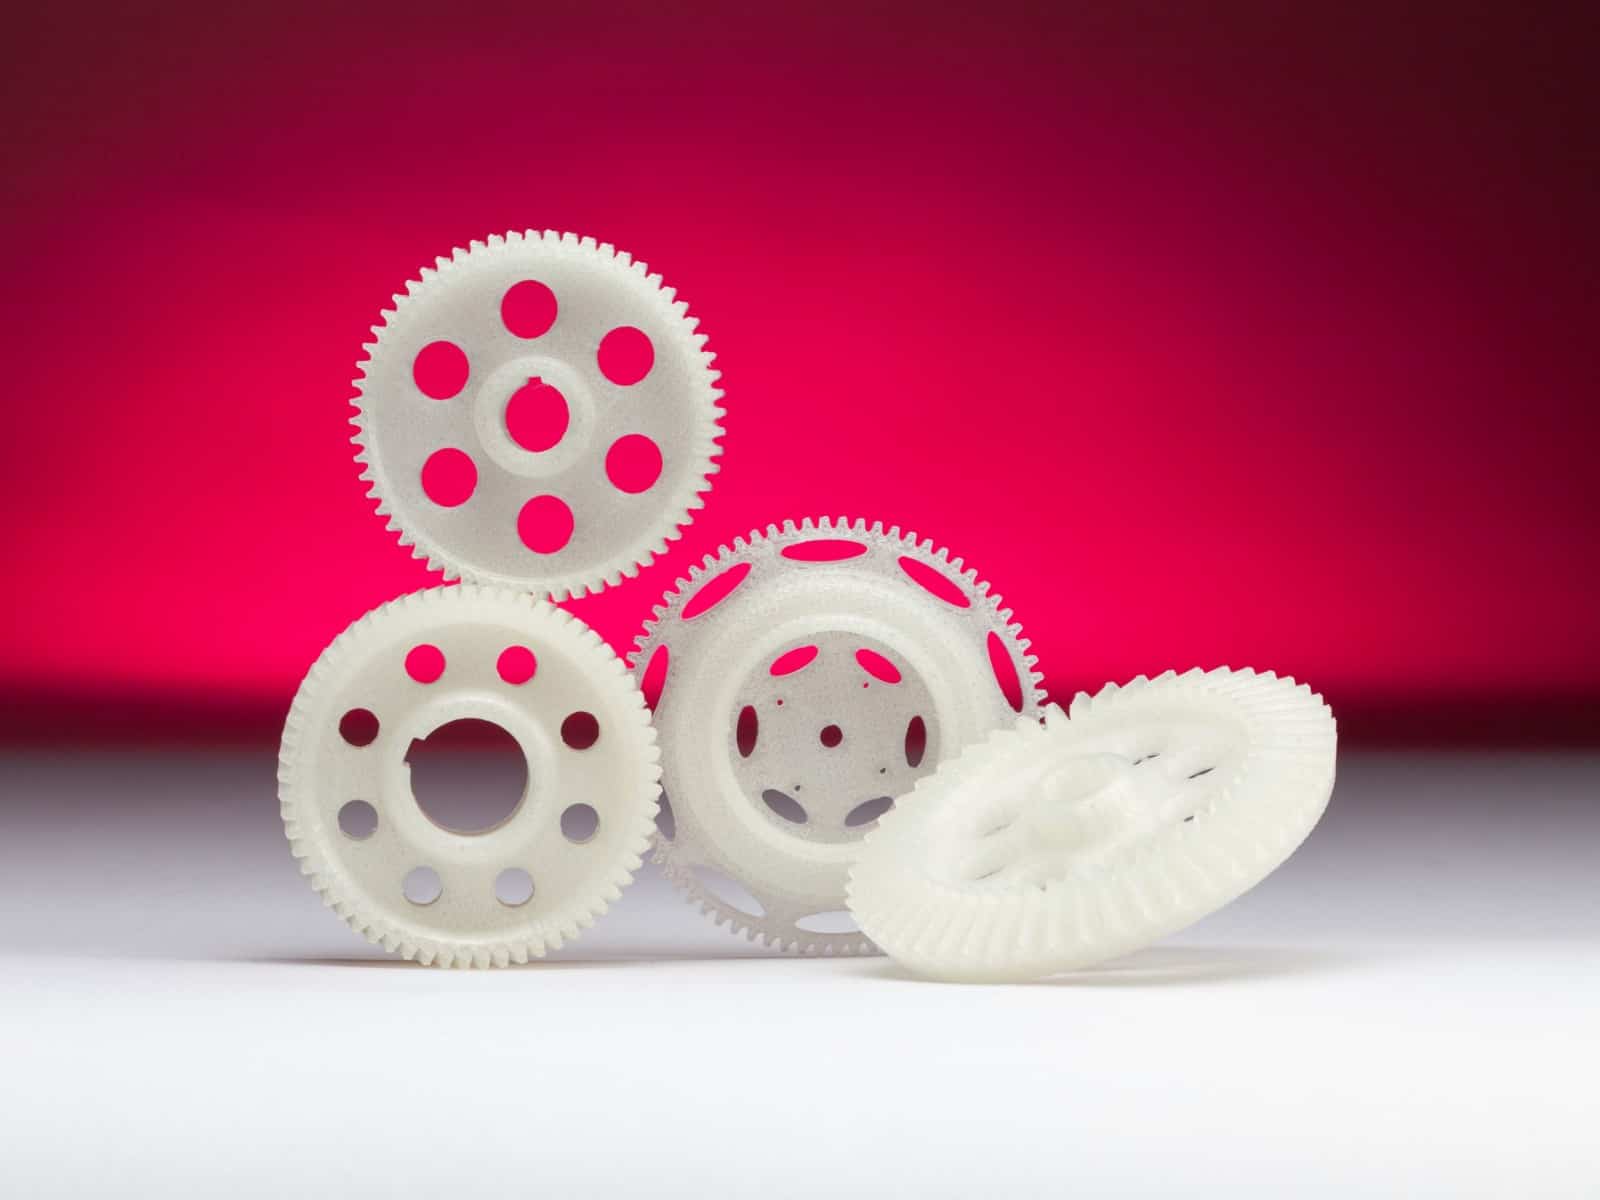
Nylon- Nylon is a strong, flexible, and durable 3D printing material known for its high impact resistance and toughness. It is widely used for functional parts, gears, hinges, and mechanical components due to its excellent mechanical properties. Unlike PLA and ABS, nylon is highly resistant to wear and tear, making it suitable for high-performance applications. It has a low friction coefficient, allowing for smooth movement in printed parts like gears and bearings. Nylon also offers good chemical and heat resistance, making it ideal for industrial and engineering applications. However, it is hygroscopic, meaning it absorbs moisture from the air, which can affect print quality if not stored properly. Drying nylon filaments before printing is essential to achieve strong and precise prints. It requires higher printing temperatures than PLA and PETG, often above 240°C, and prints best in a controlled environment to prevent warping. Due to its strength and durability, nylon is used in industries such as automotive, robotics, and aerospace. Despite being challenging to print, its superior strength and flexibility make it a valuable material for high-performance 3D printing applications.
References: Reference
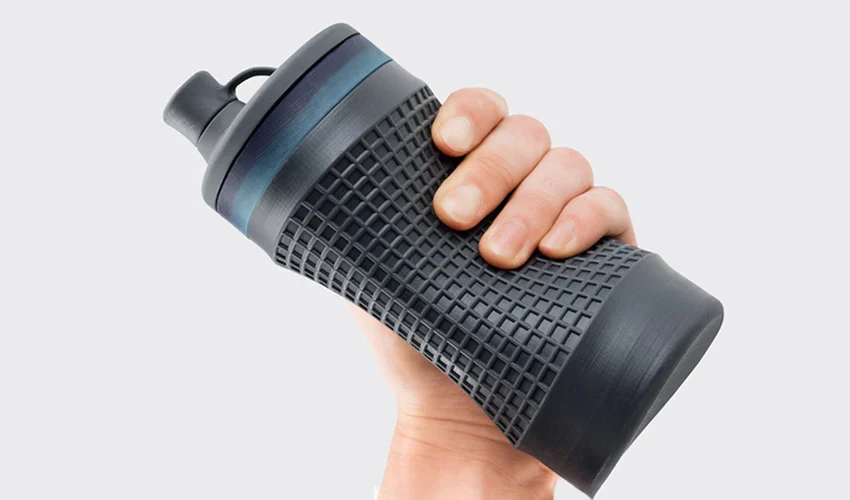
TPU- TPU (Thermoplastic Polyurethane) is a flexible and durable 3D printing material known for its rubber-like properties. It is highly elastic, allowing printed objects to bend and stretch without breaking, making it ideal for applications like phone cases, wearable devices, and automotive parts. TPU is resistant to abrasion, impact, and chemicals, ensuring longevity in harsh environments. Unlike rigid materials like PLA or ABS, TPU maintains its shape while providing flexibility, making it useful for soft grips, gaskets, and protective covers. It is also resistant to oils and greases, making it a preferred choice for industrial uses. Printing with TPU requires careful settings, as it can be challenging to feed through standard 3D printer extruders due to its flexibility. A slow print speed and a direct-drive extruder are recommended for better results. TPU filaments come in different hardness levels, measured in Shore values, allowing users to choose between softer or firmer prints. Its ability to combine strength, flexibility, and durability makes TPU a popular material for functional prototypes and end-use products.
References: Reference
2. Resins (Used in SLA & DLP printing)
Resins, also known as photopolymers, are liquid materials used in 3D printing that harden when exposed to ultraviolet (UV) light. This process is commonly referred to as vat polymerization and includes techniques such as stereolithography (SLA), digital light processing (DLP), and masked stereolithography (MSLA). These methods operate by selectively applying UV light to a vat of resin, solidifying it layer by layer to form a 3D object. Once all layers are cured, the final product remains in a ‘green’ state until further post-processing. Resins are available in various colors, including black, white, transparent, and sometimes shades of red, blue, green, and orange.
Despite its precision and smooth surface finish, resin is less commonly used due to its limitations in strength and flexibility compared to other 3D printing materials. While it is ideal for detailed prints and prototypes, it lacks the durability required for many functional applications. Resins are classified into different types, each offering specific properties suited for particular use cases.
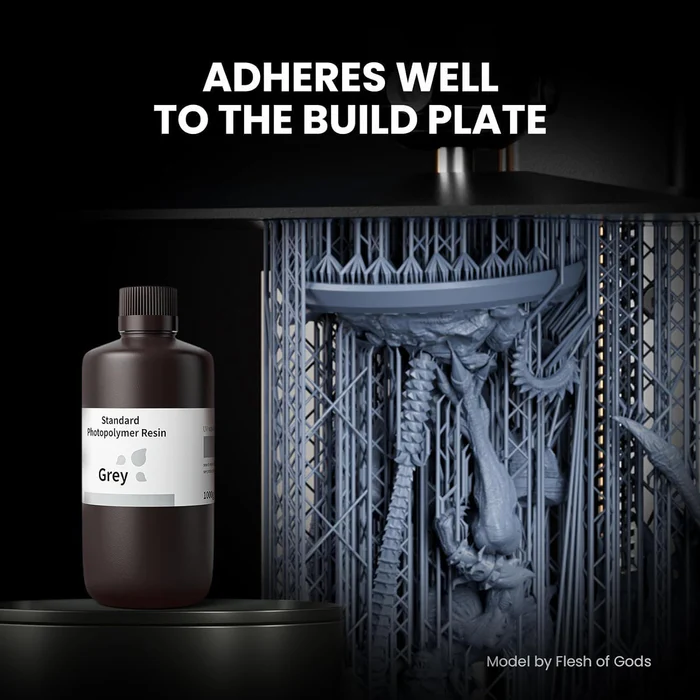
Standard Resin- Standard Resin is the most commonly used type of resin in 3D printing, primarily used for producing high-detail, smooth-surfaced objects. It is widely utilized in vat polymerization techniques such as SLA, DLP, and MSLA. This resin is known for its precision, making it ideal for applications like miniatures, prototypes, and detailed models.
However, standard resin is relatively brittle compared to other 3D printing materials, meaning it is not suitable for parts that require high impact resistance or flexibility. It typically comes in colors like white, gray, black, and transparent, offering a clean and professional finish. While it provides excellent surface quality and fine detail, printed objects may need post-processing, such as washing in isopropyl alcohol and curing under UV light, to reach their final hardened state. Standard resin is widely used in industries such as design, jewelry, and dentistry for creating intricate and visually appealing prototypes.
References: Reference
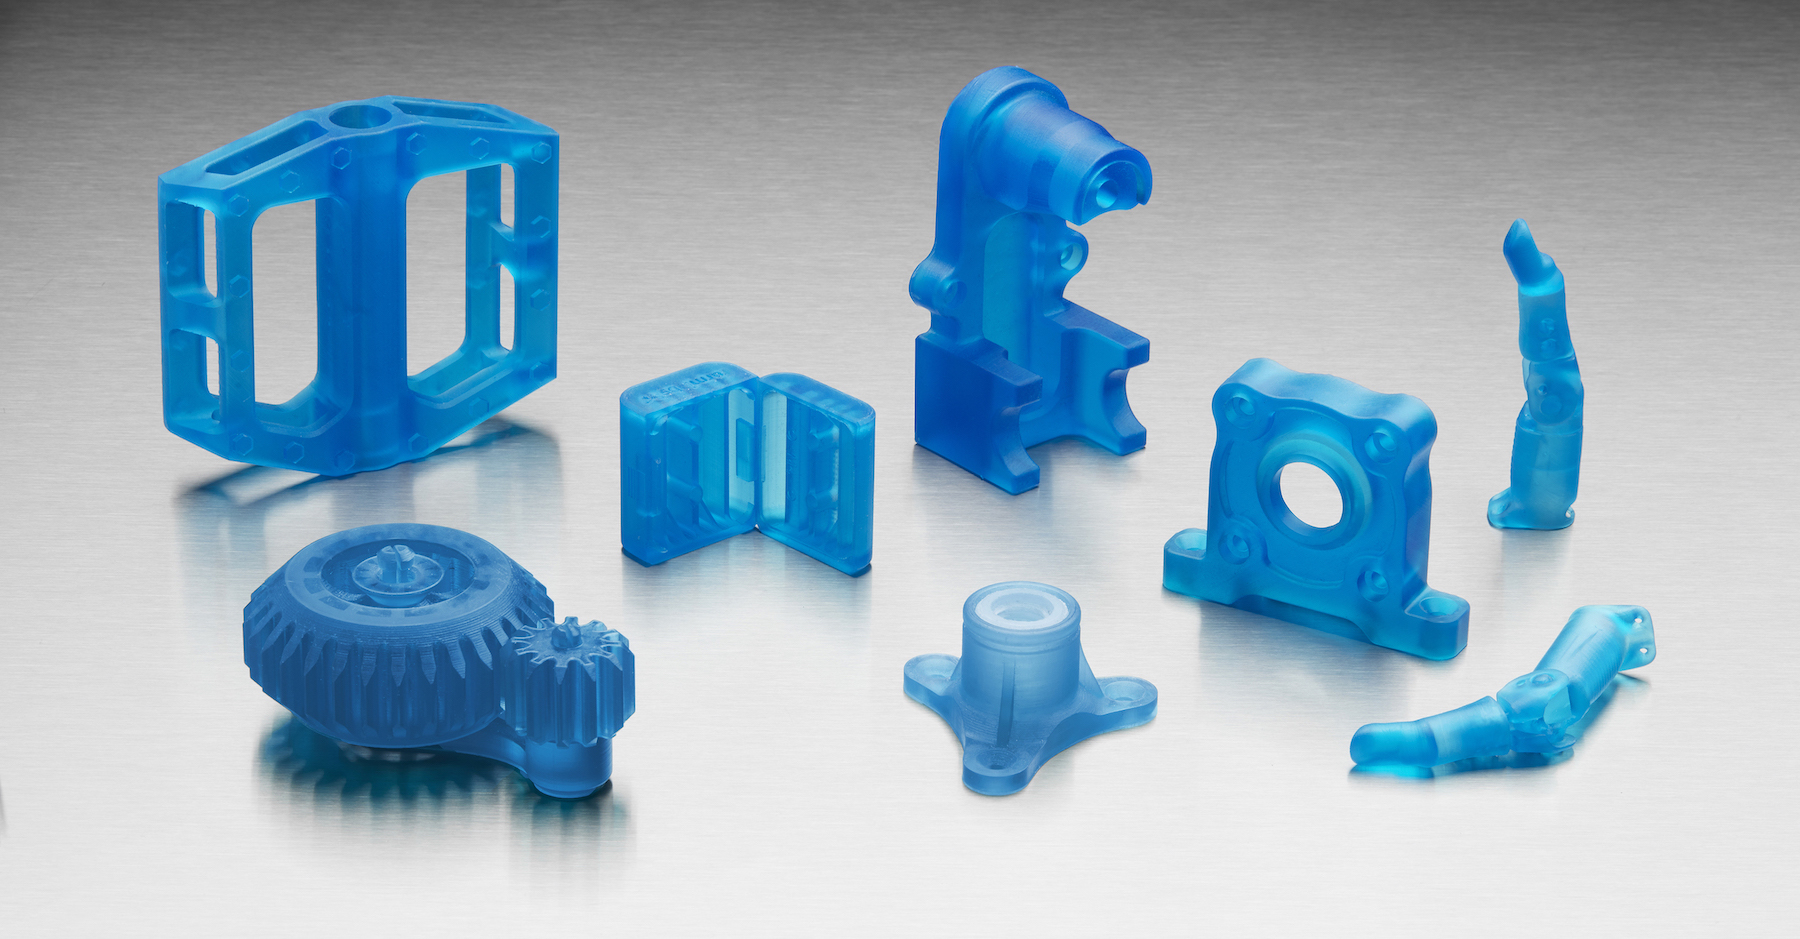
Tough Resin- Tough Resin is a type of 3D printing resin designed to produce stronger and more impact-resistant parts compared to standard resin. It is formulated to mimic the mechanical properties of ABS plastic, making it ideal for functional prototypes, engineering parts, and models that require durability. Tough resin is commonly used in SLA, DLP, and MSLA printing processes, where UV light is used to cure liquid resin layer by layer.
Unlike standard resin, tough resin offers higher tensile strength and flexibility, reducing the chances of brittleness and breaking under stress. It is especially useful for applications requiring structural integrity, such as snap-fit assemblies, tools, and mechanical components. However, like other resins, it still requires post-processing, including washing and UV curing, to achieve its full strength. Tough resin is available in various colors, though it is often found in shades of gray or transparent finishes, making it suitable for both functional and aesthetic applications.
References: Reference
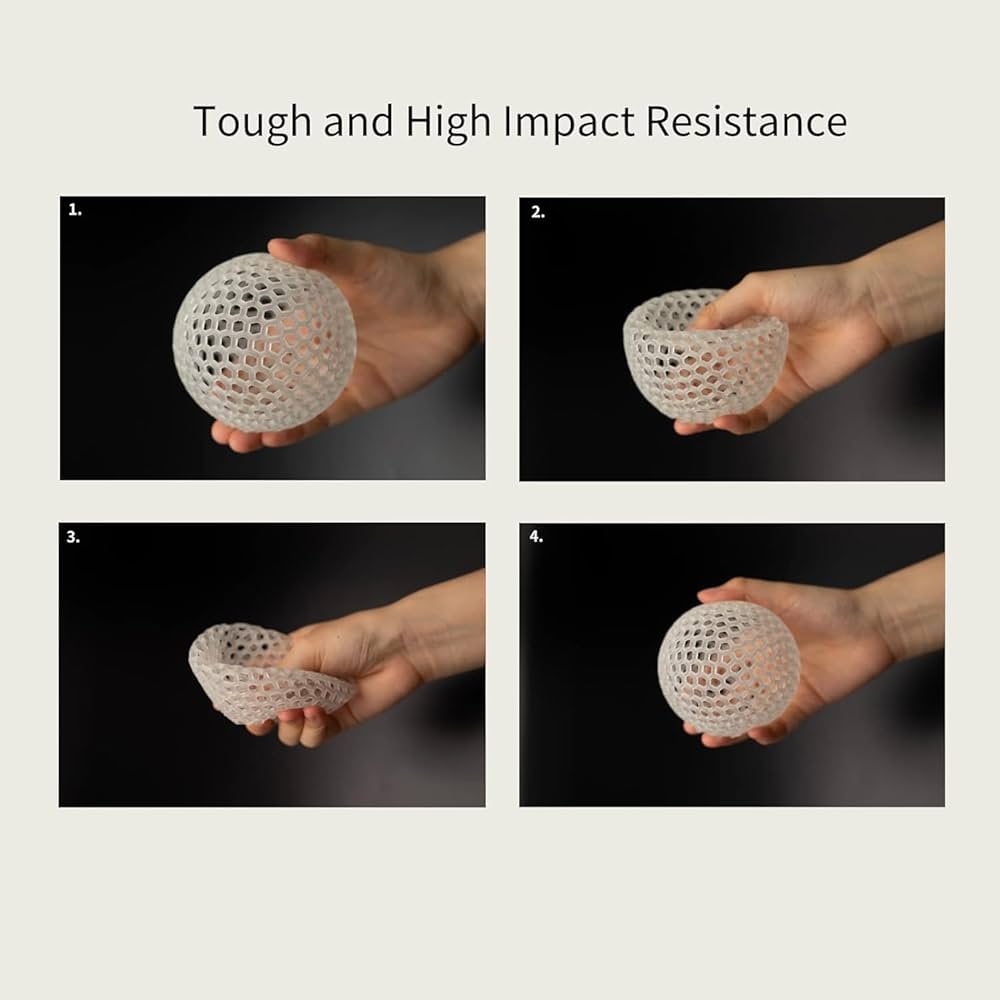
Flexible Resin- Flexible Resin is a type of 3D printing material designed to create soft, rubber-like parts with high elasticity. It is commonly used in SLA, DLP, and MSLA printing processes, where UV light selectively cures the resin layer by layer. This resin is ideal for applications requiring flexibility, impact resistance, and compressibility, such as grips, seals, wearable prototypes, and cushioning components.
Compared to standard resin, flexible resin has a lower Shore hardness, allowing printed objects to bend and stretch without breaking. It provides excellent shock absorption and can return to its original shape after deformation. However, due to its softer nature, it requires precise printing settings and careful handling during post-processing, including proper washing and curing, to maintain its mechanical properties. Flexible resin is often available in black, gray, or transparent colors, making it suitable for both functional and aesthetic applications in product design and prototyping.
References: Reference
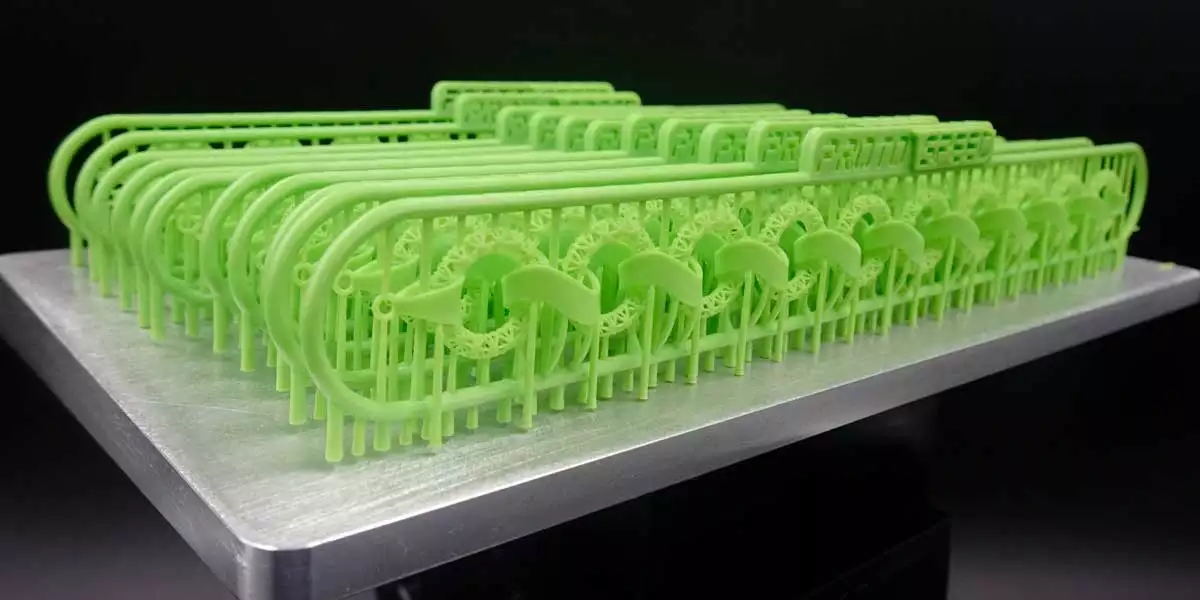
Castable Resin- Castable Resin is a specialized 3D printing material designed for investment casting applications. It is primarily used in jewelry making, dental models, and precision engineering, where intricate designs need to be converted into metal parts. This resin burns out cleanly without leaving ash or residue, ensuring a smooth casting process.
Castable resin is formulated to capture fine details, making it ideal for creating delicate patterns and complex geometries. It is commonly used with SLA, DLP, and MSLA printers, where UV light selectively cures the material layer by layer. Unlike standard resins, castable resins do not require high mechanical strength since their primary purpose is to create temporary molds. After printing, the resin models undergo post-processing, including washing and curing, before being embedded in a casting mold. When heated, the resin vaporizes, leaving behind a precise cavity for molten metal to fill. This process is widely used in high-quality custom jewelry, dental crowns, and small industrial components.
References: Reference
3. Composites
Composites are advanced 3D printing materials that combine a base material, like plastic or resin, with reinforcing elements such as carbon fiber, glass fiber, or metal particles. These materials enhance strength, durability, and heat resistance, making them ideal for industrial, aerospace, and automotive applications. Composite filaments are typically used in FDM 3D printing, while composite resins are compatible with SLA or DLP printing. Due to their improved mechanical properties, composites offer a lightweight yet robust alternative to pure plastics, allowing for the production of high-performance parts with excellent structural integrity.
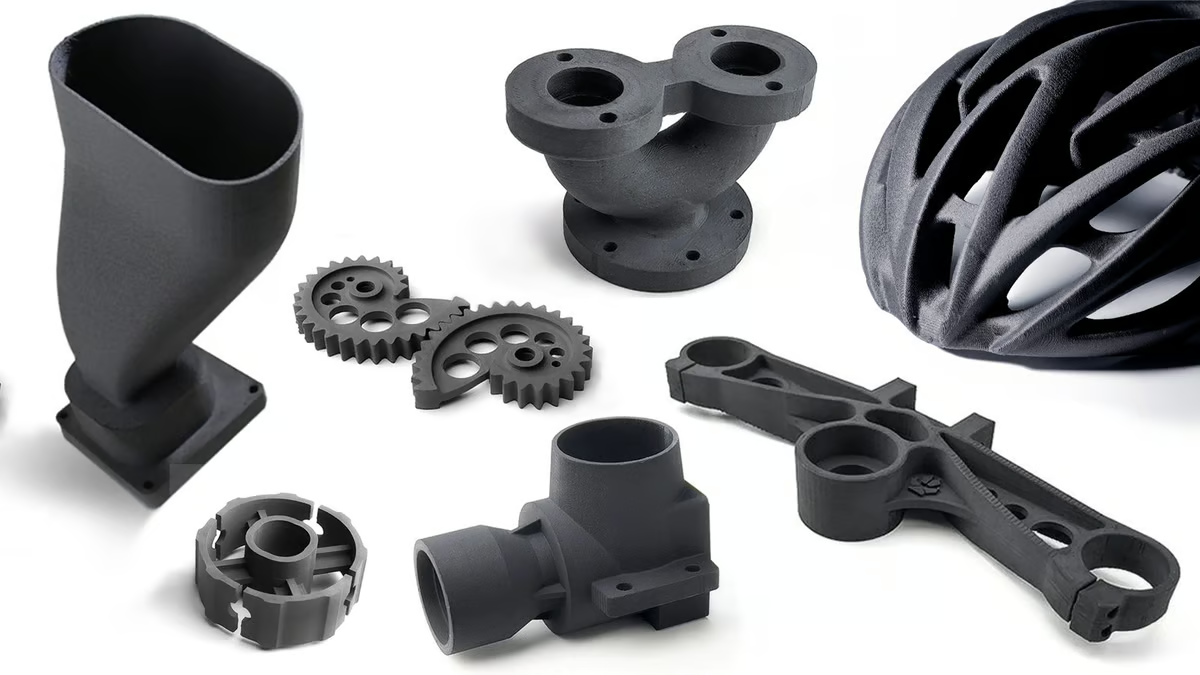
Carbon Fiber Filament- Carbon Fiber Filament is a high-strength 3D printing material made by infusing short carbon fibers into a thermoplastic base, such as PLA, ABS, PETG, or Nylon. This combination significantly enhances the strength, stiffness, and lightweight properties of the printed object while reducing warping and shrinkage. Carbon fiber filaments are widely used in aerospace, automotive, and engineering applications where durability and rigidity are crucial. However, due to their abrasive nature, they require hardened steel or ruby-tipped nozzles to prevent excessive wear on standard 3D printer components. Despite its challenges, carbon fiber filament is ideal for creating strong, lightweight, and impact-resistant parts.
References: Reference
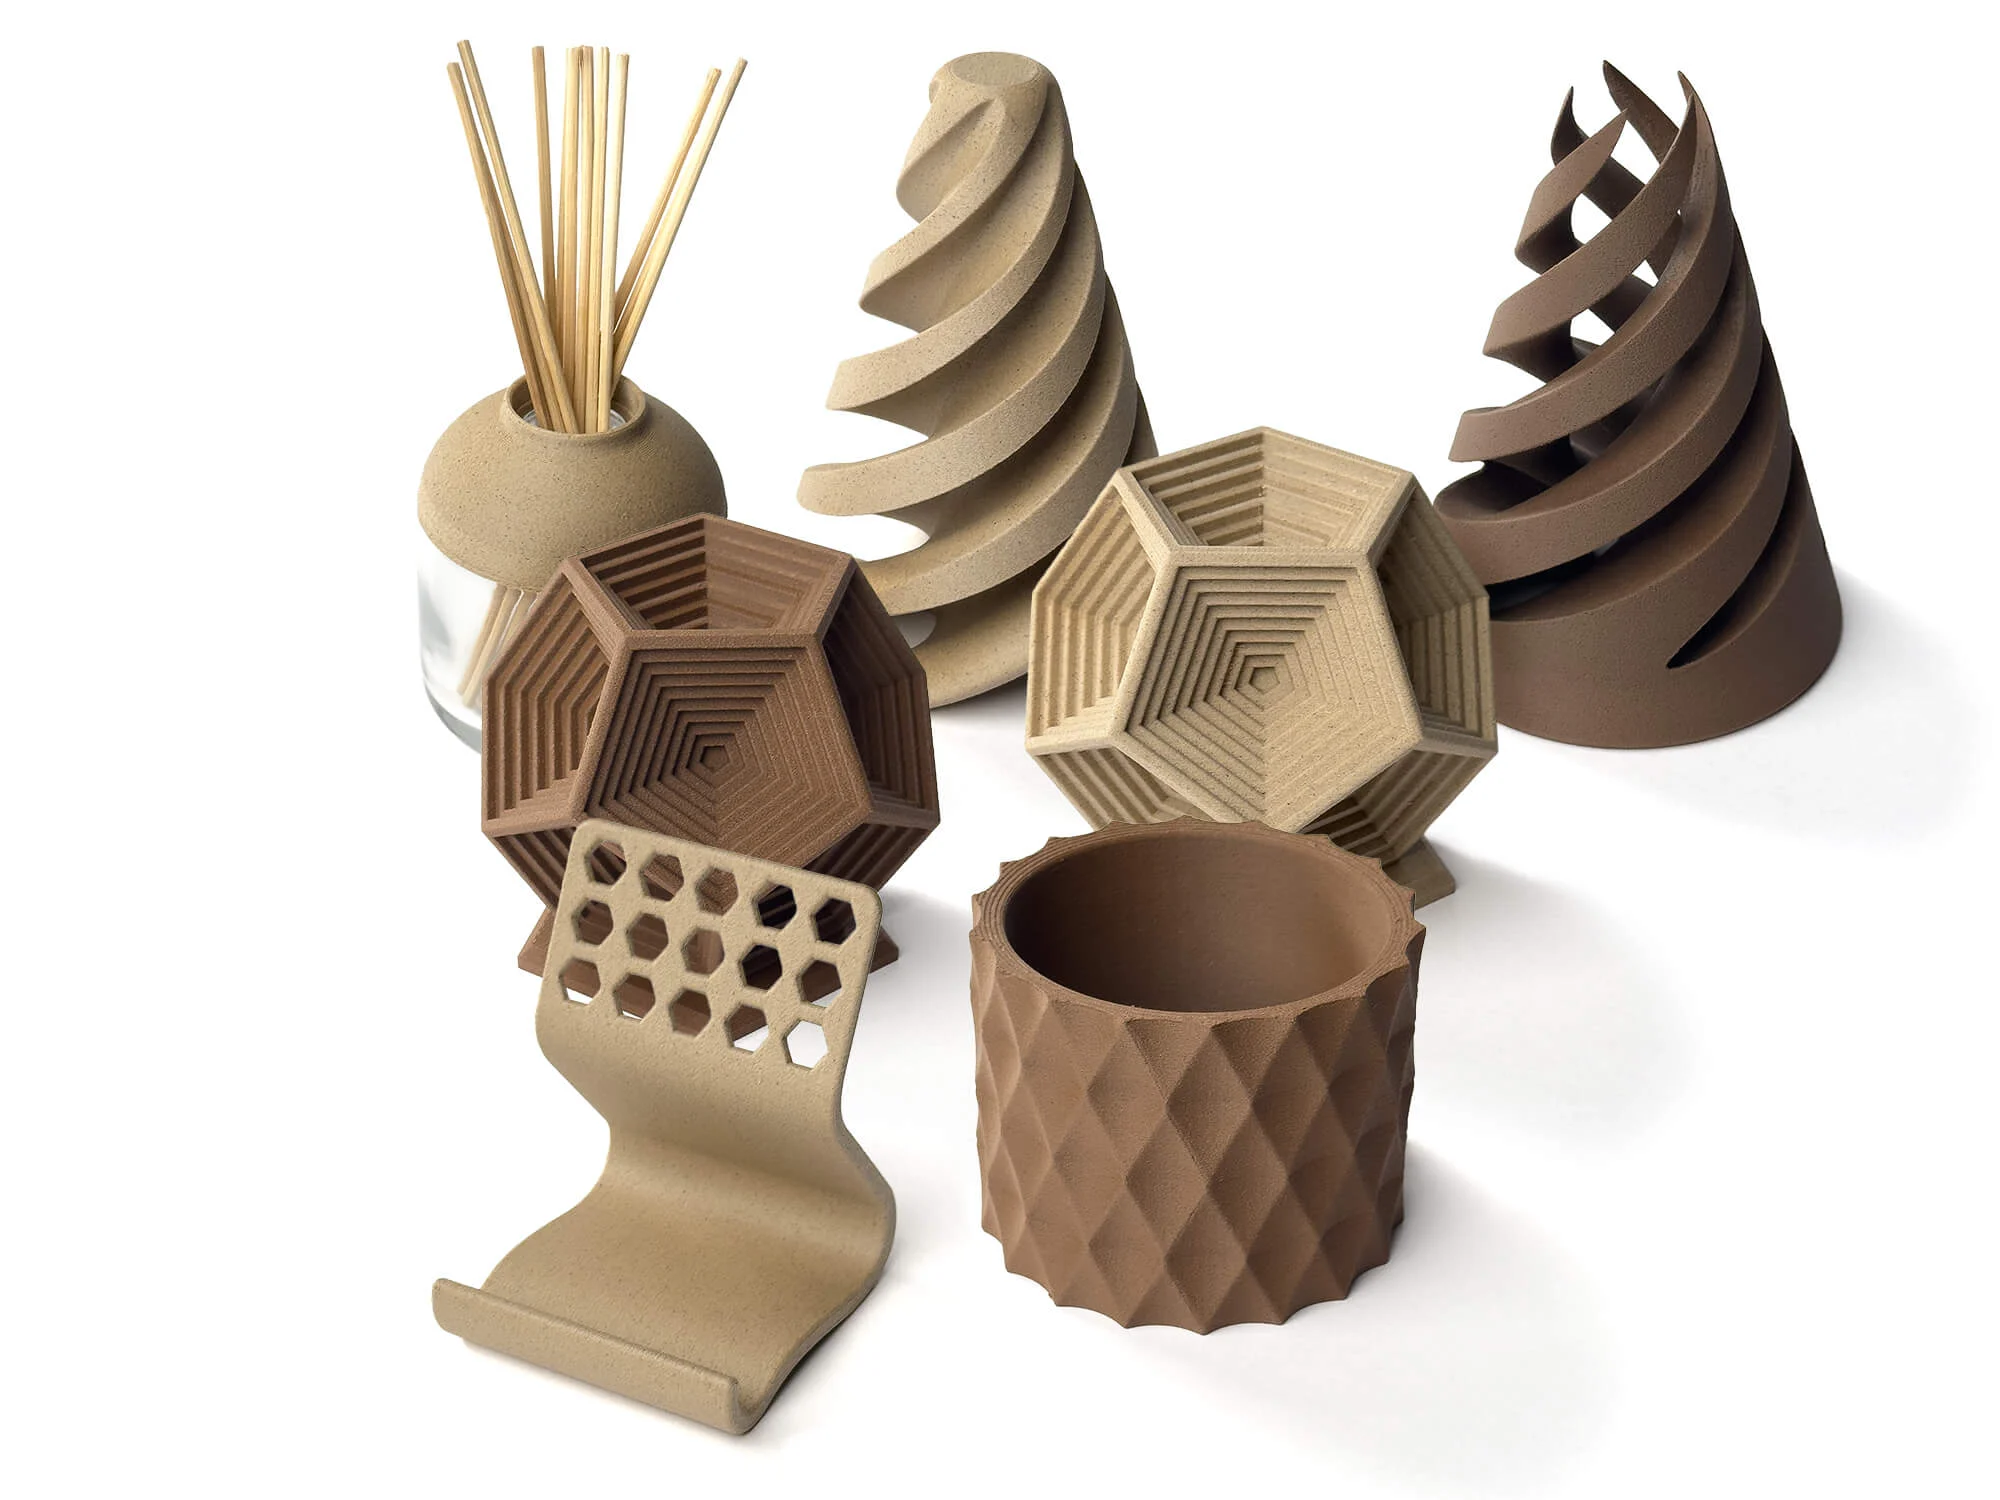
Wood-filled Filament- Wood-Filled Filament is a composite 3D printing material that combines a standard thermoplastic, such as PLA, with fine wood particles. This mixture gives prints a natural wood-like appearance, texture, and even the ability to be sanded and stained like real wood. Wood-filled filament is popular for decorative objects, artistic sculptures, and furniture prototypes, as it creates prints with a warm, organic look. It is available in different wood types, including bamboo, pine, and walnut, each giving a unique color and finish. However, printing with wood filament requires careful temperature control to avoid excessive burning or clogging of the nozzle. While it is not as strong as pure plastic filaments, it offers a visually appealing and eco-friendly alternative for creative projects.
References: Reference
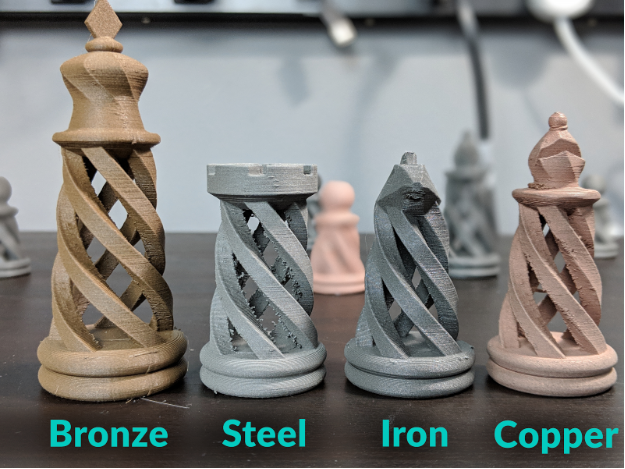
Metal-filled Filament- Metal-Filled Filament is a composite 3D printing material that combines standard thermoplastics, such as PLA or ABS, with fine metal powders like copper, bronze, brass, or stainless steel. This blend gives prints a metallic appearance, weight, and sometimes even a slightly rough texture, mimicking real metal parts. Metal-filled filaments are commonly used for decorative items, jewelry, and artistic pieces due to their ability to be polished, sanded, and even oxidized for an aged effect. While they provide a more realistic metal finish compared to standard plastic prints, they are denser and more abrasive, which can cause increased wear on the printer’s nozzle. For best results, a hardened steel or ruby-tipped nozzle is recommended.
References: Reference
4. Powders (Used in SLS & MJF printing)
Powders (Used in SLS & MJF Printing) are fine-grained materials used in Selective Laser Sintering (SLS) and Multi Jet Fusion (MJF) 3D printing processes. These powders, typically made of nylon (PA), TPU, metal, or ceramics, are spread layer by layer and selectively fused using a laser (SLS) or a fusing agent with infrared heat (MJF). The process results in durable, high-detail parts with excellent mechanical properties and no need for support structures. Powder-based printing is widely used in industrial applications for creating functional prototypes, end-use parts, and complex geometries that traditional manufacturing methods cannot achieve.
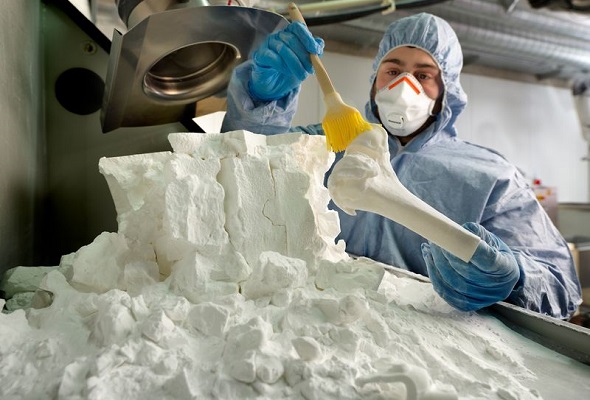
Nylon Powder- Nylon Powder is a widely used material in Selective Laser Sintering (SLS) and Multi Jet Fusion (MJF) 3D printing. It is known for its durability, flexibility, and chemical resistance, making it suitable for functional prototypes and end-use parts. Nylon powder is typically Polyamide 12 (PA12) or Polyamide 11 (PA11) and is sintered layer by layer using a laser or fused with a binding agent and infrared heat. The resulting prints have high strength, good impact resistance, and excellent surface quality. Nylon powder is commonly used in automotive, aerospace, medical, and consumer product manufacturing due to its balance of mechanical performance and lightweight properties.
References: Reference
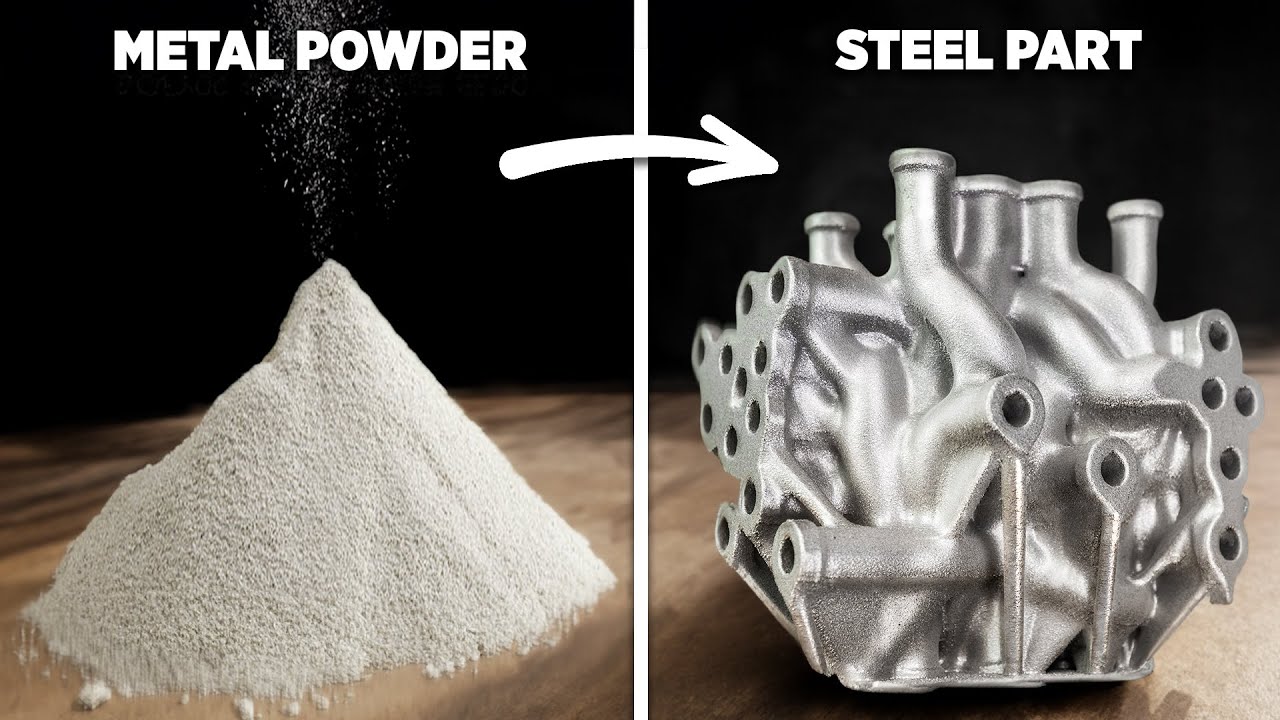
Metal Powder- Metal Powder is a key material used in Selective Laser Sintering (SLS), Direct Metal Laser Sintering (DMLS), and Binder Jetting (BJ) 3D printing processes. It consists of fine metal particles, such as stainless steel, titanium, aluminum, cobalt-chrome, and nickel alloys, which are fused together layer by layer using a high-powered laser or a binding agent. Metal powder printing is widely used in aerospace, automotive, medical, and industrial manufacturing due to its ability to create strong, heat-resistant, and complex metal parts that are difficult to produce using traditional machining. The final products often require post-processing, such as sintering or heat treatment, to achieve their full strength and durability.
References: Reference
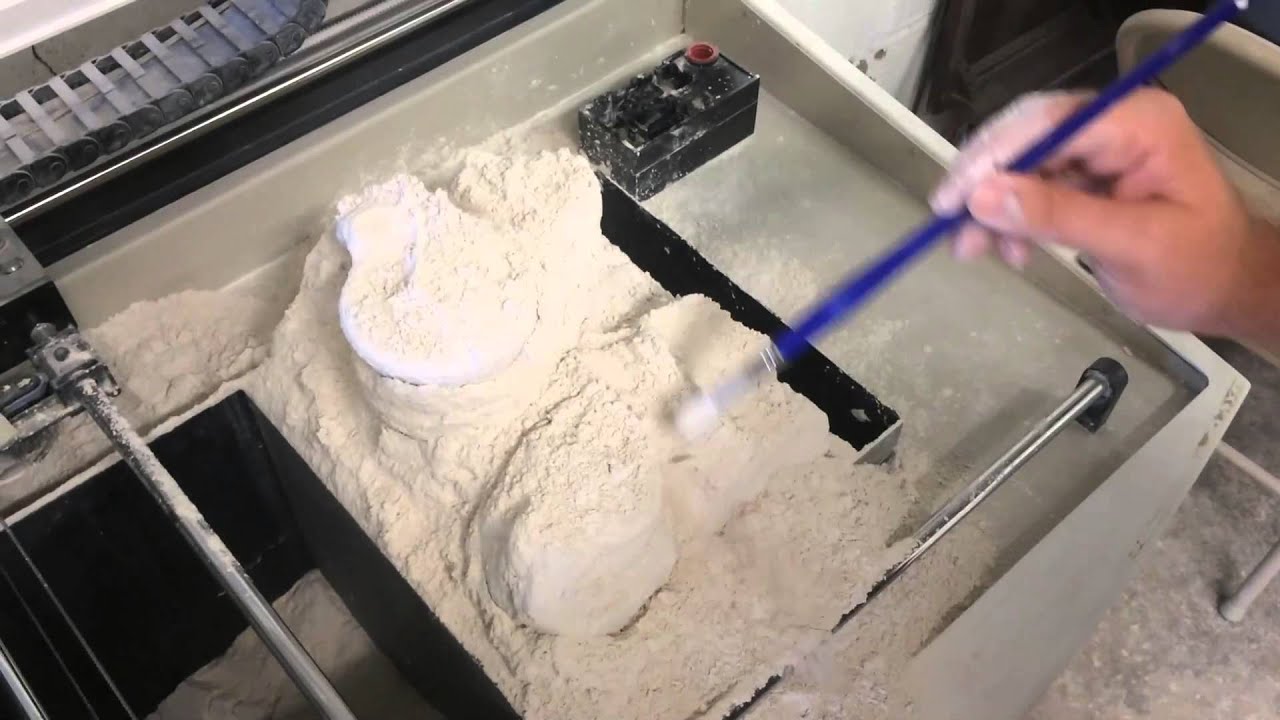
Ceramic Powder- Ceramic Powder is a specialized material used in 3D printing techniques like Binder Jetting, Stereolithography (SLA), and Selective Laser Sintering (SLS) to create objects with high-temperature resistance, hardness, and durability. Made from materials like alumina, zirconia, and silica, ceramic powders are ideal for applications in aerospace, biomedical, and art industries. The printing process involves binding ceramic particles layer by layer, followed by sintering or kiln-firing to achieve the final solid structure. Ceramic 3D prints are valued for their heat resistance, electrical insulation, and smooth surface finish, making them suitable for medical implants, engine components, and decorative objects.
References: Reference
Material Properties
Below is one filament guide table that includes all sorts of supported filament, divided both by material and specific manufacturers. Here, one can compare their parameters including physical properties of the filament. Click here for more information.
One more source to refer: For materials and their properties..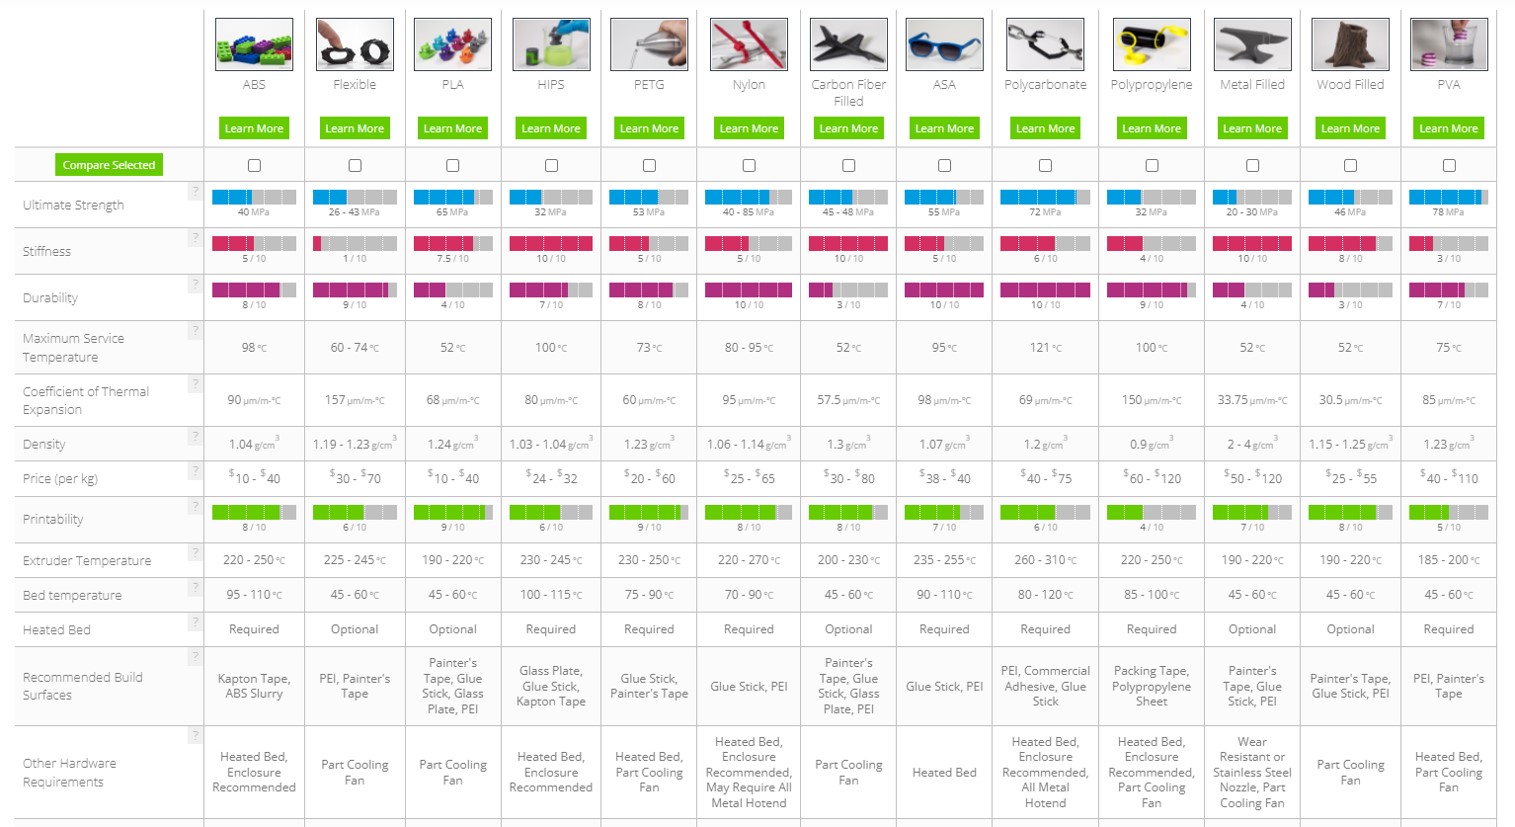
3D Scanning
3D scanning is a technique used to analyze real-world objects or environments to gather data on their shape and, in some cases, their appearance, such as color. This data is then used to create digital 3D models for various applications.
Different technologies power 3D scanners, each with unique benefits, limitations, and costs. Some challenges remain, particularly when scanning dark, reflective, or transparent objects using optical methods. Technologies like industrial computed tomography (CT) scanning, structured-light scanners, LiDAR, and Time-of-Flight scanners help generate accurate 3D models without damaging the object.
The captured 3D data has numerous applications across different industries. In entertainment, it plays a key role in creating realistic video games, movies, and virtual reality experiences. Other uses include augmented reality, motion tracking, robotics, industrial design, orthotics and prosthetics, reverse engineering, quality control, and preserving cultural artifacts in digital form.
Functionality:The primary function of a 3D scanner is to generate a 3D model of an object. This model is made up of a polygon mesh or a point cloud, representing geometric samples from the object's surface. These points help reconstruct the shape of the object, a process known as reconstruction. If the scanner captures color data at each point, it can also recreate the object's surface colors or textures.
3D scanners function similarly to cameras in some ways. Like cameras, they have a cone-shaped field of view and can only collect data from visible surfaces. However, while a camera captures color details, a 3D scanner records distance measurements from the object’s surface within its field of view. The resulting "image" from a 3D scanner provides information about the distance to the surface at each point, making it possible to determine the precise 3D position of each point.
In many cases, a single scan is not enough to fully capture an object. Multiple scans from different angles are often required to gather complete details. These scans must then be aligned, a process known as registration, before they are merged to form a comprehensive 3D model. This entire workflow, from capturing separate scans to assembling a complete model, is referred to as the 3D scanning pipeline.
Click here to read more.
I took the help of ChatGPT to understand the above expansion for my own learning and further exploration.ChatGPT
Group Assignment Brief
Test the design rules for your 3D printer
3D Printing:
3D printing is an additive manufacturing process in which an object is made by depositing material layer by layer according to the design. Line by line, it is made in a circle and made in a hexa gun and is printed based on our design in which filament like ABS PLA is used, FDM (Fused Deposition Modeling) – Printing is done in layers by melting plastic filament through a hot nozzle.
3D Scanning :
3D scanning which creates accurate digital 3D models by capturing the shape and details of physical objects. It records the geometry and texture of an object using various methods such as laser scanning, structured light and photogrammetry. 3D scanning has the ability to convert physical objects into digital formats such as STL and OBJ, facilitating design modifications and reproduction.
Materials used
1.PLA
2.ABS,
3.PETG,
4.Nylon
Uses of 3D Printing
1.Manufacturing - For design and product development.
2.Manufacturing and production - Making customized products on a small scale.
3.Automobile - Manufacturing robust automobiles.
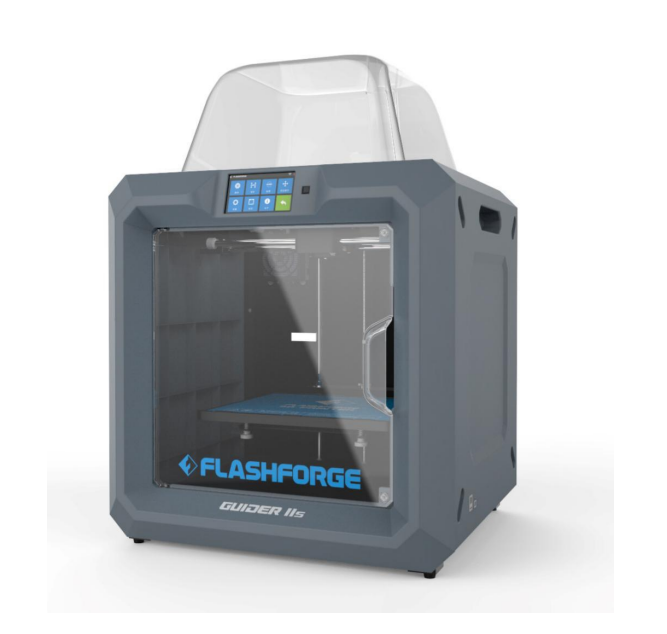
FlashForge Guider IIS 3D Printer
I thoroughly read the manual book of the 3D printer and understood its components (as shown in the attached photos). I successfully installed the 3D printer and its software. Furthermore, I downloaded and installed FlashPrint 5 from its official website to explore its features.
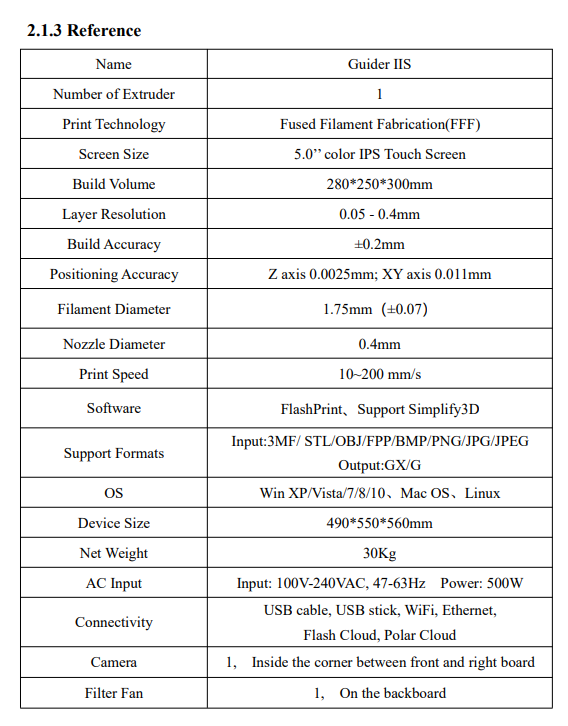
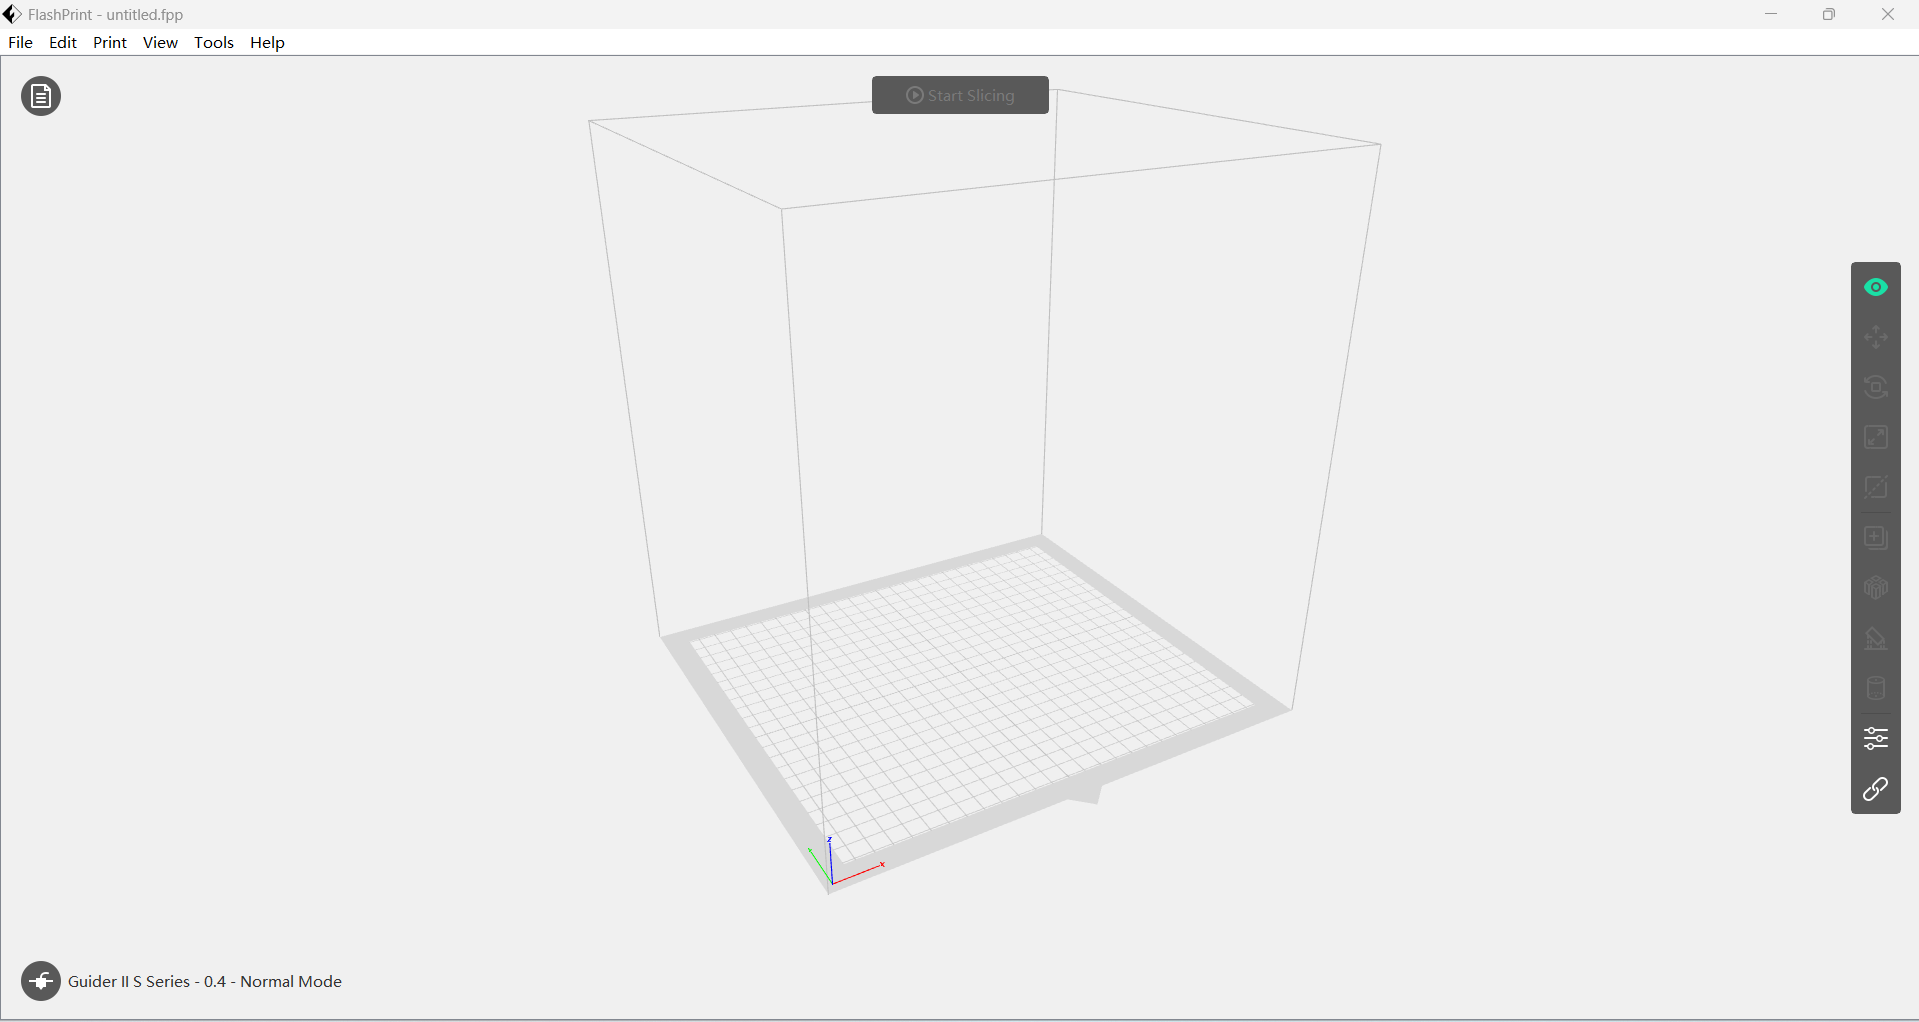
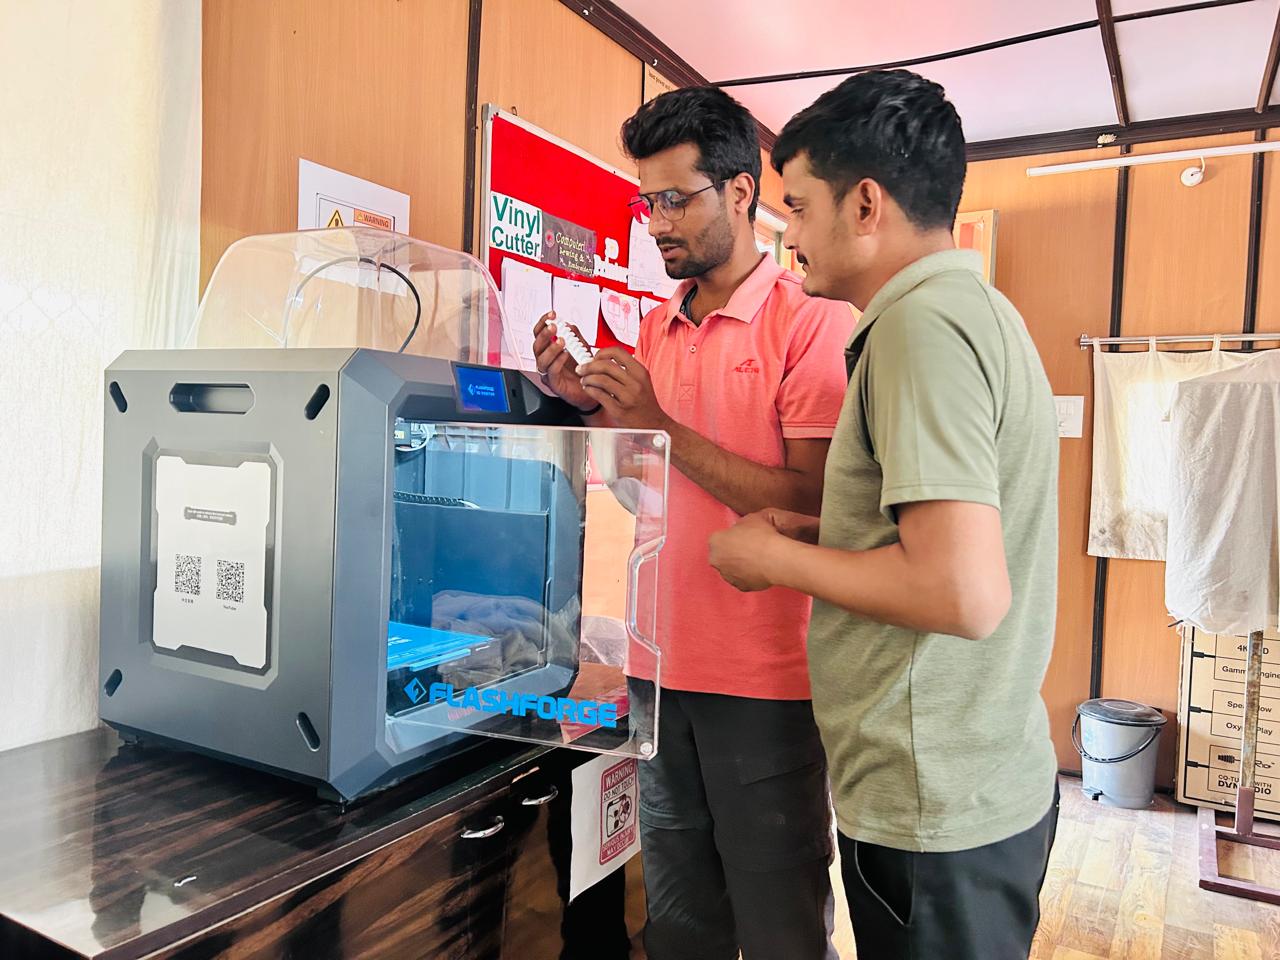
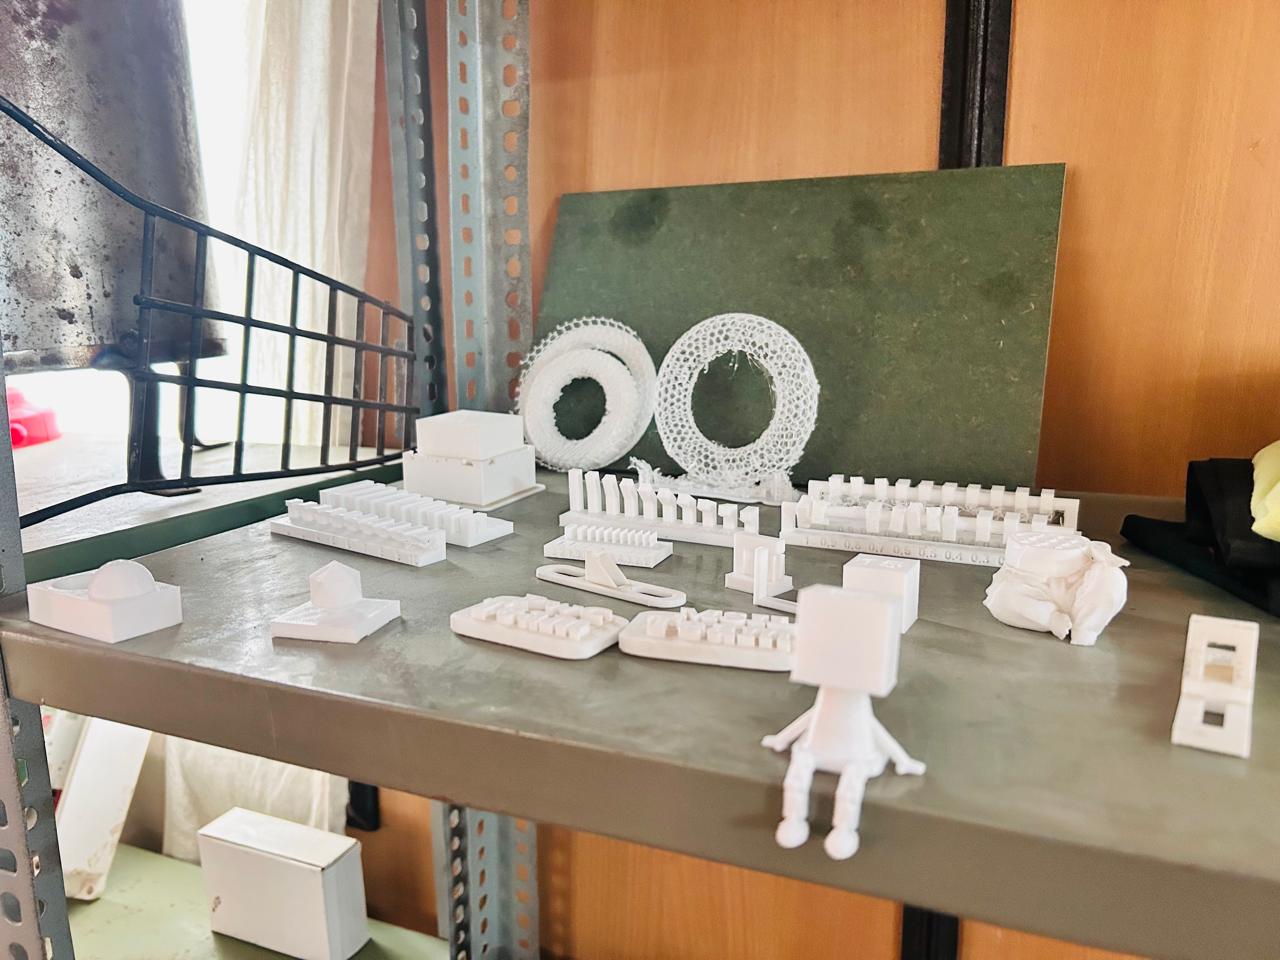
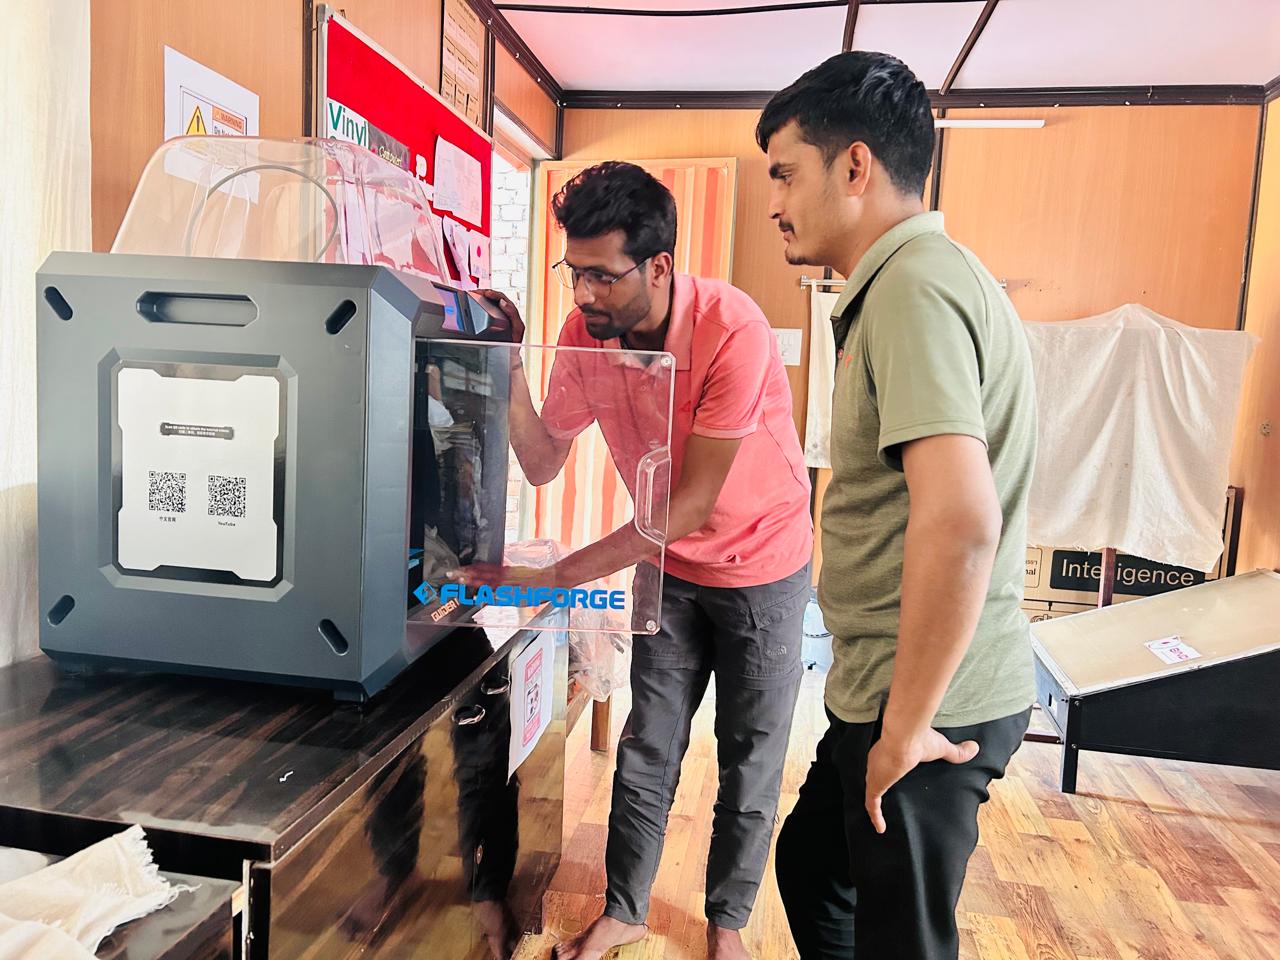
Task Group Assignment
For our group assignment, we were tasked with testing design files on a 3D printer. We obtained STL files for various tests, including Clearance, Overhang, Thickness, Angle, Anisotropy, Bridging, Dimension, Finish, Free, and Infill, from online sources. Our objective was to conduct these tests, determine the optimal values for each parameter, and draw meaningful conclusions, which are summarized below.
Test Result
Clearance
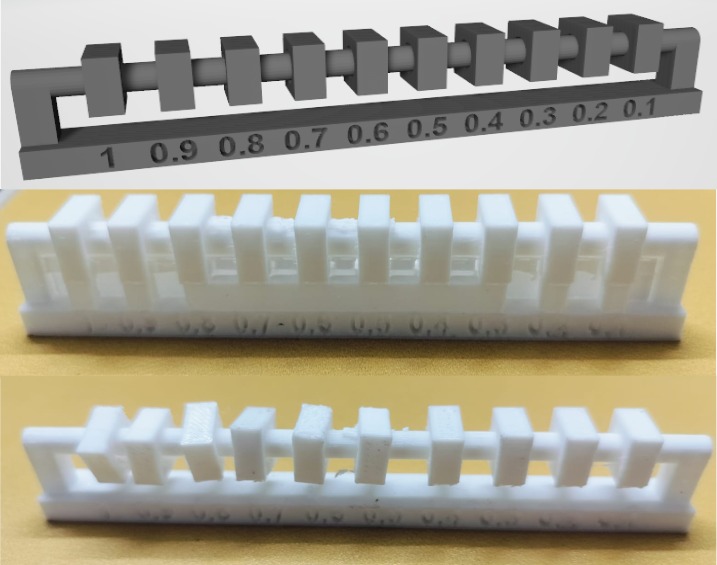
Clearance Test Results:
1.Objects with a distance of 0.3-0.2-0.1 mm remain stable and does not move.
2.Objects with a distance of 0.4-0.5-0.6 mm exhibit slight movement but remain well-set.
3.Objects with a distance of 0.7-0.8-0.9-1.0 mm show significant movement and have higher flexibility.
4.Clearance testing requires supports so that the stability and movement of the object can be accurately measured. The support
stabilize the object and prevent movement, ensuring accurate clearance test results
Overhang
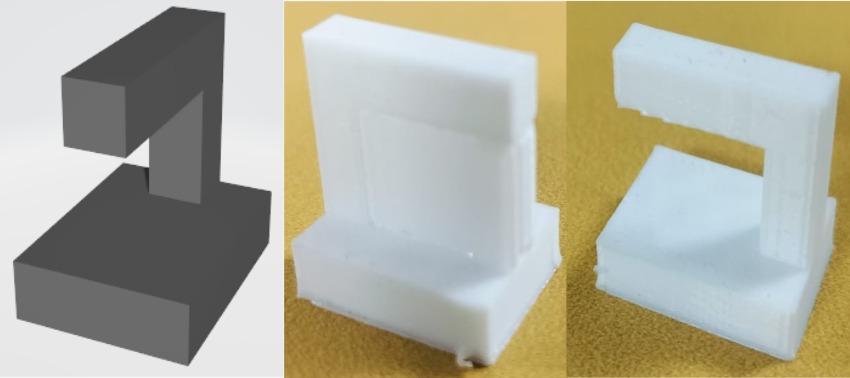
Overhang Test Result
1.In 3D printing, overhangs require proper support to ensure accurate printing.
2.If the overhang angle exceeds a certain limit (typically 45°), the print may deform or fail.
3.Providing adequate support structures helps maintain the shape and quality of the design.
4.Without support, excessive overhangs may lead to sagging or incomplete prints
Thickness

Thickness Test Result
1.In 3D printing, the wall thickness should be at least 2 to 3 mm to ensure a strong and well-formed structure.
2.If the thickness is reduced to 1 mm or less, the wall may not form properly.
3.Adjust the wall thickness according to the object to minimize material wastage and save time.
Angle

Angle Test Result
1.A 3D printer works efficiently at angles between 30° and 90°.
2.At angles below 30° (10°-30°), the printer struggles to form proper layers, leading to printing issues.
3.Printing at lower angles may cause excess material to accumulate underneath.
4.Therefore, it is recommended to design with angles between 30° and 90° for better results.
Anisotropy
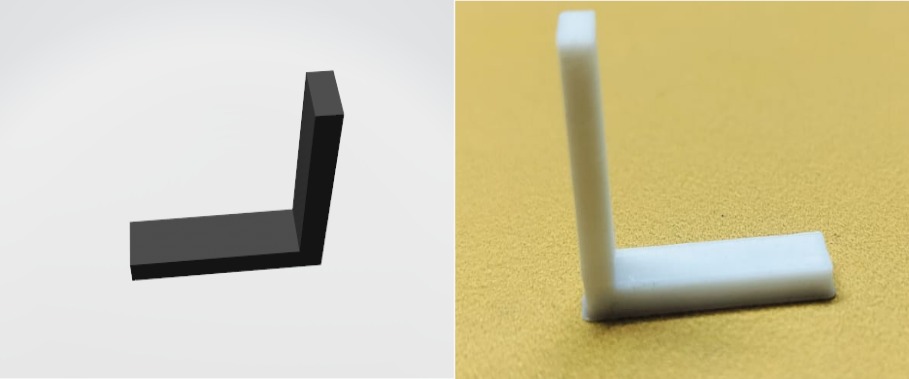
Anisotropy Test Result
If we are making this type of design, then we do not need any support. The 3D printer works well at 90 degrees.
Bridging
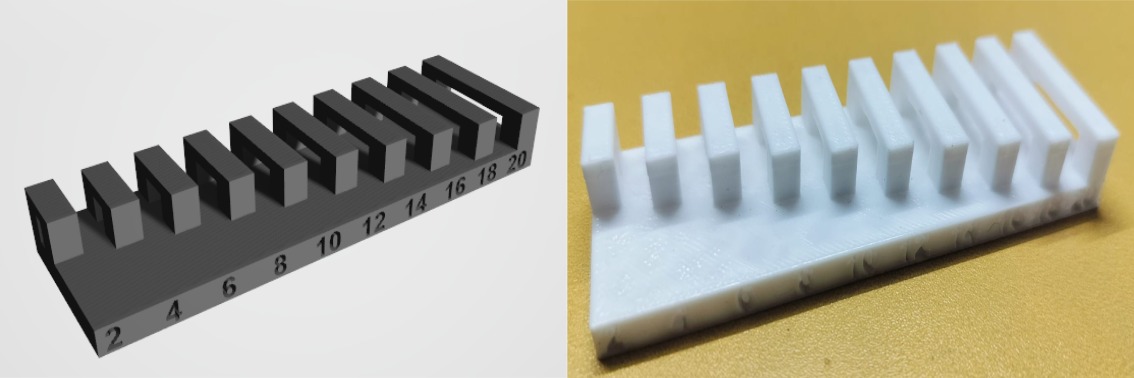
Bridging Test Results
1.Reduce bridging length and use thicker walls for longer bridges
2.Avoid thin, long bridges to prevent breakage.
Dimension
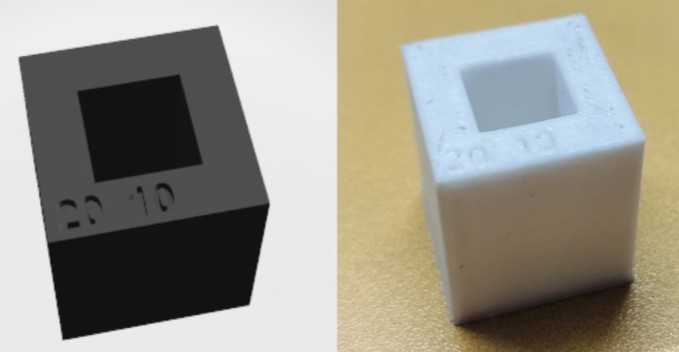
Dimension Test Results
1.Ensure that objects fit within the printer build volume.
2.Consider strength, printability, and material spacing tolerances.
Finish

Finish Test Result
1.The quality and smoothness of both the outer and inner parts affect the surface finish.
2.Use a higher resolution for smoother parts, but note that this will increase print time as finishing takes longer.
Infill
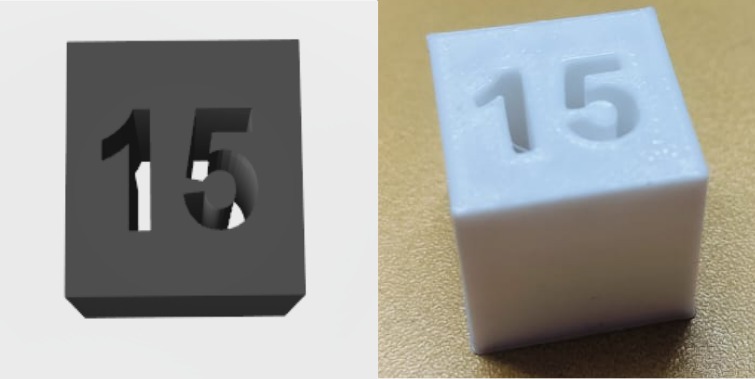
Infill Test Result
1.A higher infill percentage increase strength but consumes more material and time.
2.A lower infill percentage saves time and material but may reduce strength.
Conclusion
Mastering 3D printing design rules involves a continuous process of experimentation and refinement. By carefully considering clearance, overhangs, wall thickness, infill, angles, orientation, and material efficiency, you can consistently produce high-quality, functional 3D-printed objects. And by understanding the effects that each setting has on the final product, you can greatly improve your 3d printing experience.
Individual Assignment
For Individual Assignment, I used the Ender 3 3D printer.
Understanding 3D Printing
Before starting with the printer, I first learned about the basics of 3D printing, including how it works, different types of 3D printing technologies, and the materials used. Additionally, I explored the advantages of 3D printing, such as rapid prototyping, customization, reduced waste, and cost-effectiveness.
Learning the Creality Ender 3 Printer
Once I understood the fundamentals, I focused on learning the detailed working of the Creality Ender 3 printer. This included:
1.Understanding the printer's components and their functions
2.Setting up and calibrating the printer
3.Loading filament and adjusting print settings
4.Using slicing software to prepare models for printing
Advantages of Creality Ender 3 Printer
1. Affordable and Budget-Friendly – The Ender 3 offers excellent features at a low cost, making it one of the best entry-level 3D printers.
2. Open-Source and Customizable – It supports modifications and upgrades, allowing users to enhance its performance and capabilities.
3. Decent Print Quality – With proper calibration, the Ender 3 can produce high-quality prints with fine details and smooth surfaces.
4. Sturdy and Compact Design – Its metal frame ensures durability while maintaining a compact footprint, making it suitable for small workspaces.
5. Wide Community Support – A large user base and open-source firmware provide extensive troubleshooting resources and improvements.
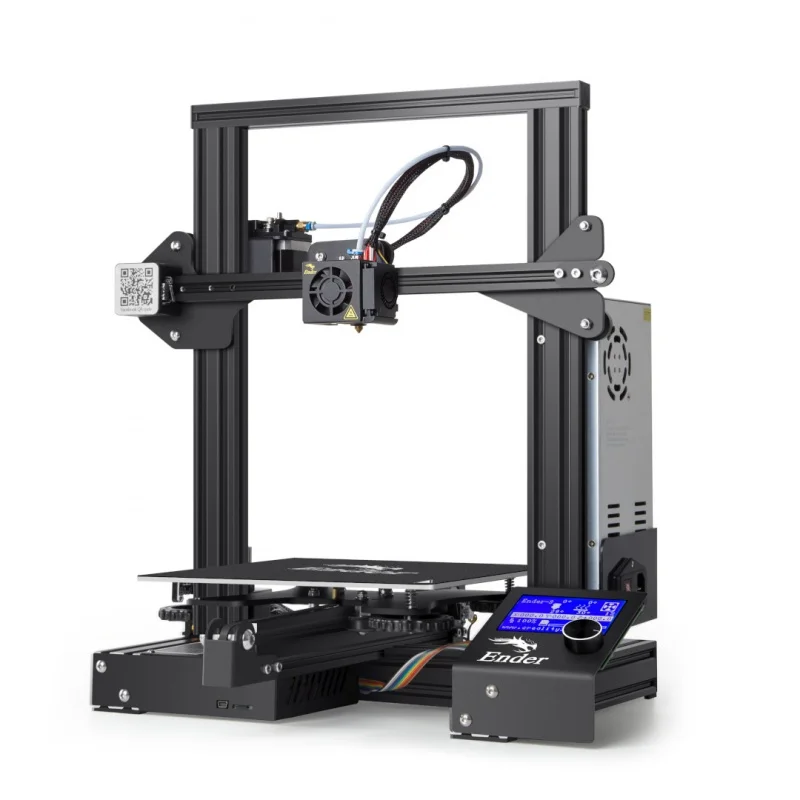
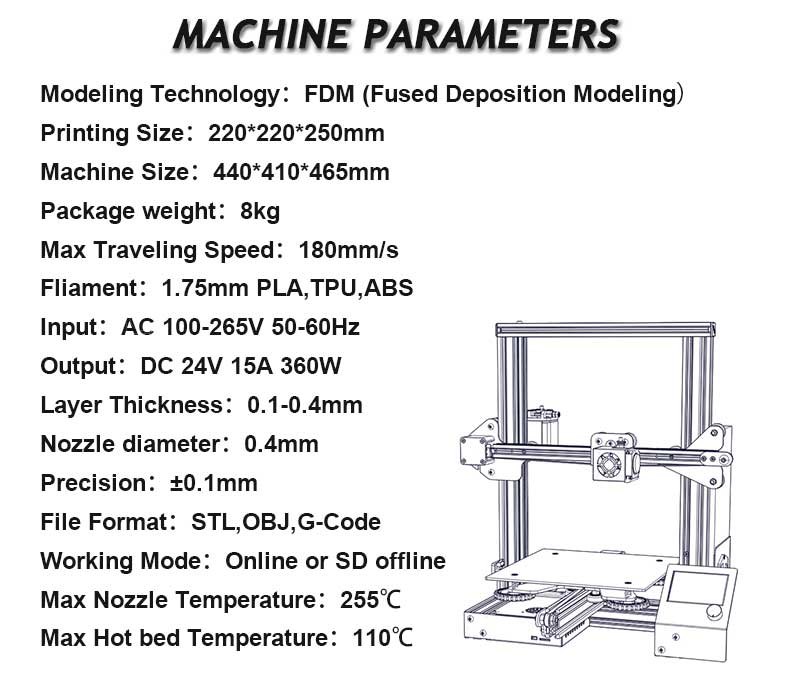
Control Panel of 3D Printer:
The Creality Ender 3 control panel consists of an LCD screen and a rotary encoder knob, allowing users to navigate settings, control print functions, and monitor the printer's status. It includes options for adjusting temperature, movement, preheating, printing from an SD card, and tuning settings during a print.
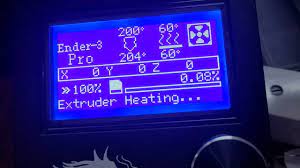
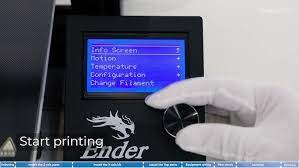
References: Reference1,Reference2
The Crea Ultimaker Cura – Slicing Software: I used Cura software for slicing my design before printing on the Creality Ender 3.
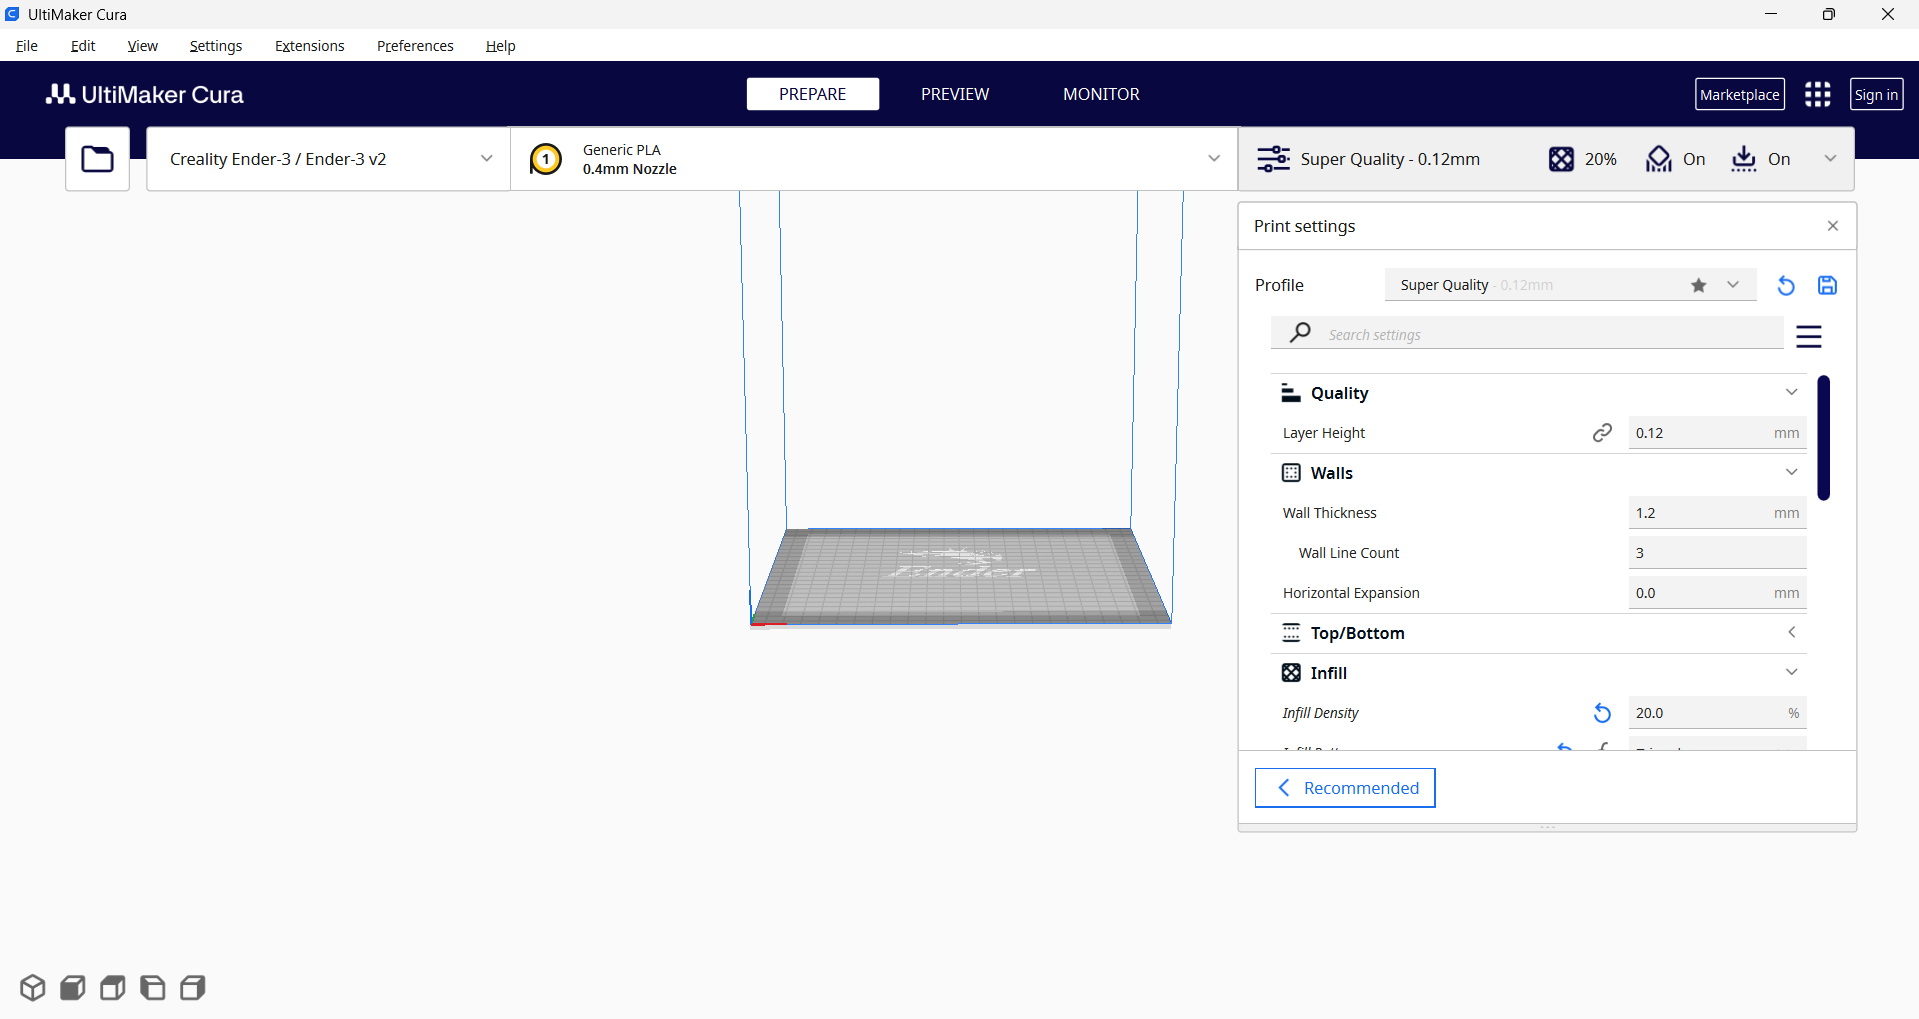
Slicing and Generating G-Code
Here are the steps I followed to generate G-code for the 3D printer after slicing the 3D model I designed.
Step 1- Opened Cura I launched Cura and ensured the printer profile was set to Creality Ender 3.
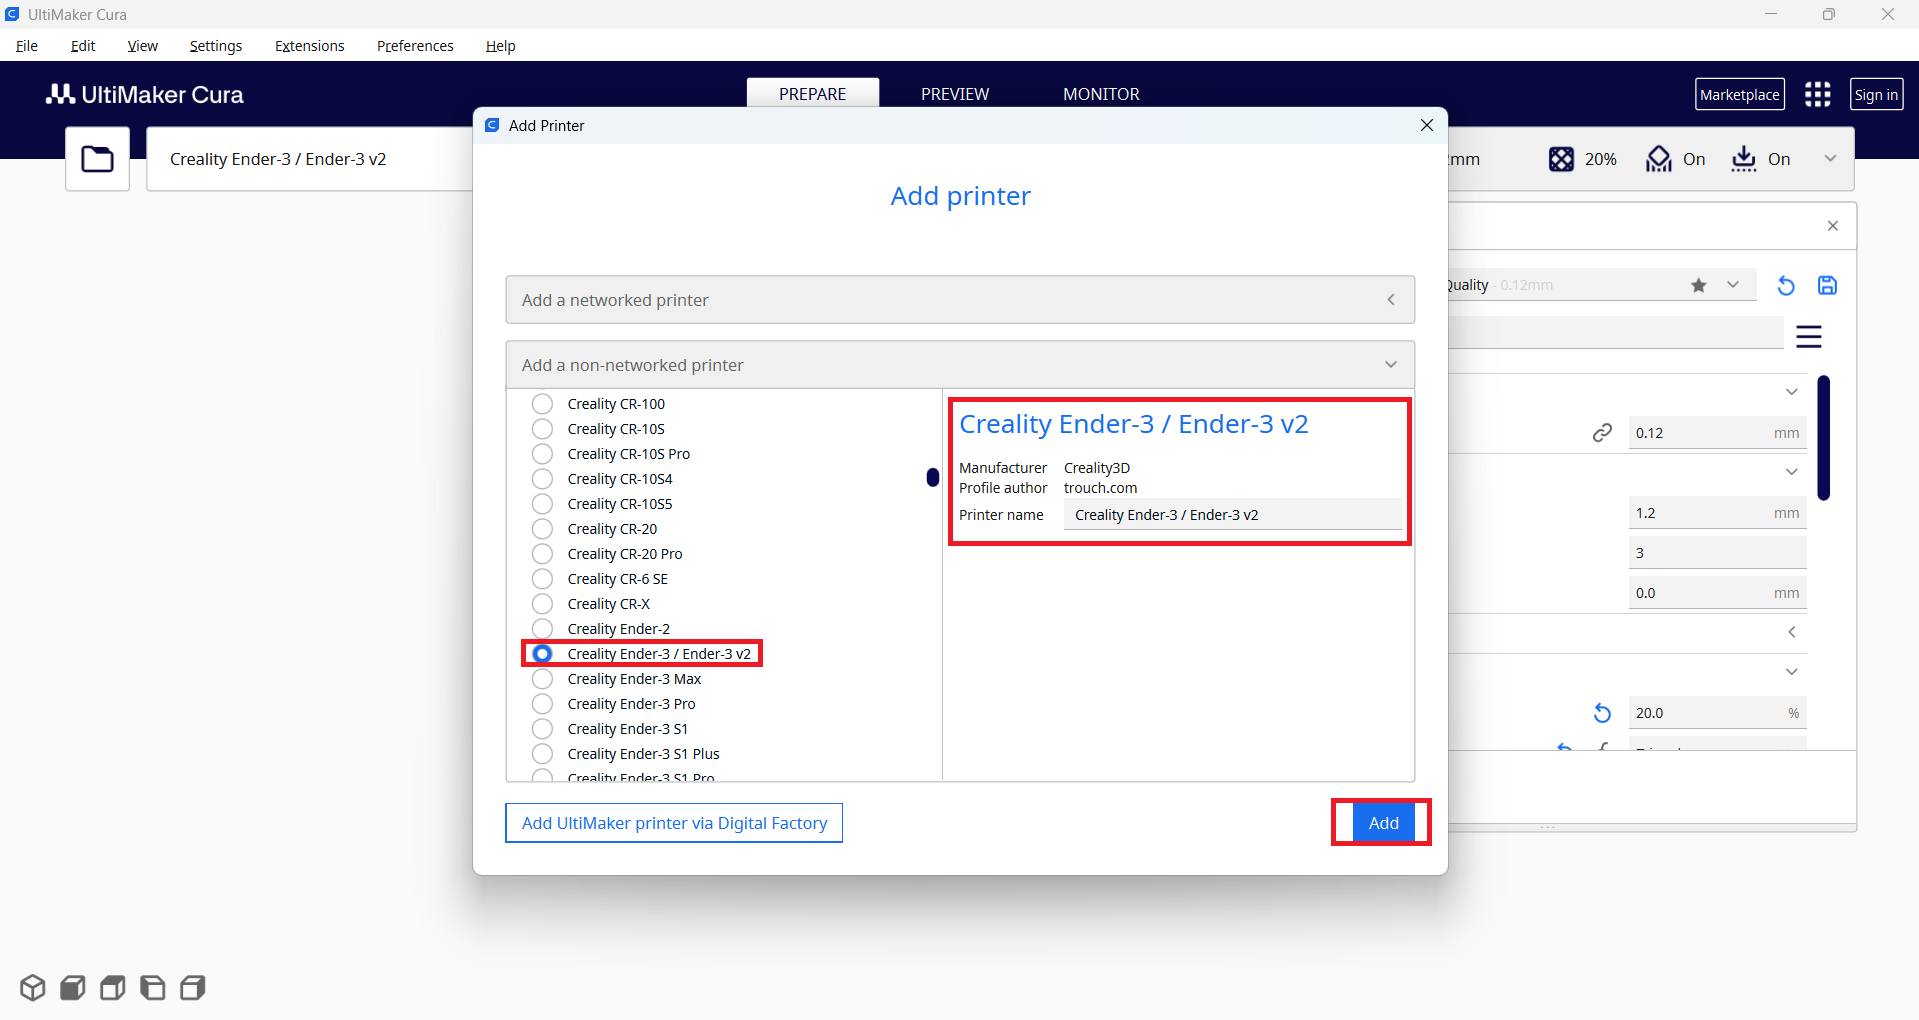
Step 2- Imported My 3D Model – I clicked "Open File" and loaded my STL file into the workspace.
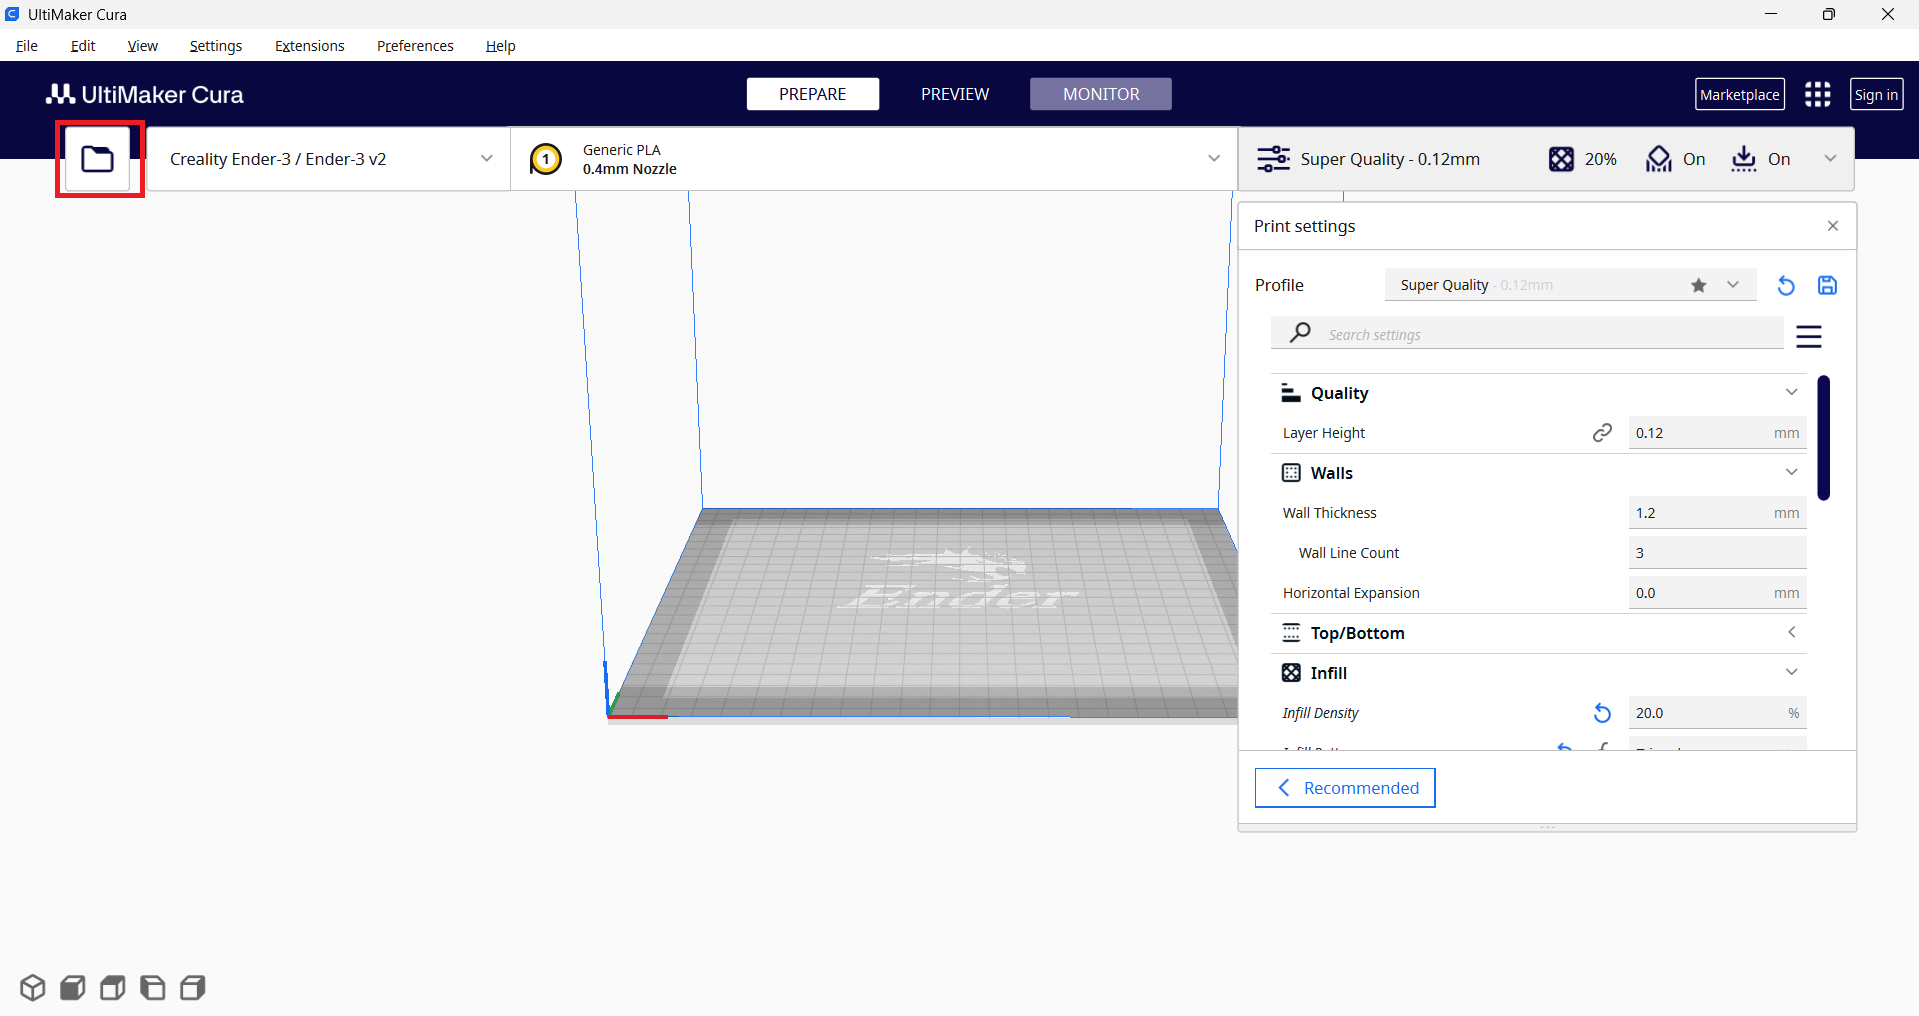
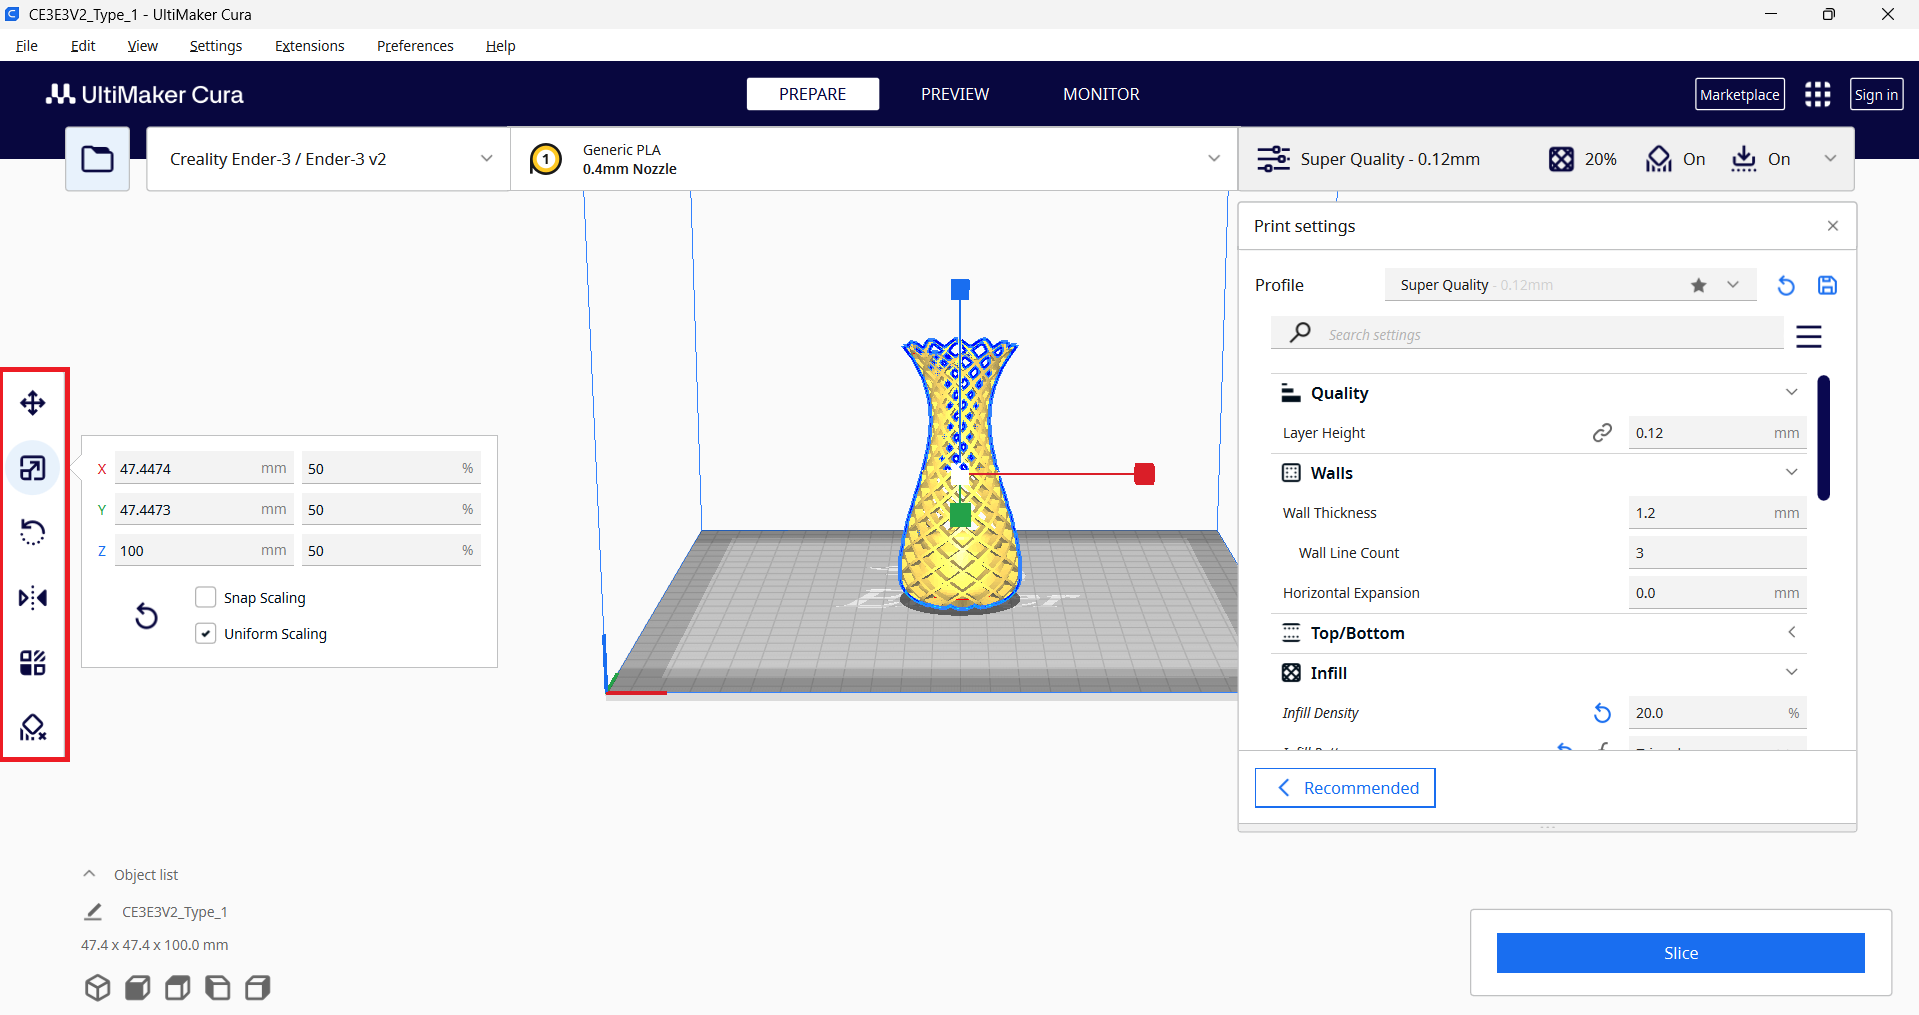
Step 3- Adjusted the Model – I checked the orientation, scale, and position to make sure it fit well on the print bed.
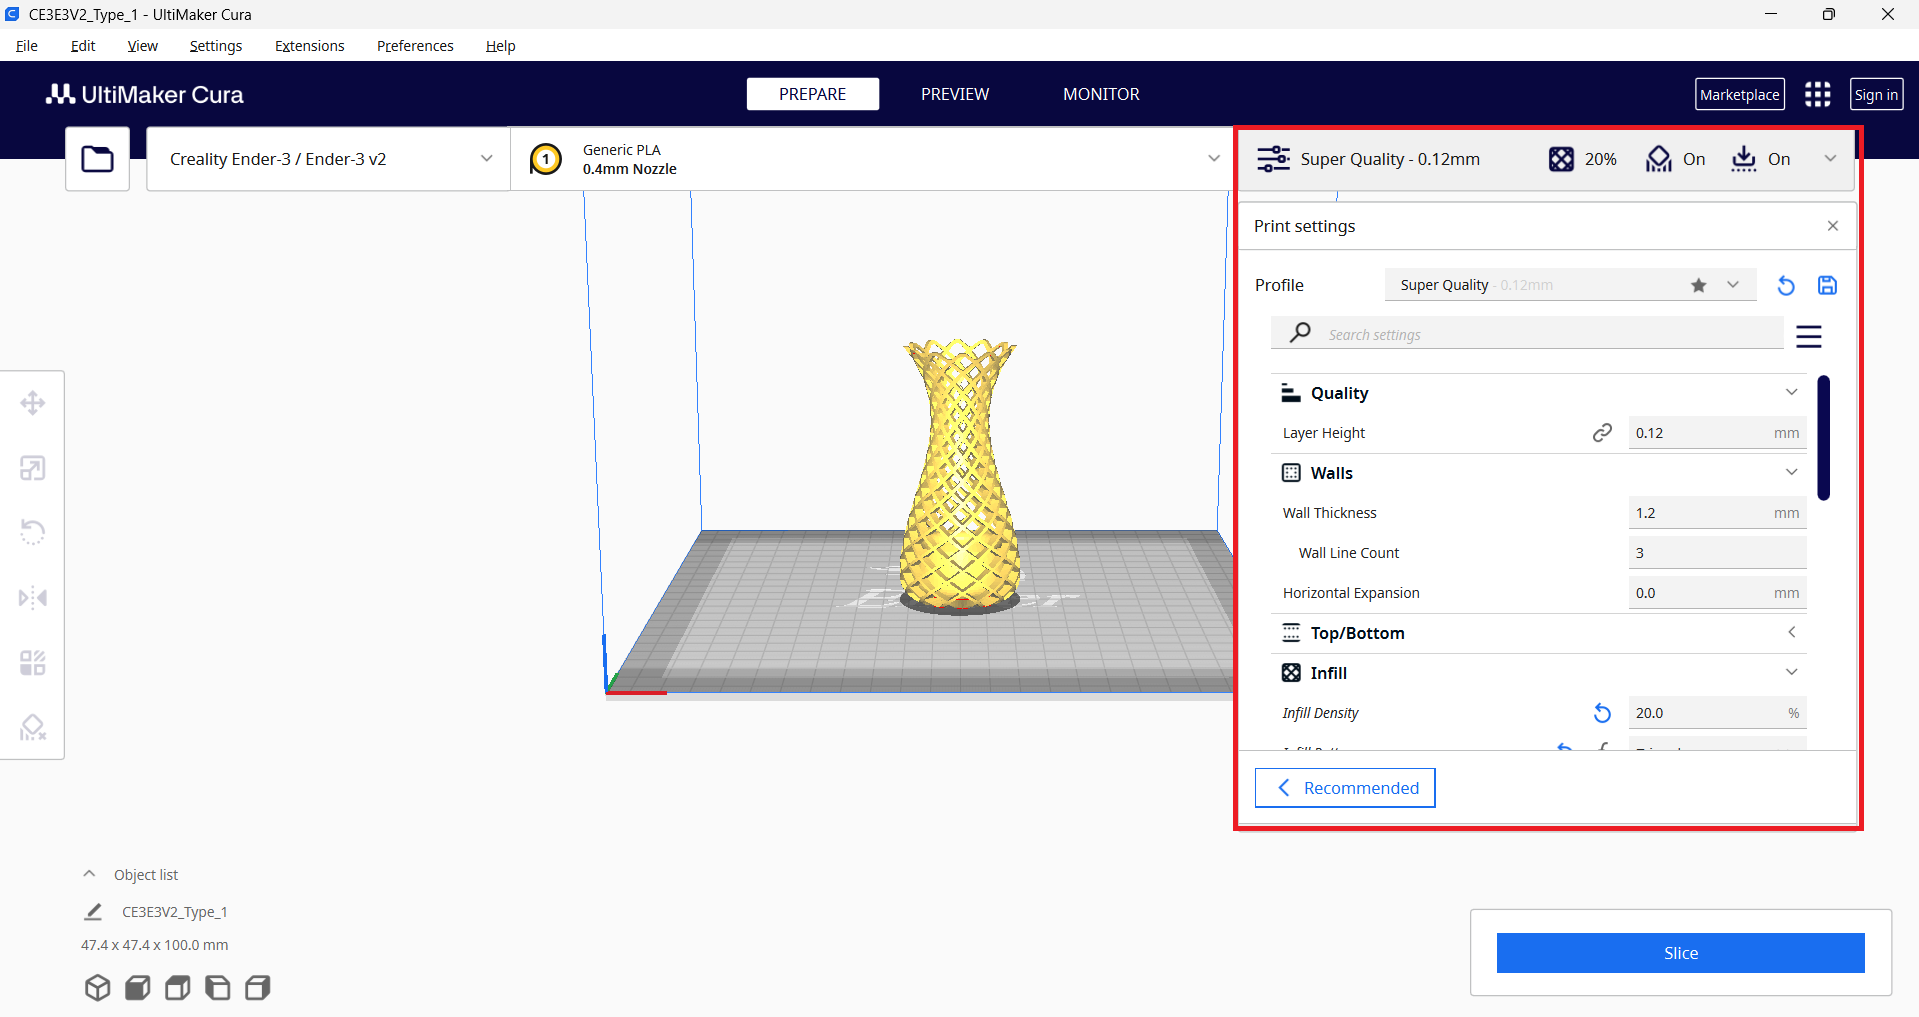
Step 4- Configured Print Settings – I selected the right layer height, infill density, print speed, support structures, and bed adhesion settings for my print.
Step 5-Sliced the Model – I clicked "Slice", and Cura generated a preview of the print layers along with estimated print time.
Step 6- Saved the G-code – I exported the G-code file to an SD card for my Ender 3.
Step 7- Ready to Print – I inserted the SD card into the printer, selected the file, and started printing.
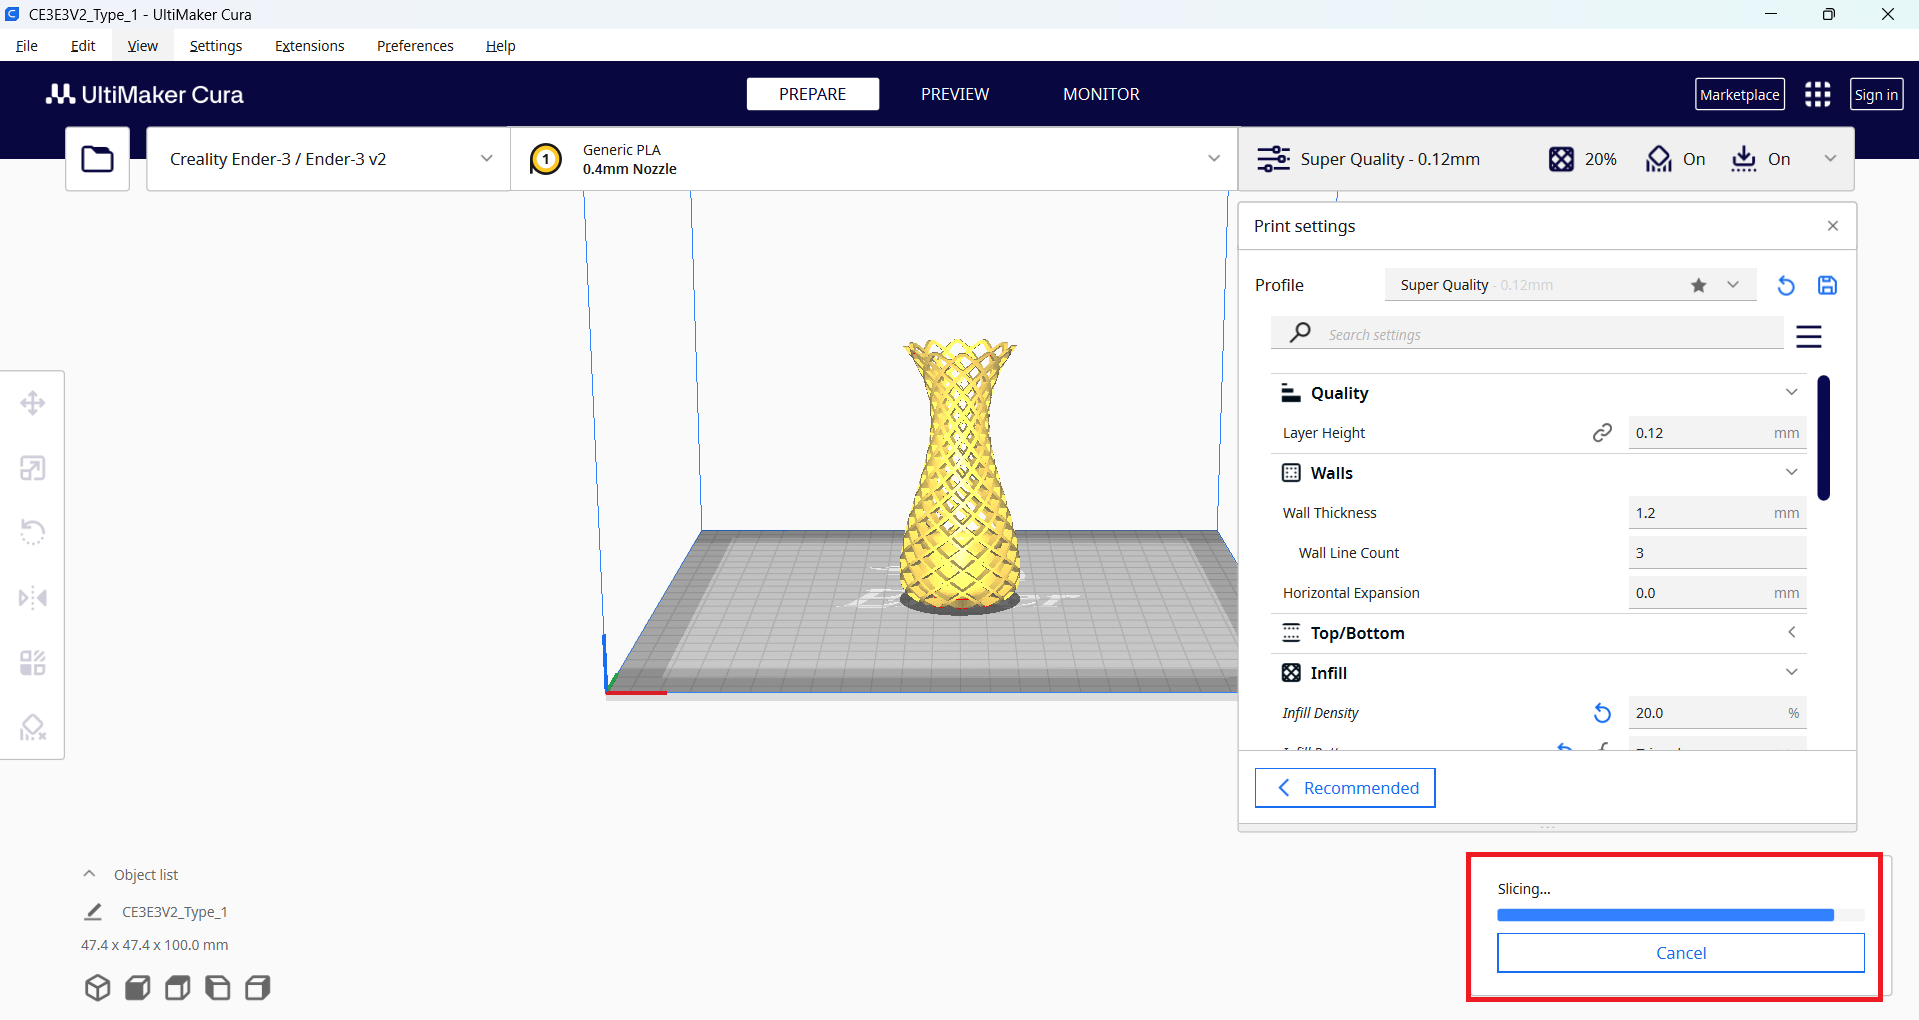
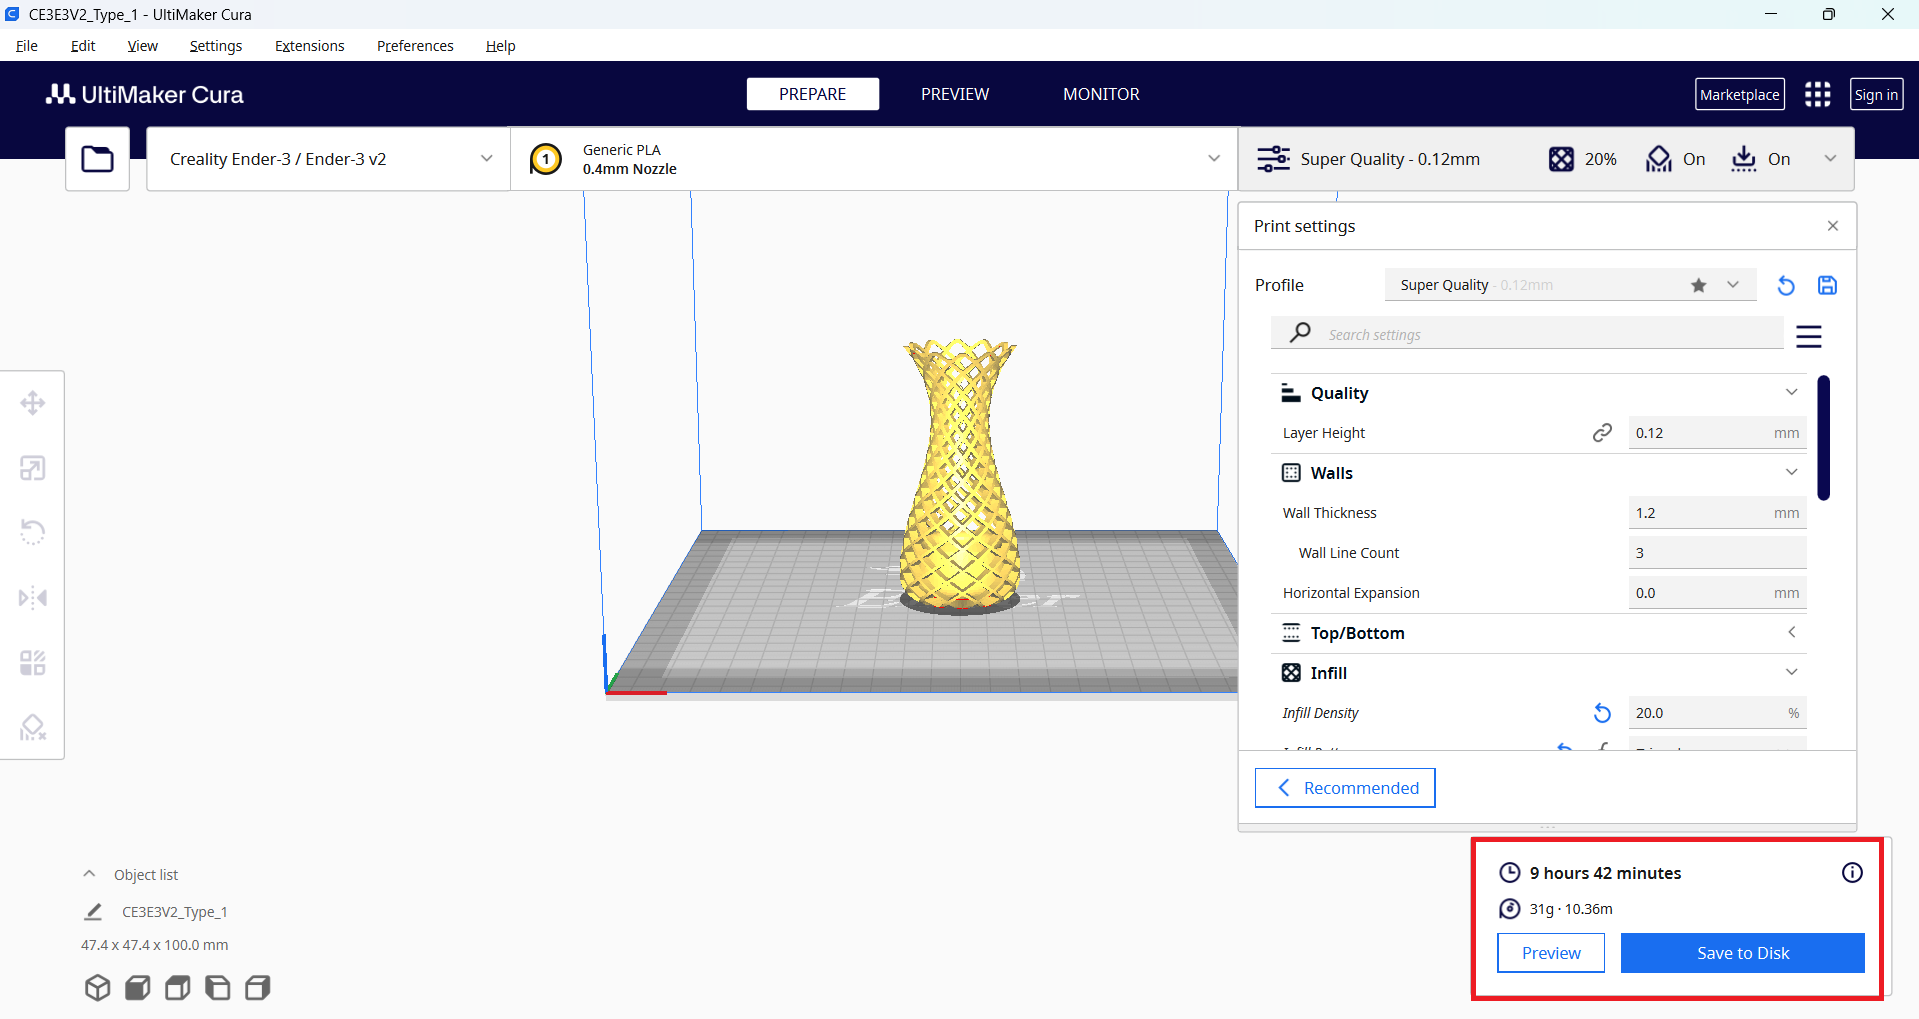
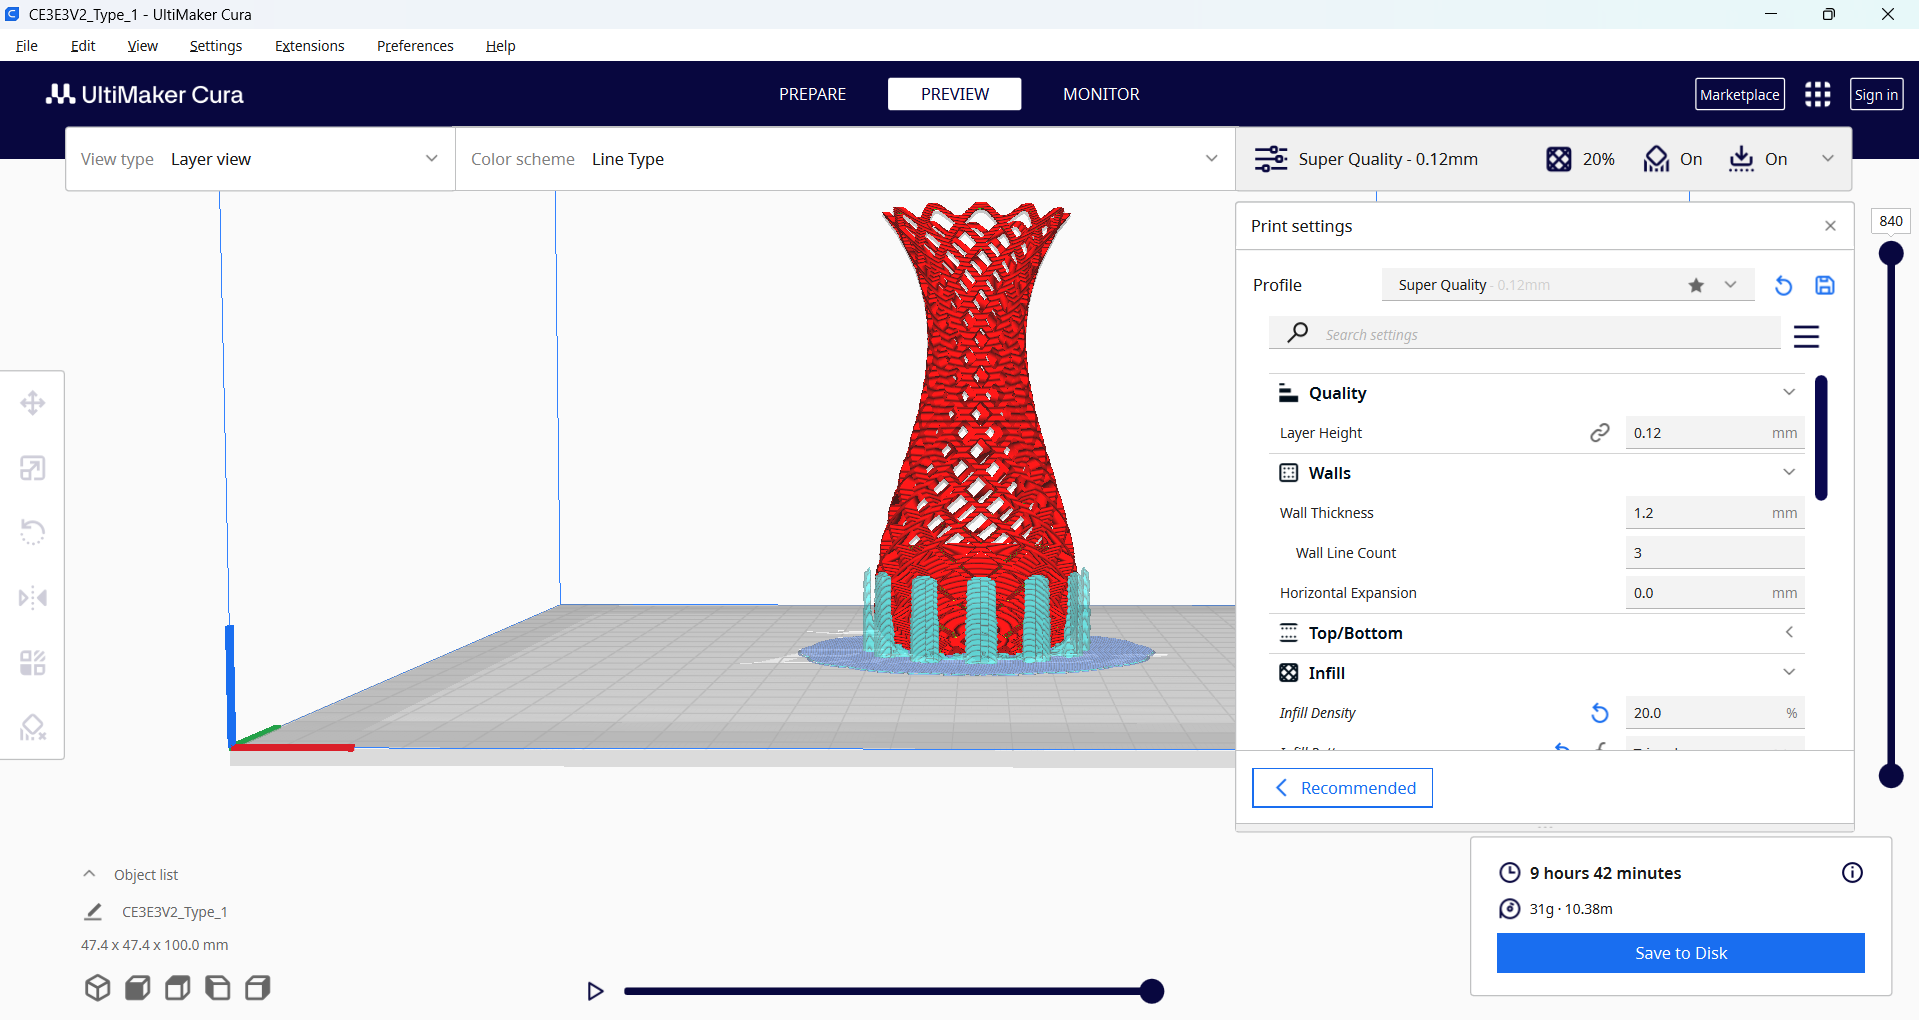
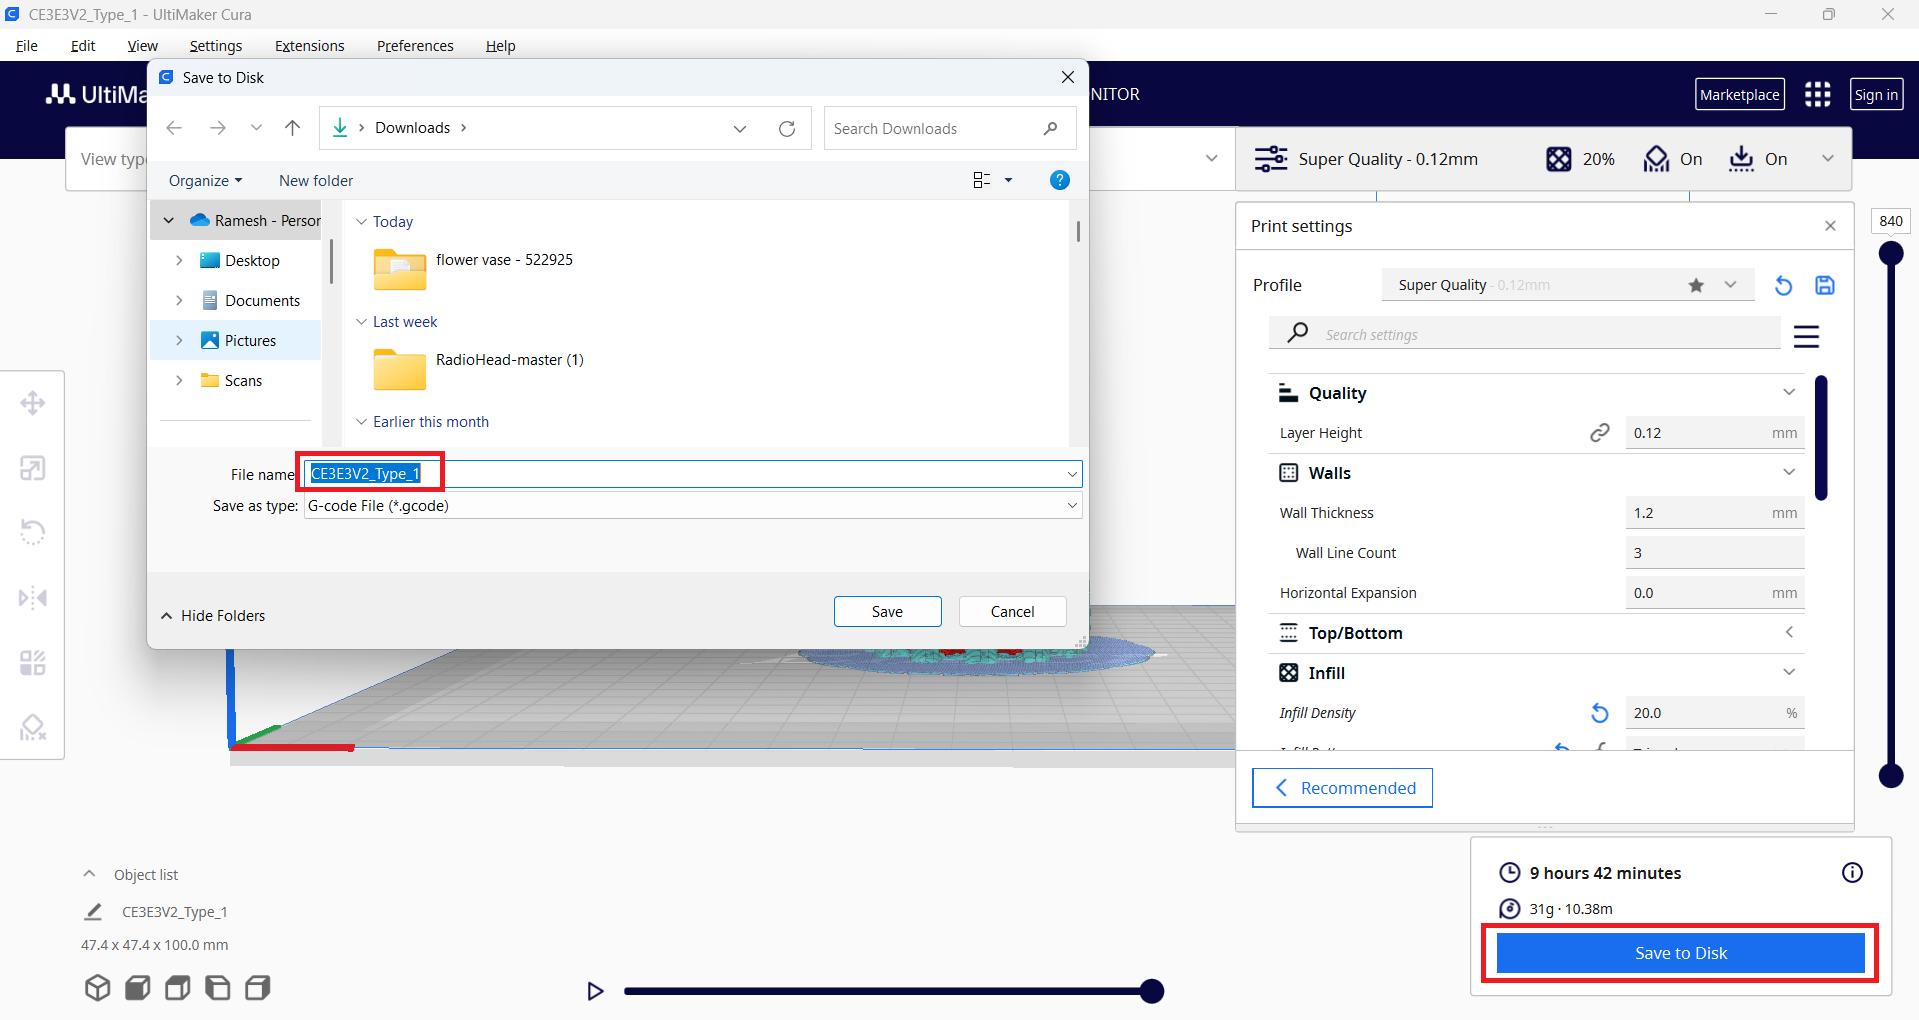
After understanding the entire process, I started thinking about creating my own design. After some time, I came up with an idea — I decided to design an RC car chassis using SolidWorks. Based on my idea, I began working on the design, and I have explained the process in detail below.
To begin working on my idea, I opened SolidWorks software, selected the Part Design option, and started designing the model.
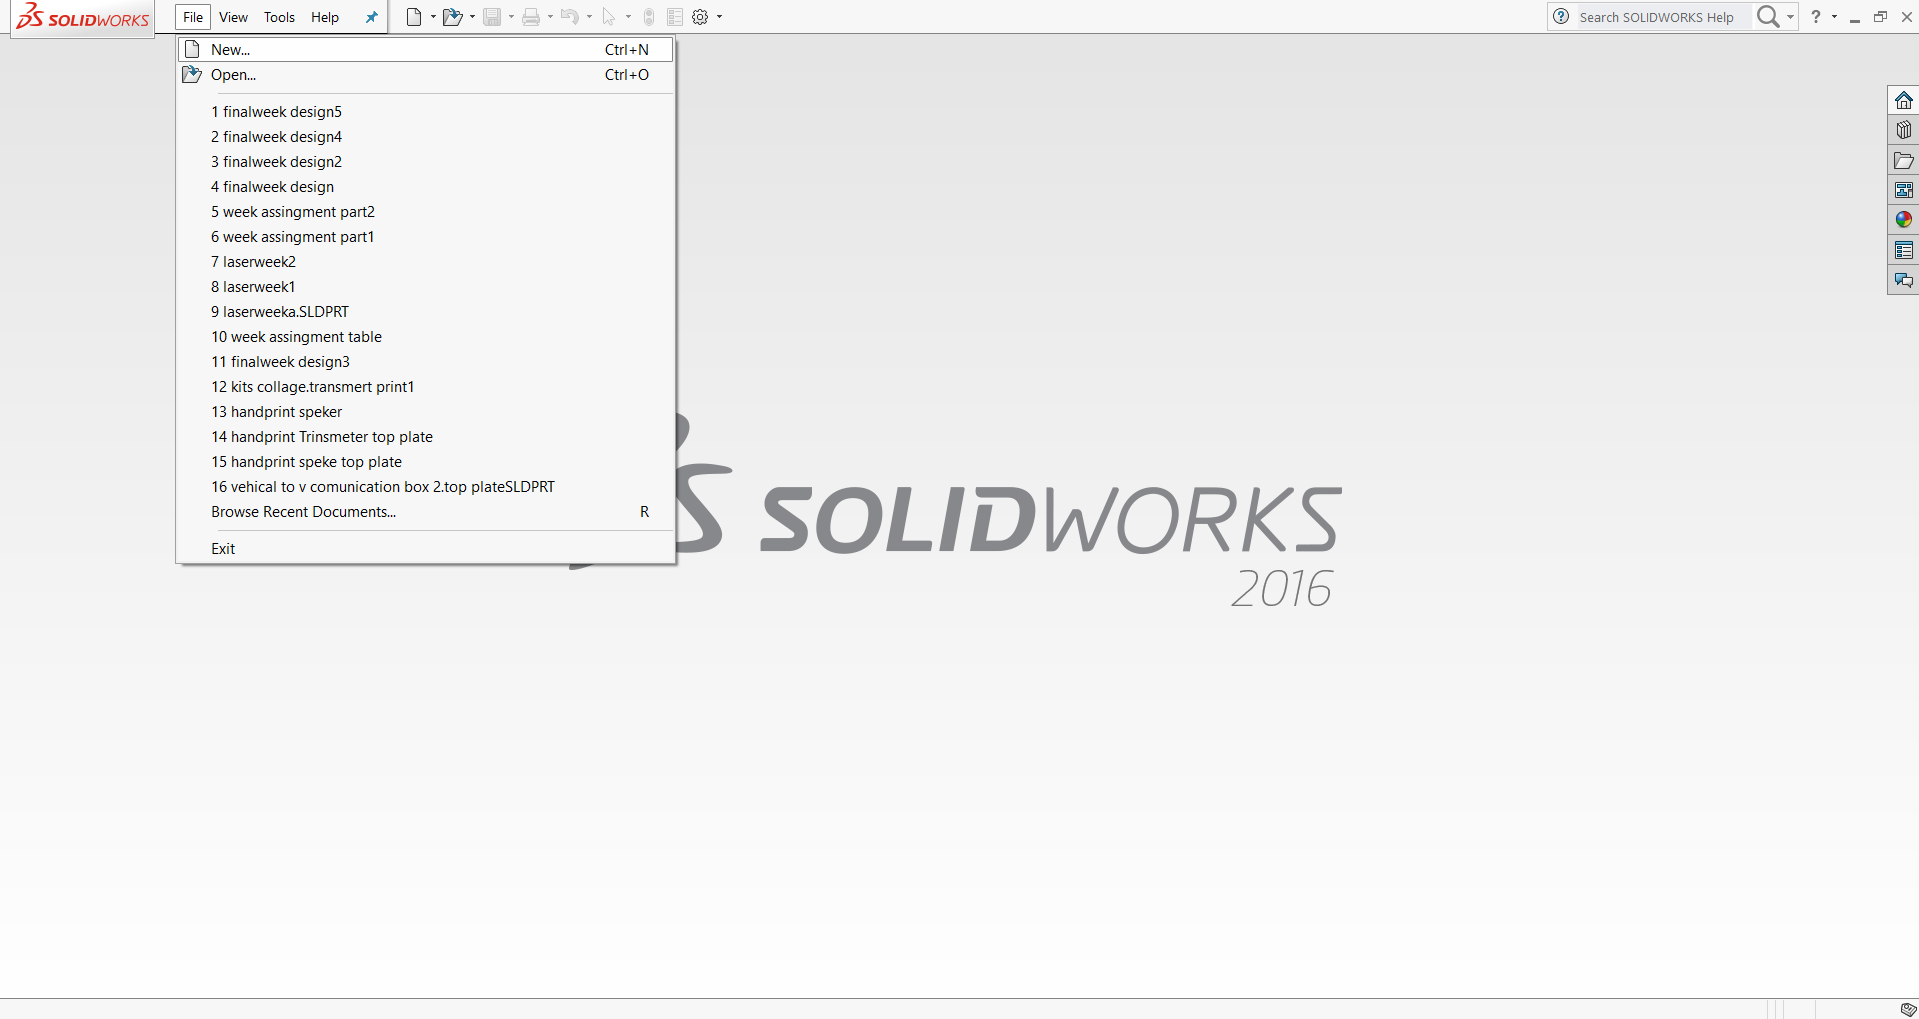
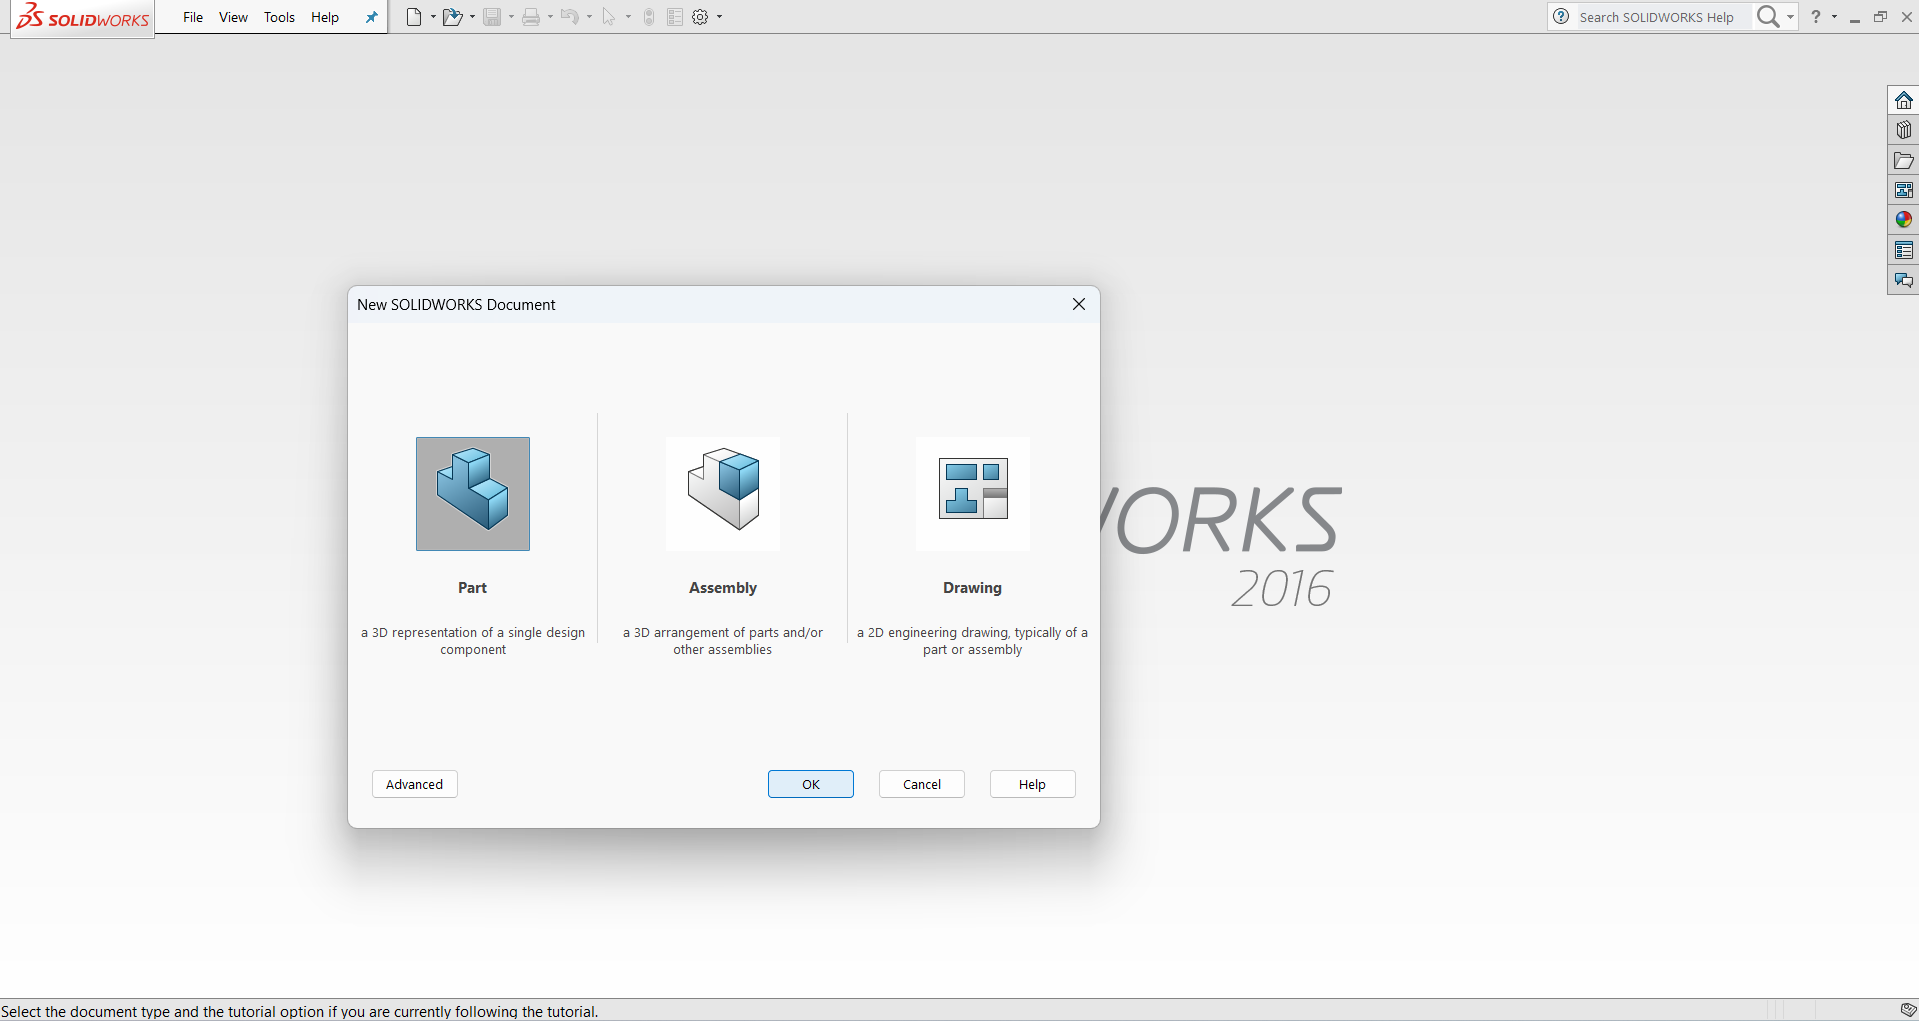
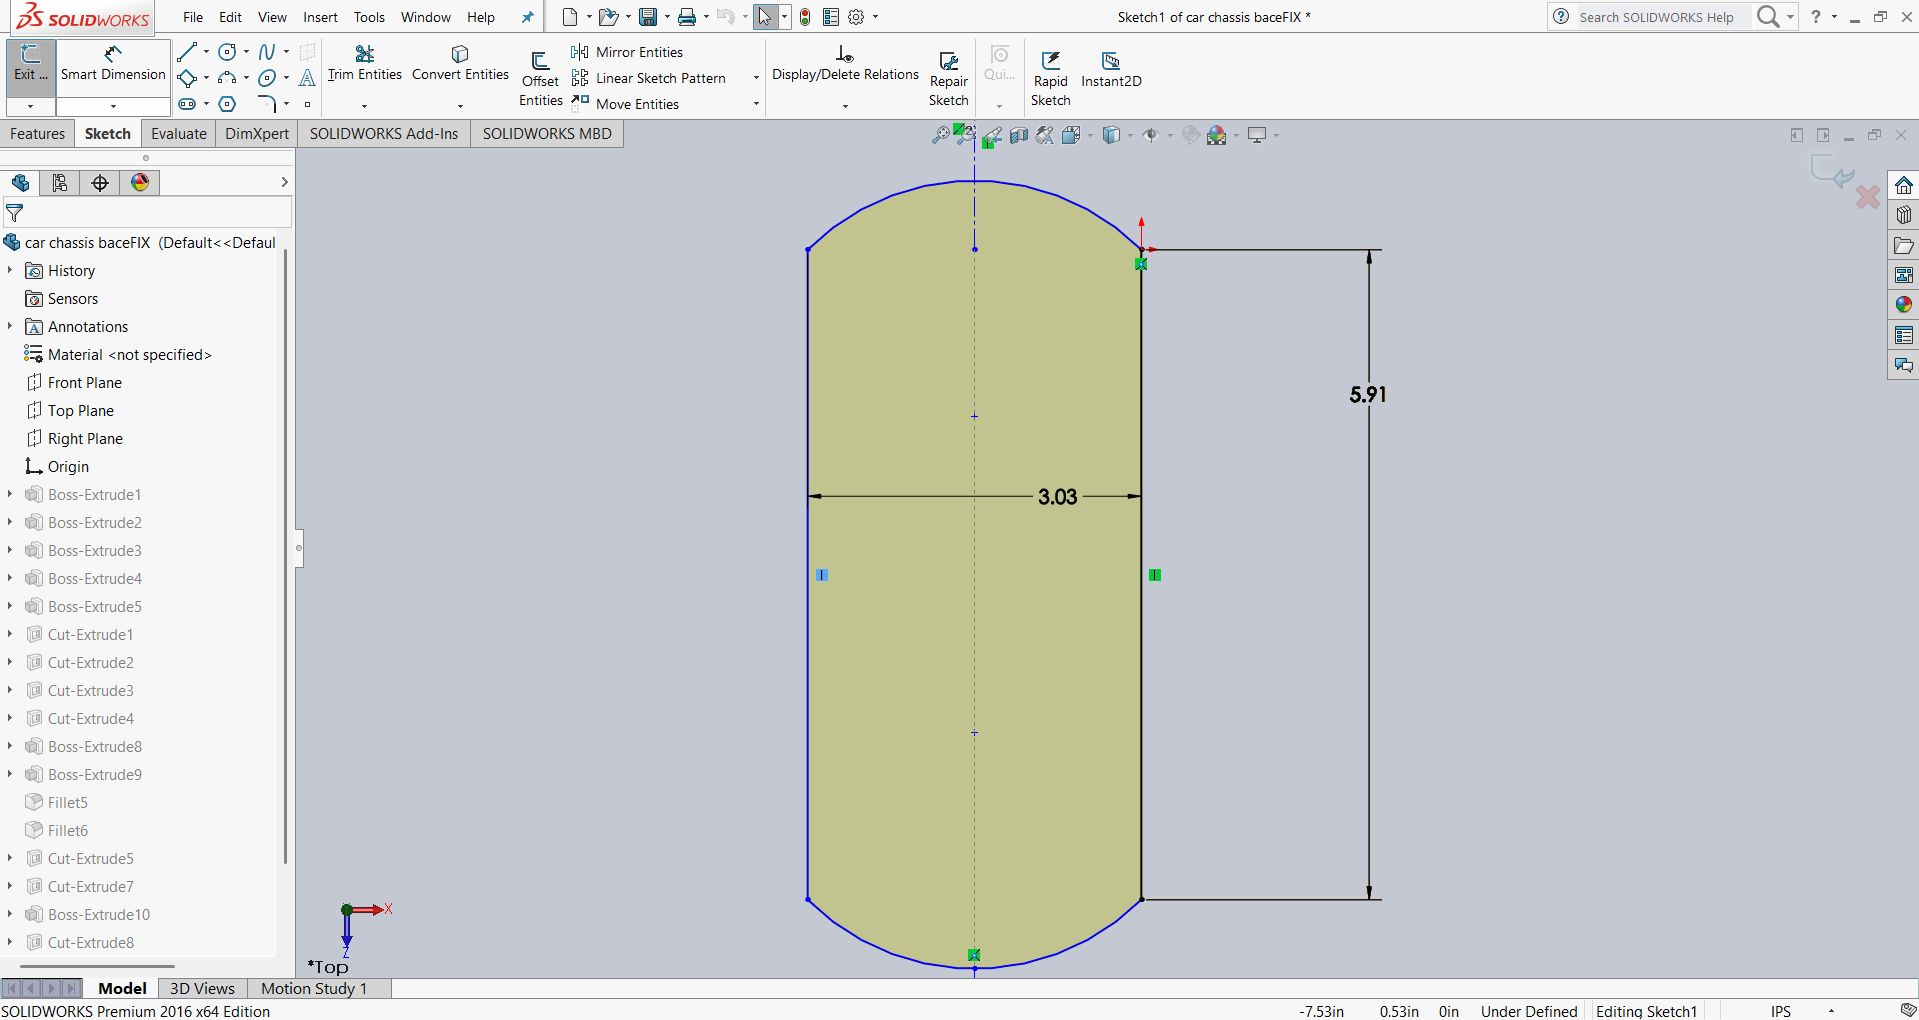
After creating the part design, I started by sketching on the top plane. In Assignment 2, I have already explained in detail how to create a sketch on a reference plane — if you would like to review that, please
click here.
I began by drawing the base of my chassis and then extruded it up to a thickness of 3 mm. The image below shows the result of this step.
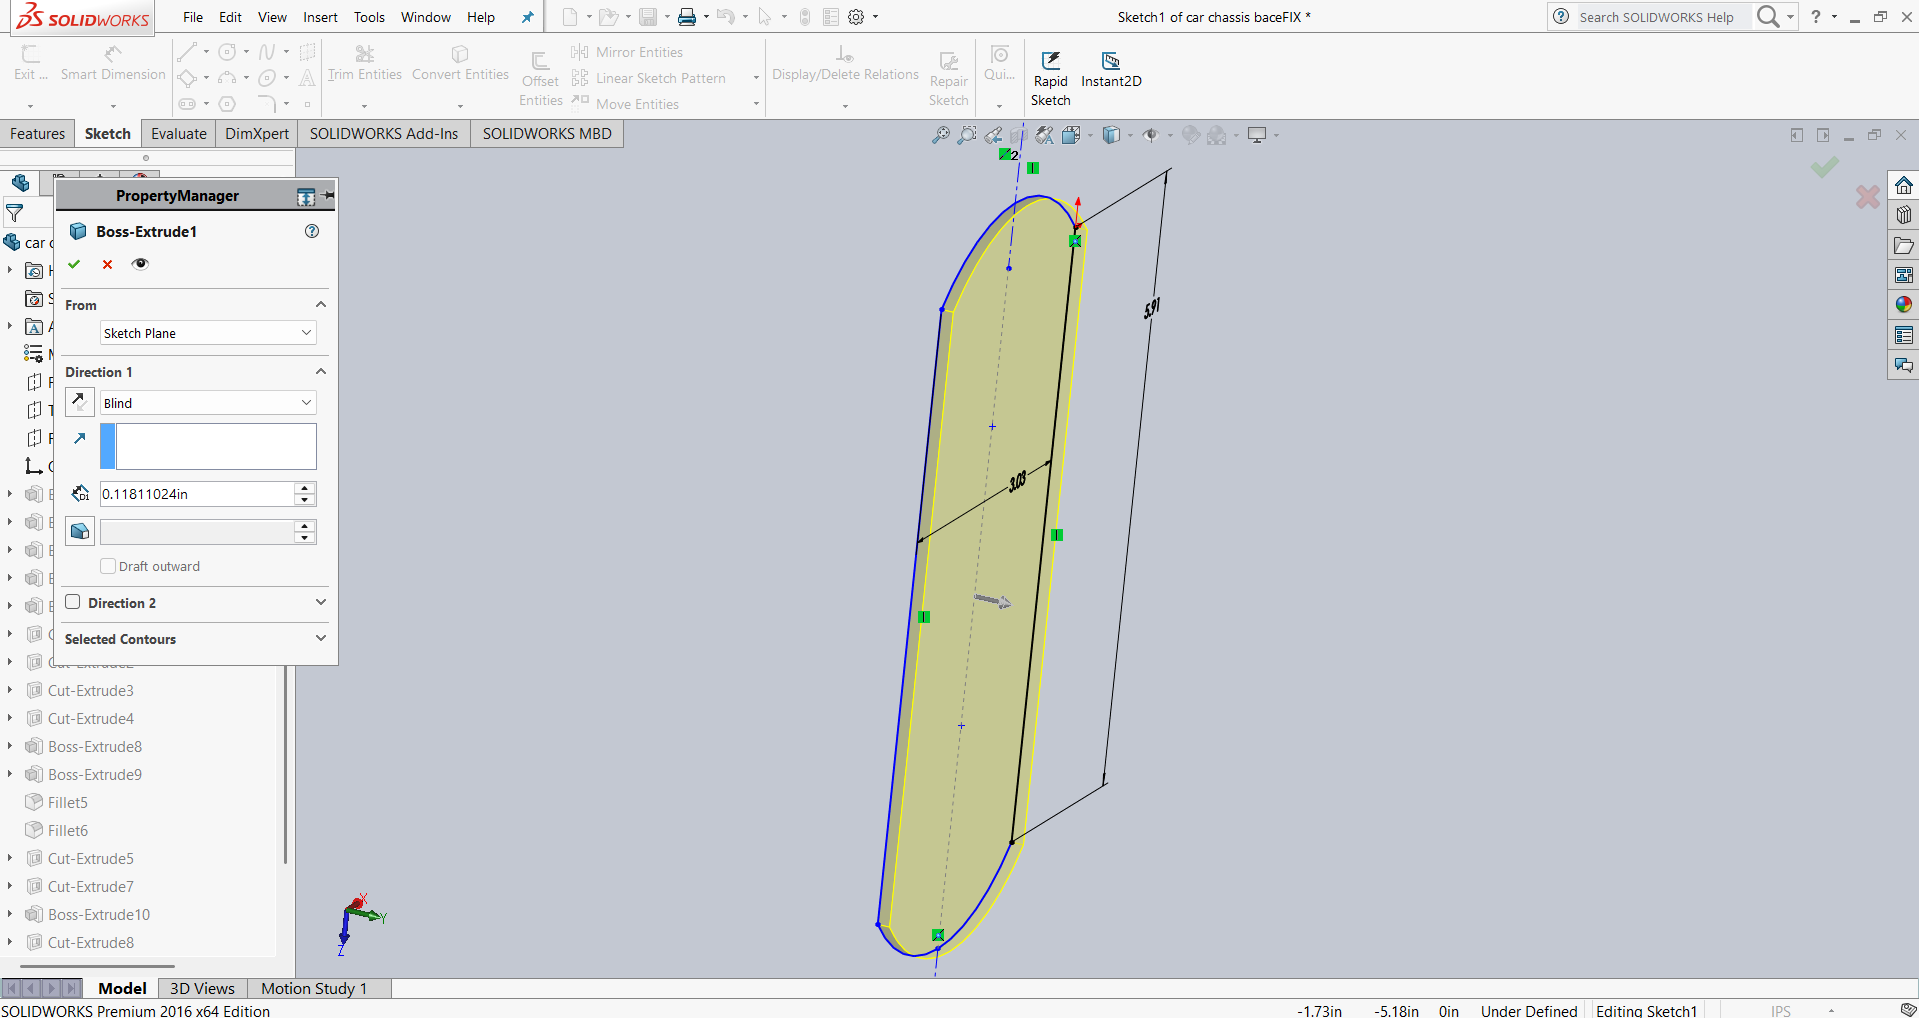
After successfully creating the base, I needed to add a base plate to my chassis to cover and protect all the components inside the car. To support this plate, I built pillars on the base. These pillars also help to keep the motor stable while the car is moving and ensure it remains securely fixed in place.
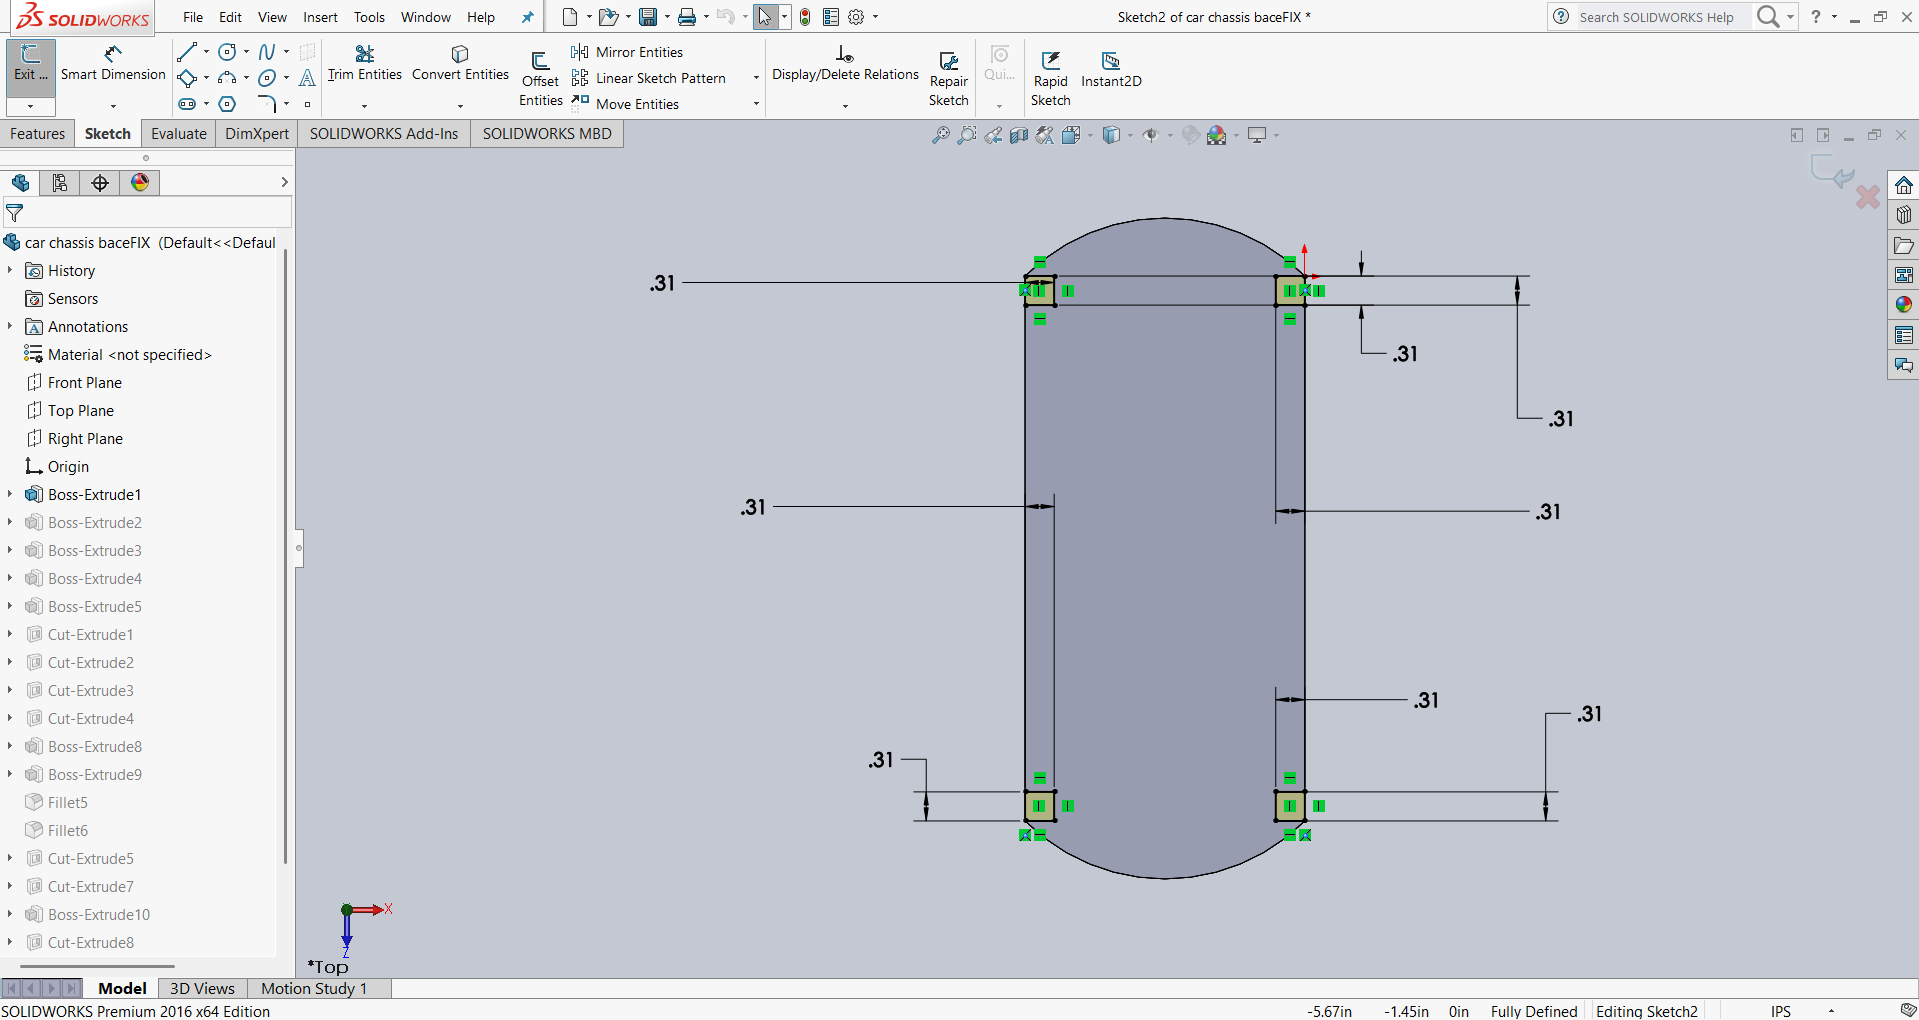
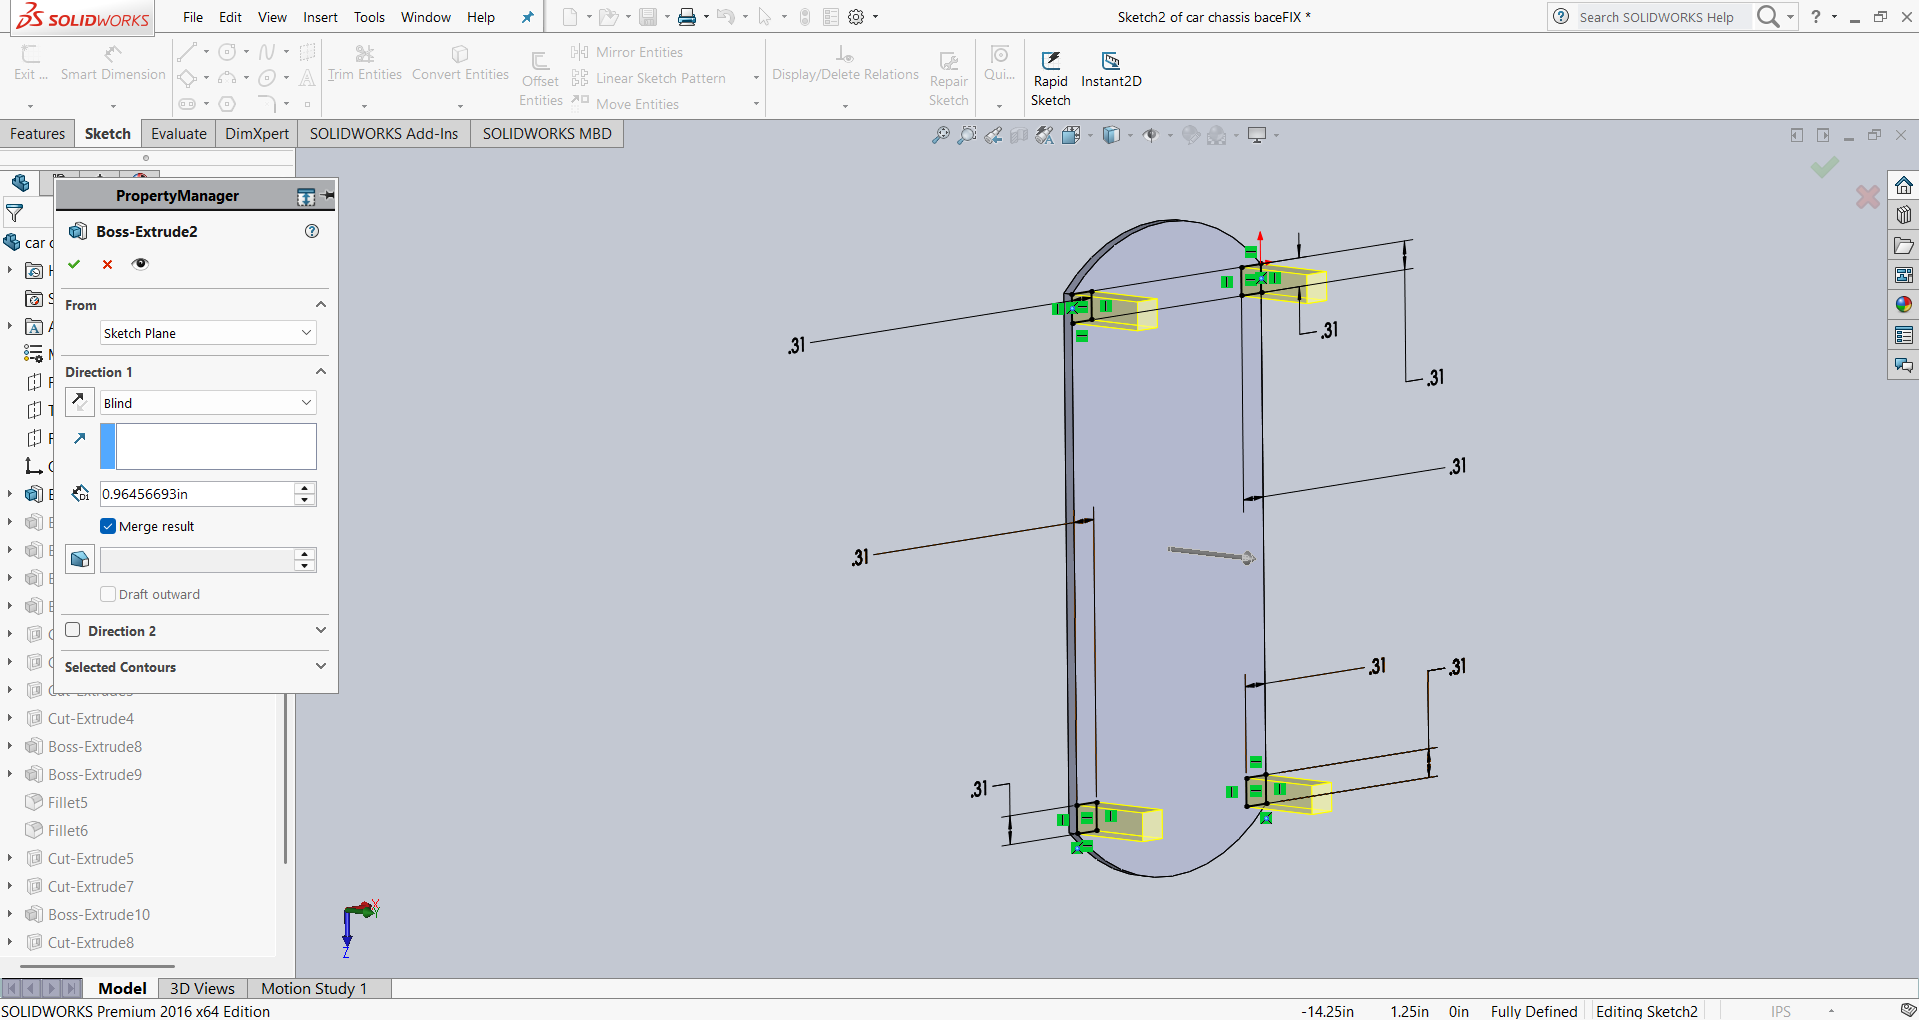
After extruding the two pillars, I realized they were not strong enough to support the structure effectively. To improve their stability and strength, I added support features connecting the pillars to the base. These supports help reinforce the design and ensure the pillars can handle the load without bending or breaking. The image below shows the updated design with these added supports.
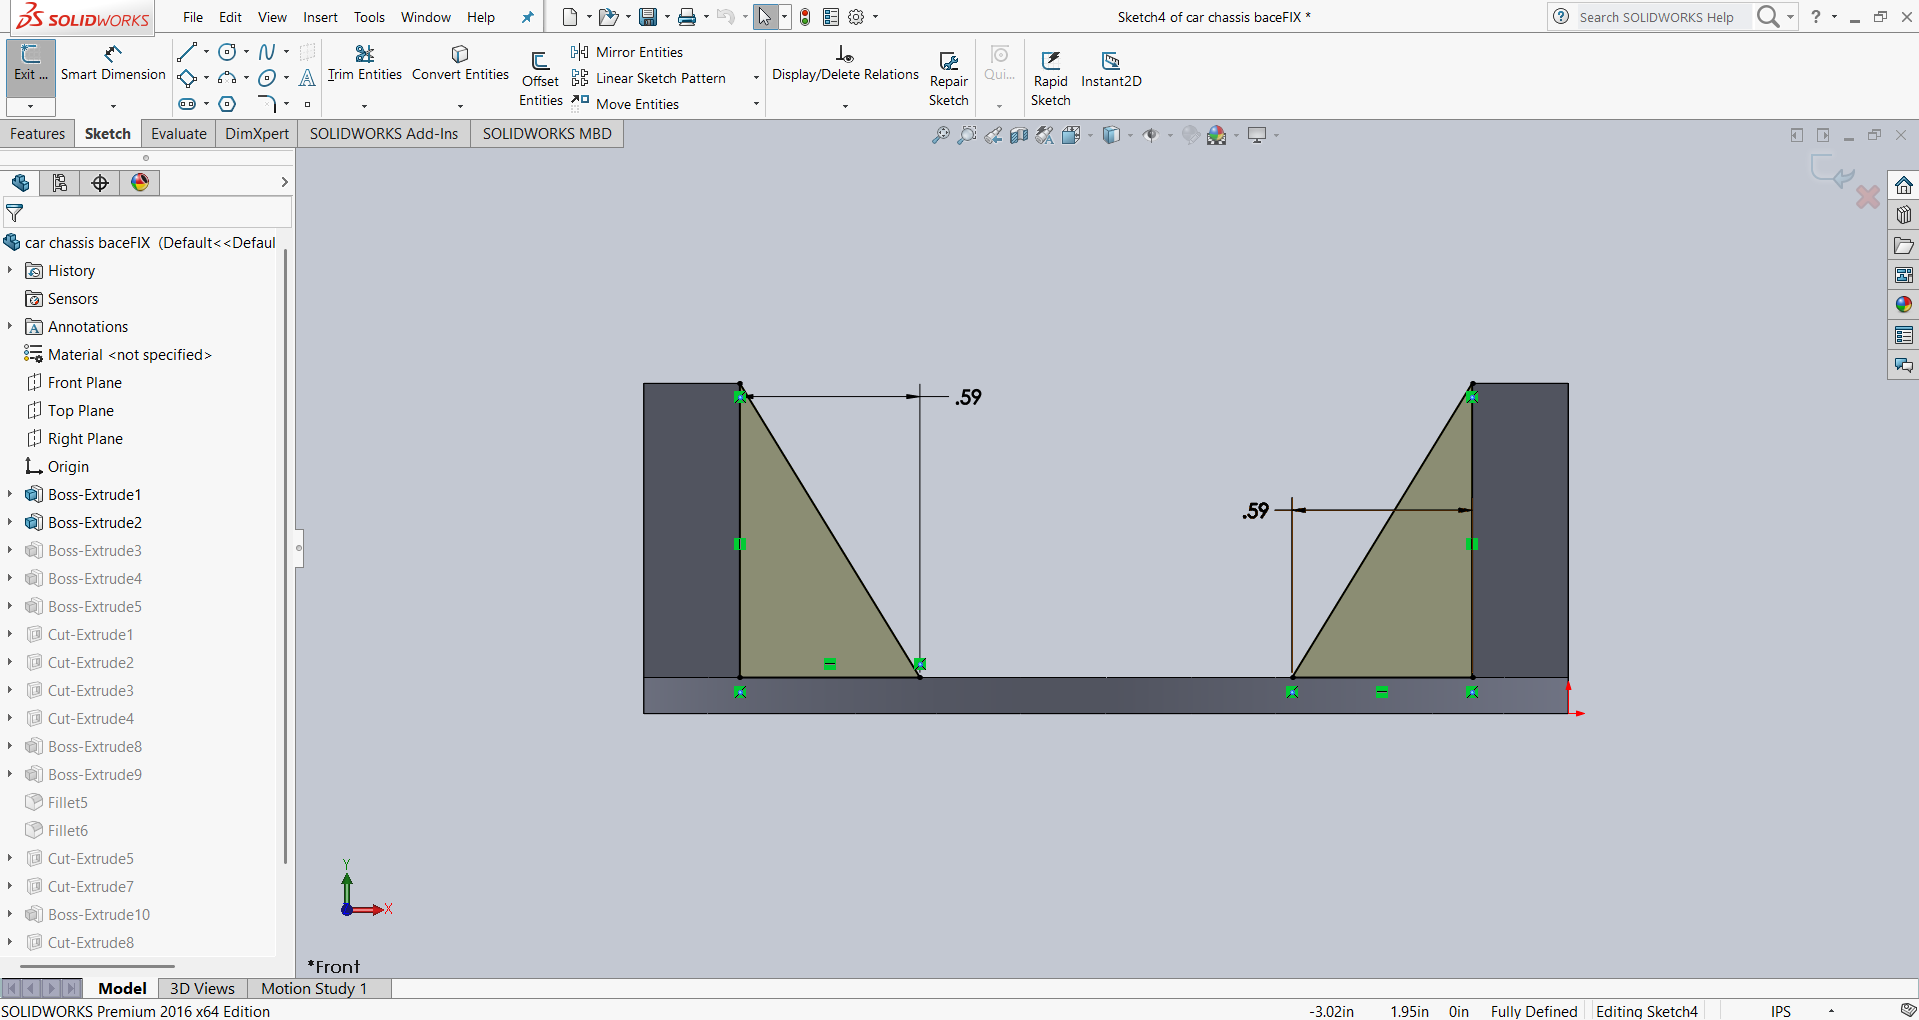
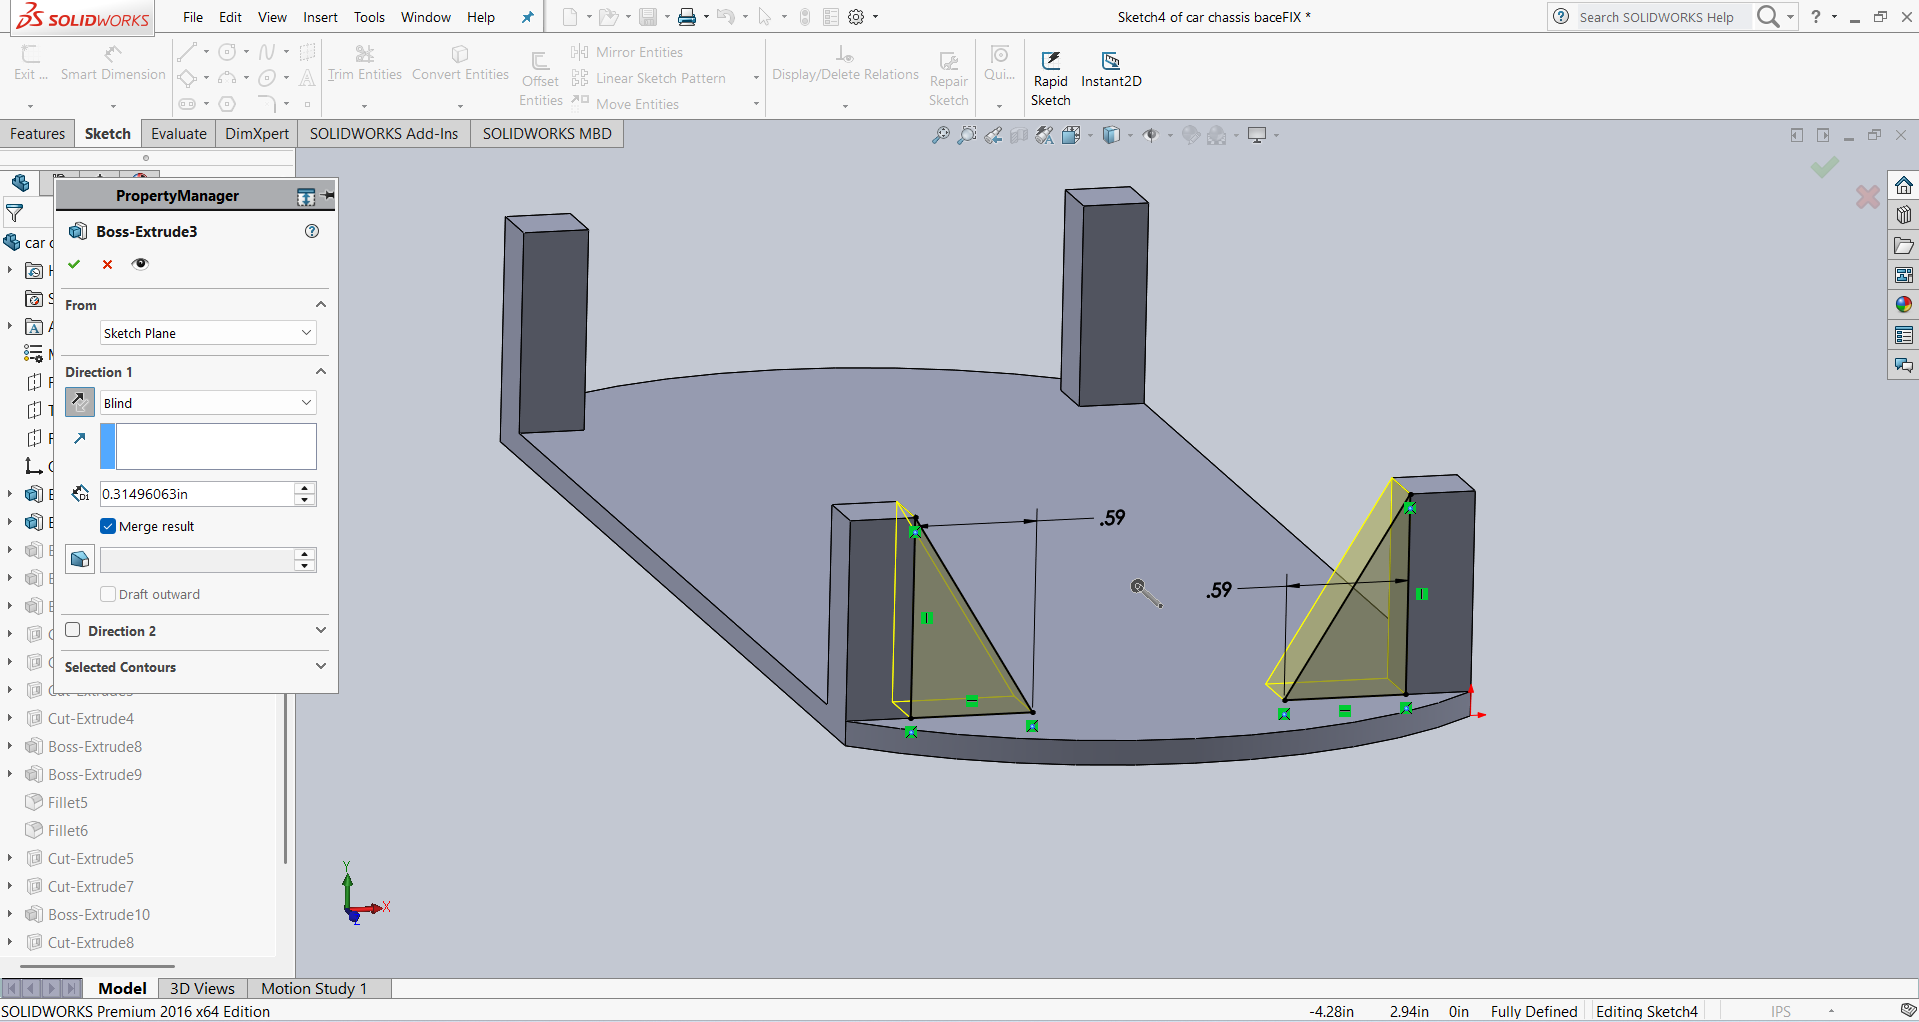
After that, I created a design for holding the motor. In the image below, you can see how the motor is fixed to the plate. I also added holes for mounting the motor using nuts and bolts, which helps keep the motor securely in place and prevents it from moving during operation.
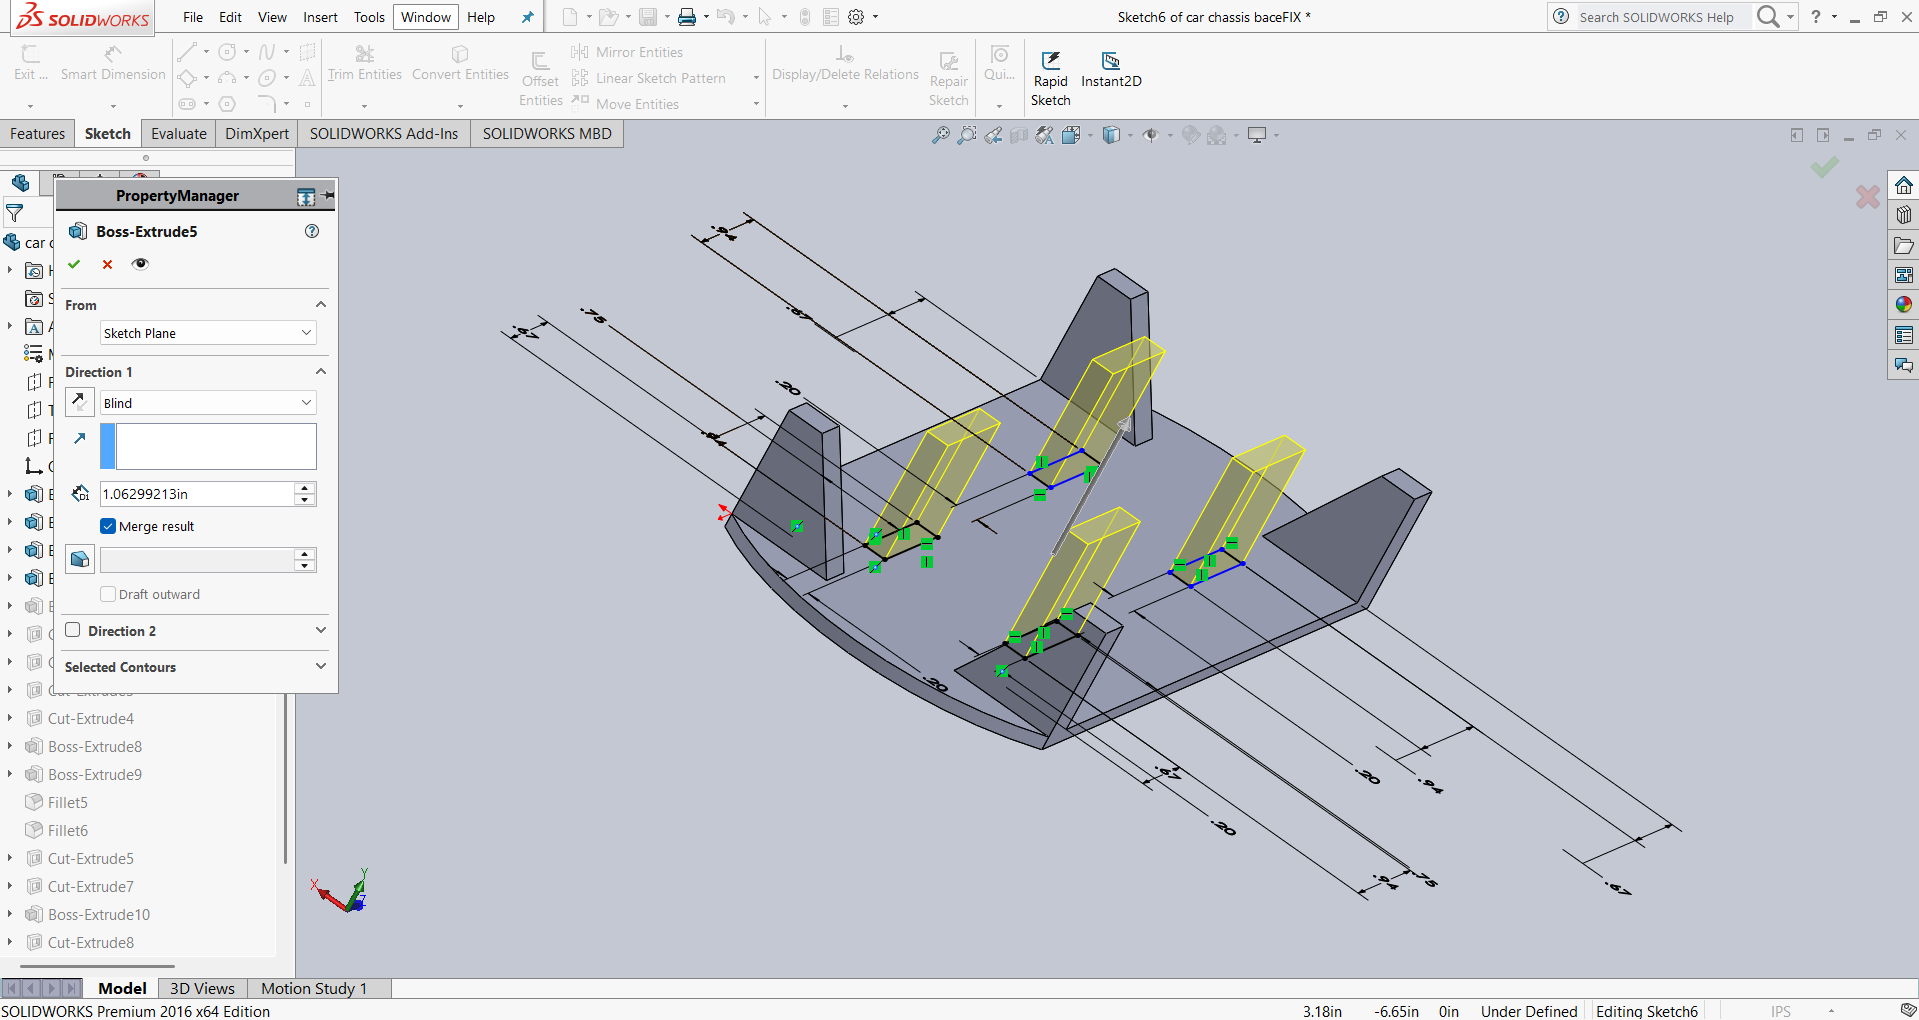
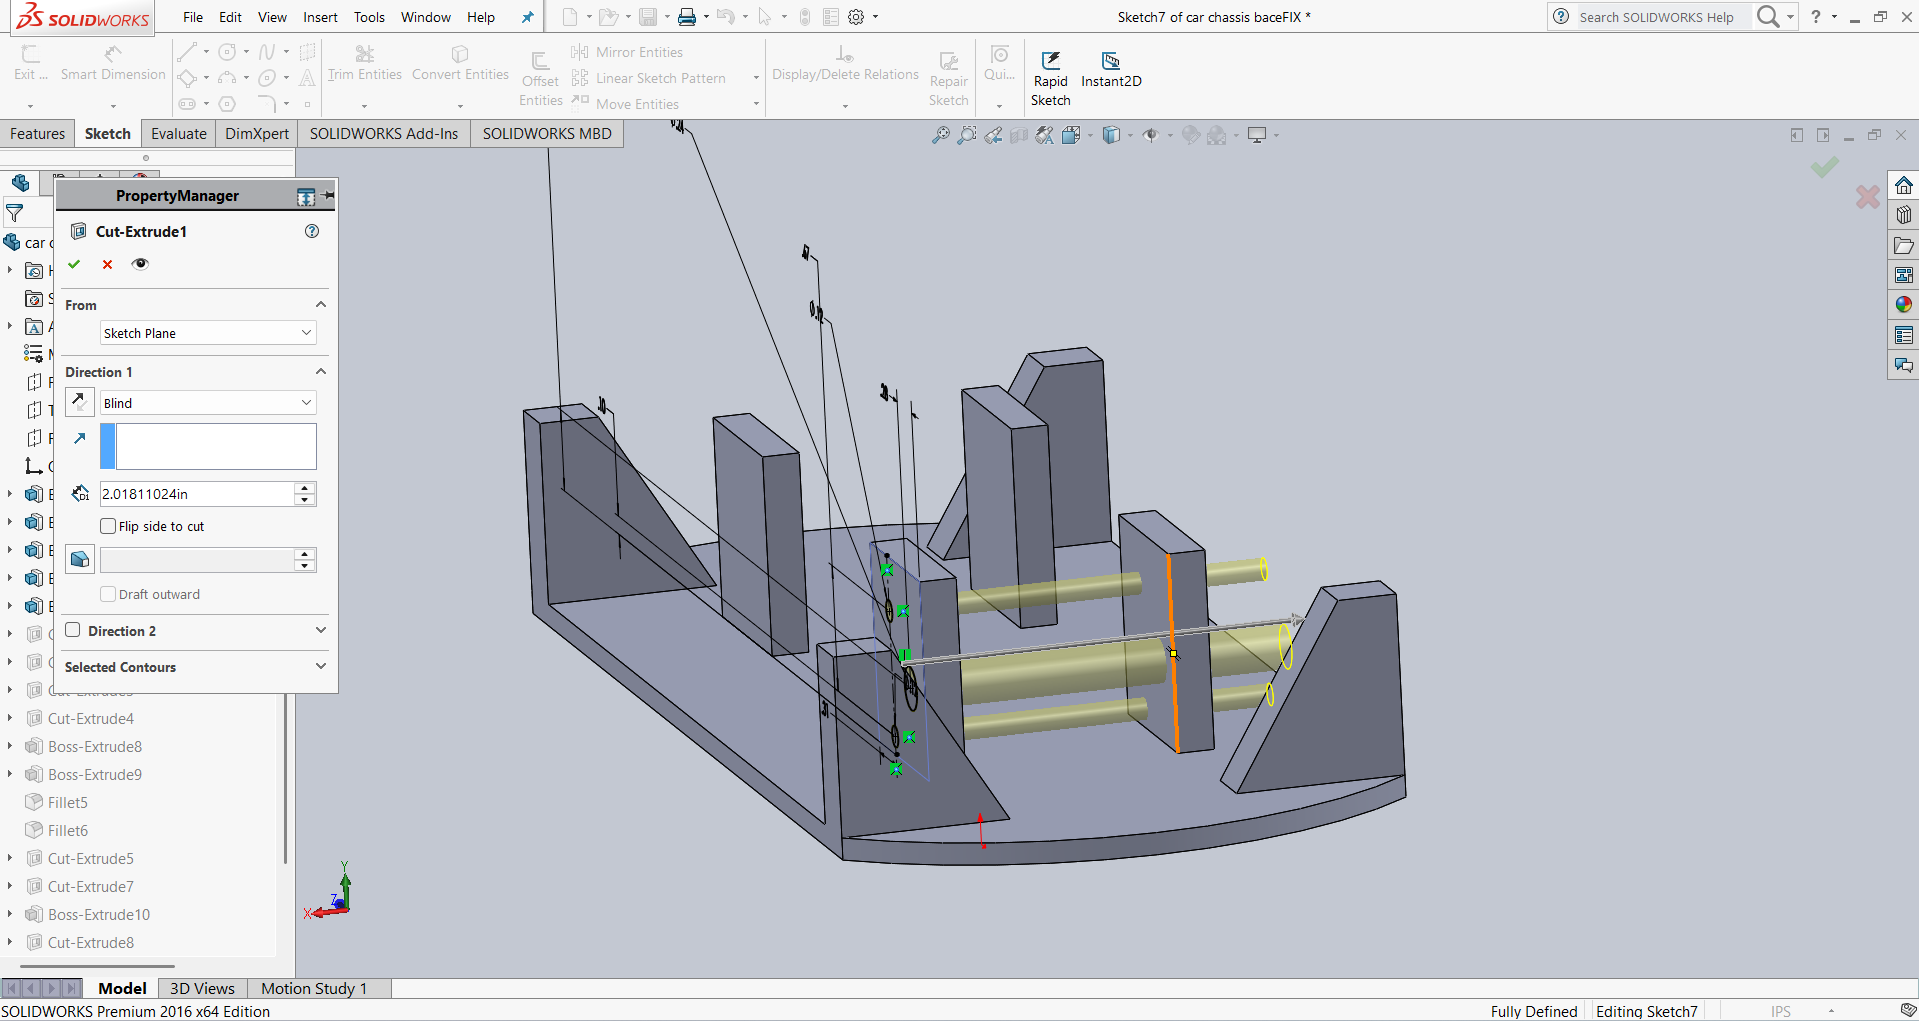
I felt that the motor support plate might be weak, so I added additional supports to strengthen it. In the image below, you can see the supports that were added to reinforce the motor mount. The final design of the top plate is also shown in the same image.
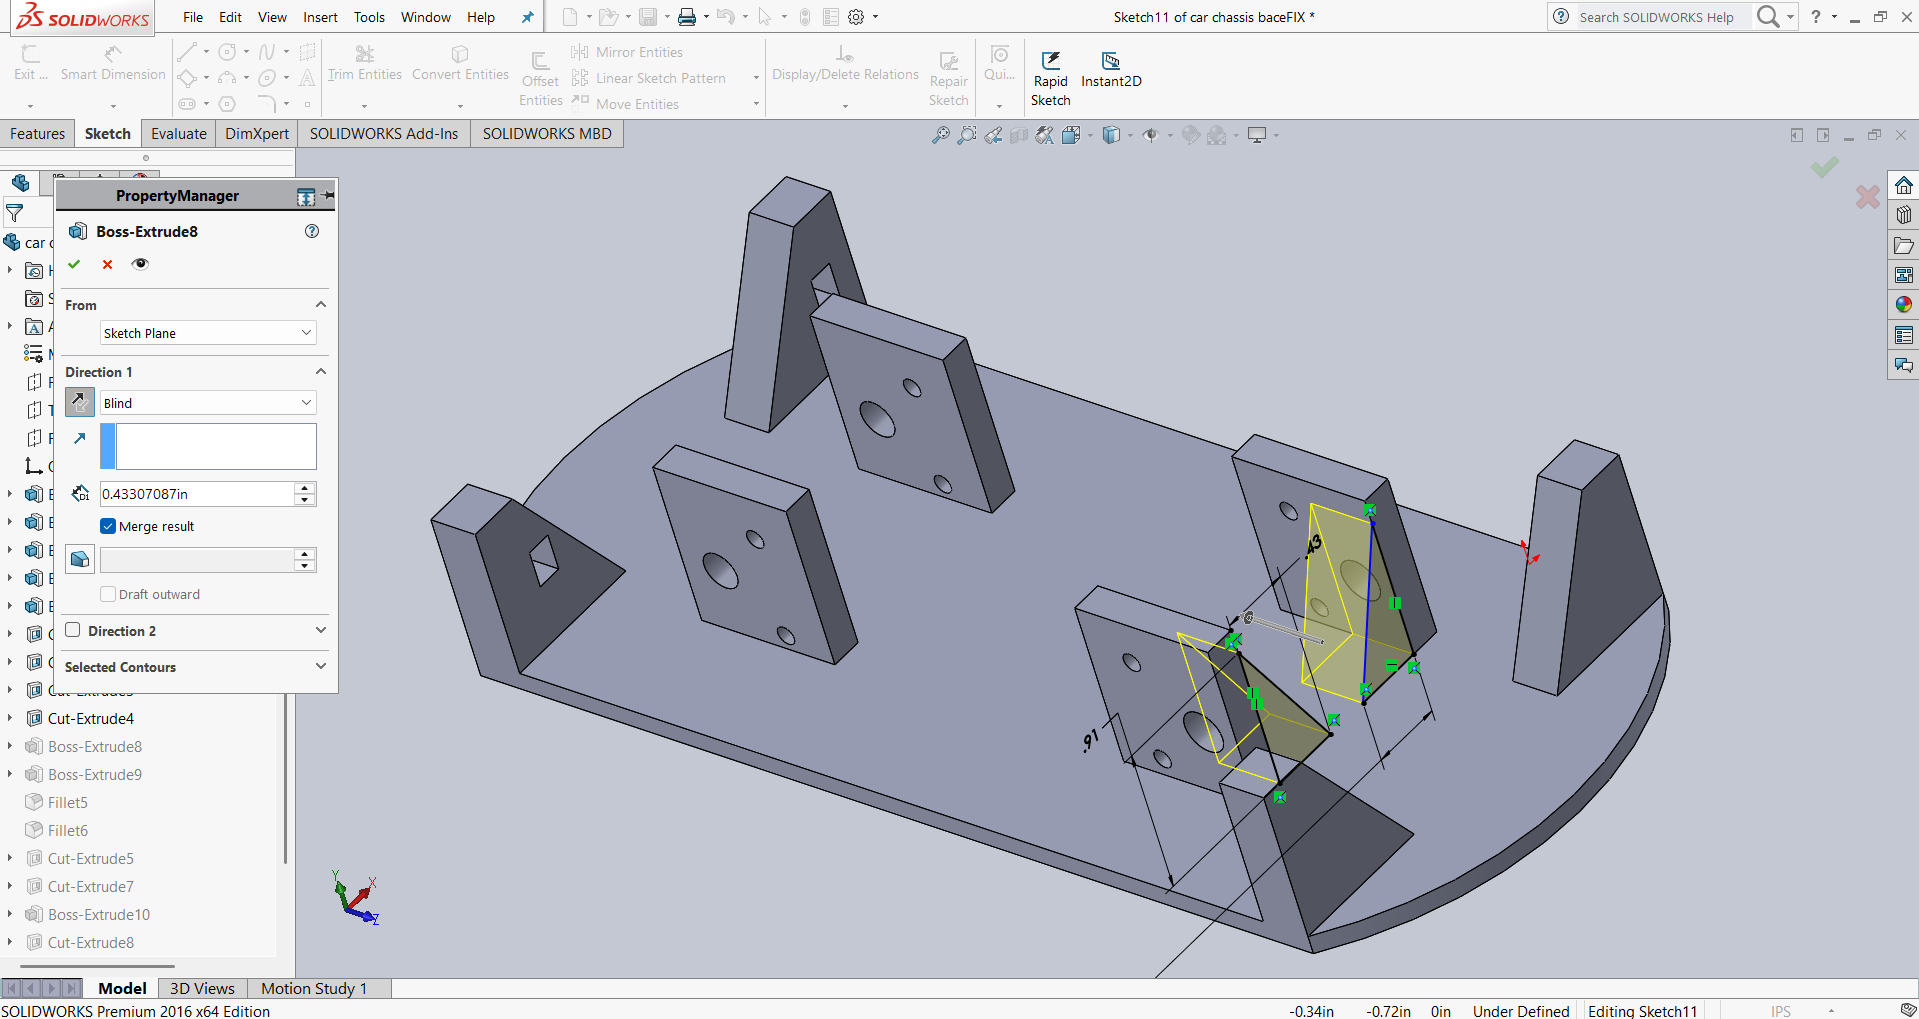
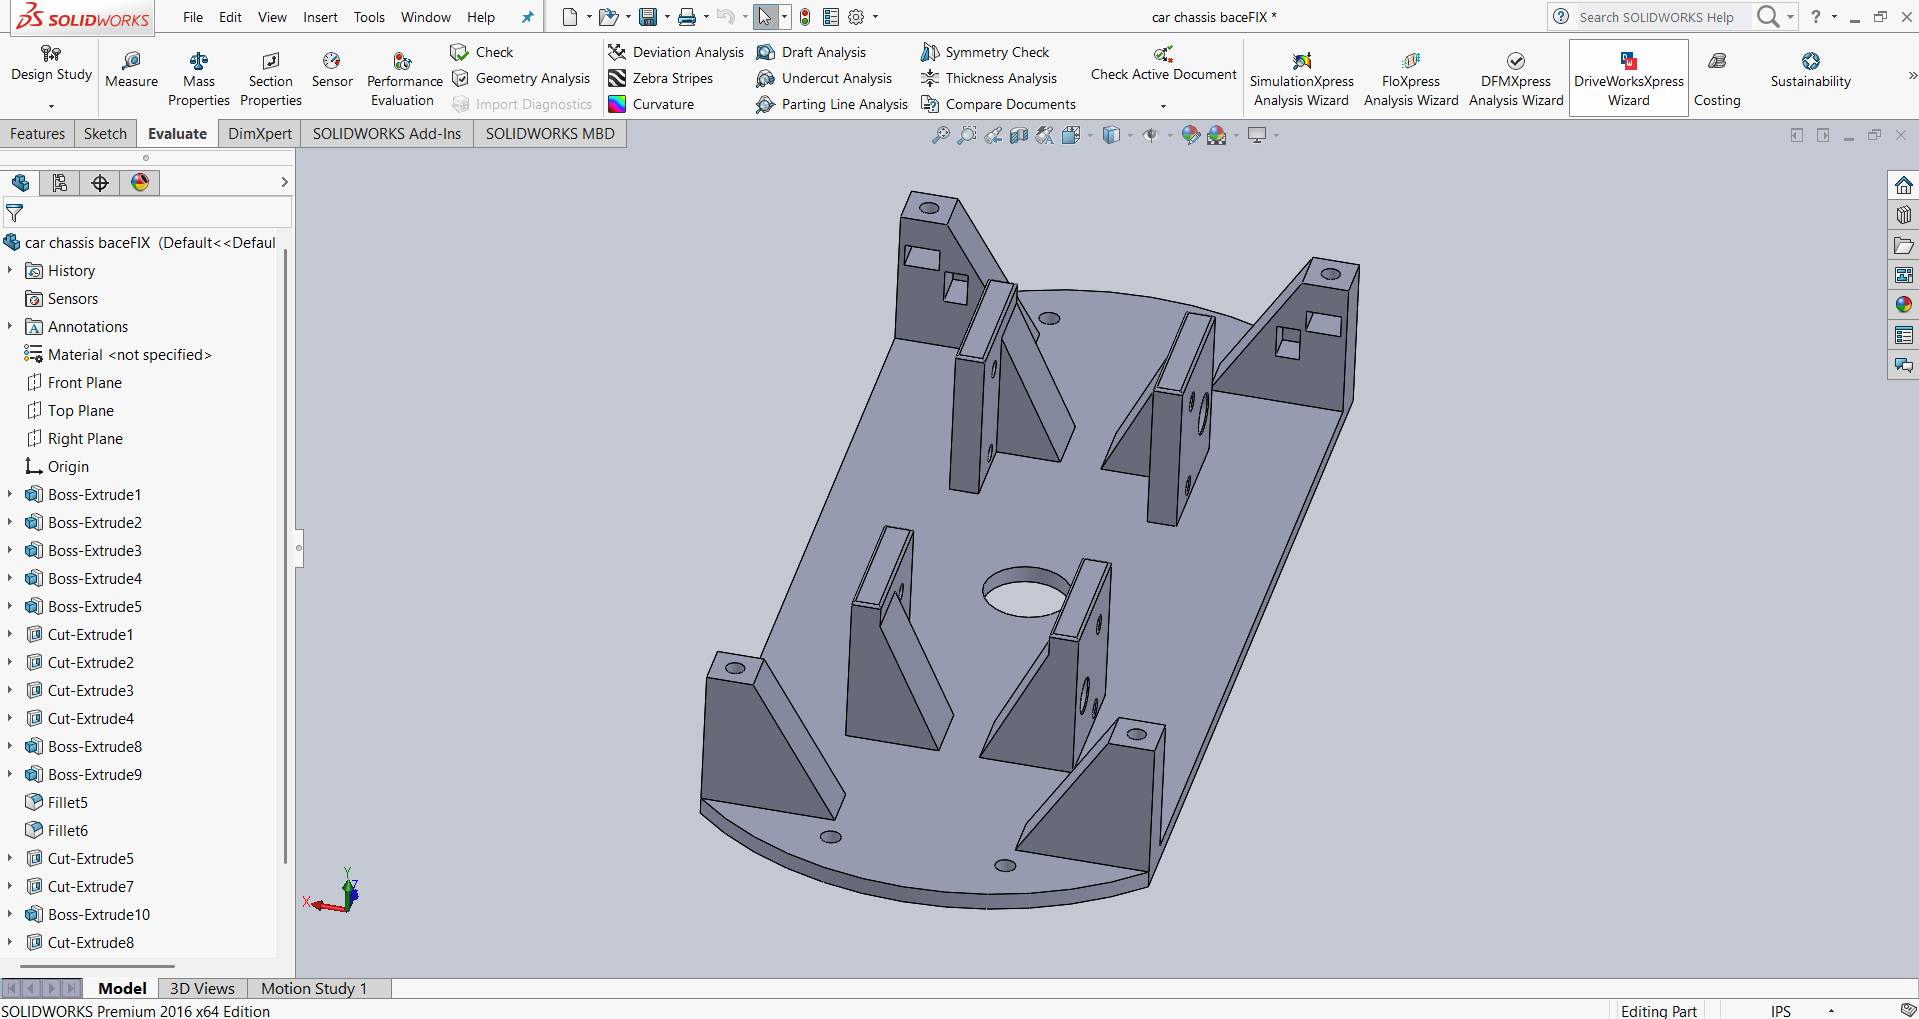
After successfully completing the top plate design, I started working on the base plate for my RC car. I began by creating the base plate sketch and then extruded it to a thickness of 3 mm. The image below shows the result of the base plate design.
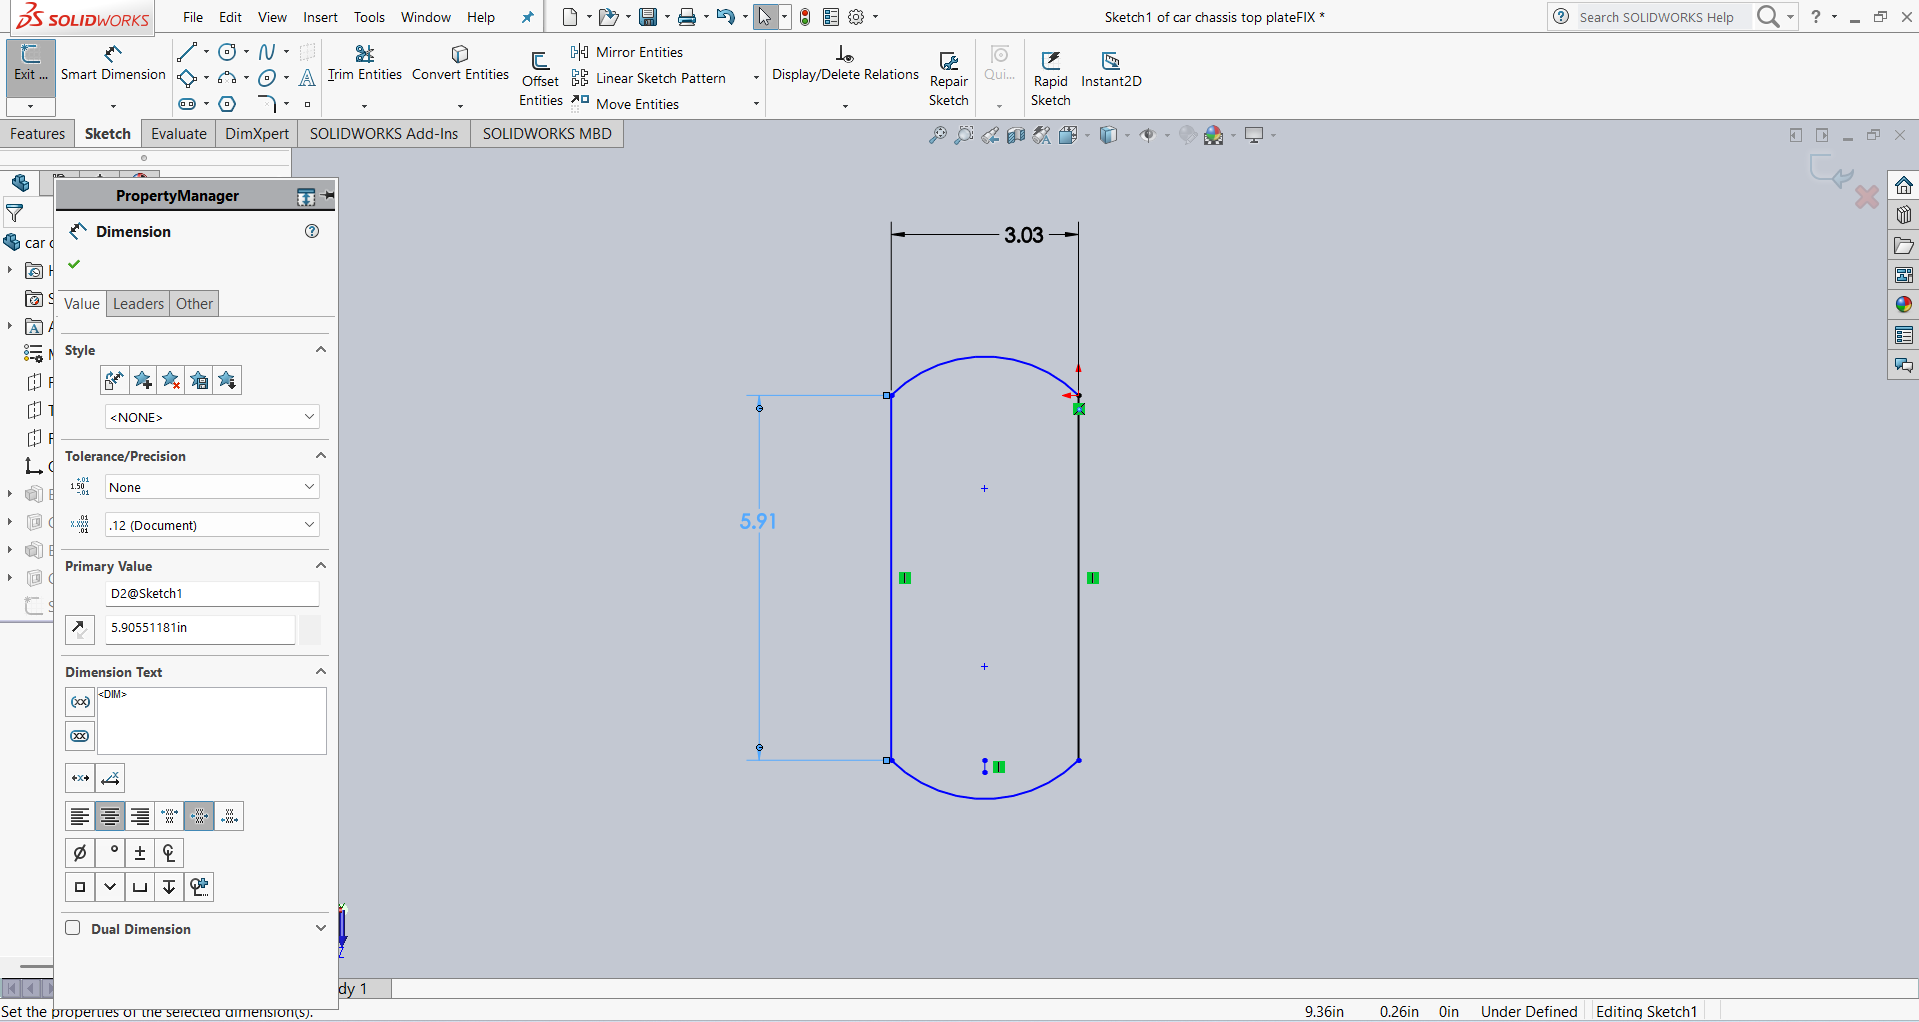
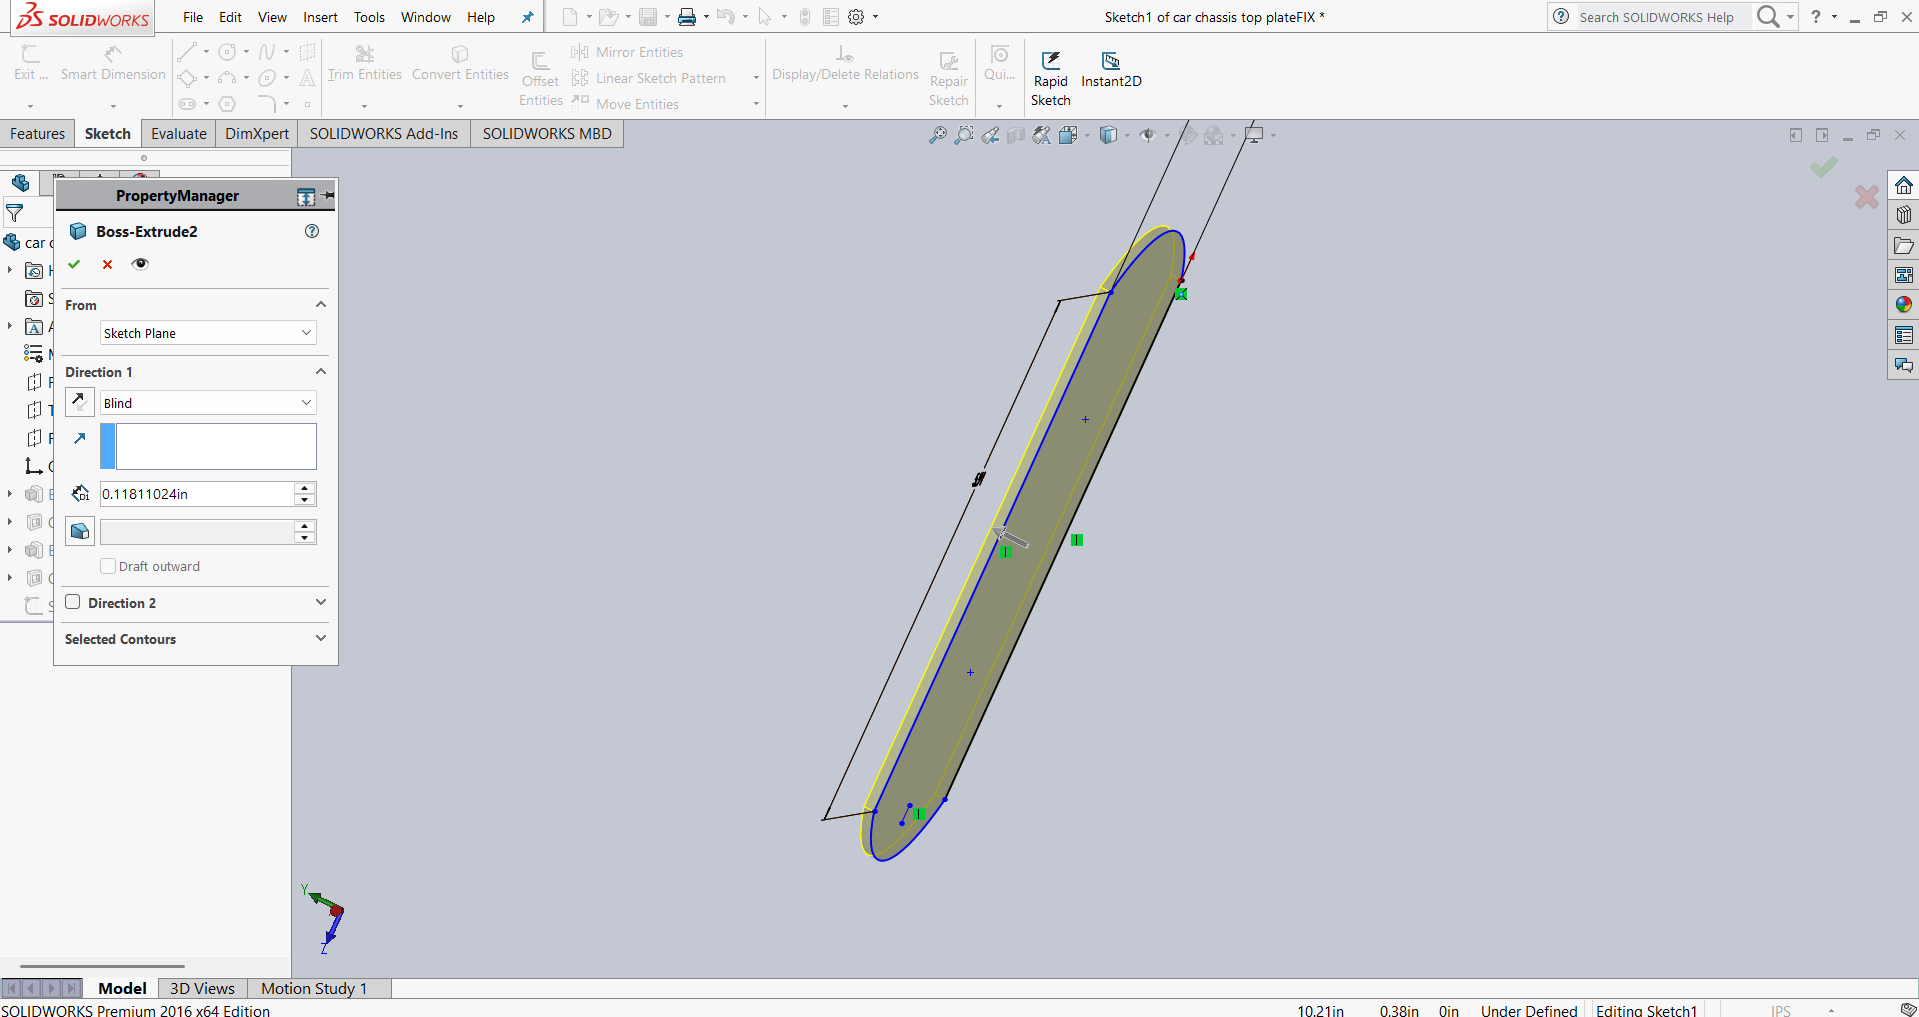
After that, I added holes to fix the base plate to the top plate. I also used a press-fit design to make the assembly stronger and more secure.
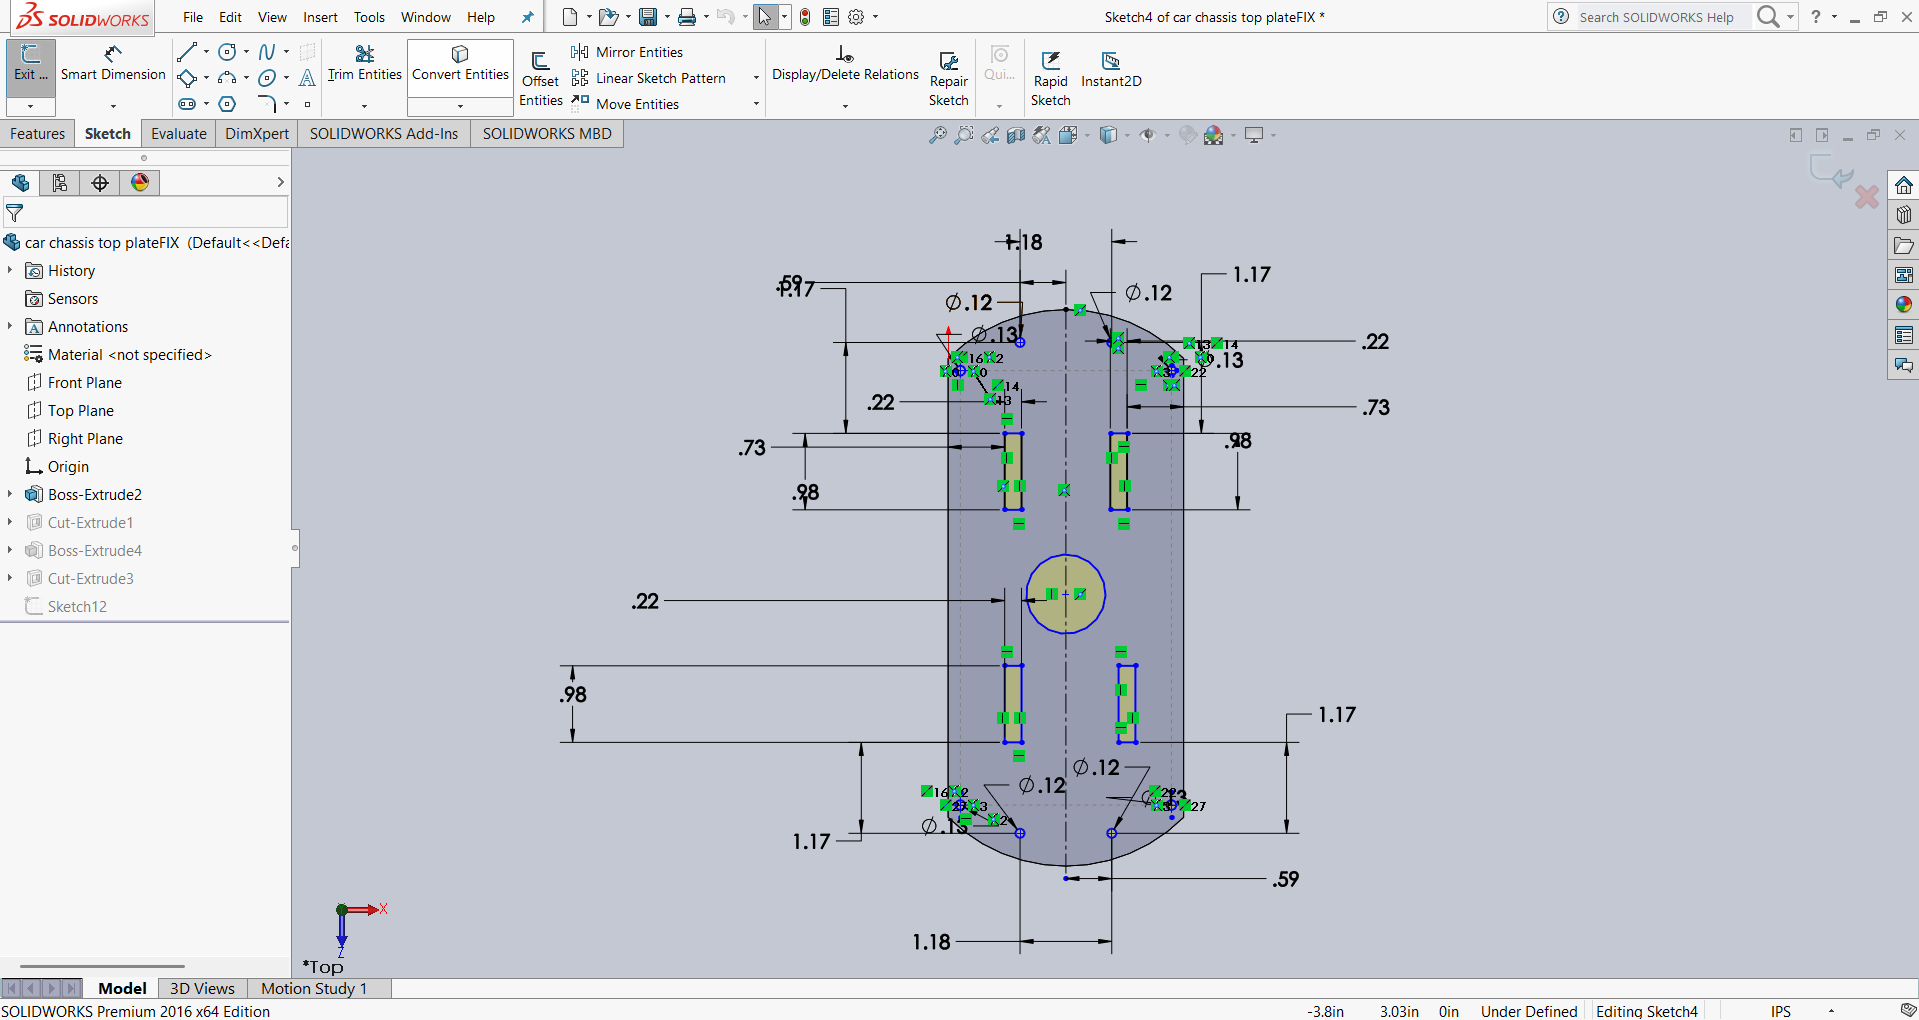
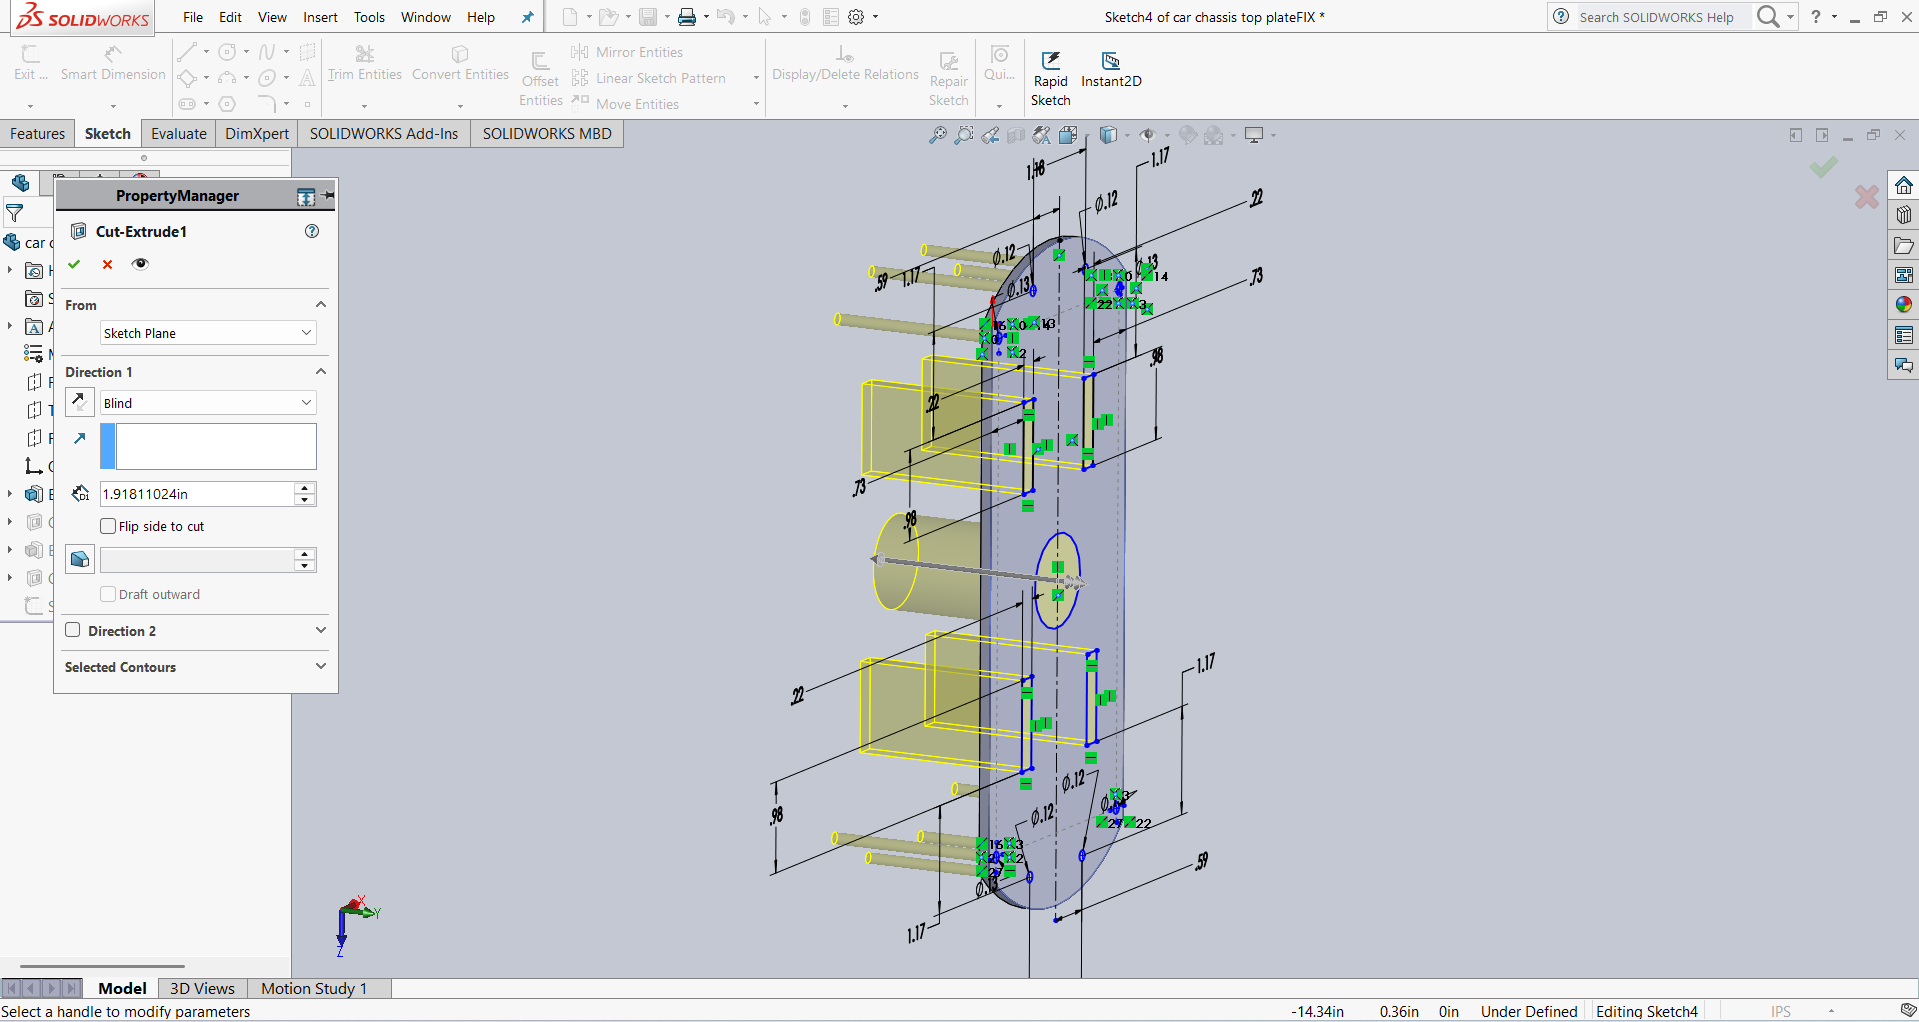
Below, I am showing the final part of my base plate and the final assembly of my chassis.
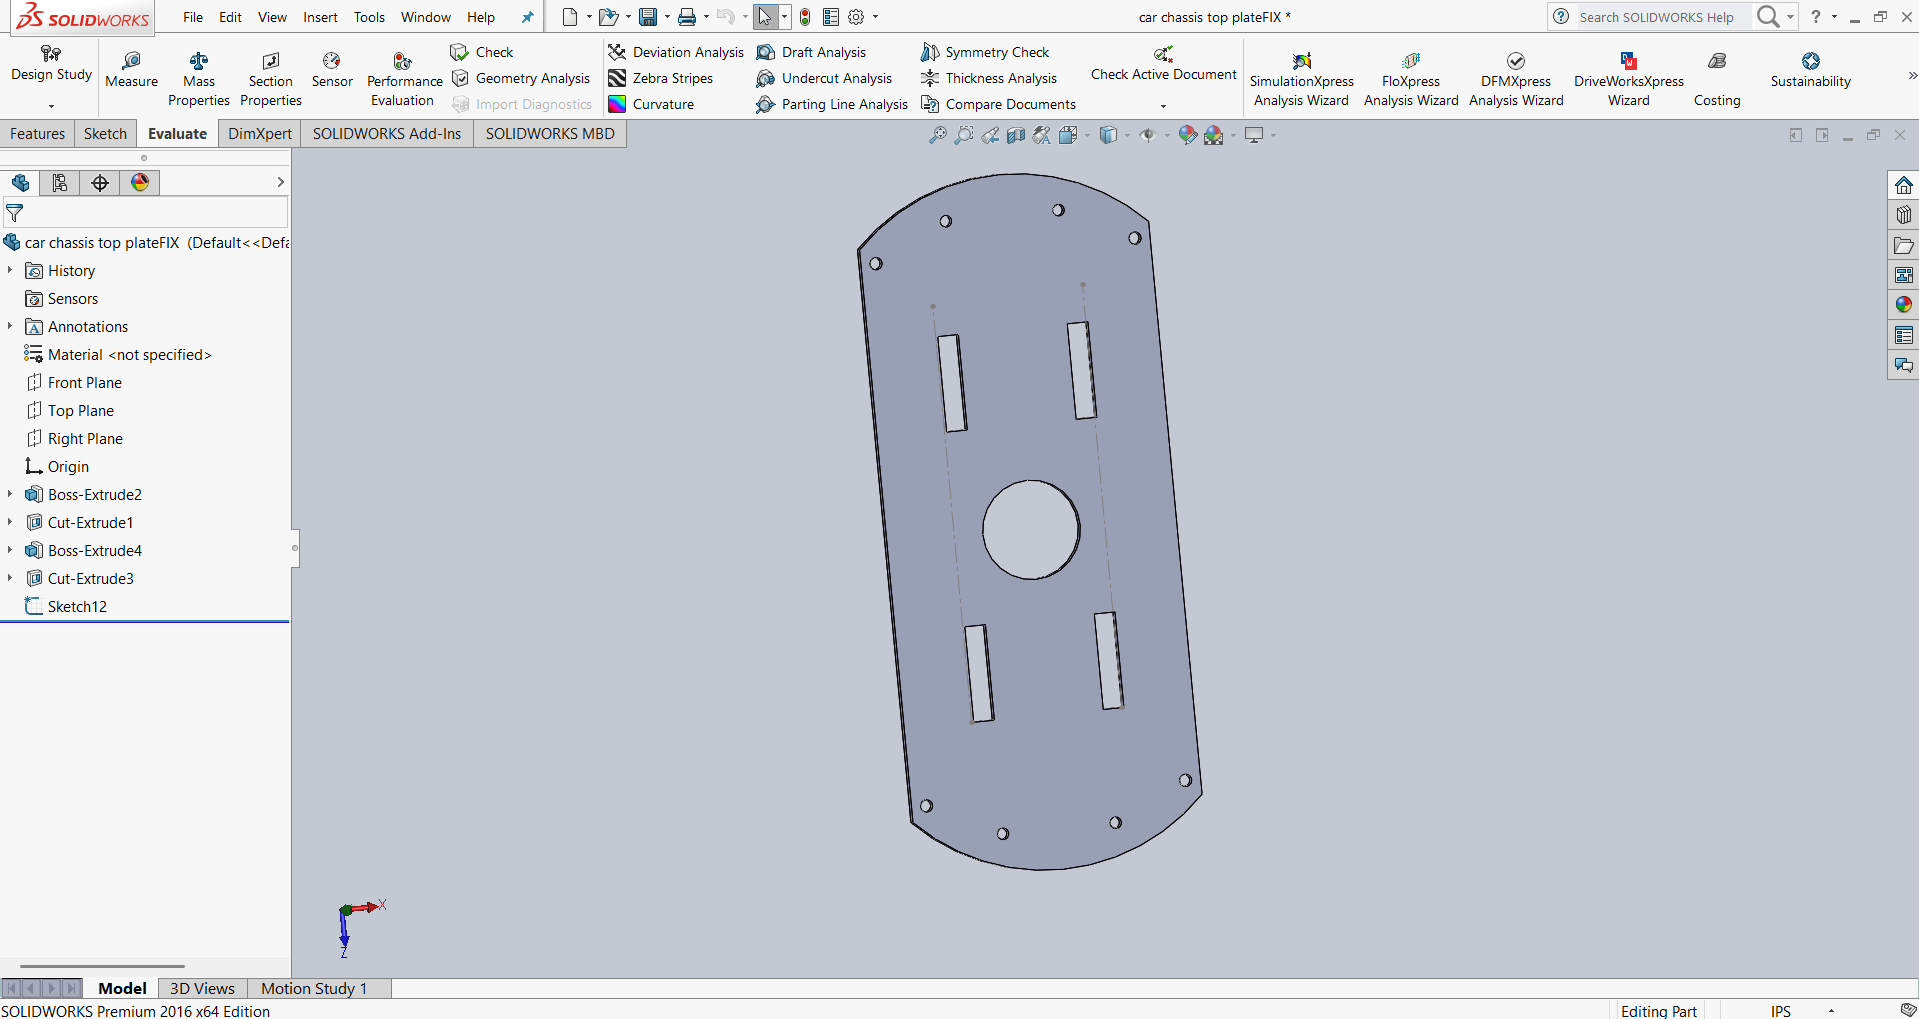
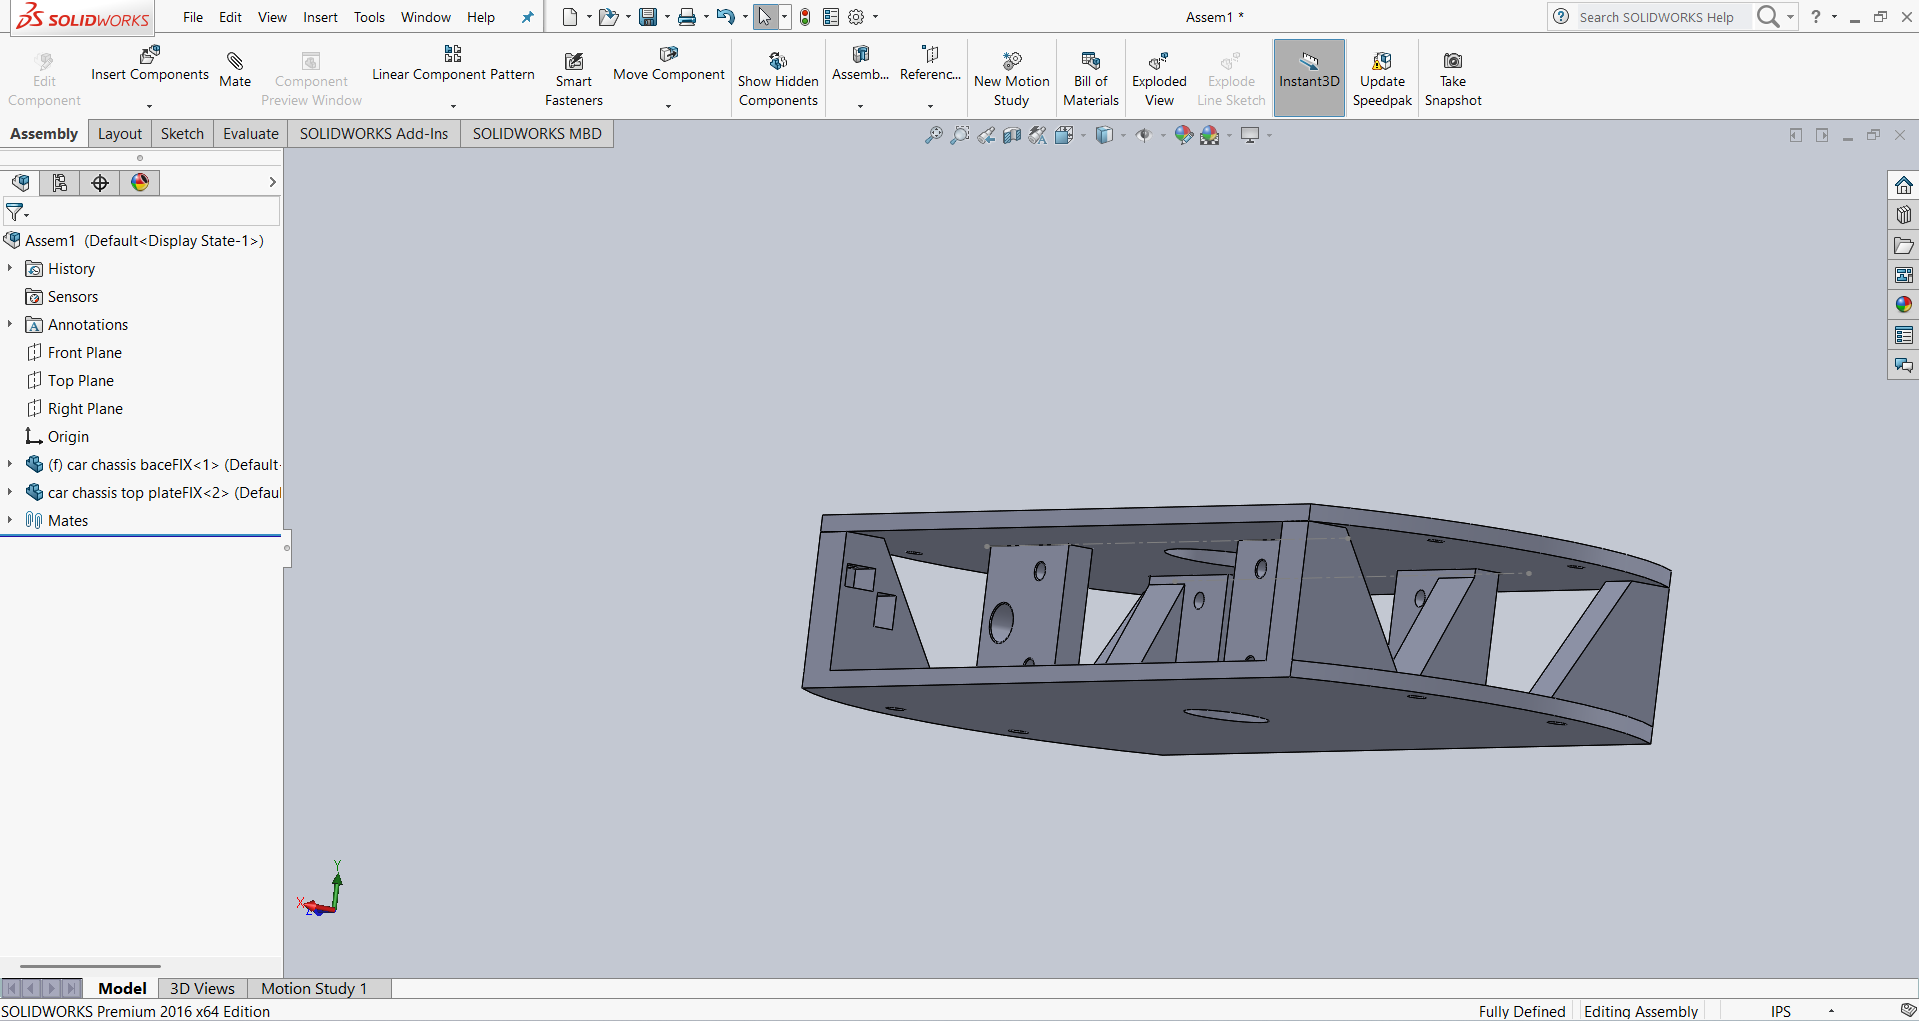
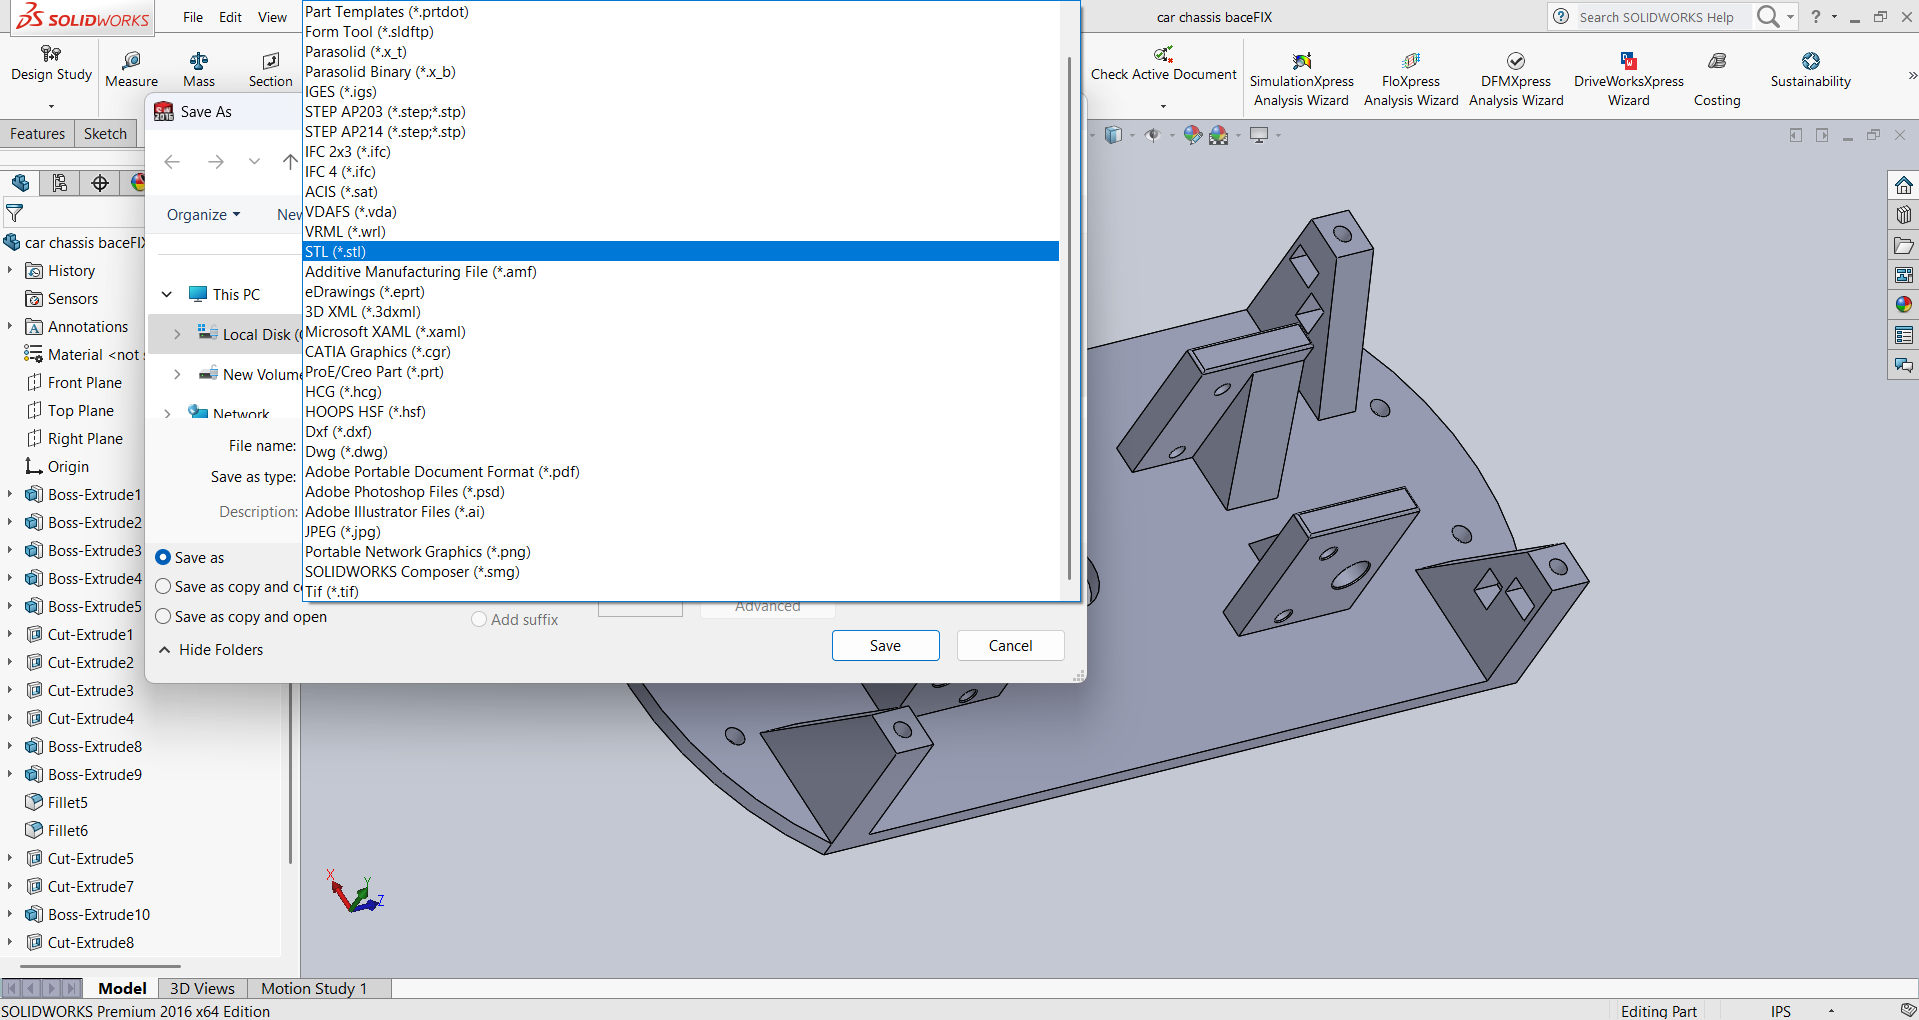
After completing the assembly, I confirmed that my design was accurate and functional. I then saved the design files in STL format. Finally, I imported them into Cura software to generate the G-code for 3D printing.
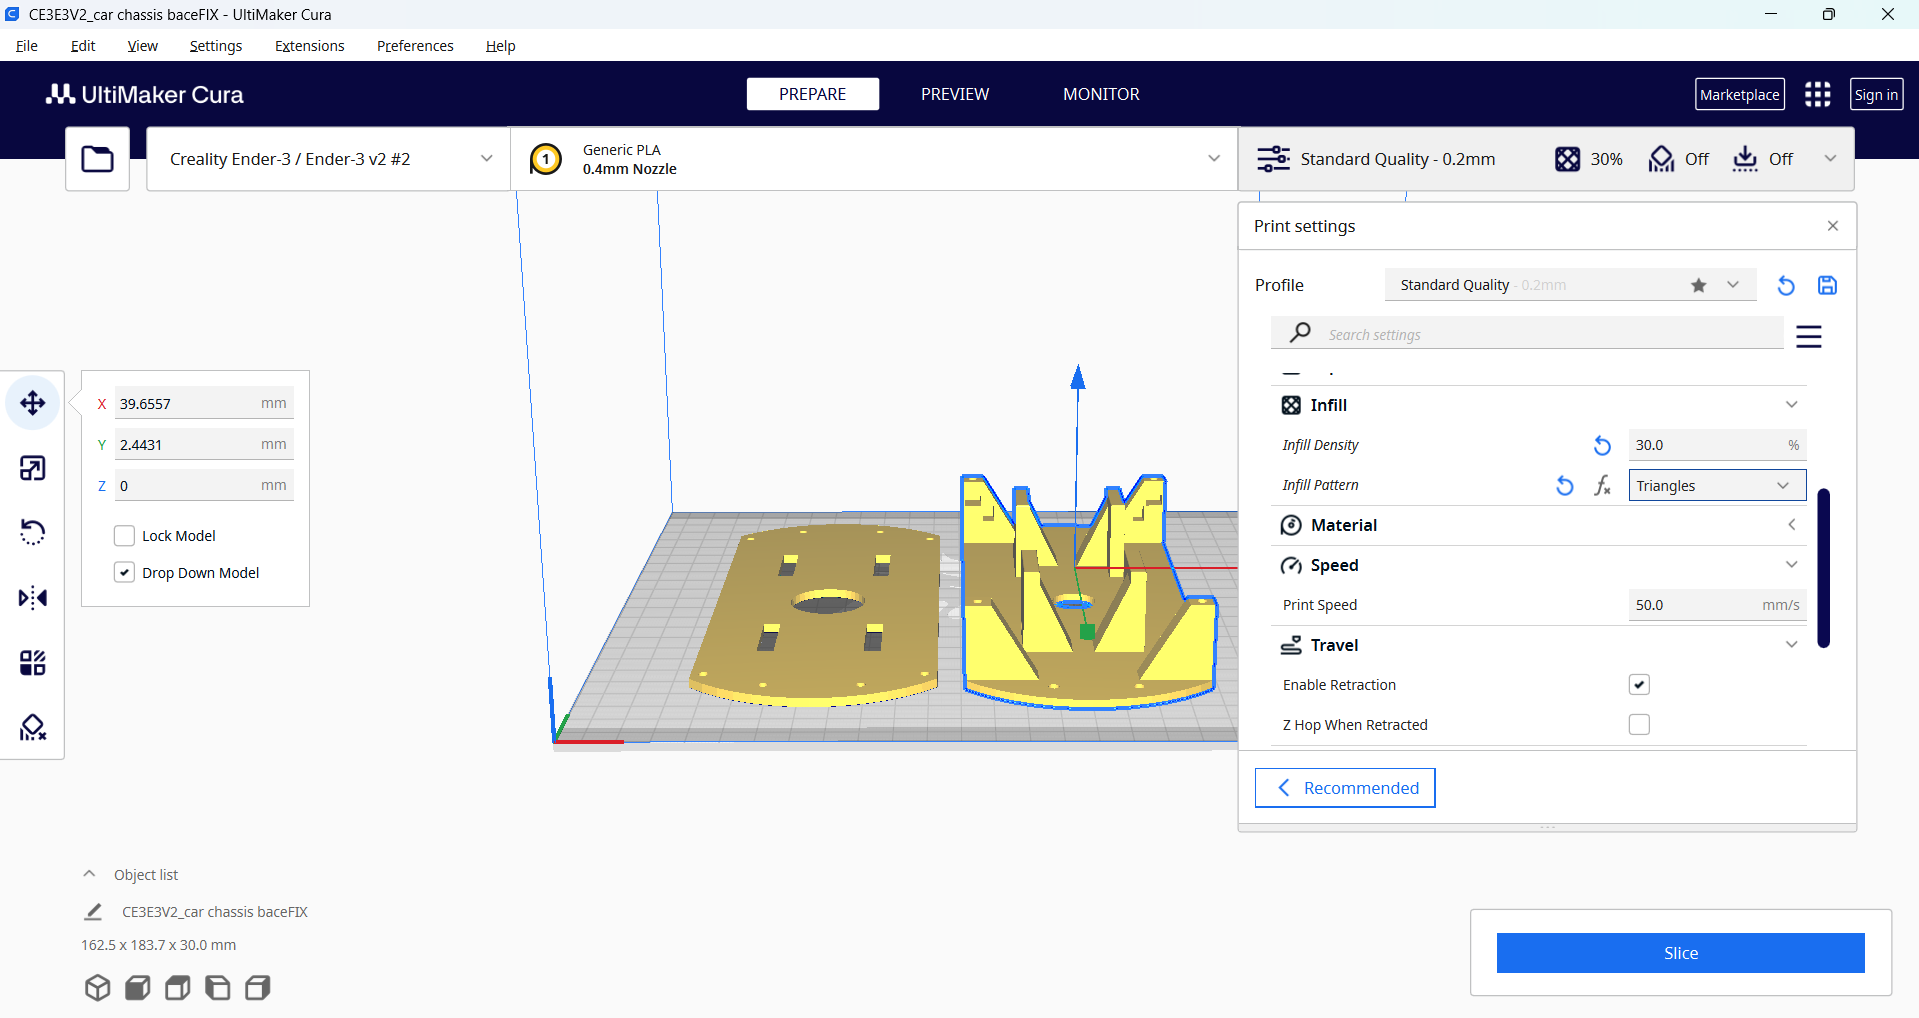
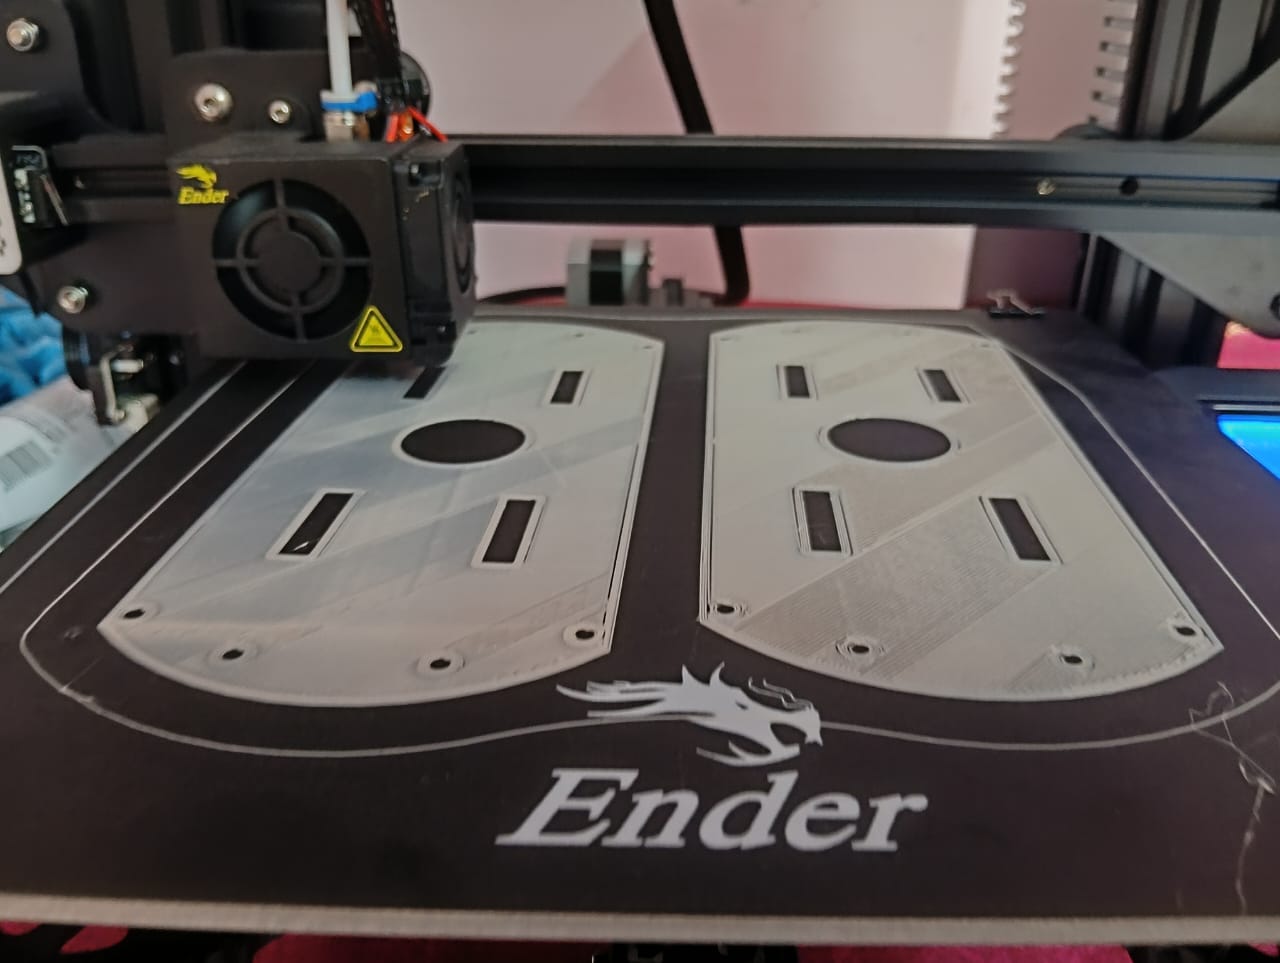
Here, I have given 30% infill in the print settings. In the image above, I have already explained how I prepared the file and sent it to the printer after converting it to G-code, so I won’t explain that again here. Below, I am showing how my printer is printing the design.
Note: In the slicing section above, I showed both the top and bottom plates sliced together, but here I am printing two sets for my chess. Please don’t get confused when looking at the prints.
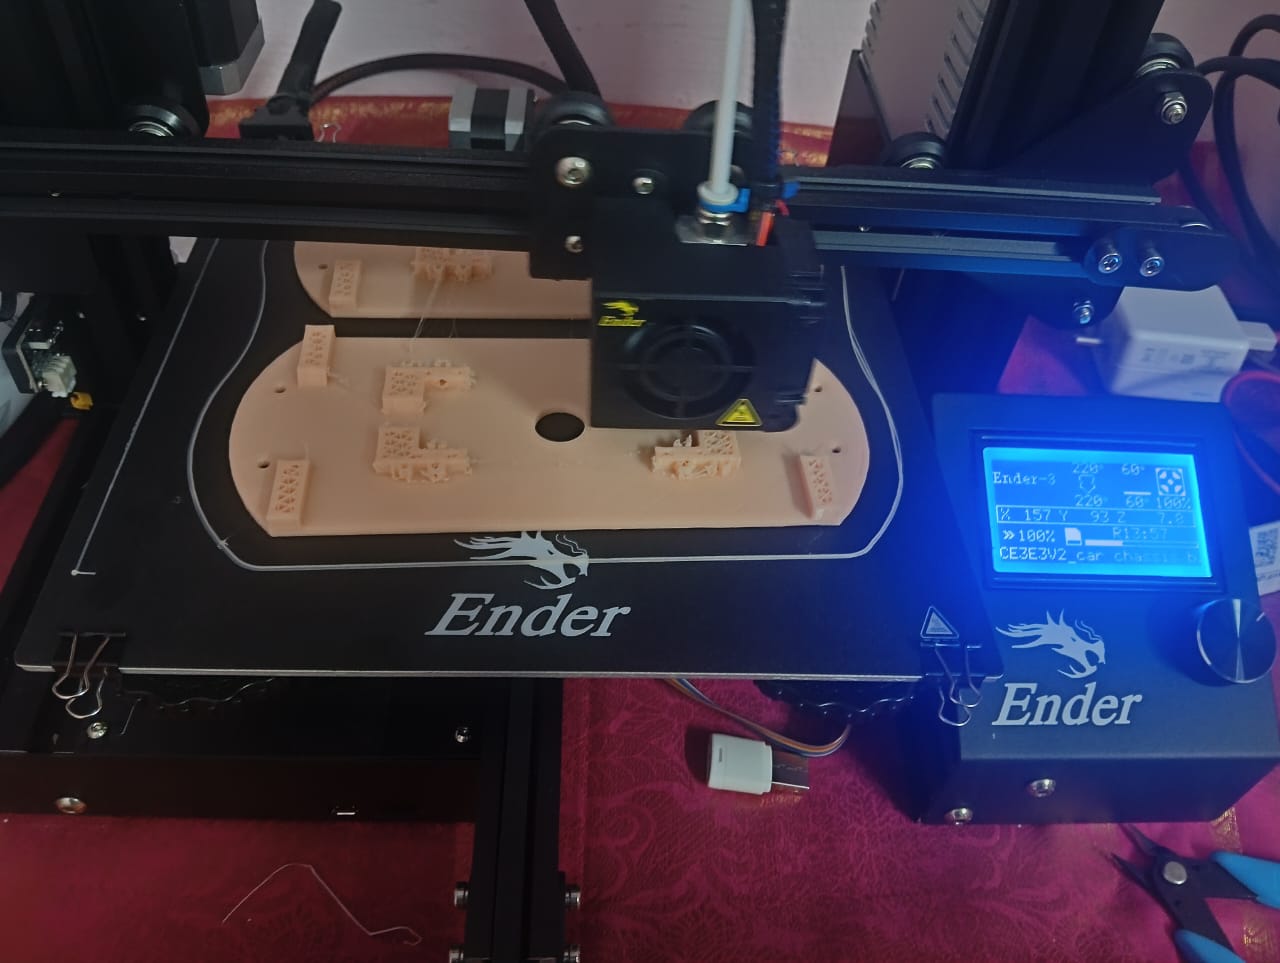

Here, I am observing whether the printer is working properly and checking if the filament is coming out of the nozzle or not.
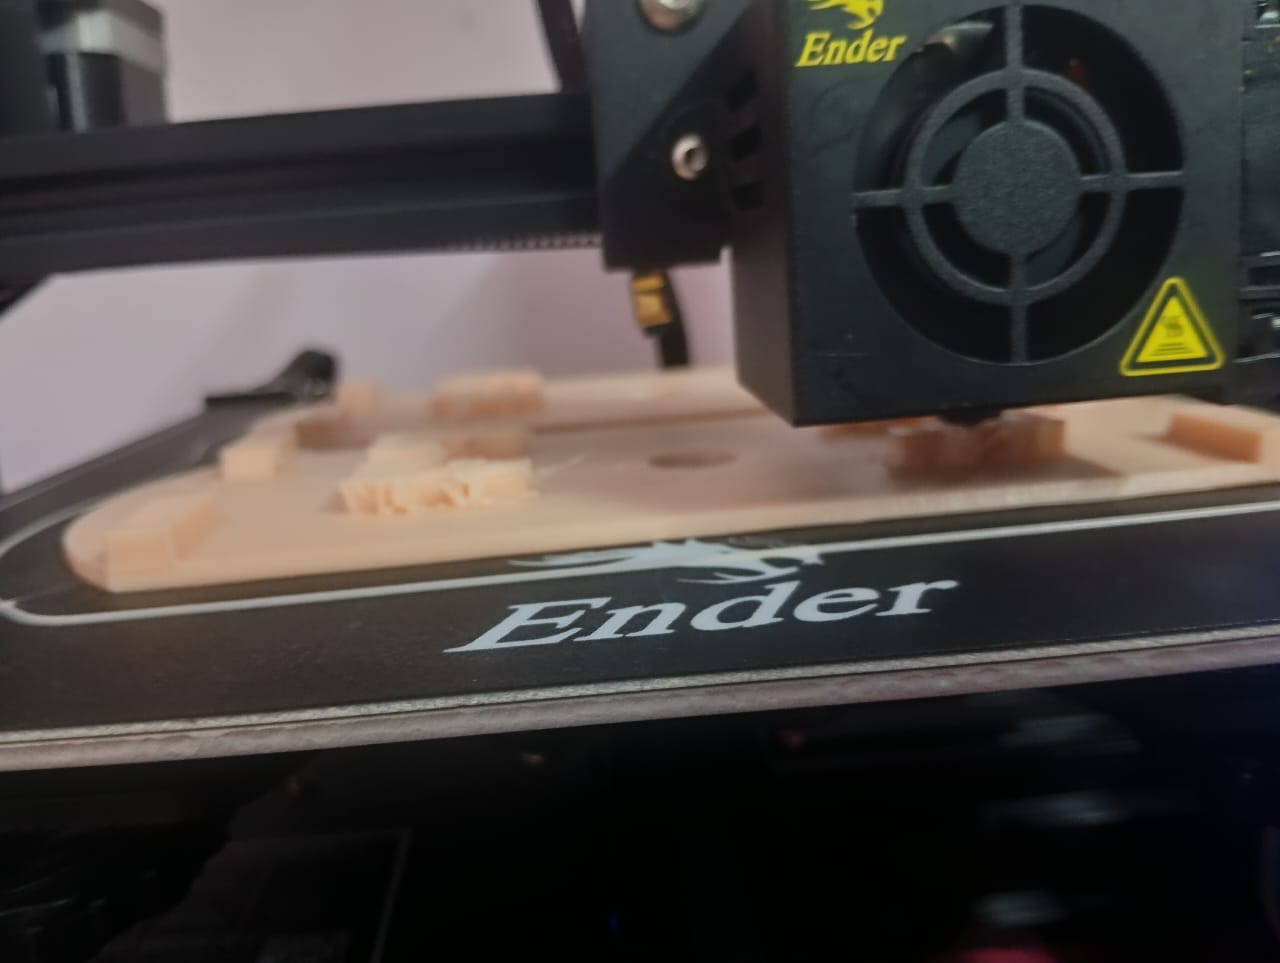
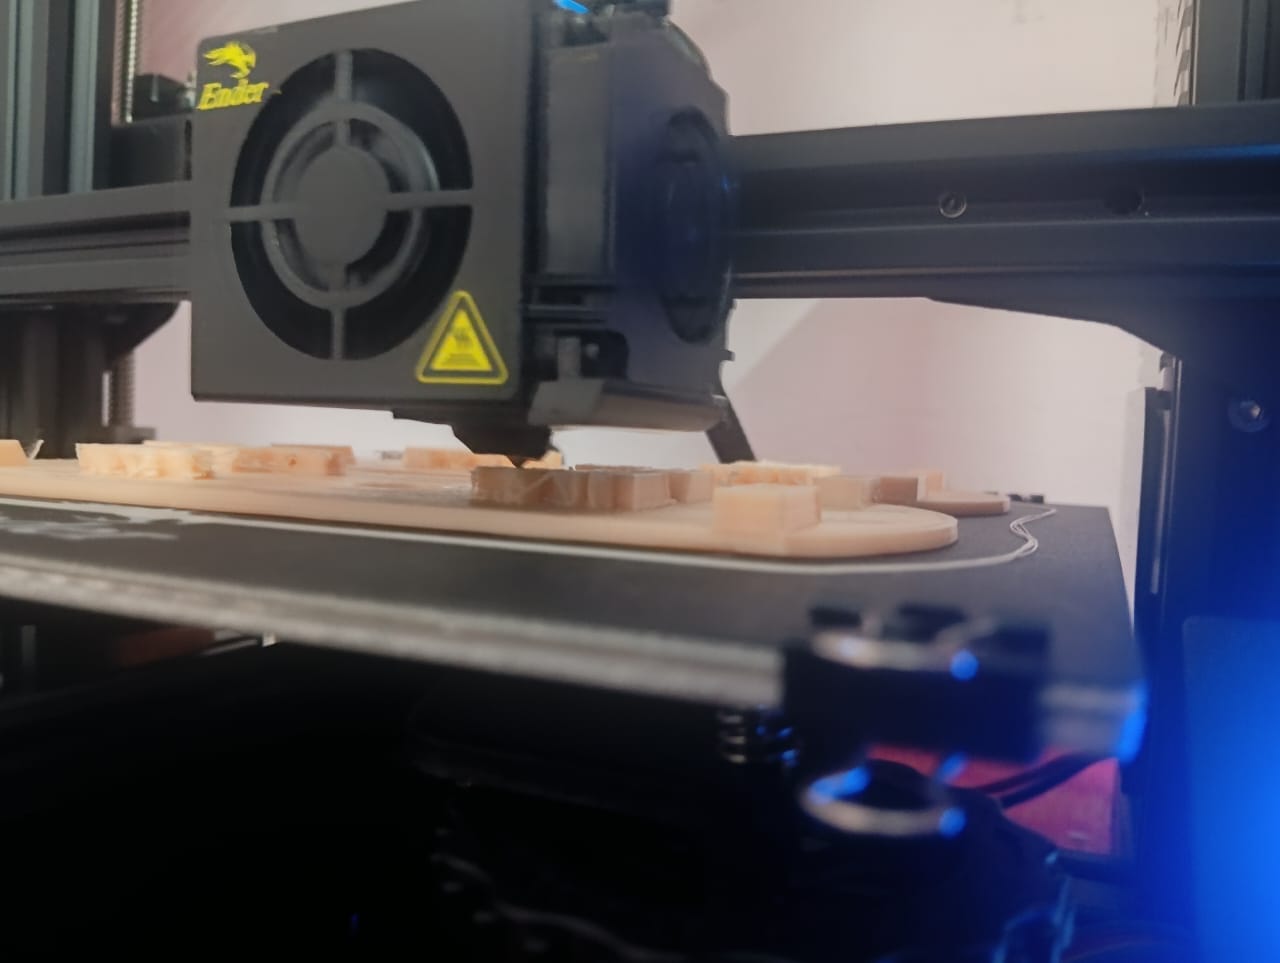
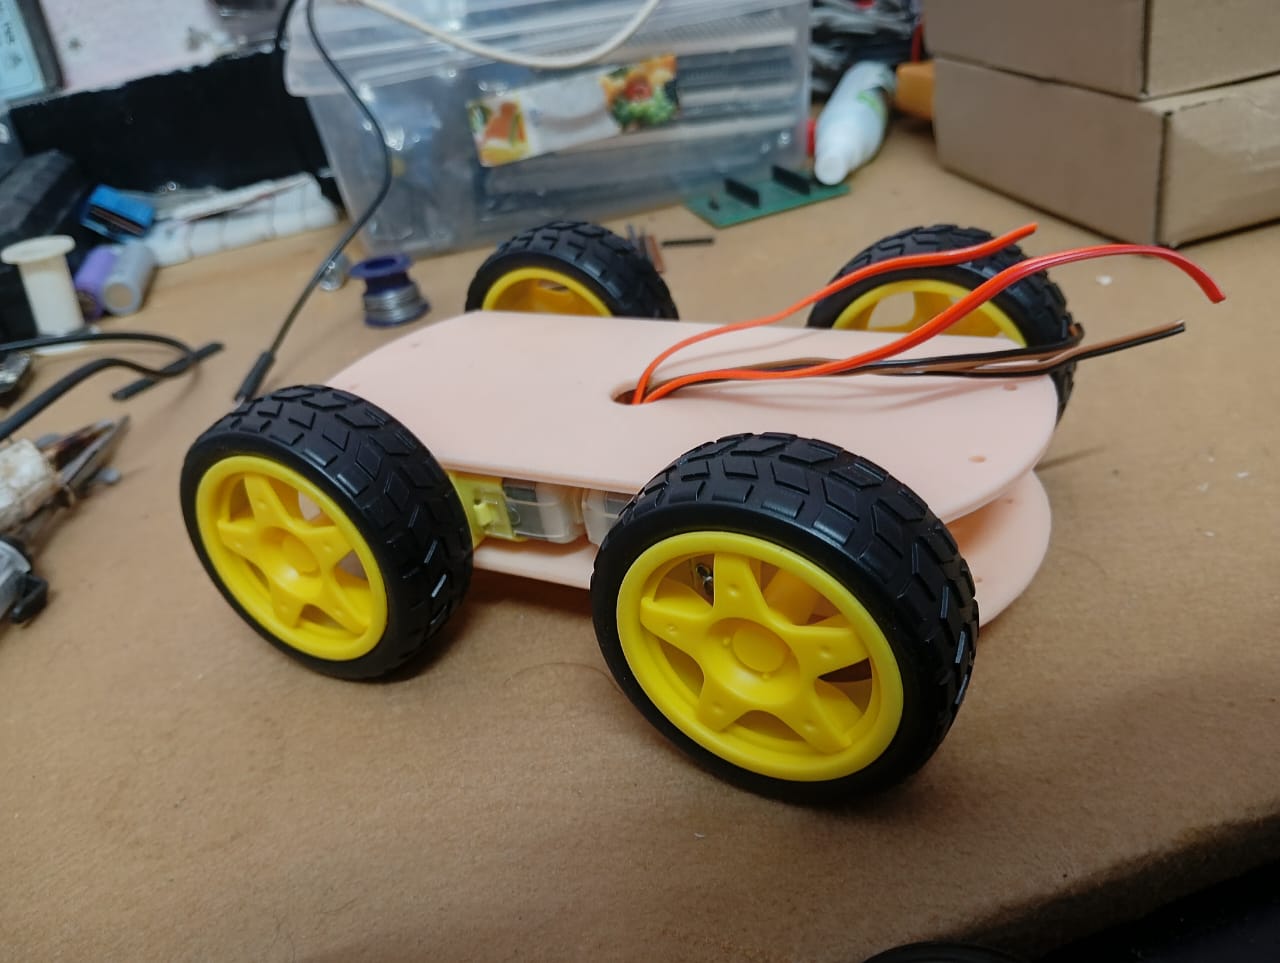
After completing the printing, I started assembling the car. I collected all the necessary components. Below, I am showing the output of my design using the 3D printer and also assembling the motors to the car.
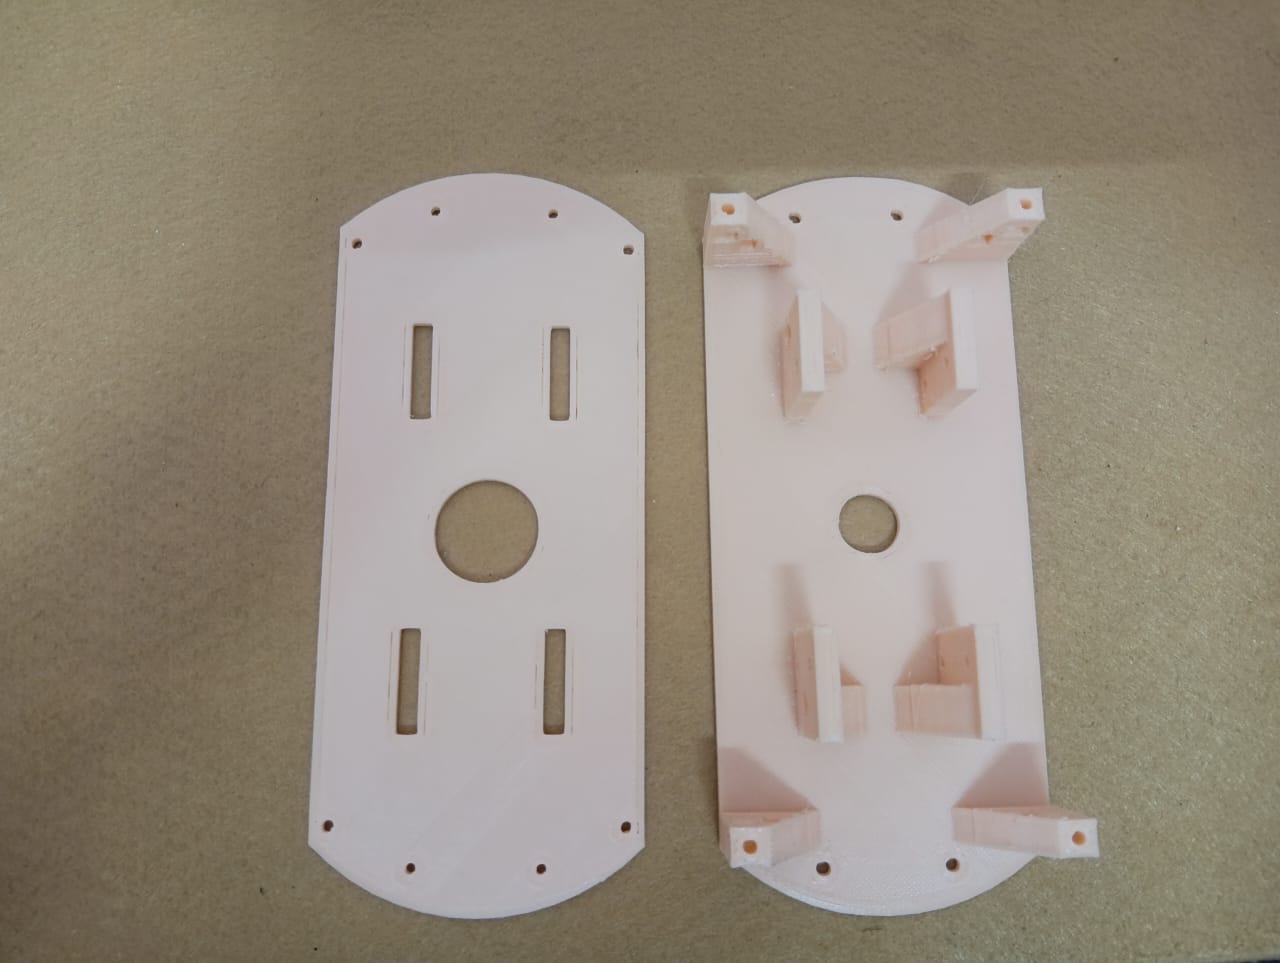
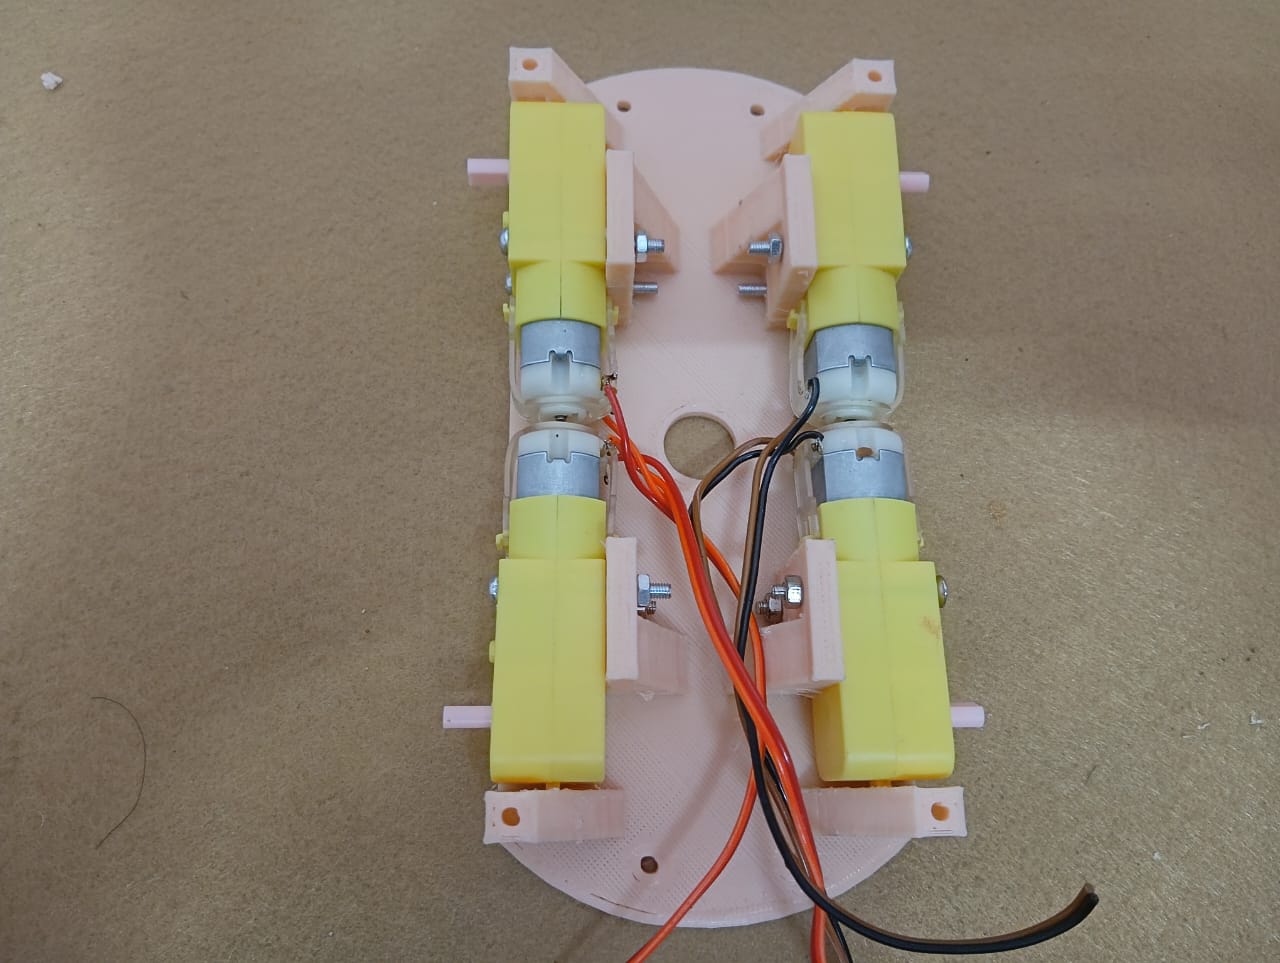
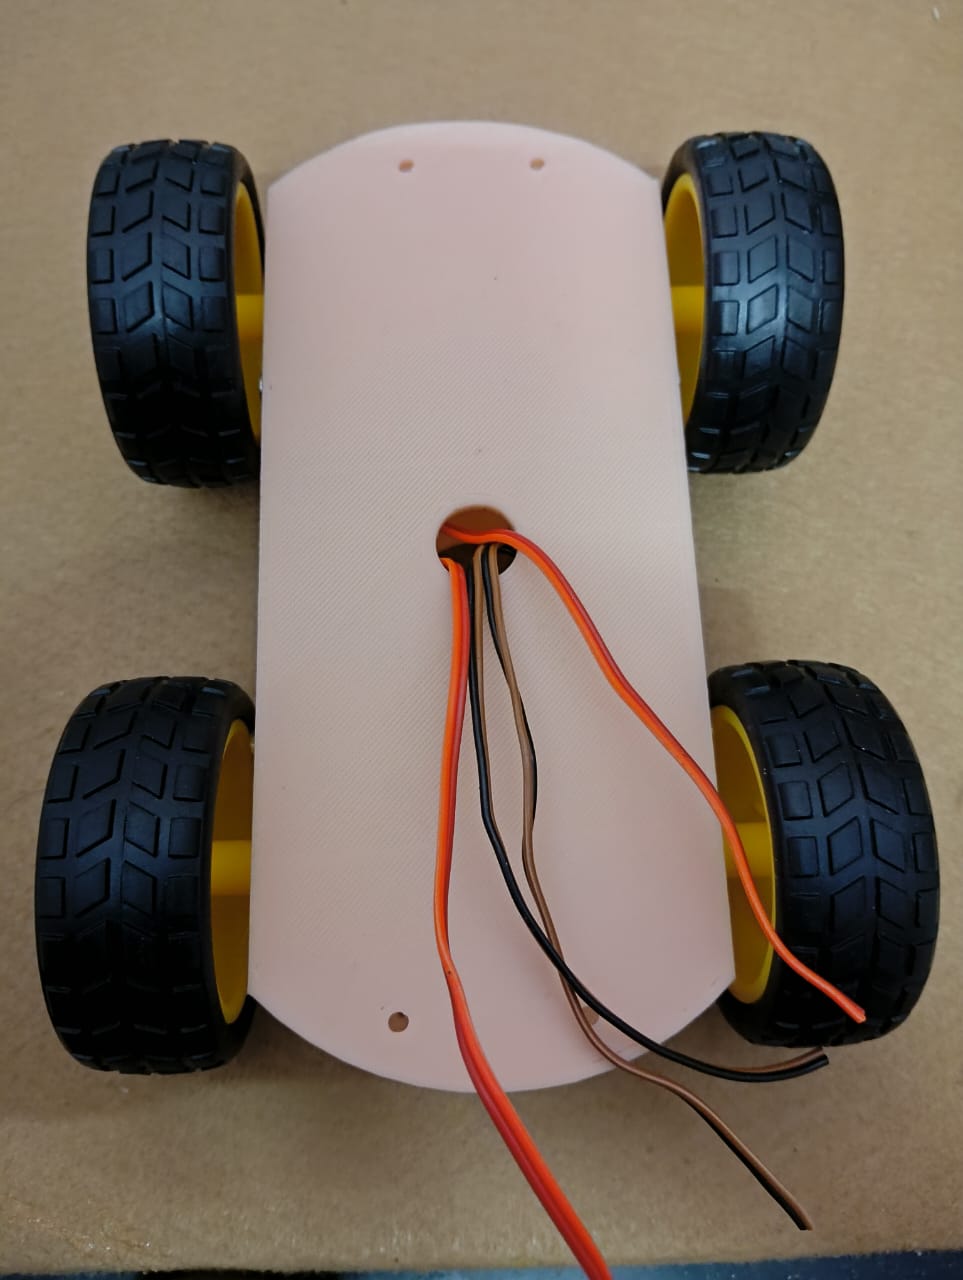
After successfully assembling the motors, I fixed the bottom plate using a press-fit method and pulled out all the wires for the connections.
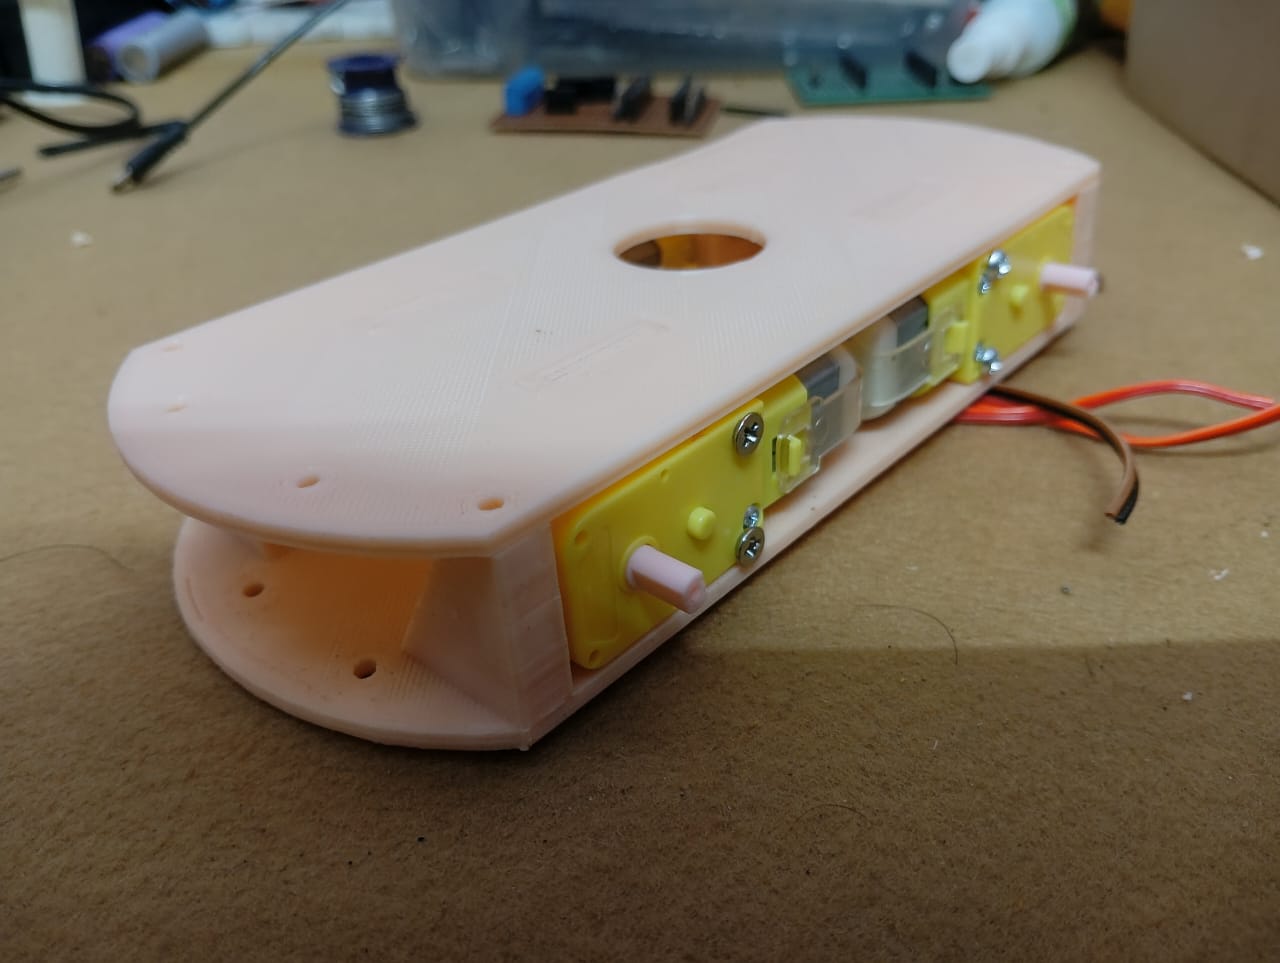
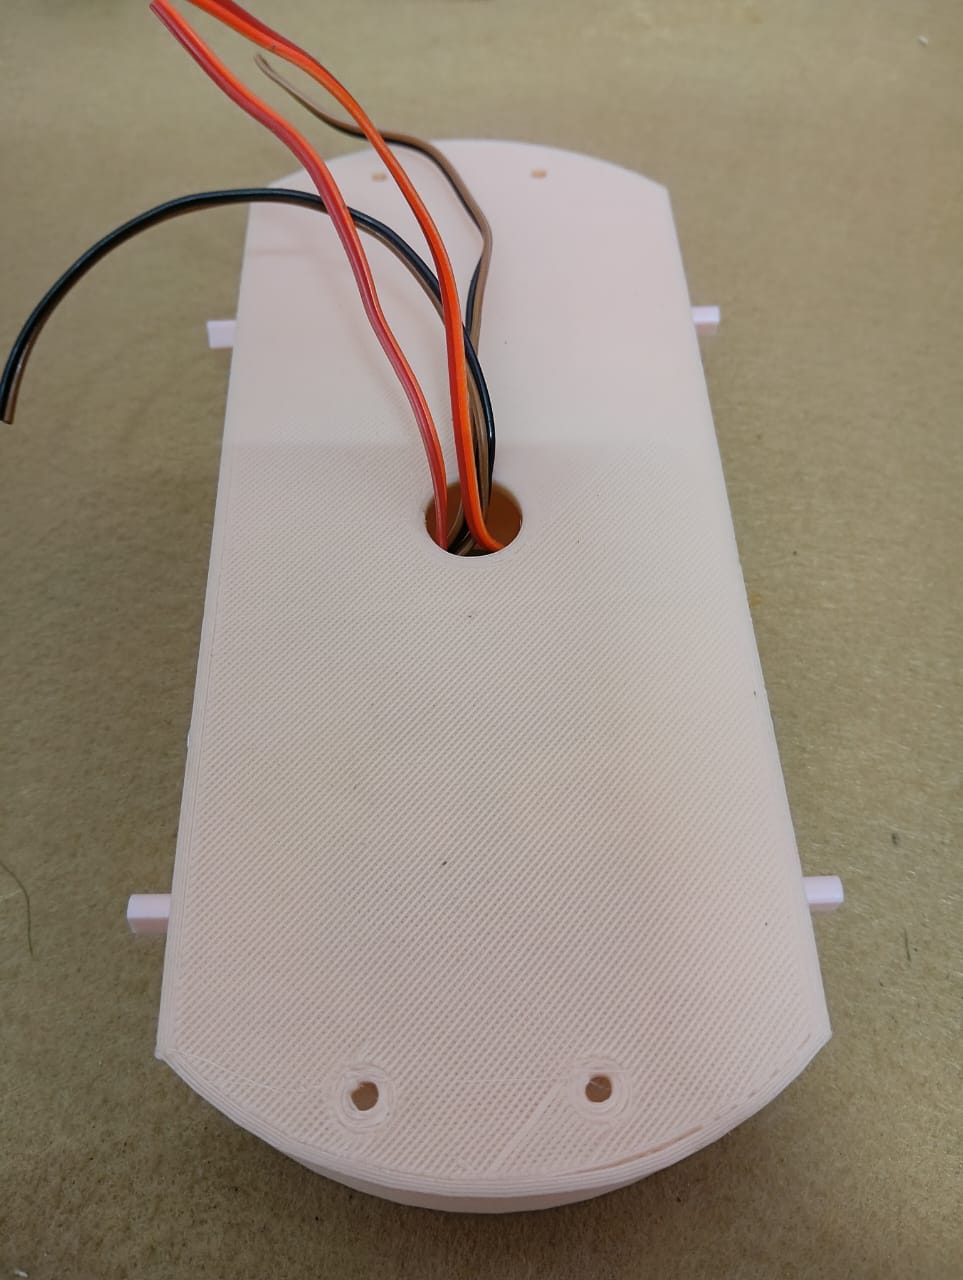
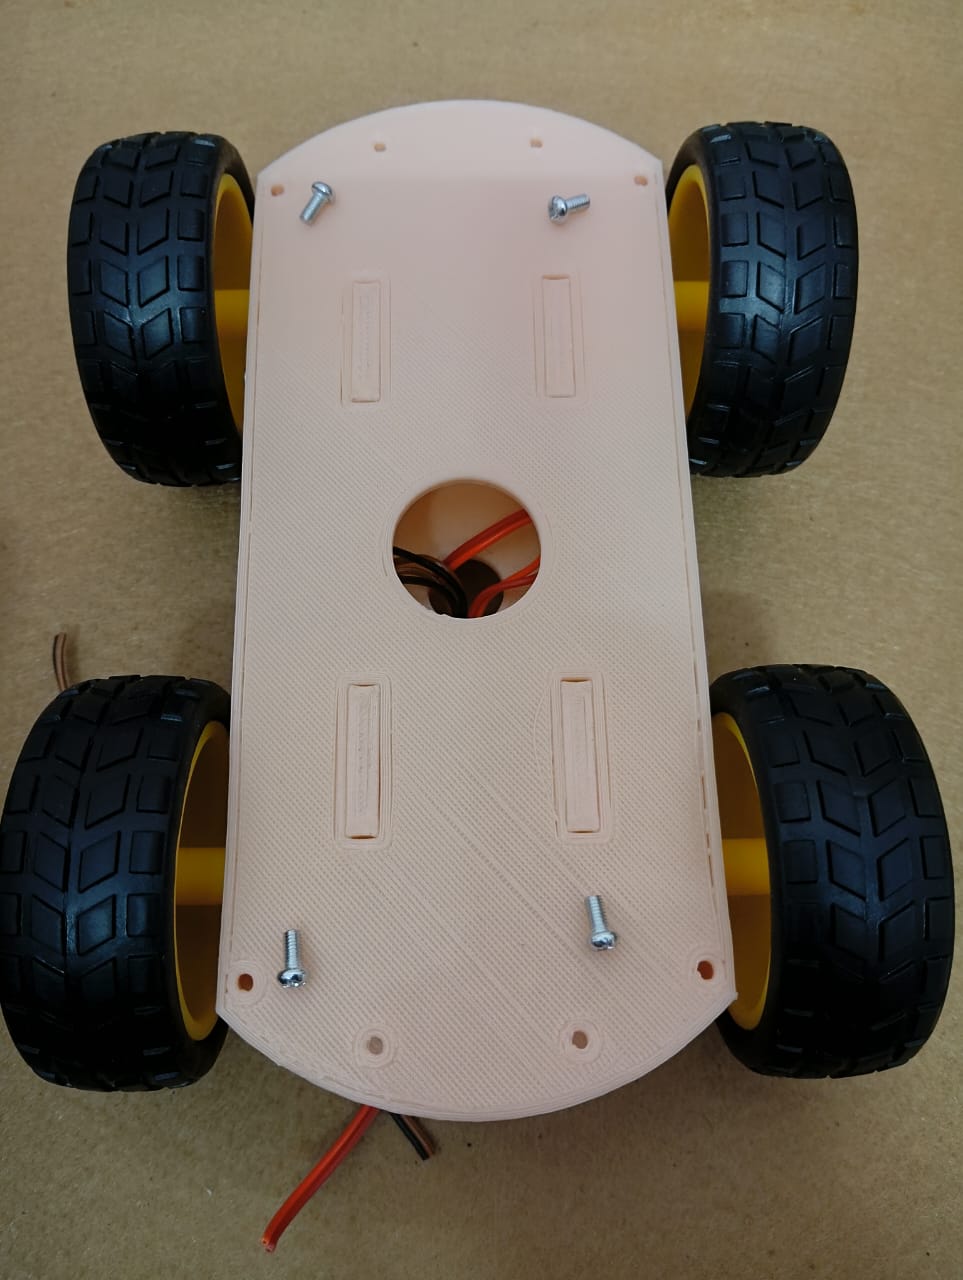
After that, I fixed the bottom plate using screws and attached the wheels to the car. I also connected some electronic components for testing basic movements. In the image below, I am showing the setup.
Finally, in the image below, I am showing the final assembly of my 3D-printed car with all the electronics.

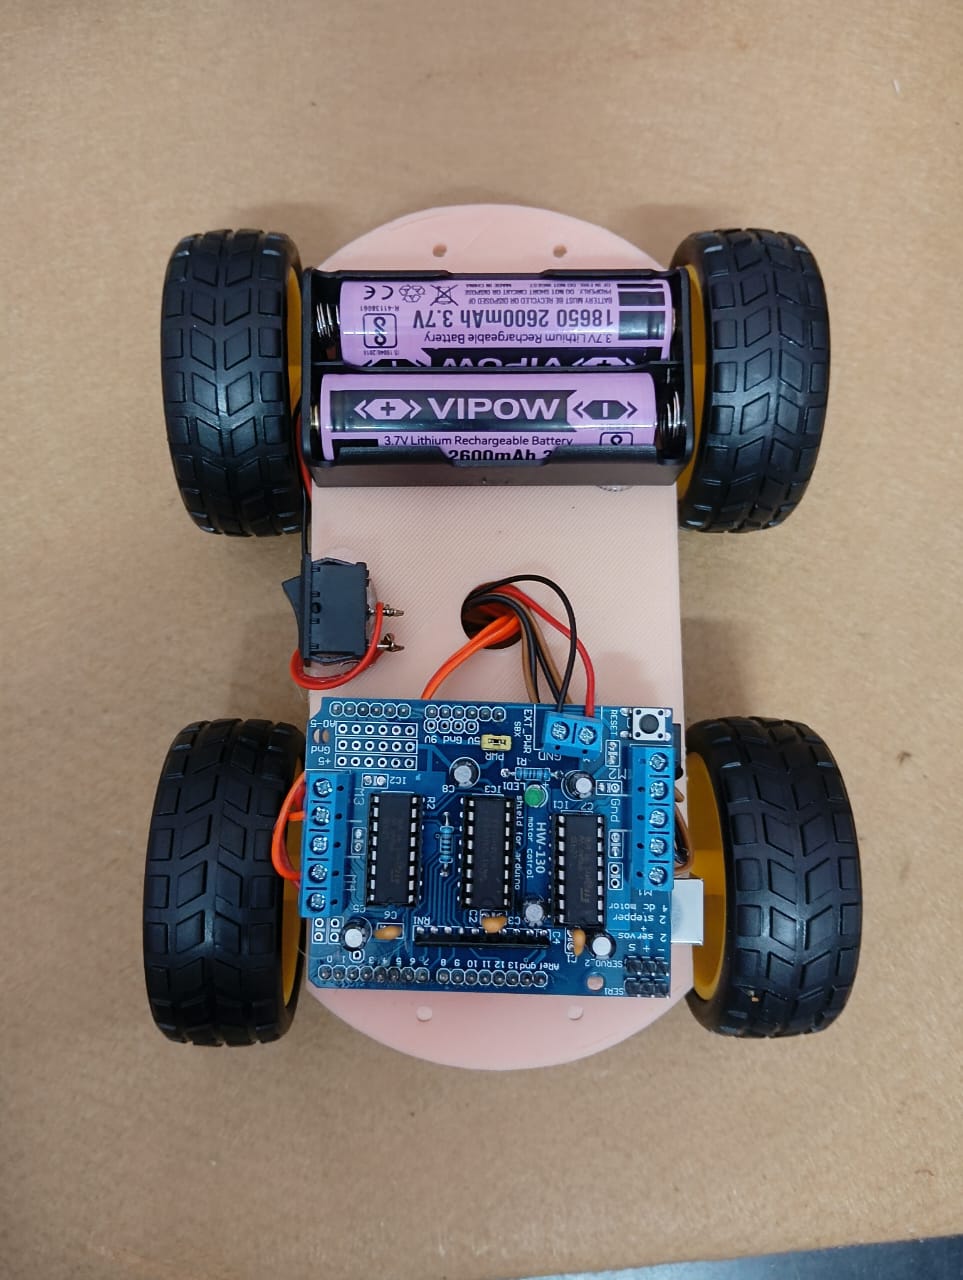
Note: Here, I am not showing or explaining any coding part because this assignment focuses on 3D printing. However, I tested whether my design fits properly and checked for any errors. If you want the code, I will provide it at the end of this assignment.
Here is the working video of my 3D-printed car in action.
3D Scanning :
3D scanning is the process of analyzing a real-world object or environment to collect three dimensional data of its shape and possibly its appearance (e.g. color). The collected data can then be used to construct digital 3D models.
A 3D scanner can be based on many different technologies, each with its own limitations, advantages and costs. Many limitations in the kind of objects that can be digitized are still present. For example, optical technology may encounter difficulties with dark, shiny, reflective or transparent objects while industrial computed tomography scanning, structured-light 3D scanners, LiDAR and Time Of Flight 3D Scanners can be used to construct digital 3D models, without destructive testing.
Click here to read more.
For the Scanning i am using the WIDAR pro mobile application:
Click here for WIDAR pro mobile applicationFirst, I downloaded the application on my mobile and signed in using my details. Below, I am showing the screenshots.


After that, I started a new scan. With the help of my friend, I began scanning myself. Below, I am showing how I scanned my image.


I took nearly 50 pictures. When I rotated the phone, it automatically captured the images. After that, I clicked on 'Generate 3D Model'. In the image below, I am showing that step.


After processing, it took some time to generate the 3D object. Once completed, I saw my 3D object on the screen. Below, I am showing the image.

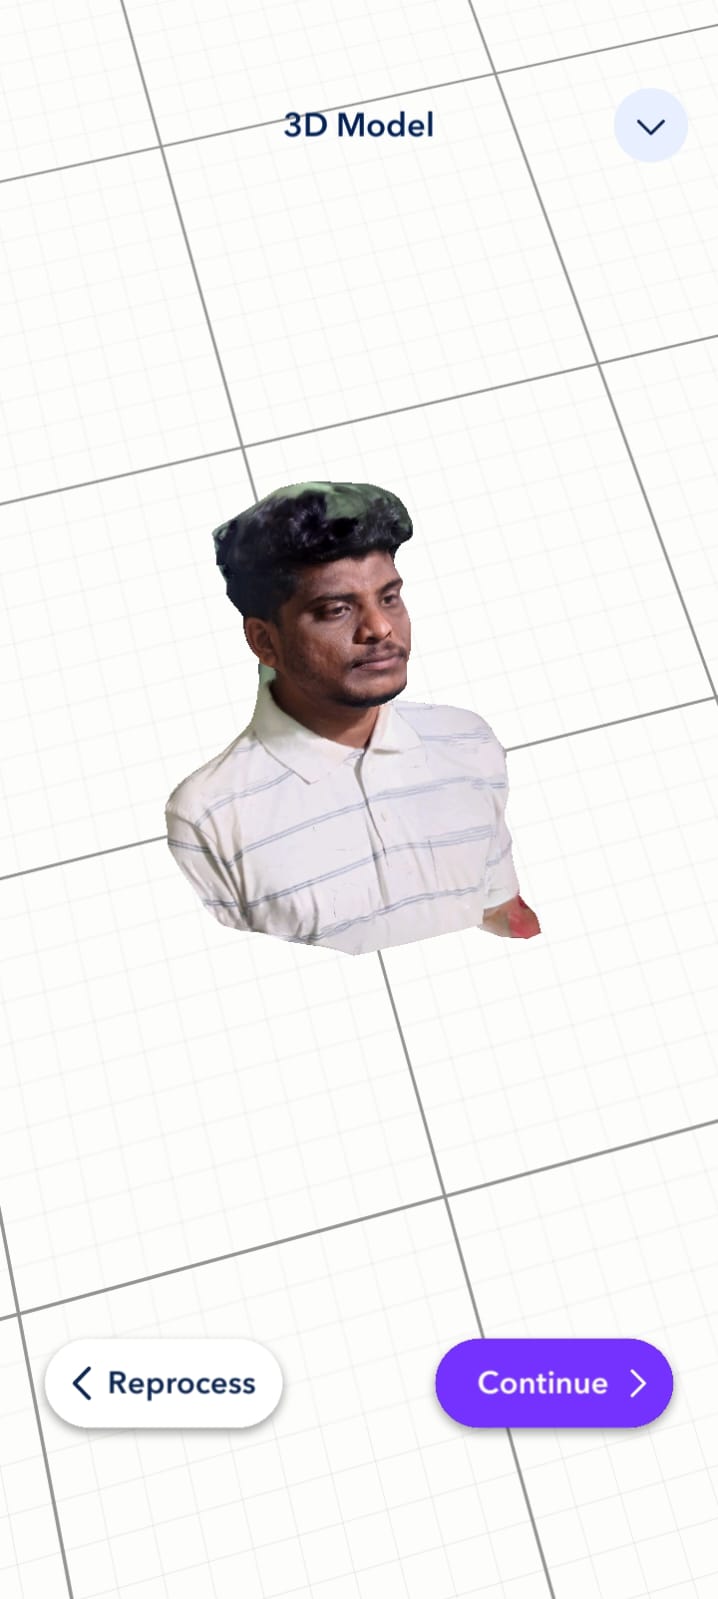
Below, I am sharing one more result showing how it was created. The output came out with very good clarity. After that, I tried to download the STL format.
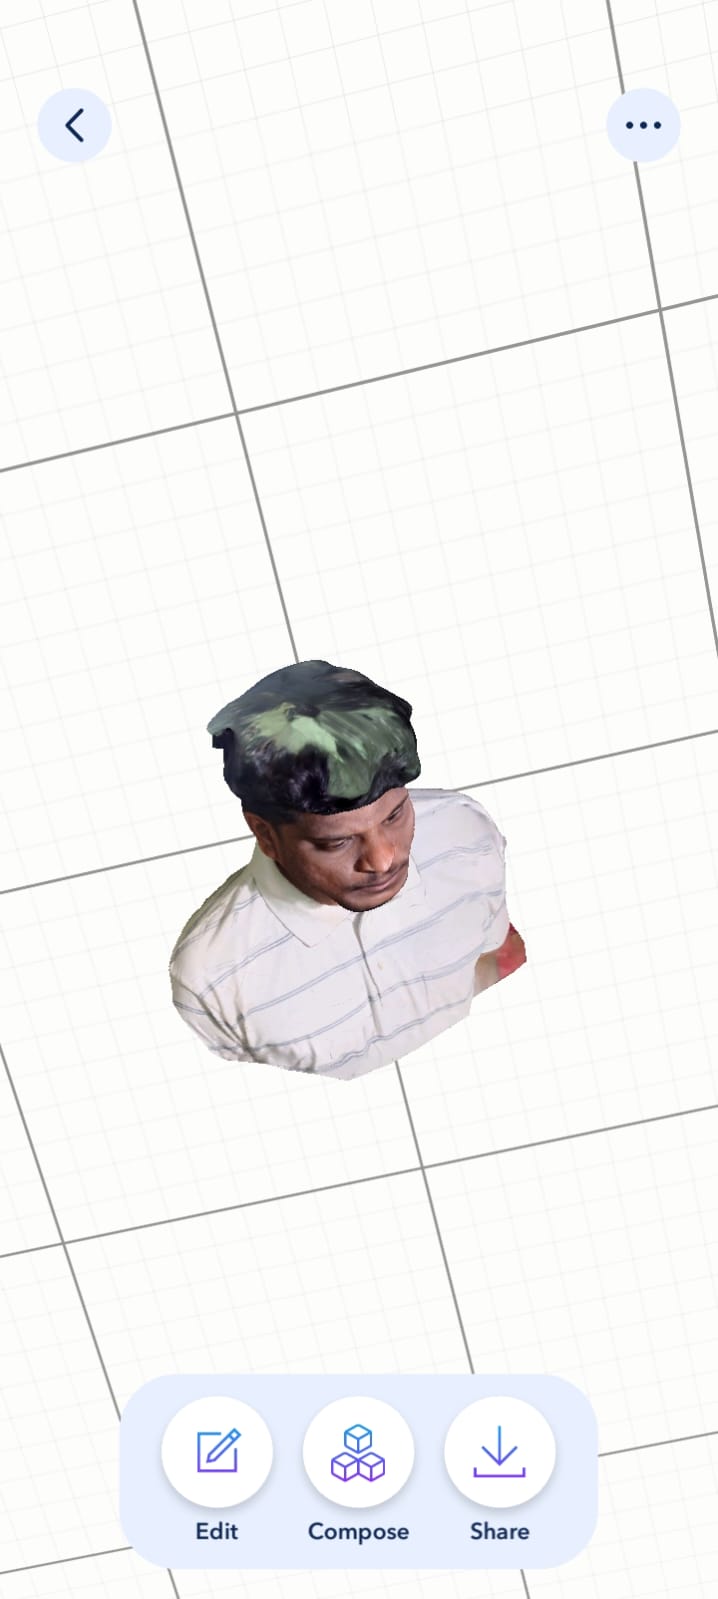
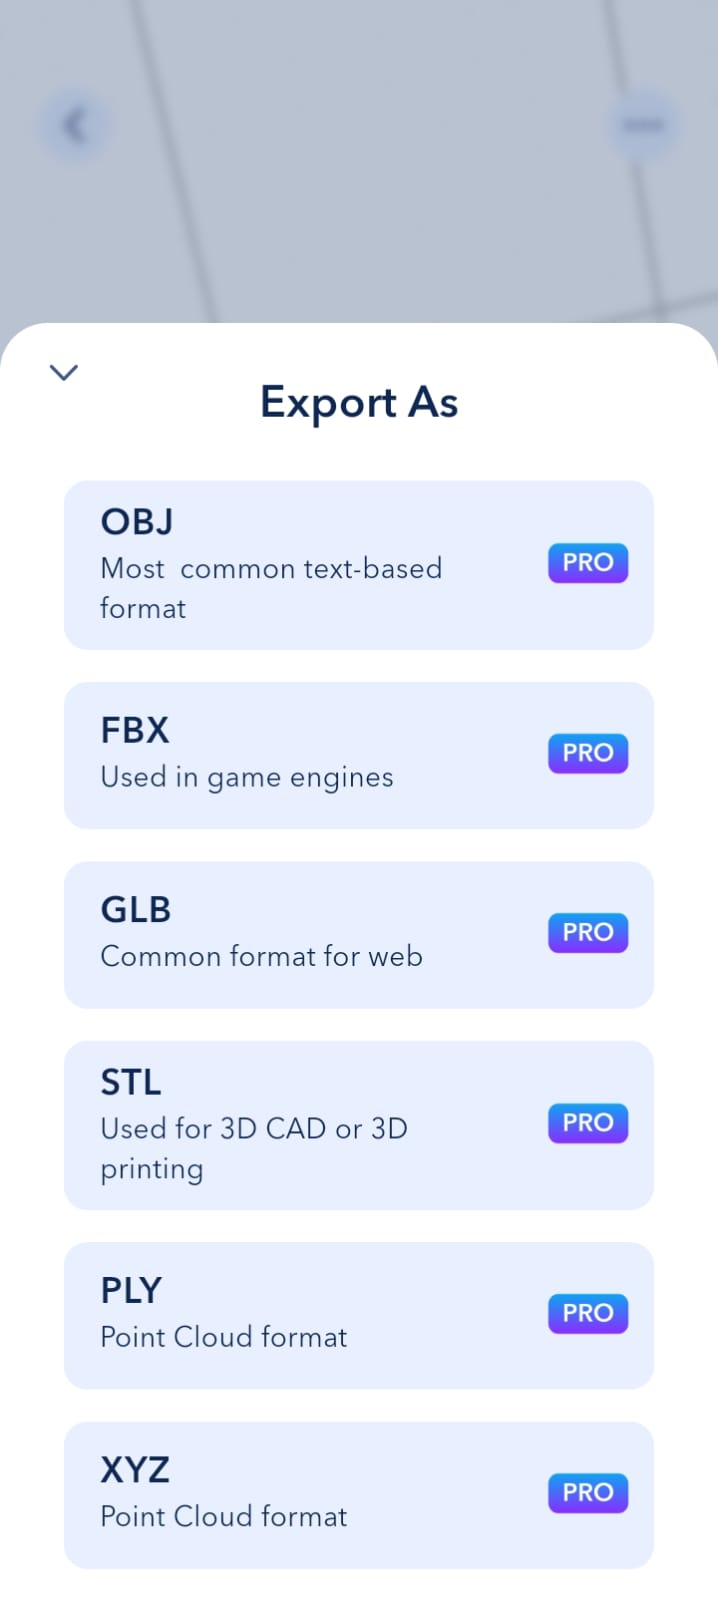
The file is not able to be downloaded because it is a paid version, and there is no other option available to do that. I’m very sorry to say this.

Positive Outcomes:
In this assignment, I gained new knowledge and hands-on experience with 3D printing. I explored different approaches in design and experimented creatively. My design skills have improved through practice and iteration. I now understand the complete process of 3D printing, from modeling to execution. This experience boosted my confidence in using 3D printing tools and techniques.
Challenges Encountered:
In this assignment, I did not face any major challenges overall. The process went smoothly with minor adjustments during design and printing.