Group Assignment 5: 3D scanning and printing
Group assignment
Test the design rules for your 3D printer
3D Printing:
Using the additive manufacturing technique known as 3D printing, objects are created by layering materials according to a digital design. The process builds the object layer by layer in a circular pattern using a hexa cannon and prints it with ABS or PLA filament. One common method, Fused Deposition Modeling (FDM), involves melting plastic filament through a heated nozzle to form layers that gradually shape the final structure.
3D Scanning :
3D scanning captures the shape and details of real-world objects to create accurate digital 3D models. It utilizes various techniques, such as laser scanning, structured light, and photogrammetry, to record an object's geometry and texture. By converting physical objects into digital formats like STL and OBJ, 3D scanning facilitates replication and design modifications.
Materials used
PLA
ABS,
PETG,
Nylon
Uses of 3D Printing
Manufacturing - For design and product development.
Manufacturing and production - Making customized products on a small scale.
Automobile - Manufacturing robust automobiles.
FlashForge Guider IIS 3D Printer
I thoroughly read the 3D printer manual and familiarized myself with its components (as shown in the attached photos). I successfully set up the 3D printer and installed its software. Additionally, I downloaded and installed FlashPrint 5 from the official website to explore its features.
Task
We tested design files on a 3D printer as part of our group project. Using online resources, we obtained STL files for various test parameters, including clearance, overhang, thickness, angle, bridging, anisotropy, dimension, surface finish, freeform, and infill. Our objective was to conduct these tests, determine the optimal values for each parameter, and derive meaningful conclusions, which are detailed below.
G code generate Process
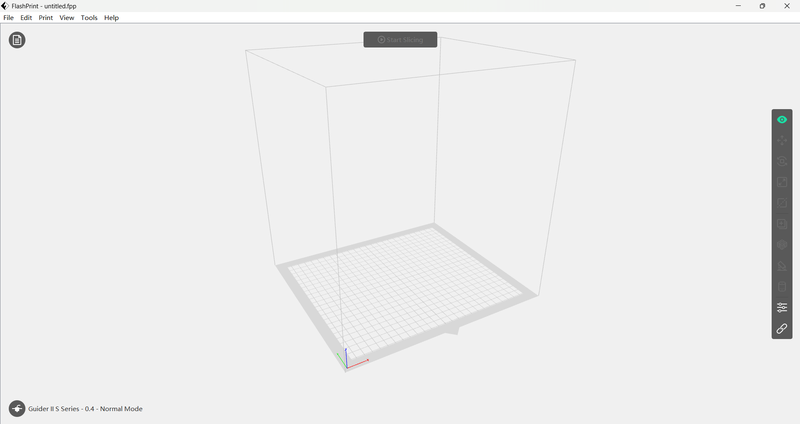
First, we open FlashPrint 5
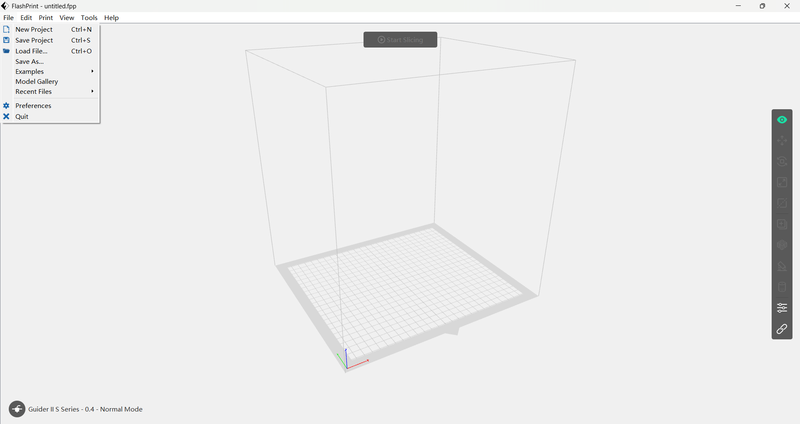
Load the file by clicking on the New
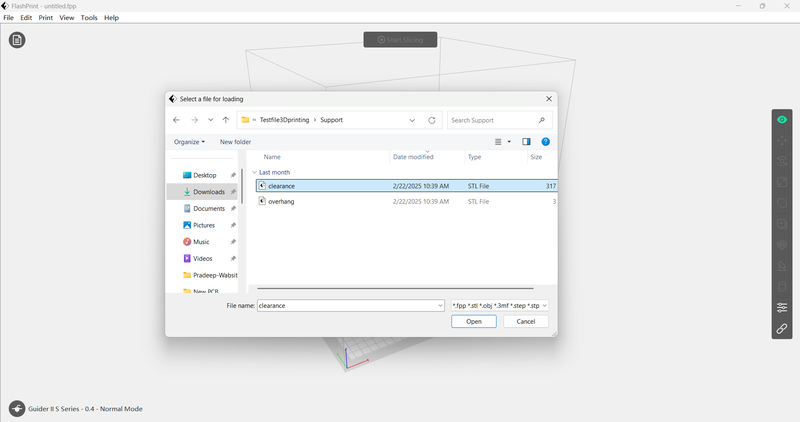
Selected the file
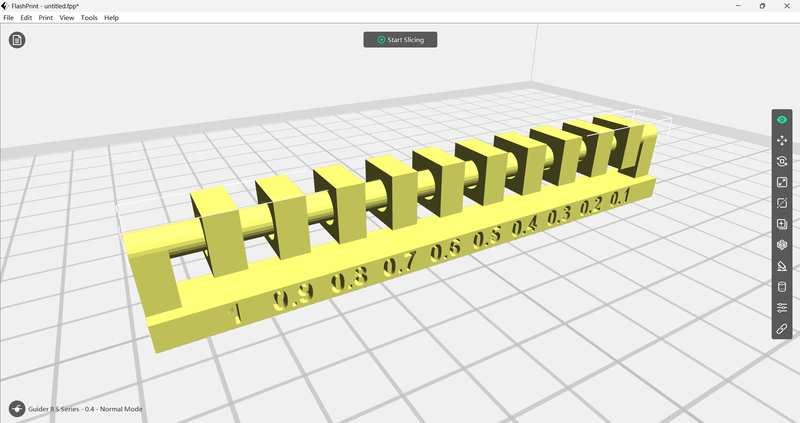
Select the slicing
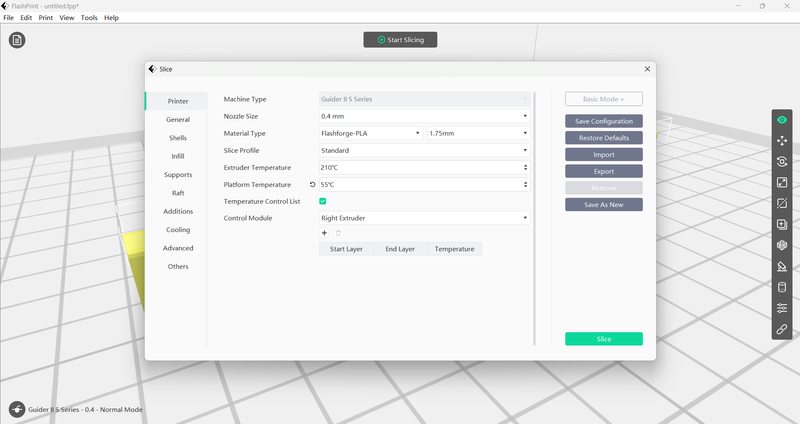
Set the temperature of the platform to 30 to 55
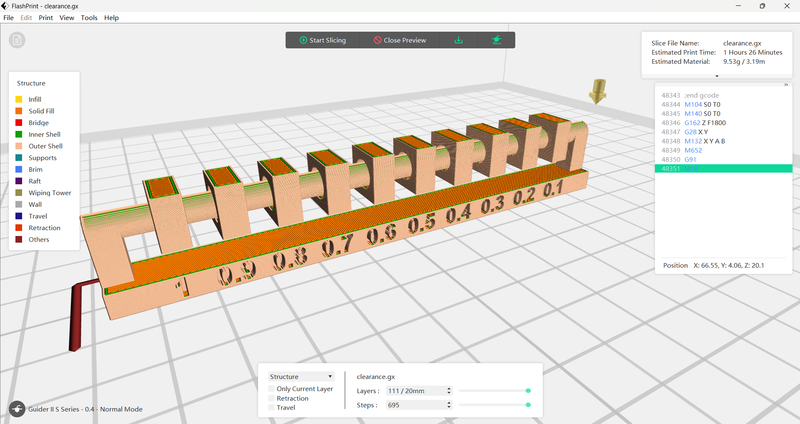
Click to slice - Click for the download button
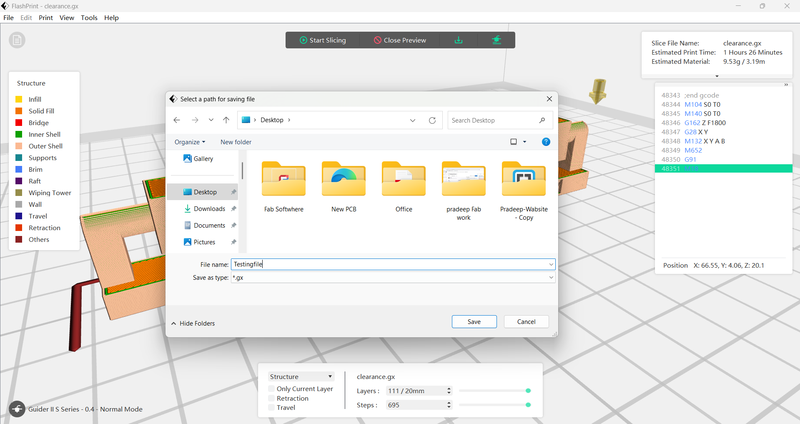
Save the G code, after we build the the by 3d printer
Test Result
Clearance

|
Clearance Test Results:
Objects with a gap of 0.3–0.2–0.1 mm remain stable and do not move.
Objects with a gap of 0.4–0.5–0.6 mm exhibit slight movement but remain securely positioned.
Objects with a gap of 0.7–0.8–0.9–1.0 mm show significant movement and greater flexibility.
Clearance testing requires supports to accurately measure the stability and movement of the object. These supports help stabilize the object, preventing unintended movement and ensuring precise clearance test results.
|
Overhang

|
Overhang Test Result
In 3D printing, overhangs require proper support to ensure accurate and successful prints.
If the overhang angle exceeds a certain limit (typically 45°), the print may deform or fail.
Adding adequate support structures helps maintain the design's shape and quality.
Without support, excessive overhangs can lead to sagging or incomplete prints.
Thickness

Thickness Test Result
In 3D printing, the wall thickness should be at least 2 to 3 mm to ensure a strong and well-formed structure.
If the thickness is reduced to 1 mm or less, the wall may not form properly.
Adjust the wall thickness based on the object’s requirements to minimize material wastage and reduce printing time.
|
Angle

Angle Test Result
A 3D printer operates most efficiently at angles between 30° and 90°.
At angles below 30° (10°-30°), the printer struggles to form proper layers, resulting in printing issues.
Printing at lower angles may lead to excess material buildup underneath.
To achieve optimal results, it is recommended to design with angles between 30° and 90°.
Anisotropy

Anisotropy Test Result
If we create this type of design, no additional support is required.
The 3D printer functions efficiently at a 90-degree angle.
|
Bridging

Bridging Test Results
Reduce the bridging length and use thicker walls for better support on longer bridges.
Avoid thin and long bridges to prevent breakage.
|
Dimension

Dimension Test Results
Ensure that objects fit within the printer's build volume.
Take into account strength, printability, and material spacing tolerances.
|
Finish

Finish Test Result
The quality and smoothness of both the outer and inner surfaces impact the overall surface finish.
Using a higher resolution results in smoother parts; however, it also increases print time, as the finishing process takes longer.
Free

|
Free Test Result
A thickness of 1-3 mm is suitable for use.
If increased beyond 2-3 mm, it may not support the design effectively. Even if it does, it will result in material wastage.
Therefore, support structures should be used to minimize material waste and save time.
Infill

|
Infill Test Result
A higher infill percentage increases strength but consumes more material and time.
A lower infill percentage saves time and material but may reduce strength
.
|
Conclusion
Mastering 3D printing design rules involves a continuous process of experimentation and refinement. By carefully considering clearance, overhangs, wall thickness, infill, angles, orientation, and material efficiency, you can consistently produce high-quality, functional 3D-printed objects. And by understanding the effects that each setting has on the final product, you can greatly improve your 3d printing experience.


