Personal Reflection: What I Learned Group assignment
This wasn't my first experience with laser cutting, but working collaboratively in this lab environment definitely deepened my understanding of the process. Having used similar equipment before, I approached this assignment with some confidence, but still discovered valuable new insights.
Despite my previous experience, I was surprised by how significantly the 0.2mm kerf affected our joint designs. I've always compensated for kerf in my designs, but seeing the dramatic difference it made in our press-fit tests reinforced the importance of precise measurement rather than estimation.
Key insights from this experience:
- Systematic parameter testing: Creating a proper test matrix yielded more reliable results than my previous trial-and-error approach
- Material variations: Even within the same material type, I noticed batch differences requiring parameter adjustments
- Team knowledge sharing: Learning from others' experiences with different materials expanded my fabrication repertoire
- Documentation discipline: Recording our findings created a valuable reference that will improve future projects
This assignment reinforced fundamentals I already knew while introducing new methodologies I'll definitely incorporate into my workflow. The collaborative testing approach particularly enhanced my understanding of how to optimize cutting parameters across different materials and thicknesses.
How I Created a Parametric Design Plus a Transformer Logo
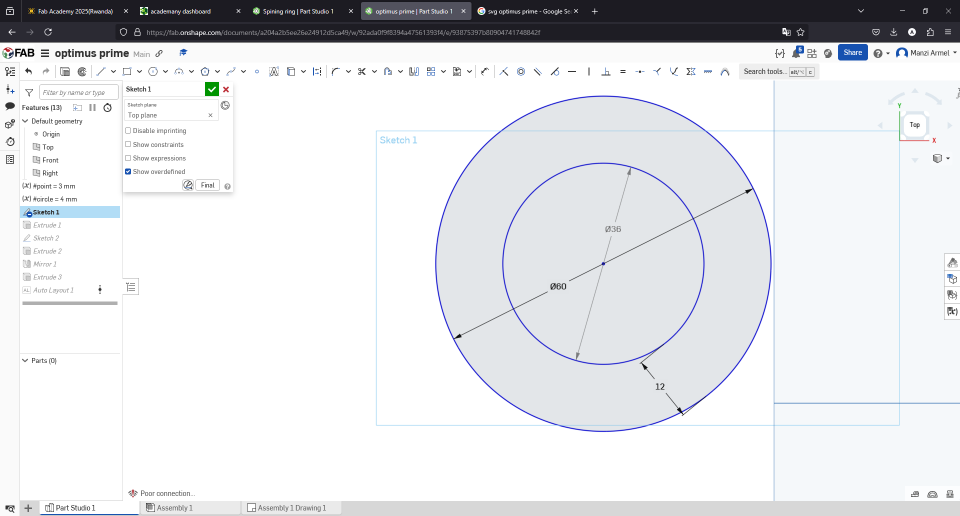
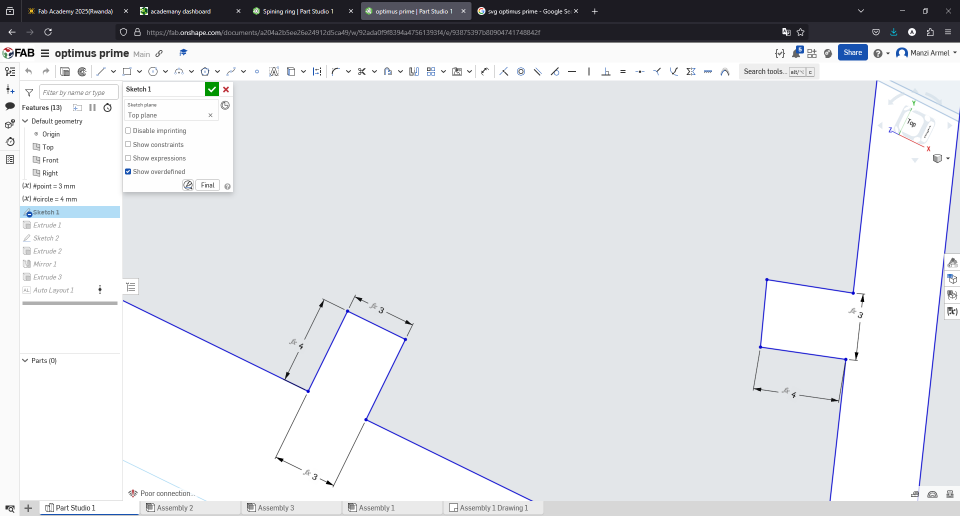
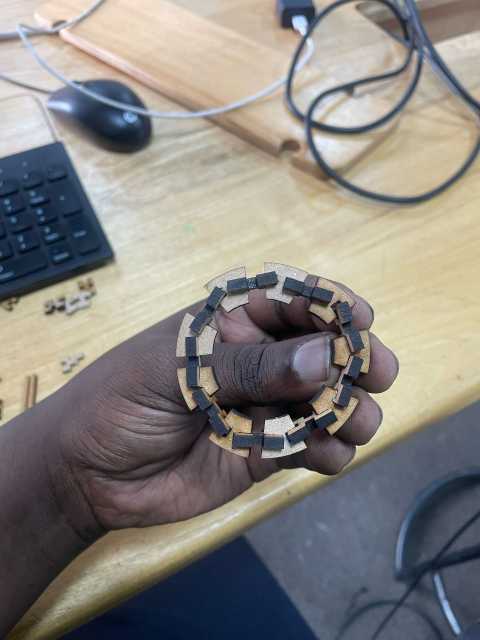
I started by creating two circles that will allow me to create a curved part for curved assembling
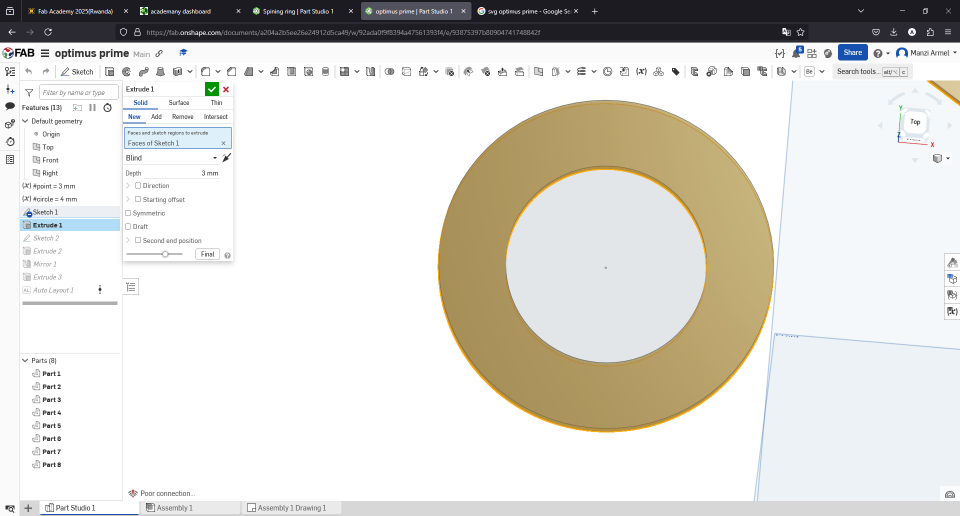
Extruded the two circles using 3mm cause I will use an MDF with a thickness of 3mm
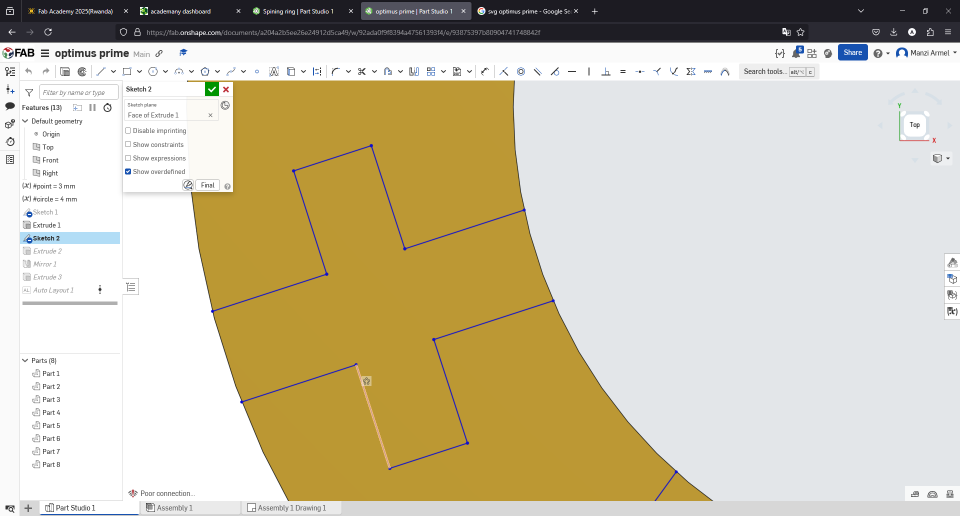
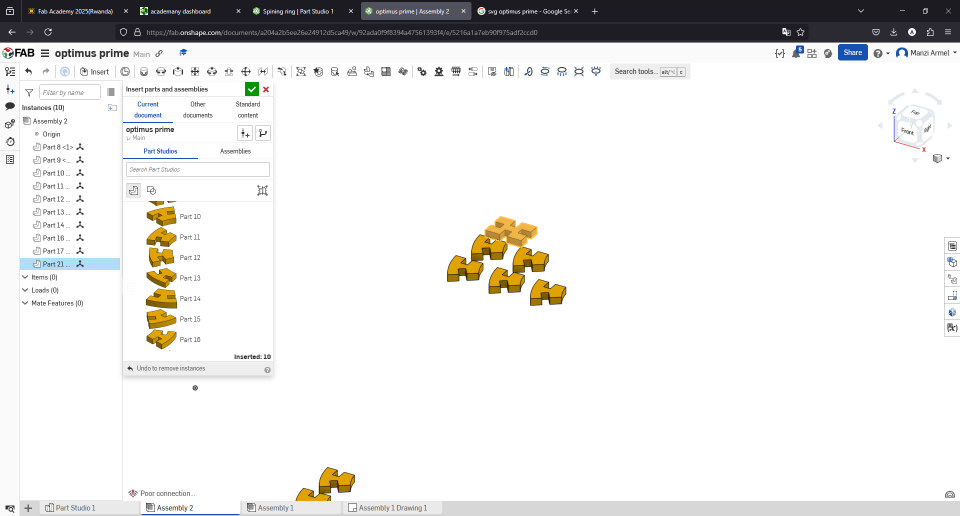
Then I created 3mm by 12mm rectangles (I created a value point = 3mm) to make the joints crossed to each other to create a cross
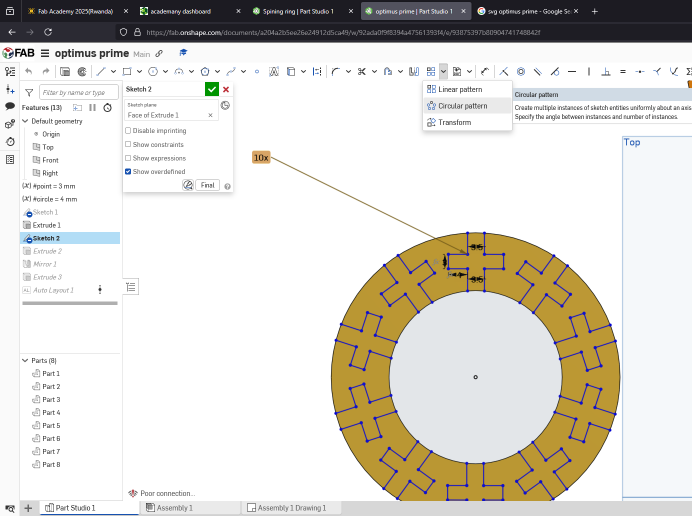
Used Circular pattern for the cross 10 times
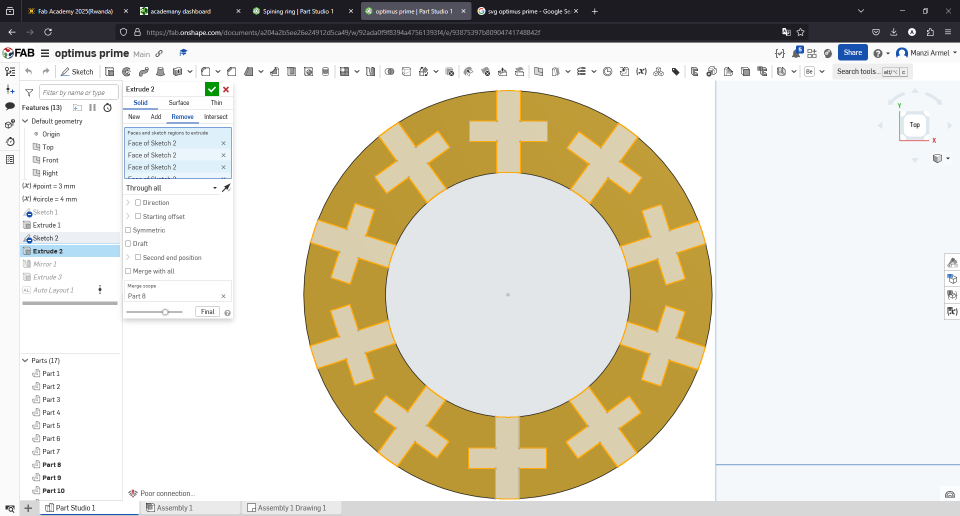
Then I extruded by removing the cross
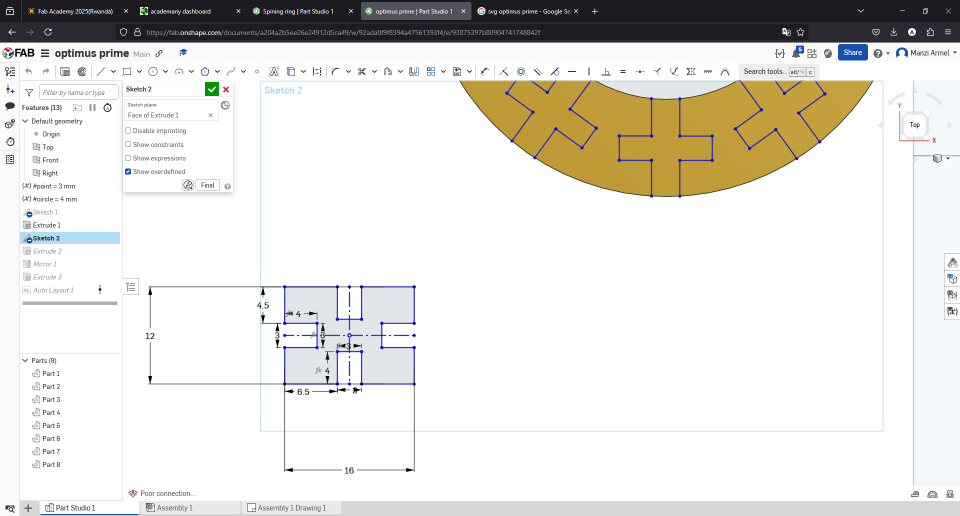
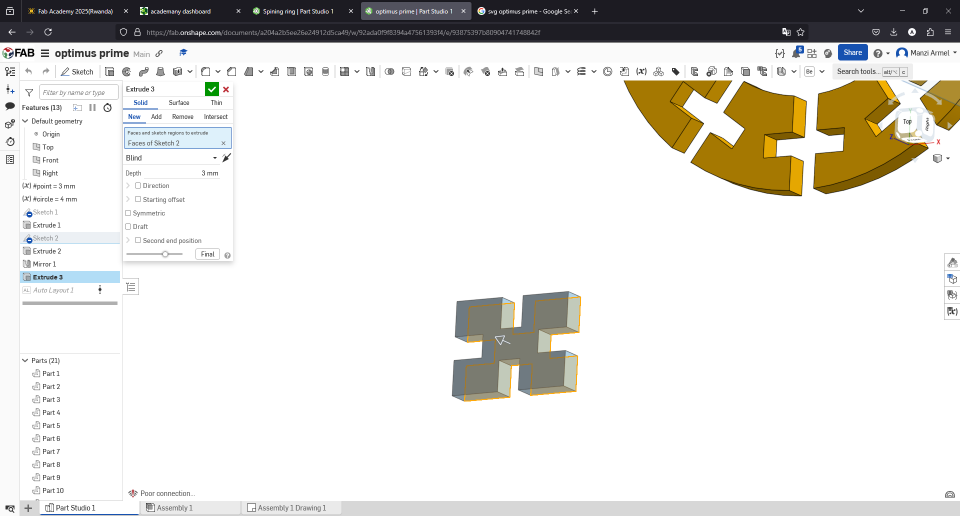
Created rectangle joints 12 by 16mm, using the same value of 3mm created a joint on each line of the rectangle
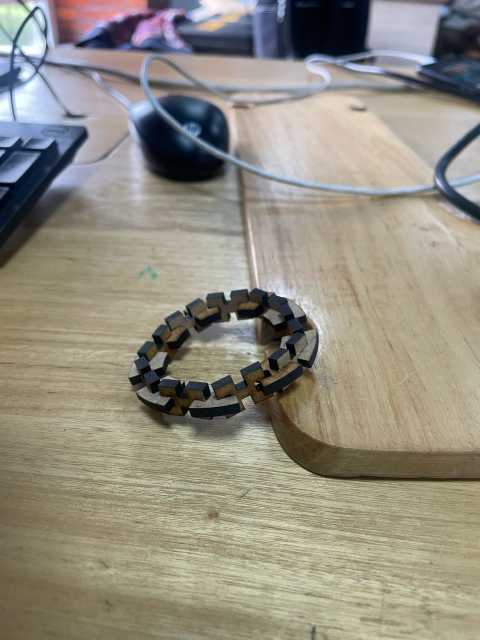
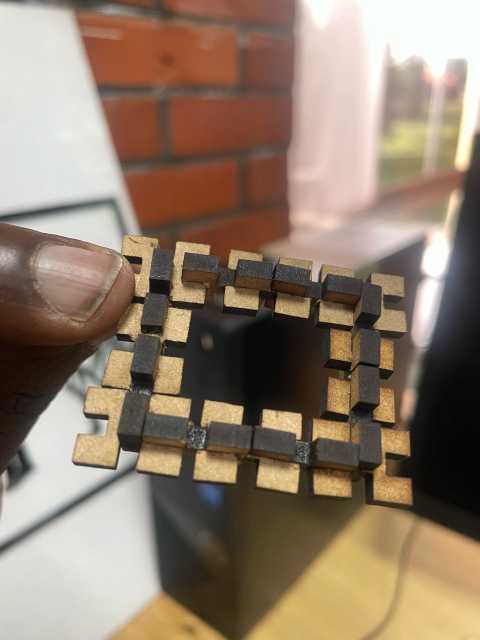
Here is the second part
Assembling started for these two parts
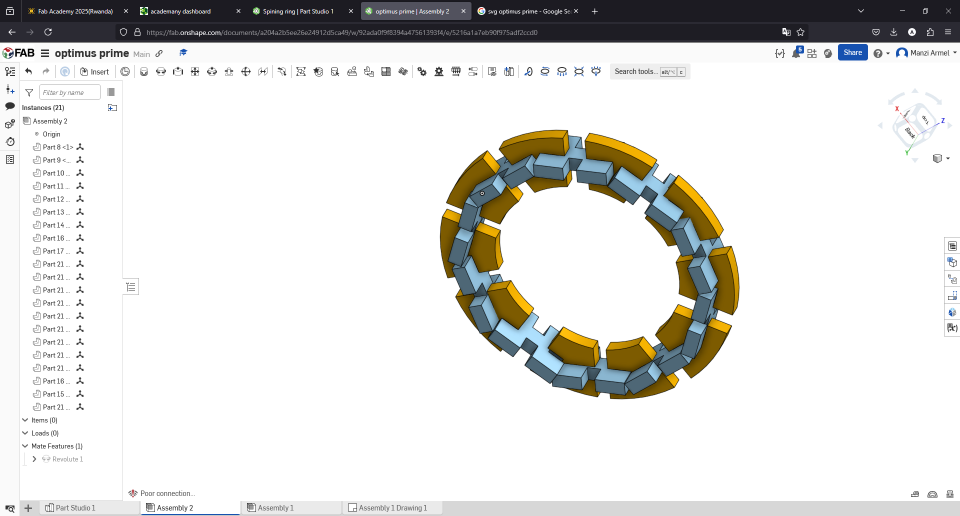
Assembly in progress
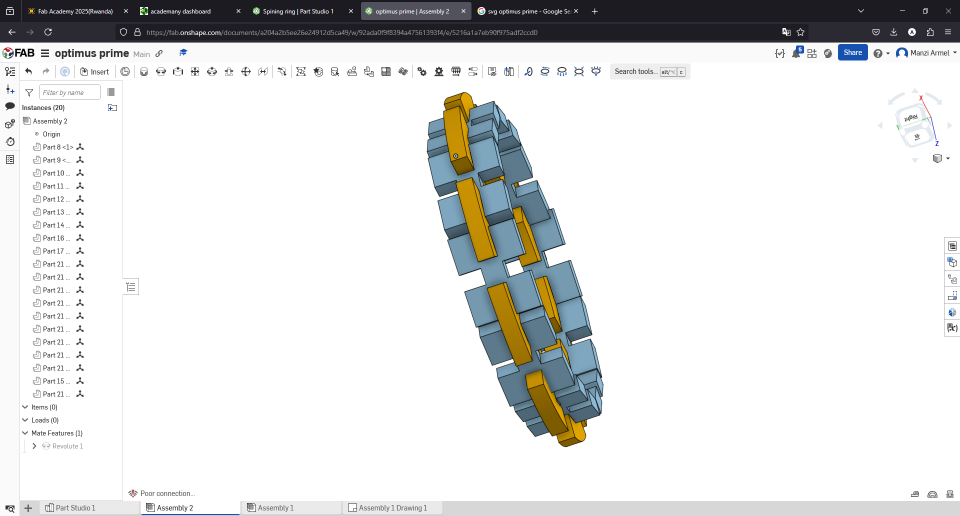
Completed assembly
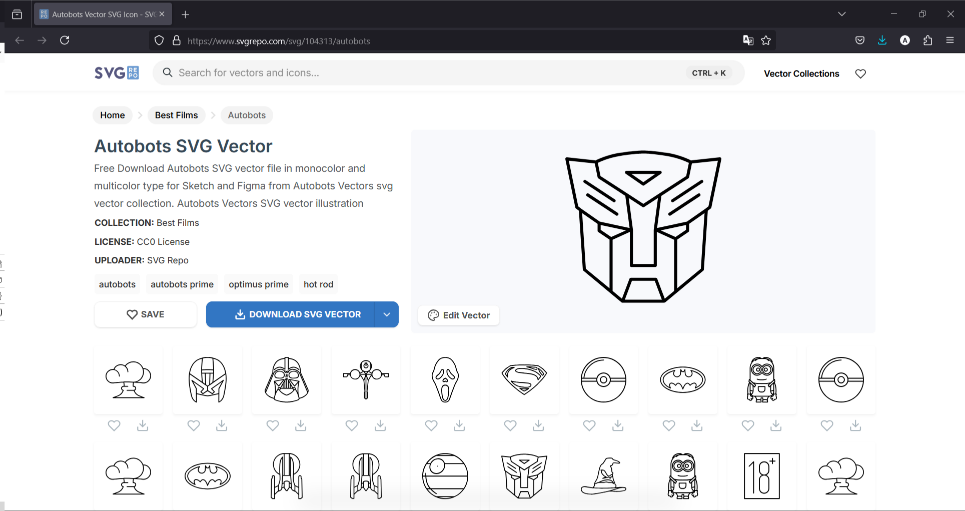
For the Autobots logo, I started by downloading the SVG of the logo here is the link
Then created rectangles of 3mm by 4mm to make joints for the parts of the Autobots logo
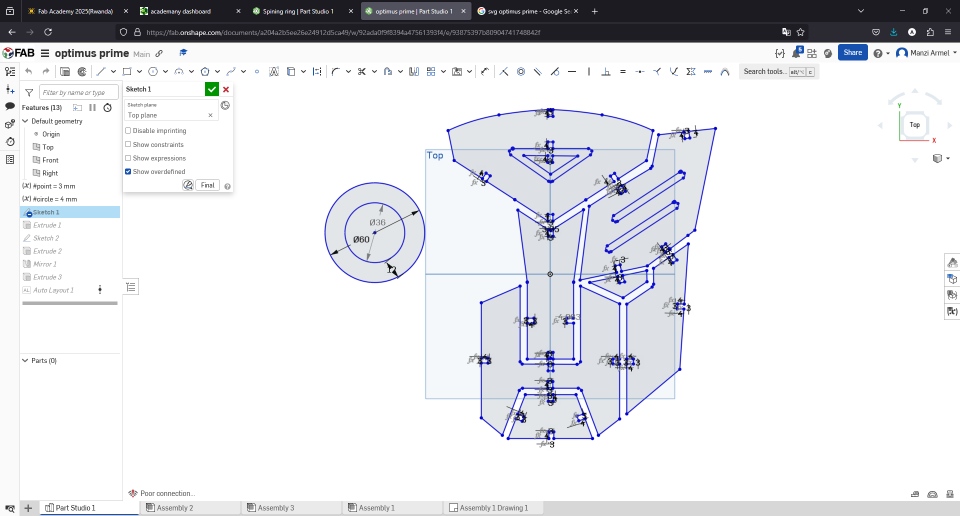
And separated the parts of the Autobots SVG so that I can transform them with the joints
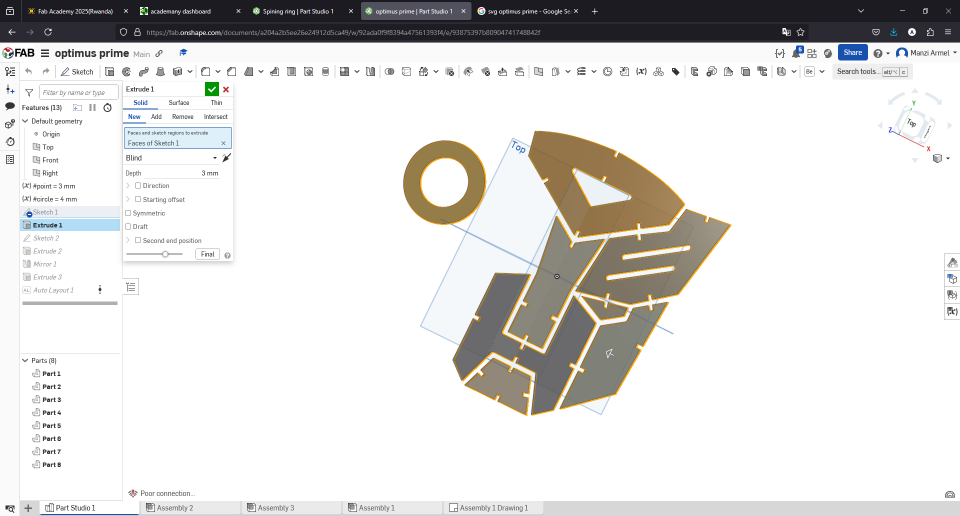
Extruded the parts
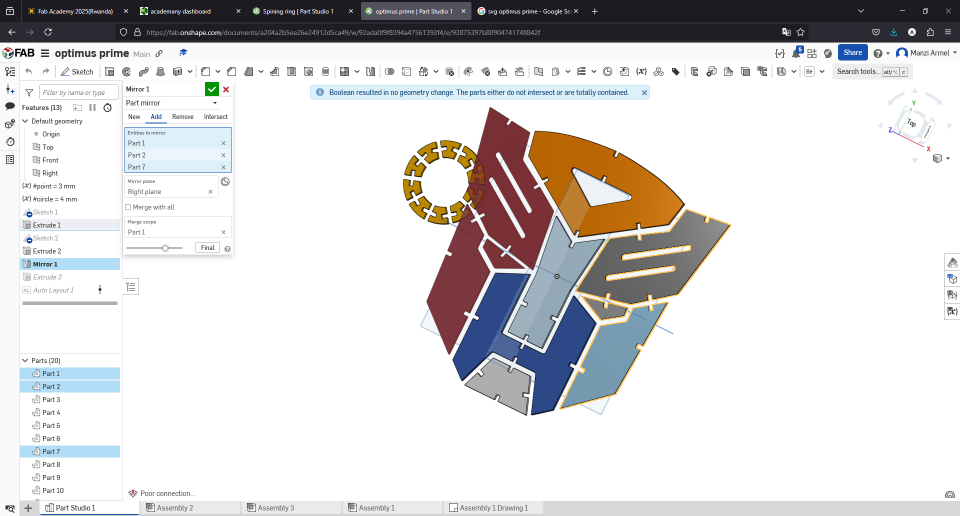
Used mirror to copy the parts for the other side of the face
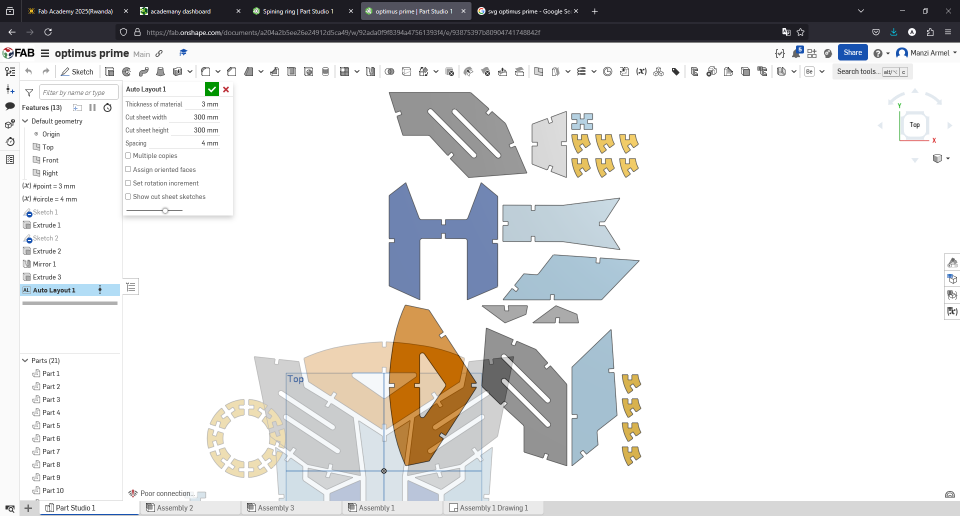
Used the autolayout to prepare the laser cutting
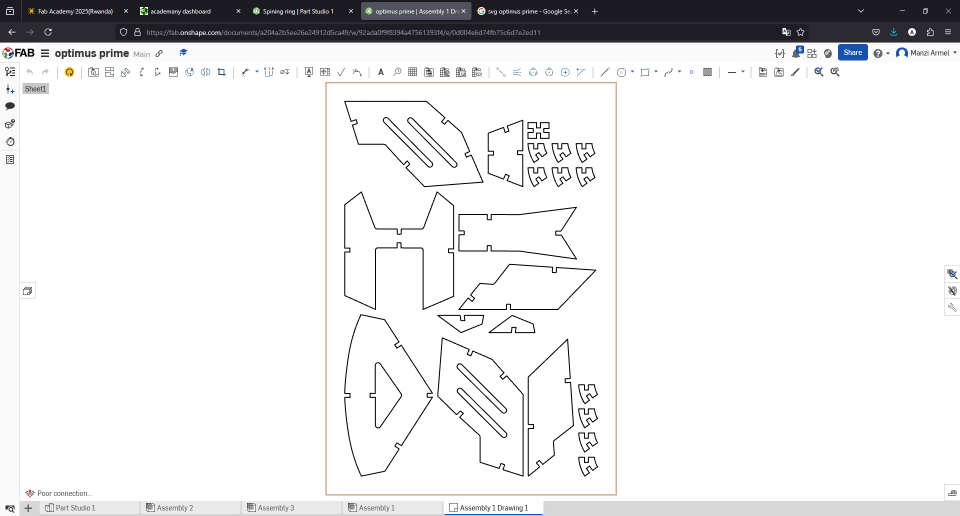
This is the drawing, I extracted it as DXF to use it in our laser cutter interface
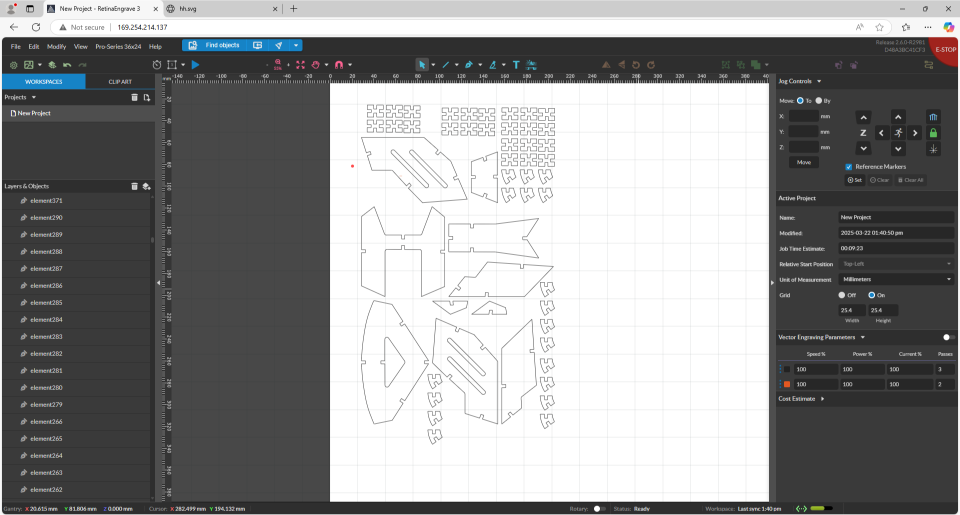
Imported the DXF into the laser cutter interface and I had to copy the joint parts as you can see
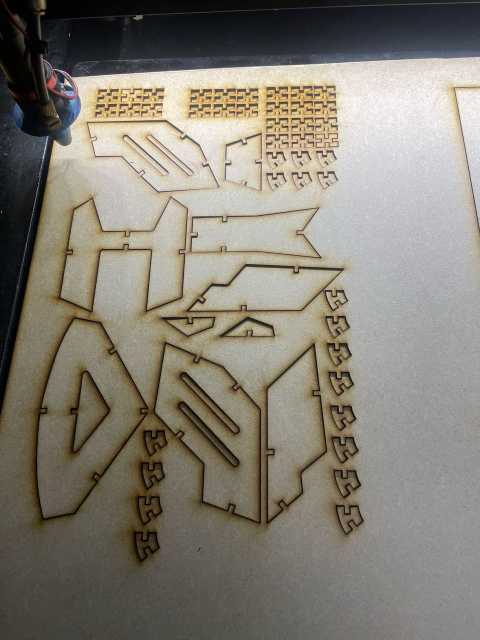
Laser cutter has finished cutting
1st shape
Assembly in progress
2nd shape

Autobots logo joint
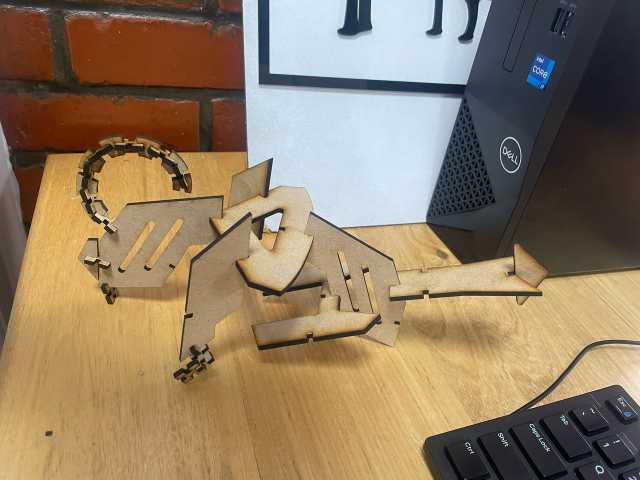
Transformed into something
How I Created Push/Pull Door Signs Using Vinyl Cutter
how I made push and pull door signs using a vinyl cutter. I'll walk you through my process and show you exactly what I did.
Getting Started
- First thing I did was to familiarize myself with the vinyl cutting machine and its operations
- Downloaded the required software for the vinyl cutter
- Installed the software using the provided CD key
.jpg)
The software interface after installation
Design Process
I started by creating the text elements in the software.
.png)
Creating the text design in the software
.png)
Creating the text design in the software
.png)
Creating the text design in the software
Cutting Process
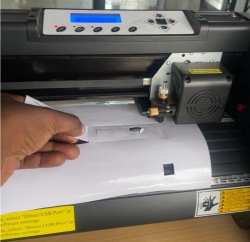
Before the final cut, I performed a test cut to ensure everything was properly set up.
.png)
Results of the test cut showing clean edges
Final Cutting
- Loaded the vinyl material into the machine
- Double-checked all settings
- Initiated the cutting process
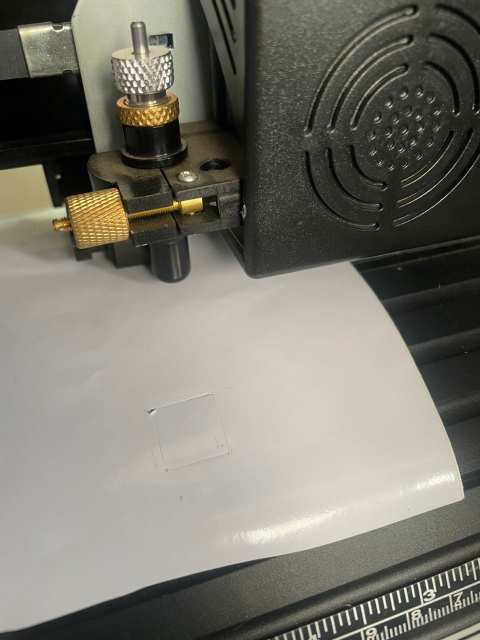
The vinyl test for calibration in action
Application Process
After cutting, I carefully removed the excess vinyl and prepared for application.
Remove the sign
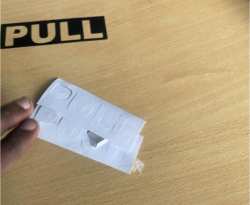
Remove the sign
Final Result
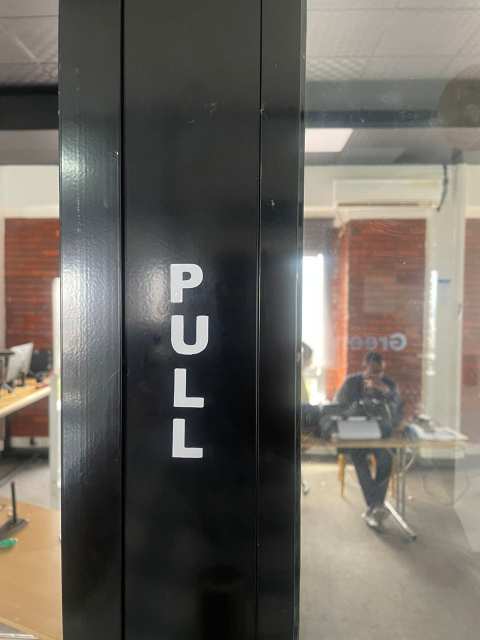
The completed push and pull signs installed on the door
- For original file laser cutter Project Onshape Link
- For original file Project DXF for laser cutting
- For original file Project DXF for Vinyl cutter