Week 17. Wild card week
What I did
I have not used this process in any other week because well, no other process includes heat and vacuum at the same time, with the Target of making a case for something.
This week was a little too messy because of the machine. I decided to do a thermoforming process.
This is basically making a moldable material like PET take the outer shape of anything. This process needs 4 main components
- Raw material
- Heat
- Mold
- Vacuum
The machine will heat the material until it is deforming without breaking, while this is happening you have to place the mold and get the machine ready for the vacuum.
That's the quick explanation, but this has more steps. The design of the has to have some specifications and you have to know how to use the machine.
Let's start with showing a quick video of how does this work.
Some rules
There are many error on that video but let me explain the creation of the mold. There are 5 main things you have to keep in mind while doing the mold
-
The mold can not have 90º walls
The mold has to have at least 3º more on each wall that's supposed to be at 90º. What I'm trying yo explain would be something like this:
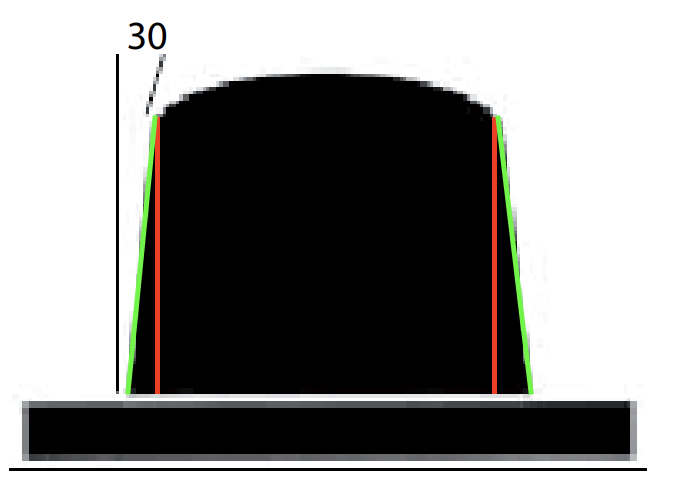
Where the read lines are the 90º degrees walls that shouldn't be. And the green lines are the 93º walls that should be. -
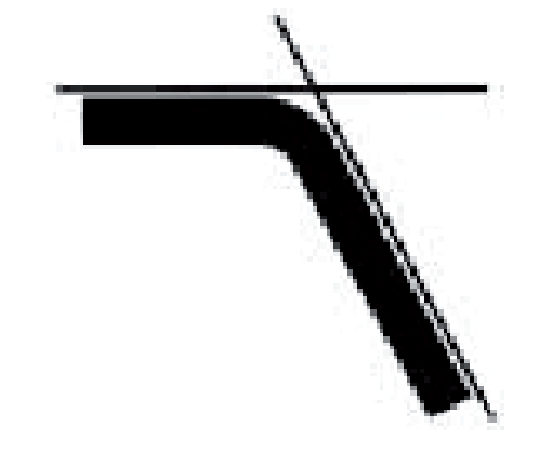
The mold can not have sharp edges
As the raw material starts to melt it becomes weaker and easier to break. So if you place something sharp edges as a mold the material will expand a lot on the edges and it will make weak areas. On the other side, rounding the edges will create stronger edges and a stronger shape on the final product. Besides it reduces the risk of breaking the raw, hot material. Watch the image to se what I'm trying to see.
-
The mold can not have inner angles.
Well it actually could have but you wouldn't be available to that the mold out. -
You have to consider a bigger mold so the original piece fits
If you want to fit the original piece replicating it with the same dimensions would lead to some troubles placing the original on the thermoformed mold. So the recommendation is making the outer shape of the mold 1% bigger than the original piece. This way it will fit perfectly. - Consider some holes so the air can scape completely
When you are making a big mold or with considerable flat surfaces you have to consider holes for the air to flow. Other way you may have air bubbles on the final product and we don't want that.
Go back again to the list to read what does each one mean.
Alright, so those are the 5 basic things to keep in mind while doing the mold, There are a few more, but I'm not making something very precise. So we can keep with this.
Making the mold
Making it was easier than I thought it would be. I went for using MDF and 3D printed parts and as my original part already had no 90º walls I just had to divide it in its faces. As the original design already had angles on its walls I I just had to consider the extra 1%.
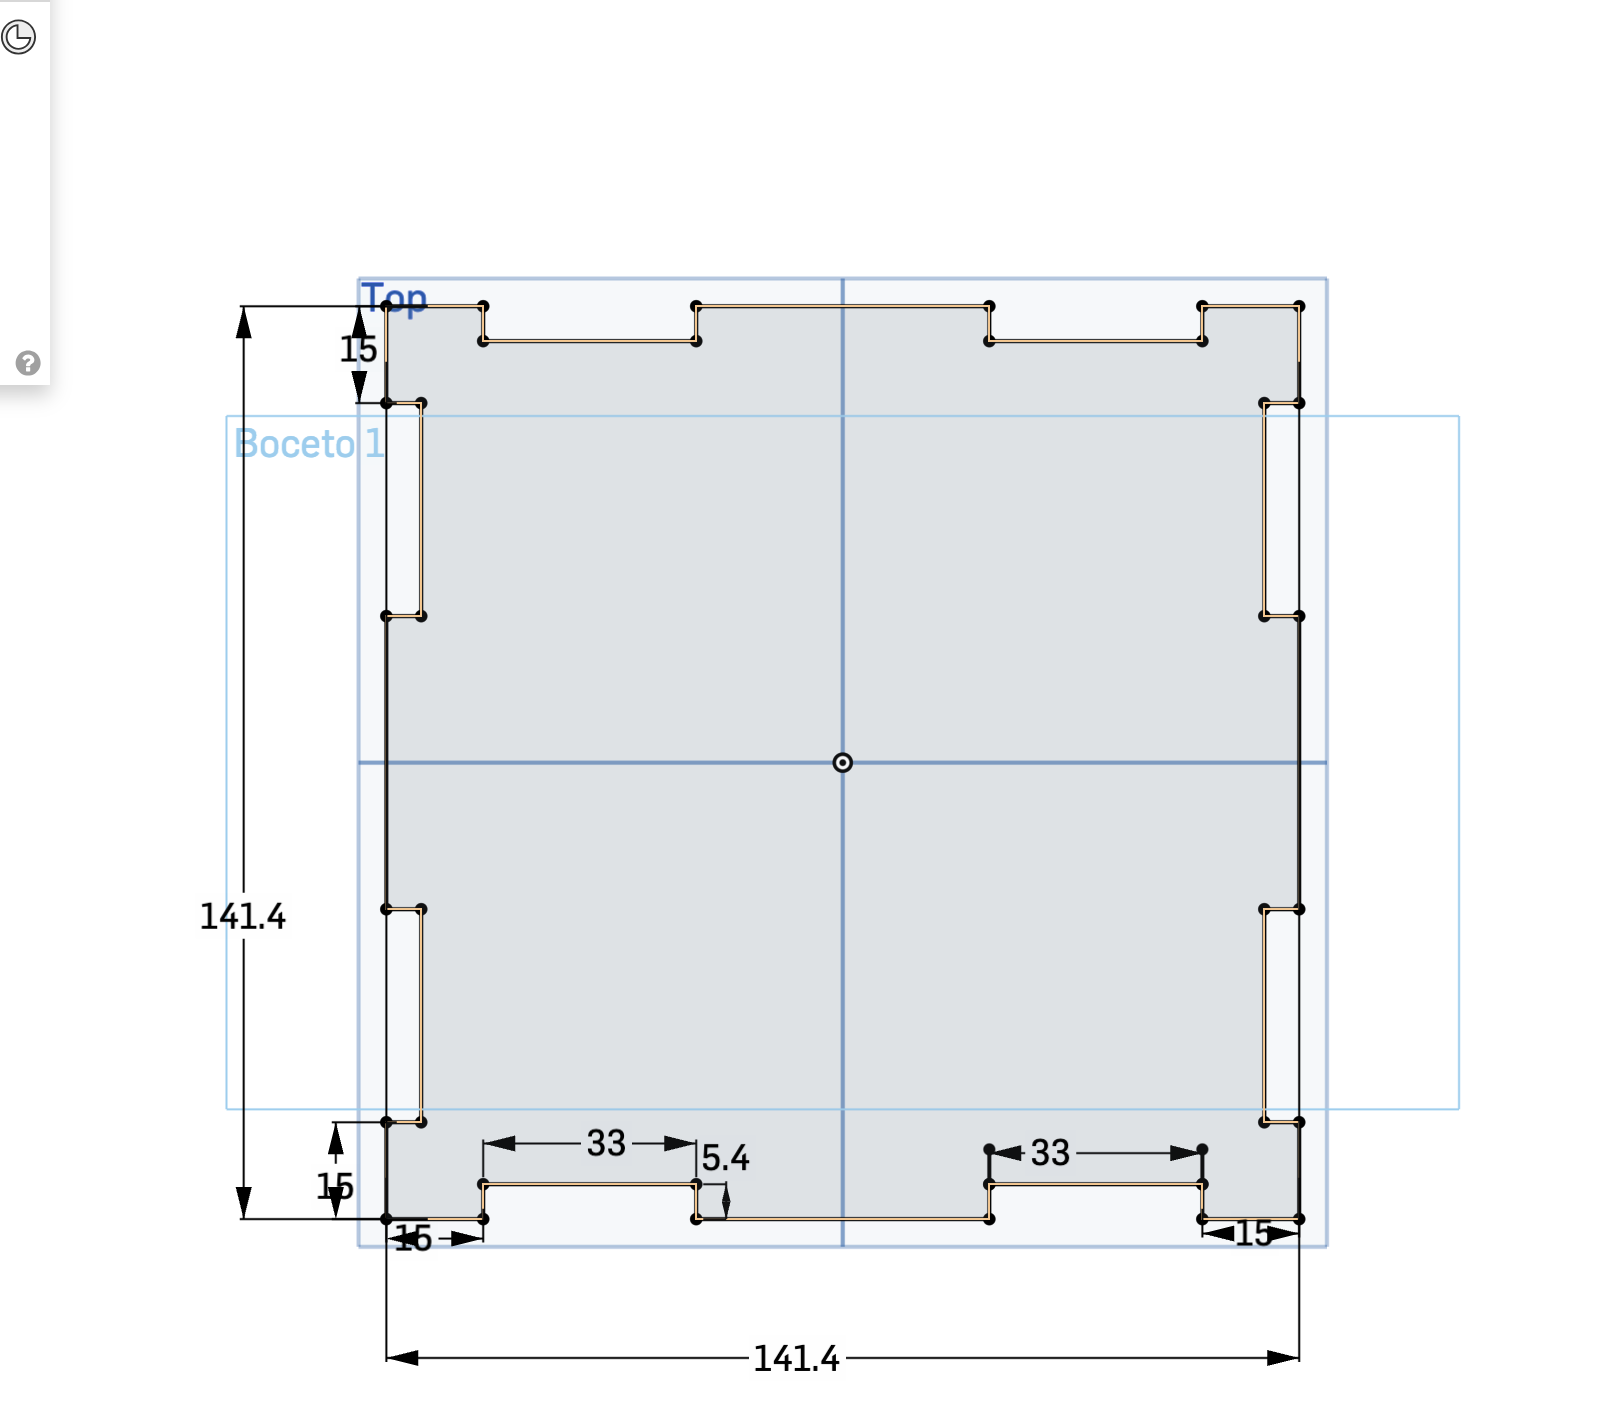
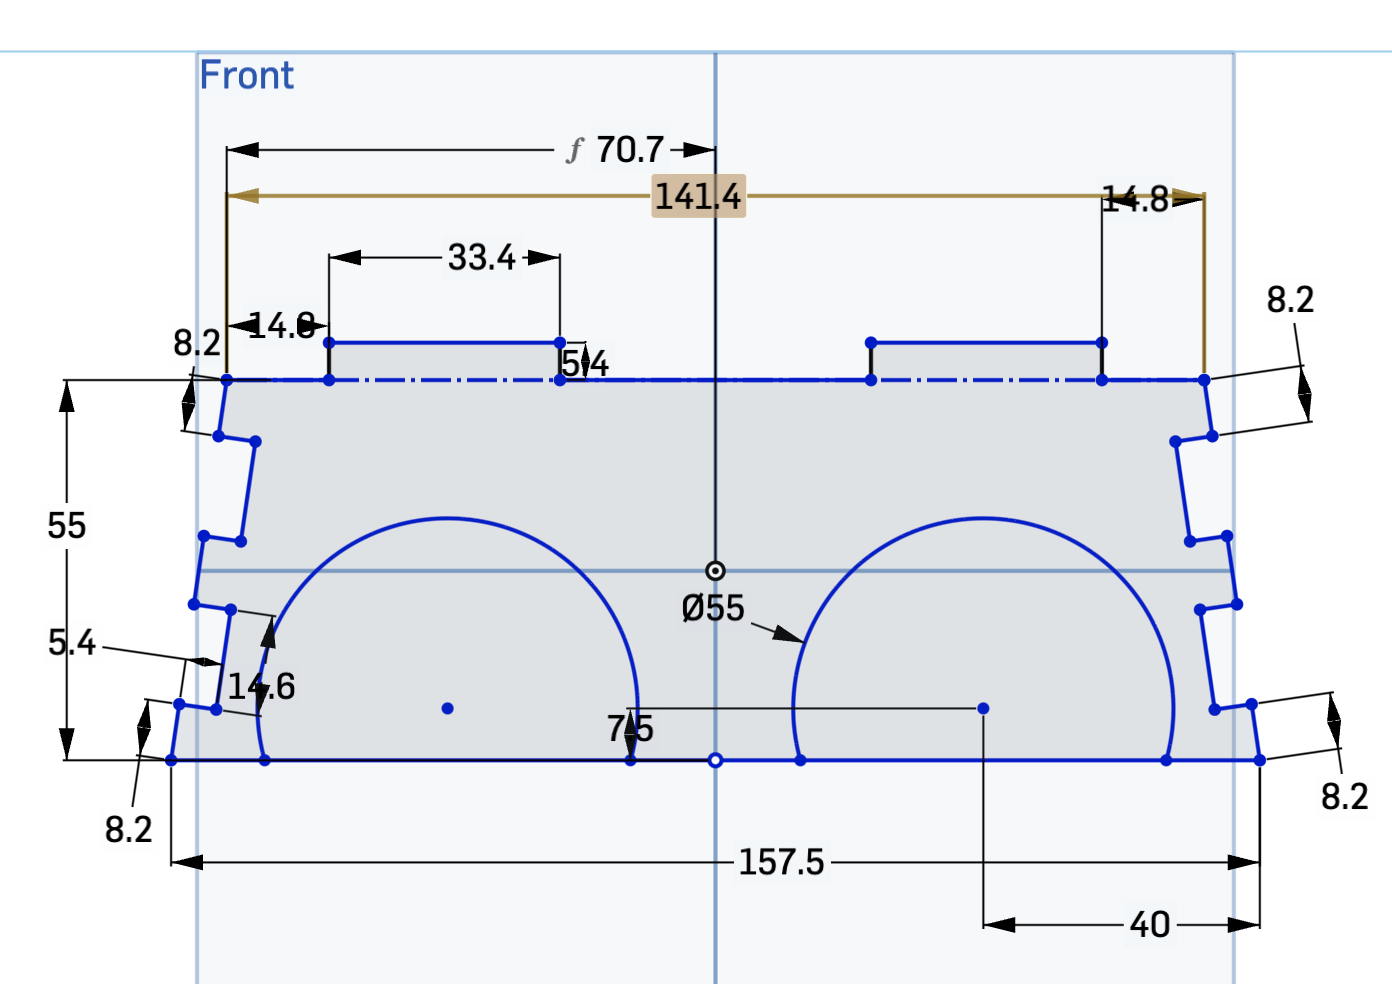
This is the top part of the mold for the case, there is the size plus a 1%. And the space for the lateral panels to fit are on the inside of the material, so the thickness of the material doesn't cause any trouble on the measures.
For the side panels there were two kinds, the panel that had the space for the wheels and the front and back panel, they are basically the same, starting with the following base. This was a little tricky because I had to consider the angle of the walls on a planar design. At first I thought I had to consider the angle on the edges, but I just had to define the distances and center everything creating the spaces for the MDF to stay together and that was it.
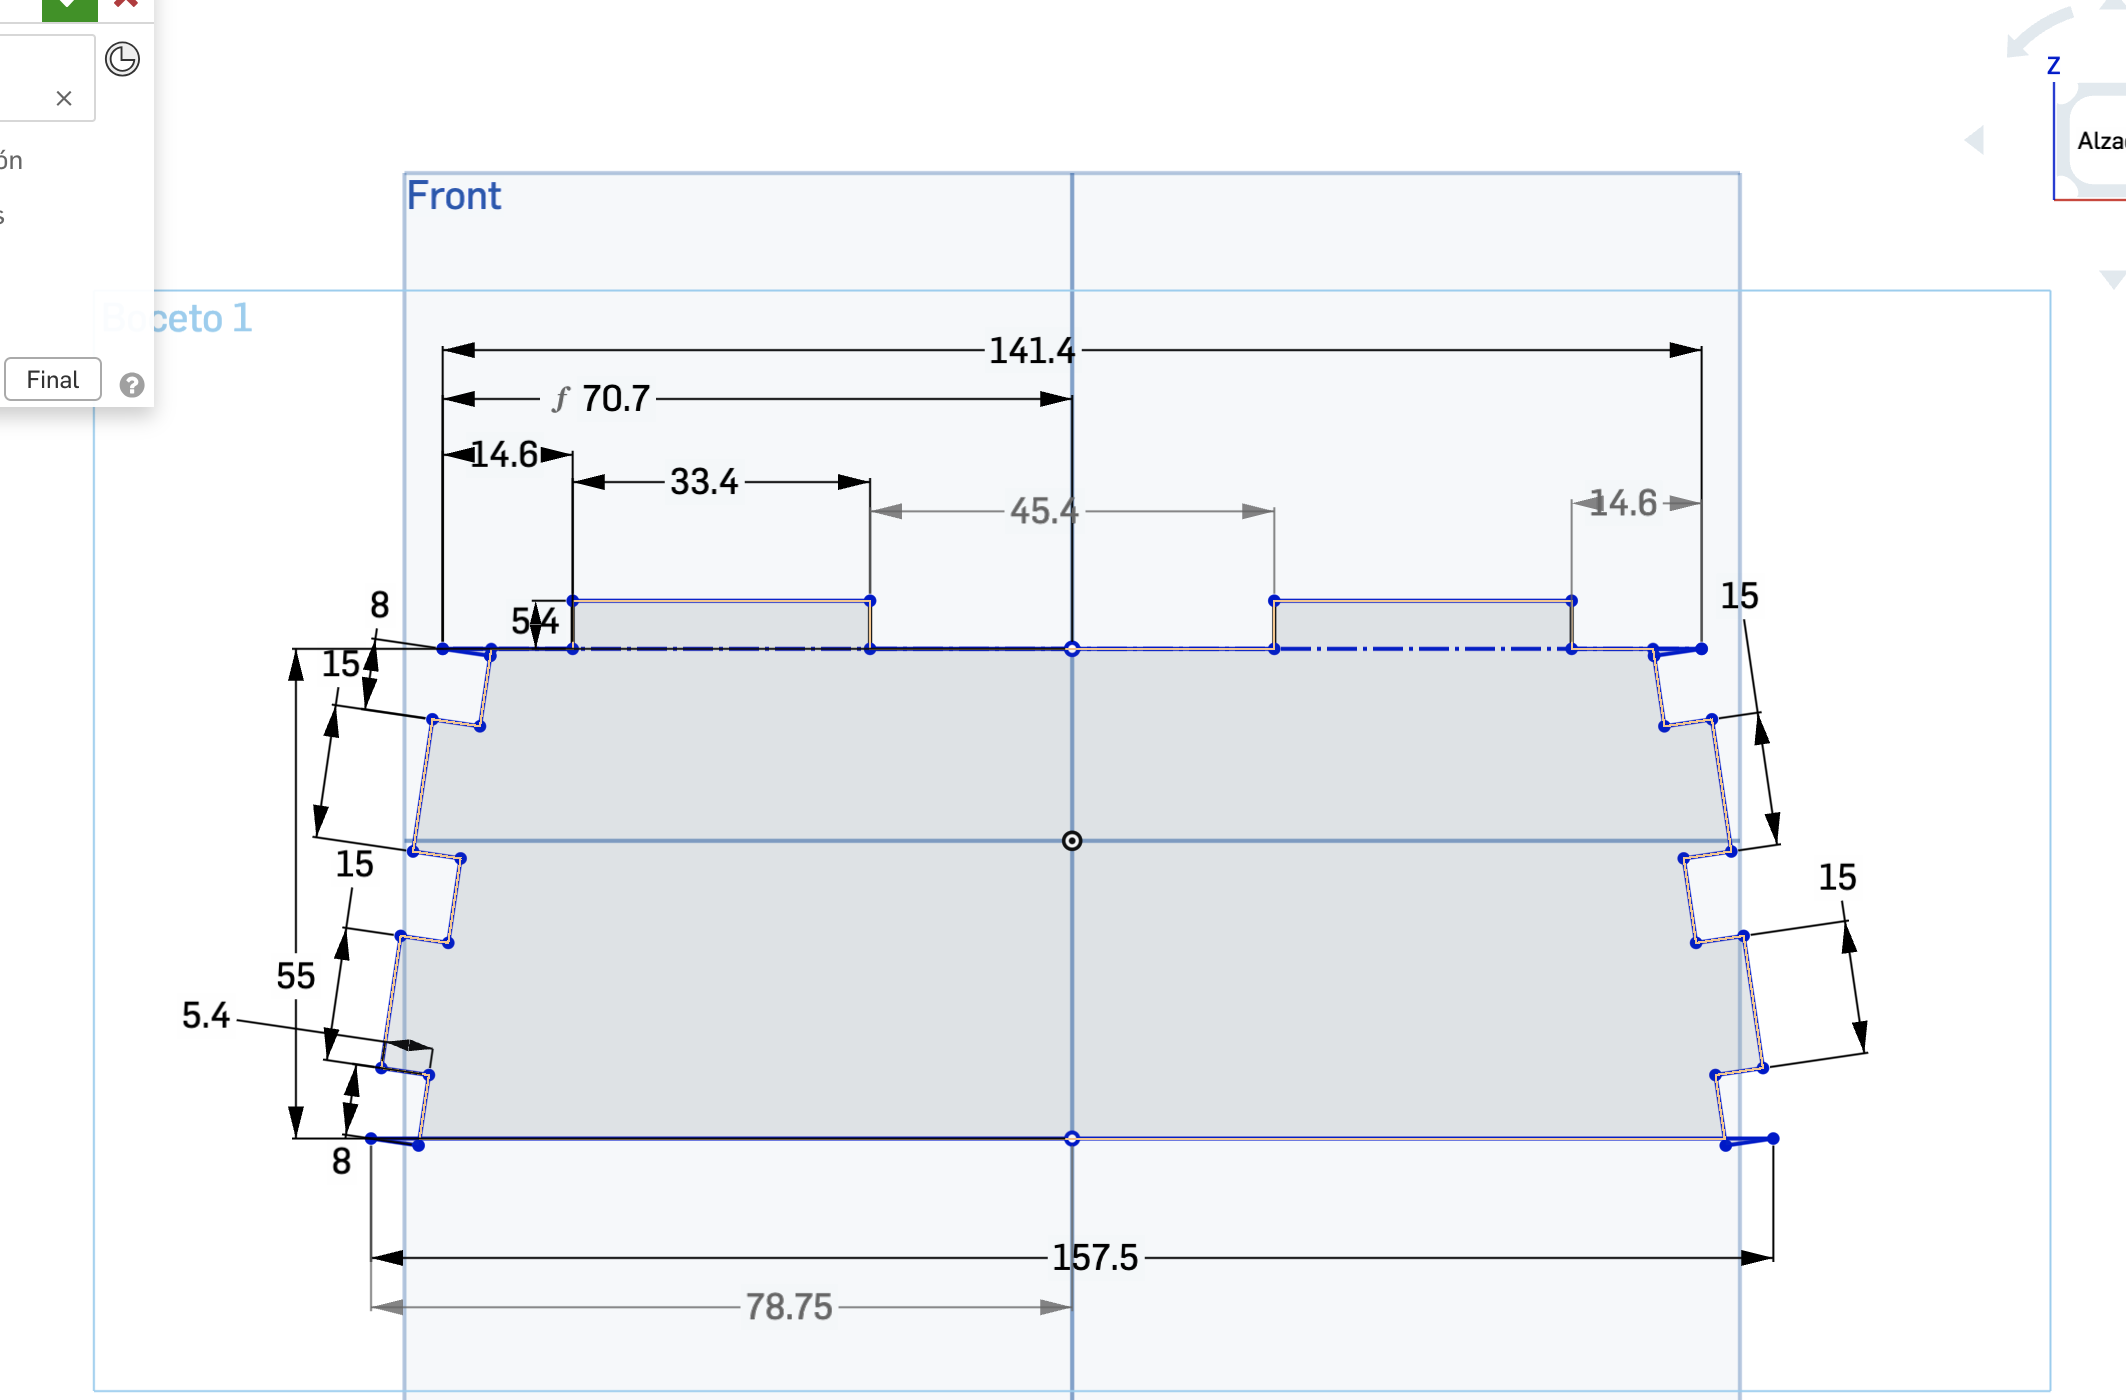
By defining the upper distance and the down distance there was no need to use angles and it had to fit perfectly on the design of the case. And same as the upper panel, the space for the material to fit is on the inside so the material thickness doesn't cause any trouble.
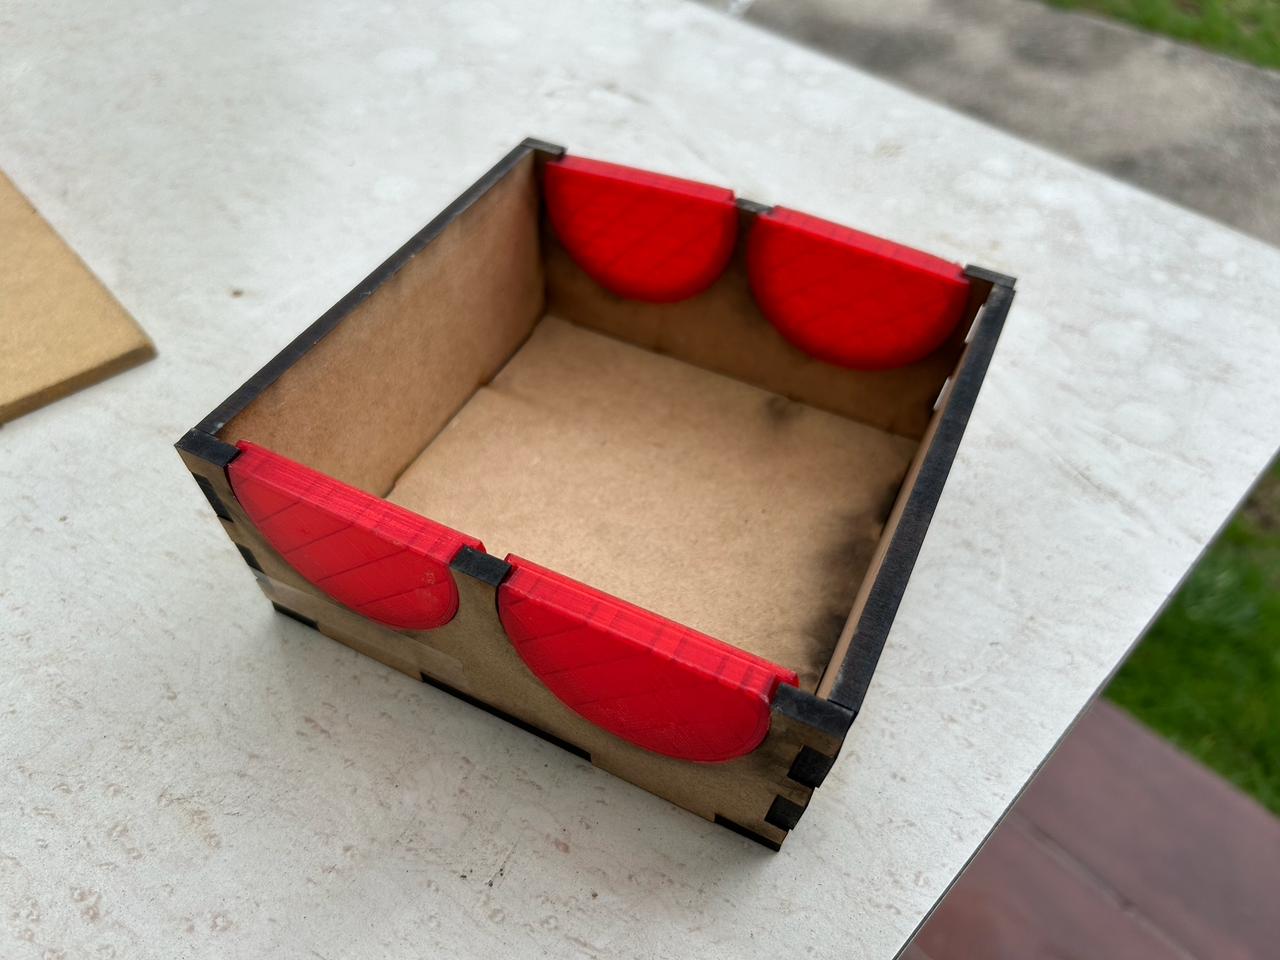
Let's go fo the side with the wheels, it is basically the same as the last part but with a semi circle on it for the wheels.
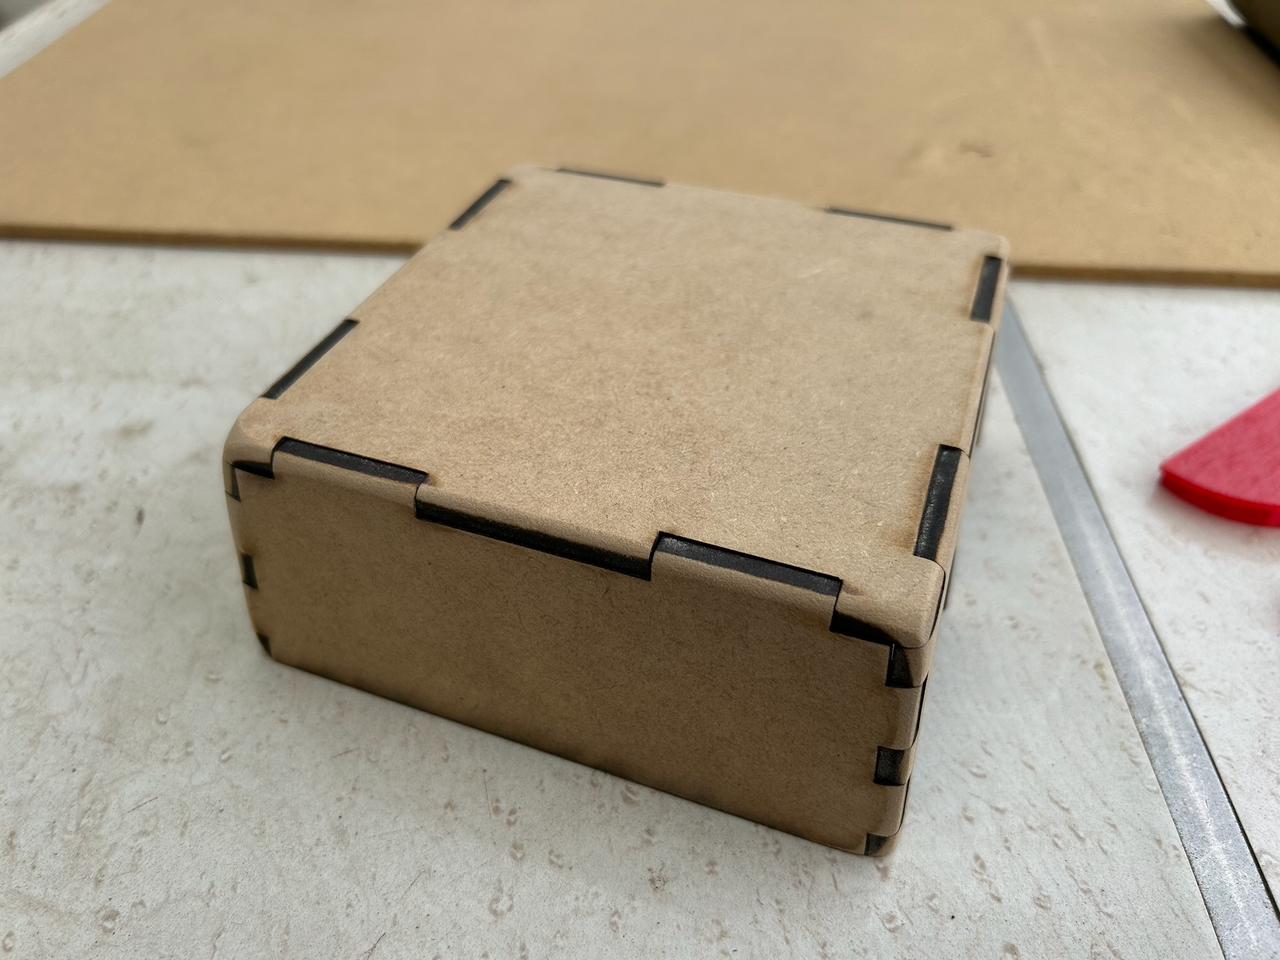
So the assembly ended up something like this:
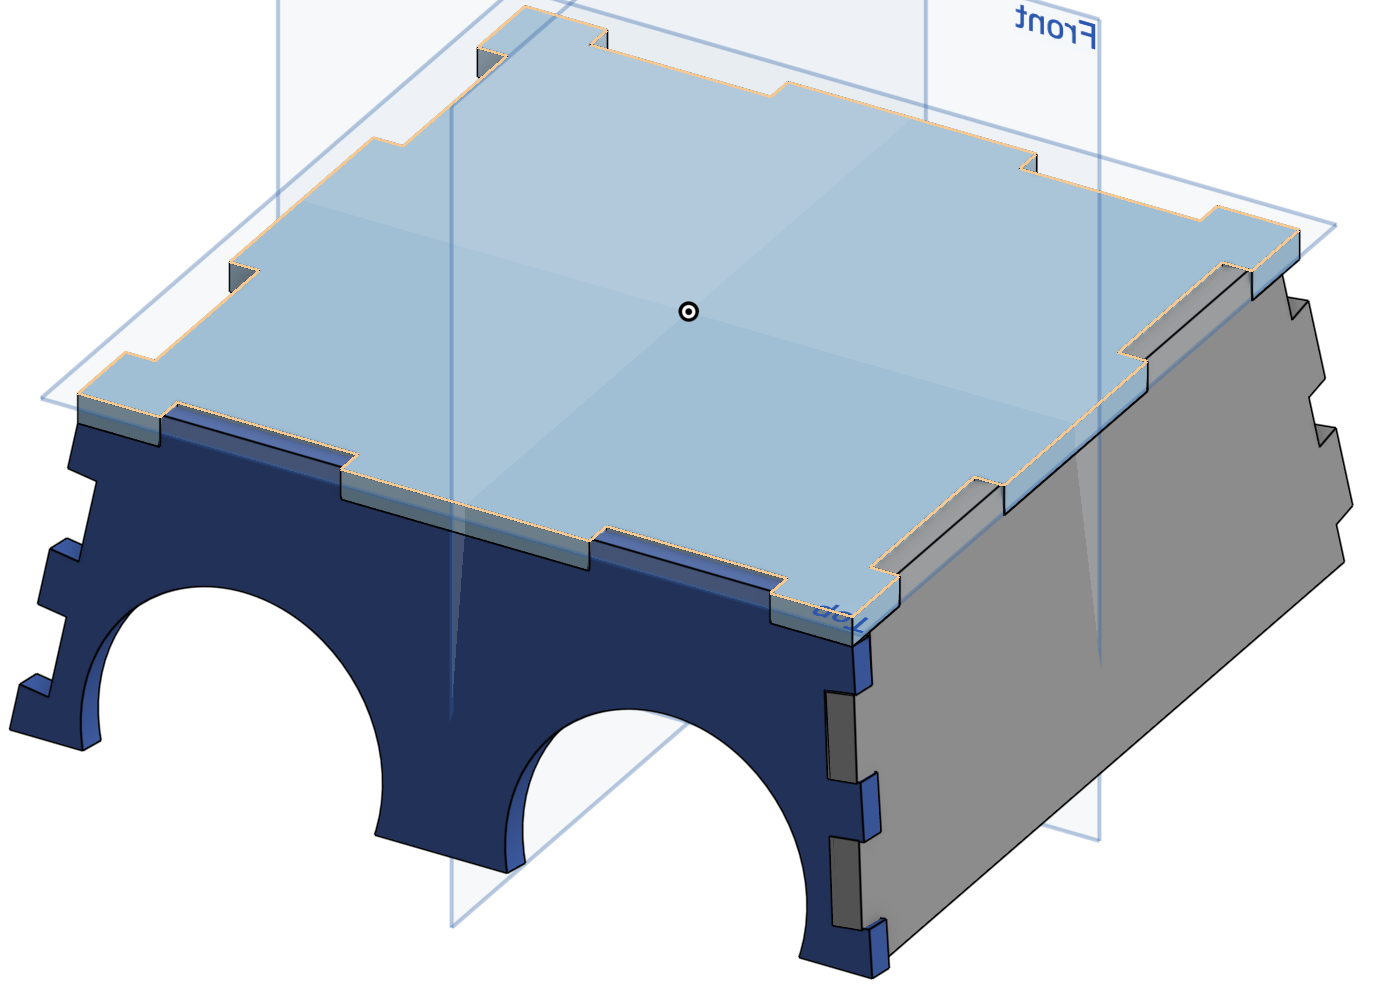
As I see it, seems pretty good, however there is something to notice
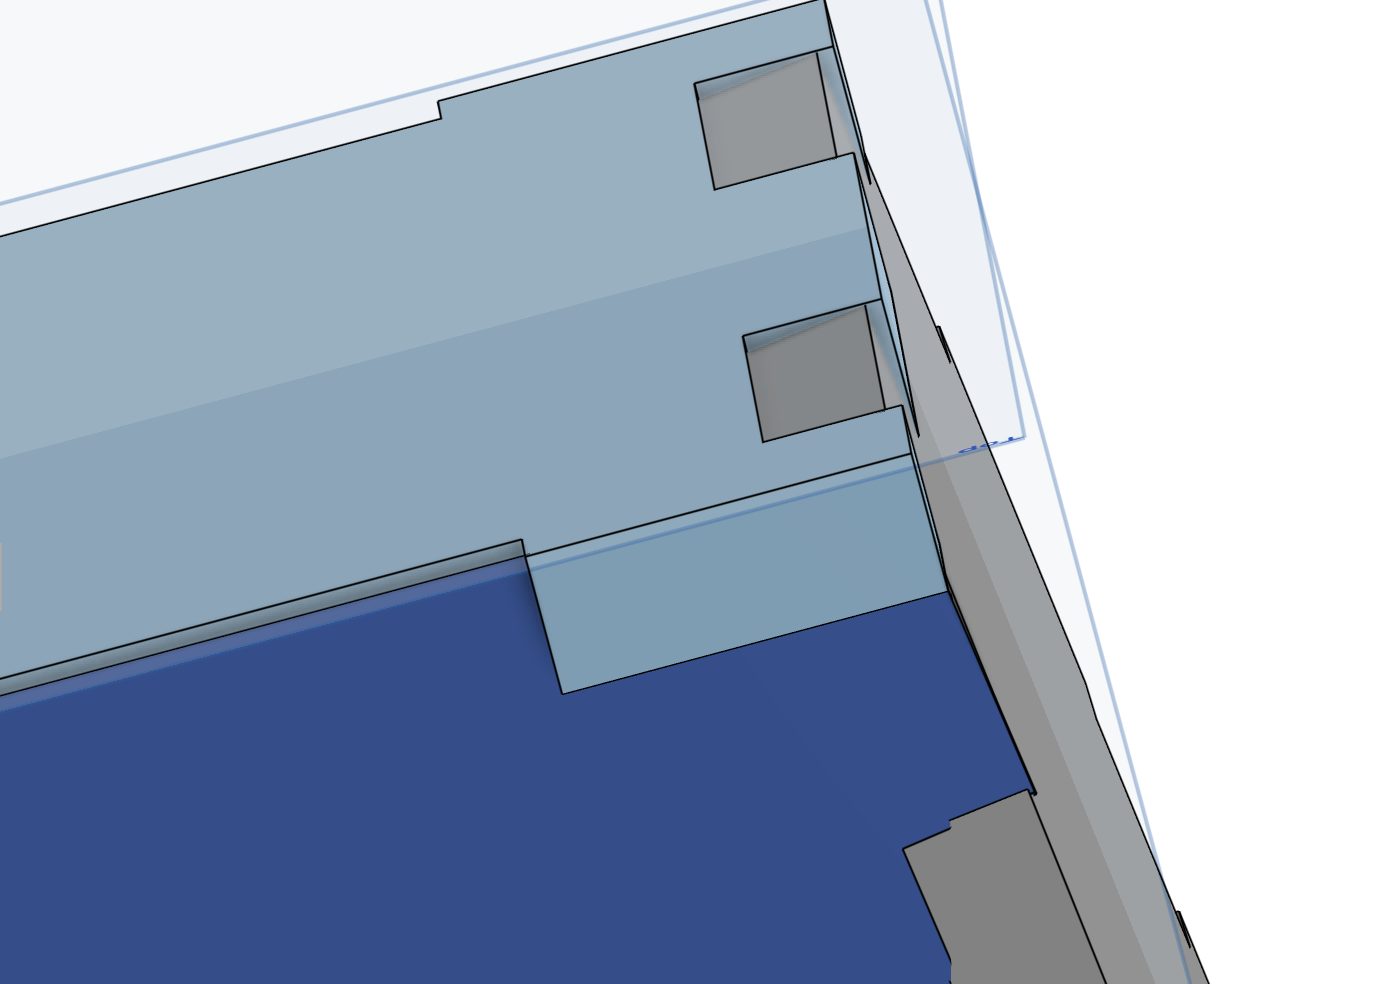
The edges doesn't fit as in a planar design, because this has angles, but this actually doesn't matter because the edges will be sanded and those gaps are not important for the process.
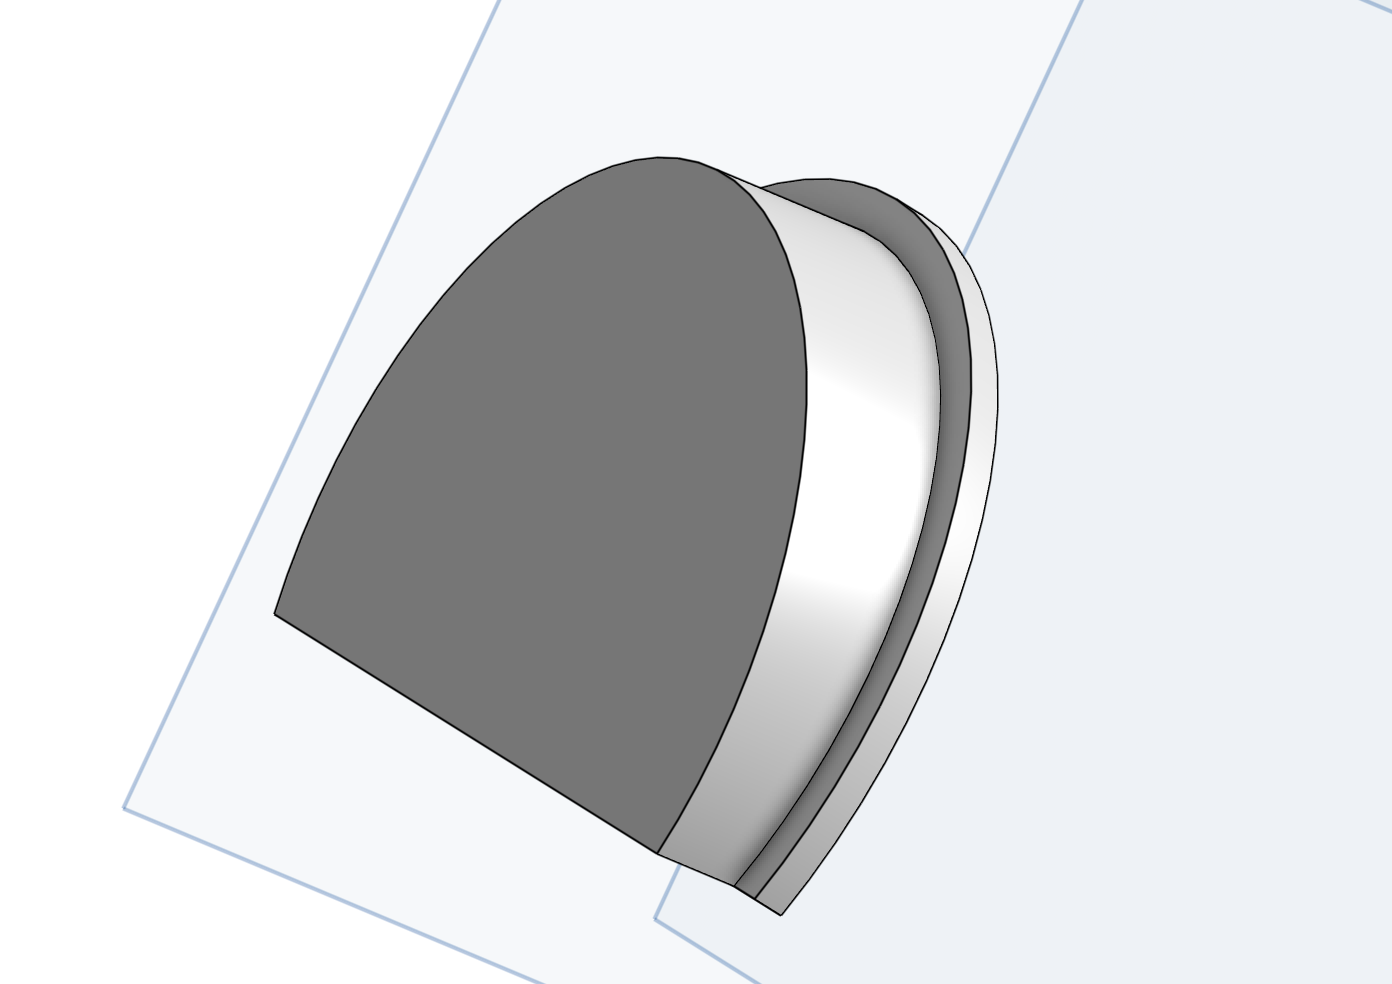
Then the mold for the wheels

And that's it. check out the to see wou to use the laser cutter for this process and the important things on it's design. And Check the printing week for more information about 3D printing
The physical mold
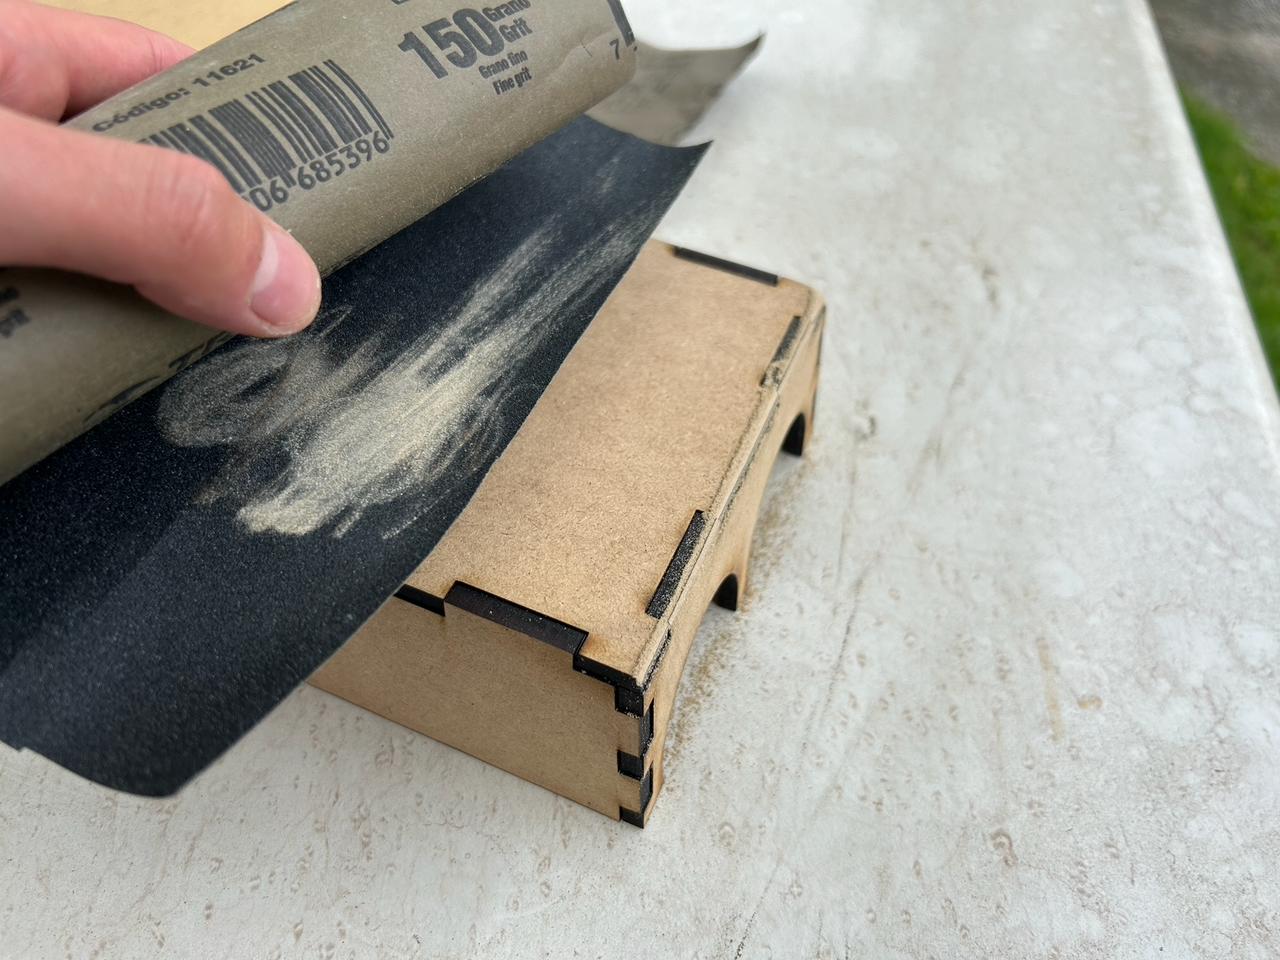
That's the only picture I had before sanding the mold, and as you can see, I had to sand the edges so the mold doesn't had any sharp edges. Once sanded It looked something lithe this:
The last step was adding the wheels mold.
Now it is ready for the thermoforming.
Thermofoarming
This was the messy part because it took me some attempts and a lot of material. by the way, before starting the process, here are some considerations to take into account. There are materials that can be used on this process and material that not. Here is a list of ome material that you can use and their thermoforming temperatures.
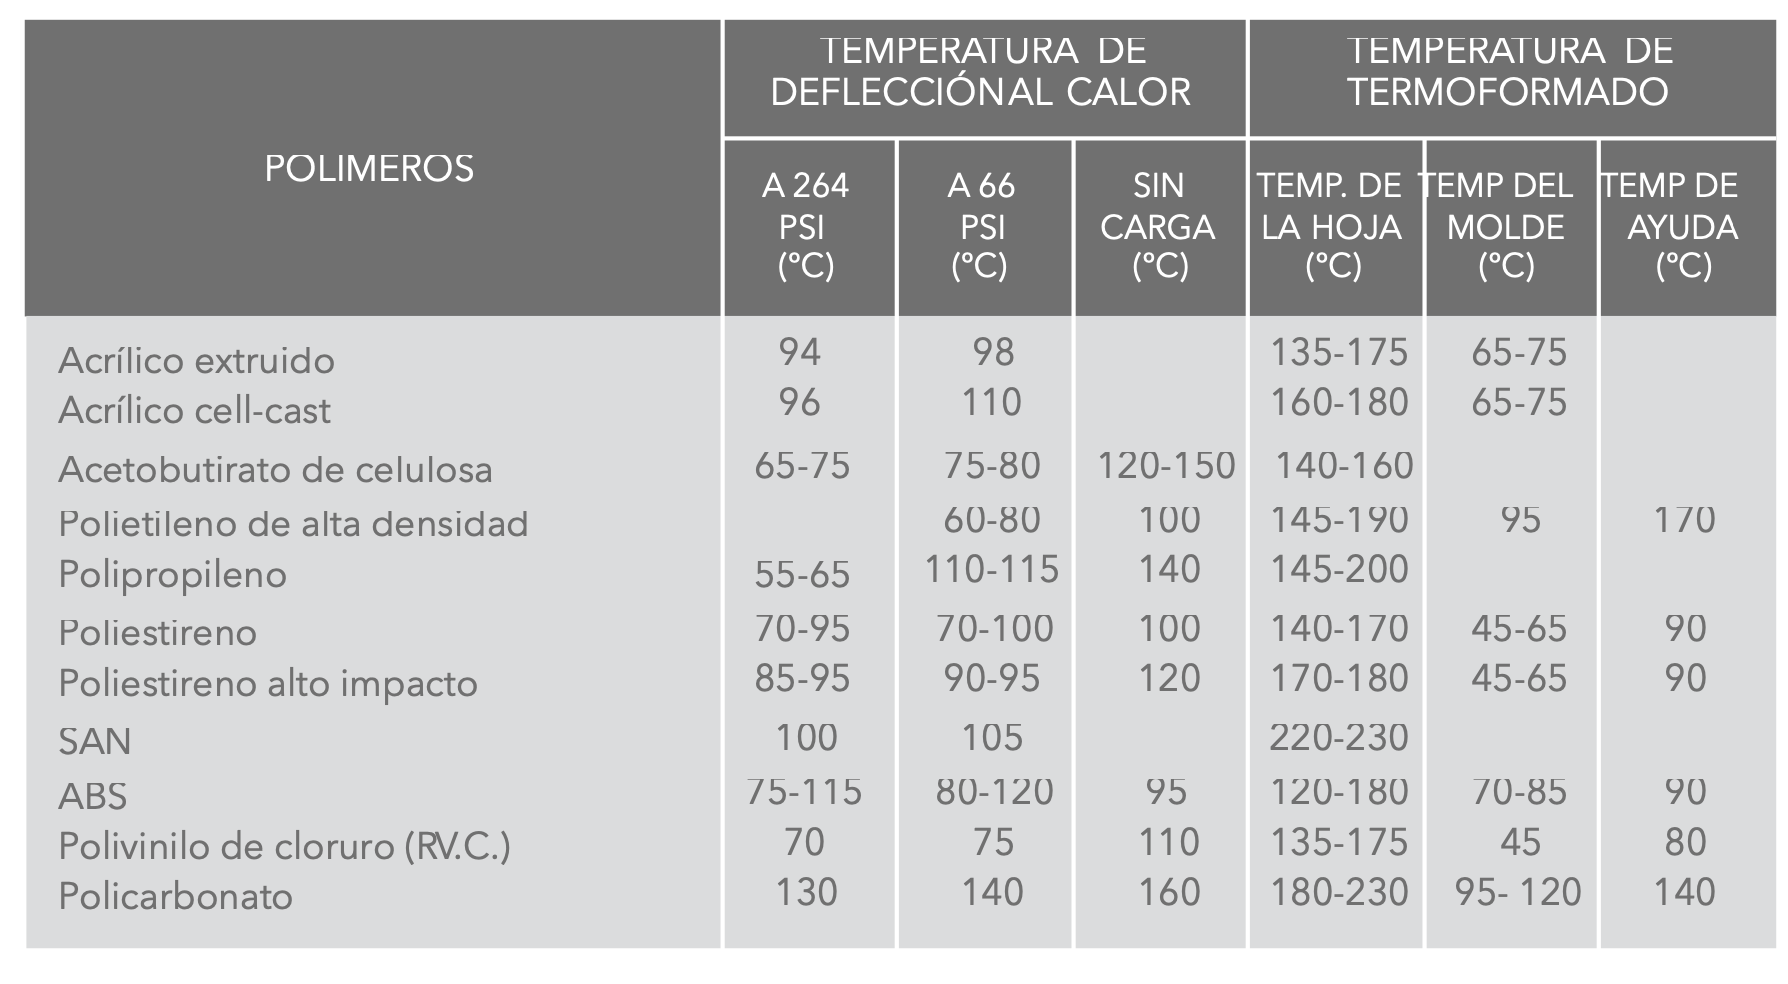
The first column left right are the names of the material that you can use, and the third column right left are the temperatures of the material to be thermoformed.
There are some material can not be used on this process so just keep among the shown on the image.
I decided to use transparent polycarbonate because it is very similar to the one used on toys cases.
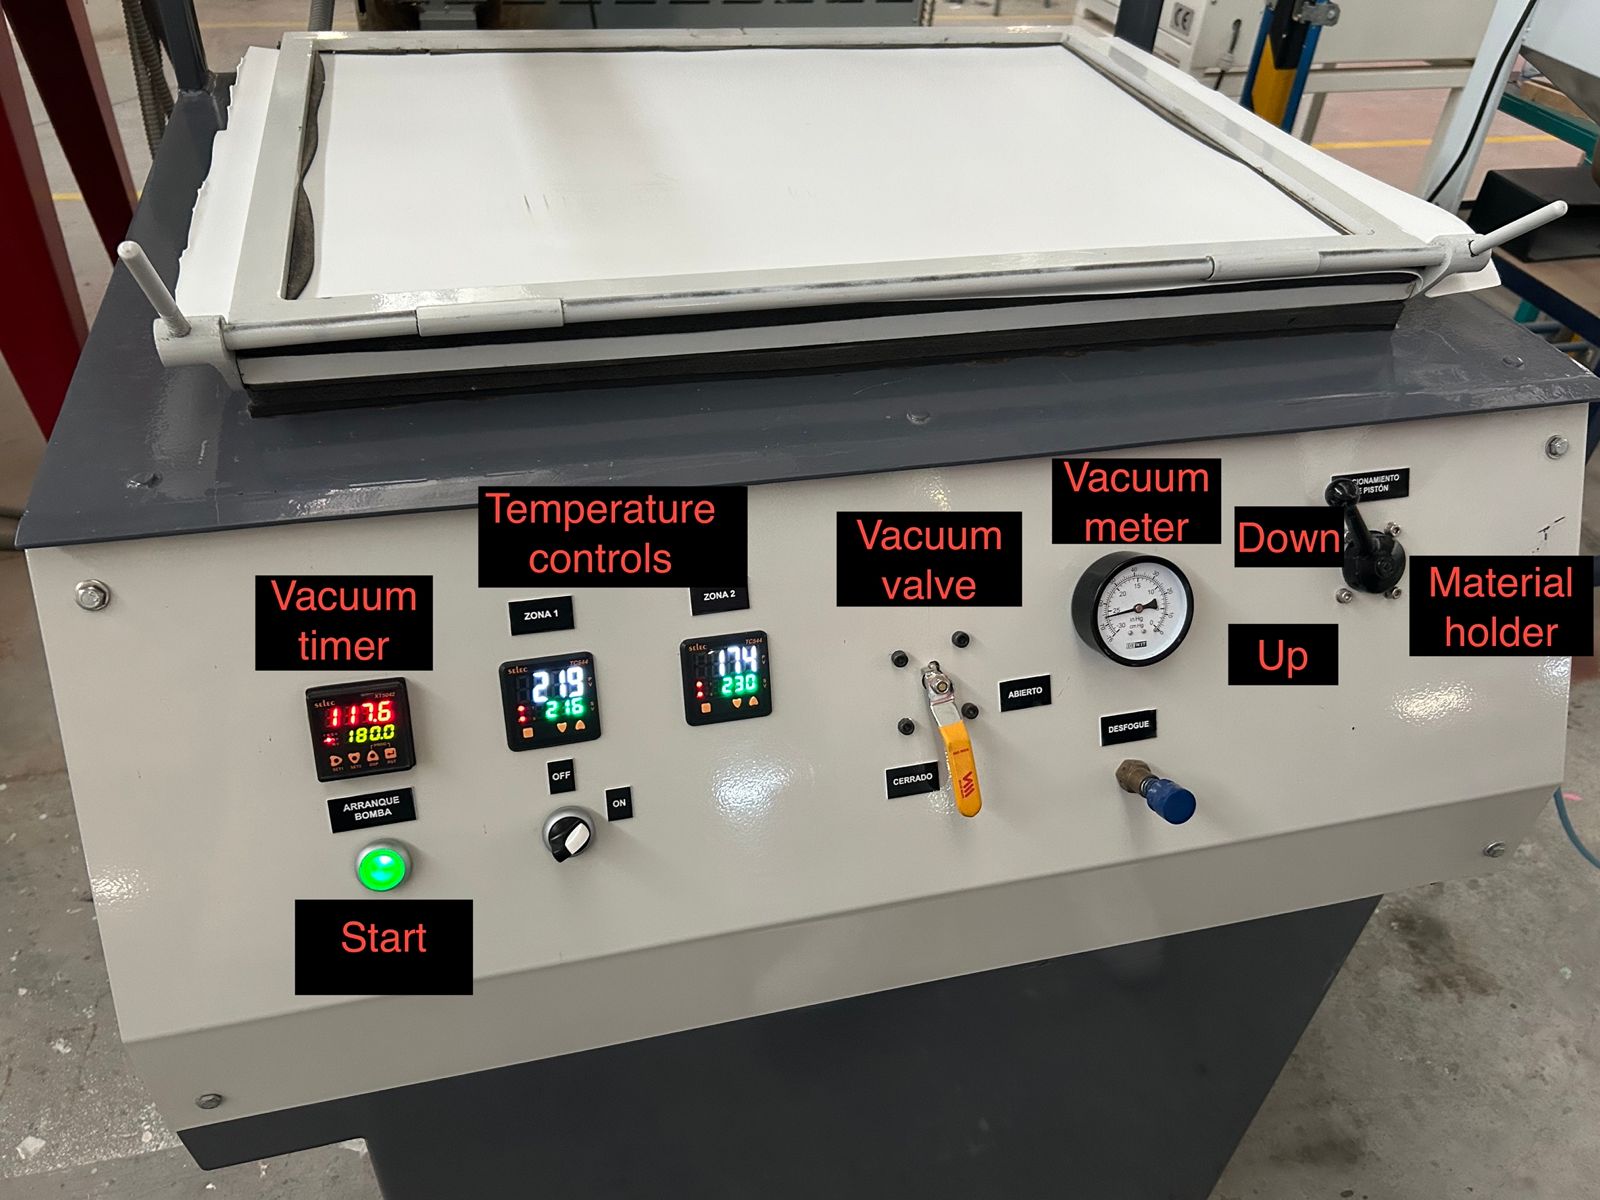
Operating the machine
This process was quite easy once understood. Basically the steps to follow are:
-
Connect and turn on the machine
There are 2 main things to connect thr machine to,- Power, just go to the back side of the machine and plug it in, it has a circular 3 pole connector, quite weird but it has a Poka yoke, so everything should be fine.
- Air, on the side of the machine there is a FRL module so you have to connect it.
-
Cutting the material, you have to leave some margin. And place it on the machine.
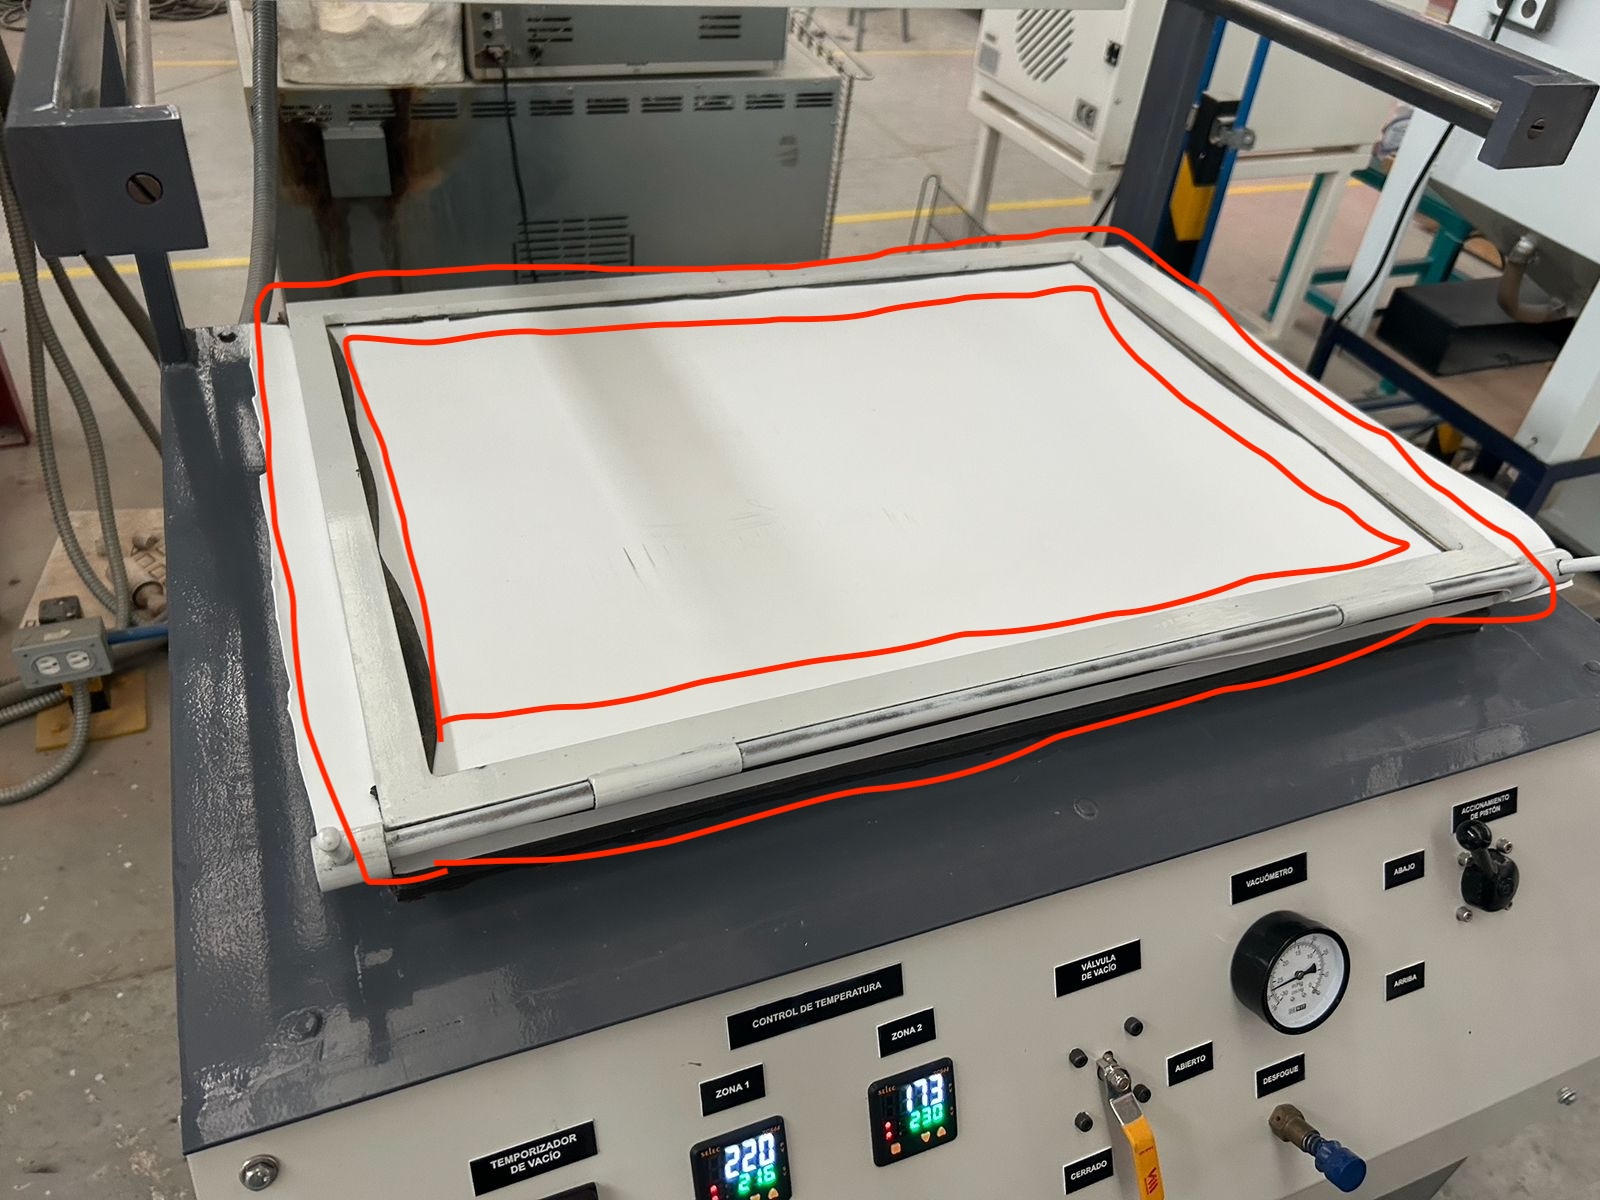
the white circled rectangle is the material holder. The whitest terribly cutted rectangle is the material, as you can see, you have to leave a margin on the material so the holder can hold it, and it doesn't move while expanding it.
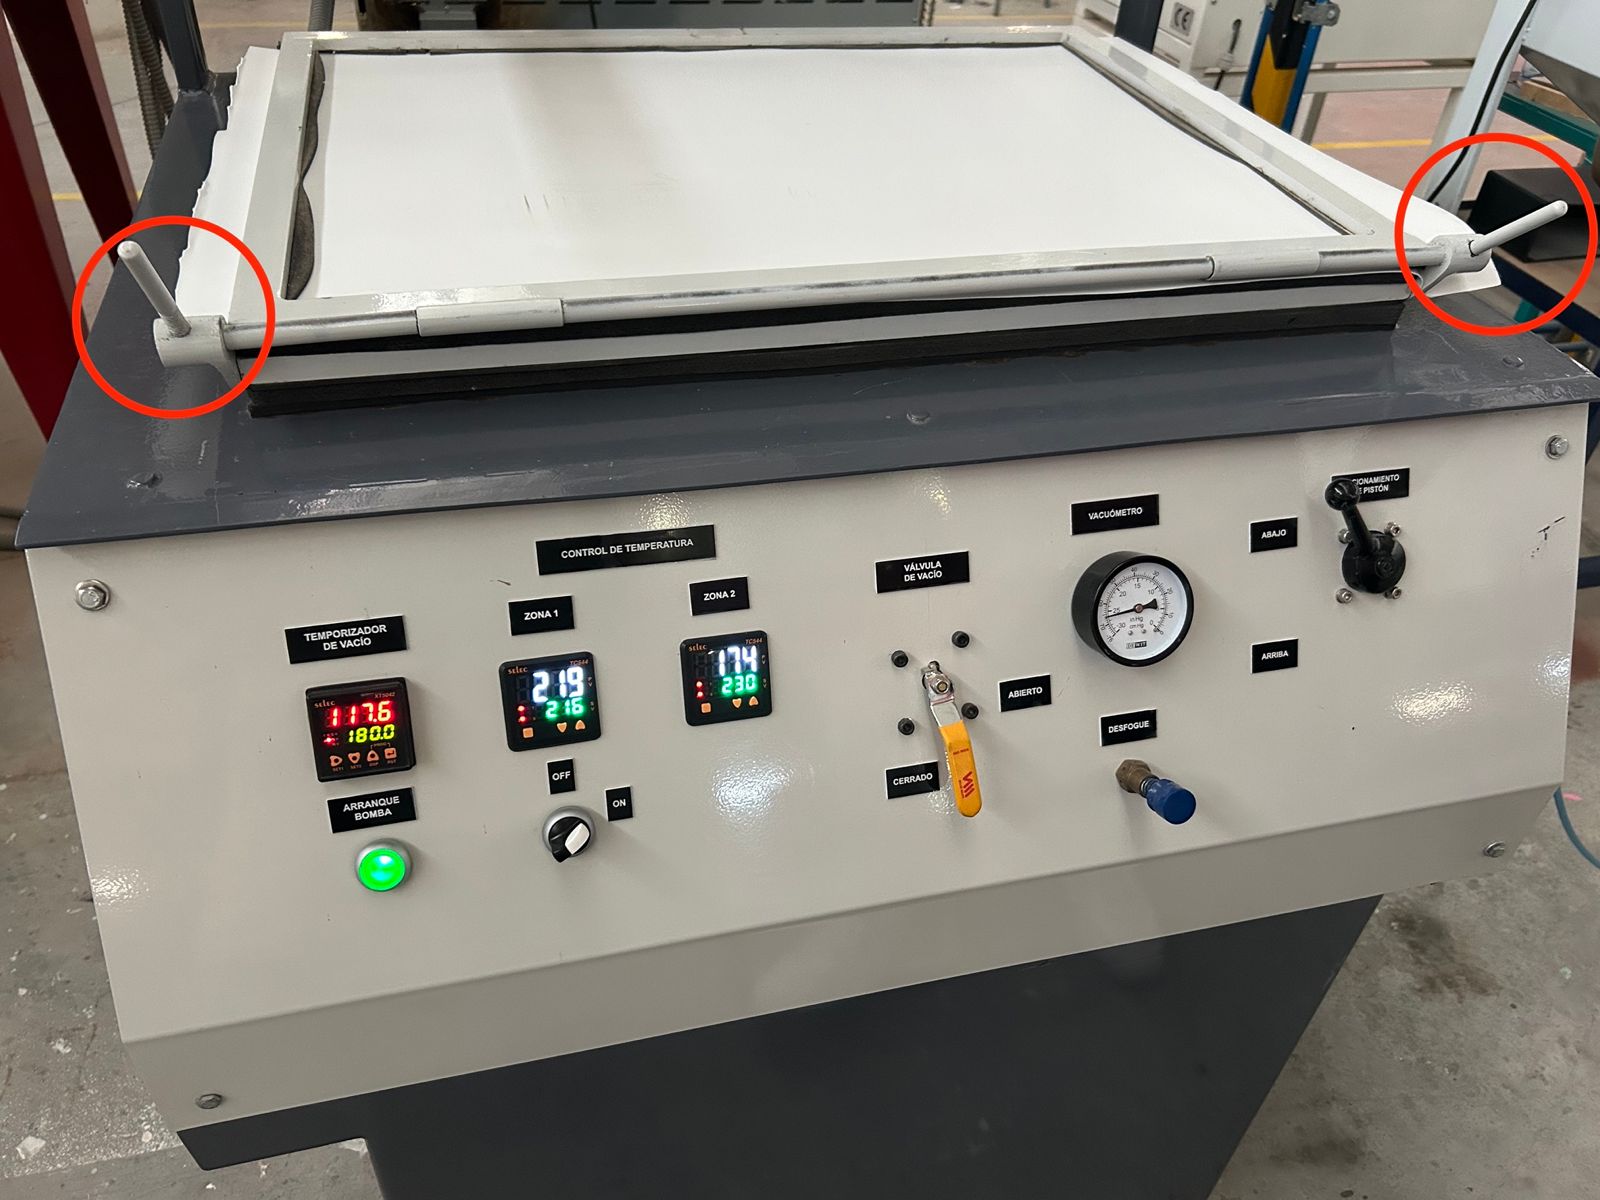
The holder has 2 handles to close it firmly, just make sure to pull them all thw way down.
-
Place the heater and set the temperature.
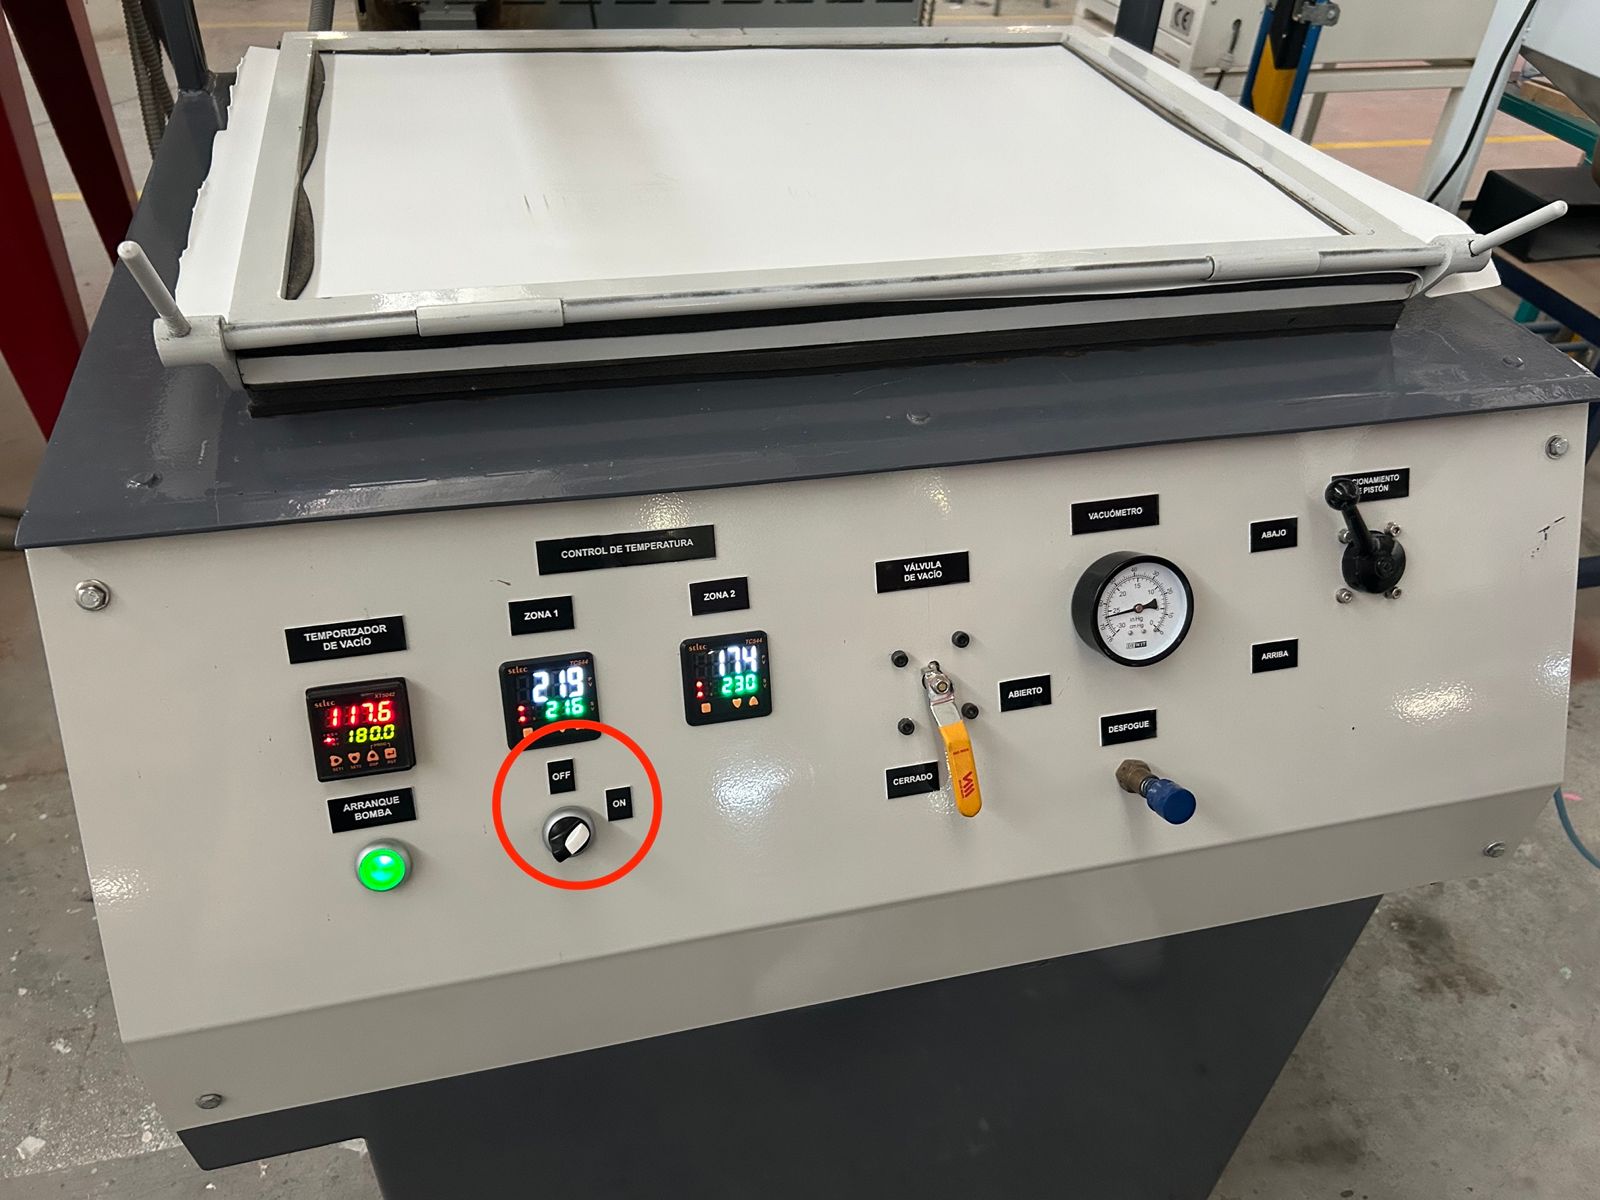
To set the temperature let's take a look to the controllers
As the temperature controllers are divided in zones, so the heater

So we basically have to set all zones on the same temperature to learn how to do that, watch the following tutorial:
While pressing the left button click on the arrows to go up/down. And click once the left button to move around the zones until they are all on the same temperature.
NOTE, it is recommendable to set the temperature a little higher than on the image, because there is a gap between the heater and the material so we have to compensate that.
-
Take up the material and pull the heater so the material can start heating, meanwhile start charging the machine and place the mold on the bed.
To take the holder up, you just have to place the lever on the "Up" position. Now the material is heating.NOTE, when pulling the heater, grab it with gloves, because as long as you use it the hotter it becomes, and it can burn you.
Meanwhile press the "Start" button so the pump starts making the vacuum, a timer will set on the very left screen, when it reaches 0 the vacuum will be ready.
While the heater and the pump are working place the mold on the bed
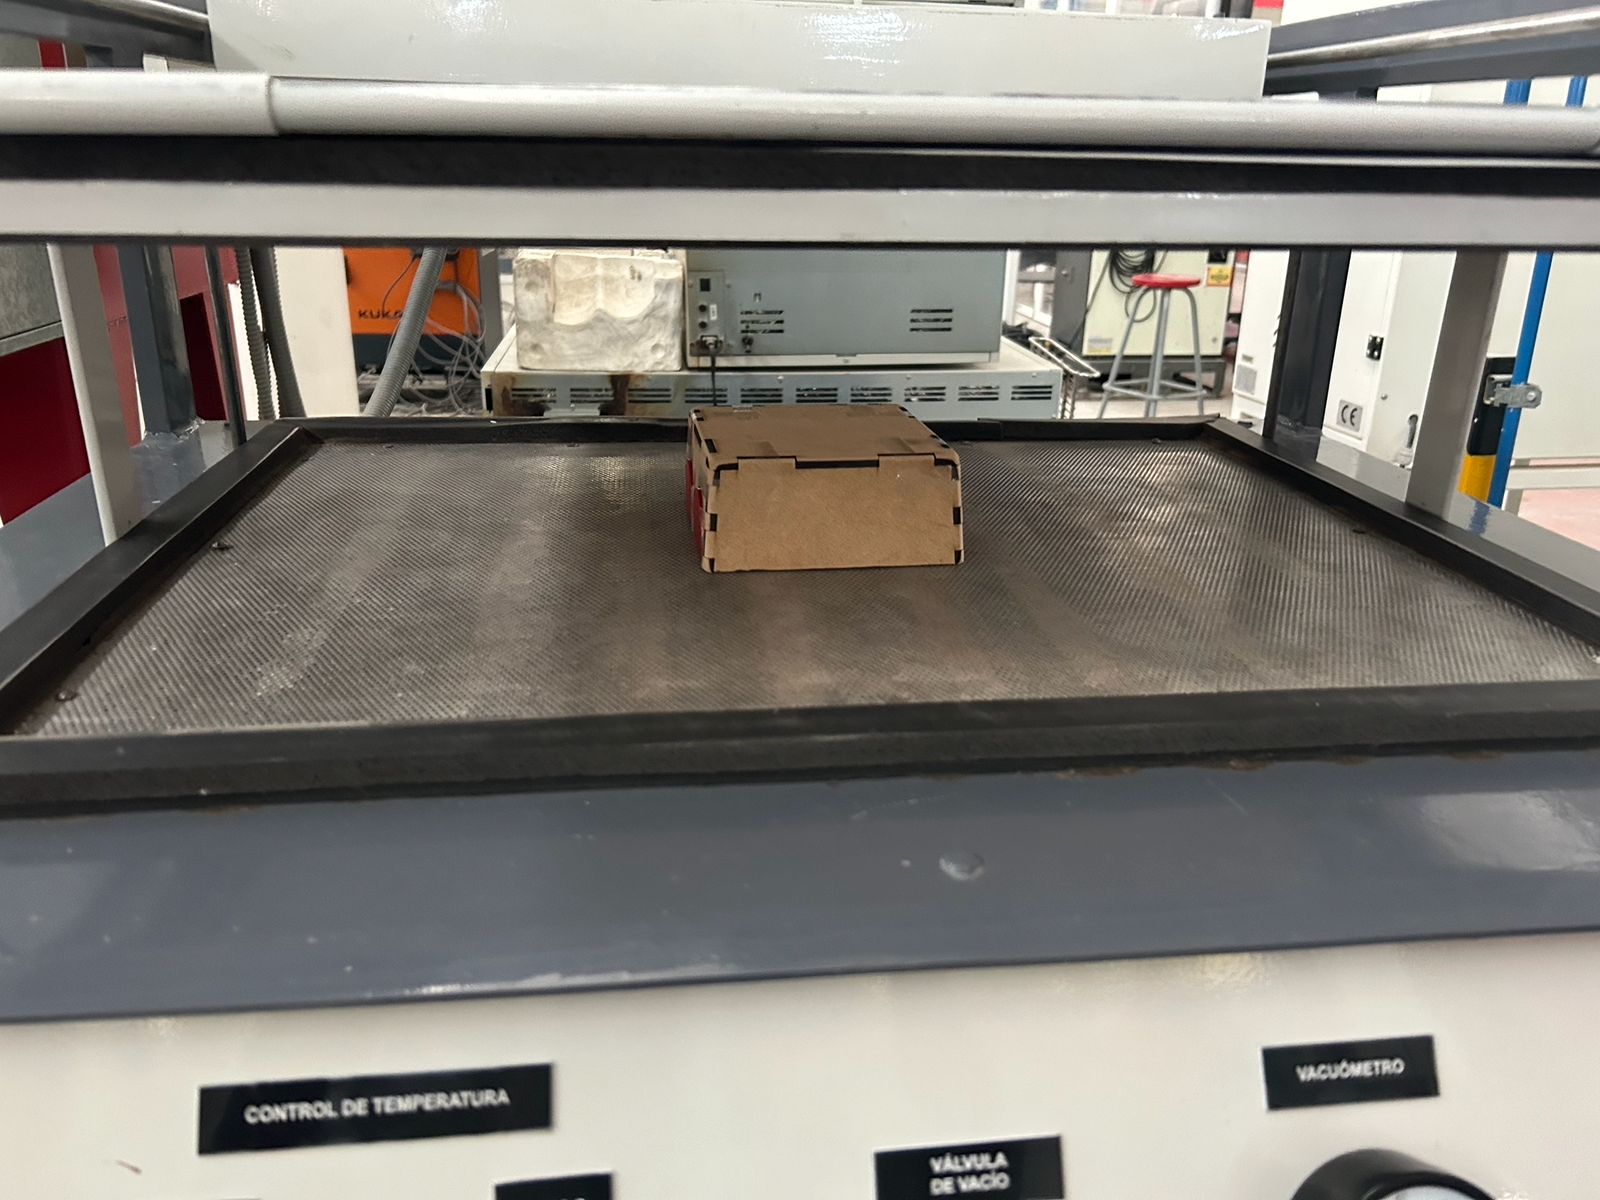
Remember to keep and eye on the material temperature with a laser thermometer so you can know exactly at what temperature is it.
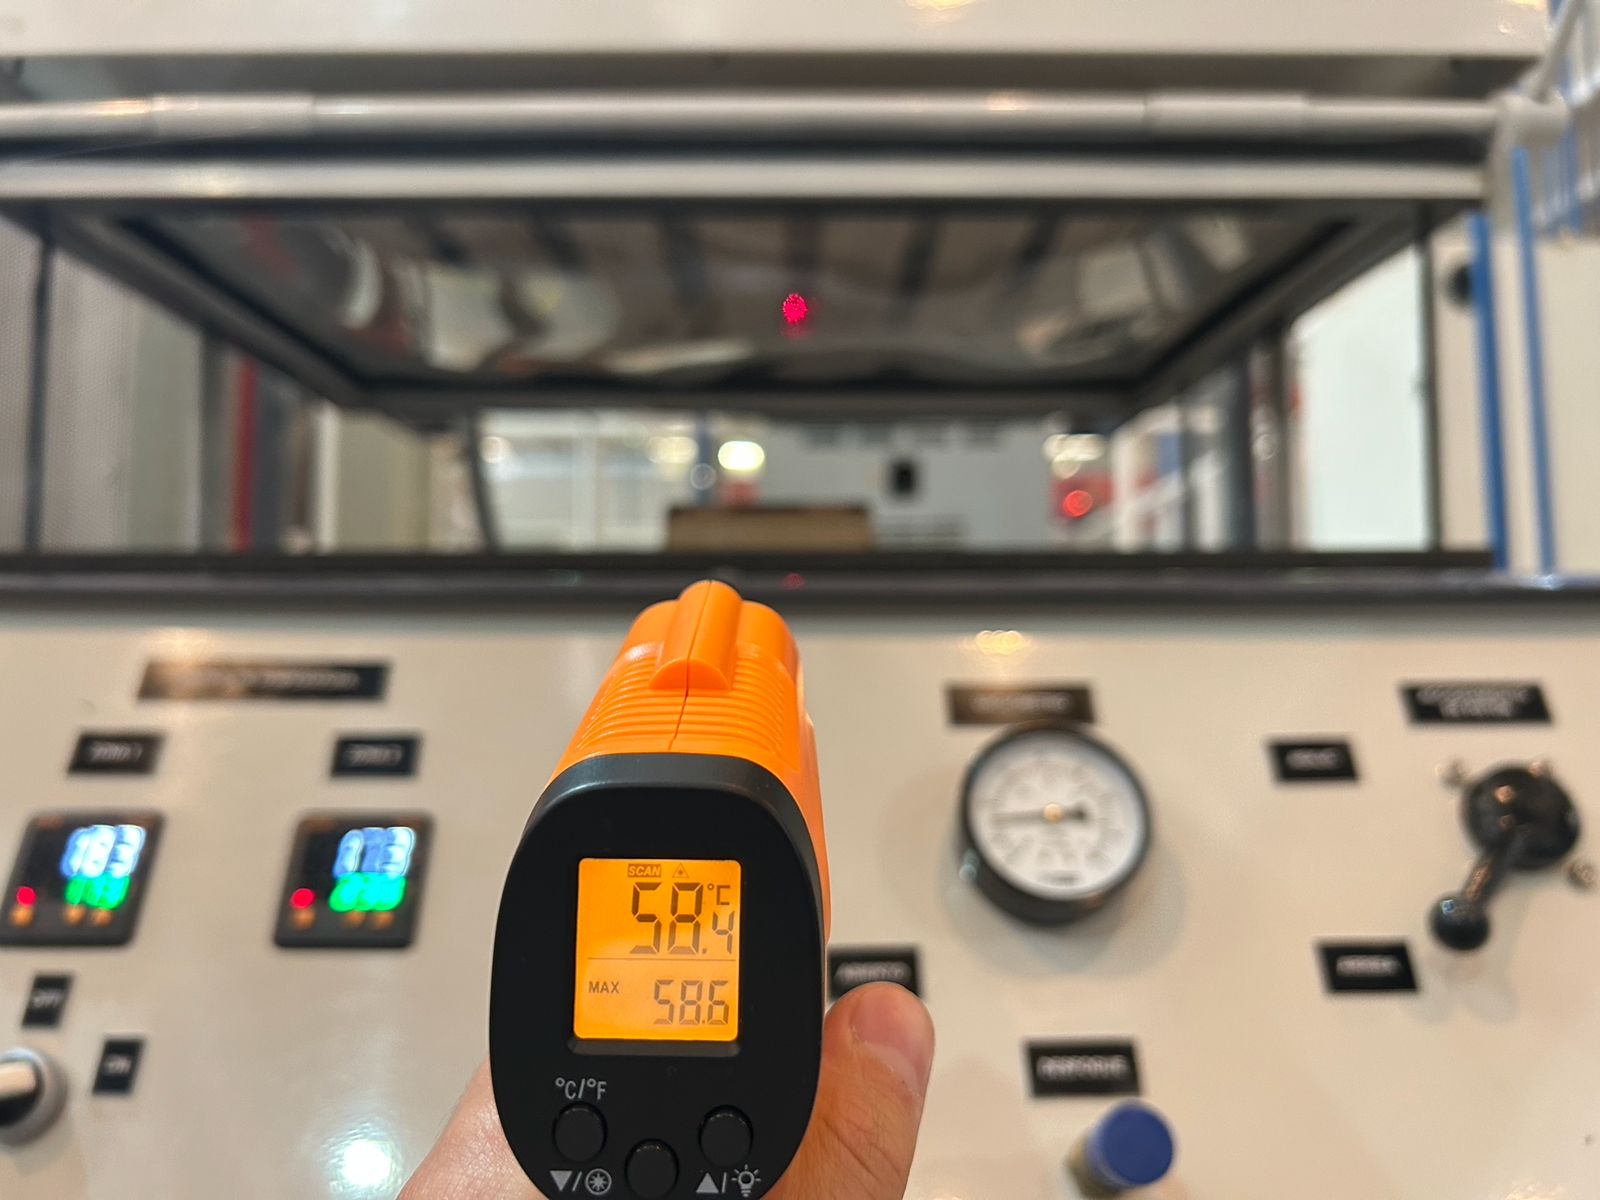
Besides the temperature, you can also look at the material to see if it is ready or not, when the material starts melting a bubble creates on the lower part as seen on the video
-
Take out the heater, bring down the material and suck the air out of the machine.
That's when you you get down the material holder once it's completely down you open the vacuum valve so a vacuum creates on the bed and the magic is done.
If the mold has a complex shape you use a counter mold to help the machine and get a better quality.
- Help a little by placing some countermold while the material is still hot and keep it a few seconds until the material cools down.
-
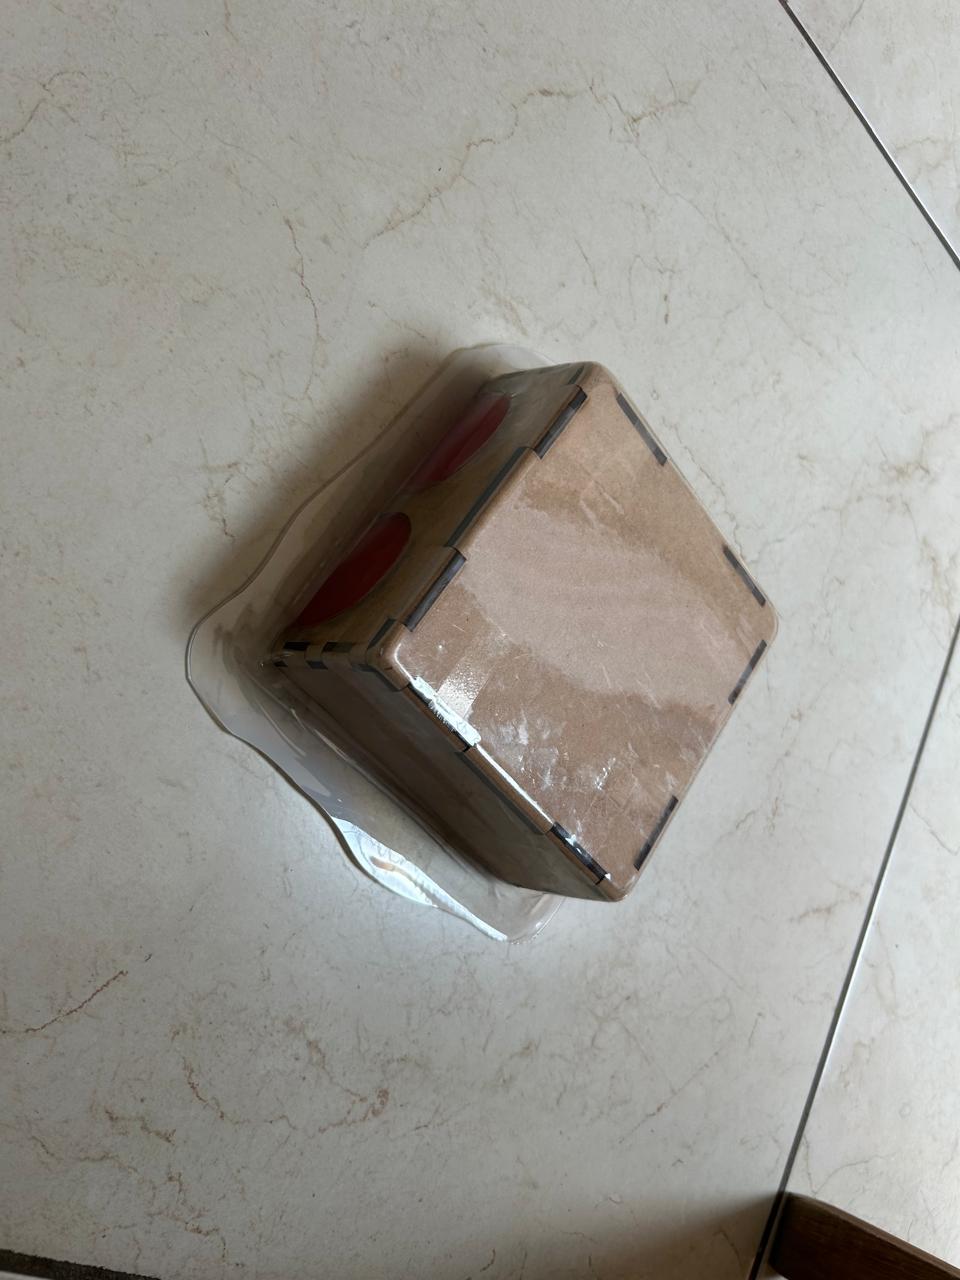
Open the material holder and take out the final product.
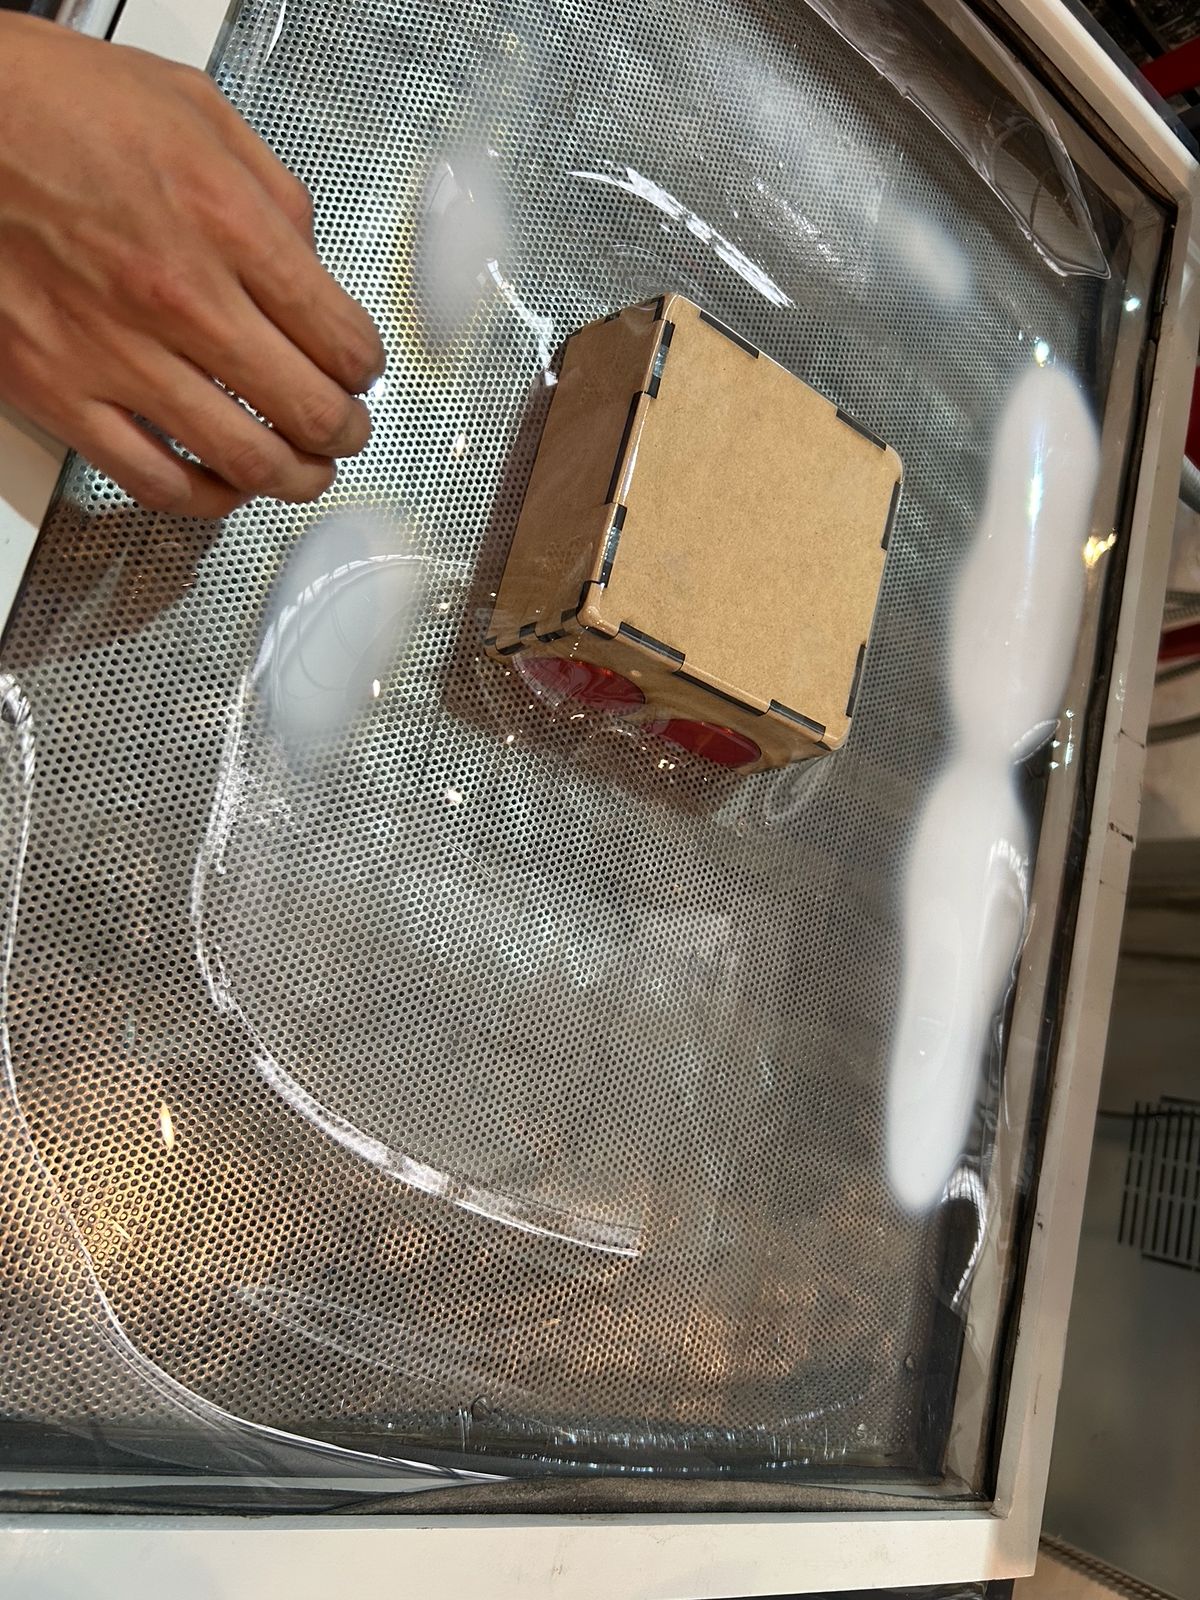
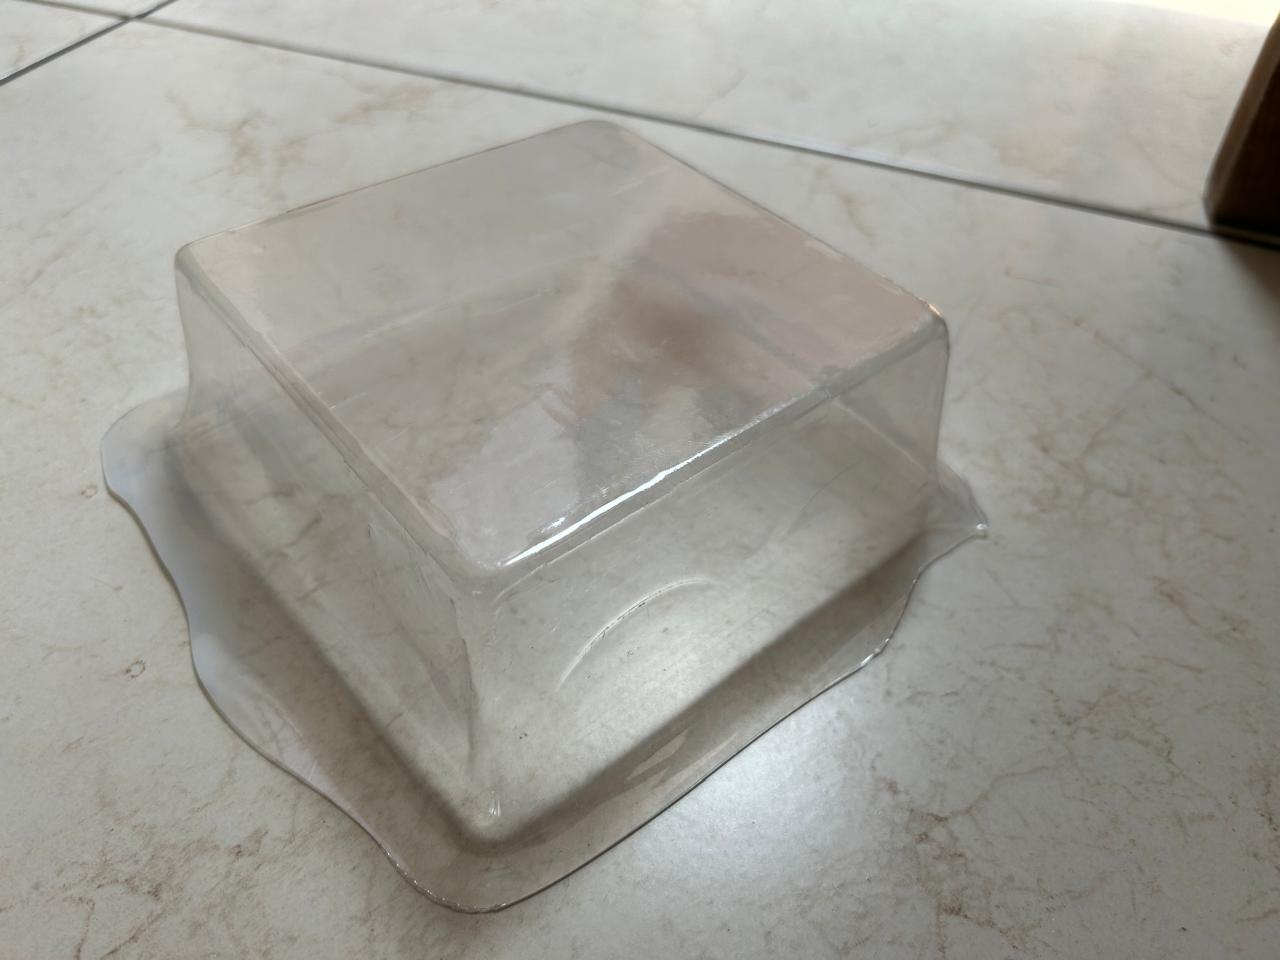
That's the raw final product, of course yu have to cut it.
The files
A .zip with the drawings
The file of the laser cutter
A manual of the machine the university gave us and where I took the information
Learning outcome
- This process can take a while, and you can repeat the process a few times with the same material, but this will lose consistency and might be more fragile The machine was not working very well and some zones where not heating while the others were overheating even with the controls on the same temperature. Due to that you might have to place different zones at different temperatures to compensate that.
- The material con brake if it is overheating and once broke, it wont work anymore.