Week 5. 3D scanning and printing
Belloooooooooo, Still here, this week is about my favorite part, 3D scanning and printing, being honest I have never 3D canned anything before, this week was my first time and I loved it. The first thing I did was the 3D scanning.
But first, take a look to the group tasks Link to the group task
What I used for 3D scanning
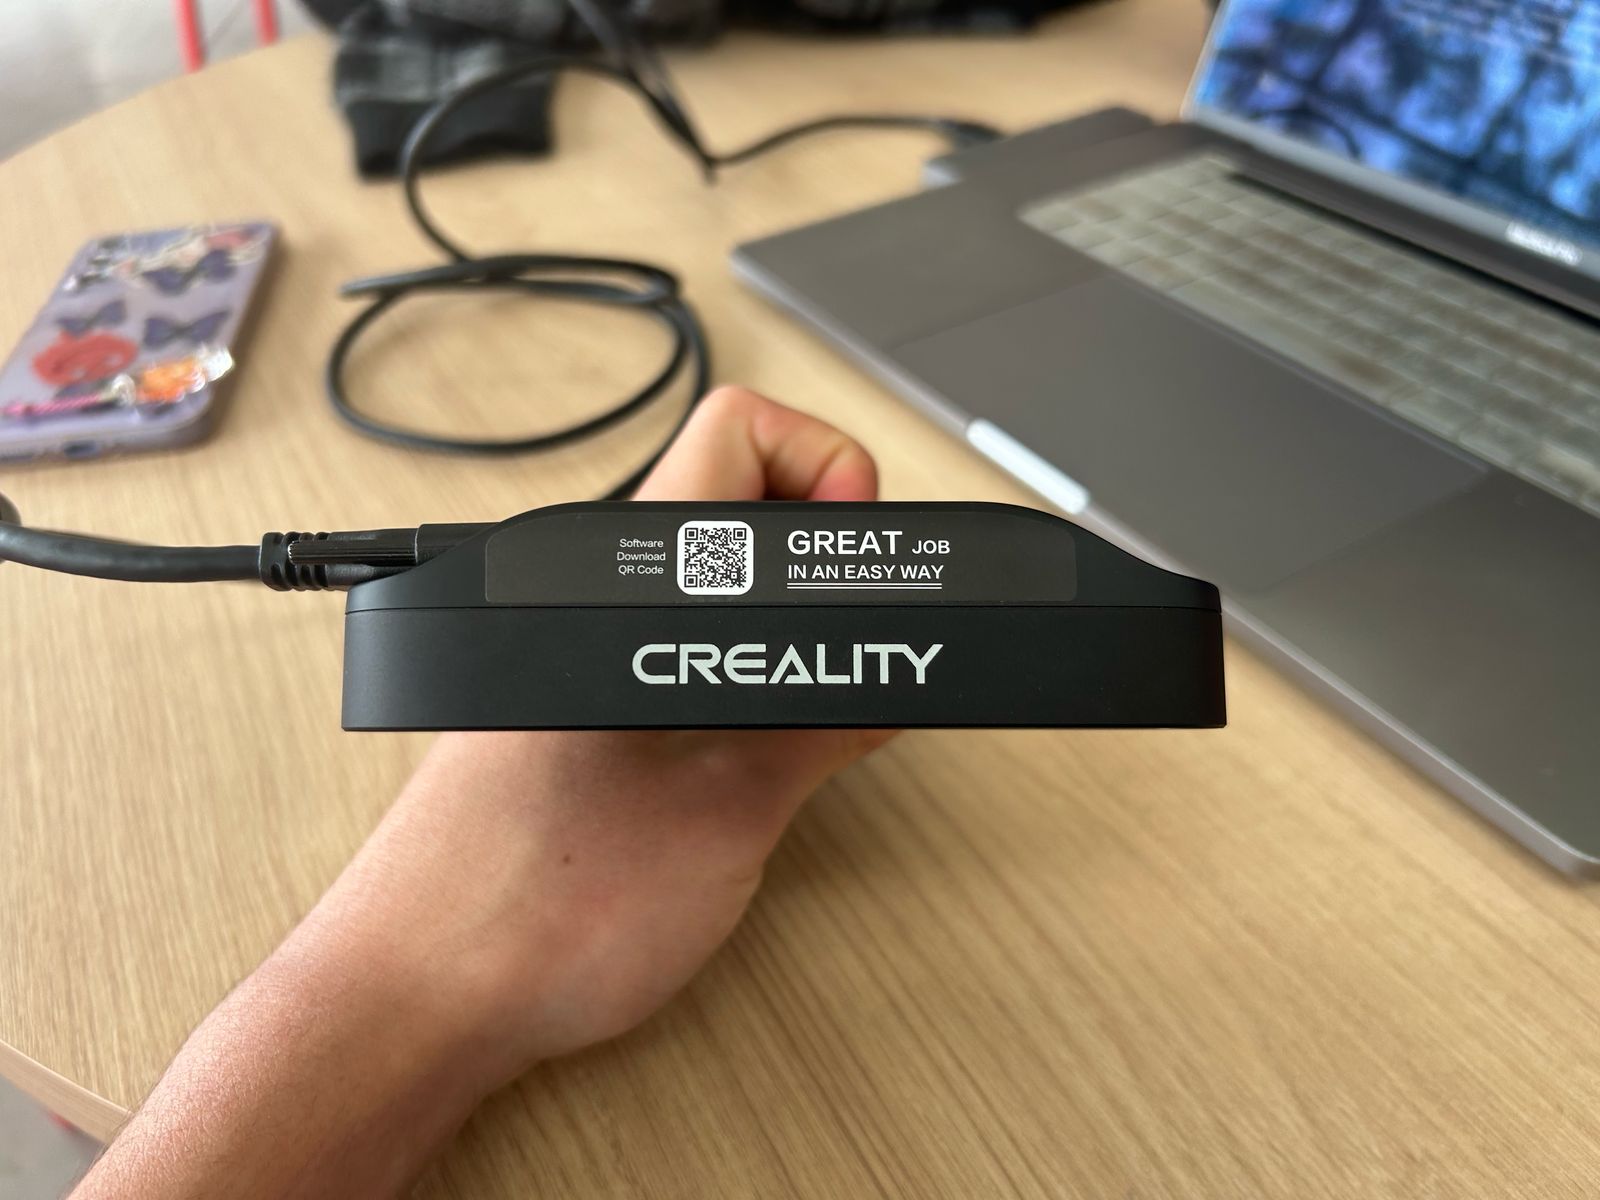
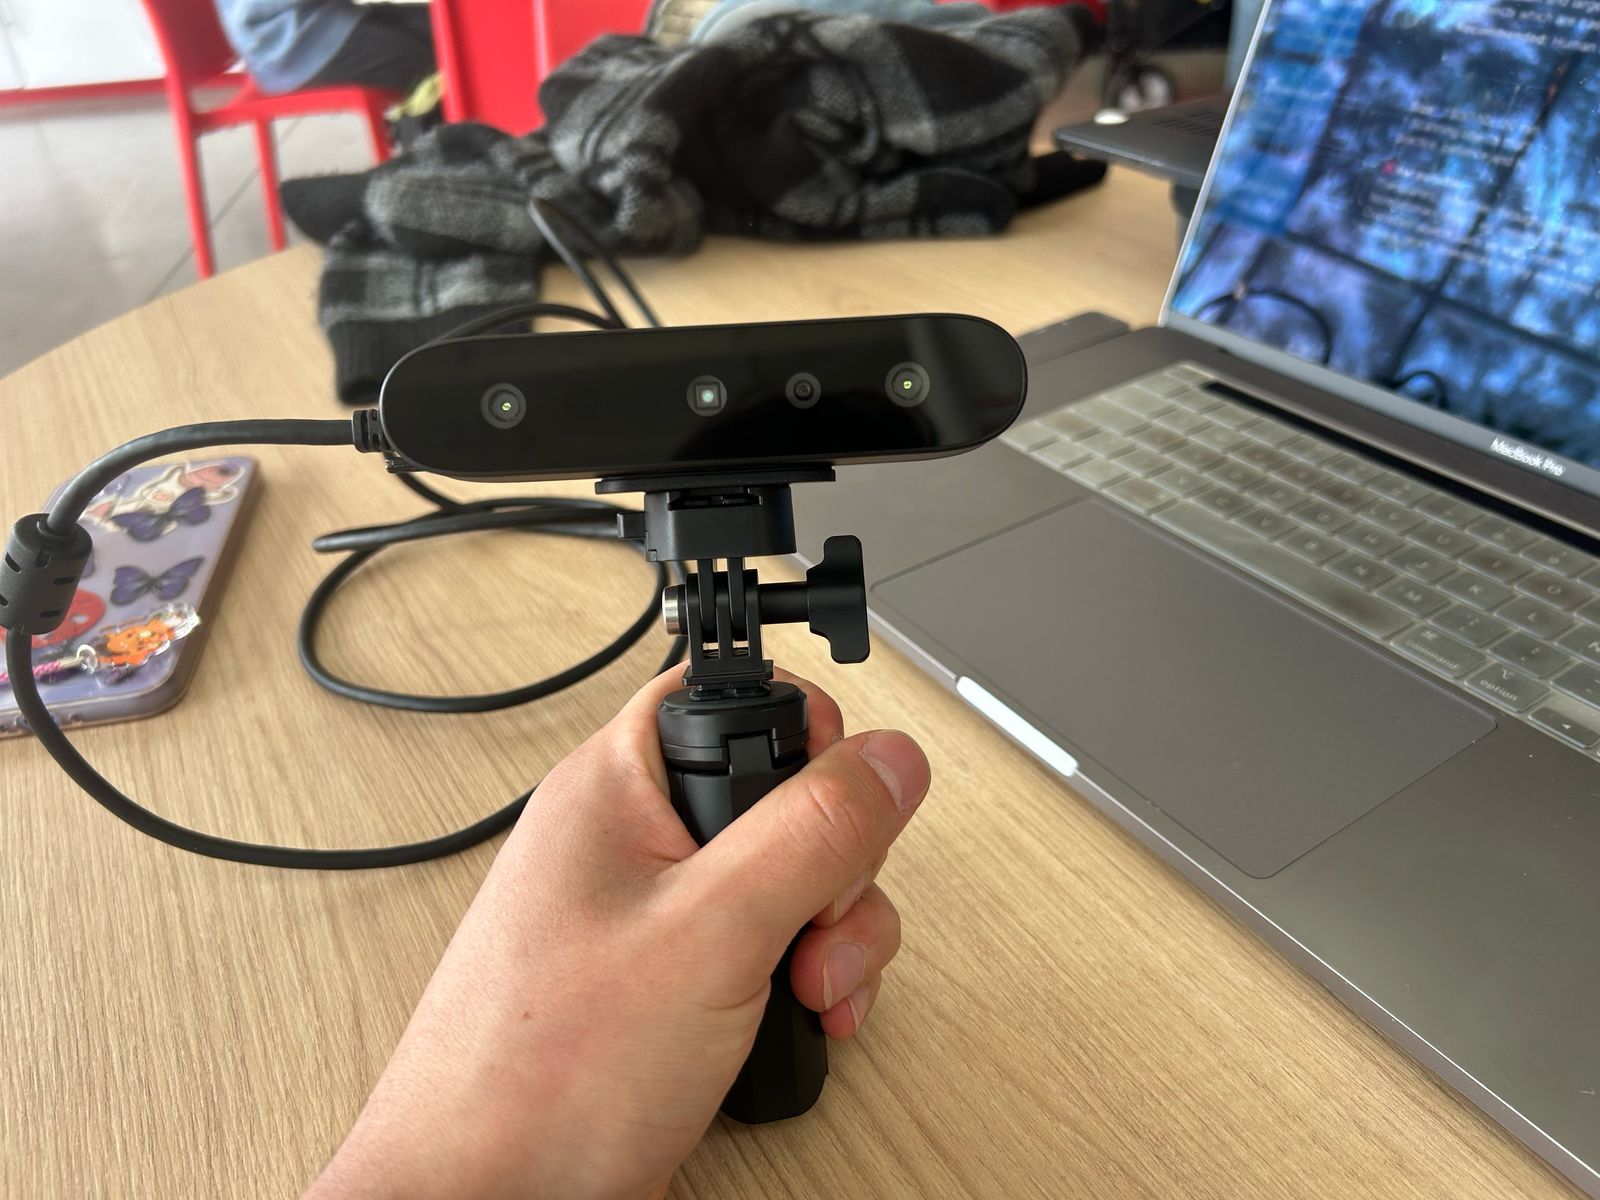
There are many ways of 3D scanning objects, by taking a lot of images from different angles and sending them to a software so it creates the 3D object. Or, you can use a 3D scanner, in my case I used a the 3D scanner from our fablab. it is a creality scanner. I don't know much about it's specifications but is this one:
Why?
I liked this scanner because it looks like a go pro and you can use it on MAC and WINDOWS, you just have to download the program (a very intuitive program), connect the scanner to the laptop and that's it. Once in the software, there is a quick explications of how it works and how to scan different things. Such as, geometry, texture and marker, yes they are what they sound to, except for marker, marker is for something with low textures and geometry.
3D scanning
Downloading the program
The program it uses is creality-scan you just have to select the software you want it for -> the latest version -> click on download and follow the installing instructions.
Starting
Once installed open it and it will ask for some permissions, and for the scanner, it will automatically search for it, so be sure to have it already plugged in to your computer after opening the program. Click on next once it detected it.
Now that we know what we want to scan, in my case a geometry, we click on scan and select the parameters that we need.
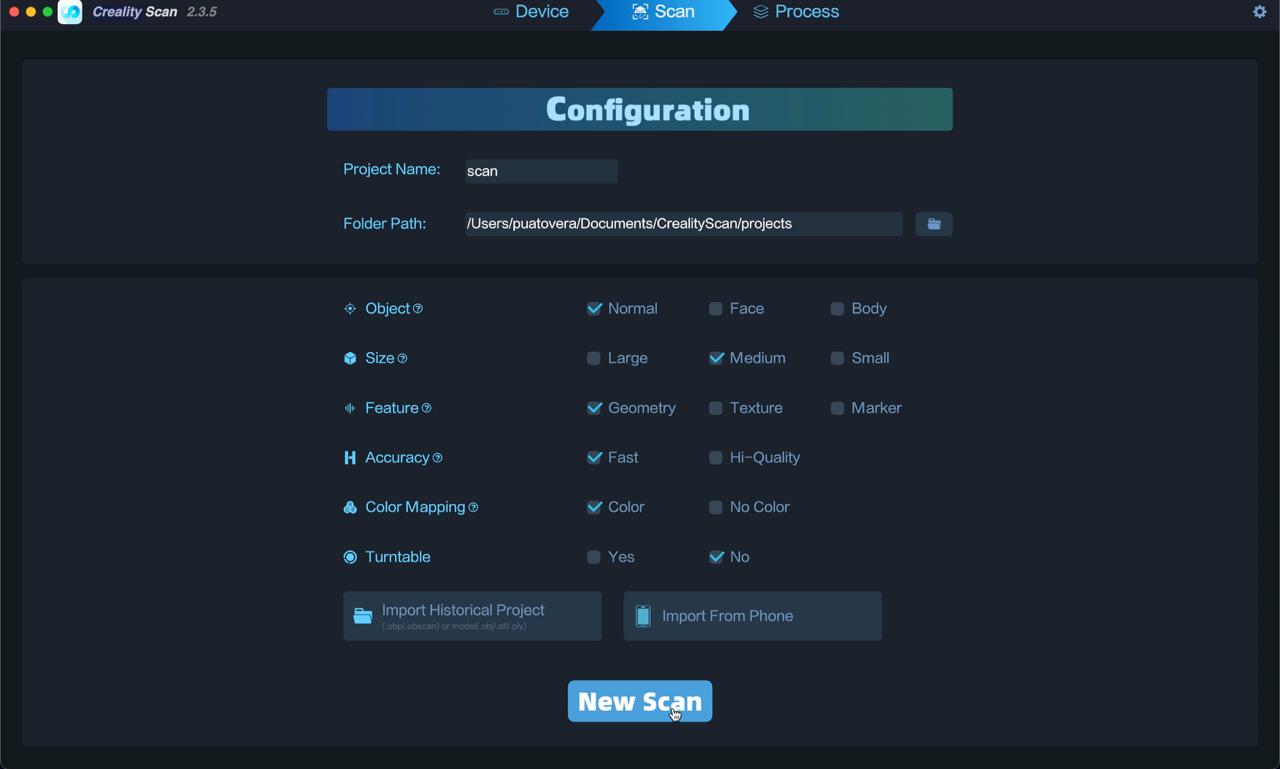
In my case I selected a normal object because it was a hand, not a complete body and a hand is not a face. the size was normal, I'm interested on the geometry on the hand, i wanted it to be not so heavy, I wanted to keep the colors and I had no rotating table to make the scan.
Before scanning
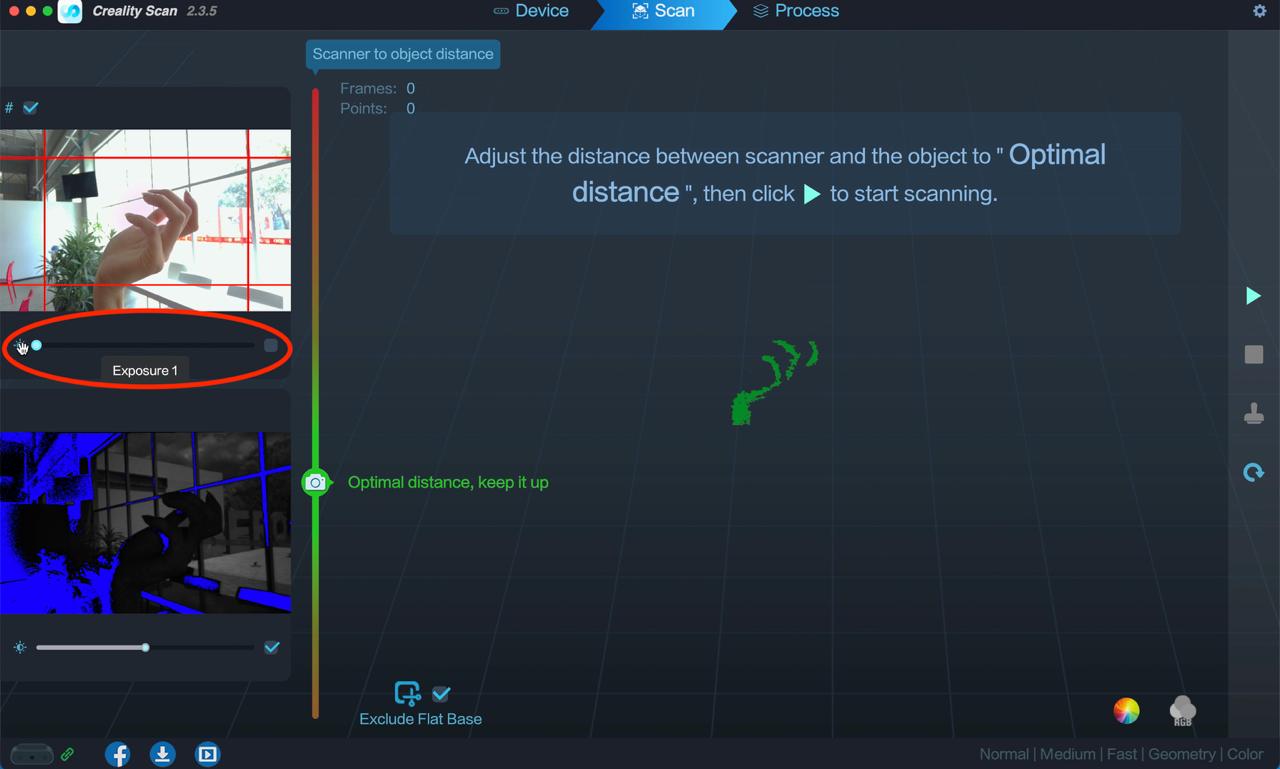
Now that we set the parameters it takes us to the scanning page, here we will have 3 views of the same thing, the main one is like what the 3D sensor is seeing, then is like a normal camera so it can see the colors I guess and kind of a infrared camera, I don't really know.
When we are scanning something we have to look for 2 things on the screen:
-
The distance line
The one on the left side of the 3D scan area. We have to keep the camera point on the green zone or a optimal distance from the object. -
The positions of the object
The 3D scanner has to keep kind of a orientation/position of the object. If we break the position or the orientation the captured object will "break" and turn into red
Just like in this video.
Scanning
Once we found the optimal distance we have to click on the "play/start" button to start capturing the data.
Place the object on the center and move the scanner around so it can capture ever inch of the object.
If your are handling the scanner like me, be sure to move it firmly.
NOTE, on the previous video the green parts are the captured data, ad once it turns red, it means the scanner lost the object and you have to go back to the previous position or stand still until the scanner fixes itself.
Important Comment
Now it took me like 20 attempts to achieve a decent 3D model, not even a good one, a decent one. I found that a key is on keeping the object right in the middle of the camera and rotate it like a machine, also, the less you can move while going around the object the better, but as a human is basically impossible. I also had to manipulate the exposure of the camera because as I made the scanning next to a giant window the light was too much and the camera was turning completely black and it affected the scanning.
Just like in this image
Finishing the scan
Once I had the decent 3D model, I clicked on the right middle squared button to stop the scanning it gives a preview of the object and then you can process the object. Just like on the following video
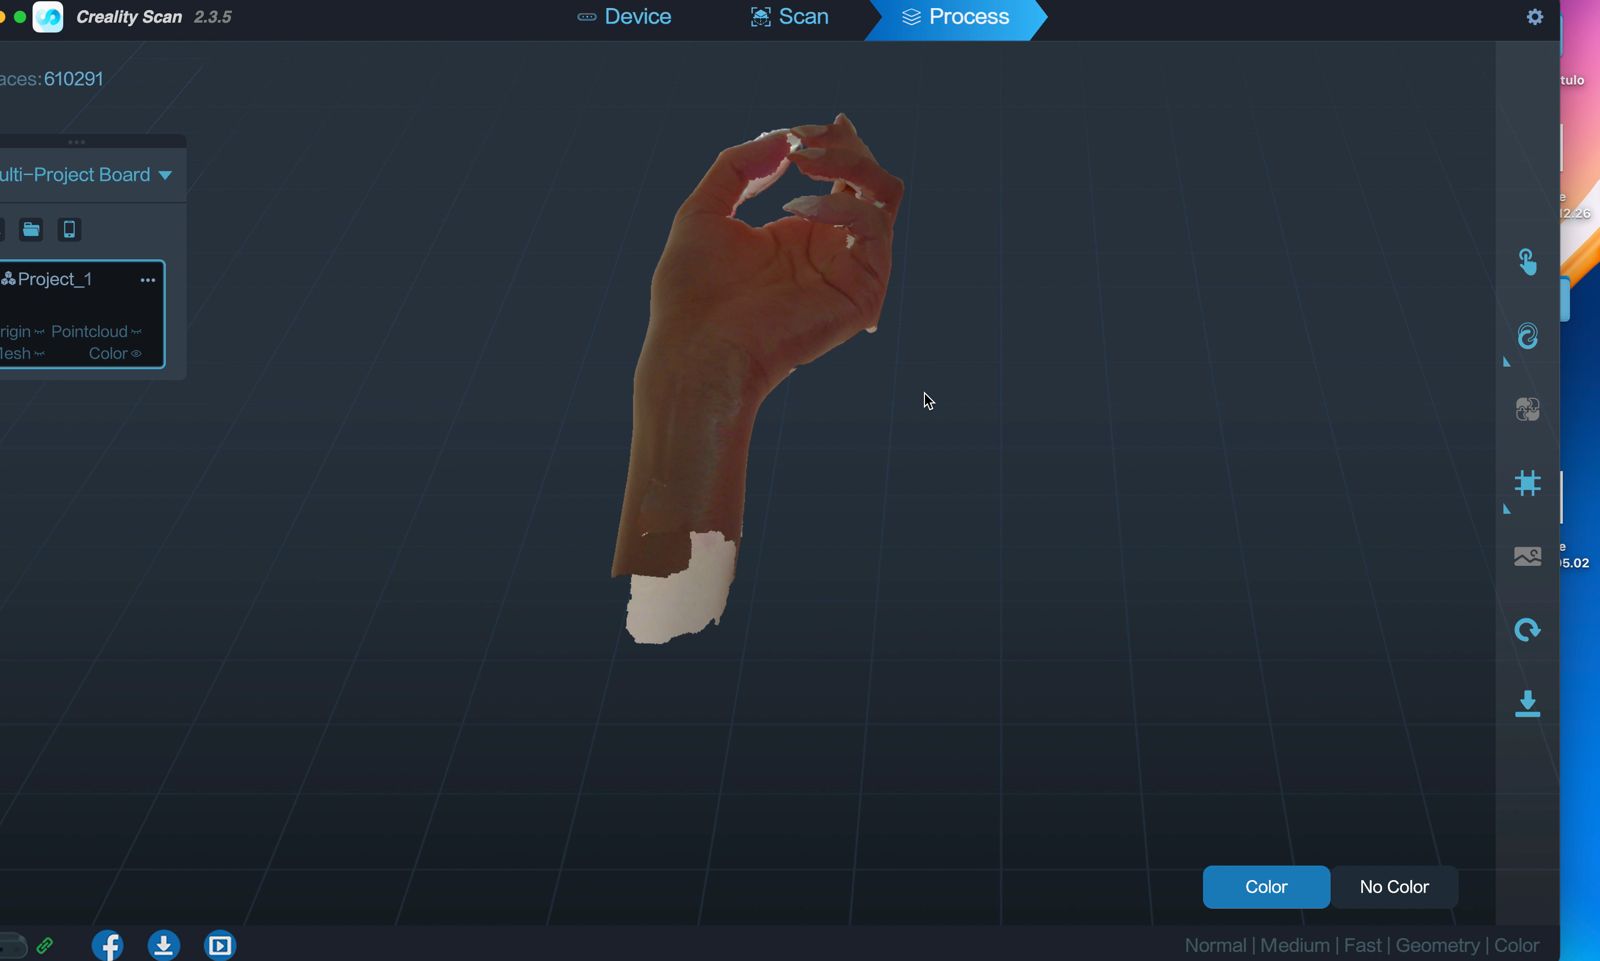
As I don't know much about it to move the processing parameters I just clicked on the default parameters of the program and it started processing it. The next step is the final object with the mesh and the color mapping
That option will do what's on the following image:
Export the Scan
To export, just click on the export button on the right side of the screen, and it will export the object as a .obj
 8.01.11.png)
Final product
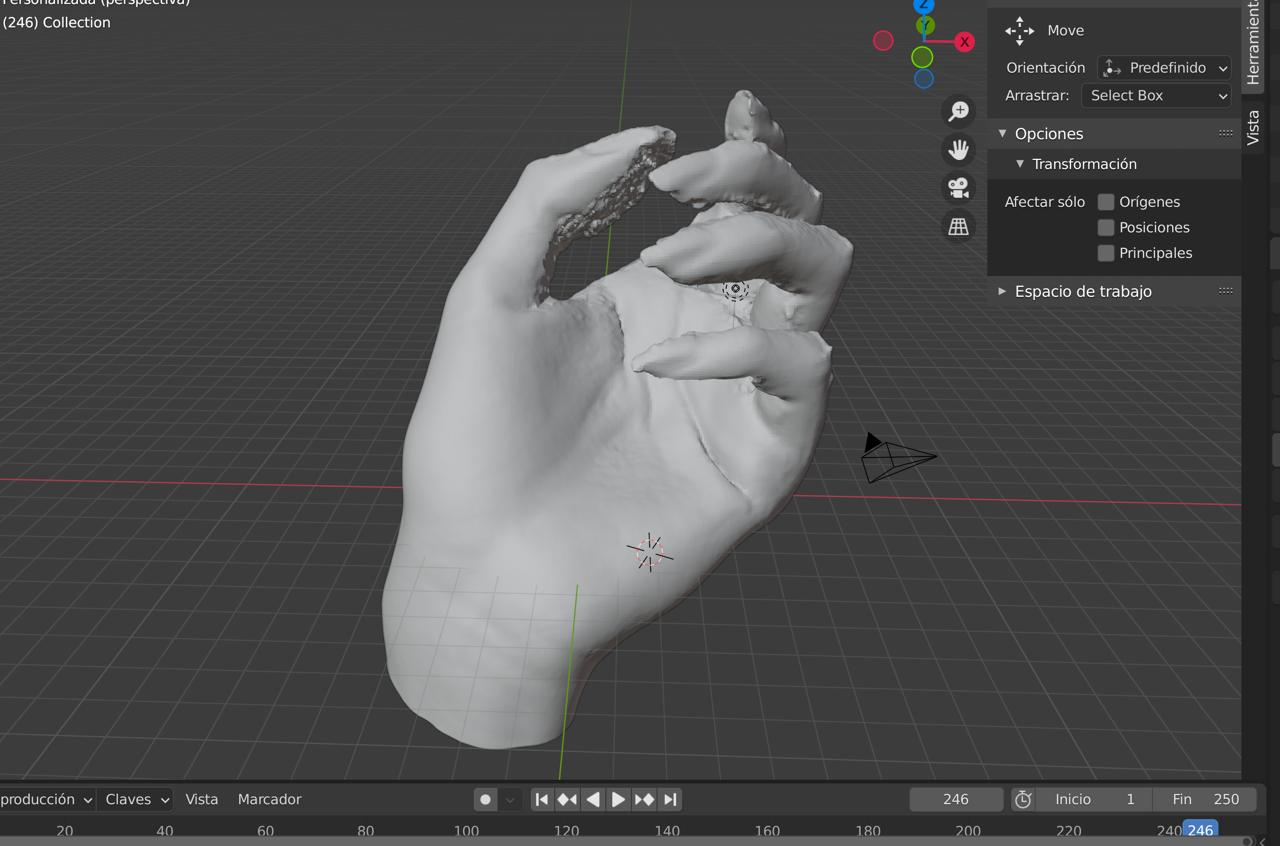
I oppened the .obj file on blender, because blender can handle vey heavy files with certain facility.
But as you can see on the previous image, the scan actually had a lot of empty spaces, so with help of blender I reconstructed it.
And here is it.
3D printing
Note, I wanted to scan the hand, reconstruct it in blender and add some water so it looked cool and print that. But the hand had A LOT of blank spaces I was going to ran out of time. So I quitted that idea and made some water in blender, and 3D printed some falling water. Here is how I created the piece:
Exporting the model
To export the model just go to "Archivo/File" -> export -> select the exporting parameters -> ok.
For what we want and STL or OBJ file are fine.
Information about printing
NOTE, 3D printers need a sliced 3D model, this means exactly what is sounds like, the software turns the 3D model into a bog sandwich so the head of the printer can follow a 2D map extruding the material and then go up a few milliliters to print a new 2D map. This sliced 3D object with all the parameters saves as a .gcode file and this is the file the 3D printers understand.
Now, there are MANY, TOO MUCH parameters we can change form a 3D slicer, but in this case we will only be focusing on the most common and basic ones:
- Import the object
- Manipulate the object
- Select the printer and material
- Velocity
- Infill
- Supports
- Bed adhesion
And I guess that's it
Printing
Import the object
This is basically it, bring the object to the software by clicking on the right button or ctr + i
NOTE, in this program you can open this type of files:

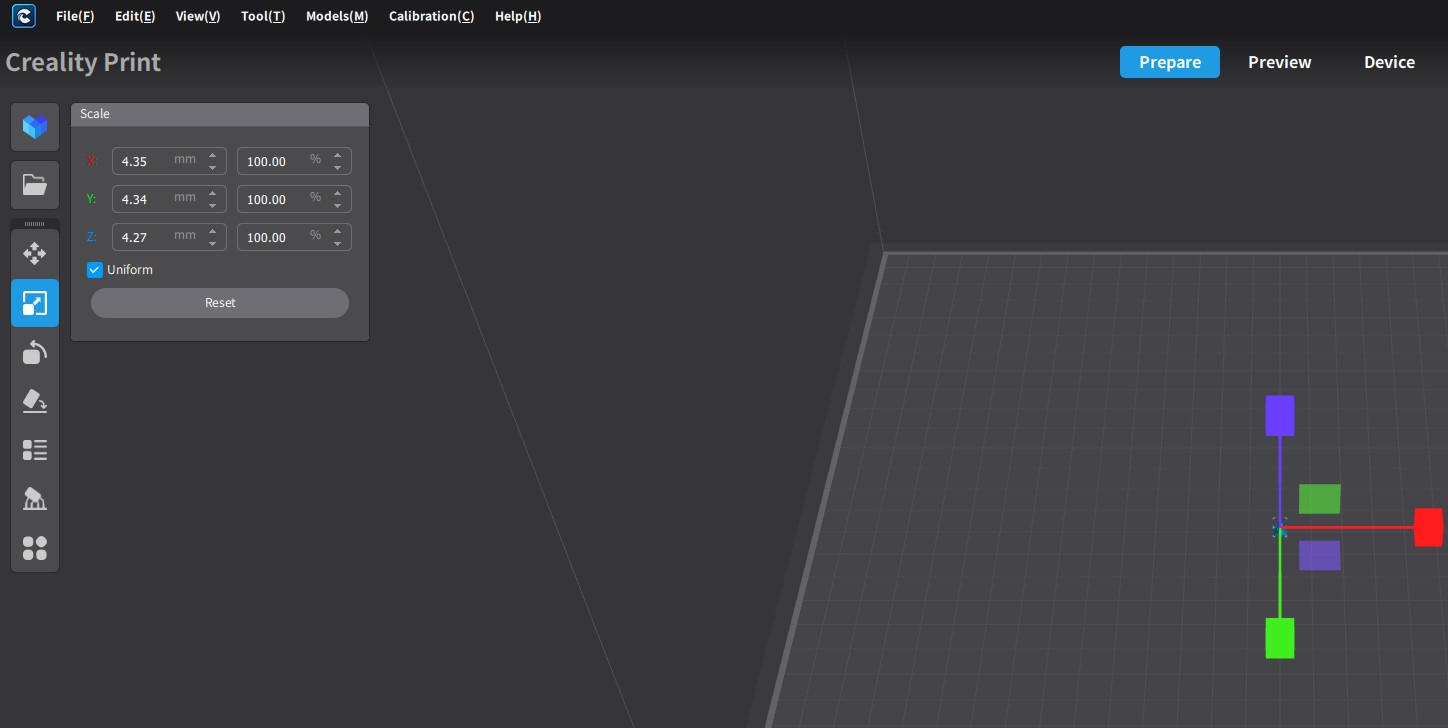
Manipulate the object
This allows you change some basic things of the object, like the:
- Position on the printing bed
- The scale of the object
- Rotate the object
- Decide in which planar face will be printed
- Duplicate the object
- And that's it for today
This menu was on the left middle side of the software, just as we can see on the image
Set the printer and and material
The "set printer" option is mostly used when you have more 2 or more printers on the same software. ou have to tell in which in e you will be working.
In my case that was not necessary because I have just 1.
However, the material is very important to set, because is not the same working with PLA or PETG or ABS, this materials need different parameters,
for example, PLA works with lower temperatures than PETG, but PLA works on higher velocities than the PETG, thats why the software allows you to manage your
materials and set the different parameters. So you just select the material.
Velocity
This parameter can vary between printers, in my case this printer con go up to 600mm/s that's fast. Is important to mention that in order to reach that speeds
we need a special kind of material, or that's just brand marketing.
This parameter usually are modified when we create the material, how ever there are sometimes when we need to change somethings, for example the first layers velocity
to get a better bed addition, or slower the outside walls to get a better surface.
In my case as I had a high velocity filament I printed at 400mm/s.
just like in this video:
Infill
This is my material saving favorite parameter, whenever I want to save material I take the infill less than 10%.
This parameter will tell the software how much material you want to put inside the object. As more material more filament used but a stronger object and the opposite way.
In this case I selected a 5 - 10 % infill because it was a quite big object and wanted to save as much material as possible.
Supports
This is exactly what it sounds like supports for flying or angled parts of the object, the thing we have to know about this is that we have the regular seared/linear/ supports and the tree supports. In my case I didn't needed supports so I'm just mentioning it
Bed adhesion
This option is very helpful but at te same time very messy sometimes, what this does basically is add some extra material on the first layer or a complete new object to make bigger the contact area of the object to the bed and so it doesn't come off while printing, using this kind of options there is no necessity to use glue. It has variety of options like:
- Raft
- Brim
- Skirt
- Among others
And you can set them like this:
The file
The final product
The files
What I learned
I learned a basic but very useful trick for the supports, the angle test, this is basically, up to what angle is the printer able to print with out supports. he default value on the printer software is 60º, but it might be less or more, I have to try it.
Correction
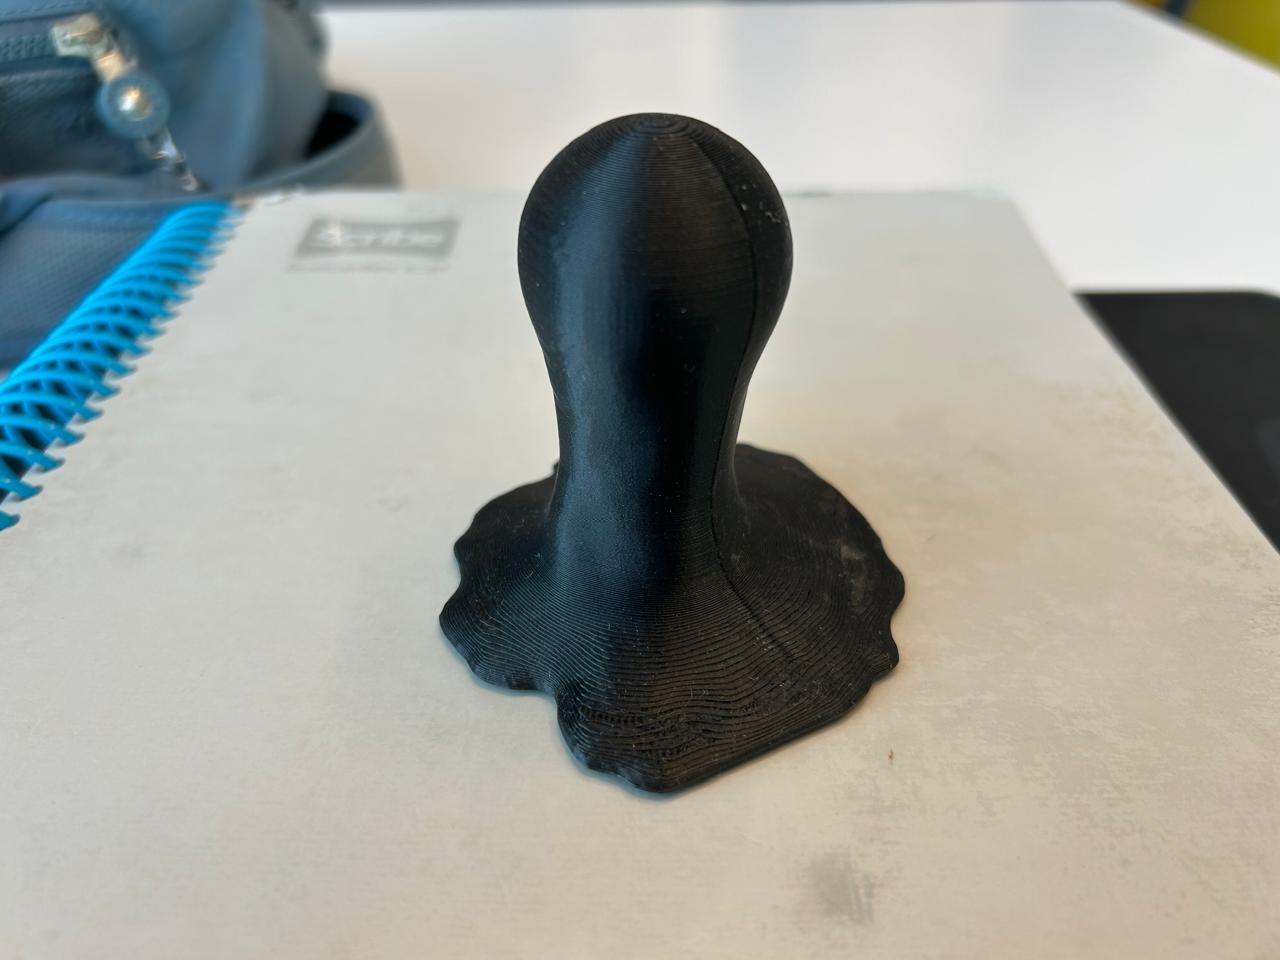
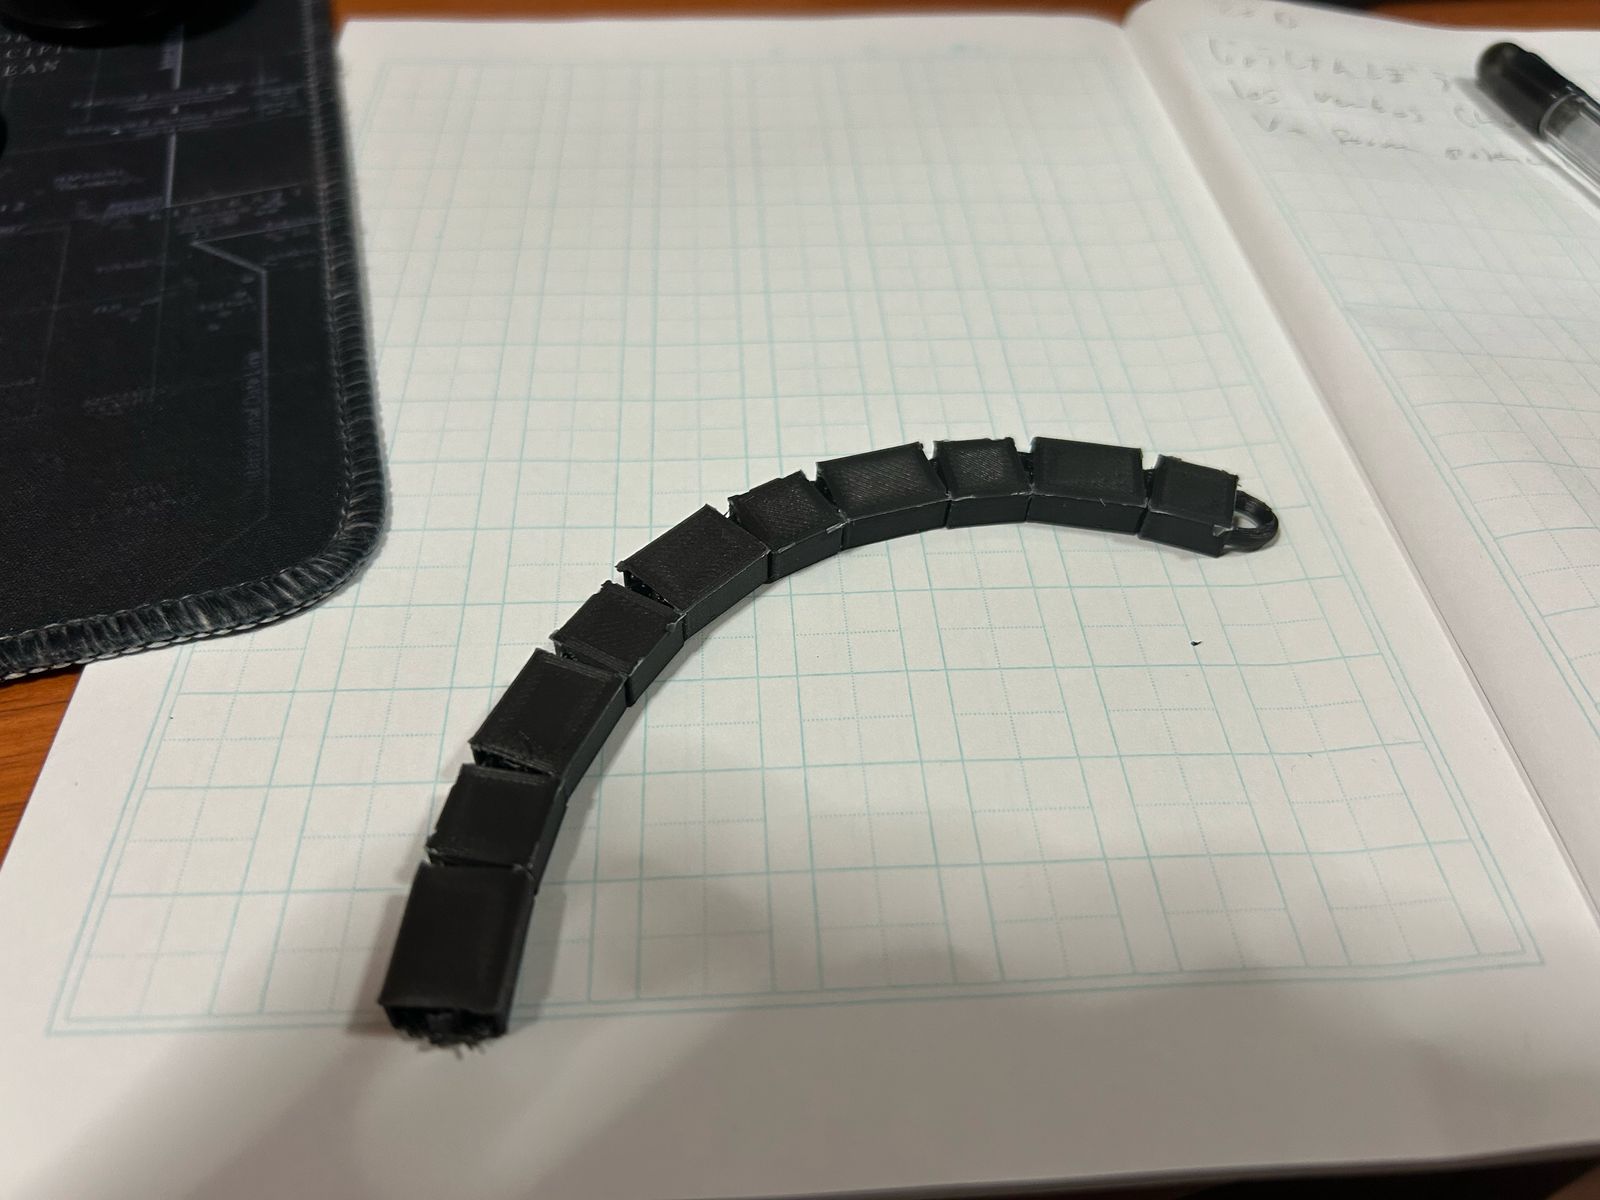
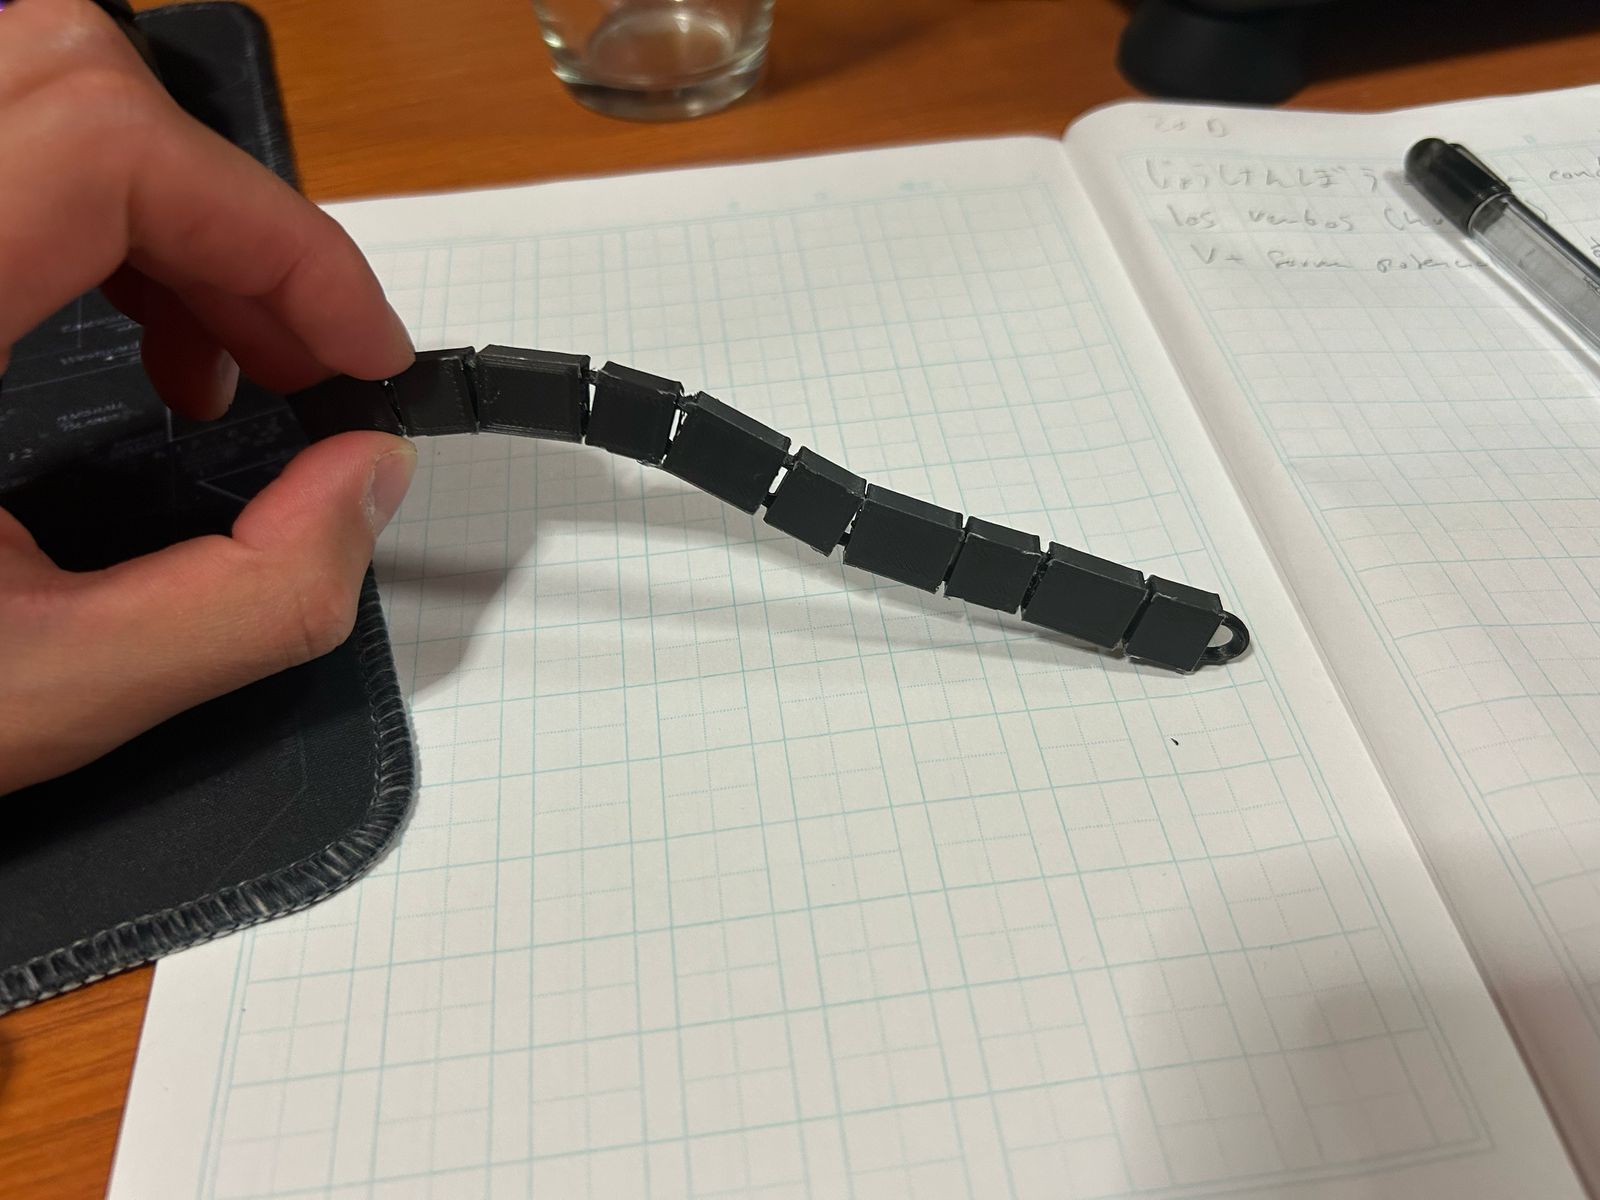
My first idea was very simple and easy to do on any other process, so I remade the print. I thought, what is complex and simple enough to make easy to a 3D printer but hard to any other. Voilá, the answer is something like a chain. So I made a chain.
How I did the new model
I just created the main figure on blender, this are teo blocks, I added circles to the first one on both sides si it can connect to the second piece. The second block is almost hollow except for the middle part and the cylinder on the center to secure the ring of the first block. I made just a pair because the magic will be on the slicer
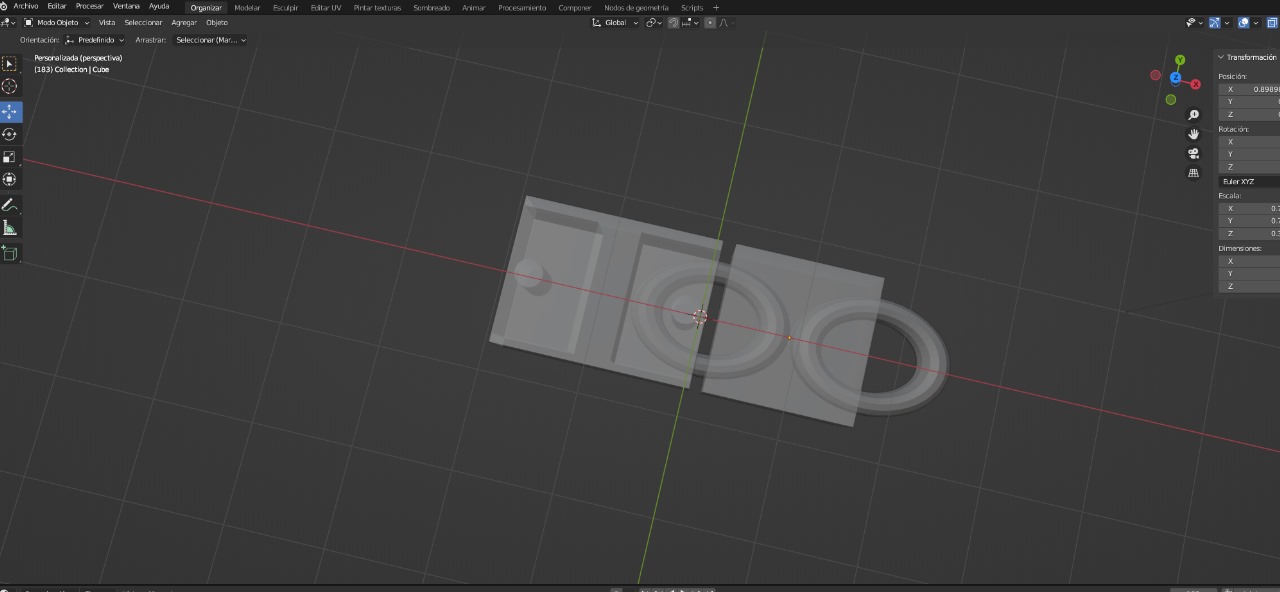
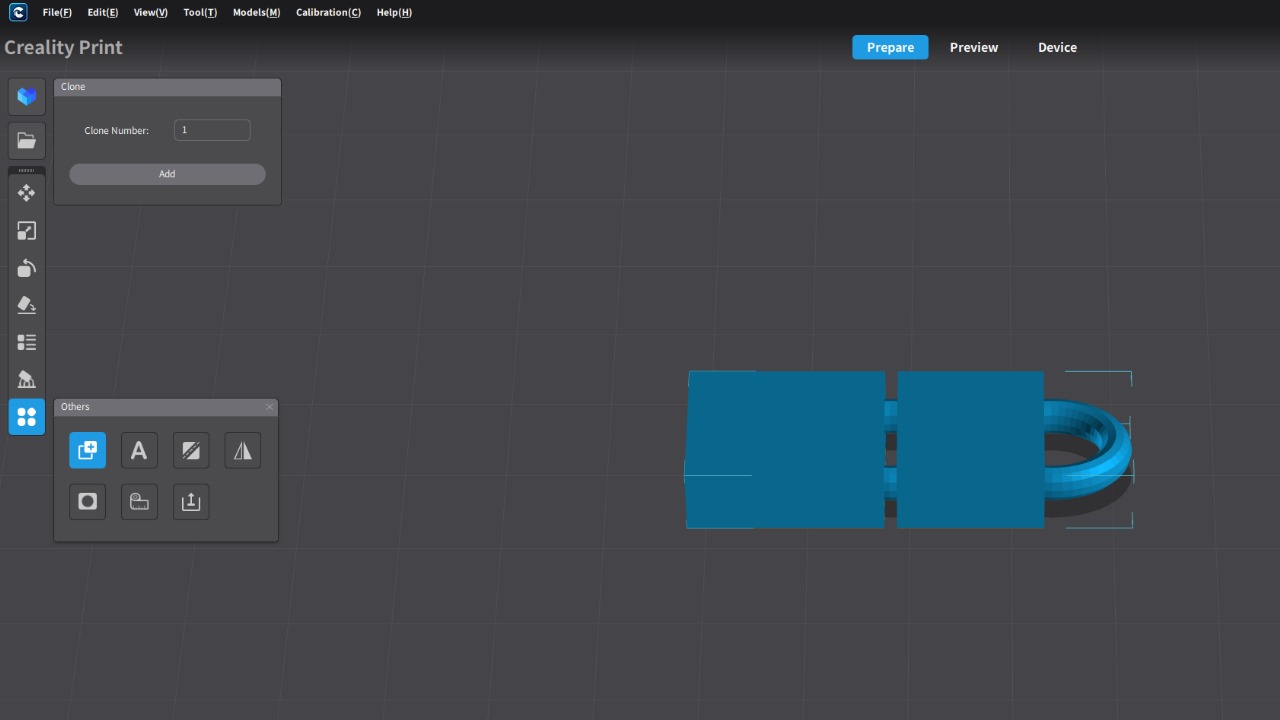
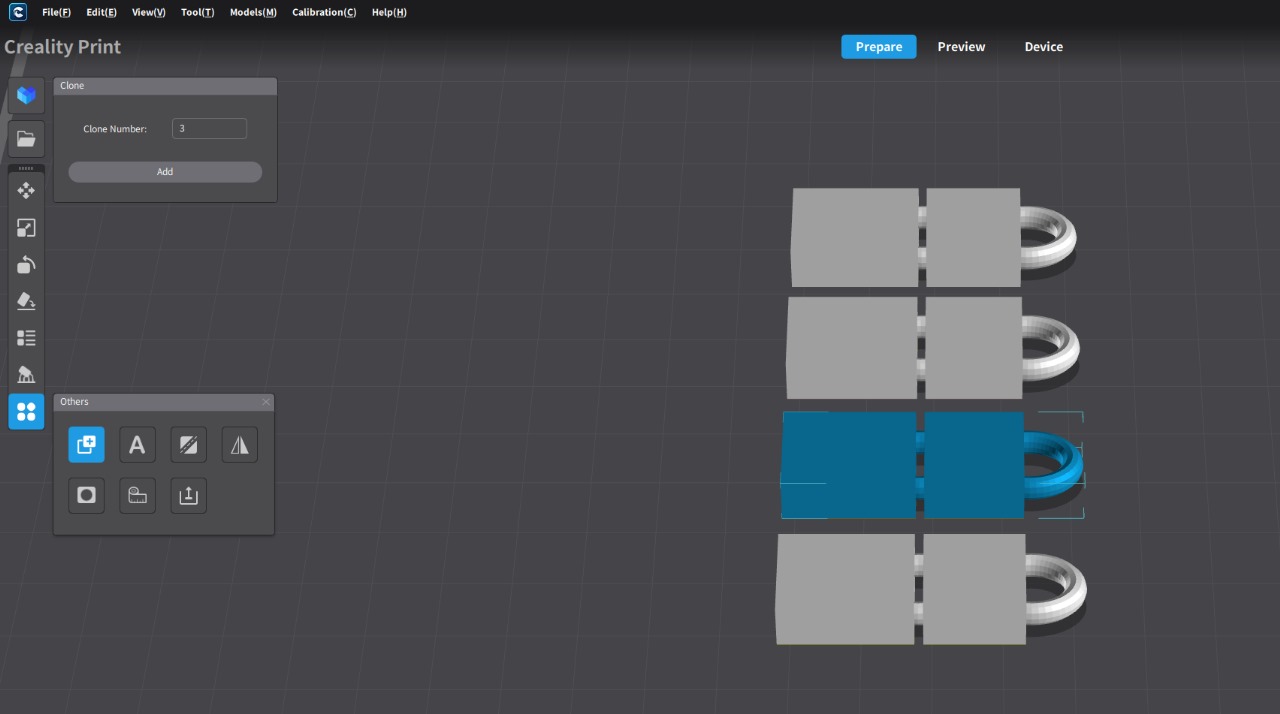
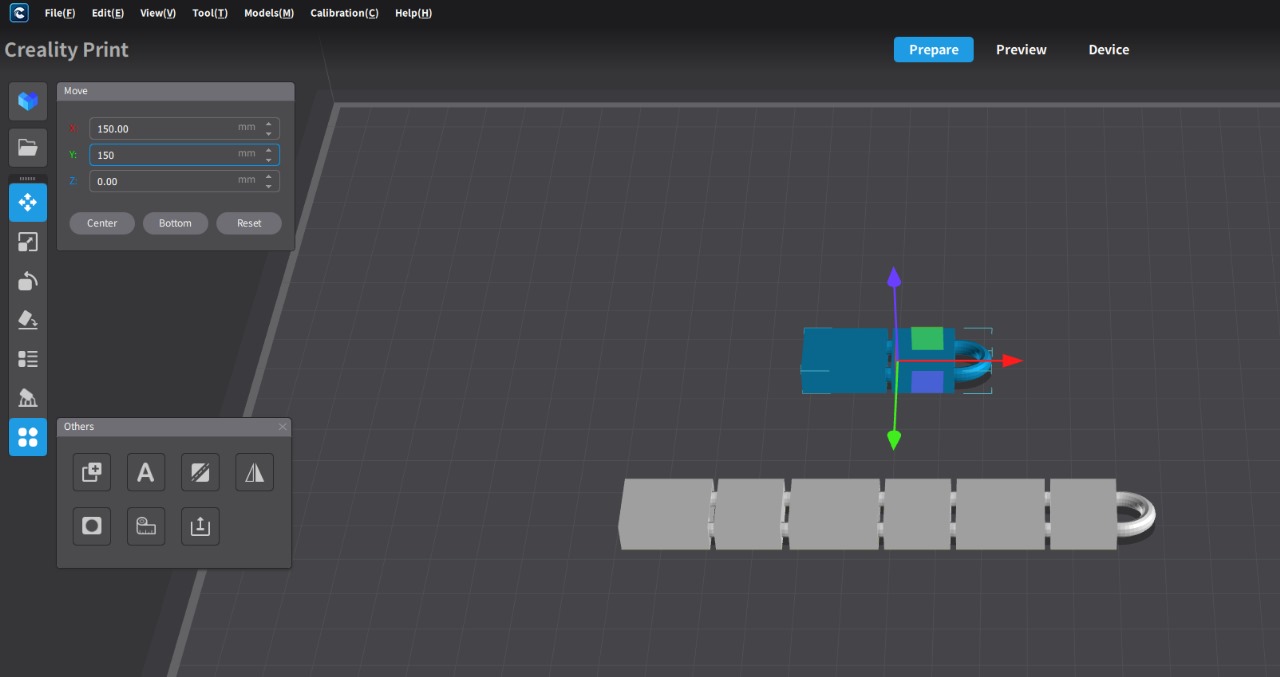

So, I imported the piece on STL and clone it, as ypu can see on the first image of this block of images. You can add as muc as you want or need. Then you have to arrange them, Here there is no x-ray view but you can take the distance between bock of the original piece to place the new ones. And we should have something like the last image, just make sure there are no har supports and click print. Once printed you will need to brake the inner supports or the material that might had stick so you can move the pieces freely.
The final final result
The files
¿Why is it ideal for a 3D printer?
What I think is that 3D printers have a powerful aspect but at the same time it's strongest weakness, they add material in layers, they start form nothing and add the material, while many other machine subtract the material form a main piece, this makes more difficult to automatize joined pieces like a chain without breaking them and stick them again.