Week 1. Project management

Basic understanding of "git"
Git can be understood like a time machine in your machine, since you create the first version of an project it will save every modification you make
(as long as you type the commands to do so). Letting you go back in time in time to every single point you save a modification,
so, if you made a mistake or erased everything, there is no need to worry, you just go back and restore the latest version.
Git will also let you work on many different devices creating clones or copies, as long as you have it installed, and connection to the internet. So it can also be seen as a file manager.
Git itself is a program like a game or whatsapp. With its own cloud on the internet.
Start using git
Once installed git, we will communicate with it in the “git dash”. Git command will be typed here just like:
-
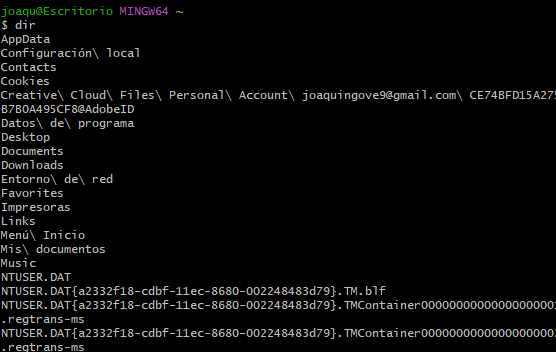
dir Shows you where you are in your computer (which folder)
-
cd (name of the folder) Opens the named folder

-
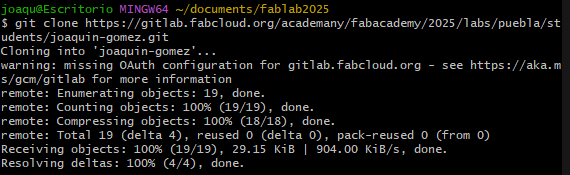
git colne (link) Clone our project files in the desire folder
-
git add . Add ALL the changes made to a package to send it to the original folder

-
git add (name of the file) Adds the selected changes made on a file to a package to send it to the original folder

-
git commit -m "name" Packs the changes and name version of changes

-
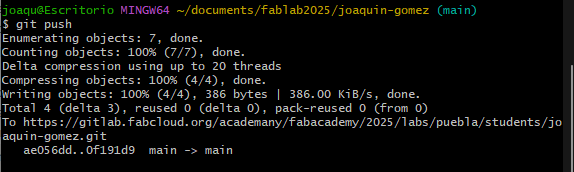
git push Sends the package to the original folder.
-
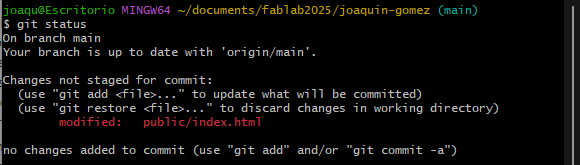
git status Shows you whats going on on git.
Cloning a project in the local hard disk
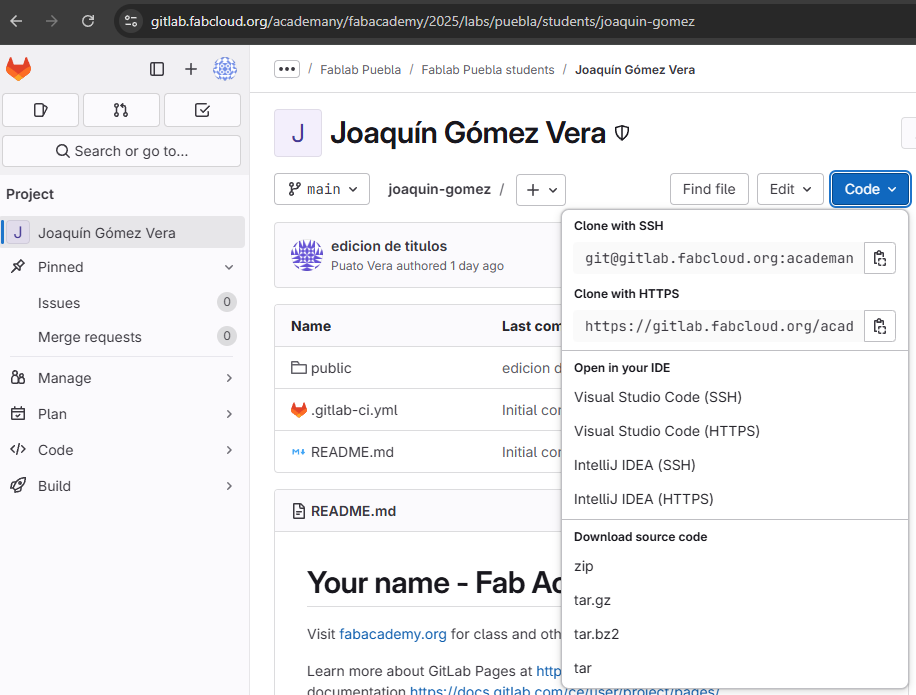
We will need only three things to create a clone of our project, open the folder to save the files, the git clone (link) command, and a link to the project route. These link will be in our gitlab profile (website), just click on the blue button (code) and select the “https” link. Paste it on the git clone (link) command and press enter.
Notes
- Notice that the git (commands) are only available once you made the clone, and they will be only available in the same folder of the clone.
- The blue label (main) next to the open folder in git tells you there is git working, and so, the project's clone.
- git bash is only for communicate with git, the files are edited in their respective programs (VS code) for example.
Basic understanding of html
The way of telling the websites what to do is with the HTML language, it works with "tags"
which divides the information depending on the type of tag, Most of the time these tags have
a specific structure, An opener tag and a closer tag. Each tag can or have to cantain more tags.
Some of the more commons tags are:
| Tag | Use | how to write it |
| head | Non visible part of the HTML code, which indicates the section to introduce meta data,
global links that will be used in the code, text codification code, name of the title, etc. |
 |
| body | The tag that will contain all the information of the web site, most of the tags are contained here. | 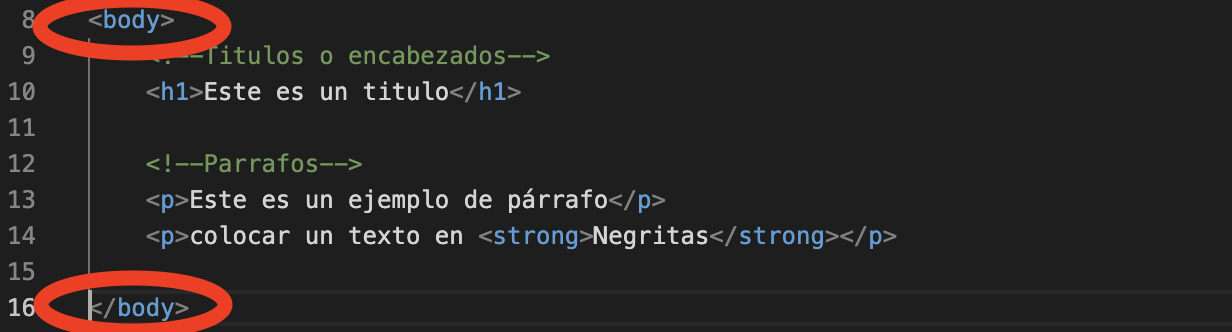 |
| footer | Contains some important information such as, copy rights, source code, licenses, contact, etc. |  |
| title | A head tag that contains the name of the navigator tag. |   |
| div | Makes a group of continuous tags | 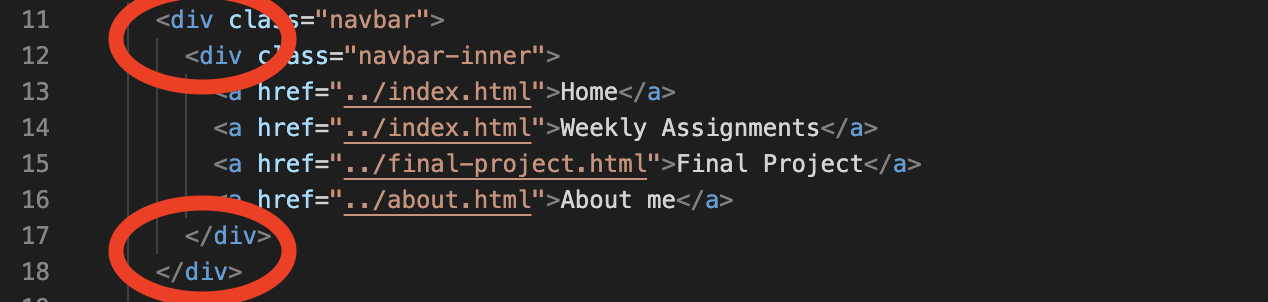 |
| h1 - h6 | Tag for the visible titles on the website. These tags start in h1 which is the biggest font size title, and the smallest font size h6. | 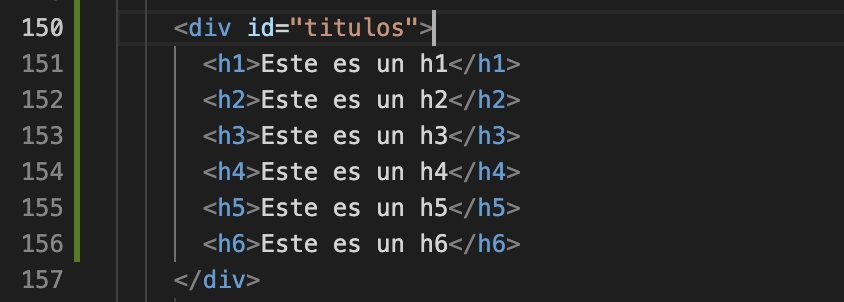 |
| a | Makes a reference to a link, documents, section of the website, other codes, among other. This tag has two main parts, the logical (hidden) part that contains the reference to where you want to go, and the visible part, the text that the user will click to go to the link. that's why there always has to be a text, and the text has to make a reference to where it goes. |  |
| p |
Allows the developer to write a complete paragraph.
NOTE, The text will be shown in a single line until the page ends,
|
 |
| ul |
|
 |
| ol |
|
 |
| table |
|
 |
| hr | Creates a line across the hole page to separate visually in sections. This one doesn't have a closer tag. |  |
| br | Makes a line jump in a text. The way of writing it is the same as hr, just a single opening tag. |  |
| img | Brings an image to the web site with hep of the src "subtag" and place it were the line code is. |  |
| code | Allows the developer to show a piece of code on the website. What's inside this tag will not execute, it will just be shown as text with a special font. NOTE, this tas does not show HTML tags, even if the HTML code is inside the code tag it will be executed. |  |
| link | Calls an external resource (css or Java Script) to be used in the HTML code, This ha to have an href "tag" to work. |  |
| Comments |
As the name says it, it allows to write comments on the website code. The comment tag can even contain code, but as long as it is between the comments tag, this will not be executed.
Also the comments will not appear on the website they are just for the ones with access to the code.
NOTE, they are usually used to give an order to the code and explain the function of a certain part of the code. |

|
Examples
Titles
This is a h1
This is a h2
This is a h3
This is a h4
This is a h5
This is a h6
Link
Paragraph
This is a paragraph This is a paragraph This is a paragraph This is a paragraph This is a paragraph This is a paragraph This is a paragraph This is a paragraph This is a paragraph This is a paragraph This is a paragraph This is a paragraph This is a paragraph This is a paragraph This is a paragraph This is a paragraph This is a paragraph This is a paragraph This is a paragraph This is a paragraph This is a paragraph This is a paragraph This is a paragraph This is a paragraph This is a paragraph This is a paragraph This is a paragraph This is a paragraph This is a paragraph This is a paragraph This is a paragraph This is a paragraph
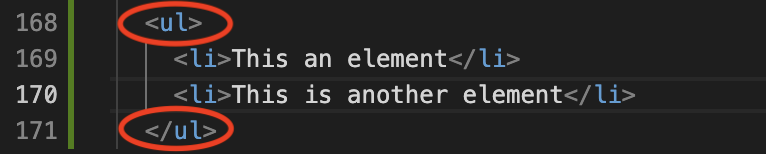
Unordered list
- This an element
- This is another element
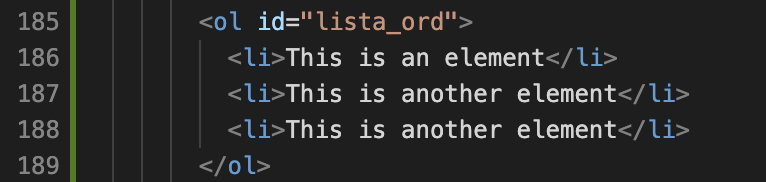
Ordered list
- This is an element
- This is another element
- This is another element
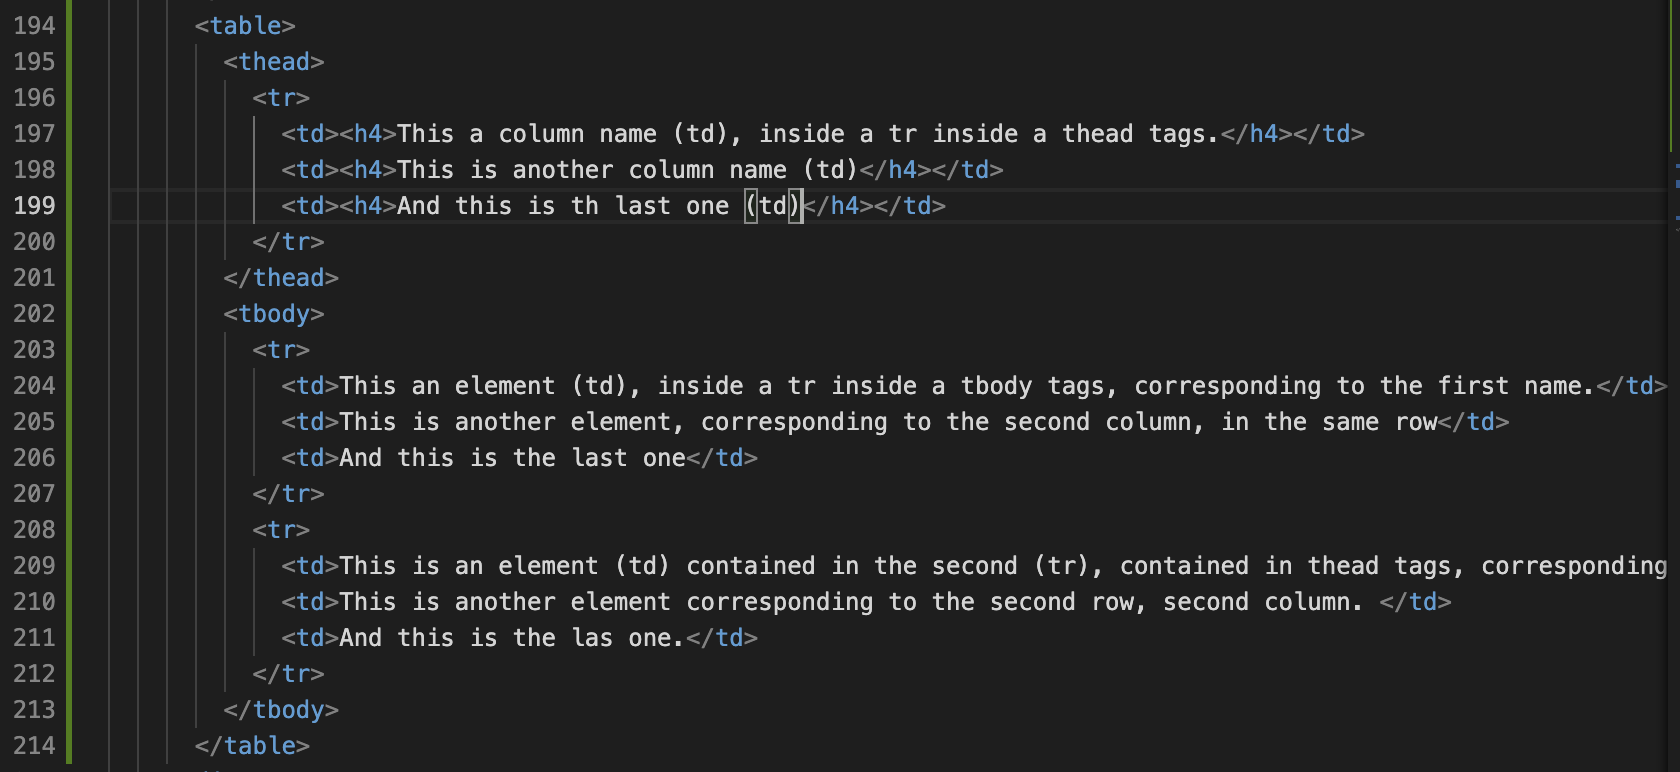
Table
This a column name (td), inside a tr inside a thead tags. |
This is another column name (td) |
And this is th last one (td) |
| This an element (td), inside a tr inside a tbody tags, corresponding to the first name. | This is another element, corresponding to the second column, in the same row | And this is the last one |
| This is an element (td) contained in the second (tr), contained in thead tags, corresponding to the first column. | This is another element corresponding to the second row, second column. | And this is the las one. |
Br
Makes a line jump on the website text, you have to put it exactly where you want the line jump.
and the way of writing it is the same as the hr tag, just the opening one.
At the end of these phrase will be a br tag
and the text continuous here, even though in the code is the same line.
Line
hr tag right bellow
Example image

Giving specific properties to the tags
Now we know HTML is the way of organizing and showing information trough a website, This language works with specifics tags, with specifics names, each tag can have others tags inside, some other are just a part of the tag and with this the bases to create your first web site are done.
How ever that's not all, just knowing what we know now is not enough to create something like the pages we go through every day, with the colors, animations, sections, buttons, and those kind of details. To get closer to something like that we must know that there are specific properties we can add to our tags.
These properties can be, a name, a class, a color, a size, a with, a height, a font size, a reference, a instruction, some borders, and even a language. Among many other specifications.
This might sound confusing but actually is the complete apposite, because this instructions do as the name says so, most of the time. In this part I will be showing and explaining some of the most common, and used in this page, specifications.
This specifications will always be written.
id property
id="name"
As you can see "id" gives a name to a tag, this name is specific and unique, that means you can not repeat the name again in the code. That allows you to make a reference to that specific element of the code, or give it special esthetic modifications
class property
class="name"
This one creates (as the name says) a class, is almost the same as id, because it also gives a name to the tags, the difference is that you do can put the same class to different tags in the code, even of they are not consecutive. That allows you to, for example, give the same esthetic modifications to the section
href property
href="location of the reference"
href the command to call to the code a link, a document, a part f the code, another code, etc (except for images, they have it's own tag). This property usually goes inside the "a" tag, these is like the hidden and
target
target="specific command"
Target tells the website what to do when clicking on a linked text (a tag). The default option of the tag is to open the link in the same tab. However targets gives many other options, the most common is _bank which opens the link on a new tab, leaving the original page open.
src
src="location of the element"
Let you call a image to insert it on the website, it can be a link fro the internet or a local direction. The link just by pasting it between the "", and te direction works with /the name of the carpet/other name , and on until you reach the desire file. In case you need to go back in folders you can write .../name/name and so on. This usually goes on the img tag.
download
download=""
This one as the name says it will download the linked image, file, etc, instead of opening it.
height and wight
height="number of he value + the units"
wight="number of the value + the units"
These specifications (as the name says it) are to change the height and wight of some element in the website, the value has to be written numerically (1, 30, 150) and the unit can depend on what you want, it can be mm, cm, px (pixels), % (percentage), in, etc.
NOTE, % means the element will occupy, the assigned percentage of the total space in the screen.
If you specify both scales, in case of images, the image will be deformed to the desired scale, how ever, if you write just one scale, the other one will automatically adjust to keep the image proportion and the specified scale.
color
color="name, rgb, hex"
As the name says it, this will apply a color to the desire section. This tag works with 3 possible ways of indicating the color, the name it self, the rgb code or the hexadecimal code.
NOTE, this last colored section can be easily replaced by css code. CSS code is a complementary HTML language that allows you specially give the website a esthetic view, as it is another language you have to create a new CSS file, which you will call to your HTML code to introduce the styles. And with help of the "tags" you can call them to modify their esthetics. The calling can be with general tags (head, body, div, h1, p, table, etc) and it will modify EVERY tag with the name you write, if you want to modify specifics sections, yu can use the class or id subtags.
NOTE, the predefined style I'm using on this website is provided by FABACADEMY. I haven't modify almost anything but the information.
Learning Outcome
Resuming what's up in the page, HTML is the most common and basic way of telling a computer how to organize and show information trough the internet. Now HTML just shows the information in it's pure way, white background, black letters, images, links, etc. Everything on the left side of the page and element above other element. that's a little boring, that's why there CSS, this is another website language that makes easy to give the information color, figures, positions, borders, and almost anything to make your website look nice. Now, as I said a few letters away, you need a HTML base to put the information you wan't to show, the way of doing it is by "tags", a starting tag for calling all the important information you will be using on the website like the language, the CSS style sheet, the title of the website, the general size of the website and many other things. Once you declare those important things (on the head tag) you can go ahead with the general information. (body tag) It is important to mention that the order in which you write the code will be the same order the information will be shown on the website. With that said, if you want a navbar, that's the first "tag" yu have to write and set it up, if right above it you want the main title to appear, that's the second tag you have to write, and so on. With the basis things we have seen here you can make a lot of things with the information, is just matter of logic, and knowing how it works. Fo example, you can make an image to be hyperlinked to another part of your website, and stuff like that. And of course there is a tag to write all the small letters (literally). This is just the creating part, the publishing and licensing part is another thing to other day.
Some valuable learning: Now I understand why many people use templates to create a nice web site, I decided I wanted to make it look bellyfull by myself and type Everything but that takes a lot of time and is very, extremely tedious so I started considering the idea of using a template. Number 2: every
THANKS FOR READING
Extra
I'm writing to make some clarifications, all the style was made many moths after the course
finished, but I don't know much about css coding.
So I asked many things to Gemini about how to do it.
For example the navbar, how to make the buttons to stay at the same distance every time and with different sizes of screen.
I also asked Gemini how to do the dropdown menu of the nav bar, and well place it as you can see it.
The codes boxes
This was an interesting thing, I thought the colors and spacing and everything was a css command.
But no, it isn't, I mean it has some code on css, but the main thing is a file you can download
from this website called primjs.
It is a pretty intuitive web site, you can preview the styles, select download and select the languages you need. Once selected the styles and languages
got to the very bottom and you will see 2 big button for downloading, a js and a css files.
Download both and add them to your work spaces, so you can call them like calling the css style file.
<(link href="../prism.css" rel="stylesheet" />
<(script src="../prism.js"><(/script>
Those commands, add them on the head tag of the html file.
Then, you have to contain the code tag, on a pre tag.
This, "pre" tag will help to make the spacing. Then, you have to add the "language-arduino" for example to the code tag.
                  <(pre>
                    <(code class="language-arduino">
<(link href="../prism.css" rel="stylesheet" />
<(script src="../prism.js"><(/script><(/code>
                  <(/pre>
And it sees something like this, obviously without the "(", I placed them so the code shows on screen.
And that's it, I usually refuse to use AI but it is useful when you don't pretty much about something and you are in a hurry.