5th week Assignment
3D Scanning and Printing
Group Assignment
Test the design rules for your 3D printer(s)
Please for group assignment details visit Anderson Zelarayan Web Page.
Individual Assignment
Design and 3D print an object (small, few cm3, limited by printer time) that could not be made subtractively
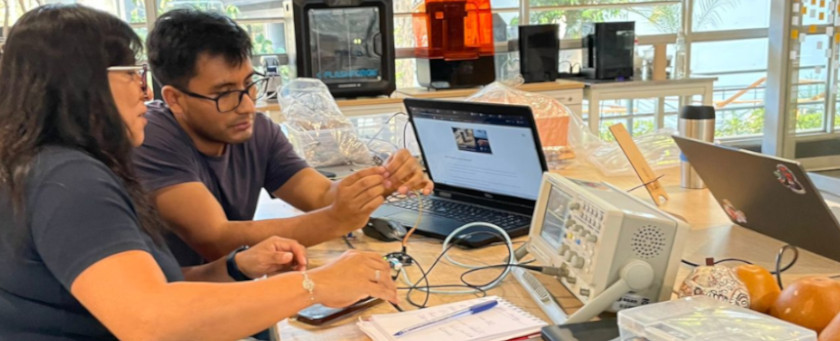
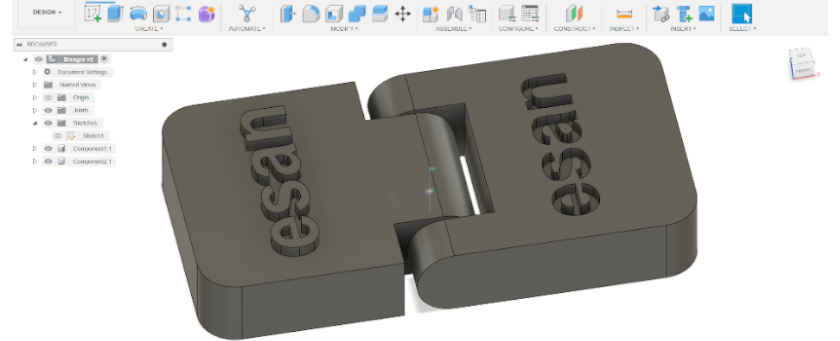
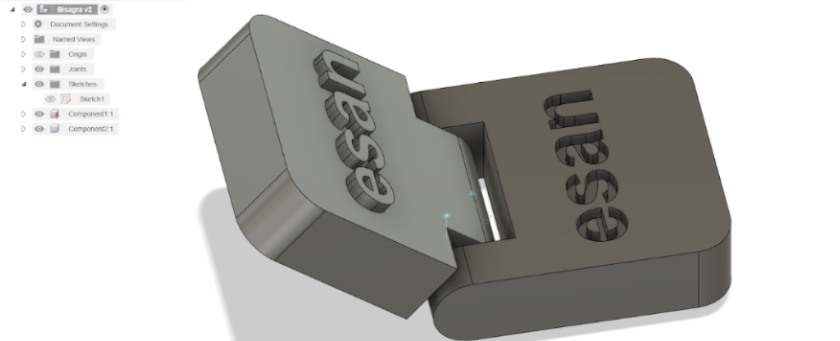
I decided to use Fusion 360 to run this assignment. I decided to develop something something with motion, to learn how to desing a hingle, that I would need for my final project.
Using Fusion 360
I followed these steps:
- I click on
sketch, there I choose ZX plane orientation - Then, on the new menu I choose
create - After, select
2-Point Rectangleto create one up to 20x6mm - Inside I drew a 4x6 mm, thus I've obtained 2 rectangles a small one up to 4x6 mm and the big one of 16x6mm
- Along rectangle's left side, I drew three circles
- Small diameter: 3mm
- Middle diameter: 3.70mm, I considered that 0.7mm will be the free space that would allow the hinge to function
- Bigger diameter: 6mm
- Then, I use
Extude Function- First, 4mm extrusion for all components
- Then I extrude only the small circle and the bigger rectangle up to 6mm
- With extrude we'll get a body
- Then, I use
Mirror Functionto duplicate only the central body - I applied
Extrude Functionset a similar body extreme with all sketch components - I repeated the procedure, so we could get a butt hingle
- I set a 1st and 2nd as components
- After we need to establish a joint between the two components, so we can applied revolte
- Thus, we can set position of both components, and pint out one component to the ground
- I applied
Fillet Functionto the components borders - I open the hinge so, I can insert a text into the hinge. I chose "ESAN" as a text
- I extrude the letter with a negative length, so it could be some kind engraved
- In the second component I wrote the same text, but extuded with a positive length, to made them in high relief
You can view the process that I followed in the next video
You can get access to the hinge here.
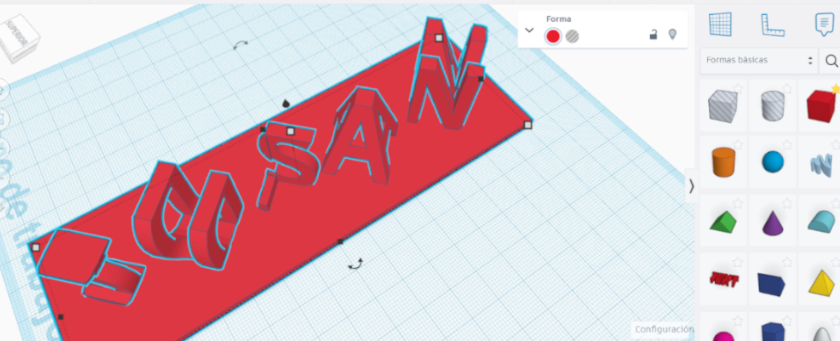
Using ThinkerCad
I found a tutorial on how to make How to Make A Dual Name Tray from a Youtube Channel called Teaching3DPrinting with 3.27 K suscriptores. You can get access here
- I create my account on here
- I click on
sketch, and did the following process - I chose
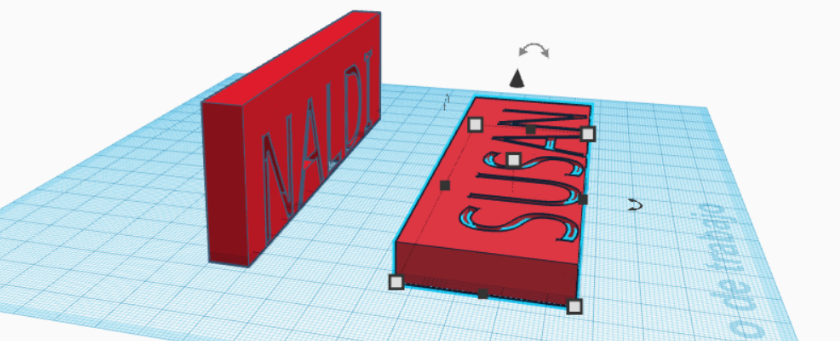
Textoption twice and include my two names on caps "NALDI" and "SUSAN", because you'll nedd names with the same quantity of letters - I make both texts to have the same sizes (100x20 mm), with 10 mm height
- I rotate both texts 90° and make the base to set the platform base
- I turn them both holes
- I increase texts widths to 100mm
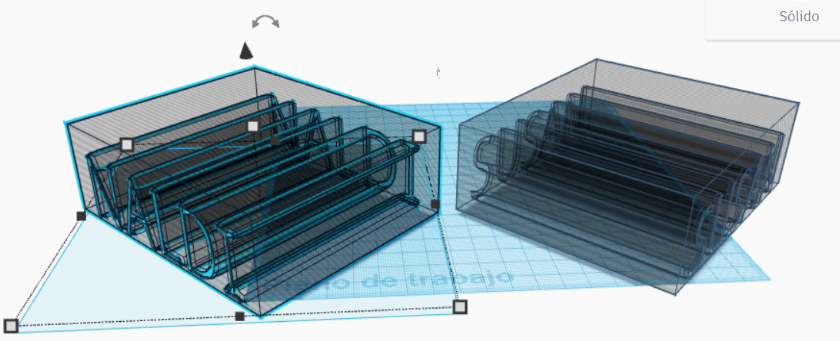
- I rotated both 45° at contrary sides, and elevated them both 3mm
- I created a 120x30x10mm cube
- I allign the three objects to the cube bottom and center them
- I grouped the three objects
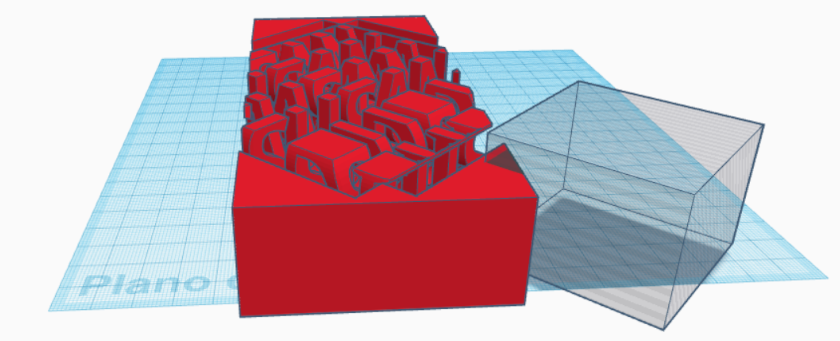
- I created a 50x50x35mm cube, and turned to a hole, rotated it 45° and elevated 3mm from the base
- I moved the hole cube to each letter that I want to desapear, and group the objects to disapeare them
- I Repeat this process until I only had left the central letters
- I created a new hole cube, but this time to reduce the letters' platform width
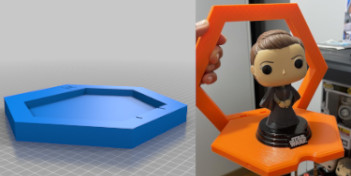
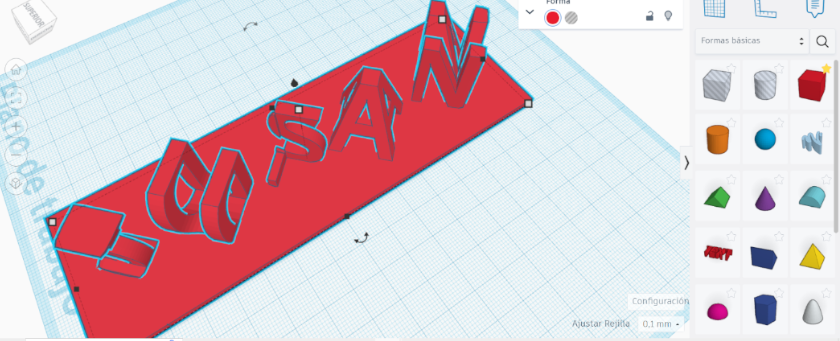
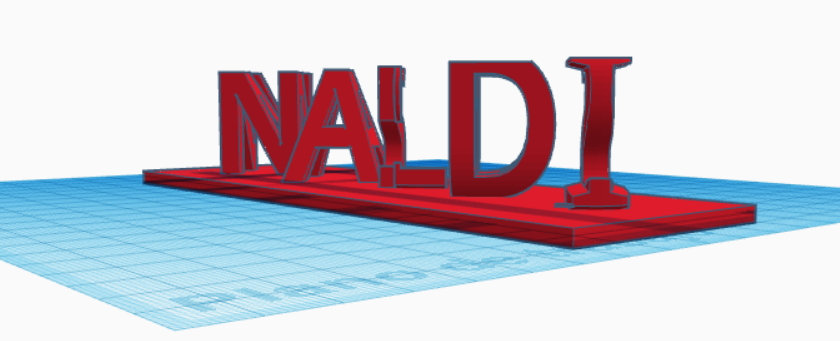
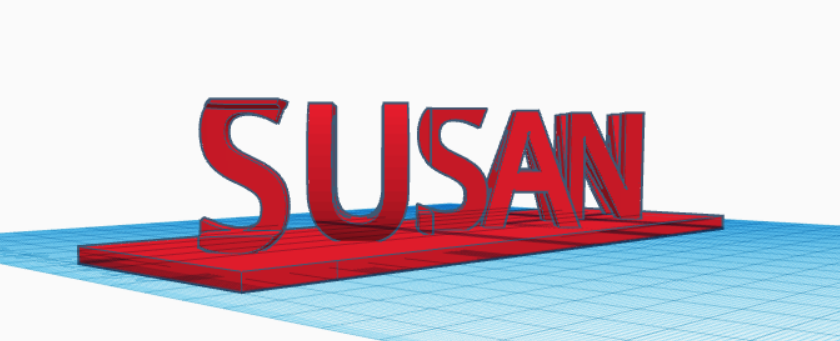
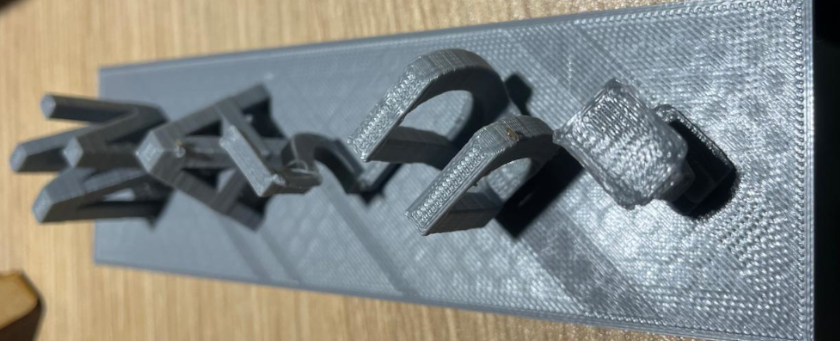
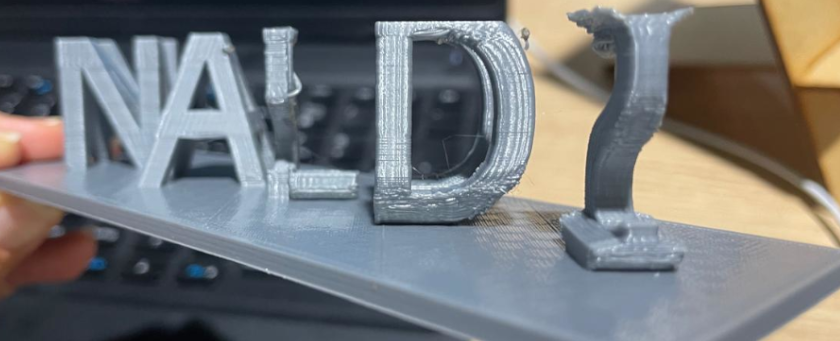
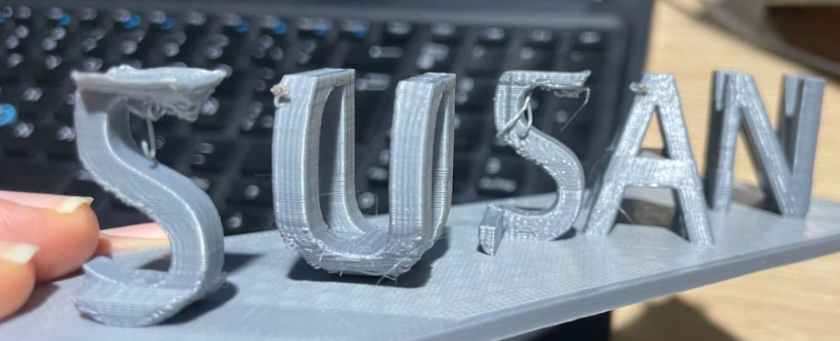
- You can see the final result in the following photos
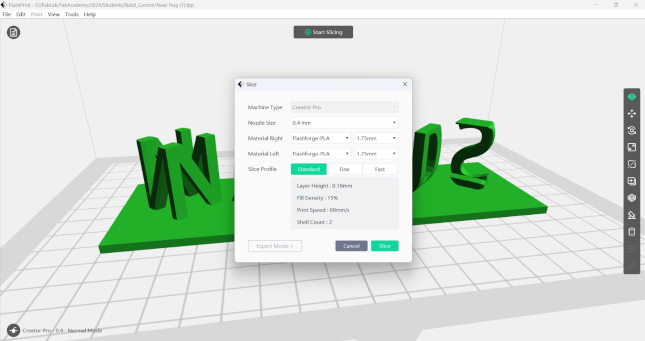
- Print time was 3 Hours and 33 Minutes
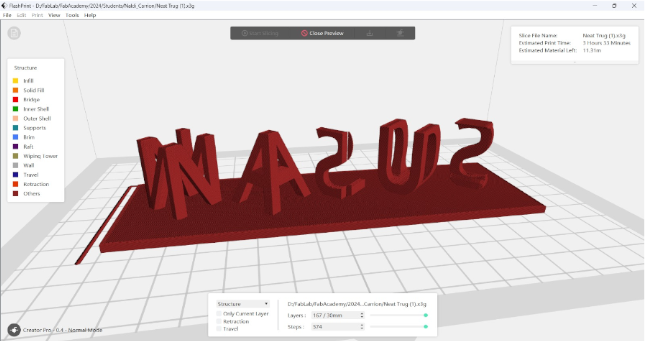
- You can see the final printintg result in the following photos
Printing Process
I used the 3D printer Creator Pro Flashforge to print this design. This Printer works with its own slicer FlashPrint. Its
configuration considered a standard print that accounts for a 60mm/s of printingspeed, using 0.18 mm as layer height, a 15%
of Fill density
You can get access to the letters files here.
3D scan an object (and optionally print it)
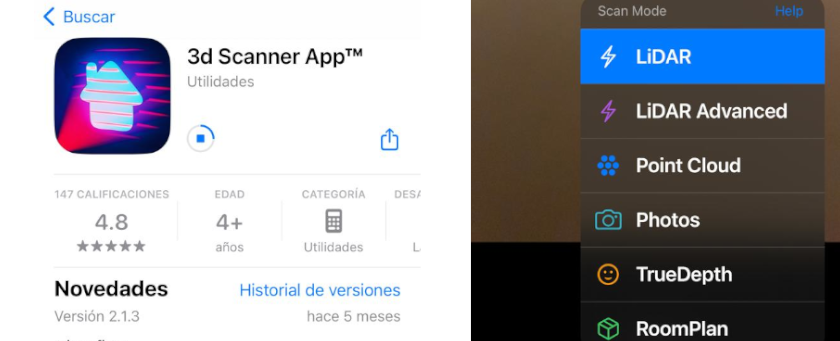
I decided to try some Apps available for iPhones.
Using 3d Acanner App
I followed these steps:
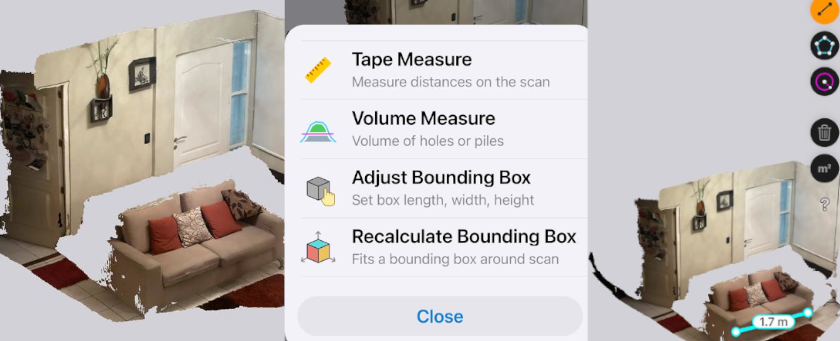
- I look
download, the App - When you open it, provides you with different options , like shown in the photo
- I push the red buttom and started to scan my living room
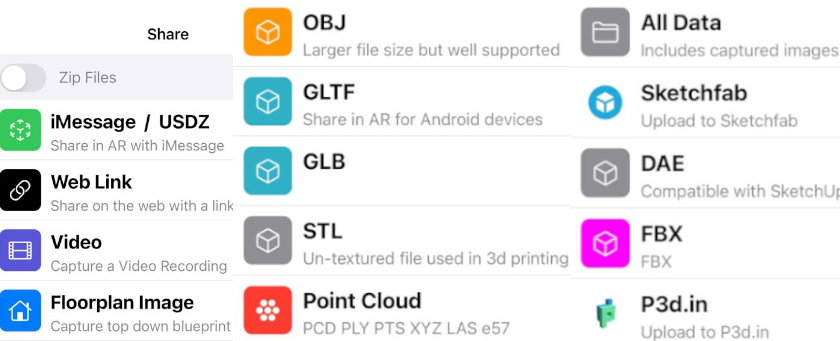
- You've got the option to export your scan in different formats, like shown in the photo below
You can view the process that I followed in the next video
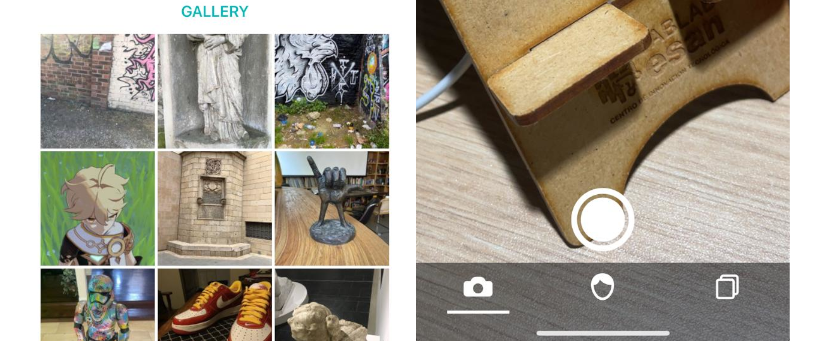
- I look forward to scan something smaller like one of my Funkos
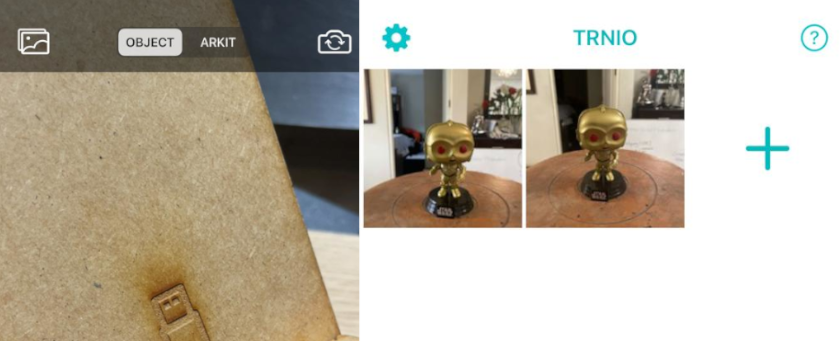
- I Use TRNIO App, it provides some scans gallery
- I pushed the camara icon to start scanning
- I tried twice
You can view both scan results in the following videos