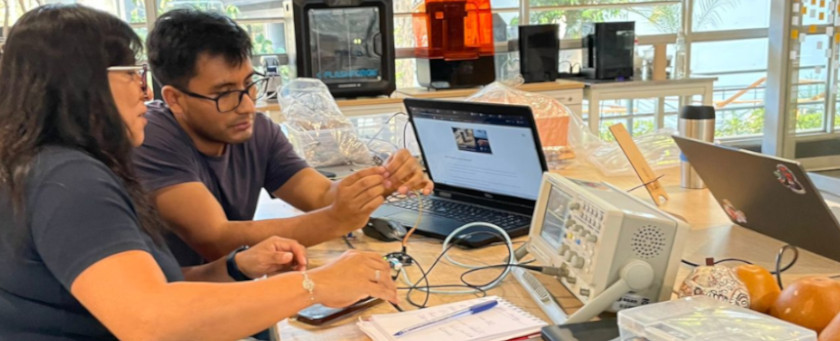
On march
6th, at night we receive the CNC reinforce and safety training, it was held in spanish by Víctor
Pimentel. The review was undertake also with the CNC machine to make us note some key this that we
need to remenber to avoid personal accidents.
Use auditive protectors
Use facemask
Use protective glasses
Use safety gloves
Mantain safety distance to aovid electrostatic discharge
To avoid machine damages
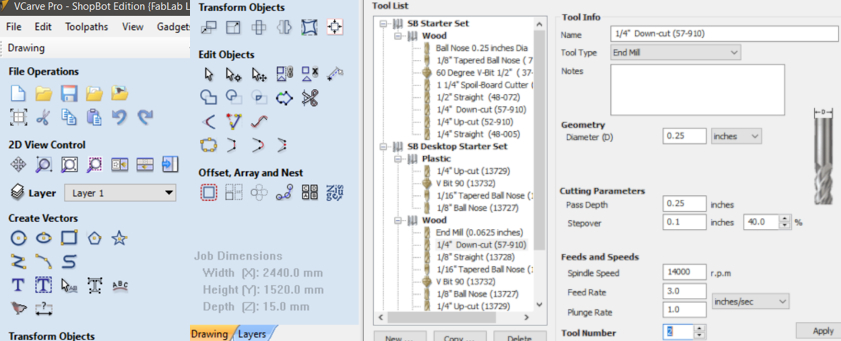
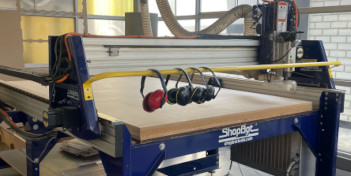
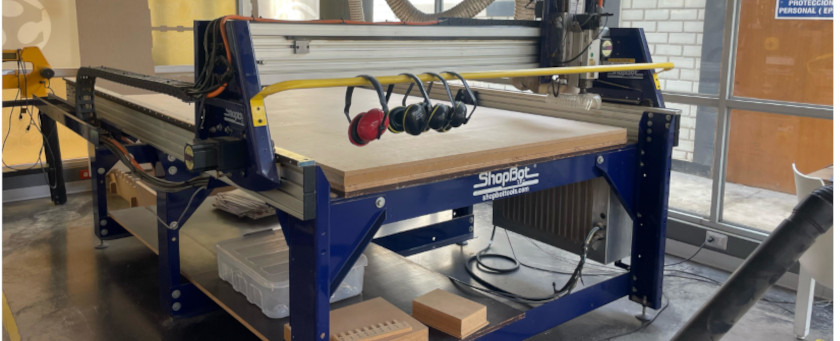
Fab Lab Esan has a 1.52 x 2.44m ShopBot. We review the Vcarve software in order to know Shopbot's
functional details, we focused on 1/4"
down-cut end mill as follow:
Regarding cutting parameters, we have 0.25 inches of pass depth and as step over 0.1 inches.
In terms of feeds and speeds, we have that the CNC works with:
Spindle speed of 14000 r.p.m,
Feed rate of 3 inches/sec, which refers to how quickly the end mill moves in the X and Y
directions and
Plunge rate of 1.0 inches/sec, refering to how quickly the end mill moves in the Z direction
To avoid machine damages
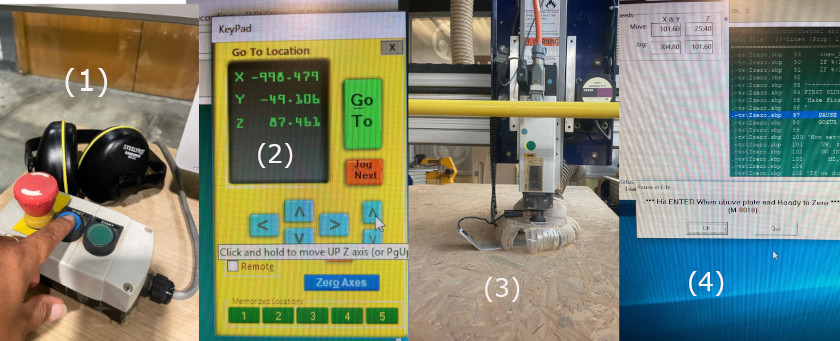
We localize that exist emergency stop buttoms next to the desktop (a) and on the CNC (b).
Thus, we could action them if we ar working at the desktop or near the CNC.
Our trainers also highligth that we need to pull the key (c) to proceed to change or
insert the end mill (d).
Design, Vcarve Pro and Shop Bot Features
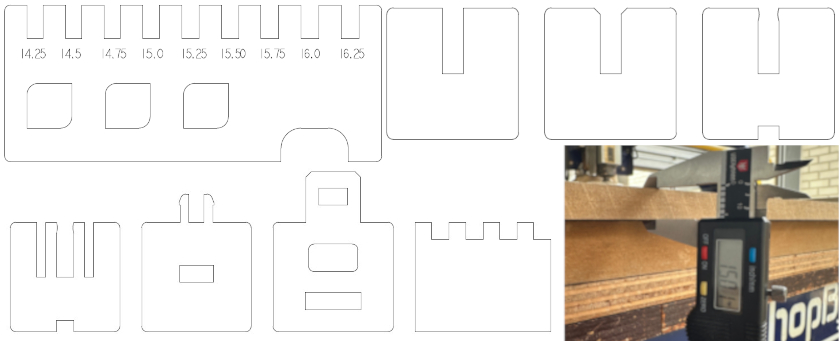
At this stage we mesure the material (mdf) width (15.01 mm). Then, we proceed to design
different joints.
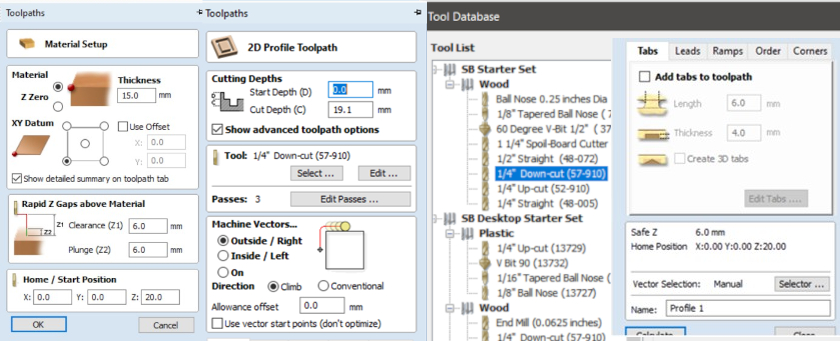
Then, we worked within Vcarve Pro ShopBot Edition Software, and proceed as follow:
Select width material,
2D Profile toohpath,
Choose 1/4" down cut end mill,
Decide to use inside and outside machine vectors, up to our design
Add personalized tabs to toolpath,
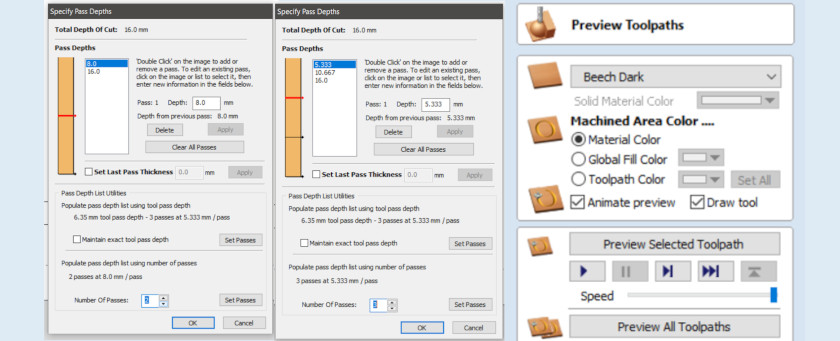
We compare depth cuts regarding number of passes (2 Vs 3) selecting the one that provide at
maximun a cut equal to the end mill diameter (1/4"), 3 passes
Then, we preview the toolpath
The challenge of CNC joinery is that the router bit cannot cut a sharp 90° corner, it will always
leave a radius equal to the end mill bit. Thus, we use T-Bone and Dog-Bone fillet.
We decide to locate the tabs trying to avoid distortions when ensambling
We create different files for inside and outside toolpath files, because when we upload to shotbot
software would facilitate its reading
Finally we save each toolpath obtaining a Shopbot's GCode
Group Assignment Results
CNC router offers many options of different types of joints, we are going to describe each result
analysis
Tolerance Test
First we create a basic serial of sloting fingers with different sizes going from 14.25 mm uo to
16.25 in order to find out material tolerance (MDF 15mm). We find out that to obtain a manageable
pressfit the tolerance reach 0.75 mm. However, our instructor suggested that for our final
individual assignment was better to consider 1 mm tolerance. This because we will have to many
different pressfit and we will have cumulative errors to manage
We tested 0.75mm tolerance with diferent joints, and we registered some problems:
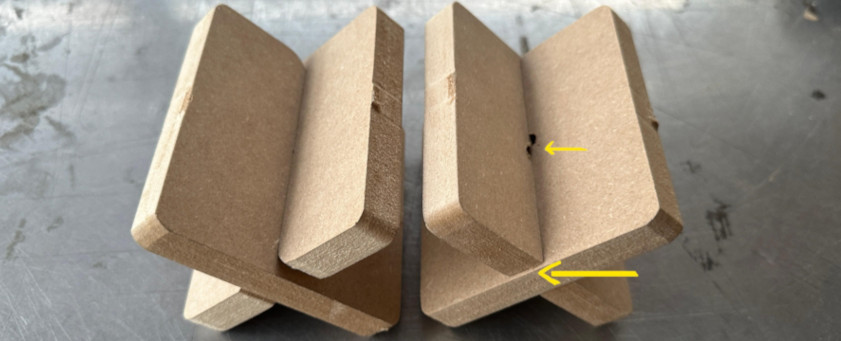
When testing wedge joint, as shown in pictures below, the wedge mortise extended into tusk
mortise. However, the wedge did not fit in, we conclude that accumulative error cause this result
After comparing snap-fit and flexure fit we notice, as shown in the photo, that snap fit fail due to
widht irregularities, but flexure design allows to buffer those differences
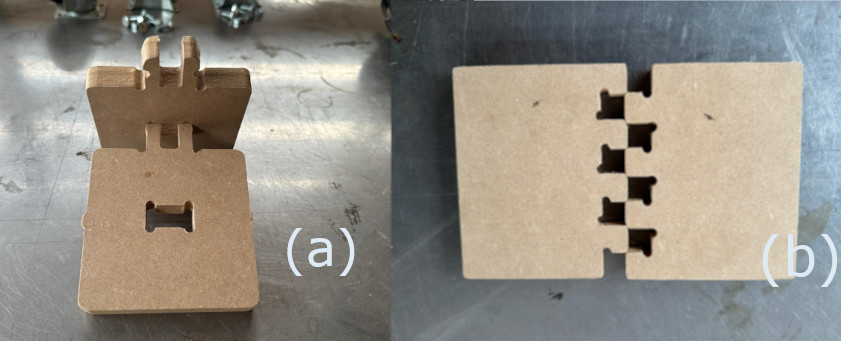
We also test snap and fingers joints. As shown in photo (a), snap fail because we could not achieve
the final lock. The beam design was too slim, and if we force the bending it would broke. In case of
the fingers joint (b), we made a mistake and only consider 0.75mm tolerance. However in this case
double tolerance is needed
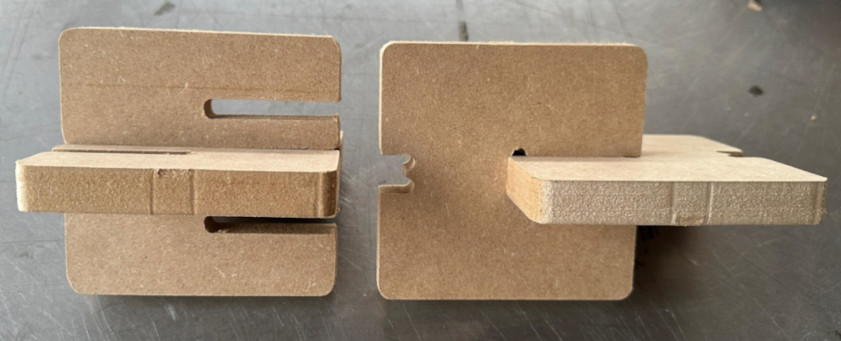
Finally, we compare press-fit versus press-fit with chamfer. We find that the second one allows a
perfect fit, while the first present son fit errors. We also tested T-Bone fillet orientation to
anotate how this coud be hidden
To choose something big to build, I focused on finding something to solve a problem at home, so it could
be useful and doesn't become waste at the end of the course. Thus, looking around I notice that I have
problems on how to organize and exhibit my vinyl records. As you can see on on photo (1) I modify a DYI
shelve sell by Playwood
Peru (2). However due to vinyls weight, the plywood is buckling, also It doesn't have specific
are to place the record and dvd players and for the special cleaning materials.
Prototyping and Designing
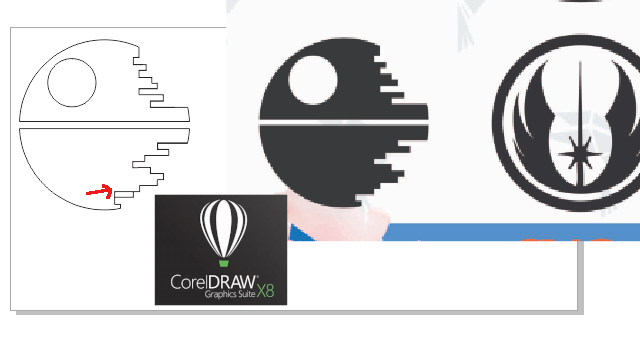
I started a web search to find some ideas that could be fabricated. I found a first example (1) at Autodesk
Instructables, but I considered to small. Then I found a vinyl storage and turntable cabinet (2)
fabricated by Wax Rax, a botique that use machines to develop customized storage,
stands and cabinets. Thus I decided to design something inspired on that design but customize to
cover my needs.
Scketching, and Designing
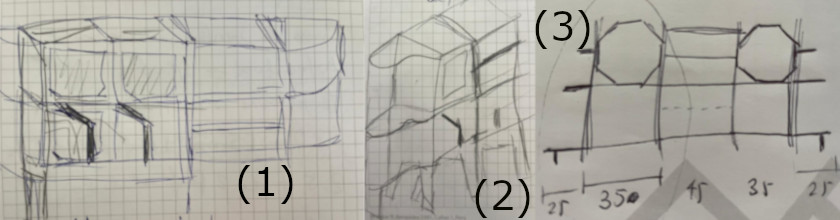
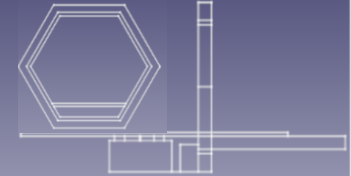
At the begining I was trying to think how to replicate the previous design (1), then I tried to
spare at
both sides of the turntable my vinyls storage (2), but I considered to small. Then I found a vinyl
storage and for the final scketch I decide to fabricate something modular with places for my
speakers (3).
I use Fusion to develop my design, I design in different files each vinyl storage part. I extruded
each 2D design. and finally projected each view to obtain each .dxf file to work on Vcarve.
Using Vcarve
To start within Vcarve software it is important to set up the material, in this case I worked with
OSB (18mm) and then I established material margins (2440x1550 mm) just using ruler options, nnd add
aditional lines to set screws margins that we will need to use to fix the material to sacrificial
table
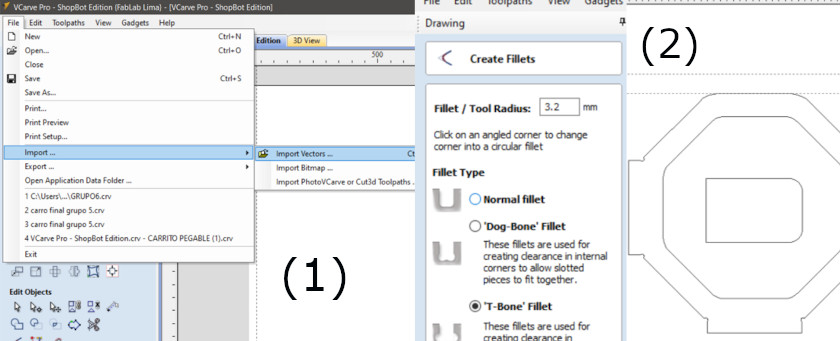
We must import each .dxf file (1) to distribute them into the milling space. Then, we need to
establish tool radiues (3.2 mm - considering 1/4" down cut end mill) (2) and choose fillet type. I
select T-Bone fillet for those
geometries presenting angles (2), and Dog Bone fillet for those with 90° angles.
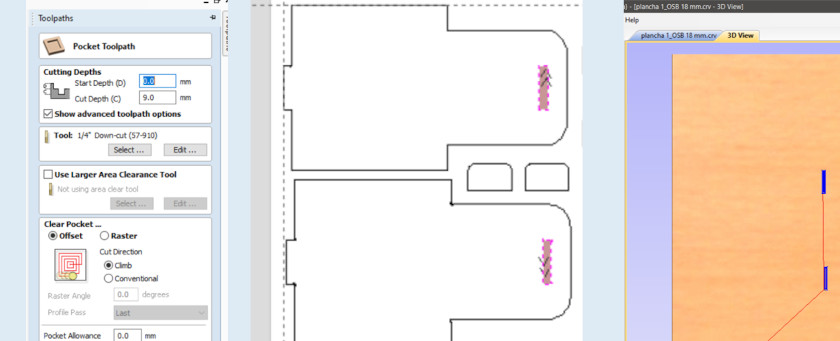
Then we need to obtain Gcode files that we will use to fabricate our design. It is recommendable
to start with pocket toolpath. I select 9mm cutting depth (half of material width), assigning 1/4"
end mill and choosing climb as a cutting direction. Then we could visualized thoolpath direction and
movement on 2D and 3D views respectively.
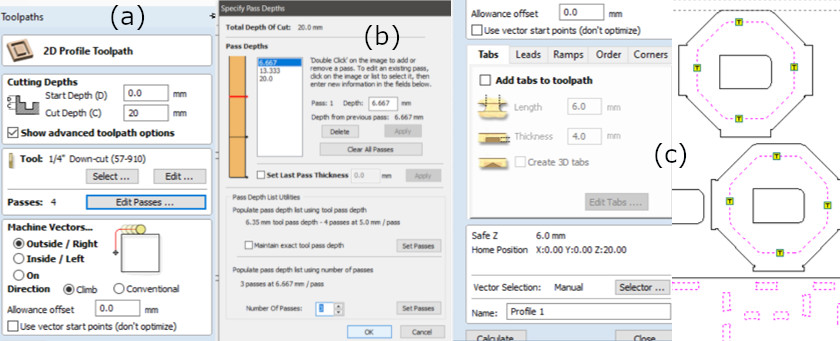
For inside and outside toolpaths, we select 2D profile toolpath option. Selecting 20 mm
as cutting depth to secure milling efficiency (a). Choose 1/4" end mill and 3 pass to mill, this
because we need to consider that depth cutting must be around end mill diameter (b). Finally, we
need to add tabs, for this we need to analyse each toolpath and the distant between each geometry.
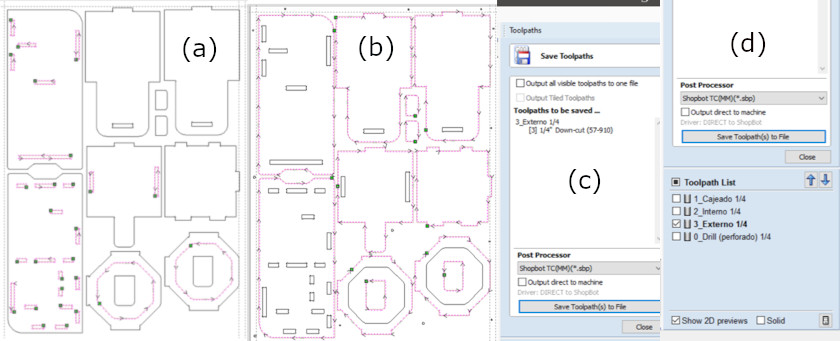
We obtained Gcode files for the other two profiles, interior (a) and exterior (b) toolpaths. Also
include one to reference screws drilling, because we need to stabilize the material so we avoid
problems during milling (c) and (d), we must choose each profile and be sure that only that file
have been selected on the check box. Otherwise we could have problems during the milling
Using the ShopBot
We need to start the CNC machine (1) and Shotbot Software, here we need to move the end mill on X, Y
(0,0) and then make descend Z axis just a little bit to proceed with Z axis calibration (3). The
software advice us to colocate the plate to continue (4).
I upload each profile, in the following order: (1) drilling (for screw drilling guidelines), then
pocket, interior and exterior toolpath.You can find profiles files here
We need to open the files, press CNC's start
buttom, verify that the end mill is turning and push the green bottom that appear in the screen.
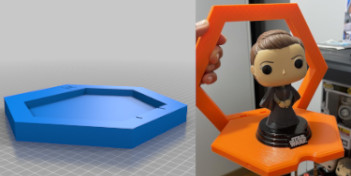
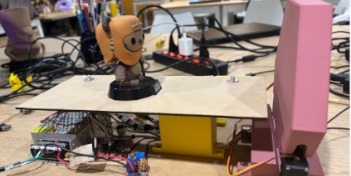
I prepare every piece by sanding them, finding a correct order to ensamble them, and proceed
manually using rubber hammer. We can observe a musical note at the side. You can observe the final
module with a vinyl record. The design allows us to appreciate the vinyl art.
You can get access to the vinyl stand design files here.
It is recommendable to model your product, or in this case furniture, digital assembling, prior to
machine, in order to avoid problems with press fits
Eventhough OSB material declared width by supplier was 18mm, it is neccesary to measure the real
widht
because it is not perfect, and exist differences and we need to take that into account while
designing
Security measures with CNC Miling machine are very important, not only for individuals security, but
to avoid any kind of equipment damages, and end-mill lost.
A totally recommended OSB as material for furniture machining, because it allow us to build
something that
could last longer in comparisson to MDF. And could even last more by recovering it with some
chemical product
A Peruvian FabAcademy Journey
Wellcome to the process of trying to make almost something
 On march
6th, at night we receive the CNC reinforce and safety training, it was held in spanish by Víctor
Pimentel. The review was undertake also with the CNC machine to make us note some key this that we
need to remenber to avoid personal accidents.
On march
6th, at night we receive the CNC reinforce and safety training, it was held in spanish by Víctor
Pimentel. The review was undertake also with the CNC machine to make us note some key this that we
need to remenber to avoid personal accidents.