14th week Assignment
Networking and Communications
Networking and Communications
Please for group assignment details visit Anderson Zelarayan Web Page.
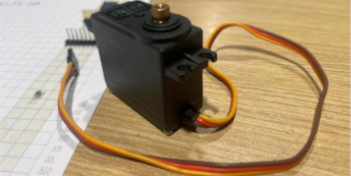
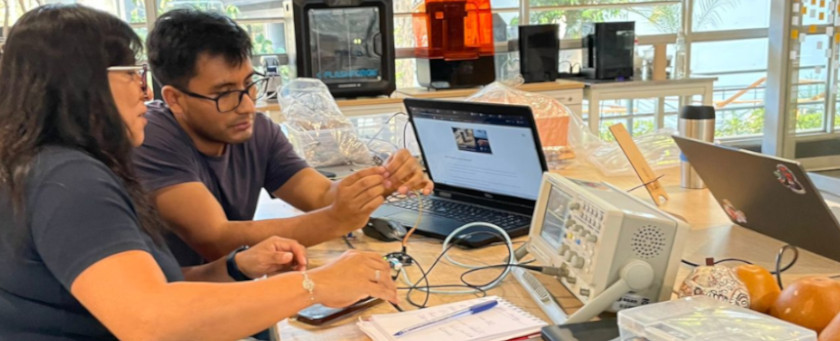
With my instructor support, we review the components that I'm gonna need for my final project in
order to decide which could require a wifi or bluethooth communication. So I decide to start with a
Servo motor
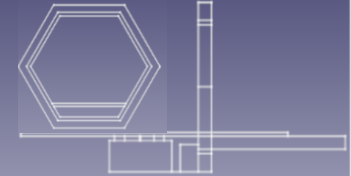
that I'll intent to use for opening the hidden shelve. The following picture show the potential
devices
that I would use for my final project. I would use 2 Servo Motors, so I decide to execute a
bluethooth connection, using an app to activate the servomotor. 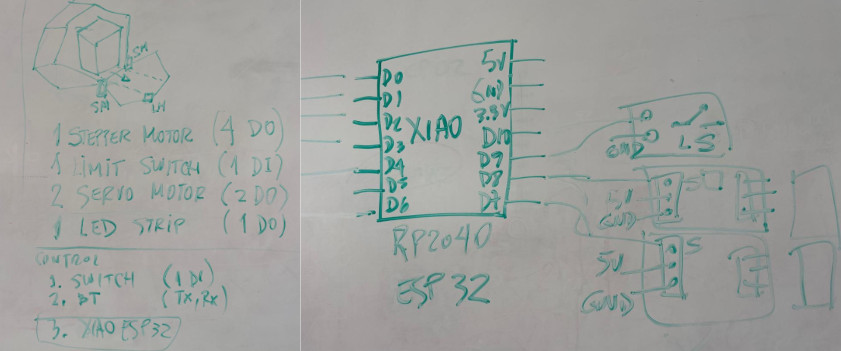
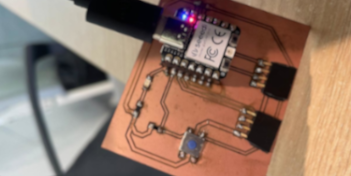
 I used
the board design and fabricated at
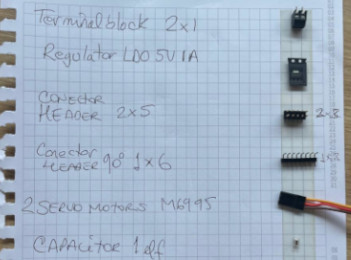
week 9 ,the following are its components:
I used
the board design and fabricated at
week 9 ,the following are its components:
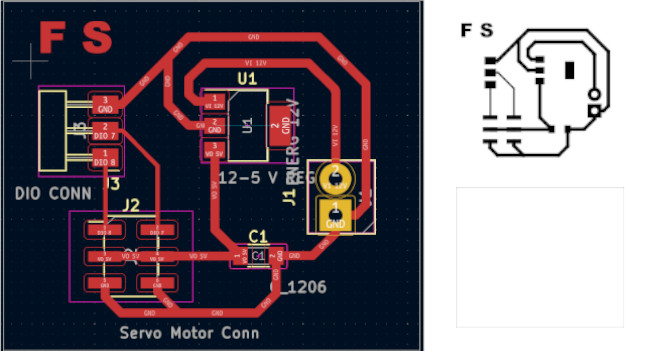
This is the pcb design where you can see all the components. You can download design file and
the SVG files here.
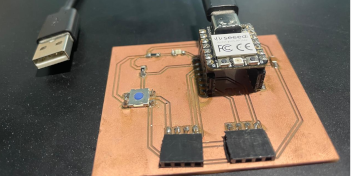
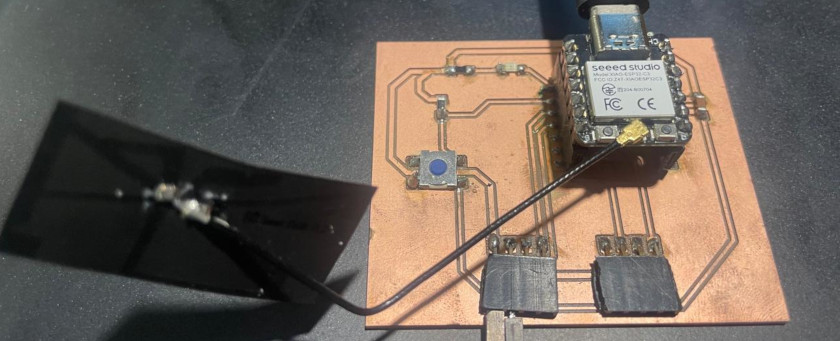
I used the board design and fabricated at week 8 , because its design includes a push bottom and a LED, and have DIO pins to connect the servo motor controller, and replaced the XIAO RP"=$= by XIAO ESP32C3. The following are its components:
This is the pcb fabricated where you can see all the components. You can download design file and
the SVG files here.
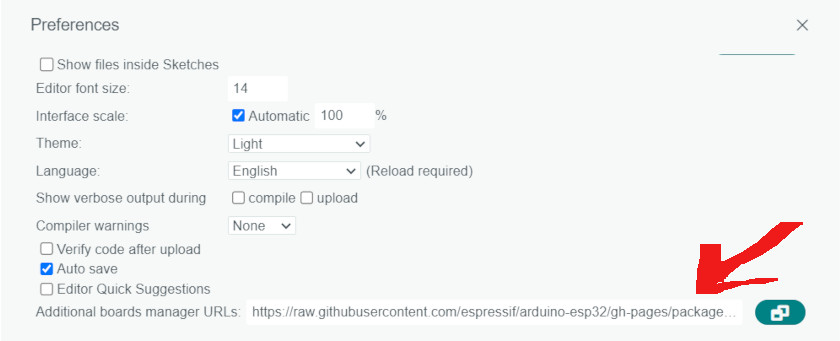
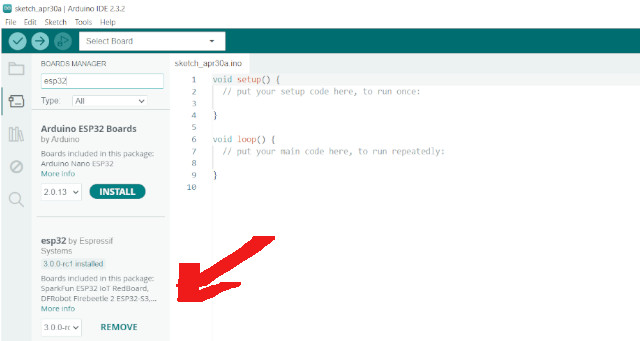
 First prepare
the
Arduino IDE software to work with the board, following the steps suggested by
Seeedstudio here
. The
steps that we need to apply, so you can be eable to upload any program using Arduino IDE are:
First prepare
the
Arduino IDE software to work with the board, following the steps suggested by
Seeedstudio here
. The
steps that we need to apply, so you can be eable to upload any program using Arduino IDE are:
First I decide to test the microcontroller following the steps suggested by Seeedstudio here.

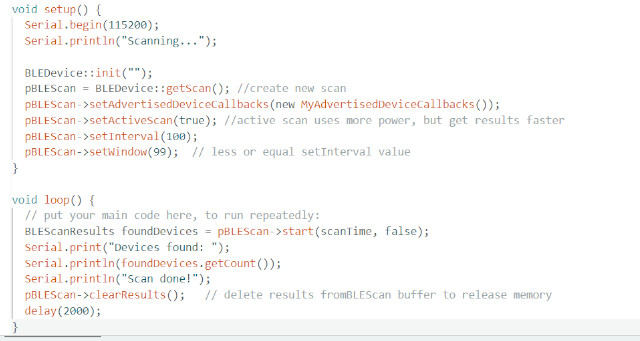
 Thus, we need to install an app to exert control over the microcontroller. Like suggested by
Seedstudio, I donwload LightBlue, because works with iphone
Thus, we need to install an app to exert control over the microcontroller. Like suggested by
Seedstudio, I donwload LightBlue, because works with iphone
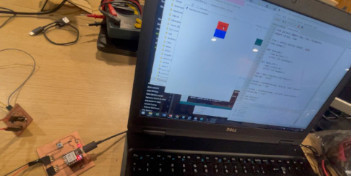
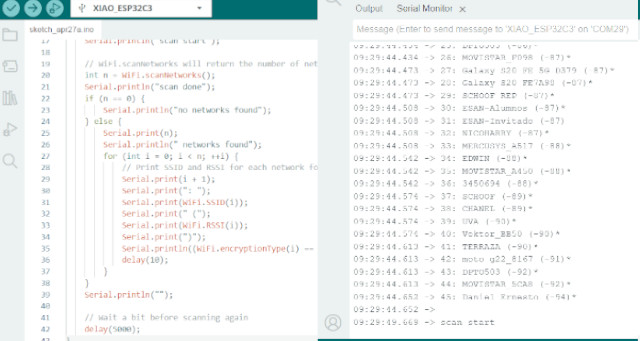
 This image shows how the message send using my celphone appears on Arduino IDE's serial
monitor
This image shows how the message send using my celphone appears on Arduino IDE's serial
monitor
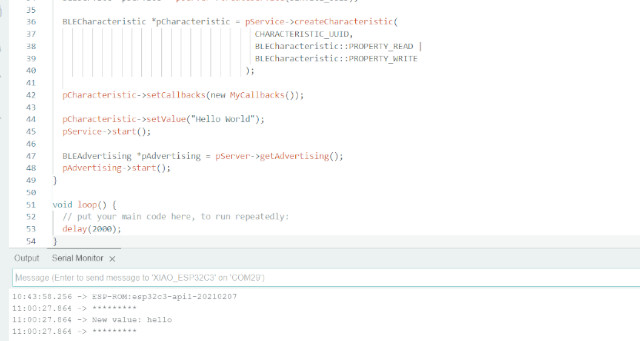
I wanted to undertake a first simple control and generate a LED blink using a ESP32C3. Thus I'm going to explain the process behind it
#include <BLEDevice.h>
#include <BLEUtils.h>
#include <BLEServer.h>
#include <BLE2902.h>

#define LED_PIN D0 // Cambia el pin según la conexión de tu LED
#define SERVICE_UUID        "4fafc201-1fb5-459e-8fcc-c5c9c331914b"
#define CHARACTERISTIC_UUID "beb5483e-36e1-4688-b7f5-ea07361b26a8"

BLEServer* pServer = NULL;
BLECharacteristic* pCharacteristic = NULL;
bool deviceConnected = false;

class MyServerCallbacks : public BLEServerCallbacks {
	void onConnect(BLEServer* pServer) {
	  deviceConnected = true;
	};

	void onDisconnect(BLEServer* pServer) {
	  deviceConnected = false;
	}
};

class MyCallbacks : public BLECharacteristicCallbacks {
	void onWrite(BLECharacteristic *pCharacteristic) {
	  std::string value = pCharacteristic->getValue();

	  if (value.length() > 0) {
		if (value[0] == '1') {
		  digitalWrite(LED_PIN, HIGH); // Encender el LED
		} else if (value[0] == '0') {
		  digitalWrite(LED_PIN, LOW); // Apagar el LED
		}
	  }
	}
};

void setup() {
  Serial.begin(115200);
  pinMode(LED_PIN, OUTPUT);

  BLEDevice::init("LEDControl");
  pServer = BLEDevice::createServer();
  pServer->setCallbacks(new MyServerCallbacks());

  BLEService *pService = pServer->createService(BLEUUID(SERVICE_UUID));
  pCharacteristic = pService->createCharacteristic(
					  BLEUUID(CHARACTERISTIC_UUID),
					  BLECharacteristic::PROPERTY_WRITE
					);

  pCharacteristic->setCallbacks(new MyCallbacks());

  pService->start();
  BLEAdvertising *pAdvertising = pServer->getAdvertising();
  pAdvertising->start();
  Serial.println("Esperando la conexión Bluetooth...");
}

void loop() {
  if (deviceConnected) {
	// Puedes realizar otras tareas mientras está conectado
  }
  delay(1000); // Espera para no saturar el procesador
}
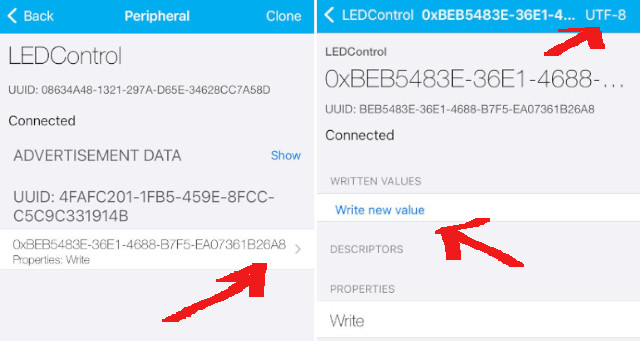
Properties WriteHexUTF-8 String
Properties write and there you'll must
click on Write new value 1 to turn the LED on, and
0 to turn it off
In the following image you can observe the process
You can download the Codehere.
In the follorwing video you can observe the final result when controlling the LED
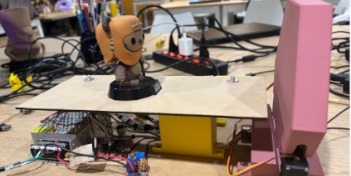
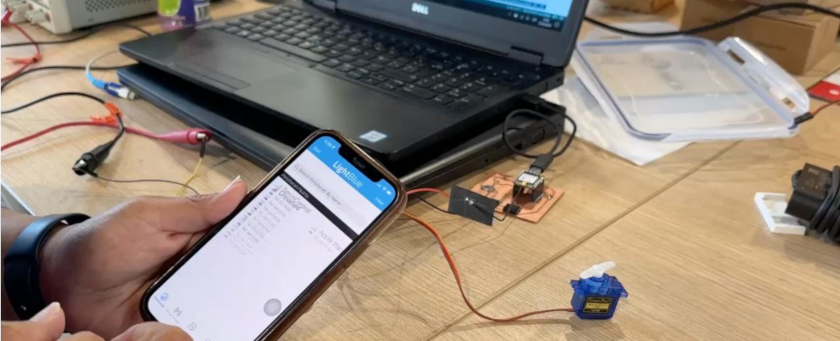
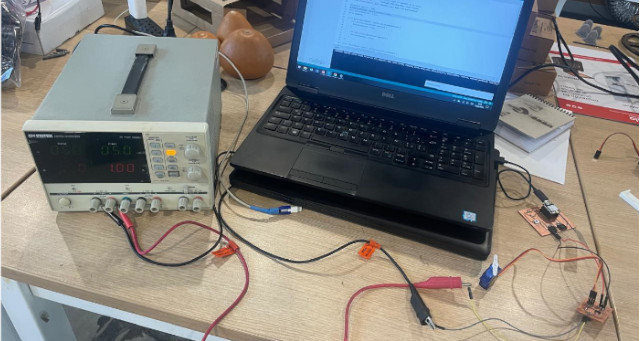
After LED controling, I decided to try ServoMotor Controling using a ESP32C3, because I will need that for my final project. The proces logic was the following:


#include <BLEDevice.h>
#include <BLEUtils.h>
#include <BLEServer.h>
#include <BLE2902.h>
#include <ESP32Servo.h>

#define SERVO_PIN D3 // Cambia el pin según la conexión de tu servo
#define SERVICE_UUID        "4fafc201-1fb5-459e-8fcc-c5c9c331914b"
#define CHARACTERISTIC_UUID "beb5483e-36e1-4688-b7f5-ea07361b26a8"

BLEServer* pServer = NULL;
BLECharacteristic* pCharacteristic = NULL;
bool deviceConnected = false;
Servo myServo;

class MyServerCallbacks : public BLEServerCallbacks {
	void onConnect(BLEServer* pServer) {
	  deviceConnected = true;
	};

	void onDisconnect(BLEServer* pServer) {
	  deviceConnected = false;
	}
};

class MyCallbacks : public BLECharacteristicCallbacks {
	void onWrite(BLECharacteristic *pCharacteristic) {
	  std::string value = pCharacteristic->getValue();

	  if (value.length() > 0) {
		if (value[0] == '1') {
		  myServo.write(90); // Mueve el servo a 90 grados (posición media)
		} else if (value[0] == '0') {
		  myServo.write(0); // Mueve el servo a 0 grados (posición mínima)
		}
	  }
	}
};

void setup() {
  Serial.begin(115200);
  pinMode(SERVO_PIN, OUTPUT);
  myServo.attach(SERVO_PIN);

  BLEDevice::init("ServoControl");
  pServer = BLEDevice::createServer();
  pServer->setCallbacks(new MyServerCallbacks());

  BLEService *pService = pServer->createService(BLEUUID(SERVICE_UUID));
  pCharacteristic = pService->createCharacteristic(
					  BLEUUID(CHARACTERISTIC_UUID),
					  BLECharacteristic::PROPERTY_WRITE
					);

  pCharacteristic->setCallbacks(new MyCallbacks());

  pService->start();
  BLEAdvertising *pAdvertising = pServer->getAdvertising();
  pAdvertising->start();
  Serial.println("Esperando la conexión Bluetooth...");
}

void loop() {
  if (deviceConnected) {
	// Puedes realizar otras tareas mientras está conectado
  }
  delay(1000); // Espera para no saturar el procesador
}
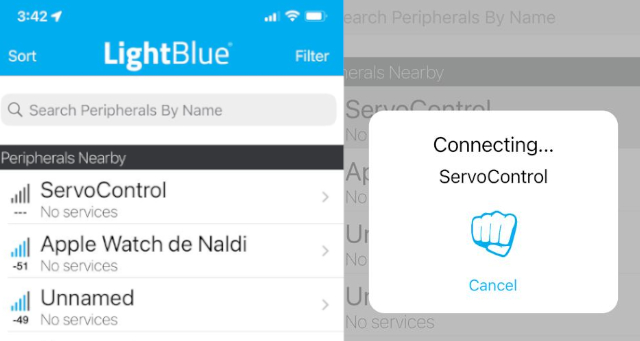
Properties WriteHexUTF-8 String
Properties write and there you'll must
click on Write new value 1 to move the servomotor's
arm 90° clockwise, and
0 to move it back to the first position
In the following images you can observe the process

You can download the KiDCad library here.
In the follorwing video you can observe the final result when controlling the ServoMotor

Wellcome to the process of trying to make almost something