During our week, we had to look at interface programming. Still in the spirit of making progress on my final project, I tried to make a remote control for my robot. The assignments we had to make were as follows:
Individual assignment:
write an application that interfaces a user with an
input &/or output device that you made
Group assignment:
compare as many tool options as possible
Group assignment:
Individual assignment:
Creating a wifi network
In order to validate my individual assignments, I tried to create a code that would allow my robot to be controlled by a kind of remote control. I first consulted different documentation and different codes. Most of them use an existing wifi network to which you connect using esp32. As our network at Agrilab is managed by the school, it's difficult to connect with this kind of device, and as the robot is supposed to be used outdoors, I need to be able to connect even if there's no wifi network nearby. So I found on the Pol-Emile Briot, one of my colleagues, a code allowing the esp32 to generate its own wifi network on which I could connect to my computer.
Checking the robot
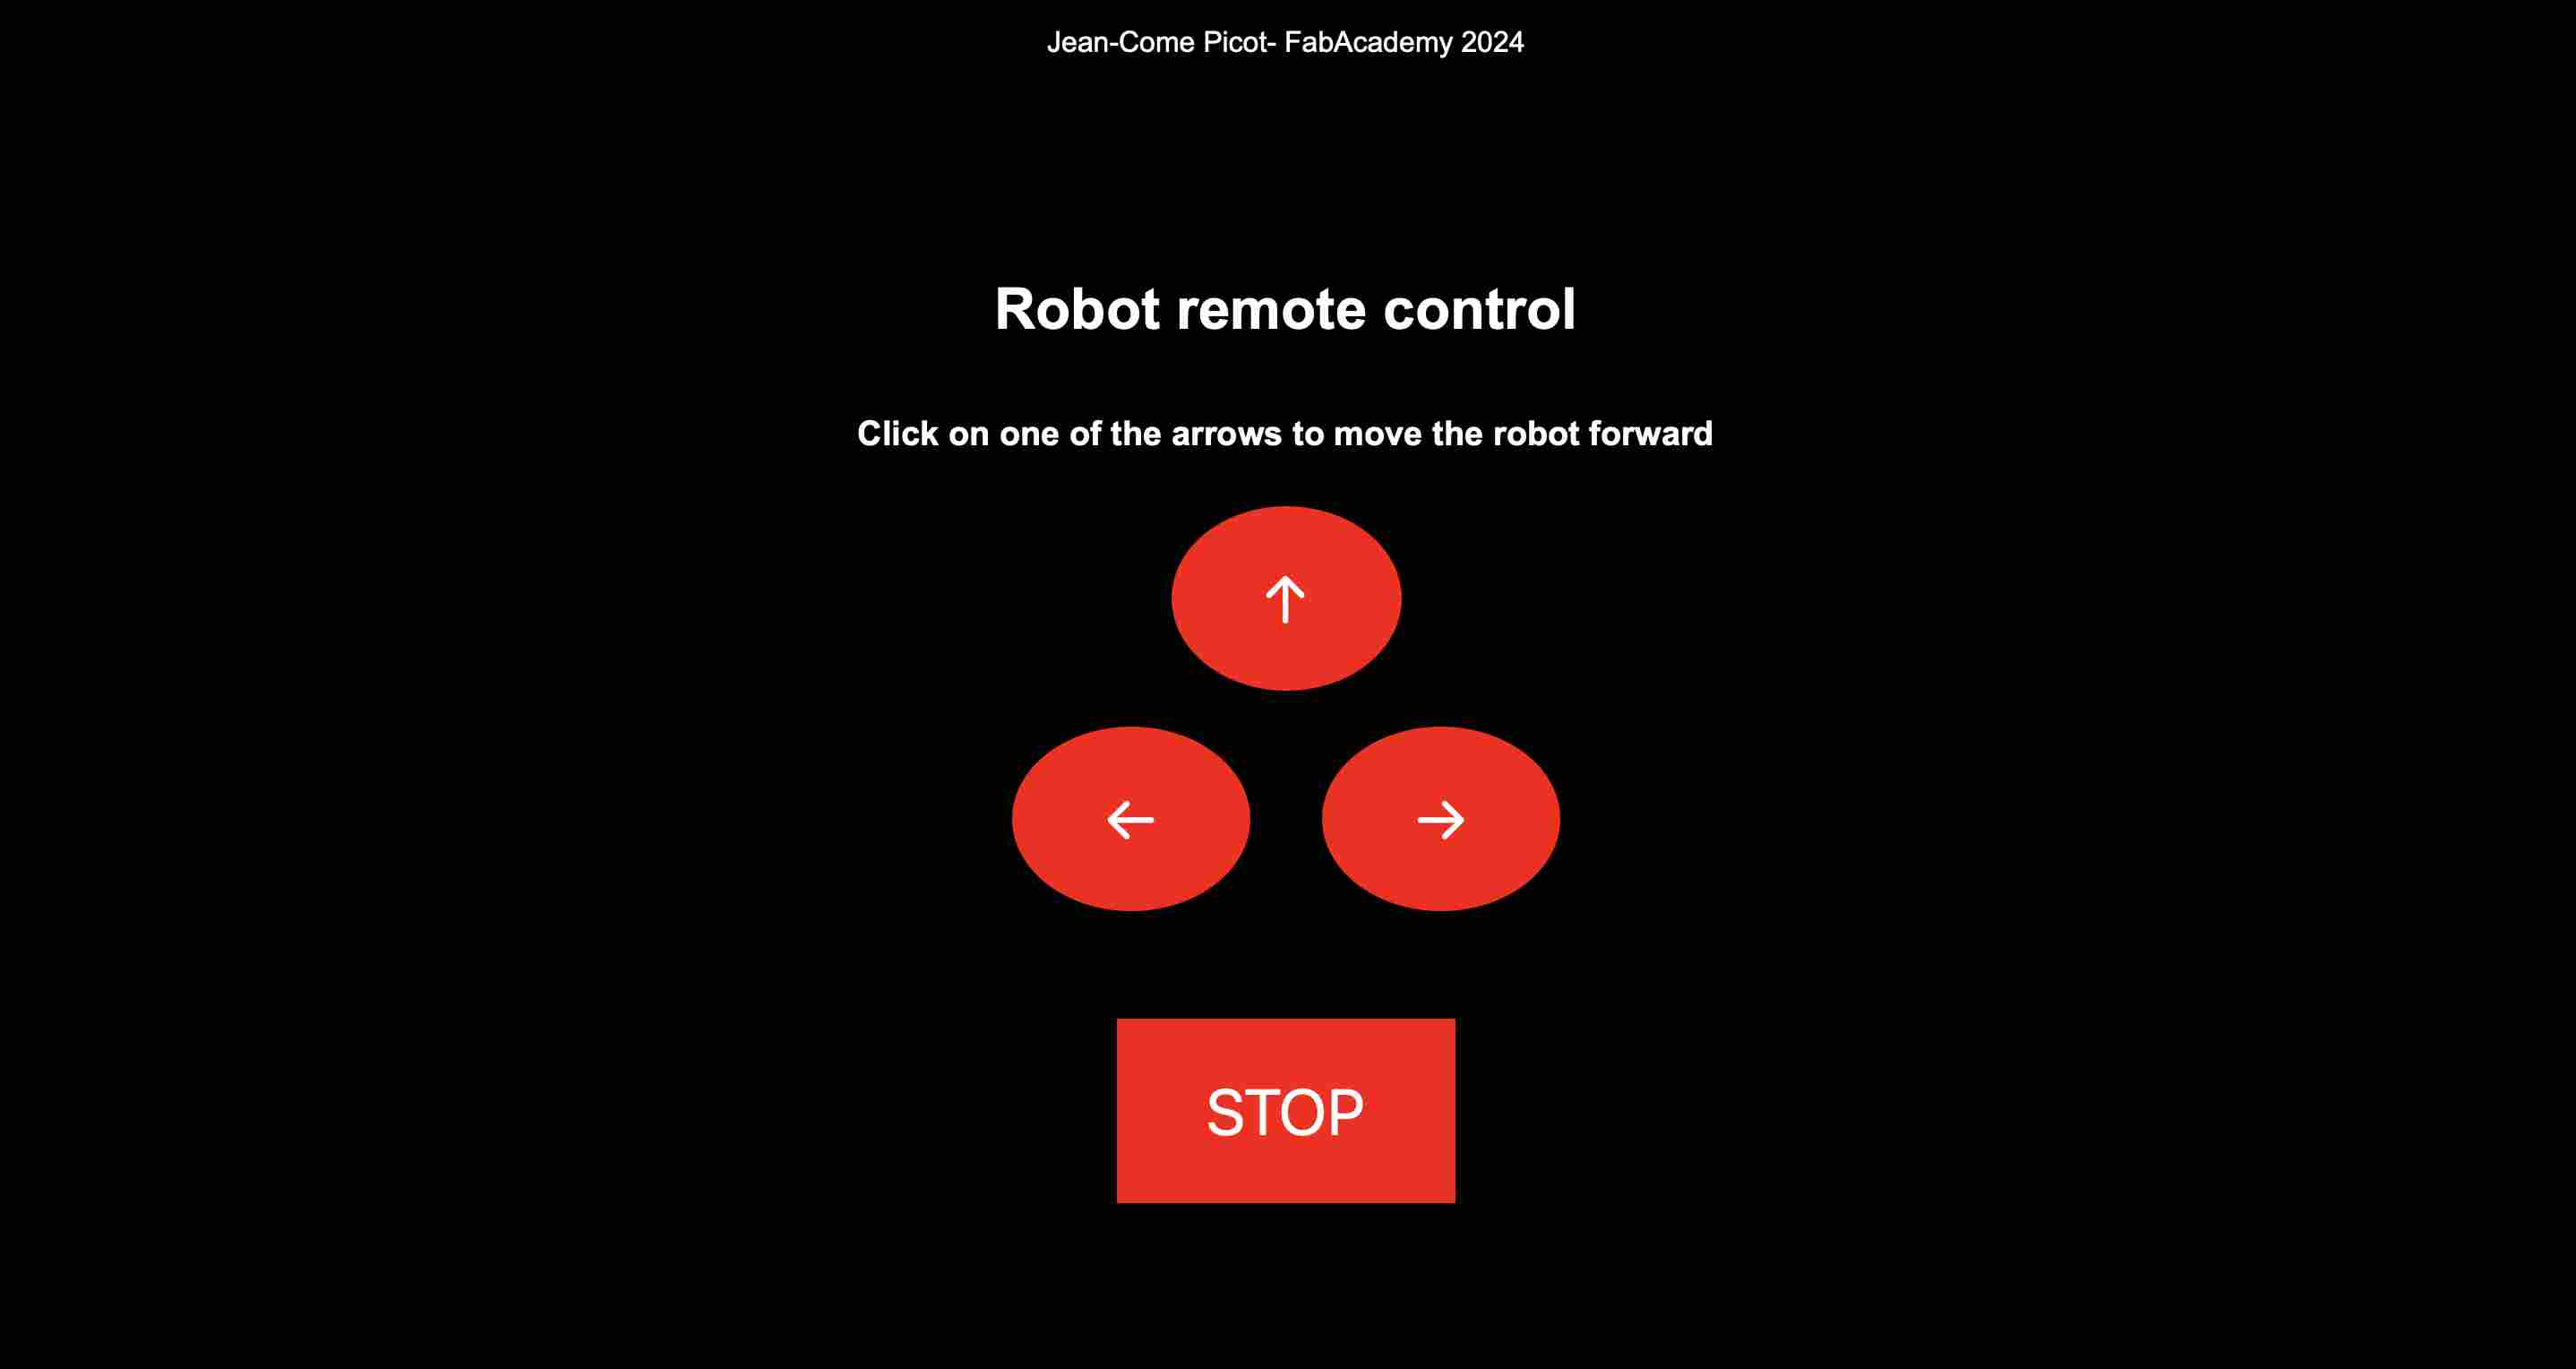
In order to control the robot, I needed to create a code that would control the robot. To do this I took inspiration from the Théo Gauthier which can generate an html page hosted on esp32 and connect to it by connecting to the esp32 network and pressing buttons. The code will read the values from the html page and apply the associated functions.
HTML Page
I was happy to use this language because it's the same one I use for my site, so I already had a good grounding in its use. On the other hand, unlike my website, I don't have any separate css, so we have to include CSS language directly in our html page. So I used Chat GPT to modify the CSS style of my interface. I also wanted to add lines of javascript to my code, as I sometimes do on my website, but I realised that it didn't work on the arduino code, which is only capable of interpreting hmtl, so I removed it. The javascript I had added made it possible to change the colour of the button so that it was visible when it was clicked. The hmtl code I produced is as follows:
<!DOCTYPE html>
<html lang='fr'>
<head>
<meta charset="UTF-8">
<meta name="viewport" content="width=device-width, initial-scale=1.0">
<title>Robot Control</title>
<style>
body { font-family: Arial, sans-serif; text-align: center; background-color: black; color: white; }
.button { background-color: #FF0000; border: none; color: white; padding: 30px 50px;
text-decoration: none; display: inline-block; font-size: 36px; margin: 10px 20px; cursor: pointer;
border-radius: 50%; } /* Bouton rond */
.container { display: flex; flex-direction: column; align-items: center; margin-top: 100px; }
.button-group { display: flex; justify-content: center; }
#stopBtn { background-color: #FF0000; border: none; color: white; padding: 30px 50px;
text-decoration: none; display: inline-block; font-size: 36px; margin: 50px 20px; cursor: pointer; } /* Bouton STOP */
</style>
</head>
<body>
<div class="container">
<h1>Robot remote control</h1>
<h3> Click on one of the arrows to move the robot forward</h3>
<a href='/go'><button class='button' id='goBtn'>↑</button></a> <!-- Flèche vers le haut -->
<div class="button-group">
<a href='/left'><button class='button' id='leftBtn'>←</button></a> <!-- Flèche vers la gauche -->
<a href='/right'><button class='button' id='rightBtn'>→</button></a> <!-- Flèche vers la droite -->
</div>
<a href='/stop'><button id='stopBtn'>STOP</button></a> <!-- Bouton STOP -->
</div>
</body>
</html>
Once my html page was ready with the above result, I was able to integrate it into my C++ code. As in the example of Théo's code, I created a function corresponding to each button by varying the direction and PWM of each motor. The final code in C++ is as follows:
#include "WiFi.h"
#include "WebServer.h"
WebServer server(80); //Default port for the ESP32 server relationship
const int DIR1 = 26; //33;
const int PWM1_PIN = 25;//32;
const int DIR2 = 33;
const int PWM2_PIN = 32;
//Adding the html page to the Arduino cod
void Homepage() {
String page= "<!DOCTYPE html>";
page += "<html lang='fr'>";
page += "<head>";
page += "<p>Jean-Come Picot- FabAcademy 2024</p>";
page += "<title>Robot Control</title>";
page += "<style>";
page += "body { font-family: Arial, sans-serif; text-align: center; background-color: black; color: white; }";
page += ".button { background-color: #FF0000; border: none; color: white; padding: 30px 50px;";
page += "text-decoration: none; display: inline-block; font-size: 36px; margin: 10px 20px; cursor: pointer;";
page += "border-radius: 50%; } /* Bouton rond */";
page += ".container { display: flex; flex-direction: column; align-items: center; margin-top: 100px; }";
page += ".button-group { display: flex; justify-content: center; }";
page += "#stopBtn { background-color: #FF0000; border: none; color: white; padding: 30px 50px;";
page += "text-decoration: none; display: inline-block; font-size: 36px; margin: 50px 20px; cursor: pointer; } /* Bouton STOP */";
page += "</style>";
page += "</head>";
page += "<body>";
page += "<div class='container'>";
page += "<h1>Robot remote control</h1>";
page += "<h3> Click on one of the arrows to move the robot forward</h3>";
page += "<a href='/go'><button class='button' id='goBtn'>↑</button></a>"; // Flèche vers le haut
page += "<div class='button-group'>";
page += "<a href='/left'><button class='button' id='leftBtn'>←</button></a>"; // Flèche vers la gauche
page += "<a href='/right'><button class='button' id='rightBtn'>→</button></a>"; // Flèche vers la droite
page += "</div>";
page += "<a href='/stop'><button id='stopBtn'>STOP</button></a>"; // Bouton STOP
page += "</div>";
page += "</body>";
page += "</html>";
server.setContentLength(page.length()); //This allows the ESP32 to know the length of the website, which allows faster communication
server.send(200, "text/html", page); // Enables data to be sent
}
void NotFound() // Function that writes to the user "404 Not found" if a page is unknown
{
server.send(404, "text/plain", "404: Not found");
}
void front() //To get both wheels moving at the same speed
{
digitalWrite(DIR1, HIGH);
digitalWrite(DIR2, HIGH);
analogWrite(PWM1_PIN, 100);
analogWrite(PWM2_PIN, 100);
server.sendHeader("Location","/"); // This then links to the home page
server.send(303); // Command that tells the server it is doing a redirect
}
void stop() //Stop the two wheels
{
digitalWrite(DIR1, HIGH);
digitalWrite(DIR2, HIGH);
analogWrite(PWM1_PIN, 0);
analogWrite(PWM2_PIN, 0);
server.sendHeader("Location","/"); // This then links to the home page
server.send(303); // Command that tells the server it is doing a redirect
}
void left() //Turn the left wheel only
{
digitalWrite(DIR1, HIGH);
digitalWrite(DIR2, HIGH);
analogWrite(PWM1_PIN, 50);
analogWrite(PWM2_PIN, 0);
server.sendHeader("Location","/"); // This then links to the home page
server.send(303); // Command that tells the server it is doing a redirect
}
void right() //Only move the right-hand wheel forward
{
digitalWrite(DIR1, HIGH);
digitalWrite(DIR2, HIGH);
analogWrite(PWM1_PIN, 0);
analogWrite(PWM2_PIN, 50);
server.sendHeader("Location","/"); // This then links to the home page
server.send(303); // Command that tells the server it is doing a redirect
}
void setup()
{
Serial.begin(115200); //Baud rate of 115200 for the esp32, not 9600 like the arduino boards
WiFi.softAP("Robot_JC", "123456789");//Create the esp32 wifi network by choosing the network name and code
delay(1000); // Delay 1s
Serial.println("\n"); // Make a line break in the serial monitor
//Declares pine trees
pinMode(DIR1, OUTPUT);//direction motor1
pinMode(PWM1_PIN, OUTPUT);//pwm motor 1
pinMode(DIR2, OUTPUT);//direction motor 2
pinMode(PWM2_PIN, OUTPUT);//speed motor 2
//Displays the IP address of esp32
Serial.print("Host IP: ");
Serial.println(WiFi.softAPIP());
//Links the keys activated on the web page to the arduino code functions
server.on("/", Homepage); // When the server is on "/" then do the homepage function
server.on("/front", front); // When the server is on "/go" then do the go function
server.on("/left", left); // When the server is on "/left" then do the left function
server.on("/right", right); // When the server is on "/right" then do the right function
server.on("/stop", stop); // When the server is on "/stop" then do the stop function
server.onNotFound(NotFound); // When the server is not found then do the NotFound function
server.begin(); // Start the server
Serial.println("Active web server!"); // Print on the serial monitor "Active web server!"
}
void loop()
{
server.handleClient(); // Manage the user who is connected to the server
}
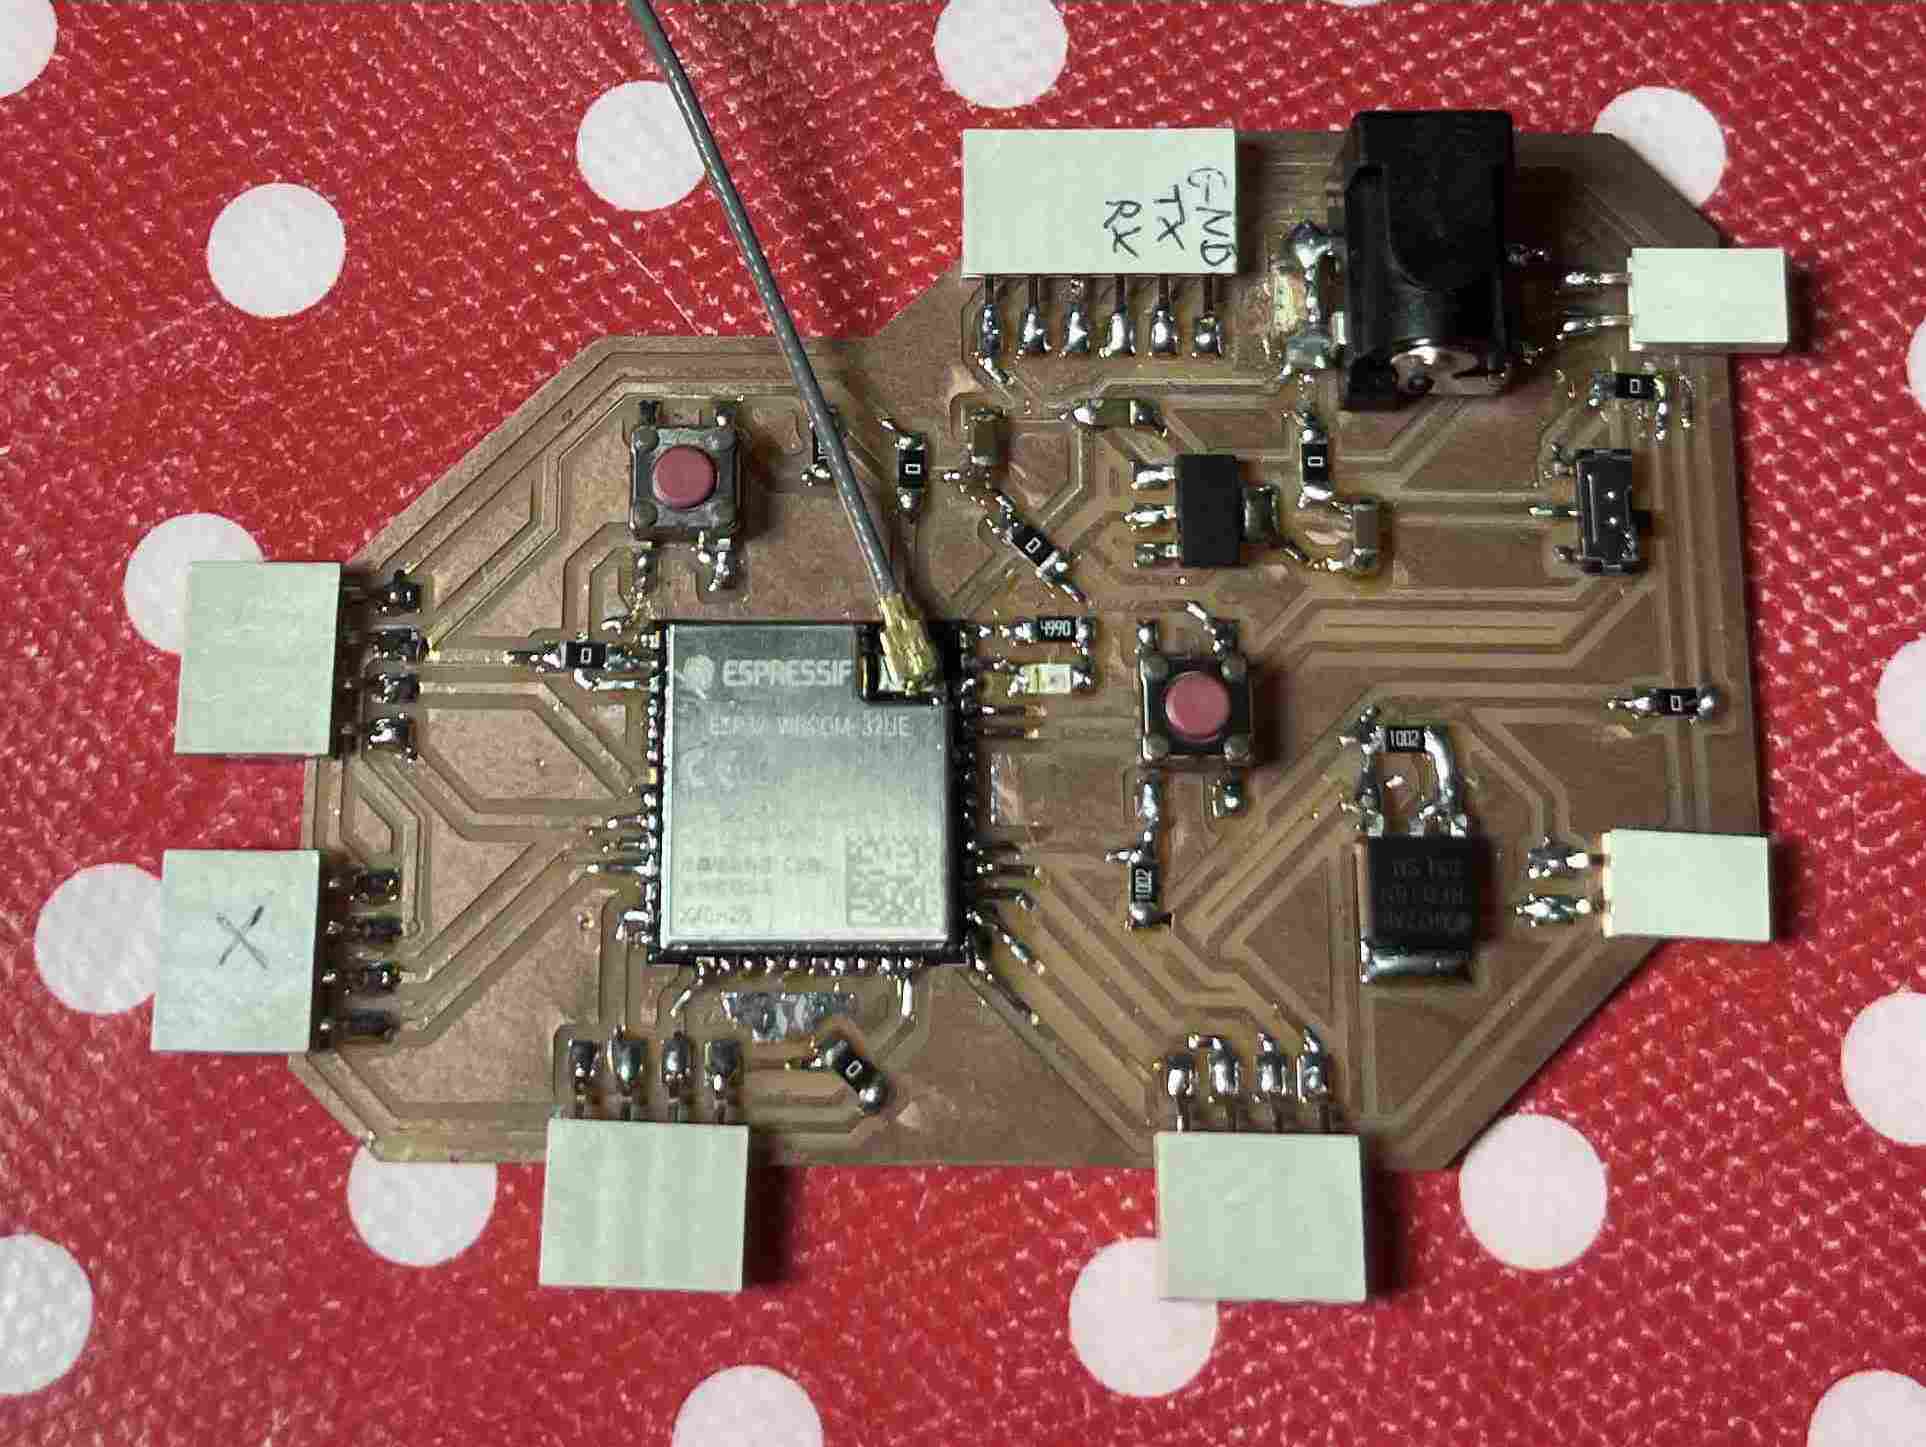
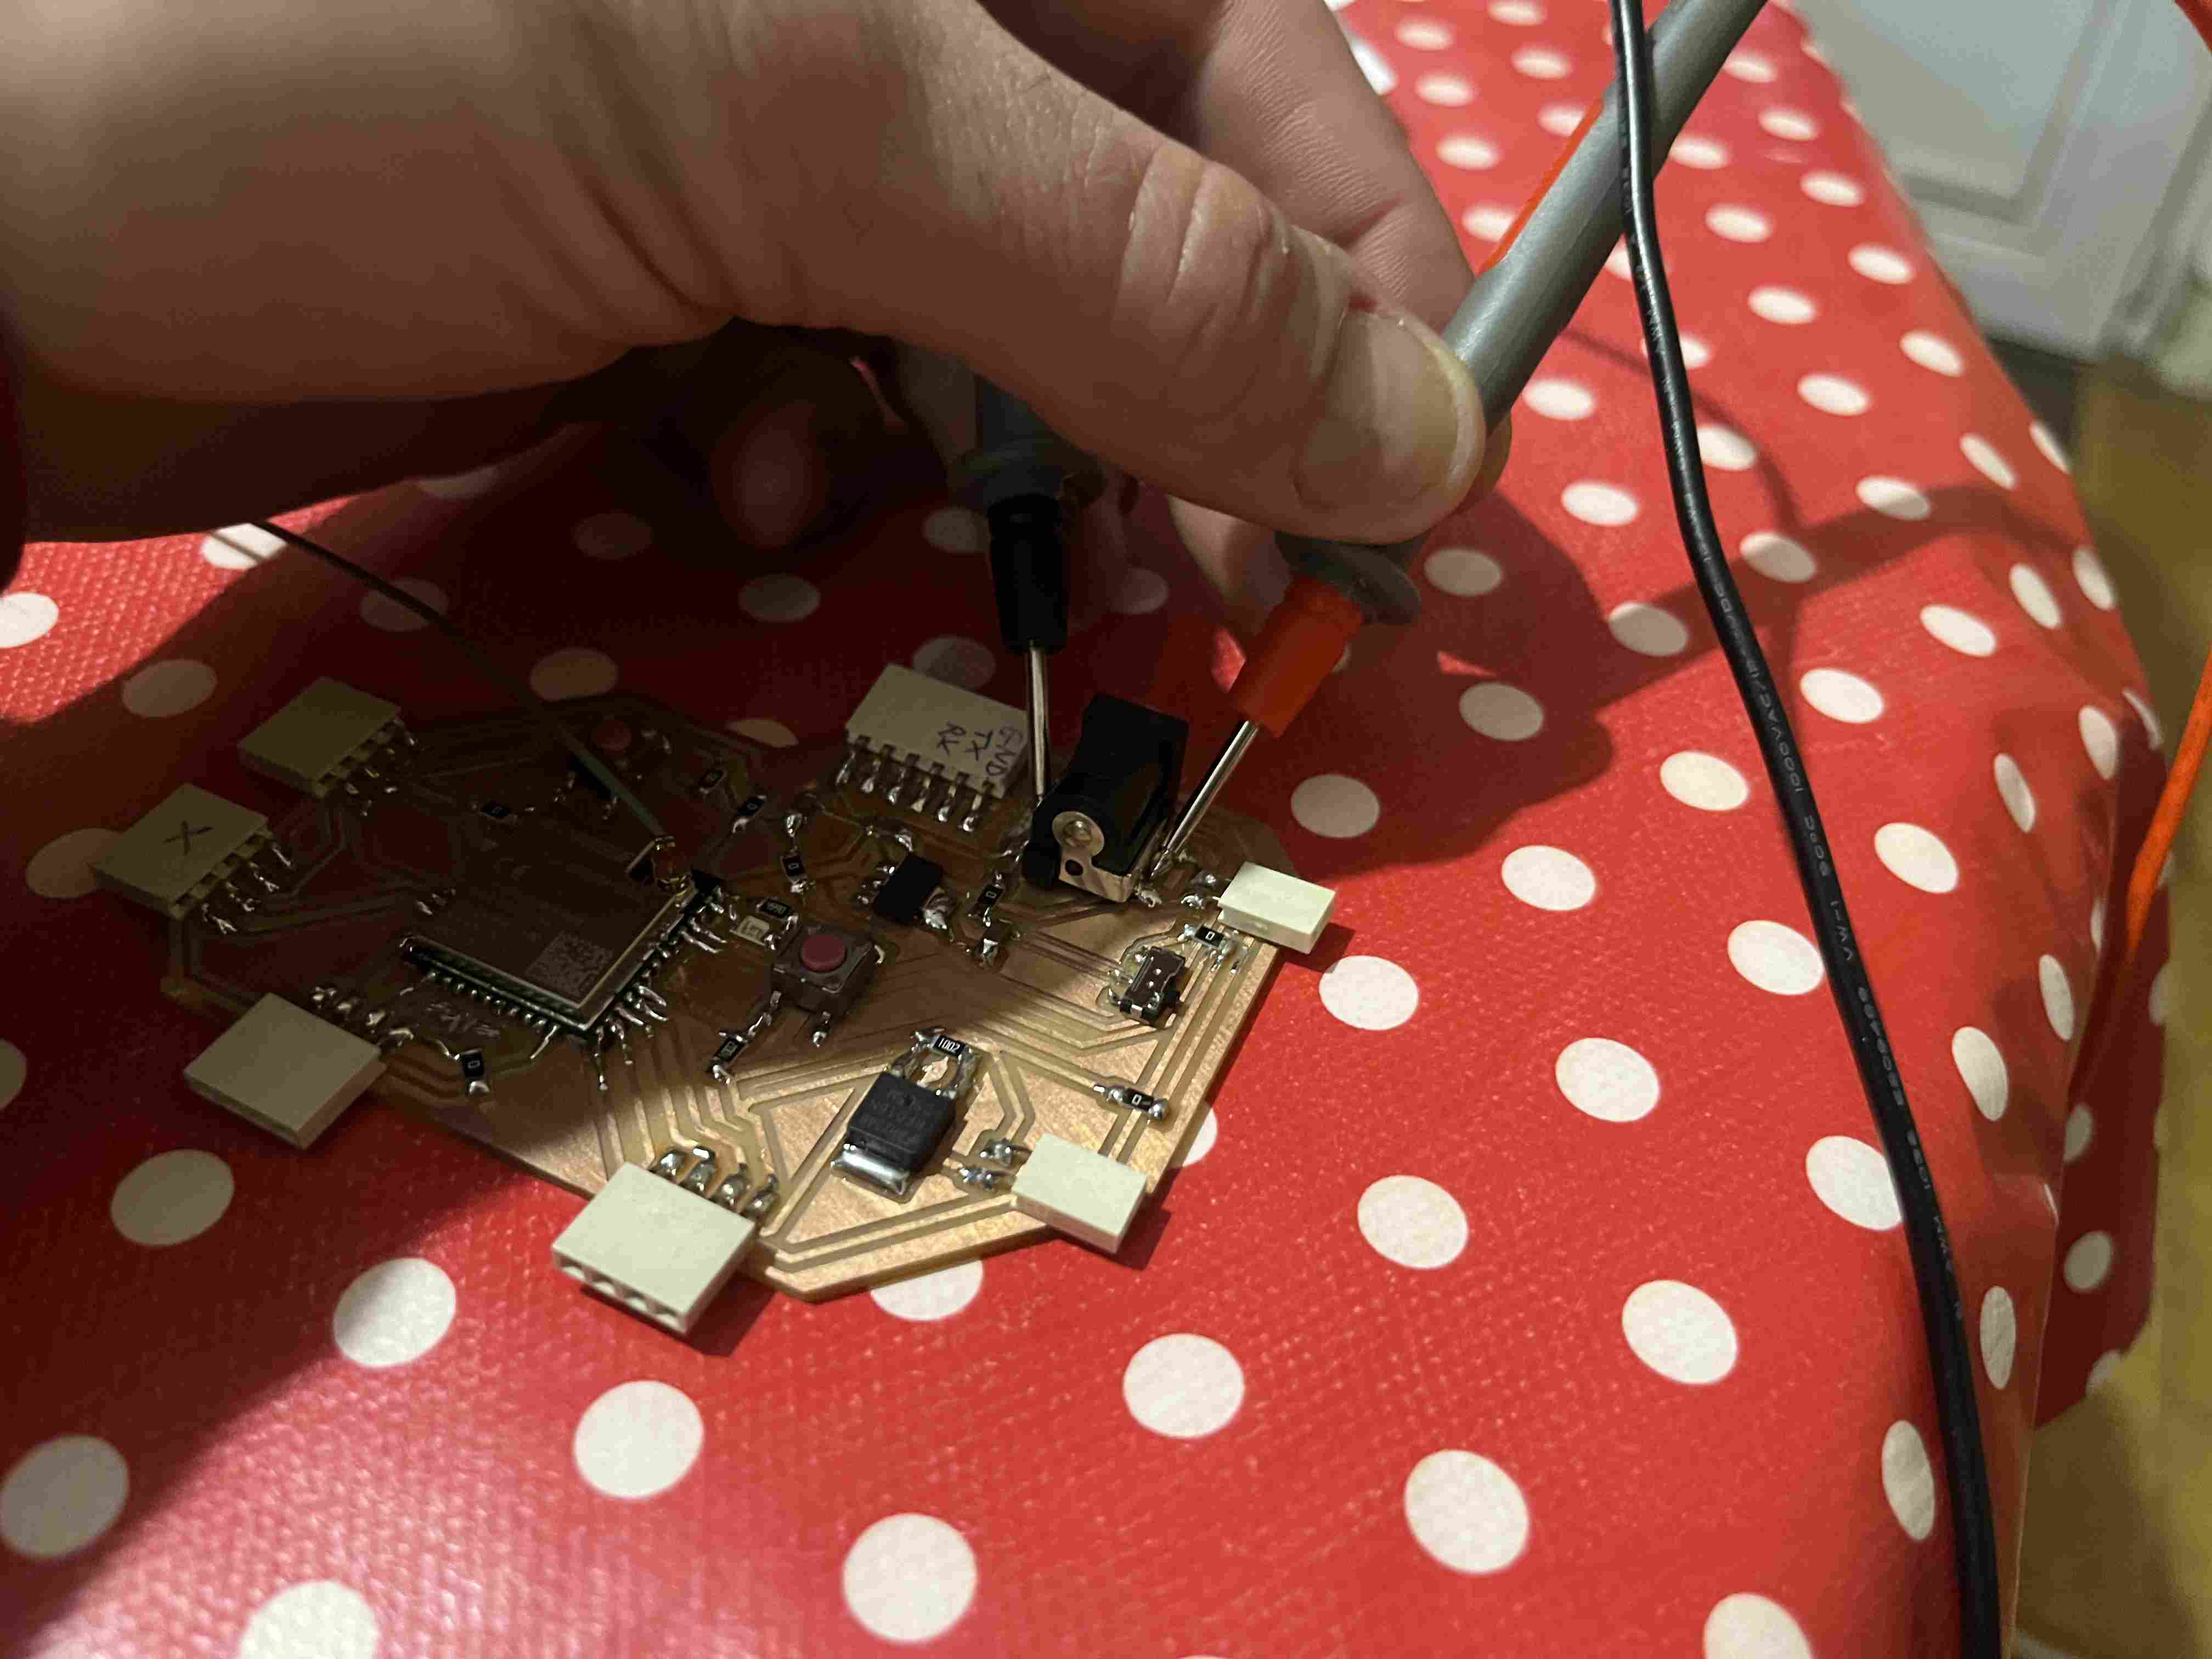
In order to execute the code, I created a new board because the old one had several faults and I damaged some pins by inserting wires to correct the errors. If you want to see the details of this PCB, you can find it on the page of my final project. Once the code has been uploaded to the esp32, we can go to the wifi settings on our esp32 and connect to the network by entering the password given in the arduino code (123456789).
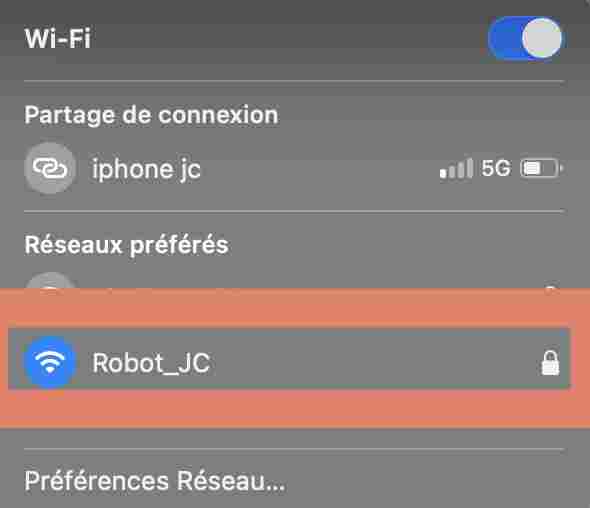
Once connected, we copy the IP address of our esp32 displayed in the serial monitor and paste it into a search engine. This will connect us to the html page for our esp32. This page remains local and it is only possible to connect if you are connected to the esp32 wifi.


Once I'm on the html page, all I have to do is turn on my robot (you'll find the documentation on my final project page, just like for the PCB) and press the various buttons on the page to activate the different functions. The rendering in real time is as follows
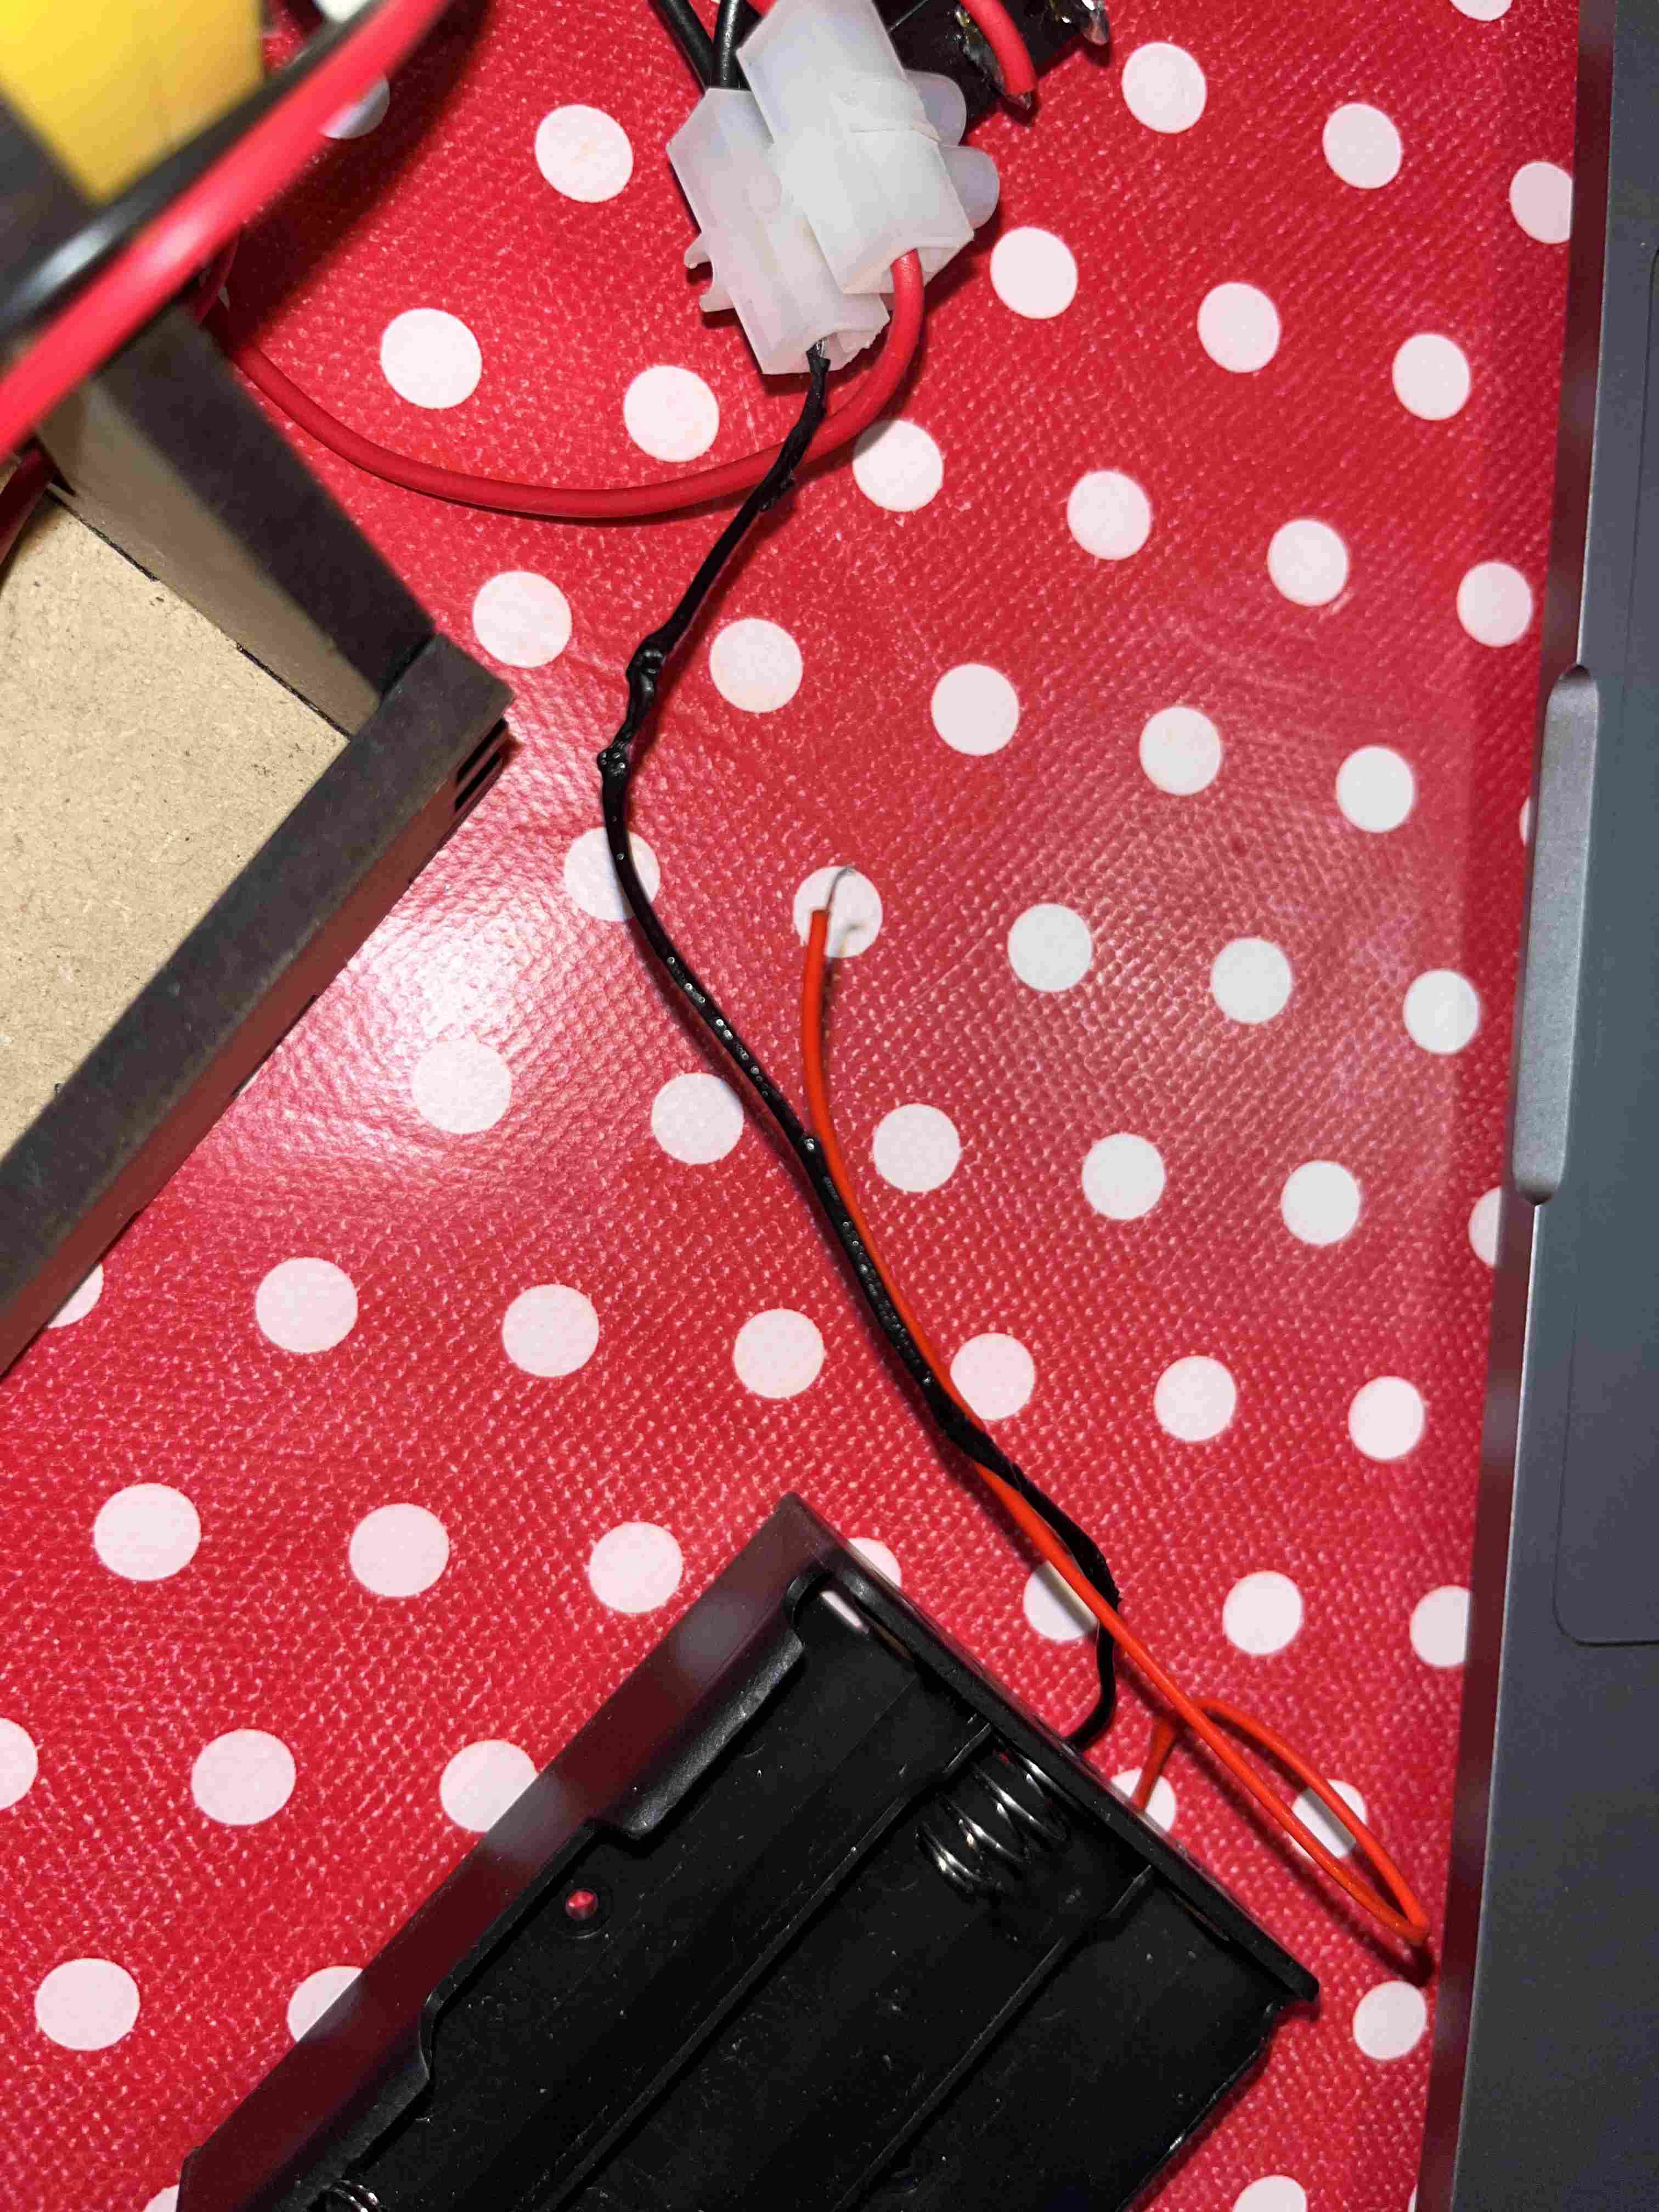
Once I'd finished my tests, I wanted to test my robot autonomously but I couldn't maintain a stable connection. I connected to the network and was disconnected very quickly. At first I thought it was a voltage problem, as the mains supply was sending out 5V while the battery supply was 12V. I then measured the voltage with a multimeter and I had a value of 3.3V whatever the power source. However, when I was on the batteries, I had a peak drop of 1V. During the review, the instructors told me that this was possibly a problem due to a lack of current. The power consumption of the esp32 may therefore be too high for my batteries.
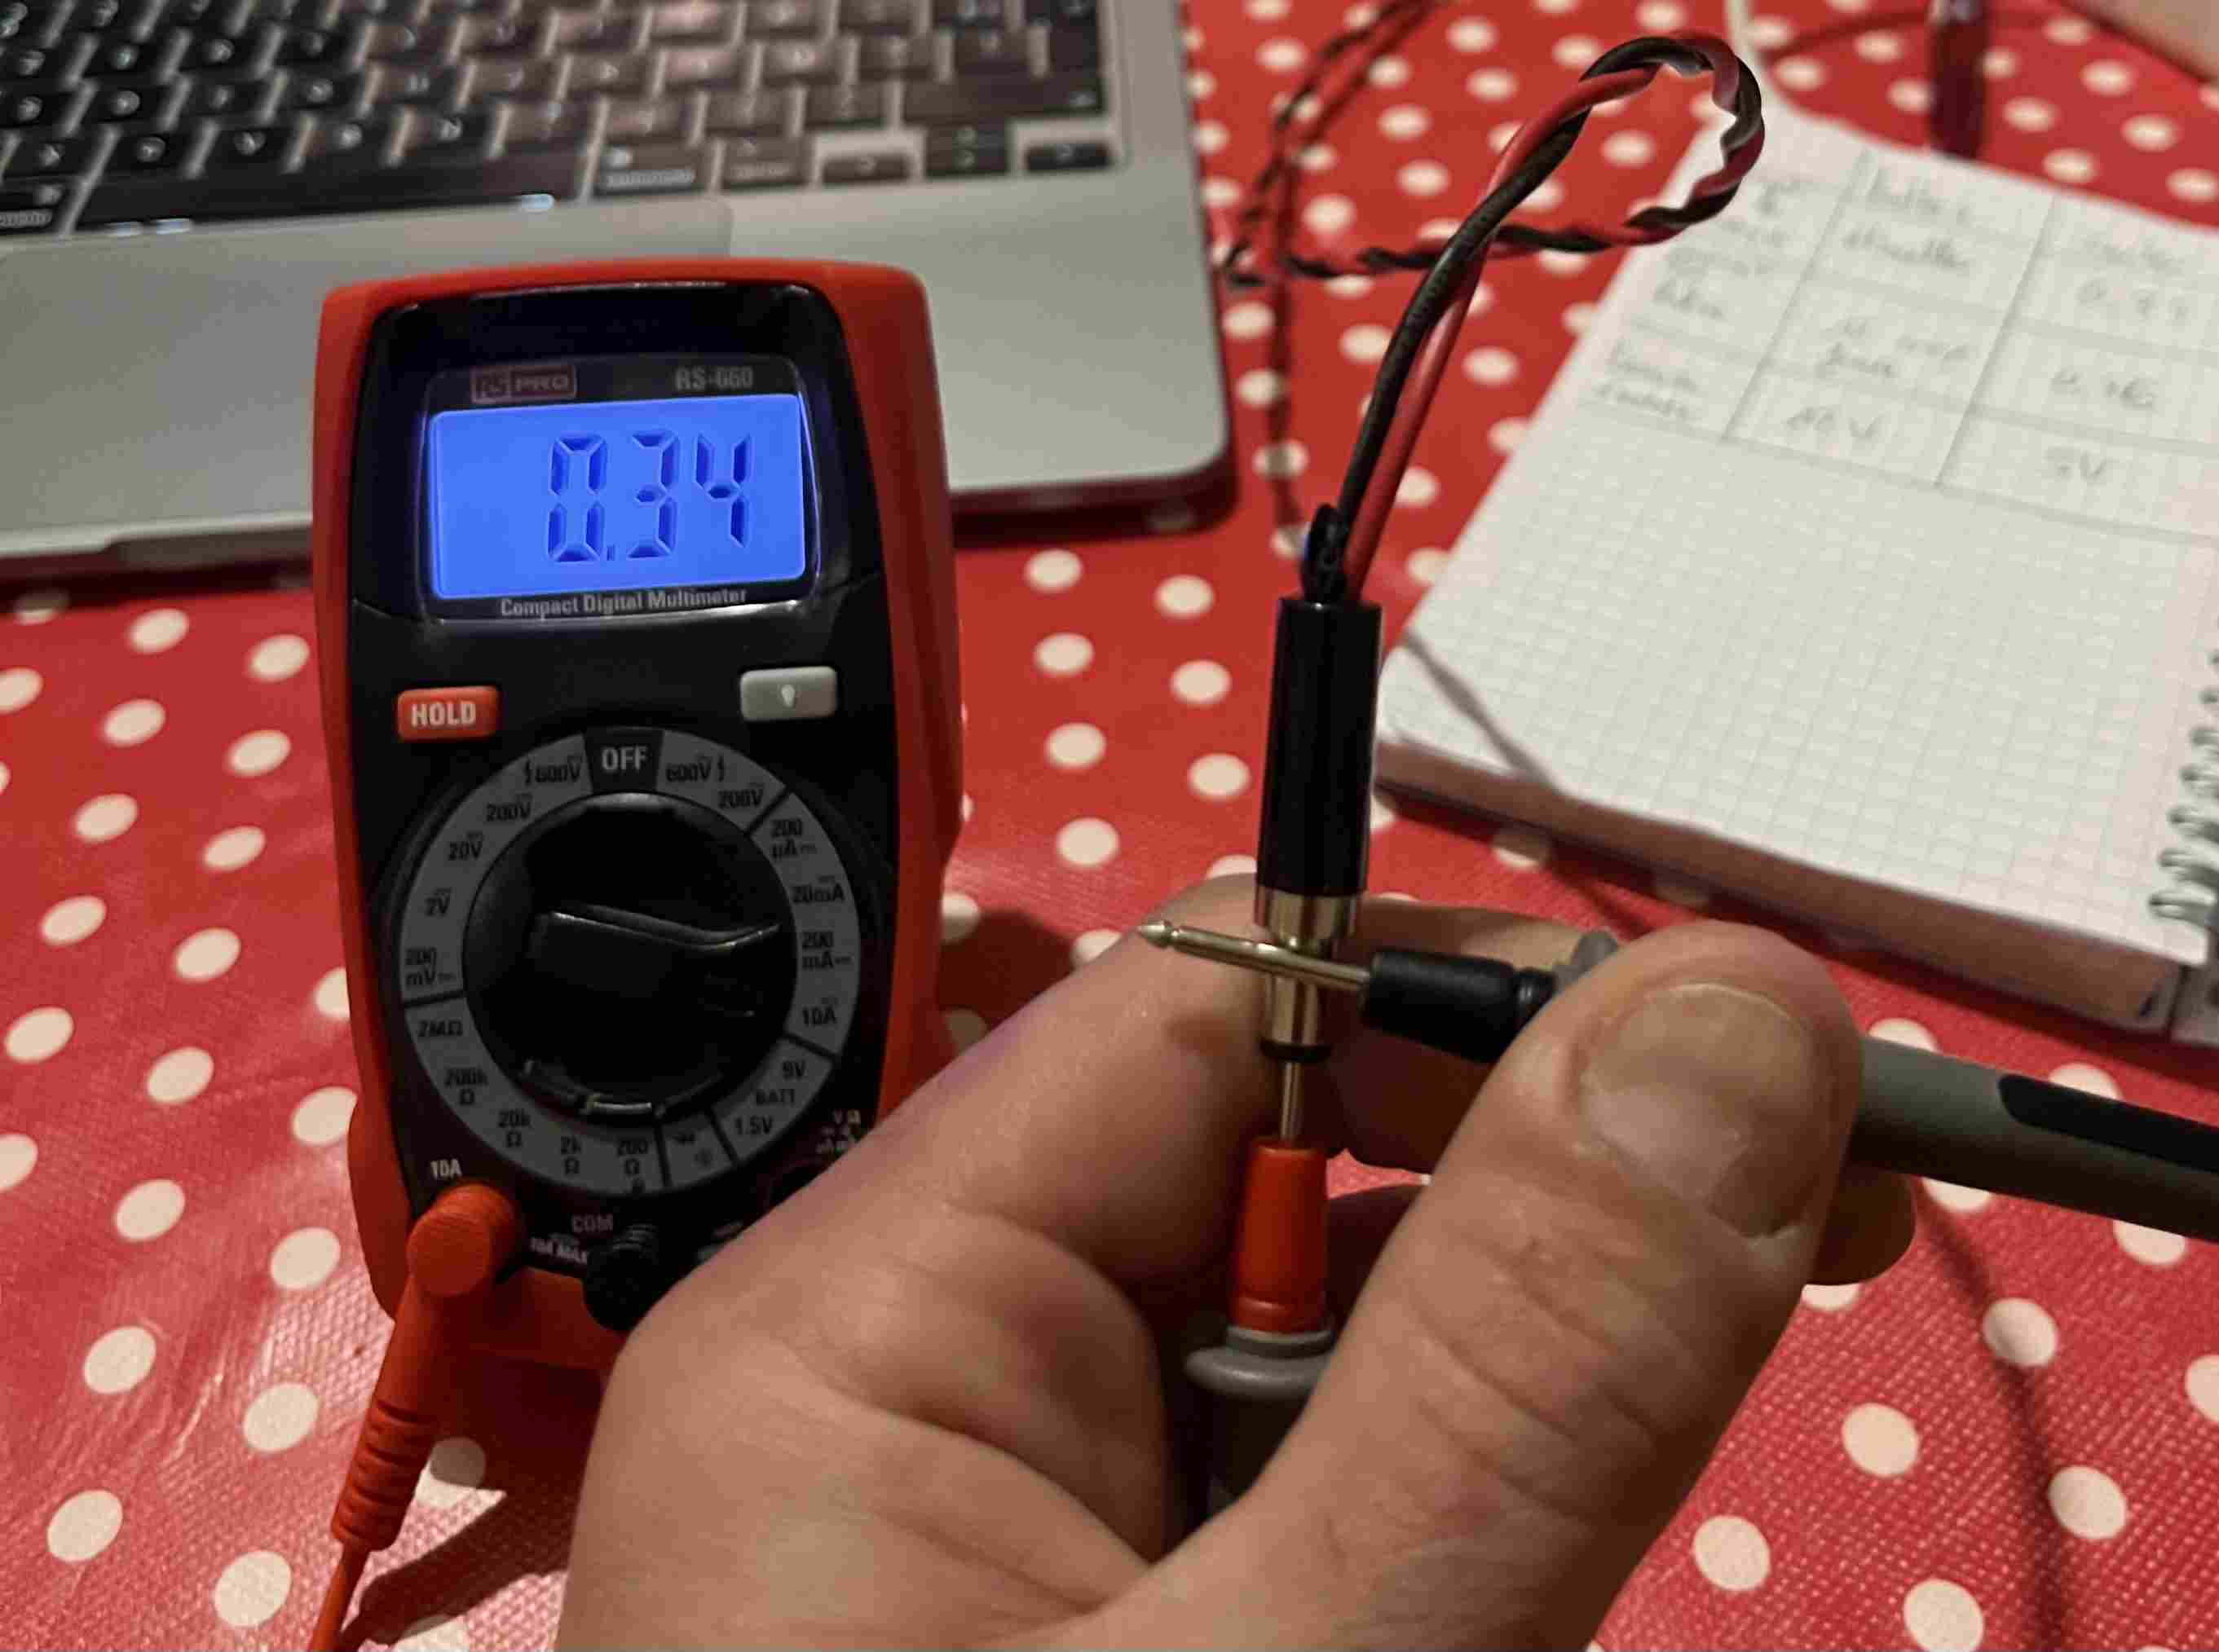
In order to test the current of my various power supplies as recommended during the review, I used the multimeter in 10amp mode, also changing the port cable. I tested the current directly on the power supply as well as on the card, and the results were as follows:
| Battery | Power Supply | |
|---|---|---|
| Current on the board | Sparks | 0.35A |
| Current on the power supply | 12A + instant battery smoke | 0.35A |
| Voltage | 12V | 5V |
As you can see from the results table, the test was not very successful and in fact very dangerous. My batteries were delivering a current of 12V and when I measured the voltage on the PCB I got sparks, I thought the problem was with my PCB and when I tested directly on the power supply, I had a current of 12amps and instantly the batteries started to smoke. I immediately took them outside. To check that nothing had been damaged, I tested the multimeter on the mains again and it showed the same values as before, the pcb was also working, so I don't think I'd done too much damage. Later, I went to see my fruit outside, the batteries weren't hot and they weren't deformed, it was the battery pack wires that had melted. The good thing about this test is that I know what the problem is and why my robot wasn't working when it was powered by the batteries. I think this accident happened because the multimeter is designed to receive a maximum of 10 amperes, and as the current was greater than this value, I created a short circuit which caused the wires to melt.