Week12. Molding and casting
This 12th week, we had to focus on molding and casting. So we tried out as many different materials as possible to make molds and creations of all kinds. Our assignments were as follows.
Group assignement
review the safety data sheets for each of your molding and casting materials,
then make and compare test casts with each of them
compare printing vs machining molds
Individual assignement
design a mold around the process you'll be using,
produce it with a smooth surface finish,
and use it to cast parts
extra credit: use more then two mold parts
Group assignement
OOMMOO 25
In order to realize the group assignments, I chose to test different materials. To do this, I wanted to test different materials. First, I wanted the'OOMOO 25 de chez SMOOTH-ON, ce matériau est un composé de caoutchouc silicone durcissant à l'étain, facile à utiliser, avec un rapport de mélange pratique de un pour un par volume.
Instructions
Safety – Use in a properly ventilated area (“room size” ventilation). Wear safety glasses, long sleeves and rubber gloves to minimize contamination risk. Wear vinyl gloves only. Latex gloves will inhibit the cure of the rubber.
Store and use material at room temperature (73°F/23°C). Storing material at warmer temperatures will also reduce the usable shelf life of unused material. These products have a limited shelf life and should be used as soon as possible. Premix Parts A and B thoroughly before using.
Cure Inhibition - Silicone rubber may be inhibited by certain contaminants in or on the pattern to be molded, resulting in tackiness at the pattern interface or a total lack of cure throughout the mold. If compatibility between the rubber and the surface is a concern, a small-scale test is recommended. Apply a small amount of rubber onto a non-critical area of the pattern. Inhibition has occurred if the rubber is gummy or uncured after the recommended cure time has passed. Materials found to cause cure inhibition include sulfur-based modeling clays and latex rubber.
To prevent inhibition apply a sealing agent . . . apply a “barrier coat” of clear acrylic lacquer sprayed onto the clay surface.
Applying A Release Agent - Although not usually necessary, a release agent will make demolding easier when pouring into or over most surfaces. Ease Release™ 200 is a proven release agent for making molds with silicone rubber and for releasing new silicone from cured silicone. Mann Ease Release™ products are available from Smooth-On or your Smooth-On distributor.
Because no two applications are quite the same, a small test application to determine suitability for your project is recommended if performance of this material is in question.
Measuring & Mixing - Before you begin, pre-mix Parts A and B thoroughly. After dispensing equal amounts of Parts A and B into mixing container, mix thoroughly for 3 minutes making sure that you scrape the sides and bottom of the mixing container several times. Mixture should have a uniform color with no color streaks. If you observe color streaks, continue mixing until they are eliminated.
Pouring – For best results, pour your mixture in a single spot at the lowest point of the containment field. Let the rubber seek its level up and over the model. A uniform flow will help minimize entrapped air. The liquid rubber should level off at least 1/2” (1.3 cm) over the highest point of the model surface.
Curing – Allow to cure for 75 minutes at room temperature (73°F/23°C) before demolding. Post curing the mold an additional 4 hours at 150°F (65°C) will eliminate any residual moisture and alcohol which is a by product of the condensation process and may inhibit some resins. Allow mold to cool to room temperature before using. Do not cure rubber where temperature is less than 65°F/18°C.
Using The Mold – No release agent is necessary when casting wax or gypsum. Applying a release agent (Ease Release™ 200) prior to casting polyurethane, polyester and epoxy resins is recommended to prevent sticking and mold degradation.
Mold Performance & Storage – The physical life of the mold depends on how you use it (materials cast, frequency, etc.). Casting abrasive materials such as concrete will quickly erode mold detail, while casting non-abrasive materials (wax) will not affect mold detail. Before storing, the mold should be cleaned with a soap solution and wiped fully dry. Two part (or more) molds should be assembled. Molds should be stored on a level surface in a cool, dry environment.
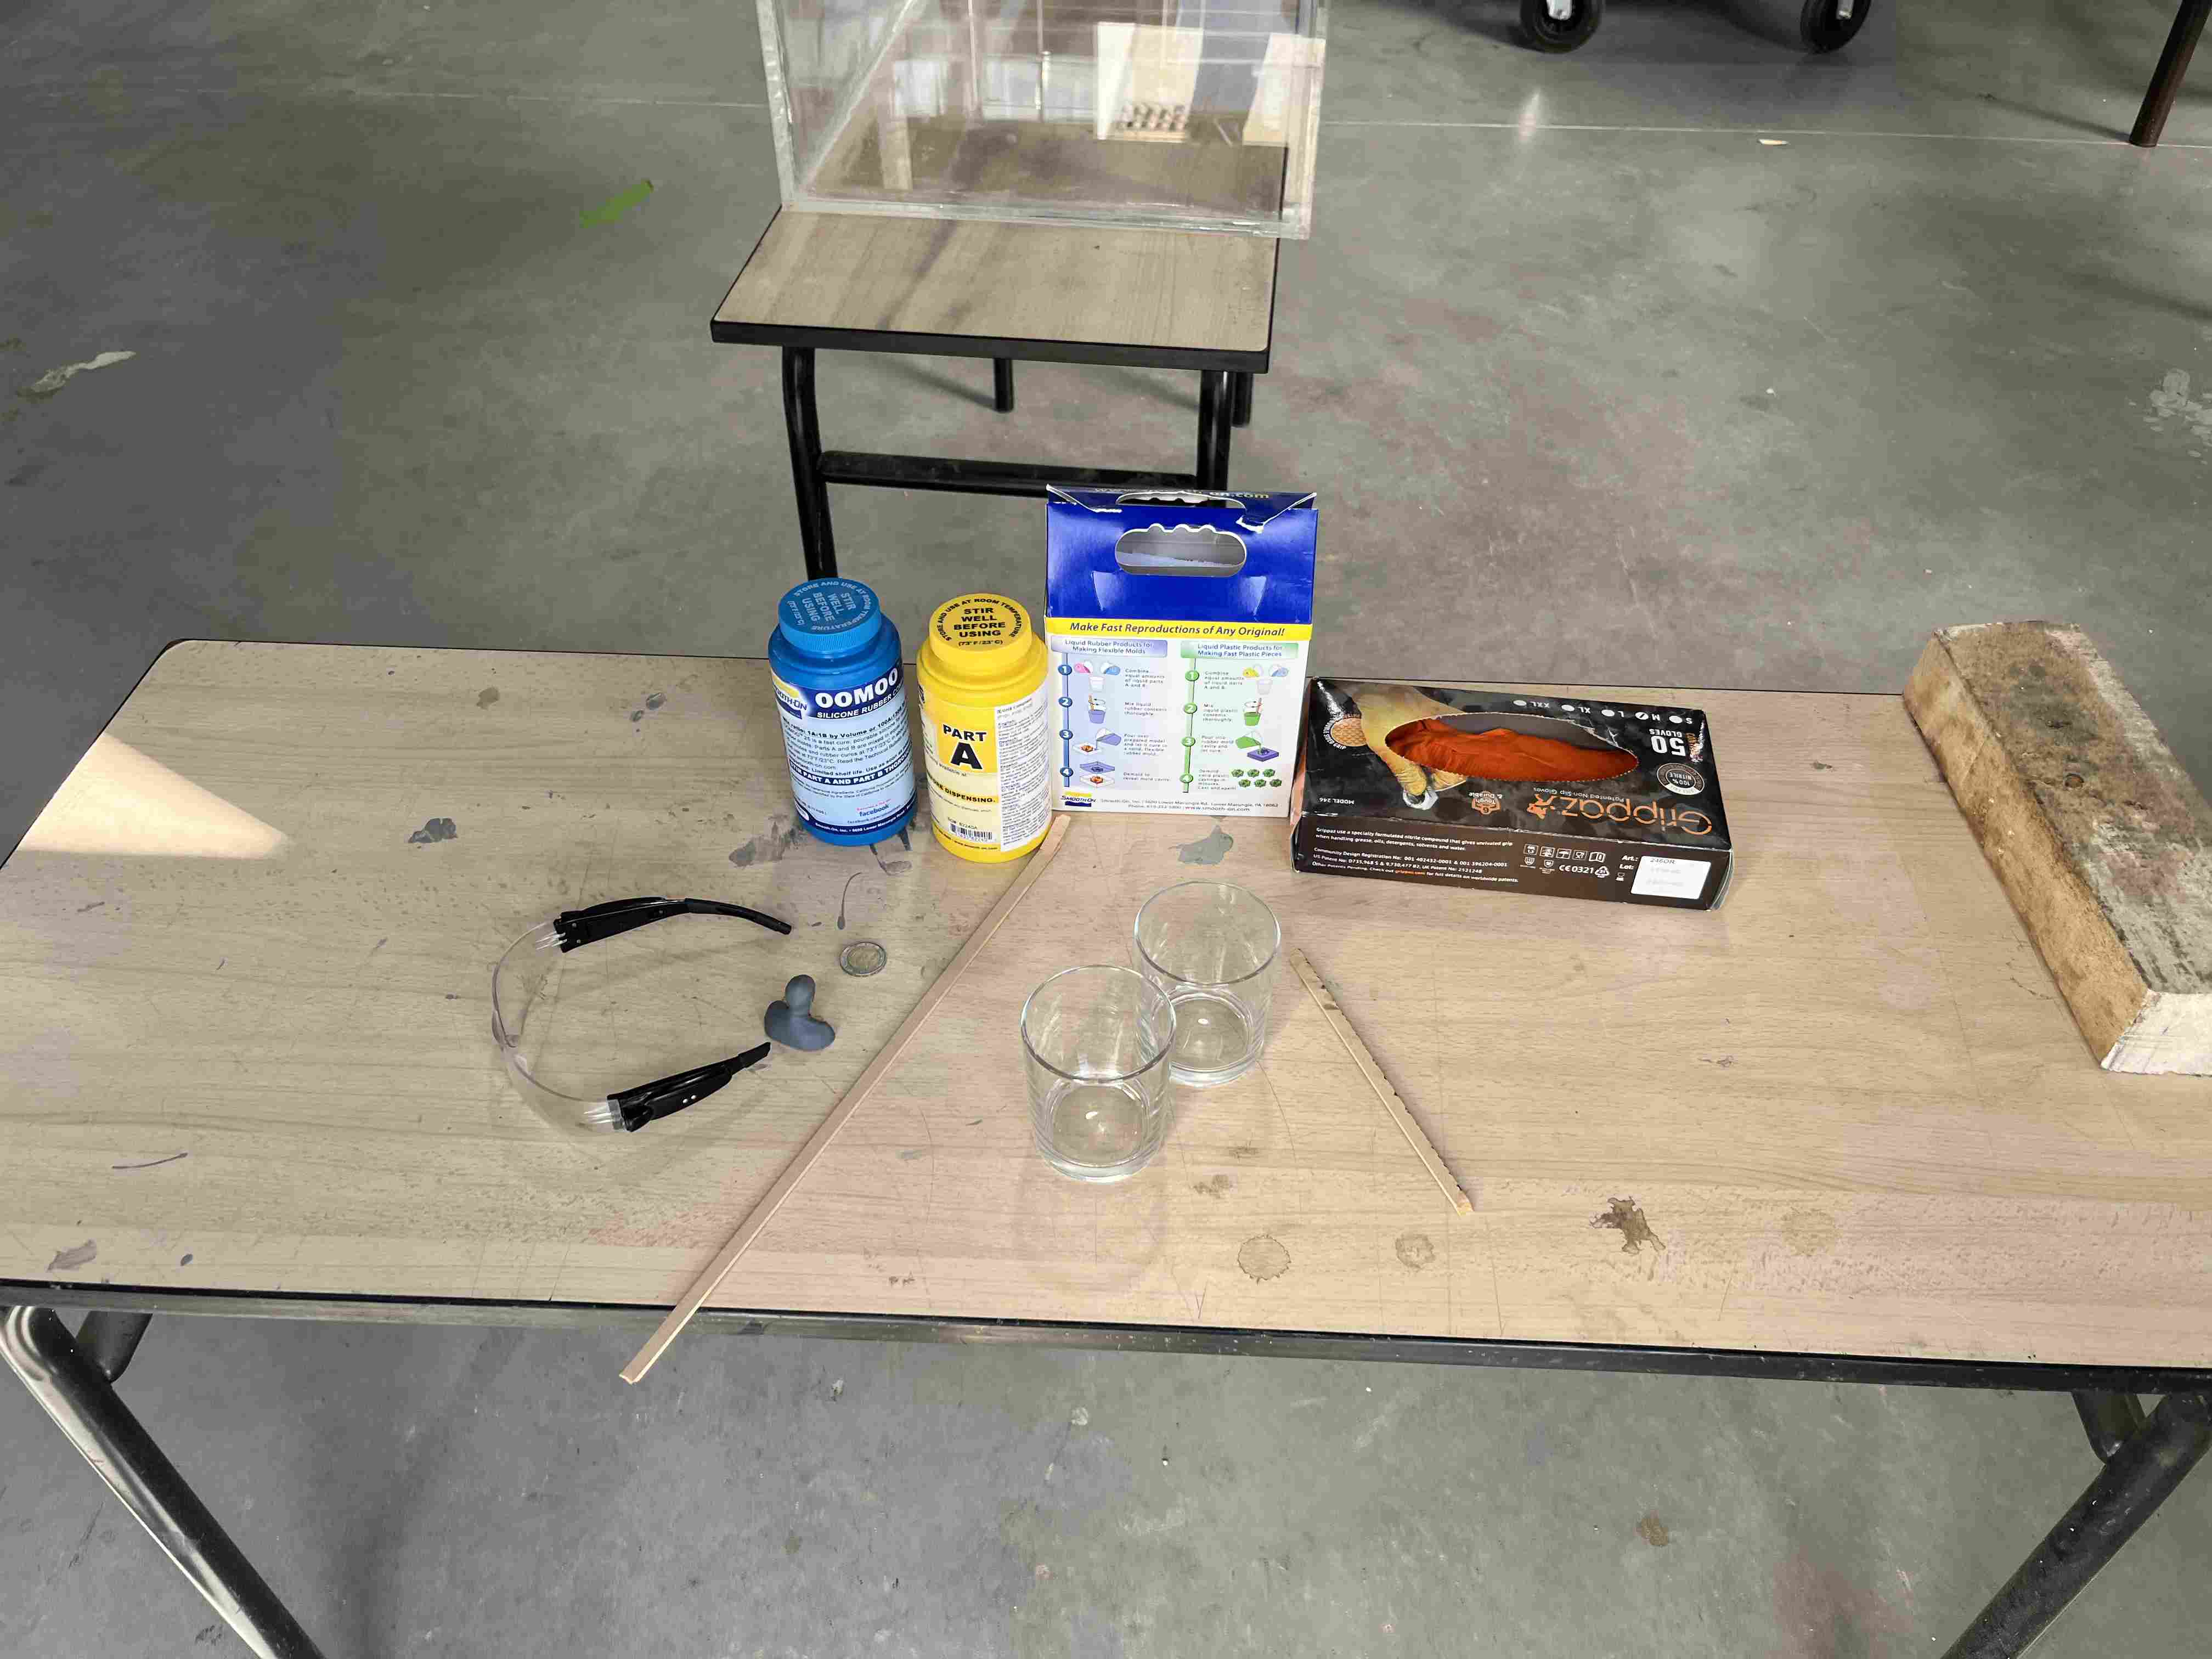
I therefore prepared the various elements necessary for the use of this material:
| Equiment |
|---|
| safety glasses |
| nitrile gloves |
| OOMOO 25 part A and B |
| Release agent |
| 3D print |
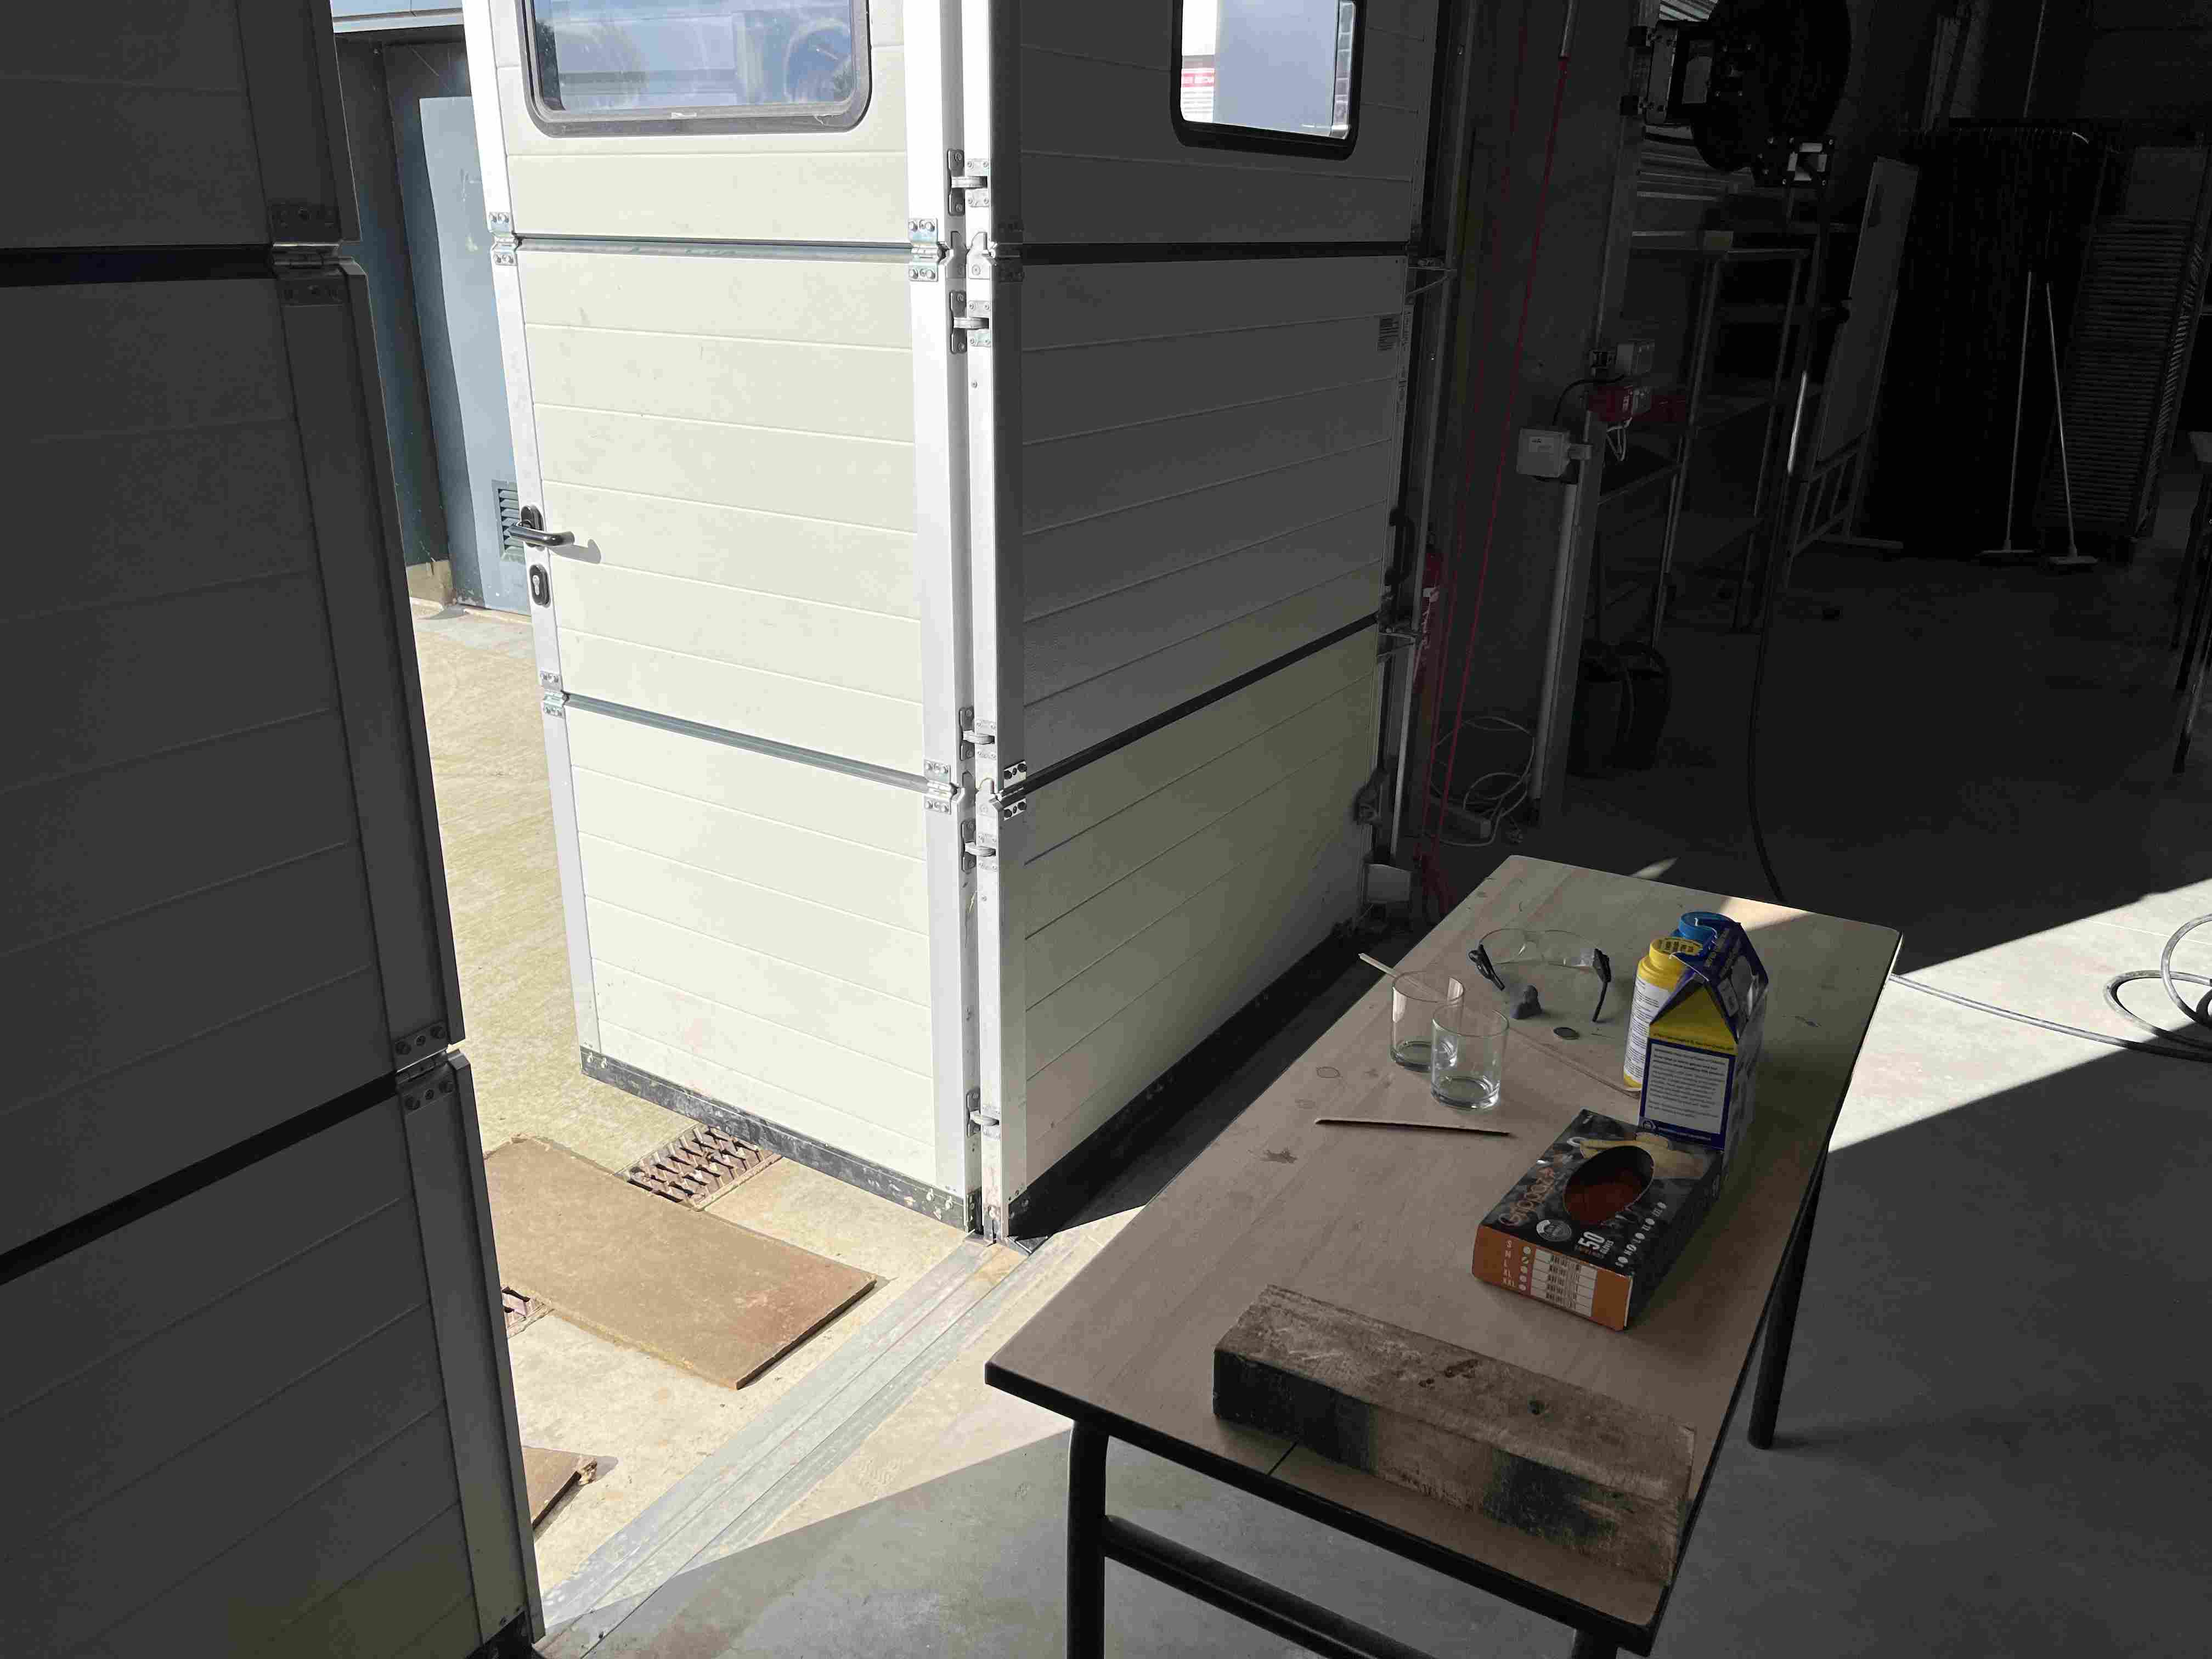
To follow the manufacturer's recommendations, I stood in front of an open door to the outside to ensure good ventilation. I used nitrile gloves rather than vinyl ones, as we didn't have any at Agrilab. I don't think this was a problem, as latex gloves in particular were to be avoided. Unfortunately, when I opened the various jars, component B had not kept well and had hardened. I was therefore unable to use the OOMOO25.
Smooth-sil 940
While staying with the same manufacturer, I chose to test the Smooth-Sil 940, a Platinum Silicones cure at room temperature with negligible shrinkage. With different hardnesses to choose from, Smooth-Sil™ products offer tremendous versatility and are suitable for making production molds of any configuration, large or small. These silicones exhibit good chemical, abrasion and heat resistance.

Instructions
Safety – Use in a properly ventilated area (“room size” ventilation). Wear safety glasses, long sleeves and rubber gloves to minimize contamination risk. Wear vinyl gloves only. Latex gloves will inhibit the cure of the rubber.
Store and use material at room temperature (73°F/23°C). Warmer temperatures will drastically reduce working time and cure time. Storing material at warmer temperatures will also reduce the usable shelf life of unused material. These products have a limited shelf life and should be used as soon as possible.
Cure Inhibition – Addition-cure silicone rubber may be inhibited by certain contaminants in or on the pattern to be molded resulting in tackiness at the pattern interface or a total lack of cure throughout the mold. Latex, tin-cure silicone, sulfur clays, certain wood surfaces, newly cast polyester, epoxy or urethane rubber my cause inhibition. If compatibility between the rubber and the surface is a concern, a small-scale test is recommended. Apply a small amount of rubber onto a non-critical area of the pattern. Inhibition has occurred if the rubber is gummy or uncured after the recommended cure time has passed.
Because no two applications are quite the same, a small test application to determine suitability for your project is recommended if performance of this material is in question.
To prevent inhibition, one or more coatings of a clear acrylic lacquer applied to the model surface is usually effective. Allow any sealer to thoroughly dry before applying rubber. Note: Even with a sealer, platinum silicones will not work with modeling clays containing heavy amounts of sulfur. Do a small scale test for compatibility before using on your project.
Applying A Release Agent - Although not usually necessary, a release agent will make demolding easier when pouring into or over most surfaces. Ease Release™ 200 is a proven release agent for making molds with silicone rubber. Mann Ease Release™ products are available from Smooth-On or your Smooth-On distributor.
IMPORTANT: To ensure thorough coverage, lightly brush the release agent with a soft brush over all surfaces of the model. Follow with a light mist coating and let the release agent dry for 30 minutes. If there is any question about the effectiveness of a sealer/release agent combination, a small-scale test should be made on an identical surface for trial.
MEASURING & MIXING...
Before you begin, pre-mix Part B thoroughly to re-disperse pigments that may have settled. Using a gram scale, dispense required amounts of parts A and B into a mixing container and mix for 3 minutes. Scrape the sides and bottom of the container several times. After mixing parts A and B, vacuum degassing is recommended to eliminate any entrapped air in liquid rubber. Your vacuum pump must pull a minimum of 29 inches of mercury (or 1 Bar / 100 KPa). Leave enough room in container for material expansion. Vacuum material until it rises, breaks and falls. Vacuum for 1 minute after material falls.
For best results, pour your mixture in a single spot at the lowest point of the containment field. Let the rubber seek its level up and over the model. A uniform flow will help minimize entrapped air. The liquid rubber should level off at least 1/2” (1.3 cm) over the highest point of the model surface.
Curing / Post Curing - Allow rubber to cure as prescribed at room temperature (73°F/23°C) before demolding. Do not cure rubber where temperature is less than 65°F/18°C. Optional: Post curing the mold will aid in quickly attaining maximum physical and performance properties. After curing at room temperature, expose the rubber to 176°F/80°C for 2 hours and 212°F/100°C for one hour. Allow mold to cool to room temperature before using.
Using The Mold - When first cast, silicone rubber molds exhibit natural release characteristics. Depending on what is being cast into the mold, mold lubricity may be depleted over time and parts will begin to stick. No release agent is necessary when casting wax or gypsum. Applying a release agent such as Ease Release™ 200 (available from Smooth-On) prior to casting polyurethane, polyester and epoxy resins is recommended to prevent mold degradation.
Thickening Smooth-Sil™ Silicones - THI-VEX™ is made especially for thickening Smooth-On’s silicones for vertical surface application (making brush-on molds). Different viscosities can be attained by varying the amount of THI-VEX™. See the THI-VEX™ technical bulletin (available from Smooth-On or your Smooth-On distributor) for full details.
Thinning Smooth-Sil™ Silicones - Smooth-On’s Silicone Thinner™ will lower the viscosity of Smooth-Sil™ for easier pouring and vacuum degassing. A disadvantage is that ultimate tear and tensile are reduced in proportion to the amount of Silicone Thinner™ added. It is not recommended to exceed 10% by weight of total system (A+B). See the Silicone Thinner™ technical bulletin (available from Smooth-On or your Smooth-On distributor) for full details.
Mold Performance & Storage - The physical life of the mold depends on how you use it (materials cast, frequency, etc.). Casting abrasive materials such as concrete can quickly erode mold detail, while casting non-abrasive materials (wax) will not affect mold detail. Before storing, the mold should be cleaned with a soap solution and wiped fully dry. Two part (or more) molds should be assembled. Molds should be stored on a level surface in a cool, dry environment.
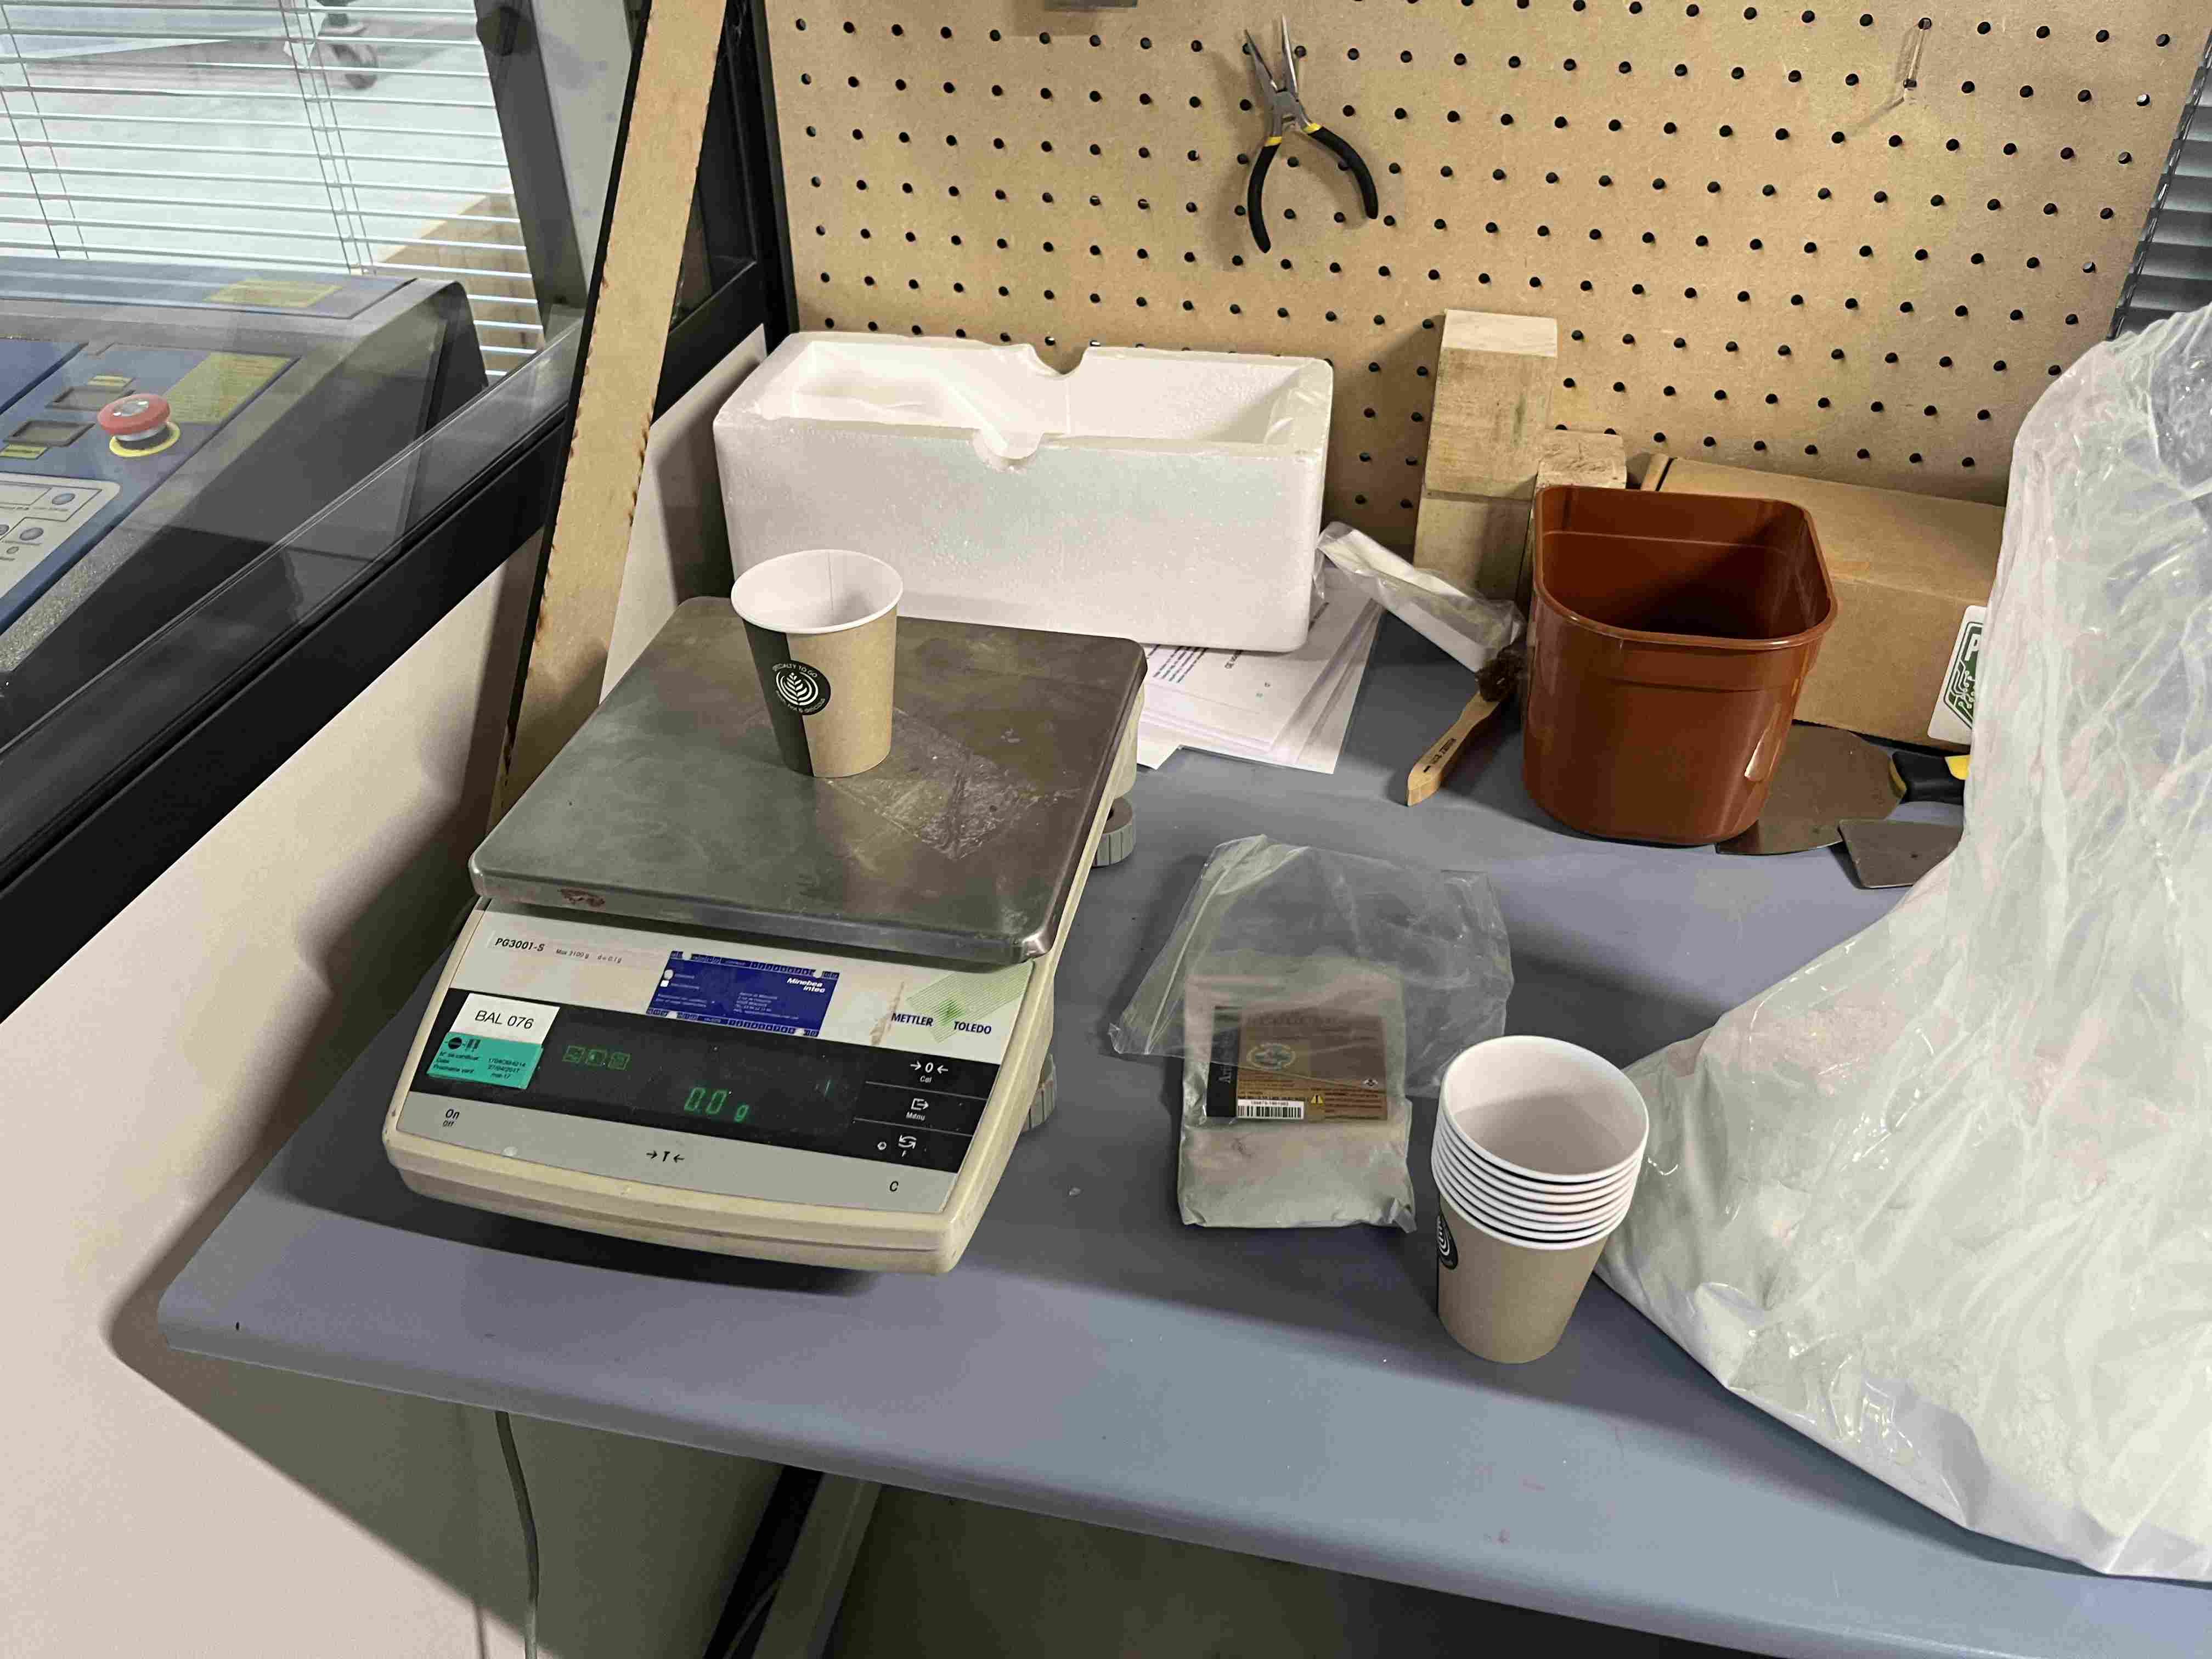
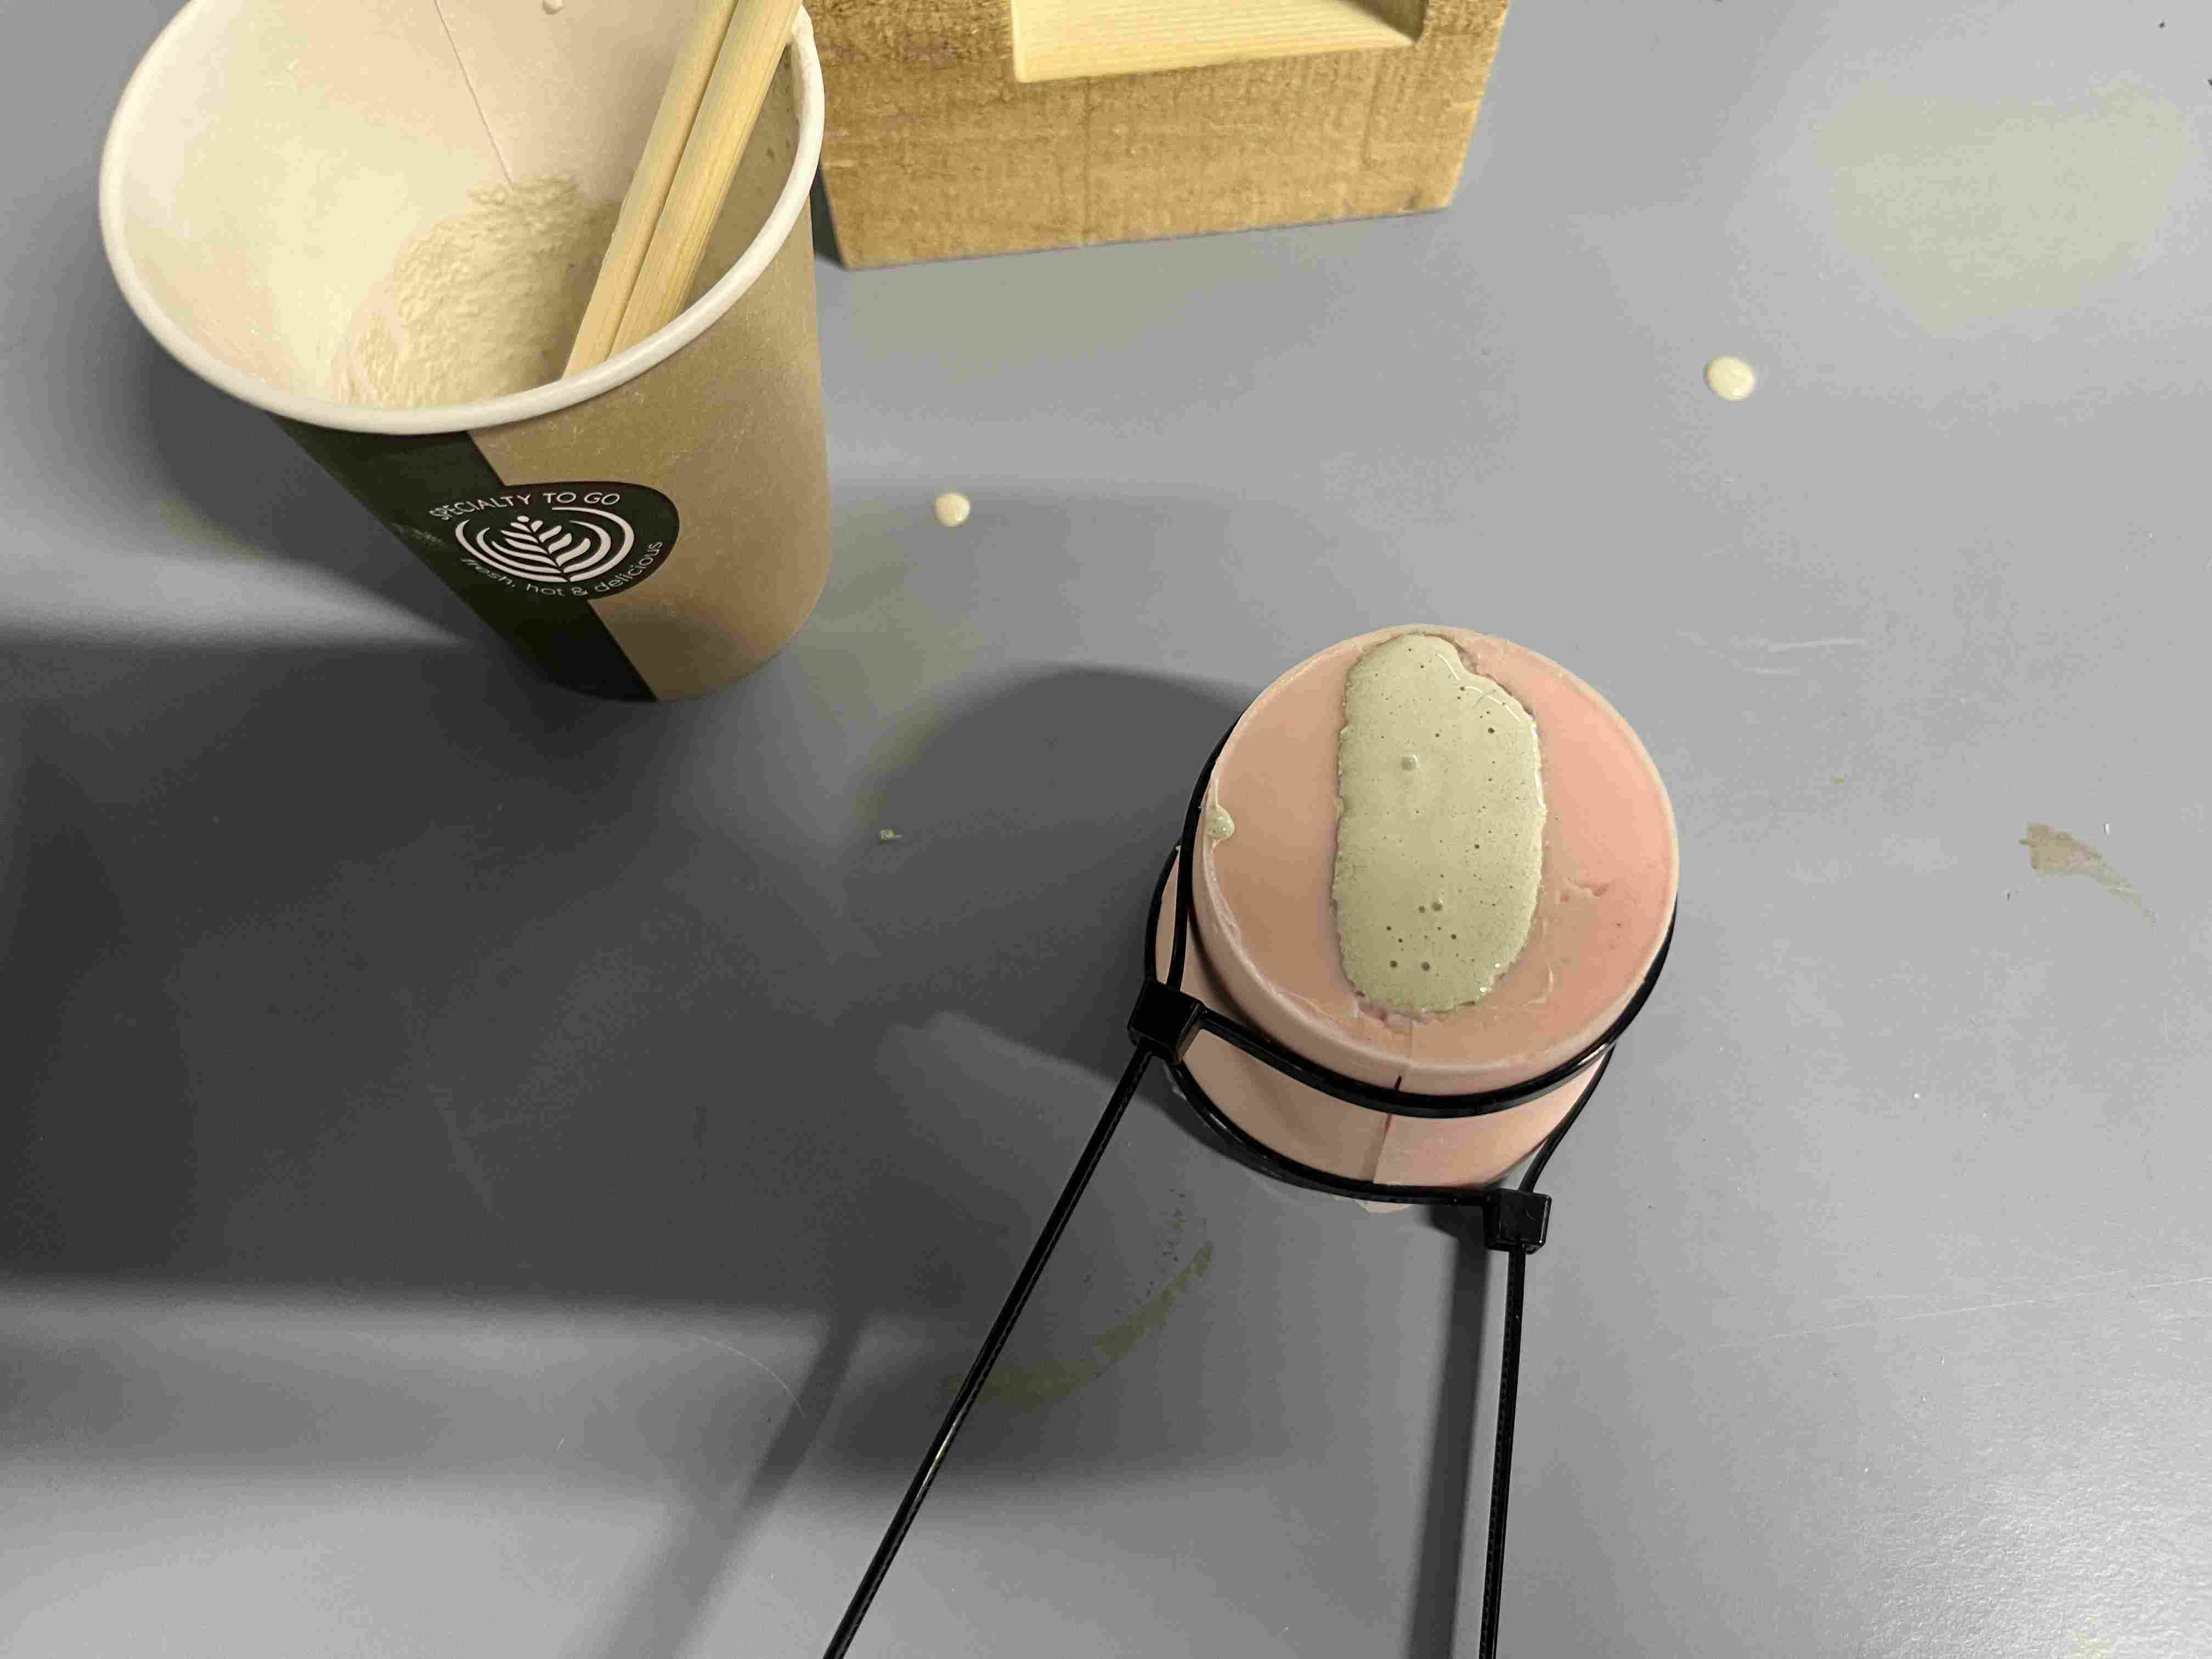
As the two materials are quite similar, I used the same equipment as for the OOMOO 25. However, the preparation process is different. To prepare Smooth-Sil™940, it's not a mix by volume, but a mix by weight. To dose them, you need to put in a mass of component B worth 10% of that of component A. Each component is stirred well before being weighed, to ensure that the materials are homogeneous. Once weighed, we mix them in the same container until we have a homogeneous color. Once the mixture is well blended, it can be placed in a vacuum chamber.

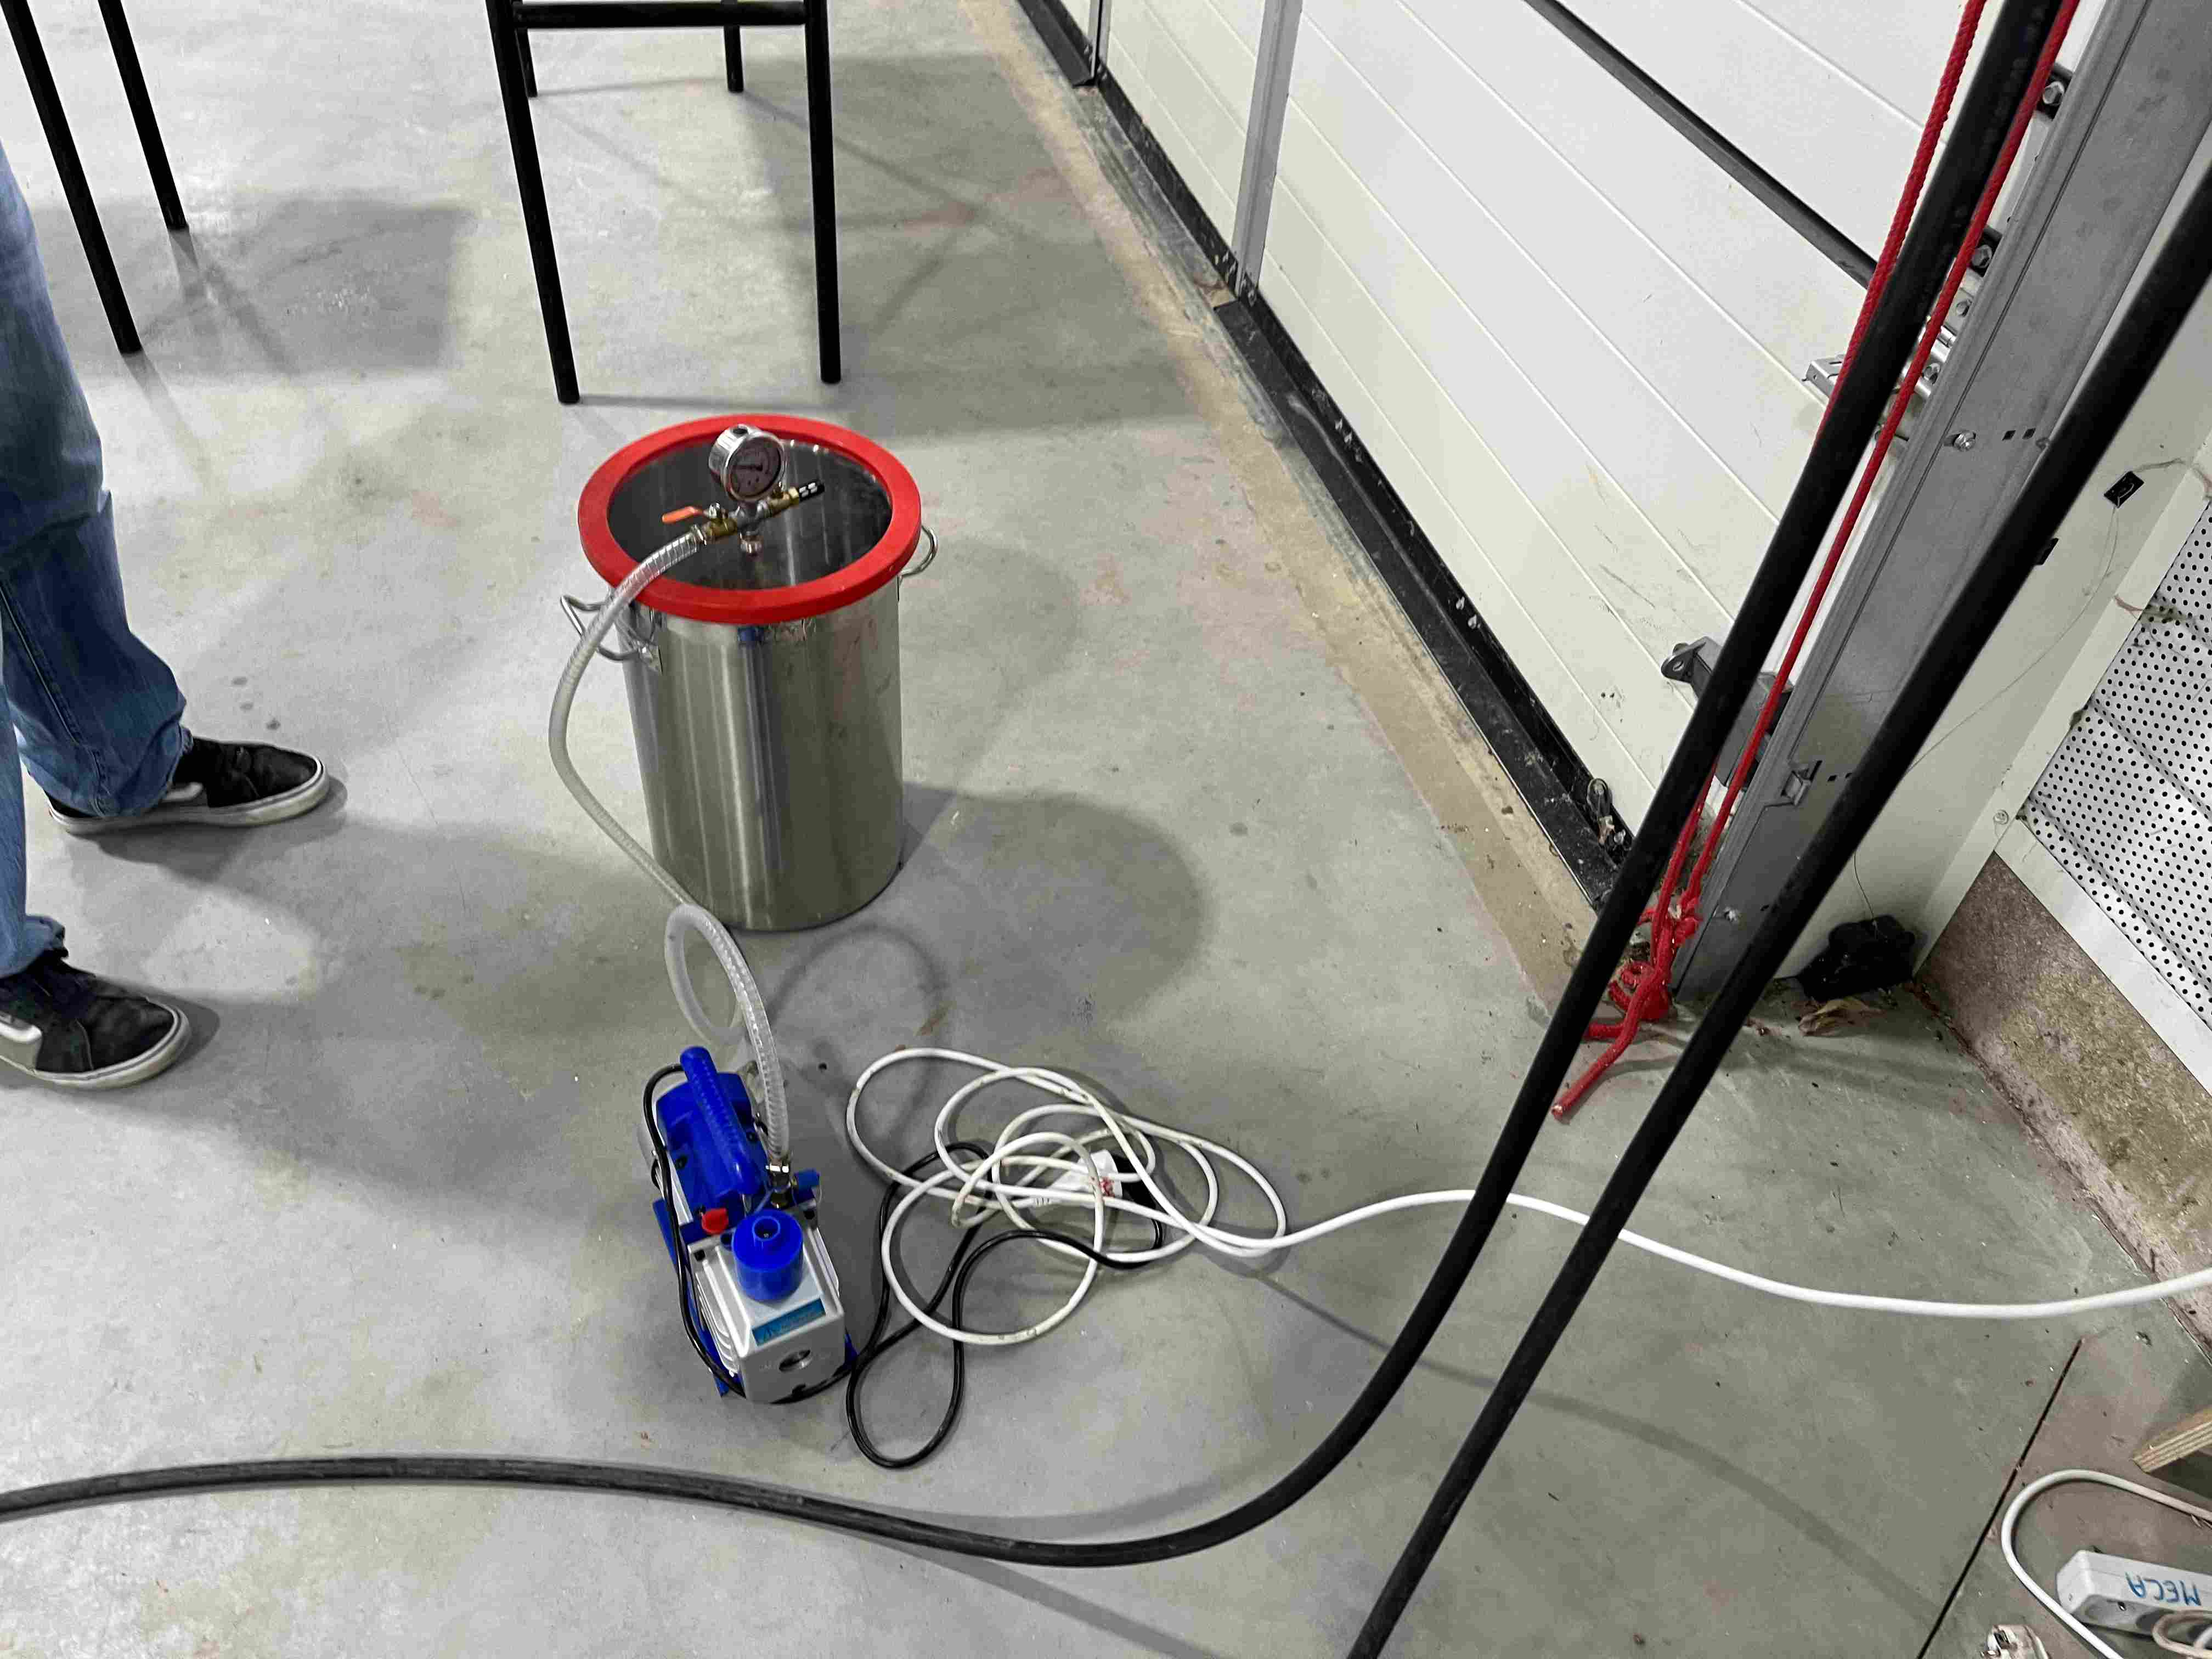
To do this, simply place our component in the vacuum chamber, close the outlet valve and open the inlet valve. About the pump, it's realy important to remove the cap, I didn't do it at first and the cap flew off very quickly when I turned on the pump.

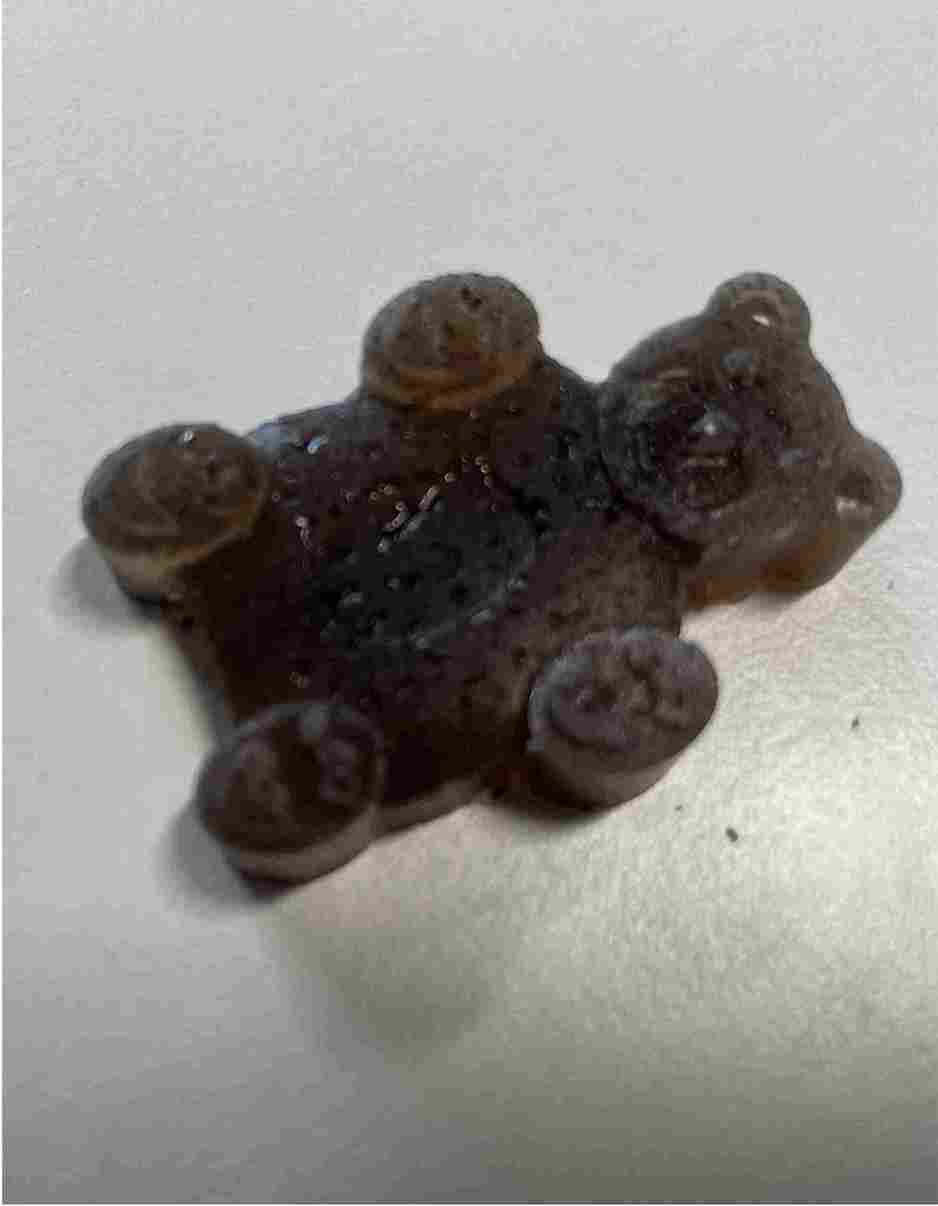
I left my sillicone in my container and put the chamber under depressurization. You need to make sure you have a large container because when the product is depressurized it swells a lot. I vacuumed several times to make sure there were no more bubbles. To test my product on something, I taped Alexis's 3D scan to the bottom of my cup, which I had printed in resin during the week 5, I then poured my sillicone and ran it through the vacuum chamber. I was pretty pleased with the result, apart from a few fine bubbles, it's really impeccable, with all the details of 3D printing. I forgot to use realese agent and had trouble removing it, as the cup is made of cardboard, it disintegrated well when wet. As for the mold, I had to cut it with a cutter to be able to extract the print.

Concrete mix
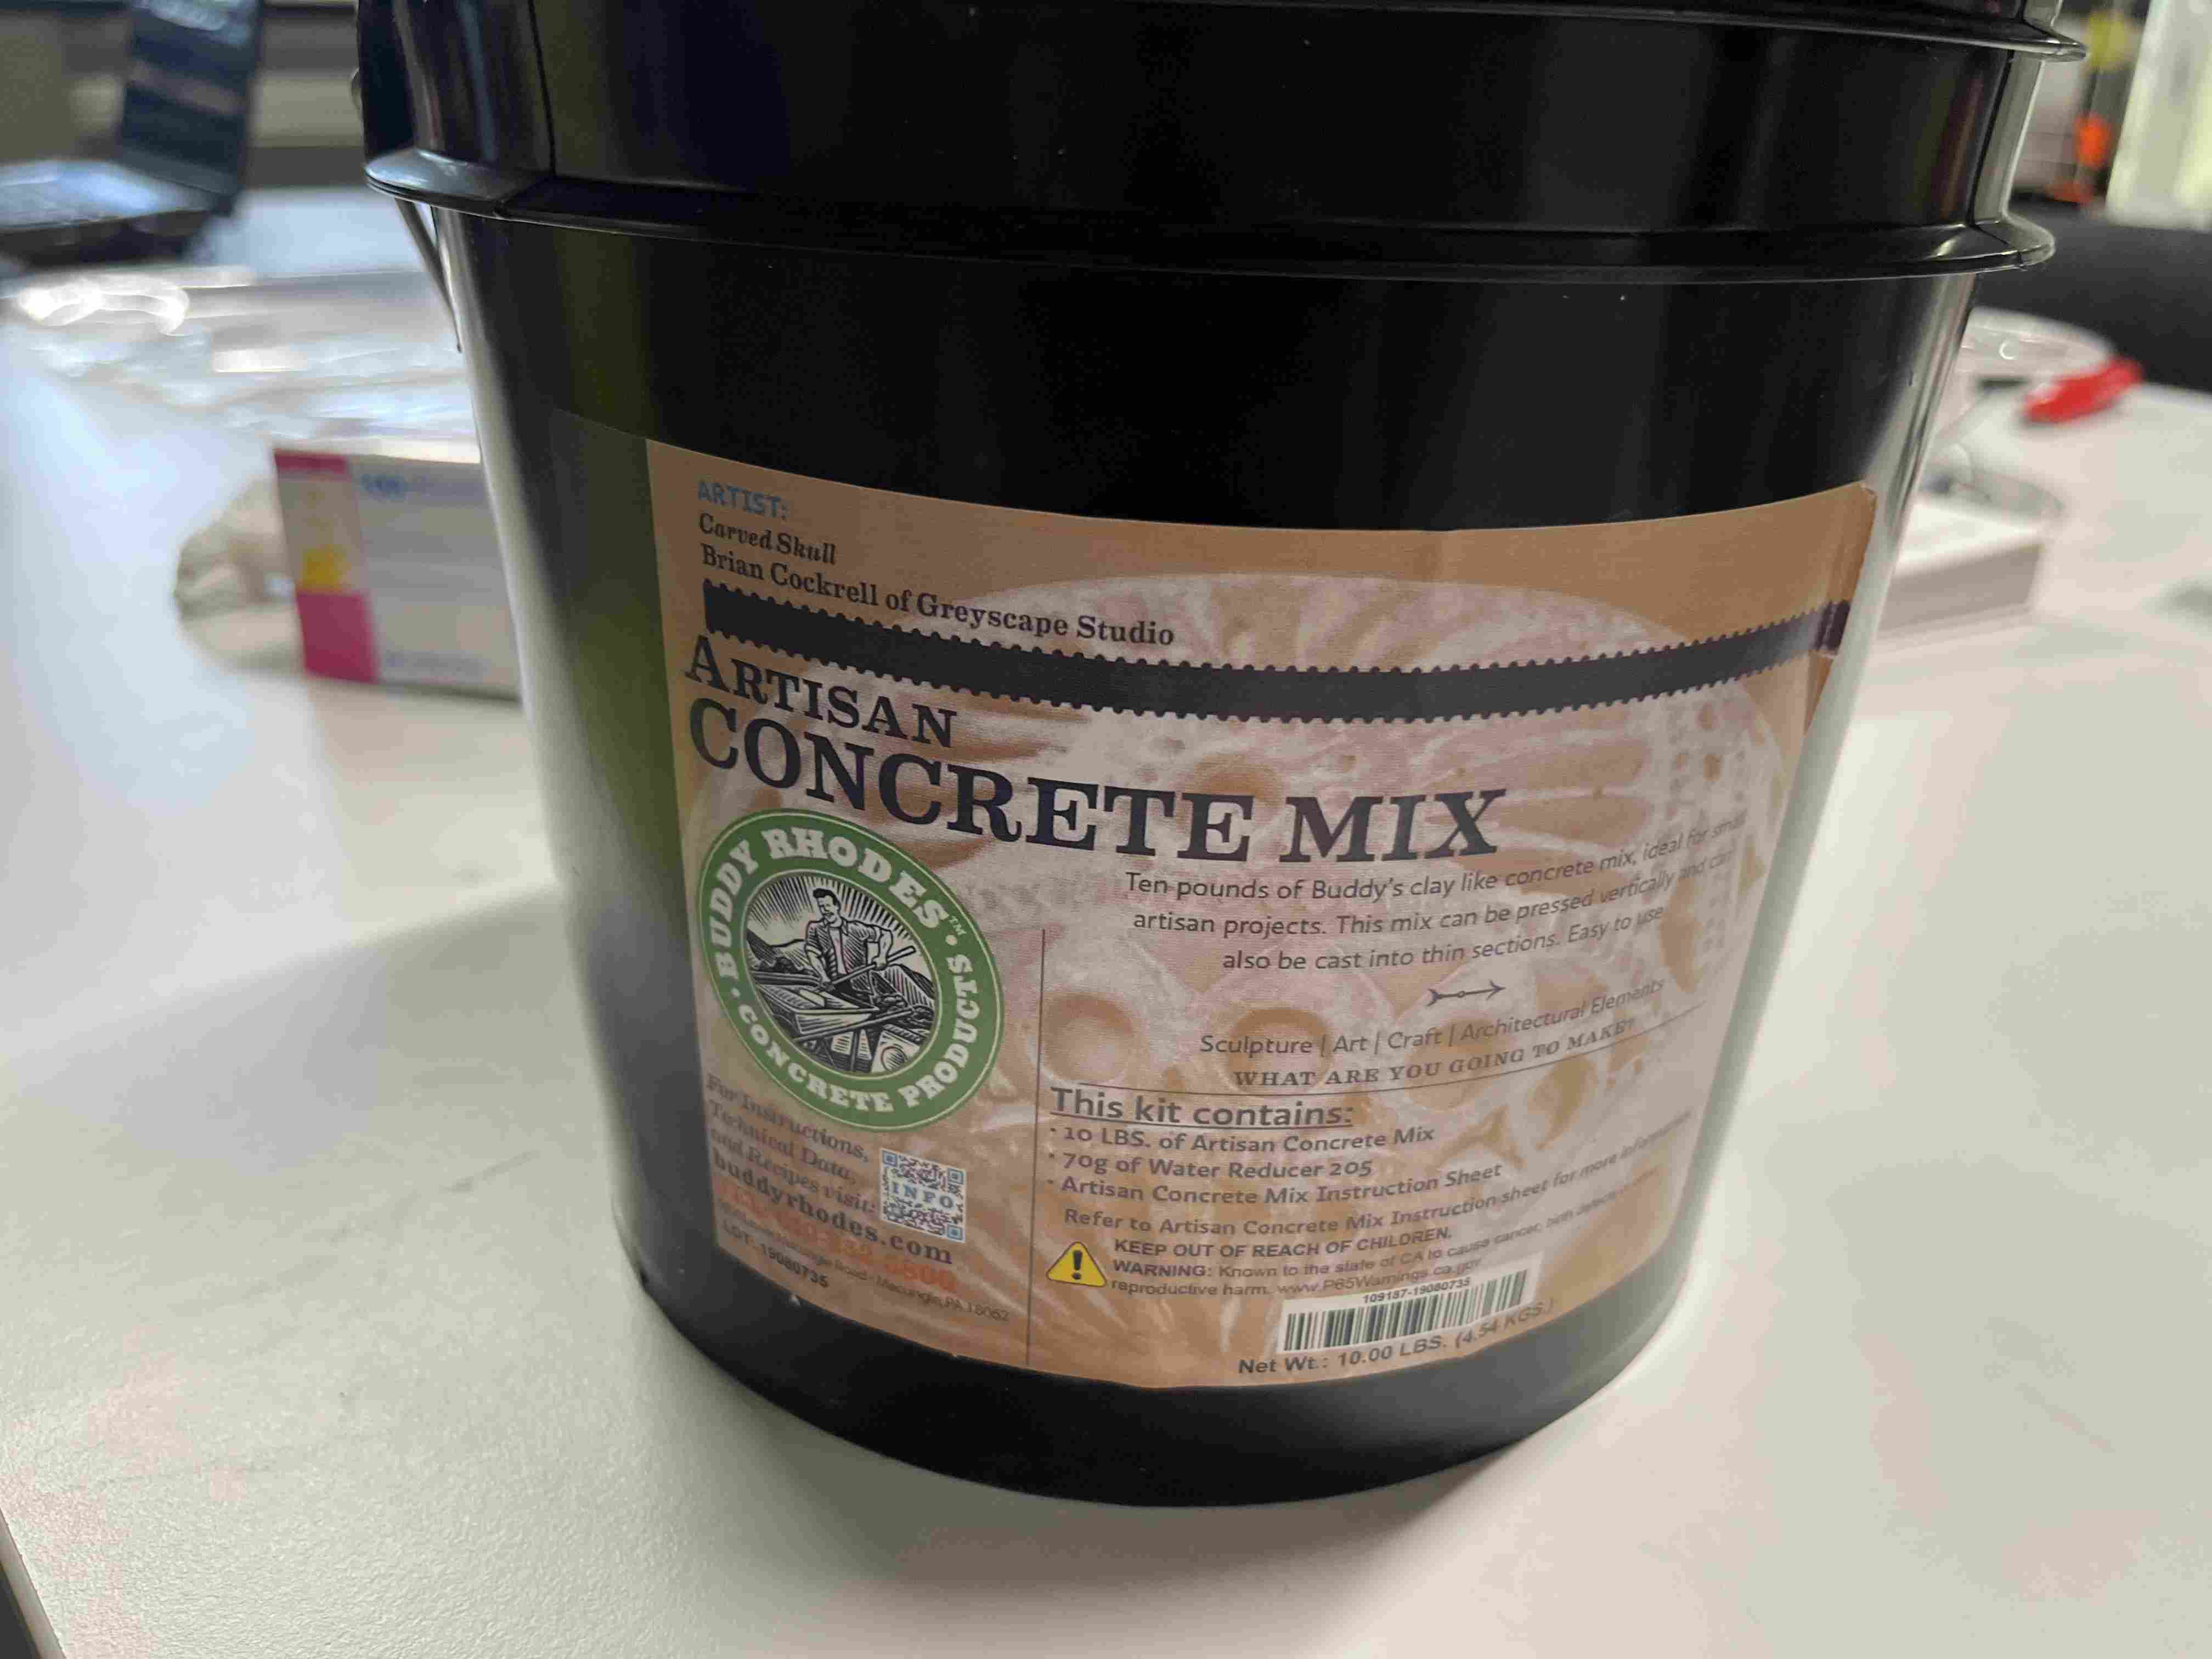
I then wanted to try the Concrete mix, it's a mixture of cement, pozzolan and polymer specially formulated to fill voids in hand-cast concrete. For this, I reused the mold I'd made with Smooth-Sil 940, which I serrated with two riselans to close it.
Concrete mix is used in the same way as traditional concrete: simply mix cement with water and mix thoroughly. A water reducer is also added to liquefy the concrete. I chose to use a dose of reducer equal to 70% of the cement mass.
INSTRUCTIONS
Mixing Instructions
The concrete is going to be strongest if no more than 750 ml of water is added. This works out to 0.75 kg of water for the entire 4.54 kg of mix. This much water will give a clay like consistency. If more stiffness is desired, then add less water
Water Reducer 205
Water reducer 205 is added to reduce the amount of water needed to make the mix more fluid. The entire package of Water Reducer 205 can be added to the full 4.54 kg of mix, and will produce a fluid mix. Smaller amounts of Water Reducer 205 can be added to soften the mix a bit, but not have it be fully fluid.
AC50 Acrylic Fiber (Optional)
These will add some reinforcement into the finished object and will remain mostly invisible, even if the concrete is polished. These fibers are added at the beginning of the mixing process.
AR Glass Fiber (Optional)
These fibers provide the greatest strength, and are great for reinforcing especially thin objects. The fibers are visible if you polish the concrete. If there are concerns about fiber showing in the finish layer of a project, a thin layer of mix that doesn’t contain the fiber can be added into the mold first, followed with a mix that does have fiber. Add the glass fibers at the end of the mixing process so as not to break them.
Pigment
Pigments are typically added by weight, and there is an upper limit to how much you can add without weakening the concrete. The maximum amount of most Buddy Rhodes pigments you should add will be between 0.25-0.5 lb of pigment per 10 lb of Artisan Mix to get the deepest, most saturated color. In most cases, however, you will add pigment to taste—in other words, until you get the color you want. If you know in advance how much pigment you will be adding, it is best to add your measured pigment to the water before mixing for a more uniform color. You can mix and match colors for various shades and tones. If you plan to use Buddy
Rhodes Bone Paste Plus to slurry with, you can also add the pigment to tint the paste.
Bone Paste Plus
Mix with water to a thick yogurt-like consistency. Apply to your finished piece to fill in holes. You can wipe clean, or let dry and polish away. Something to consider—the paste will tint the area where it is applied, even if you wipe it off.This is something you may not notice until sealing. Optionally you can rub the entire piece with Bone Paste and clean it away for even color tinting
Curing
Concrete doesn’t simply “dry out," it needs to cure—to chemically react. The concrete should remain warm and moist for 24- 48 hours. The concrete will be firm much sooner than that, but it won’t be as strong as it has the potential to be if you rush the process. Tip—make a warm place for the concrete and cover it up so the moisture isn't lost.
Polishing
Concrete can polish like stone. You can use abrasives to simply shape the concrete, and you can use abrasives to bring the concrete up to a polish. The Buddy Rhodes Diamond Polishing Pads are ideal as they will last a long time, and they are ergonomically friendly
Glaze
Buddy Rhodes Glazes are available in a variety of colors and apply like wood stain. You wipe on thin applications, and let it soak in fully. More is not necessarily better. It is best to apply in thin layers, allowing time for the glaze to fully dry between applications
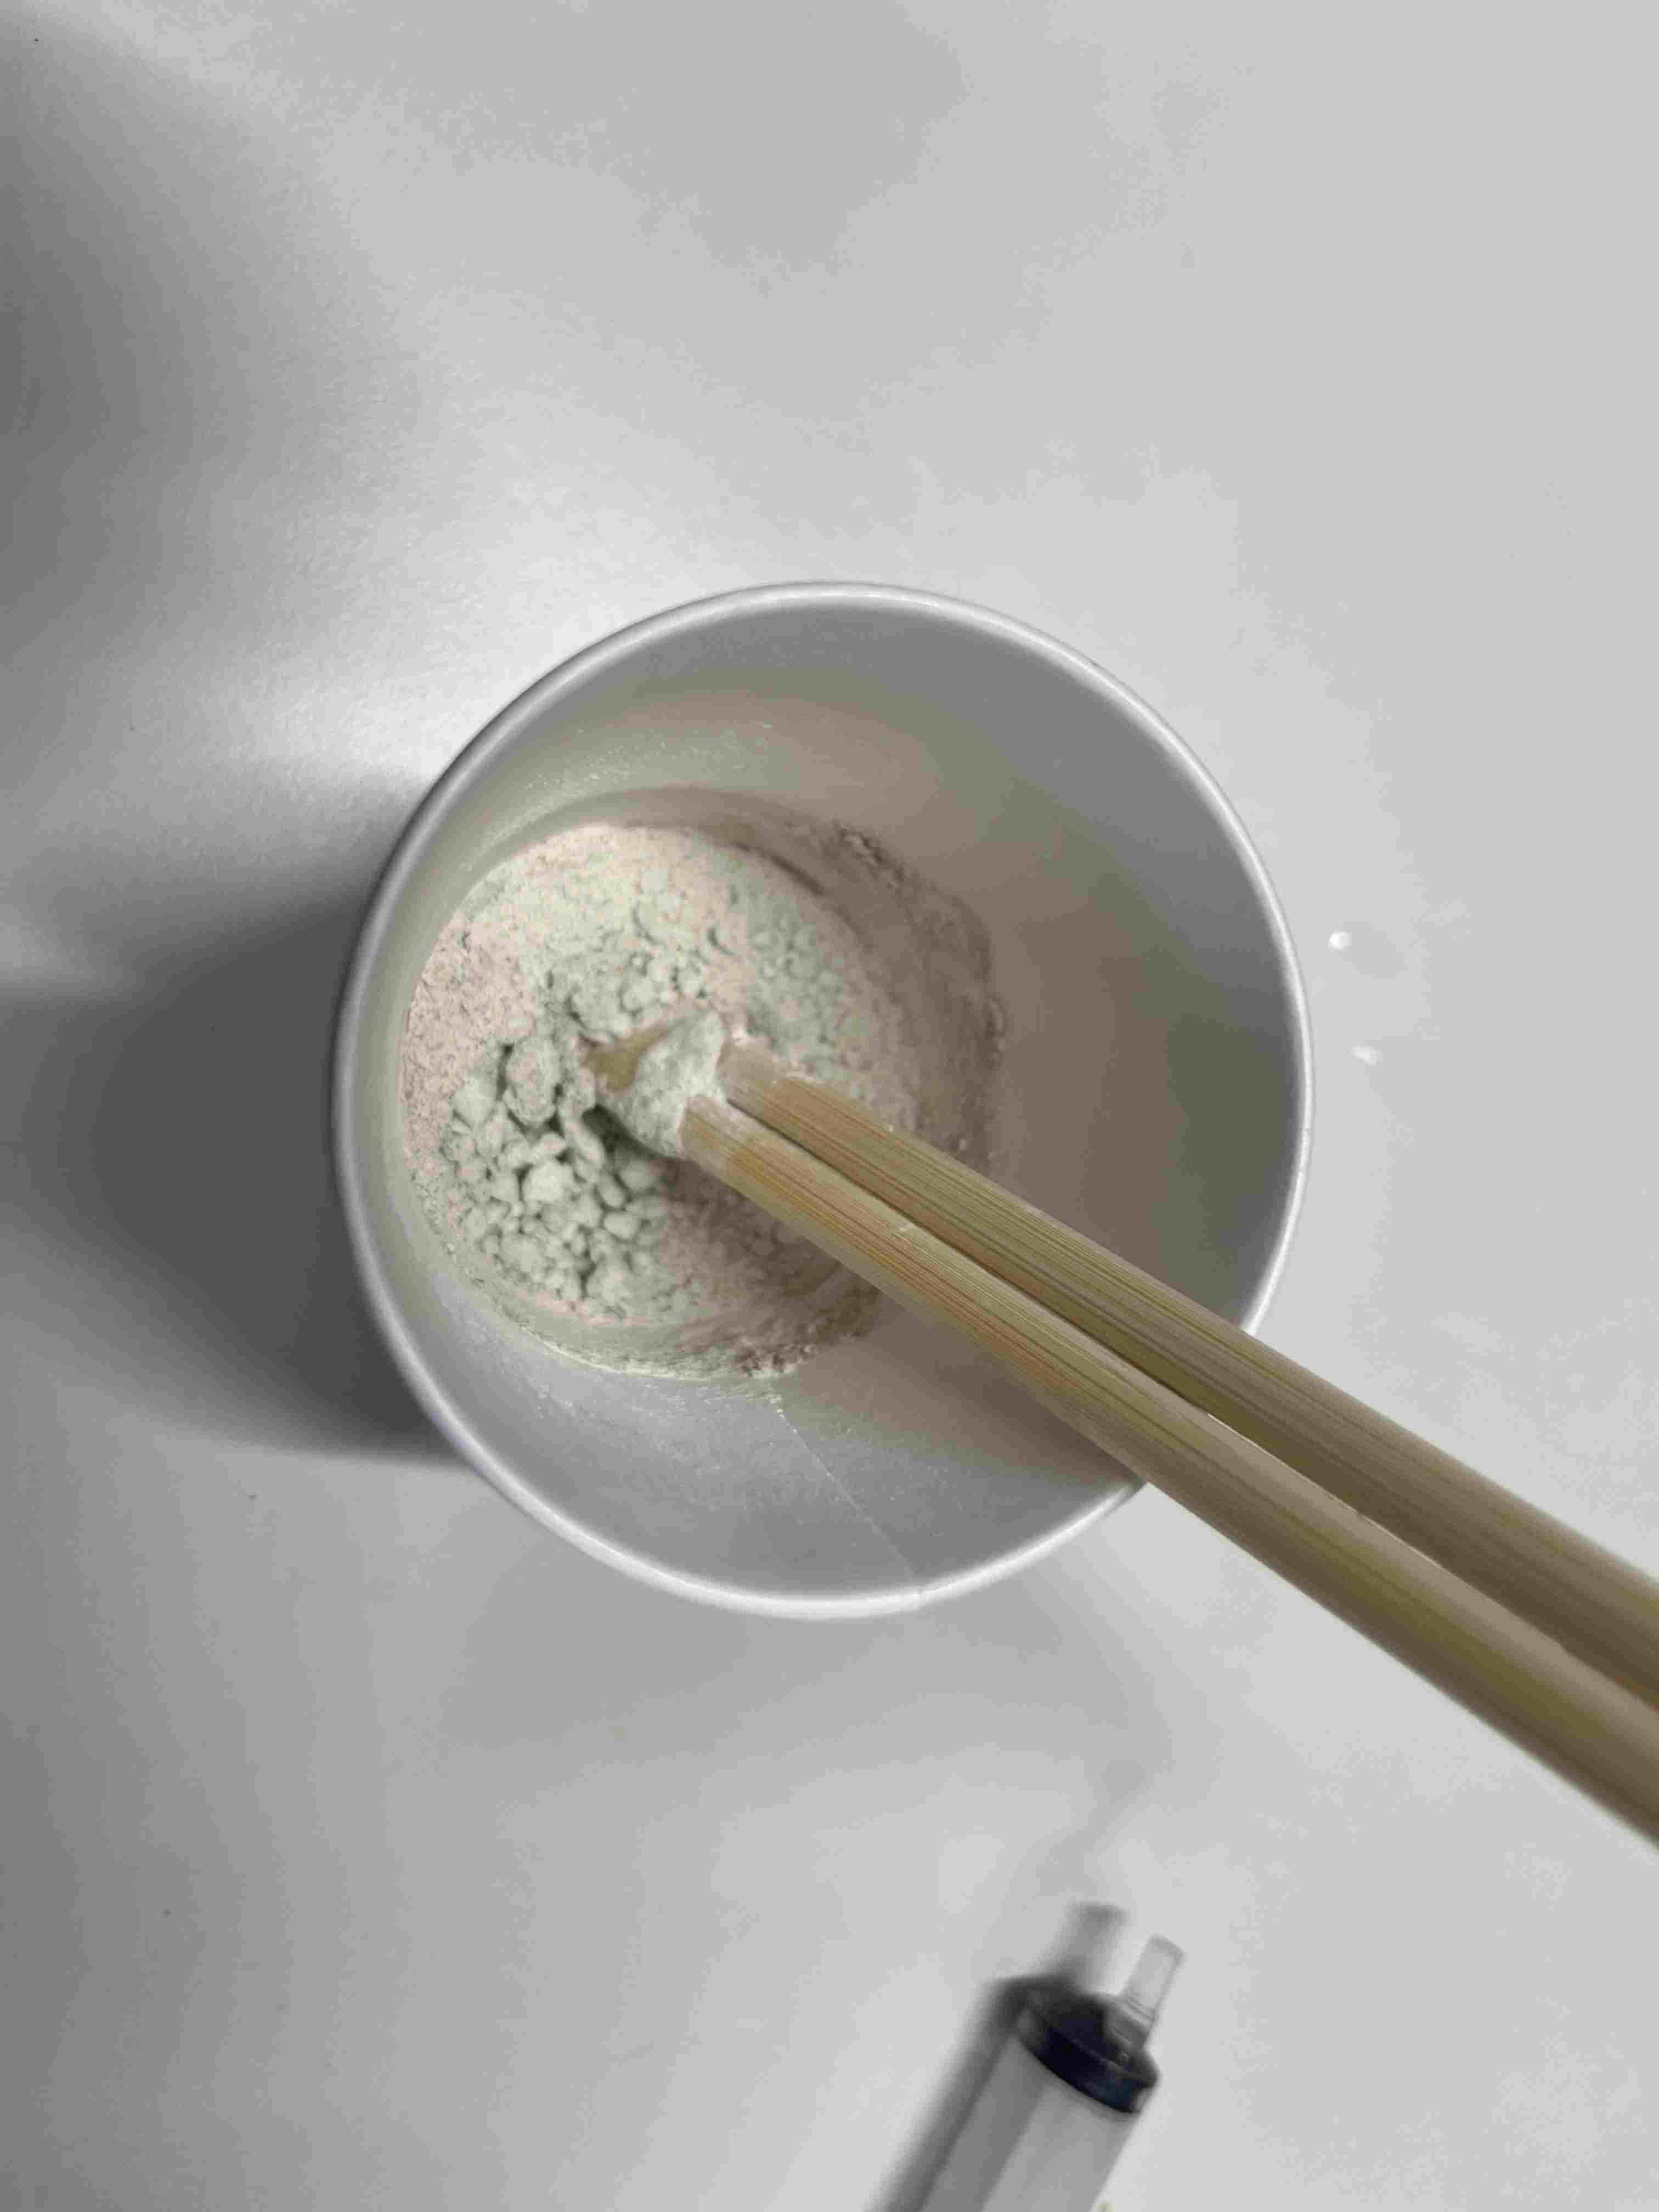
I didn't follow the recommended quantities of water in order to get a solid result. Normally, I would have needed 2.5ml of water, but I had a floury, non-liquid texture, so I added 3ml of water, which made my cement too liquid. The doses I got were as follows:
| Material | Quantity |
|---|---|
| Cement | 15,4g |
| Water Reducer 205 | 11g |
| Water | 2,5+3ml |
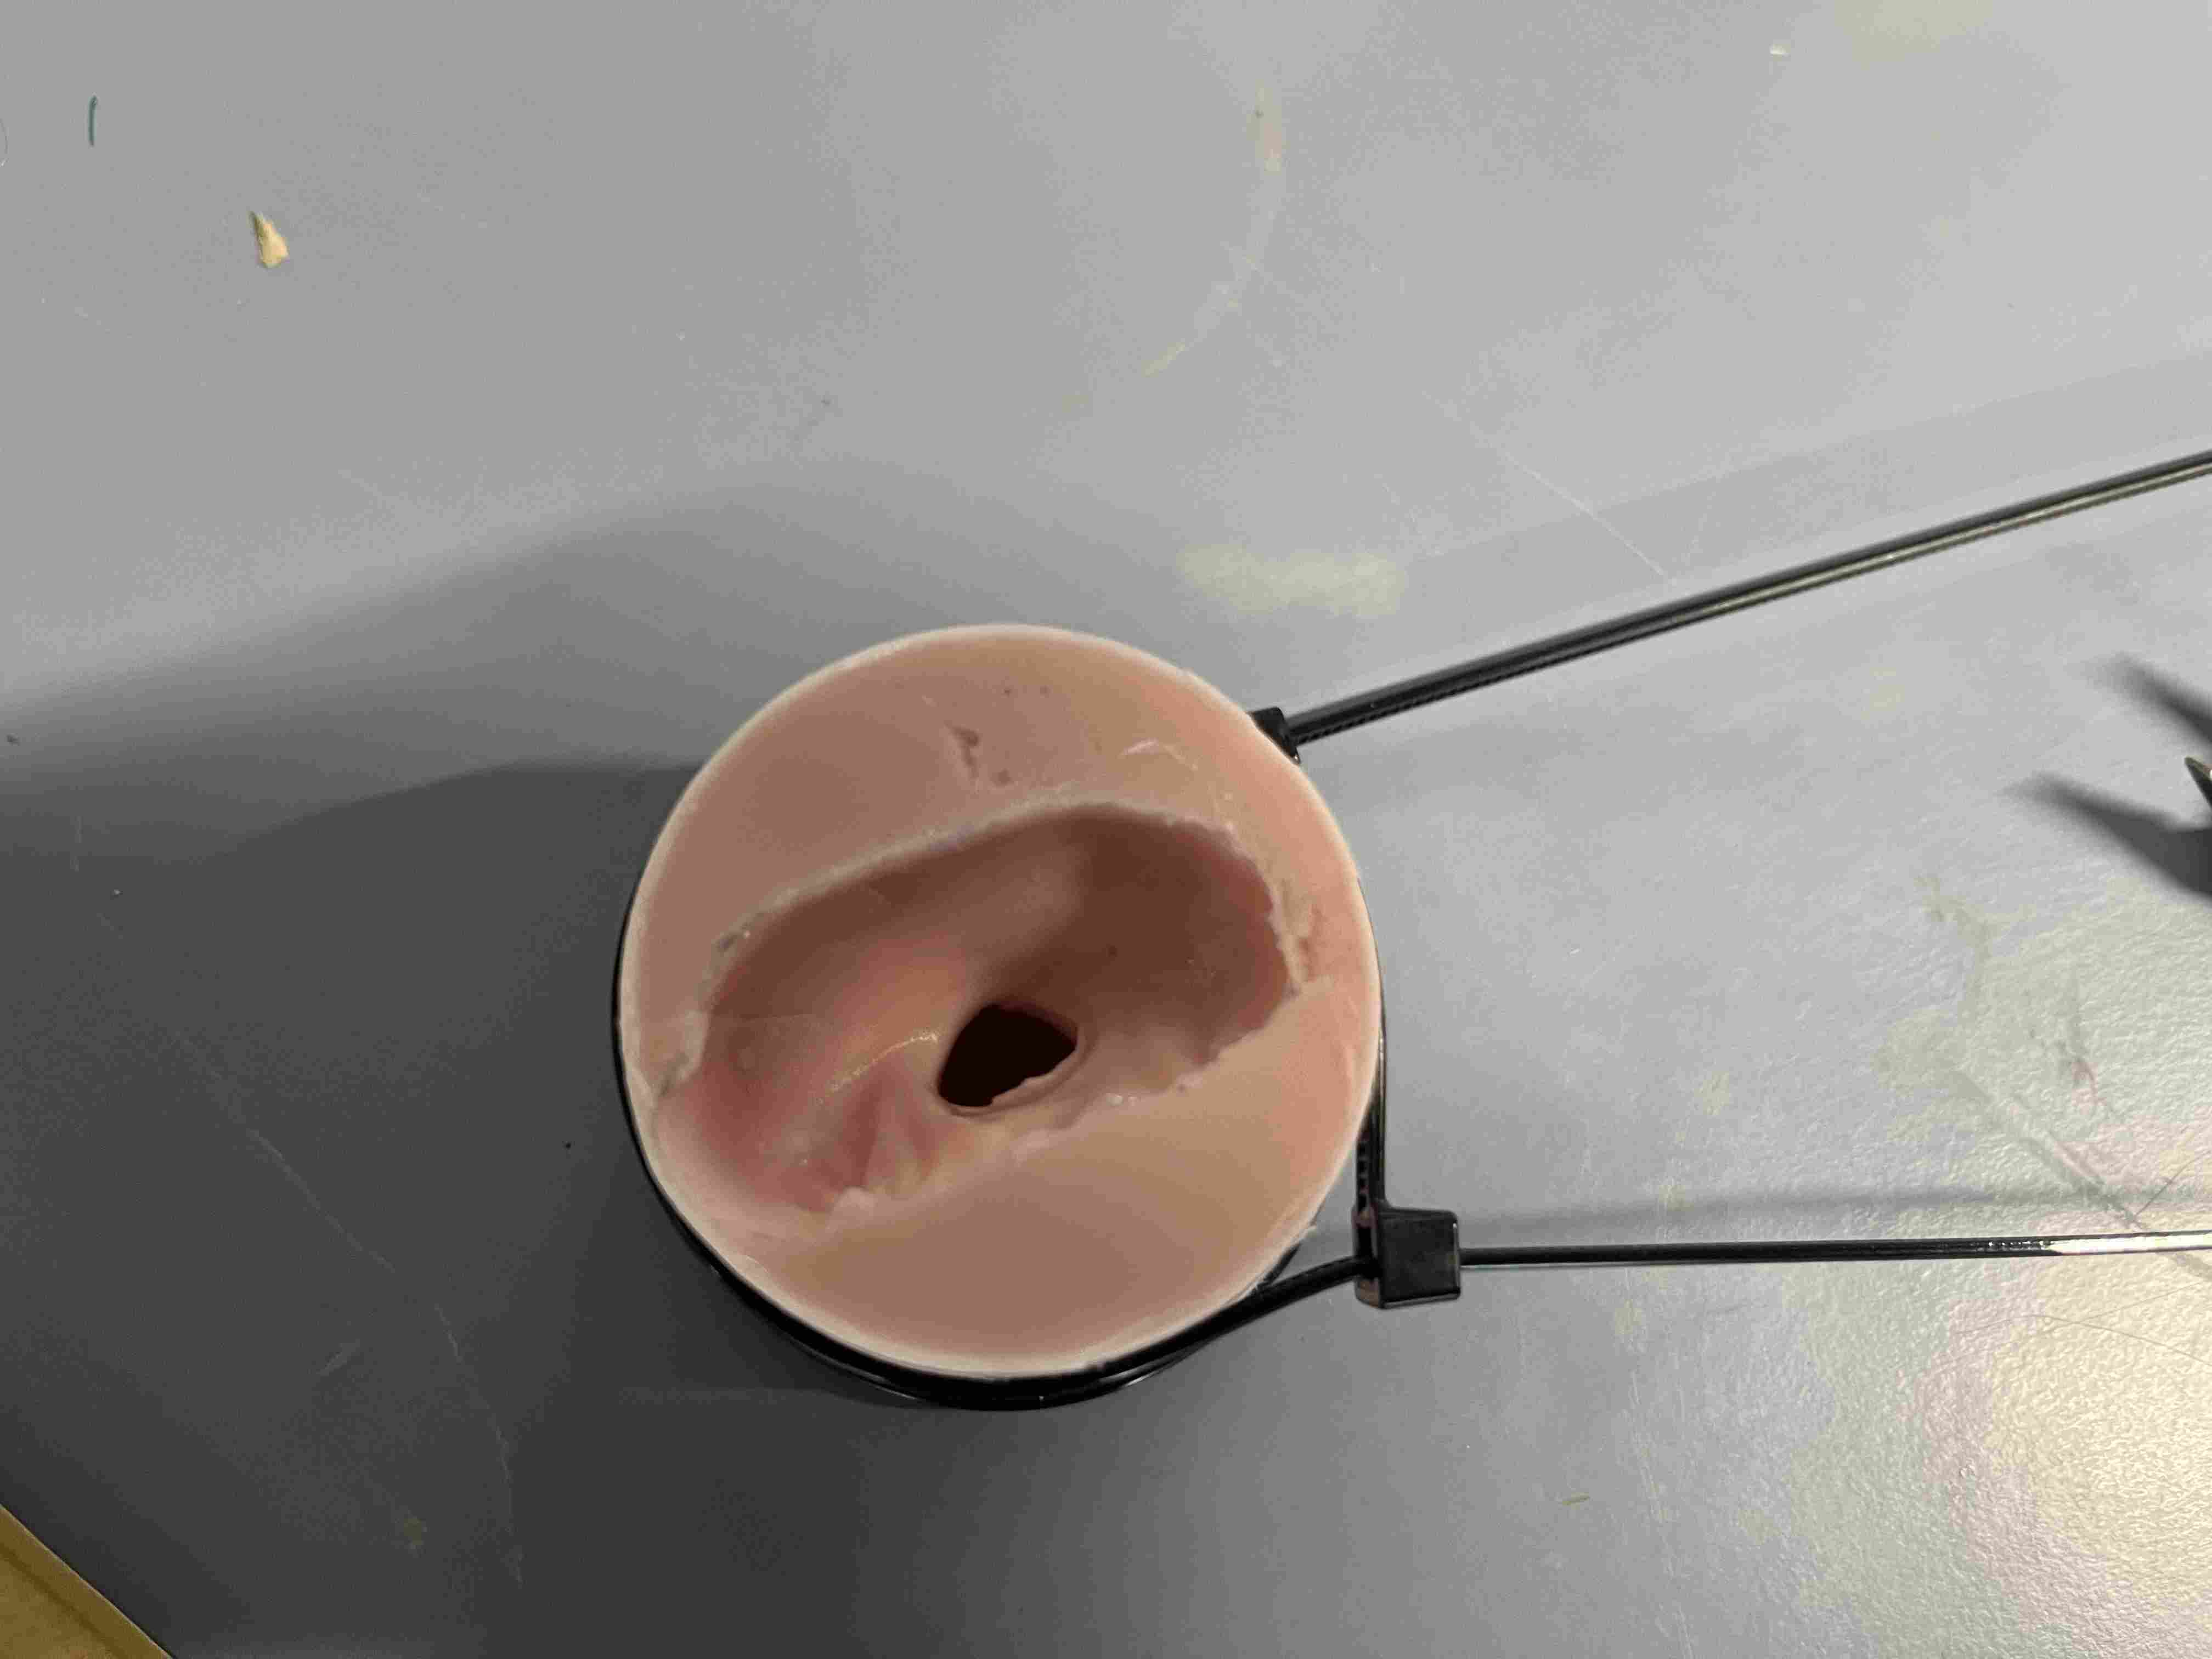
Once my cement was ready, I poured it into the silicone mold I'd made with Smooth-Sil 940. It poured well and filled the mold, but unmolding was a big failure. The texture was far too floury, and as soon as I opened the mold, the body detached from the head instantly. The texture was extremely floury.
Epoxy crystal resin EC161
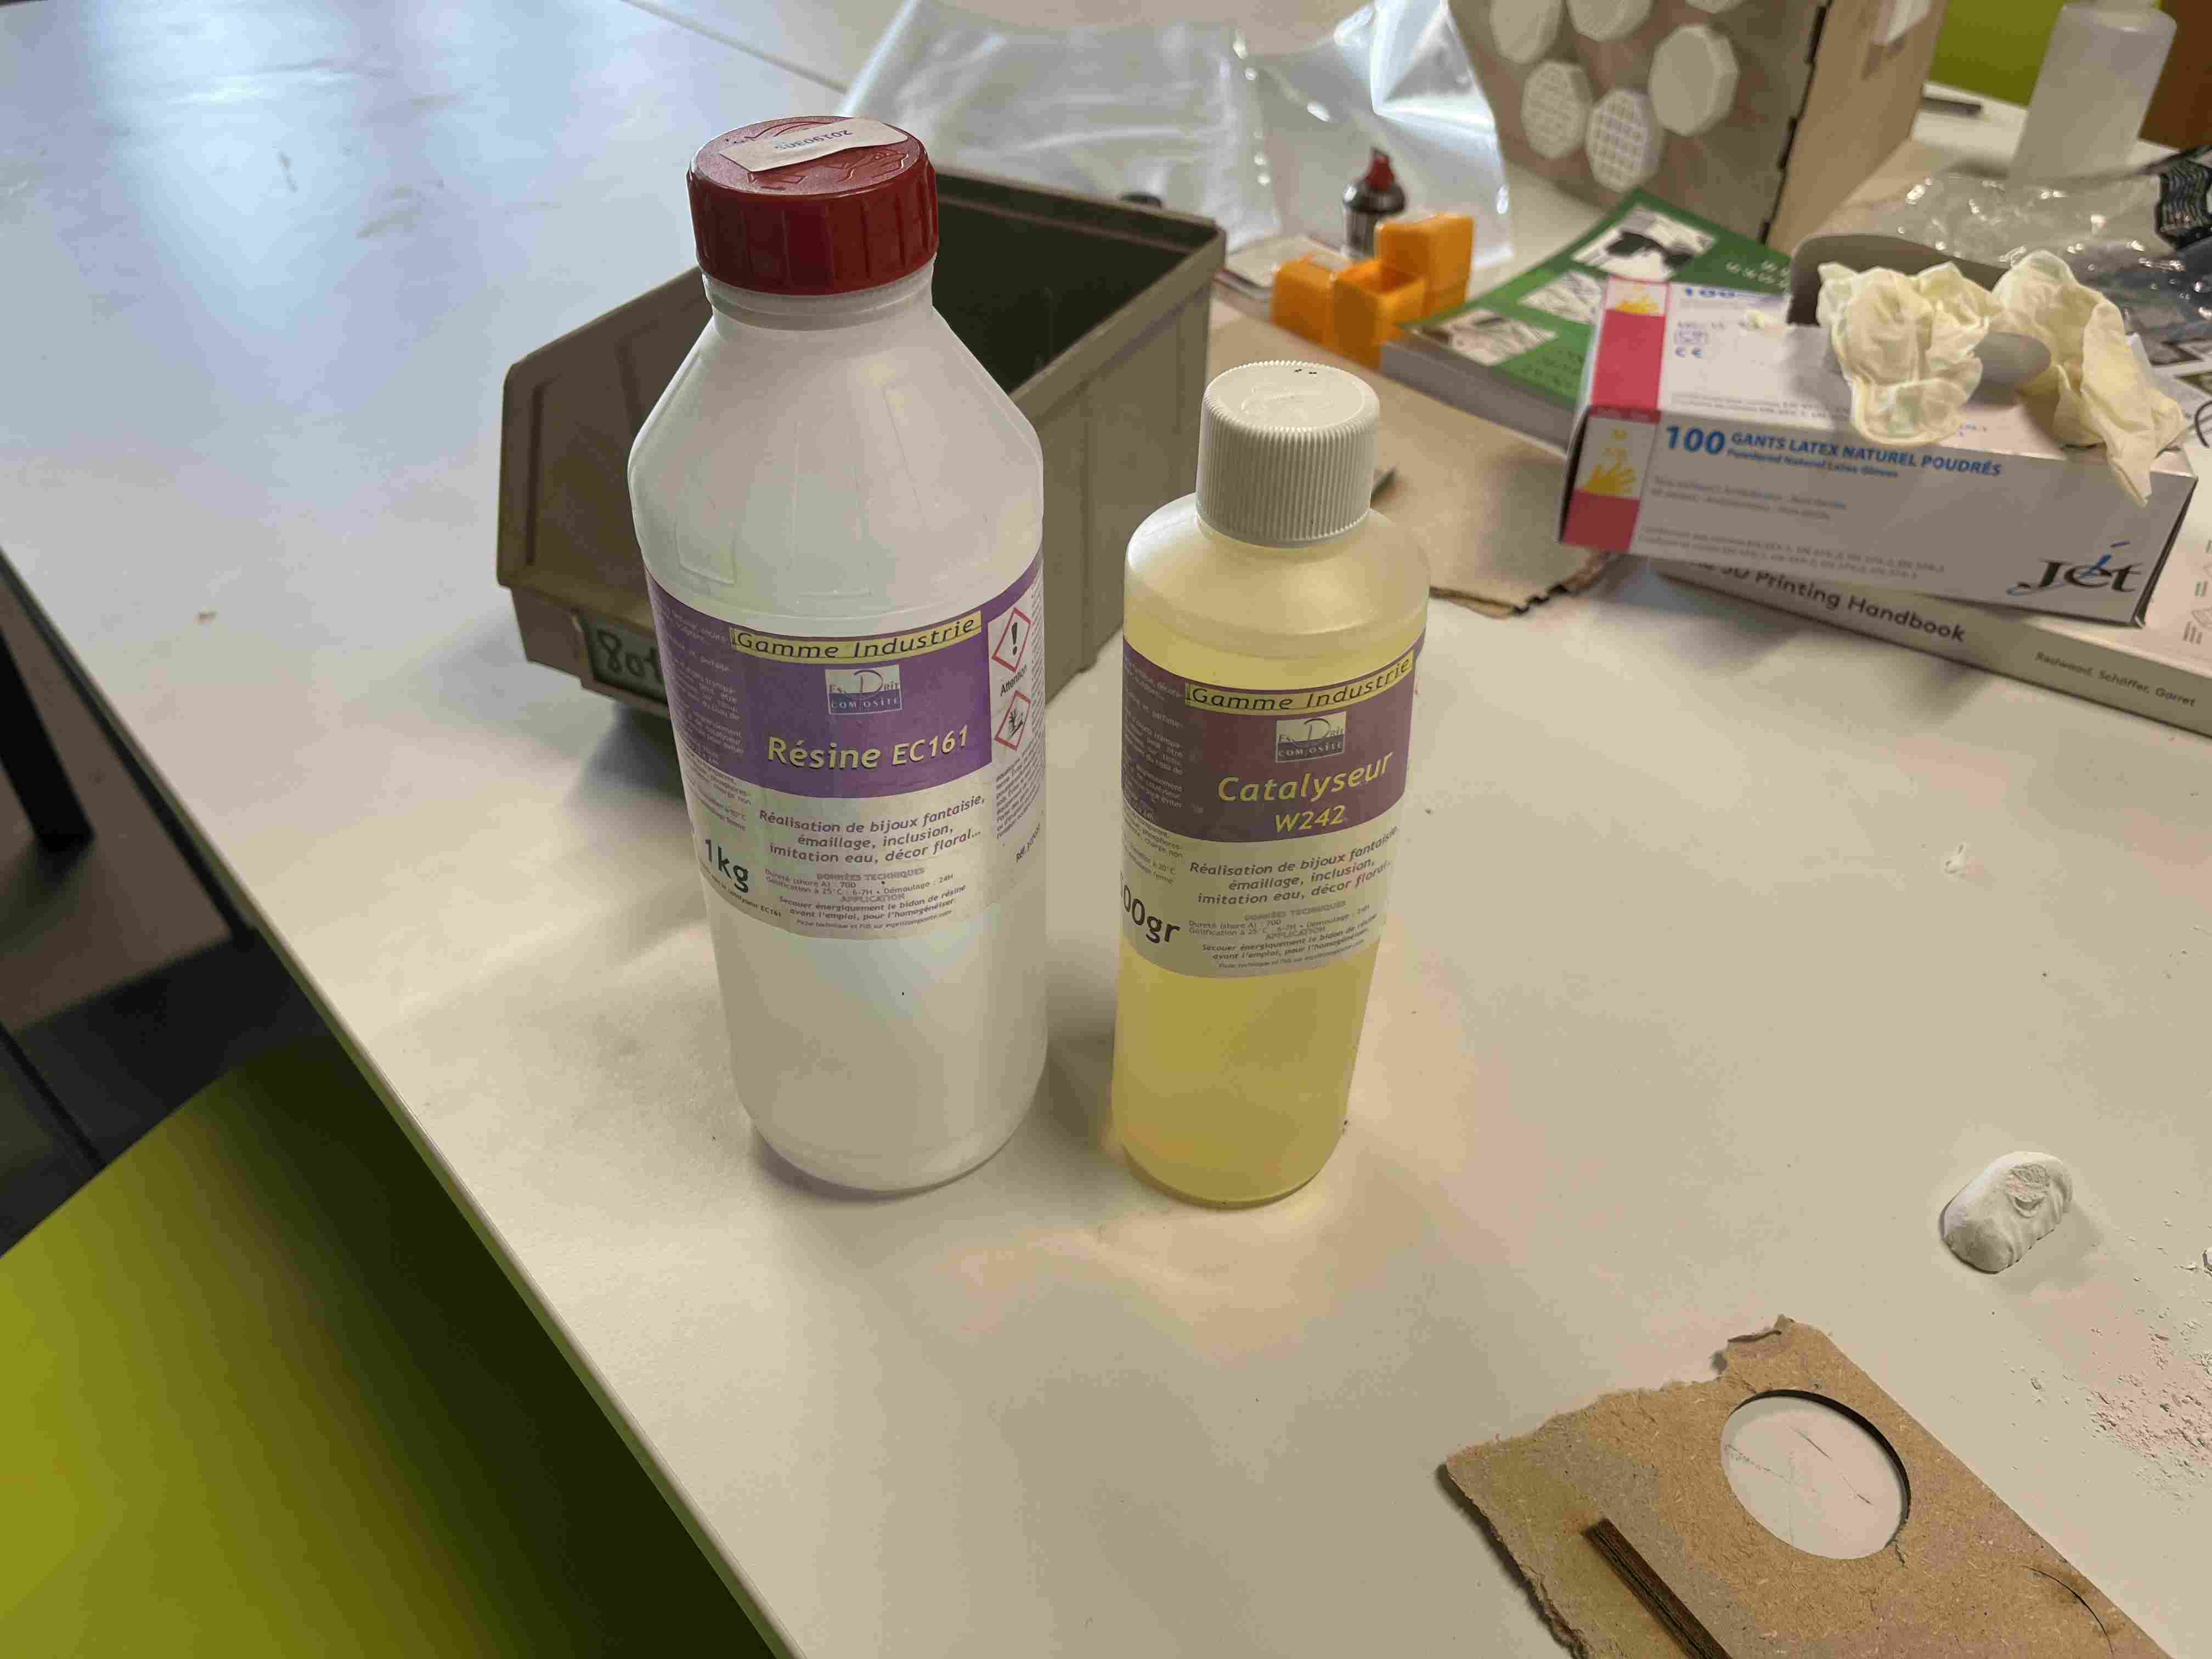
Finally, I wanted to test the EC161 epoxy crystalline resin. This is a colorless, transparent two-component epoxy resin. The system is based on unfilled low-viscosity resins and amine hardeners.
DESCRIPTION
Two-component, colorless, transparent epoxy system. The system is based on an unfilled, low-viscosity resin and an amine hardener. Long service life. Due to the low exothermic peak, fairly large objects can be cast. Applications should be used to determine whether the system is suitable for the preparation of transparent cast objects in which different materials are bonded together. Good UV resistance. Prolonged exposure to UV light will, however, cause the material to yellow. The system complies with RoHS (European directive 2002/95/EC).
W 242: Recommended for casting in thicknesses of up to 1 cm and for glazing badges and lenticular labels. Good resistance to yellowing. Prolonged exposure to UV over a period of time causes slight yellowing of the product.
APPLICATION
Encapsulation transparente.
TRAITEMENT
Impregnation. Manual pouring. Vacuum pouring. Manual and/or automatic pouring. Cures at room temperature.
Maximum recommended thickness for W 242: 10 mm
INSTRUCTIONS
Add the correct amount of hardener to the resin and mix well. Avoid trapping air. For some applications, it may be useful to preheat the components and/or vacuum deaerate the mix before pouring.
CURING / POST-TREATMENT
Post-treatment is always recommended for room-temperature polymerization systems, to stabilize the components and obtain the best properties. It is necessary when the part is operated at high temperatures. After curing, allow the tool to harden as indicated in the table, gradually increasing the tem- perature to 10°C/hour. Allow to cool slowly. Heating rate and time indicated after curing are based on standard sample size. Users should assess the best curing or post-curing conditions, depending on component size and shape. For large components, reduce the thermal gradient and increase the curing time. For thin-layer applications and composites, after curing on the mold.
STOCKAGE
Epoxy resins and their hardeners can be stored for up to one year in the original sealed containers in a cool, dry place. Hardeners are sensitive to humidity, so we recommend closing the drum immediately after each use.
TREATMENT PRECAUTIONS
Refer to the technical data sheet and comply with industrial health and waste disposal regulations.
To make the resin, I took the extra precaution of wearing a gown and mask, while carrying out the operations outdoors. As with the Smooth-Sil 940, I pumped twice with the vacuum chamber, always approaching 1bar of depressurization. I cast this resin in sillicone molds made during the Fabacademy in previous years. A large number of bubbles also disappeared during degassing. As the resin is transparent, I wanted to add color to what I was casting, so I added ground coffee powder to my mixture.
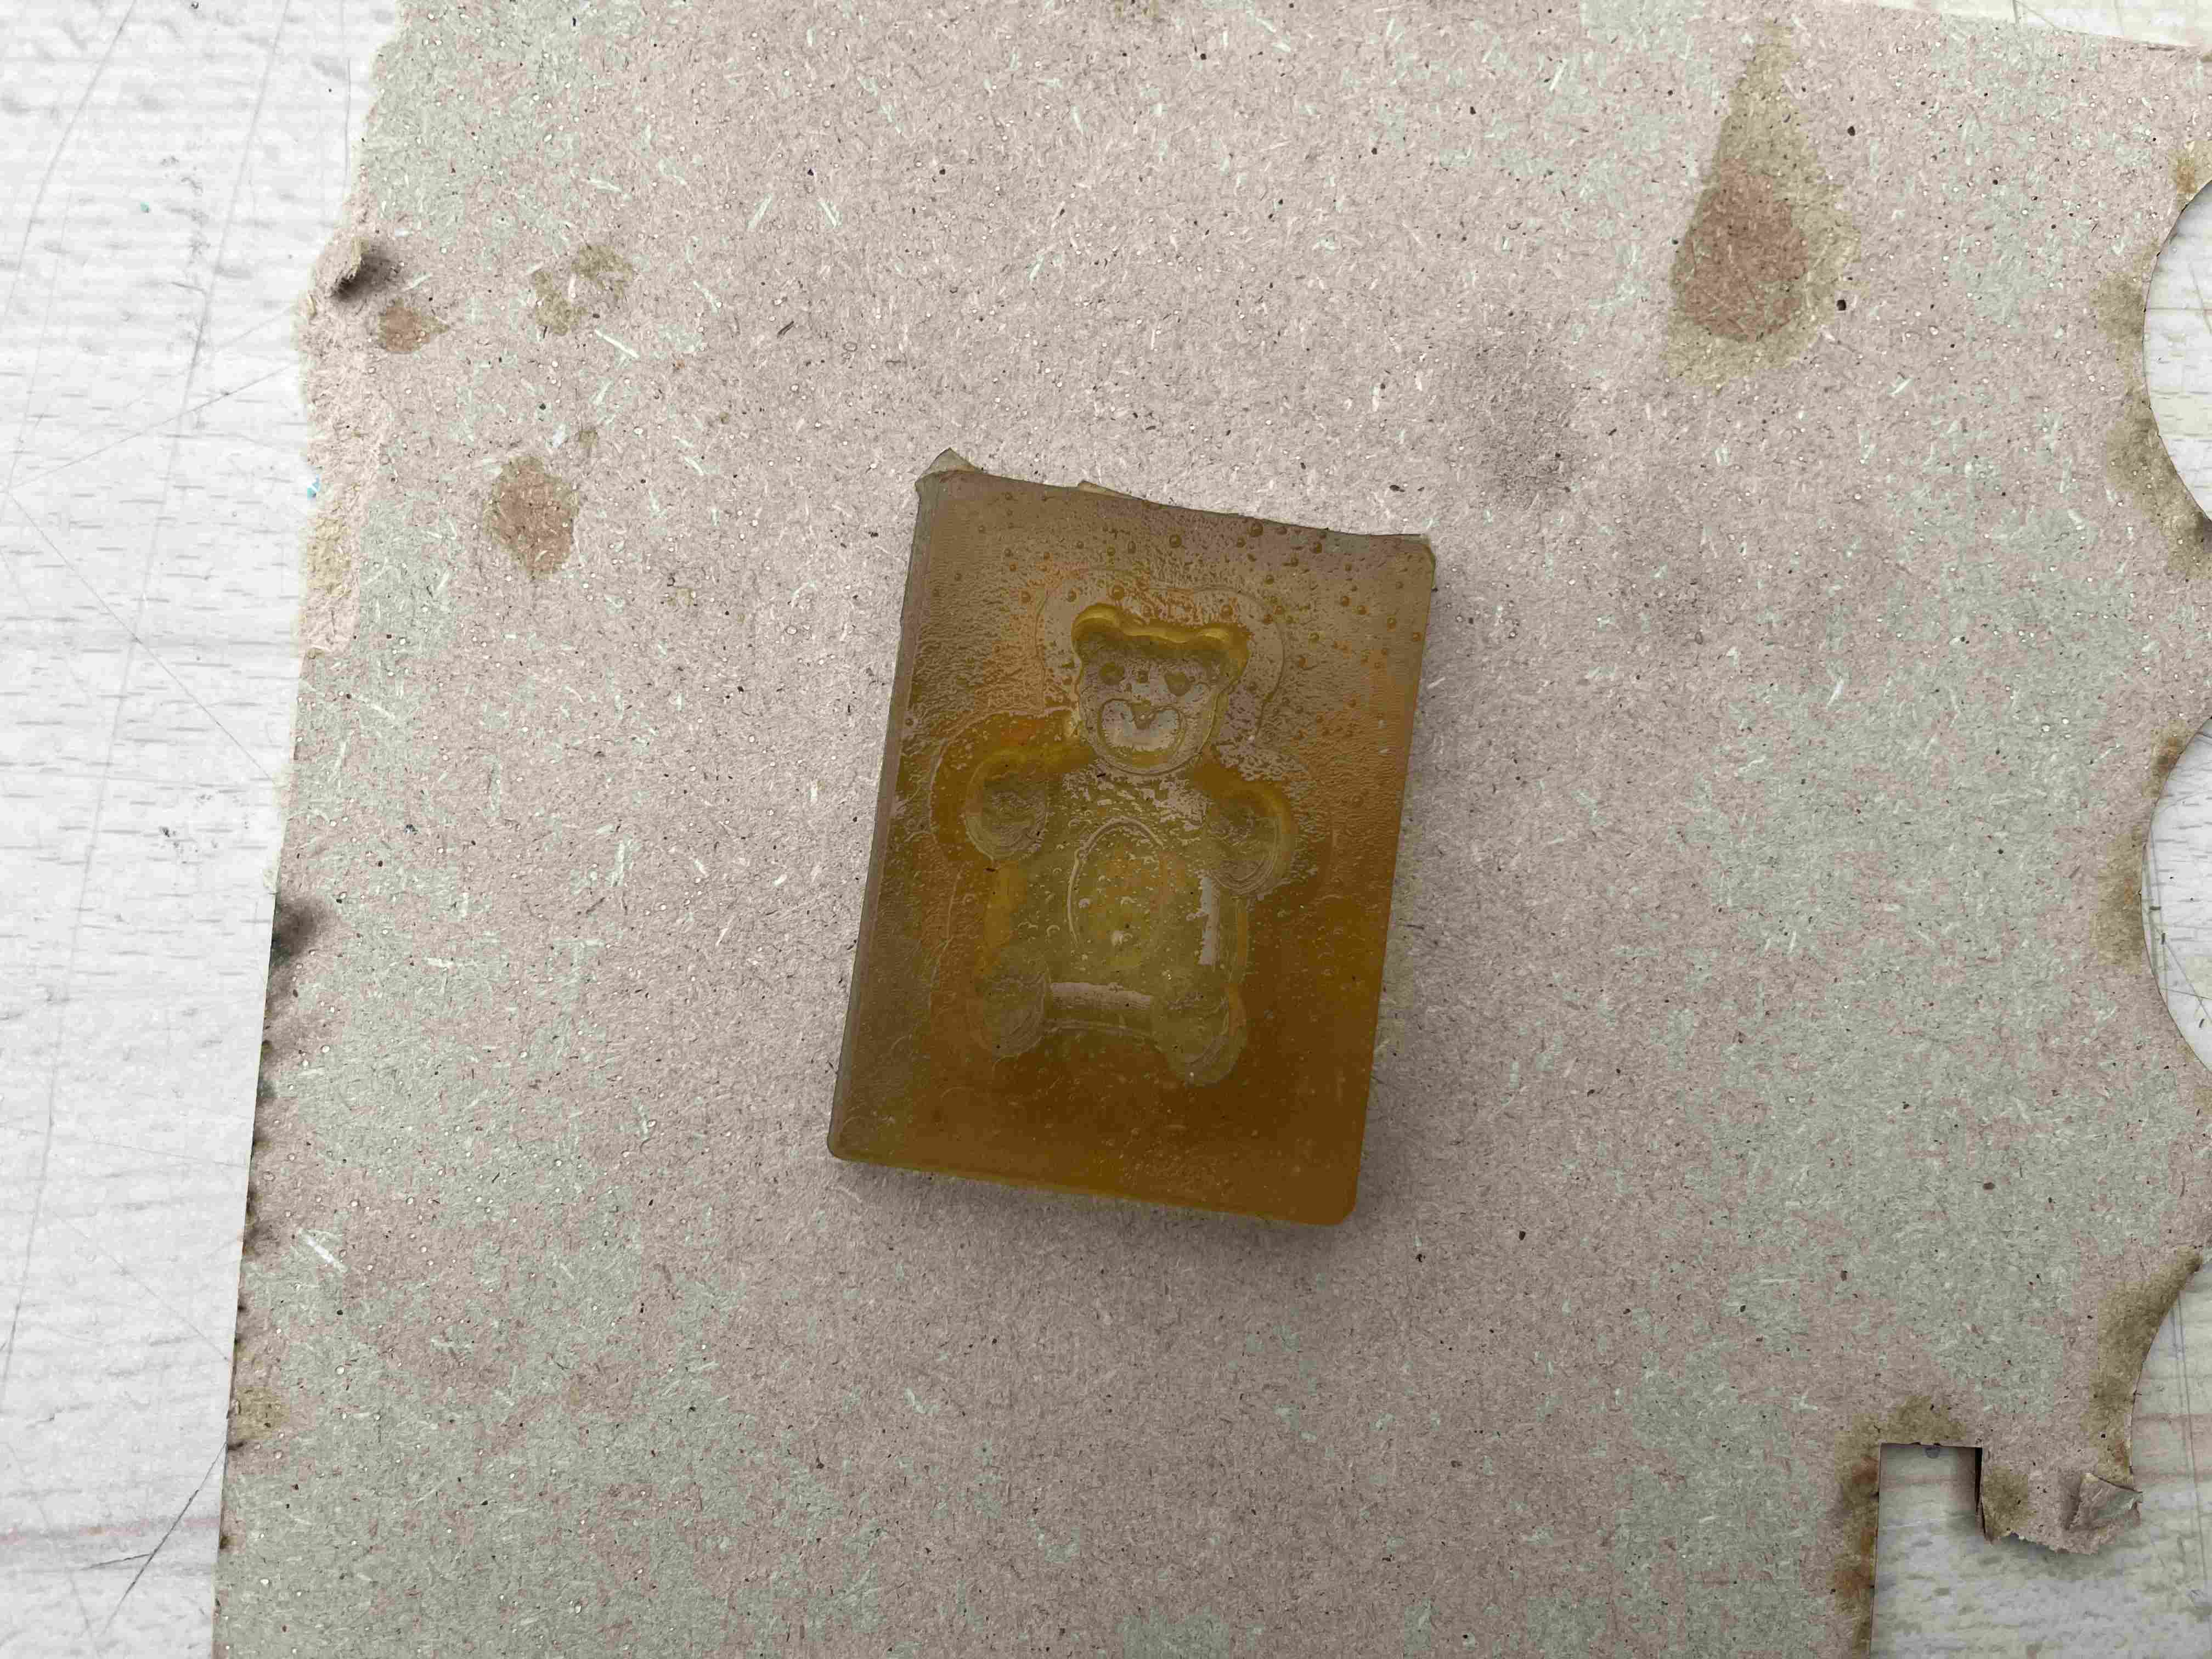
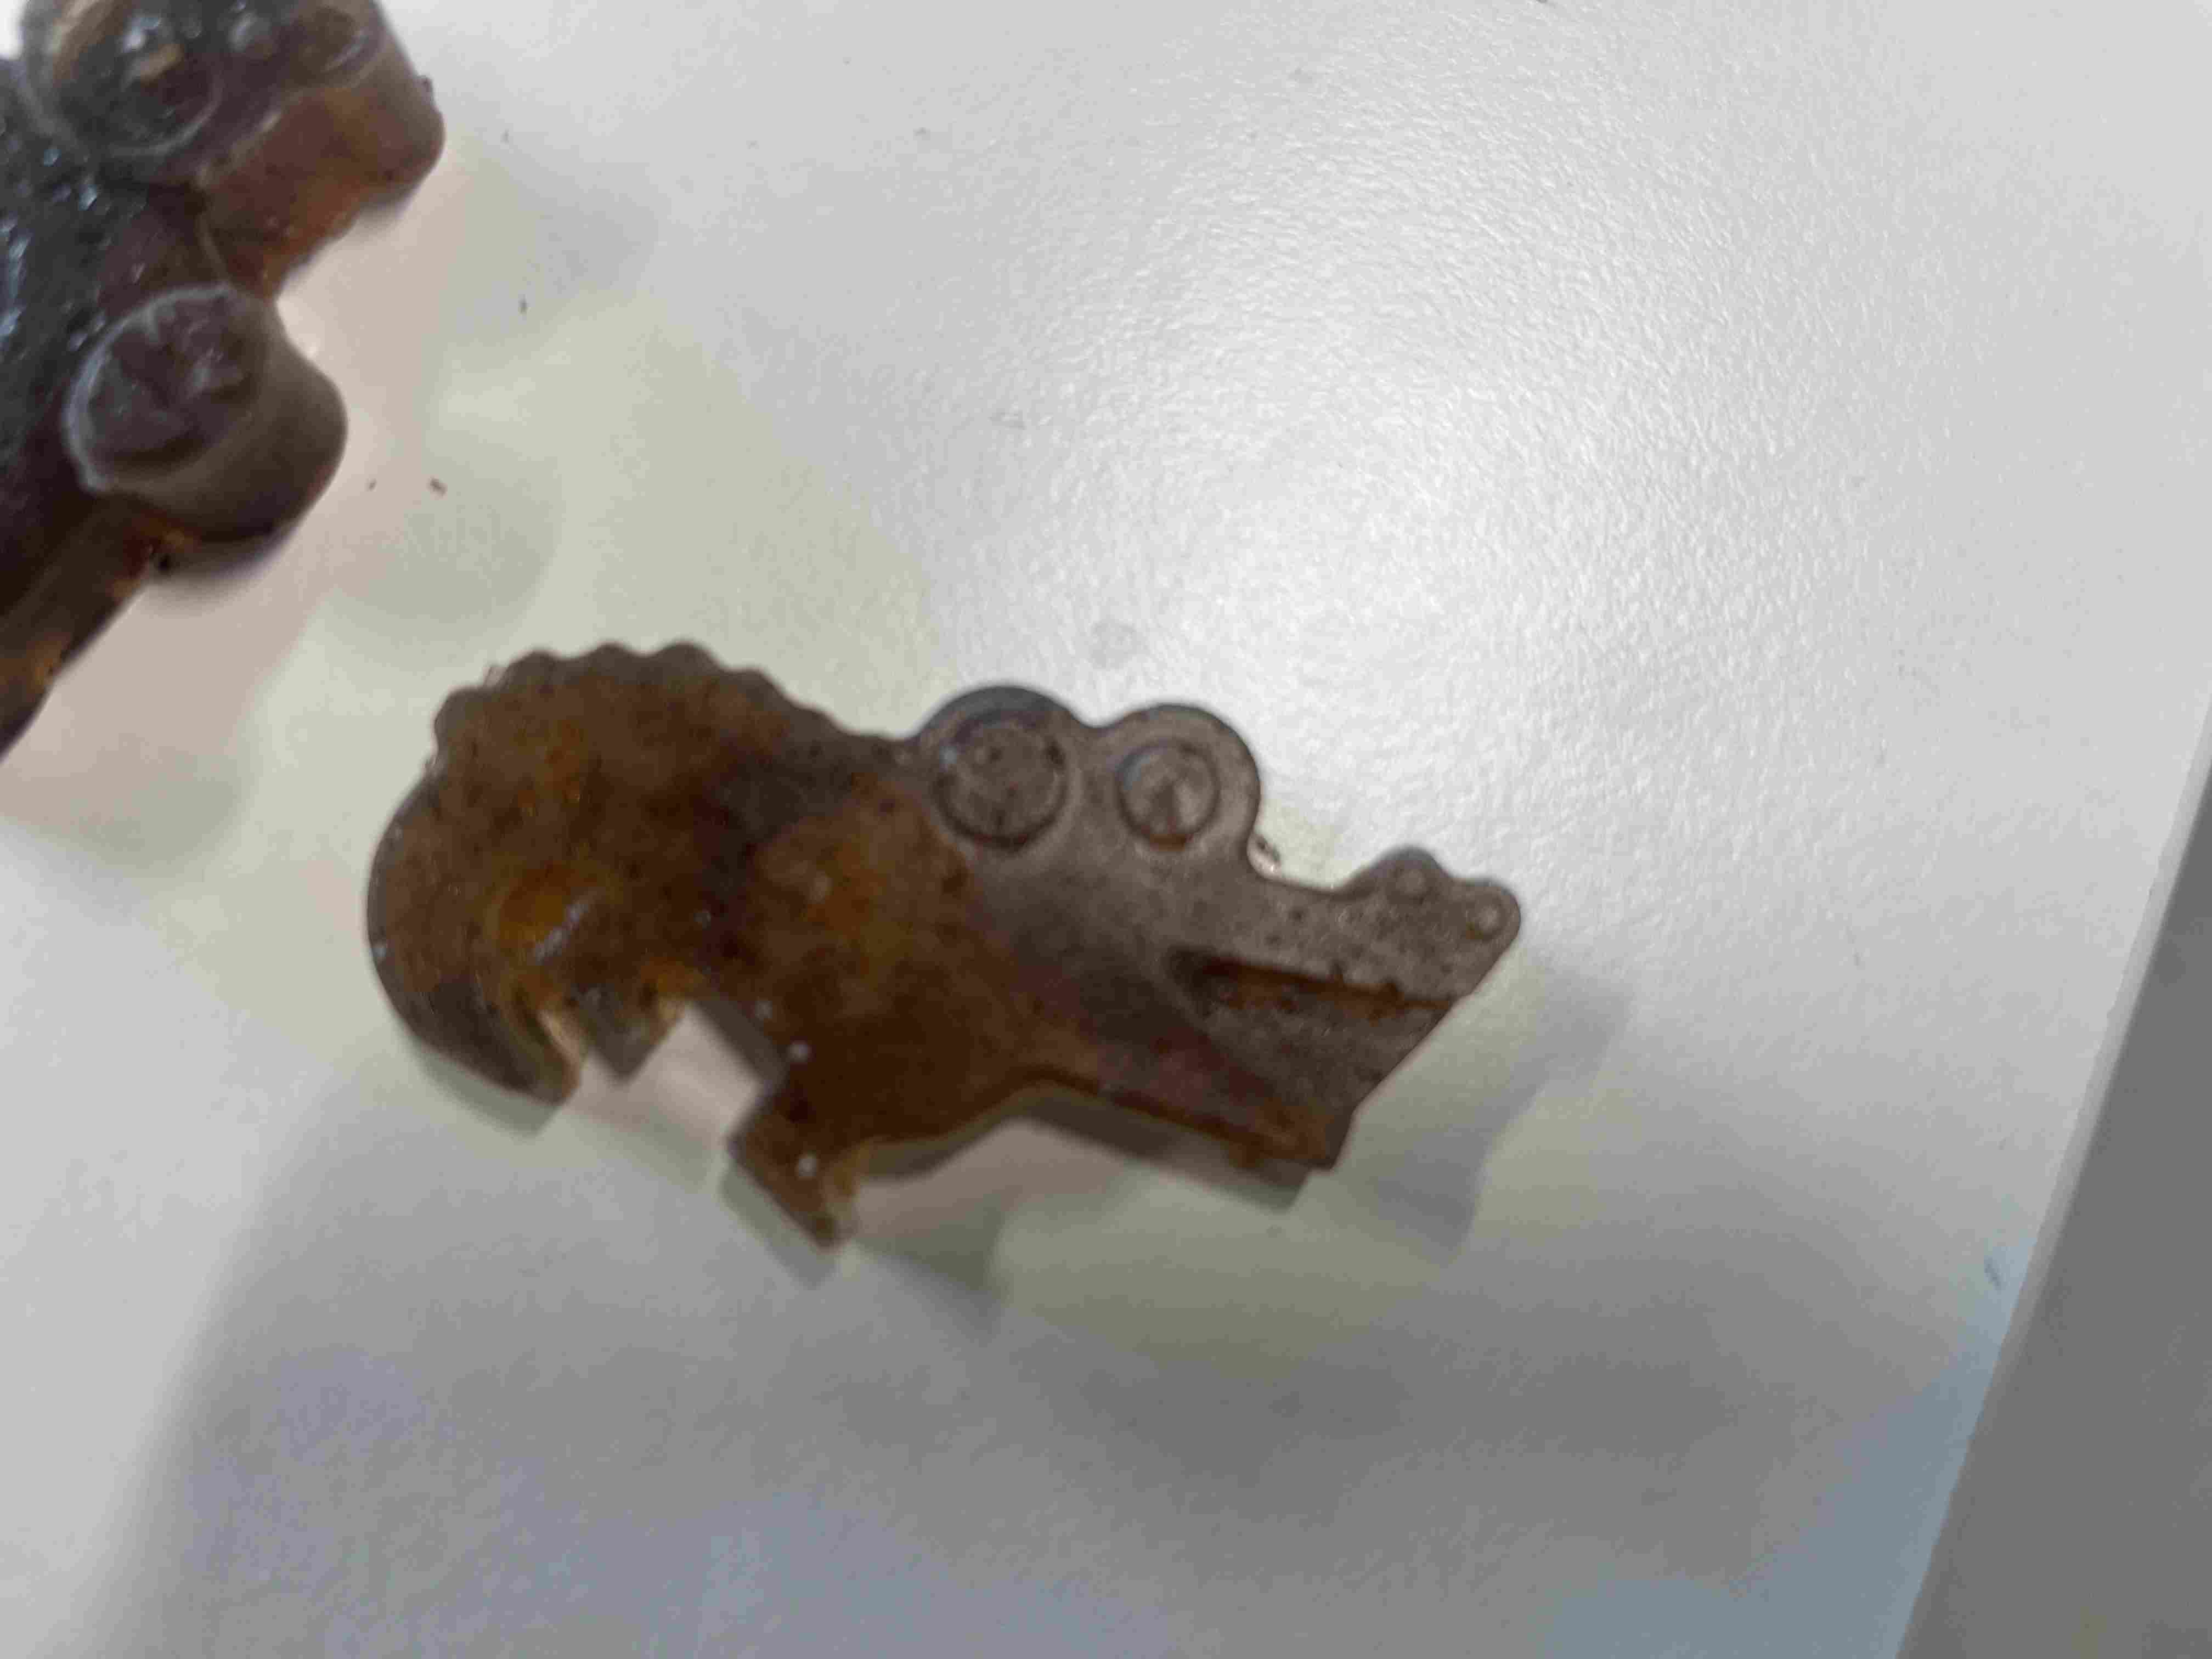
After demolding, we can see that the result is quite satisfactory, but far from perfect: if we look closely, we can see that there are a large number of bubbles.
RTV 3428
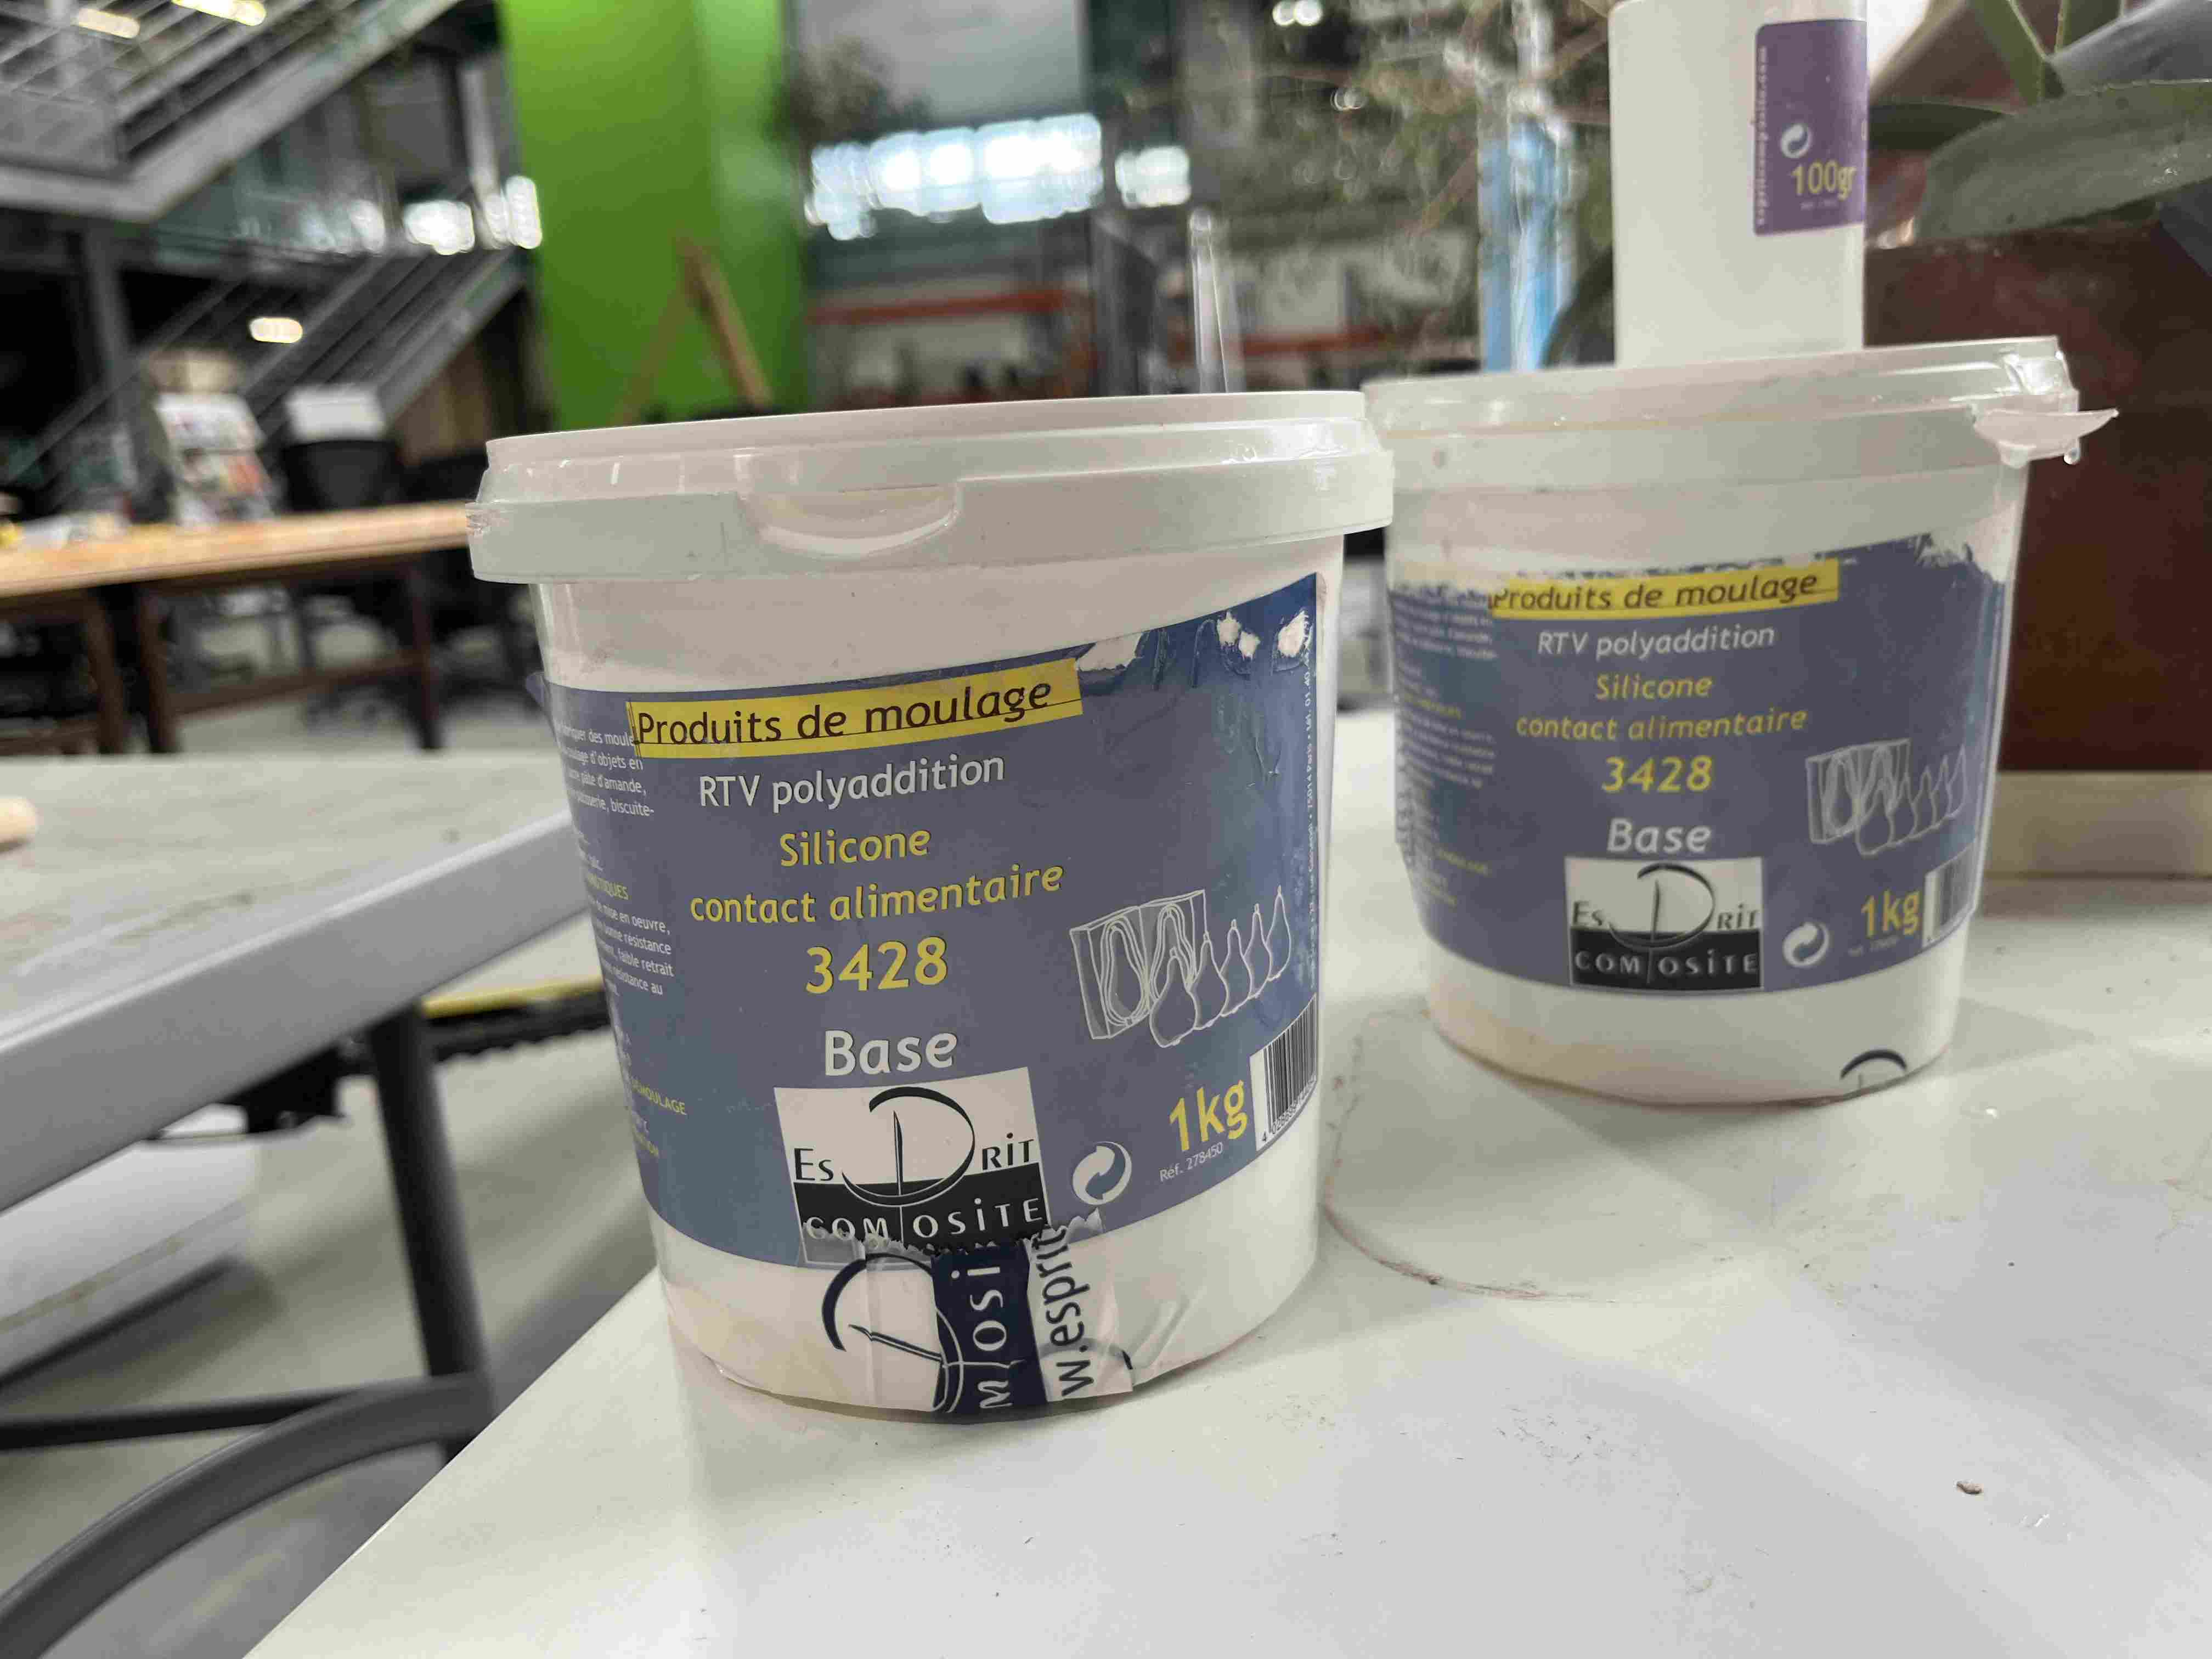
At Agrilab, we have a silicone compatible with food contact. It is a silicone from esprit composite and this is the RTV 3428, the documentation supplied by one of the dealers for this product is that of 4428, which is probably used in the same way. This silicone is used in combination with the catalyst supplied. This silicone does not present any major risk, as indicated neither on the packaging nor on the documentation, so we used gloves to prepare it. This product is dispensed by volume, with a ratio of 100g part 1 to 10g part B. It resists tearing and ageing, and can withstand temperatures of 250°C. We tested it on milled and resin-printed molds to compare quality differences. Before casting, we also used the vacuum chamber to extract the air inside.

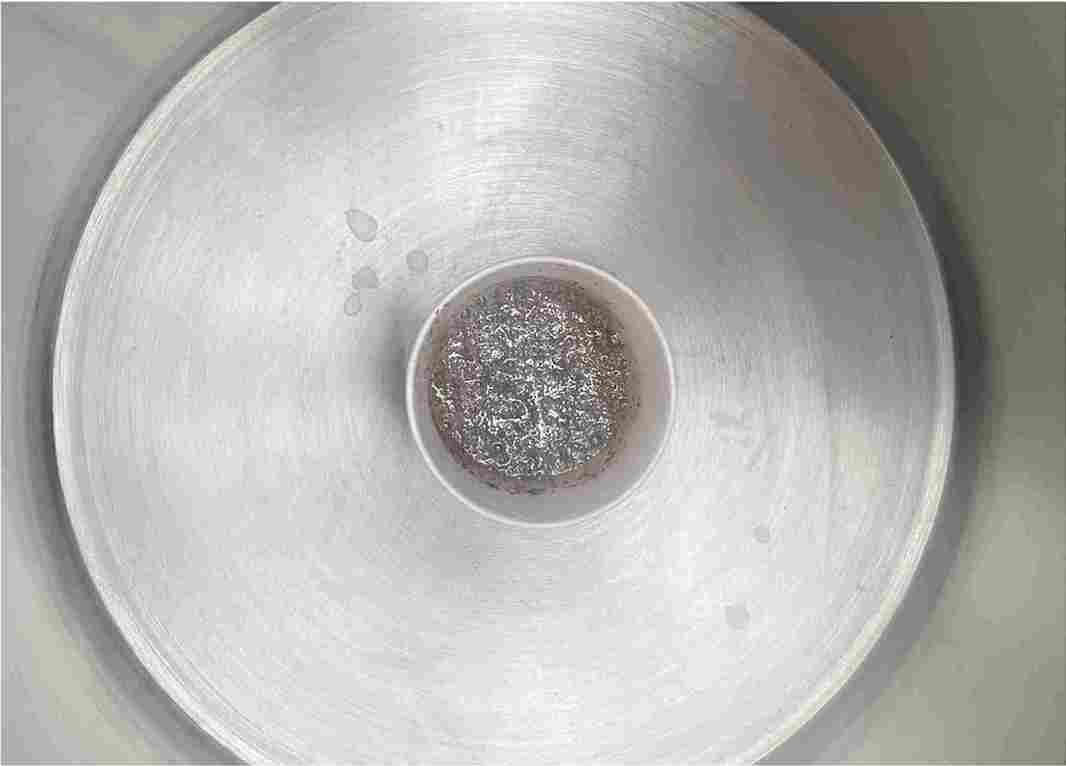
Bismuth
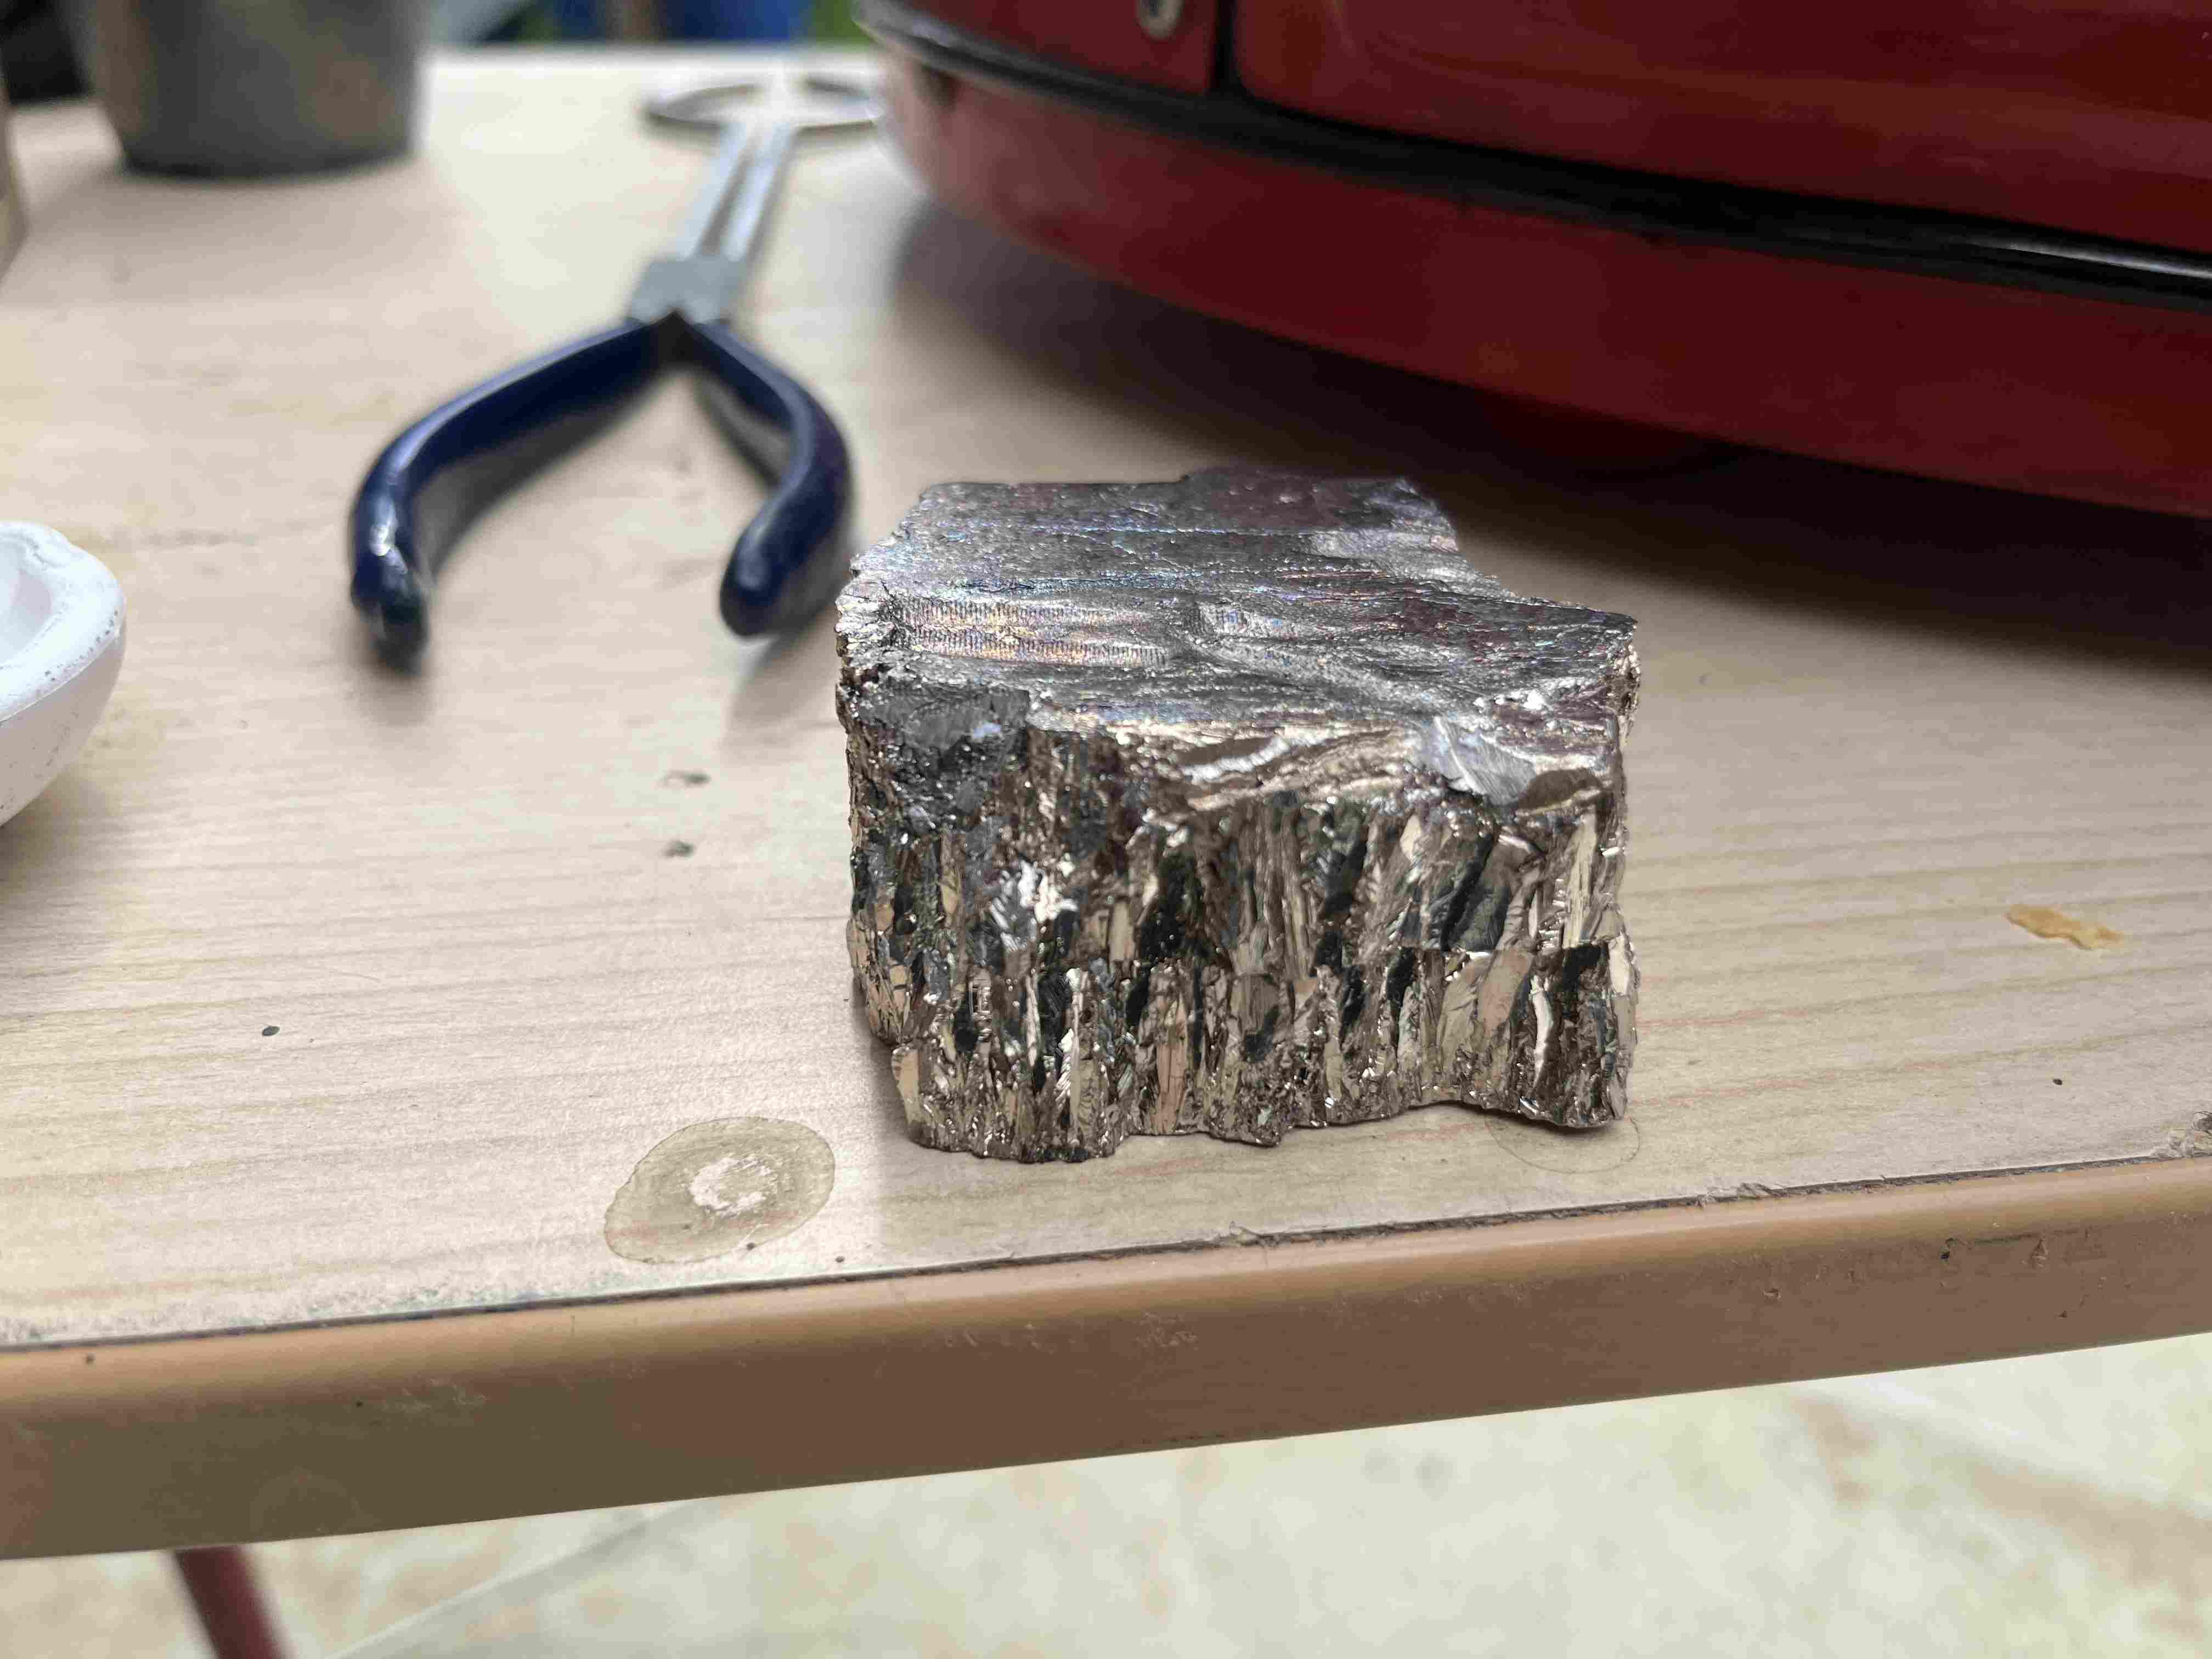
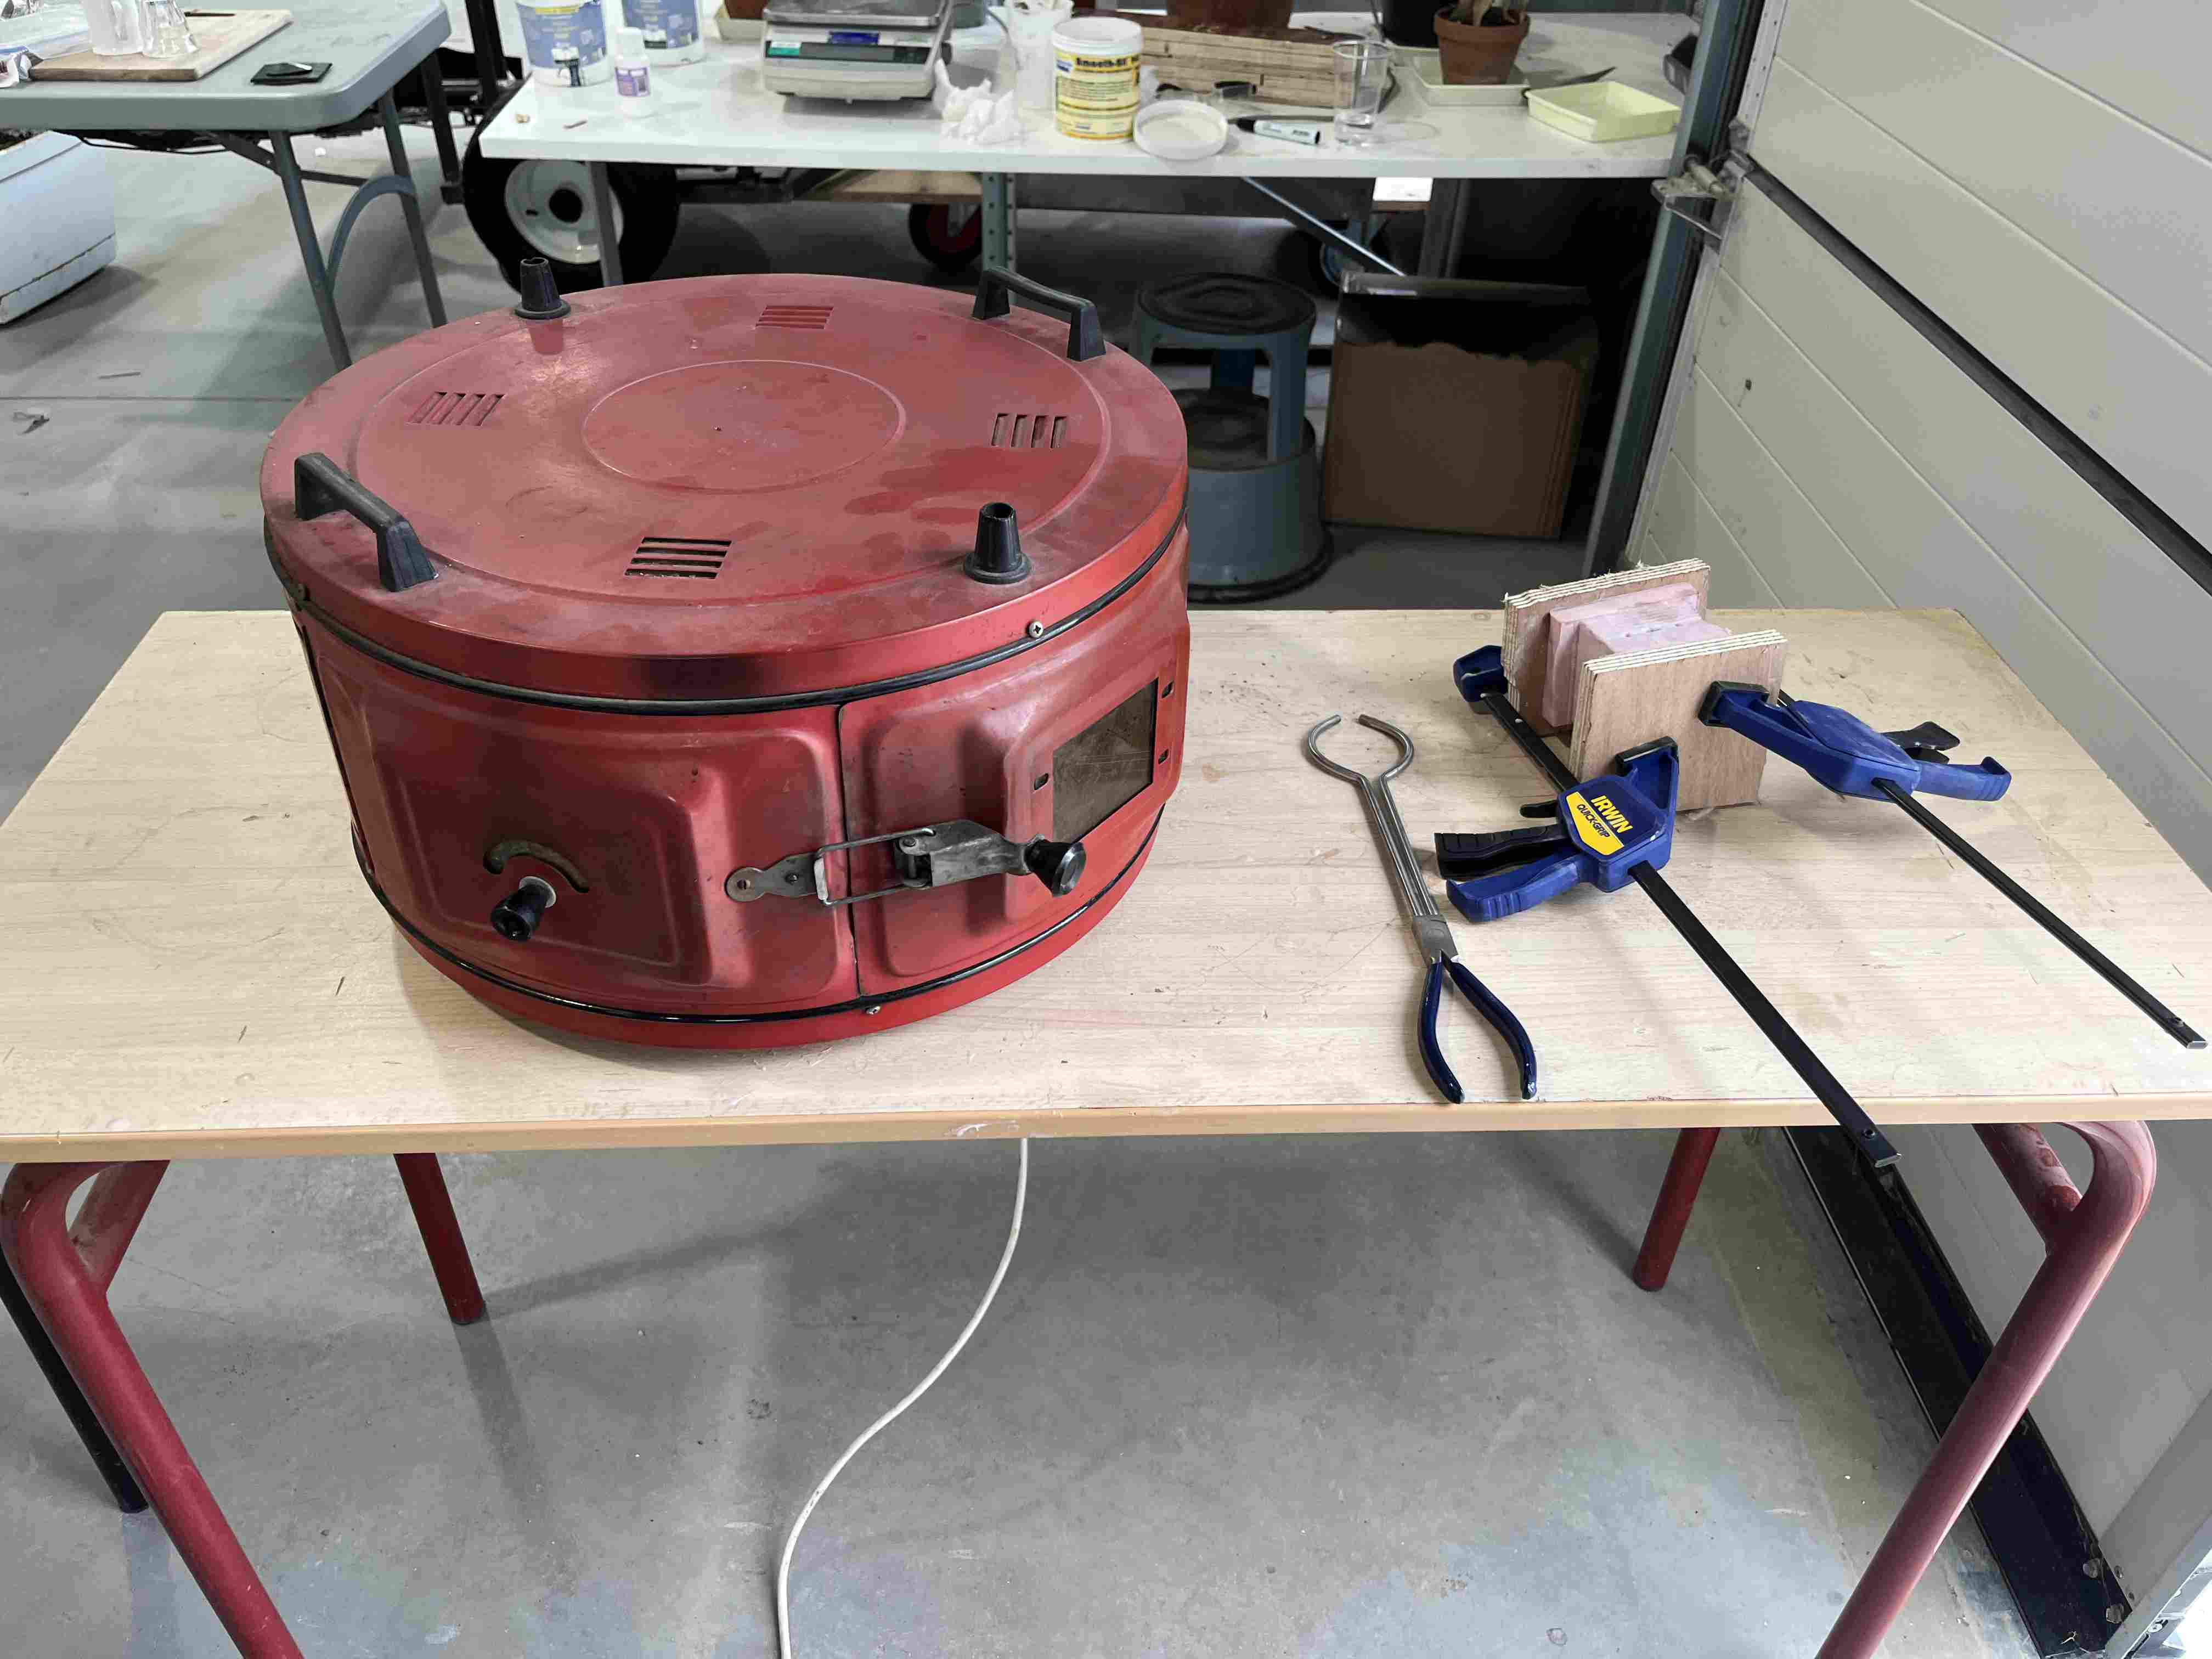
Finally, the last material we tested was Bismuth. Bi and atomic number 83 in the periodic table of elements. This metal is gray when cast, and is fairly brittle but quite heavy. This metal is used for casting because it is less harmful than lead, and because lead has a low melting point (271.4°C). We have a pizza oven at Agrilab that reaches 300°C, enabling us to melt the metal.
Utilisation
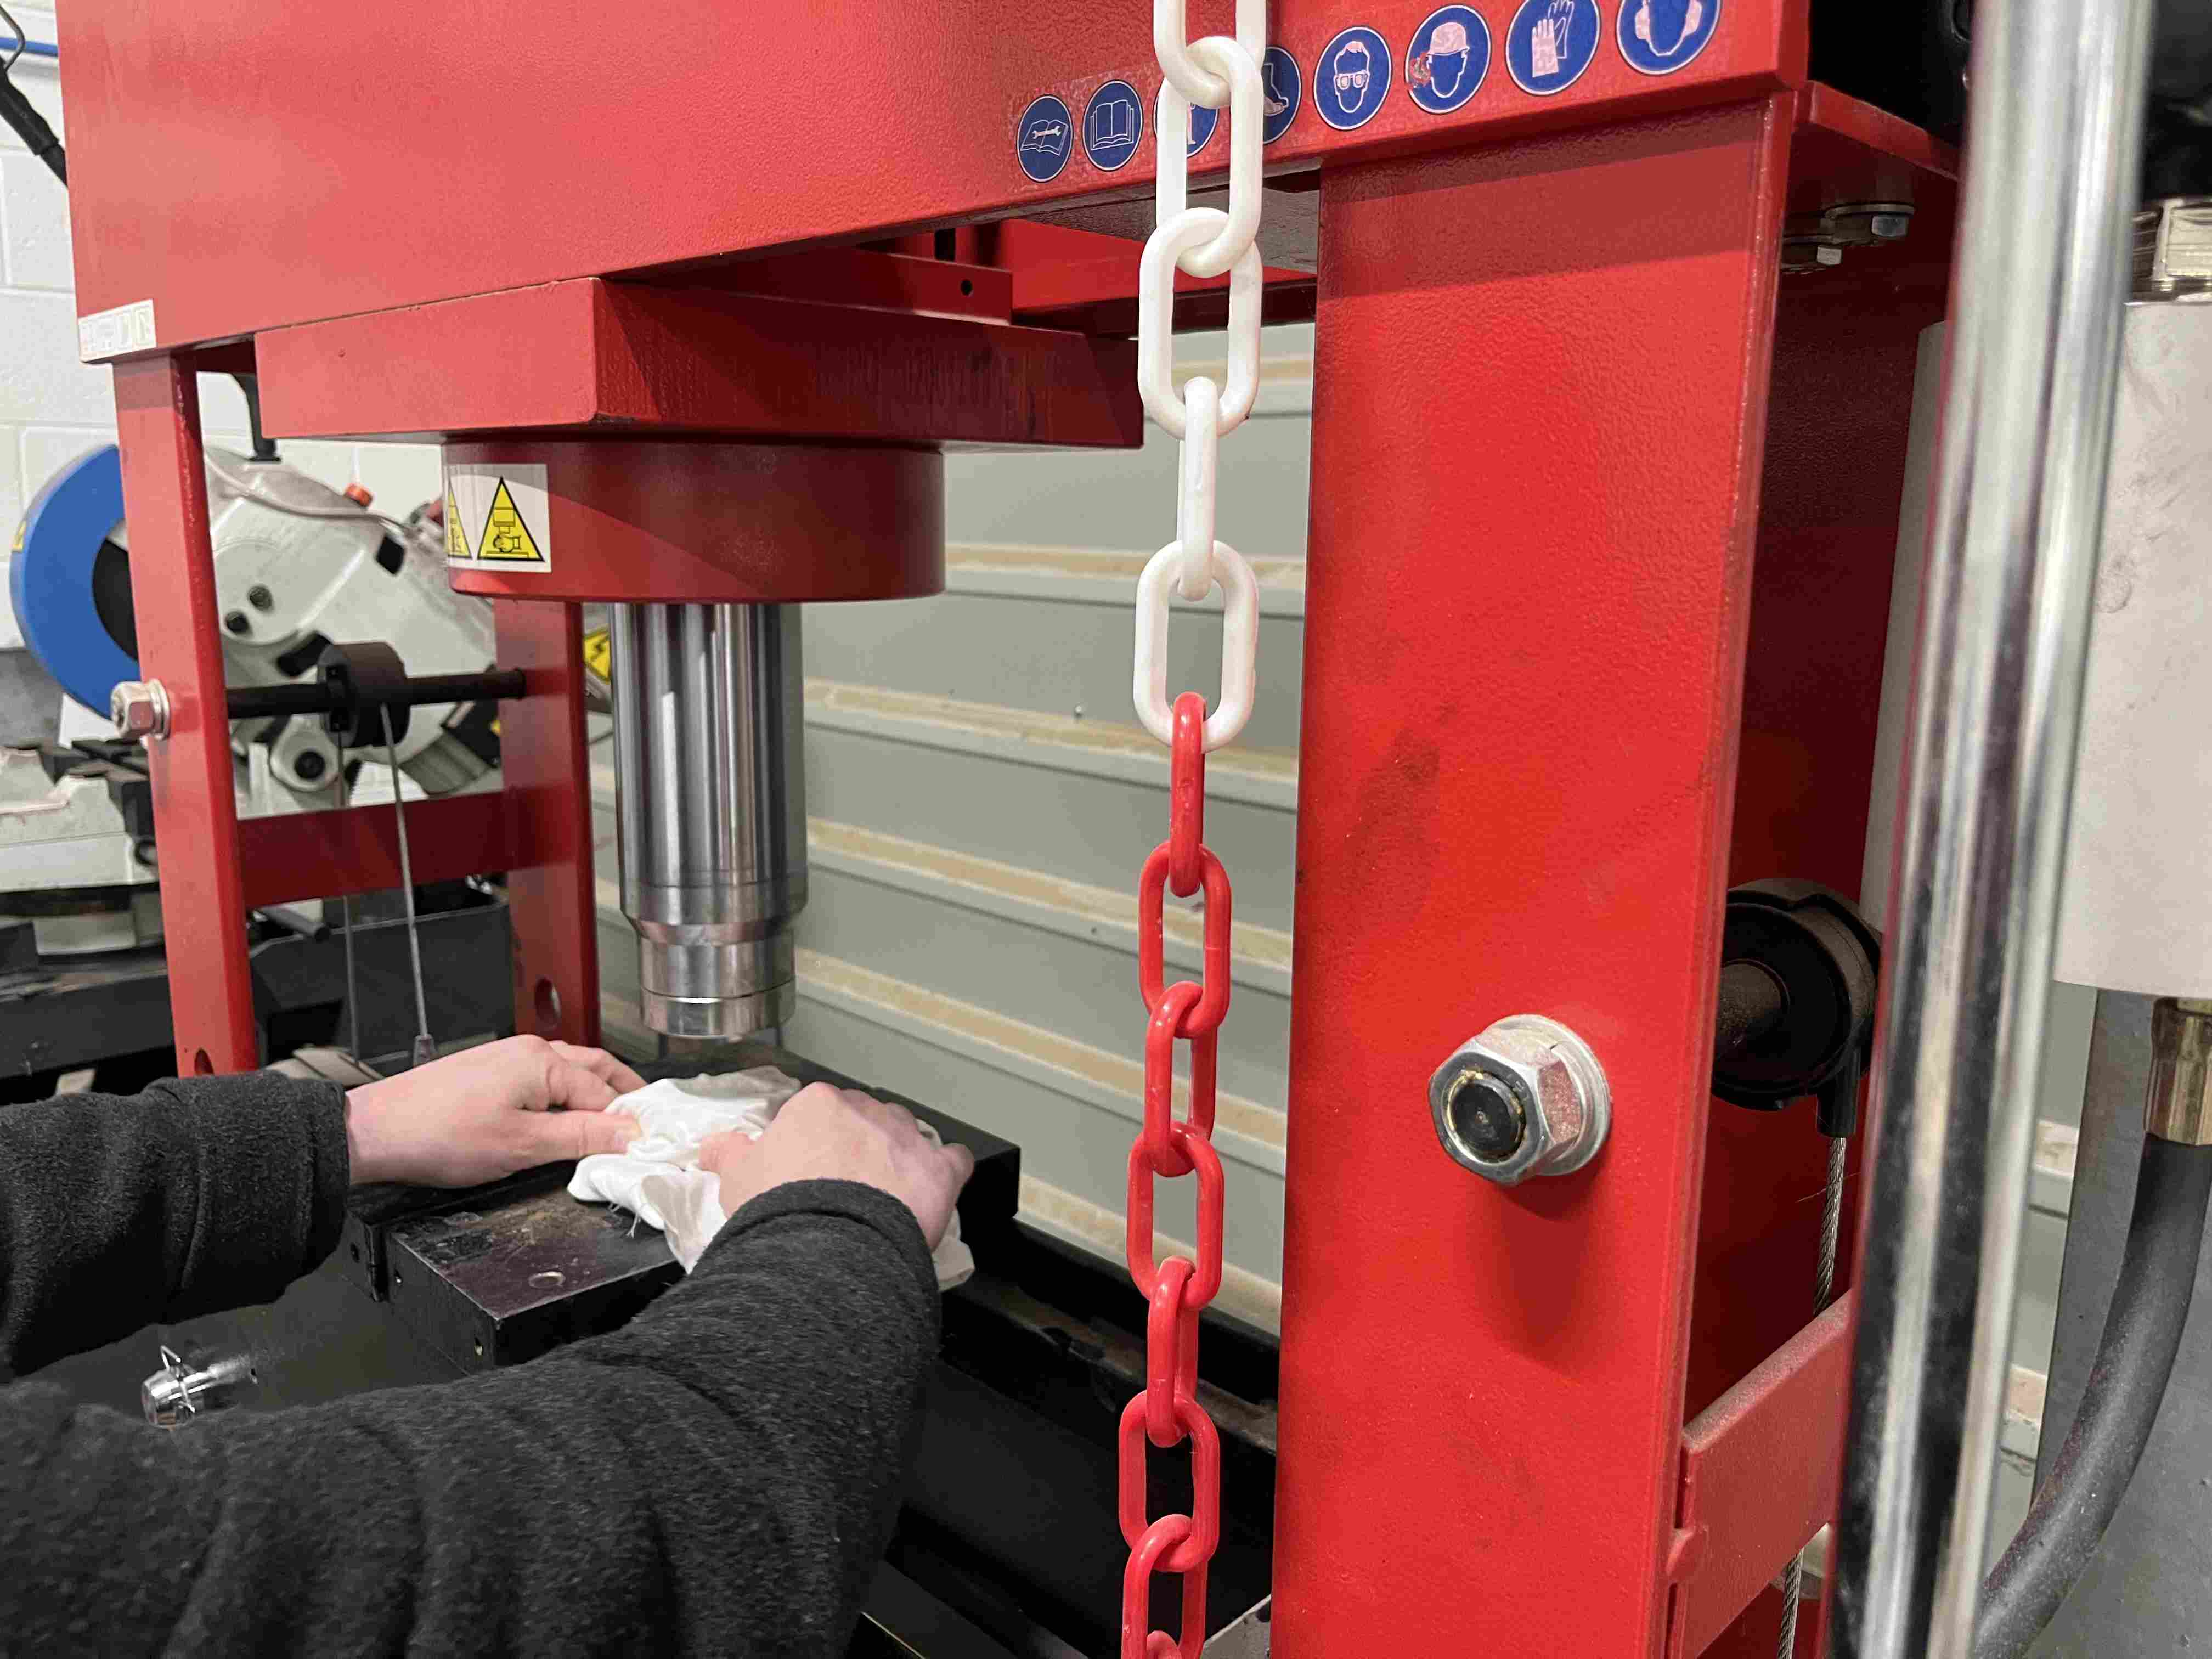
In order to use this metal, we first had to break it up into elements that would fit into our crucible. To do this, we wrapped the block of metal in a rag and broke it up with the hydrolic press and a hammer..
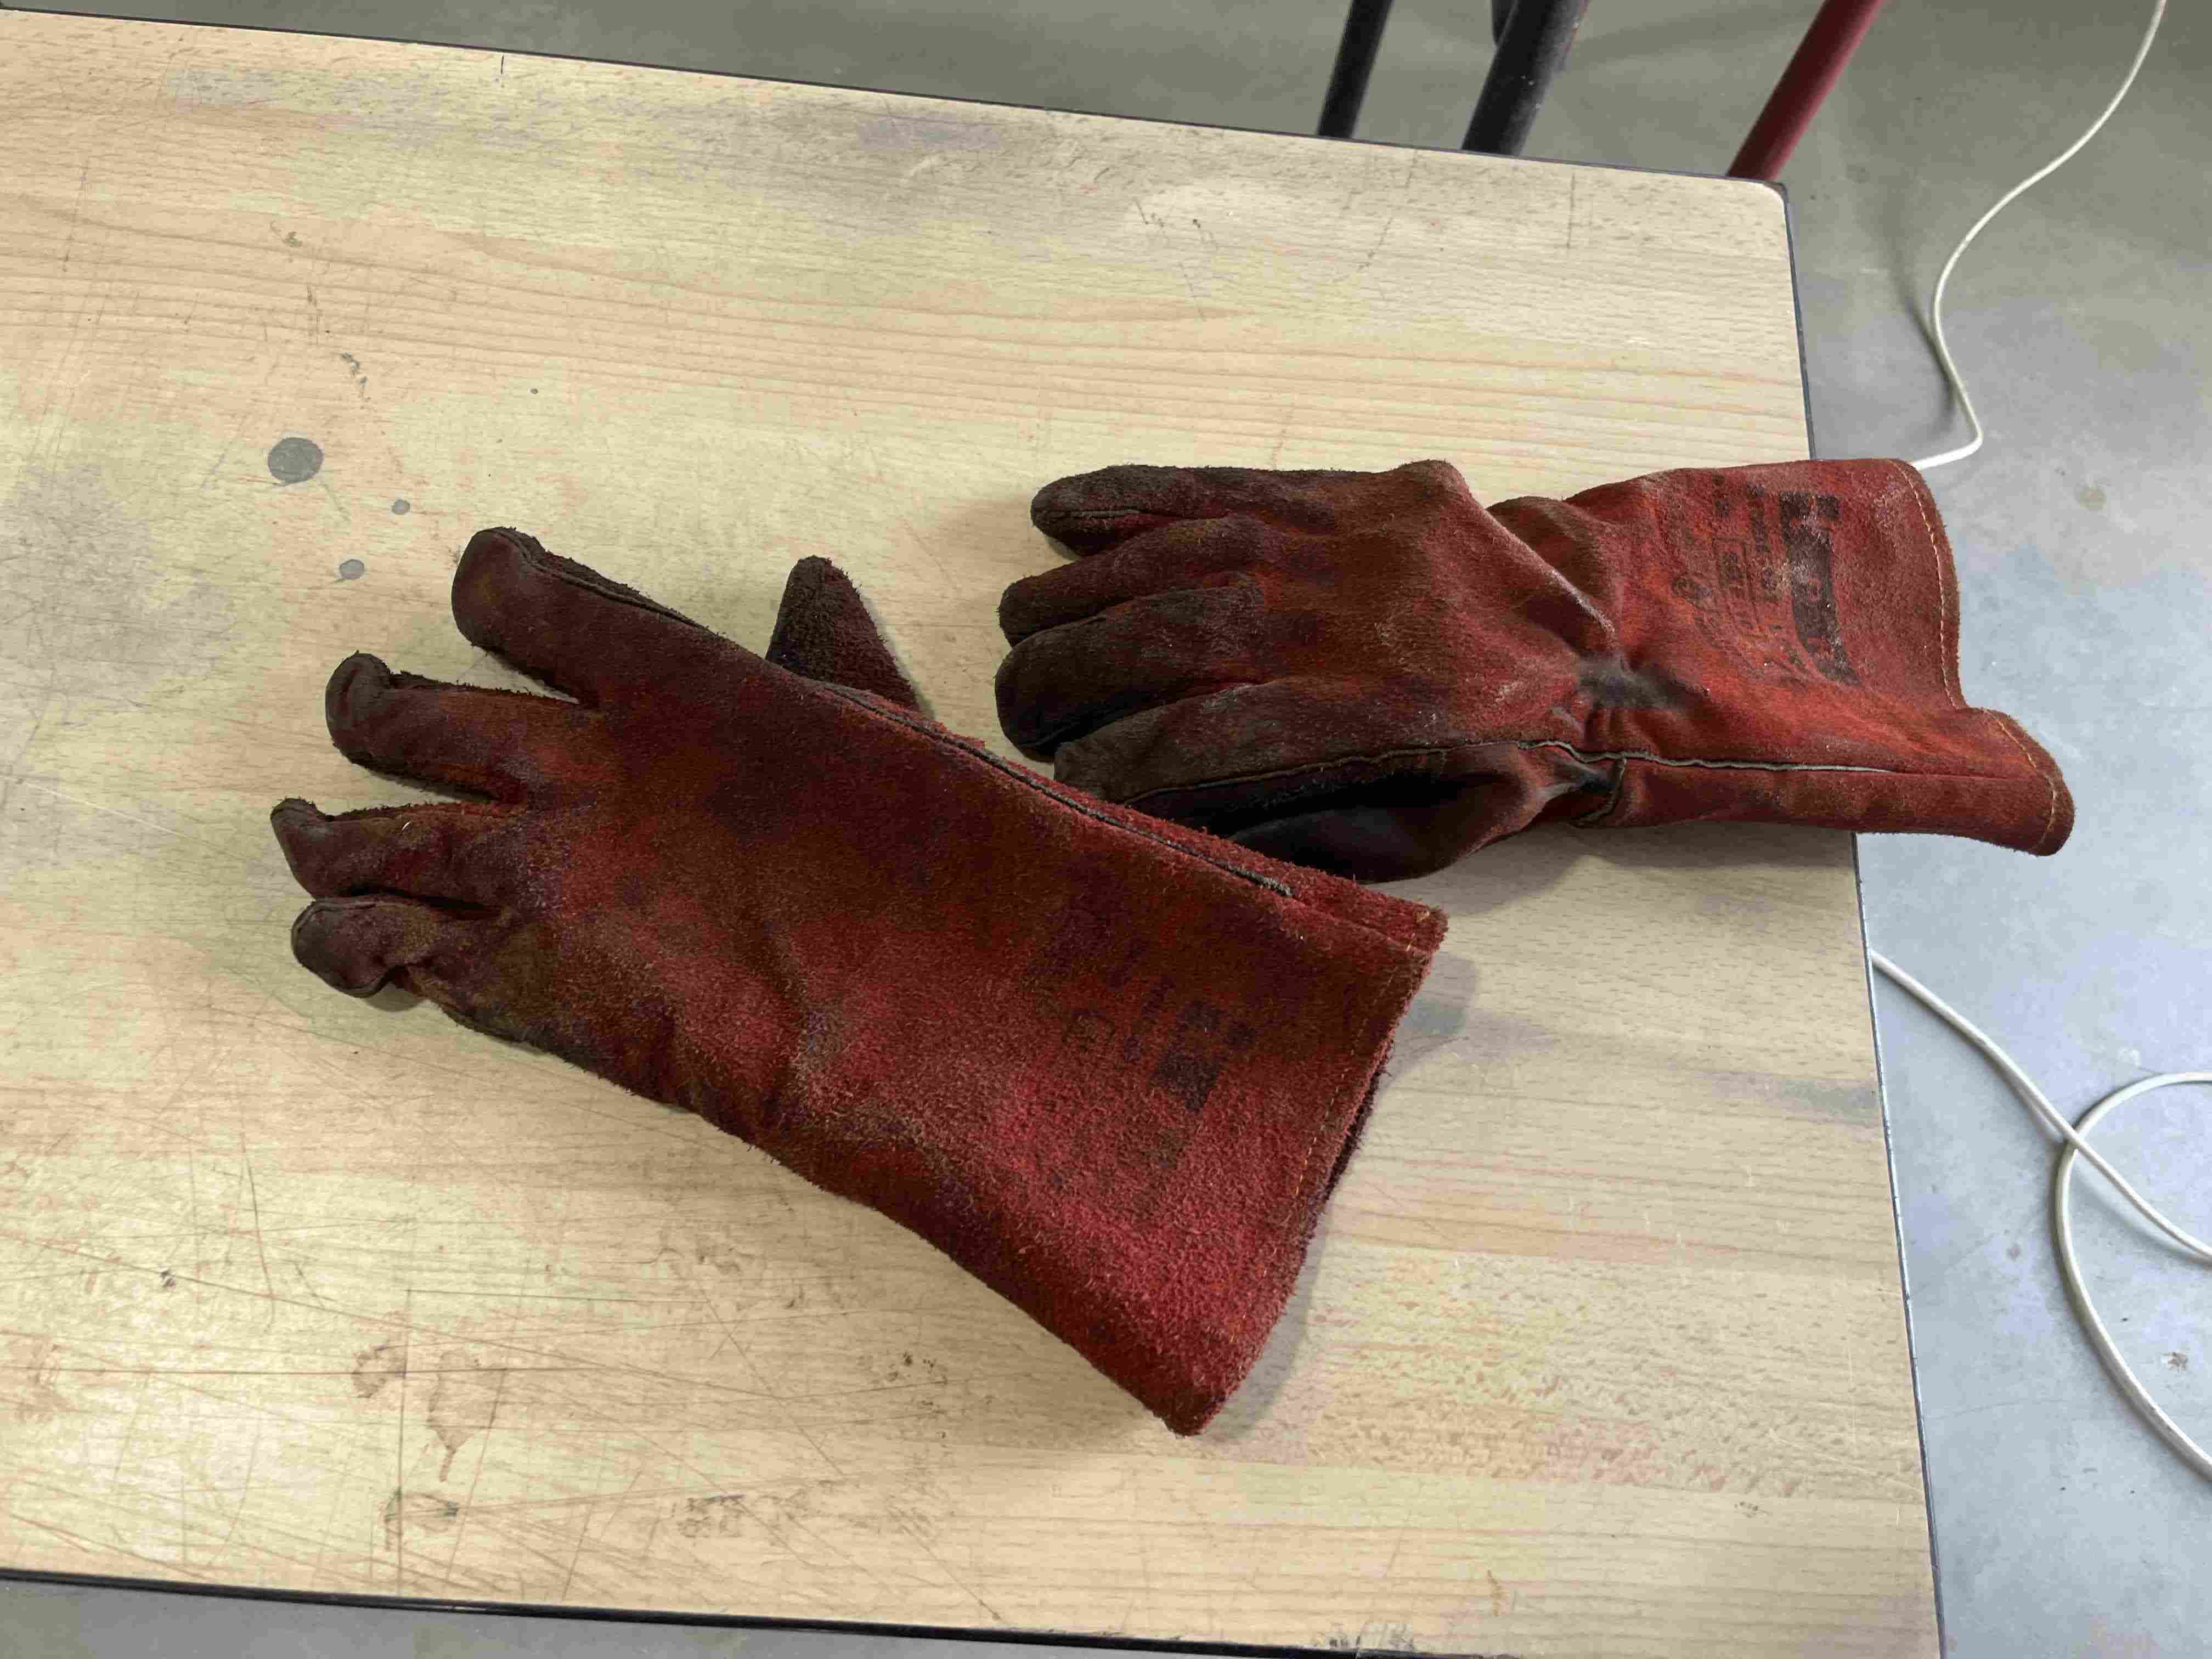
In order to use this metal with maximum safety, we have used it outdoors, and use very thick, high-temperature-resistant gloves to handle it.
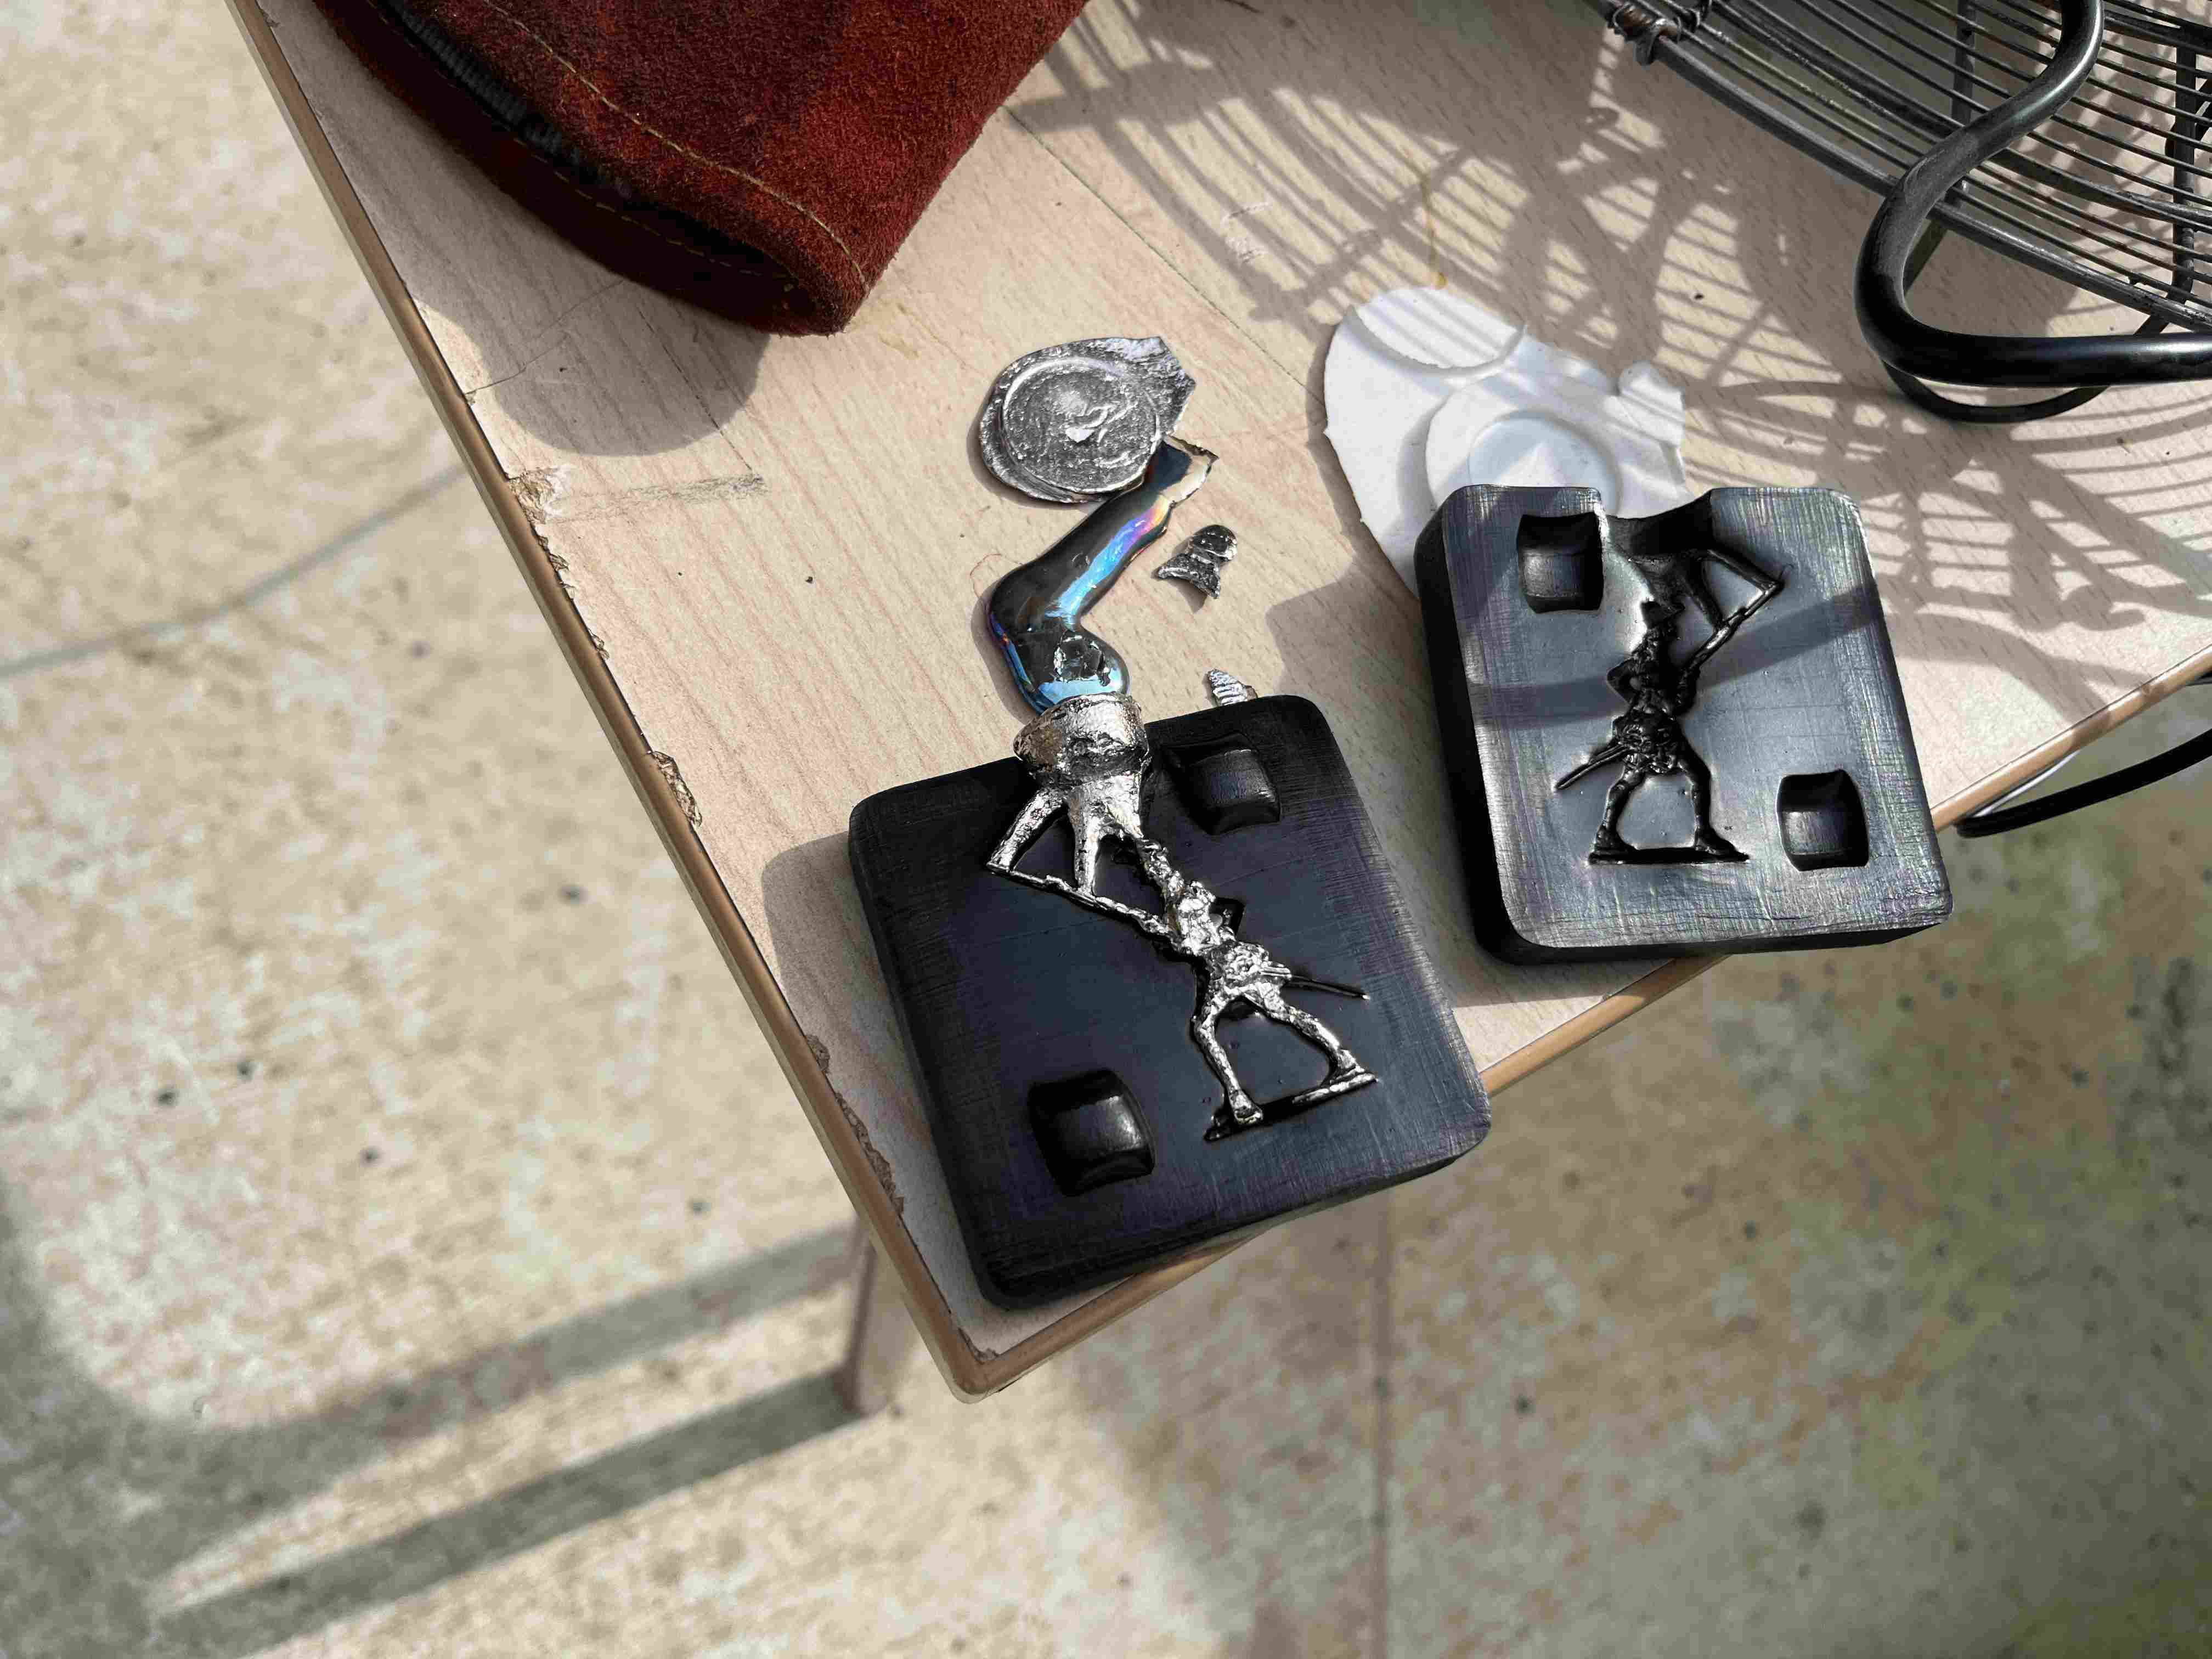
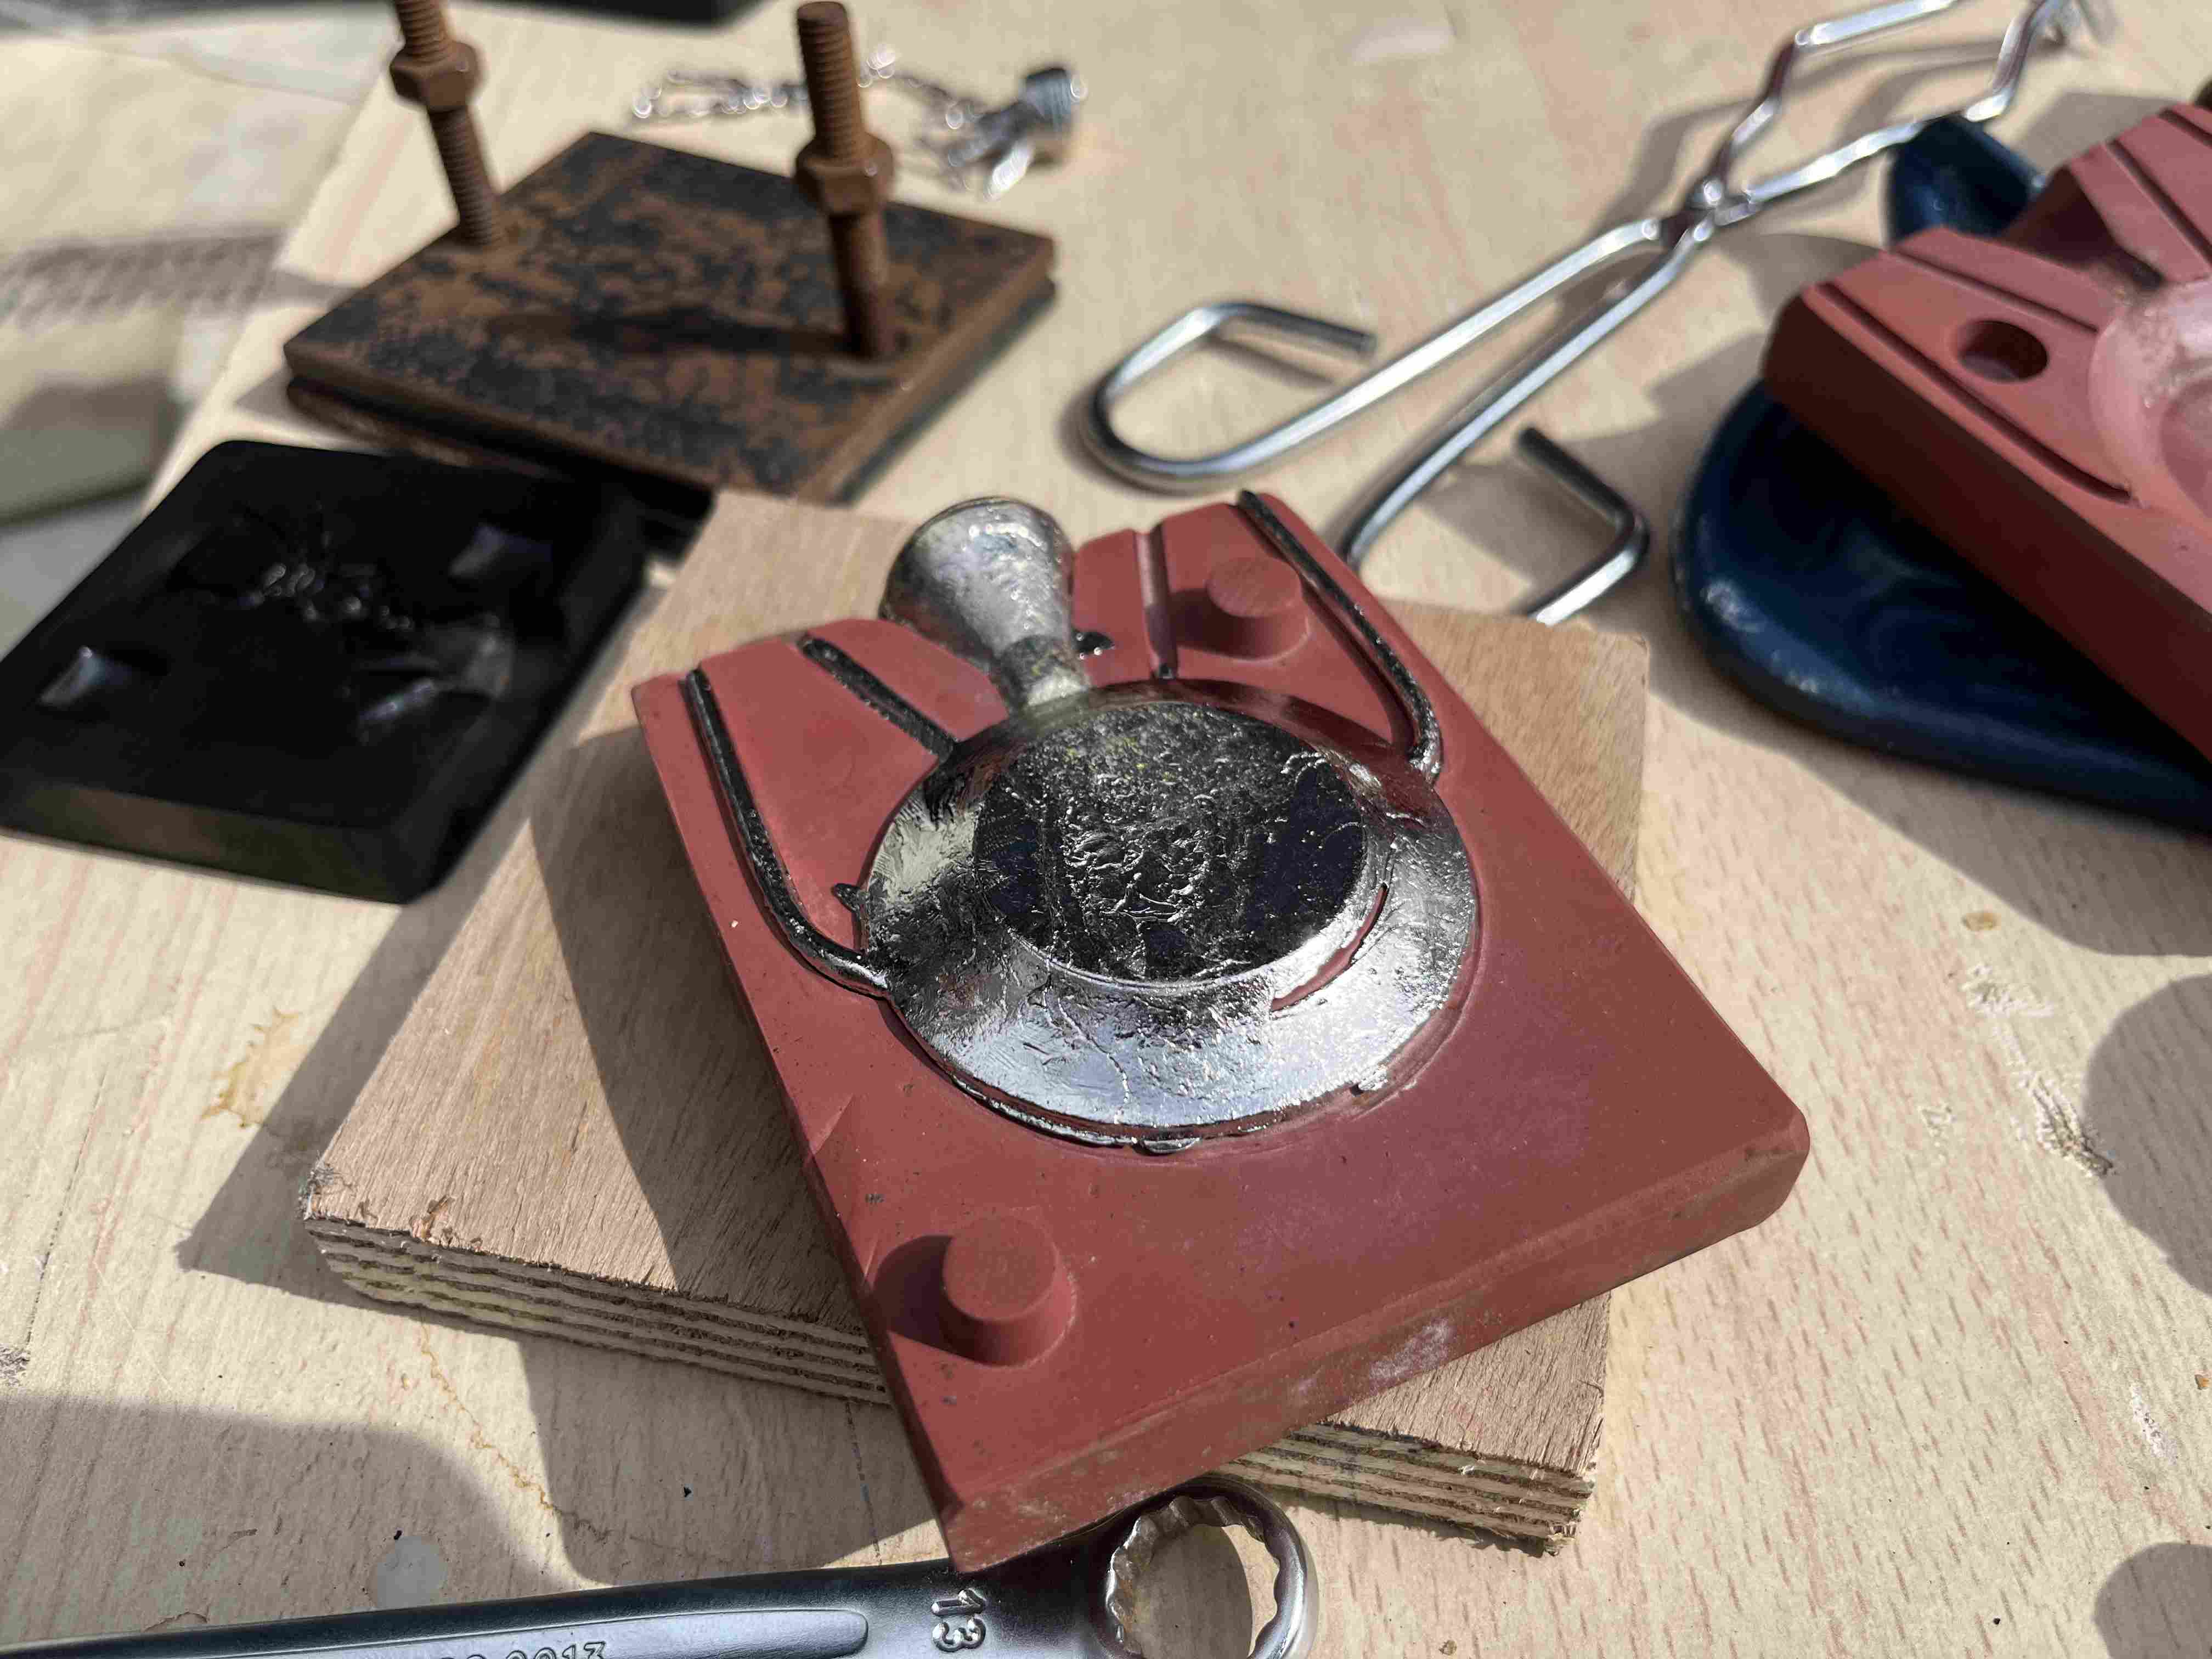
We were then able to put the metal into the crucible and put it into the furnace. After thirty minutes or so, we went back to look and the bismuth had reached its melting temperature. We then tested it in various molds: a medallion mold made for lead, a lead soldier mold, the Alexis bust mold made earlier and the 2€ coin mold. It is important to put talcum powder on the mould before casting to protect it from high temperatures.
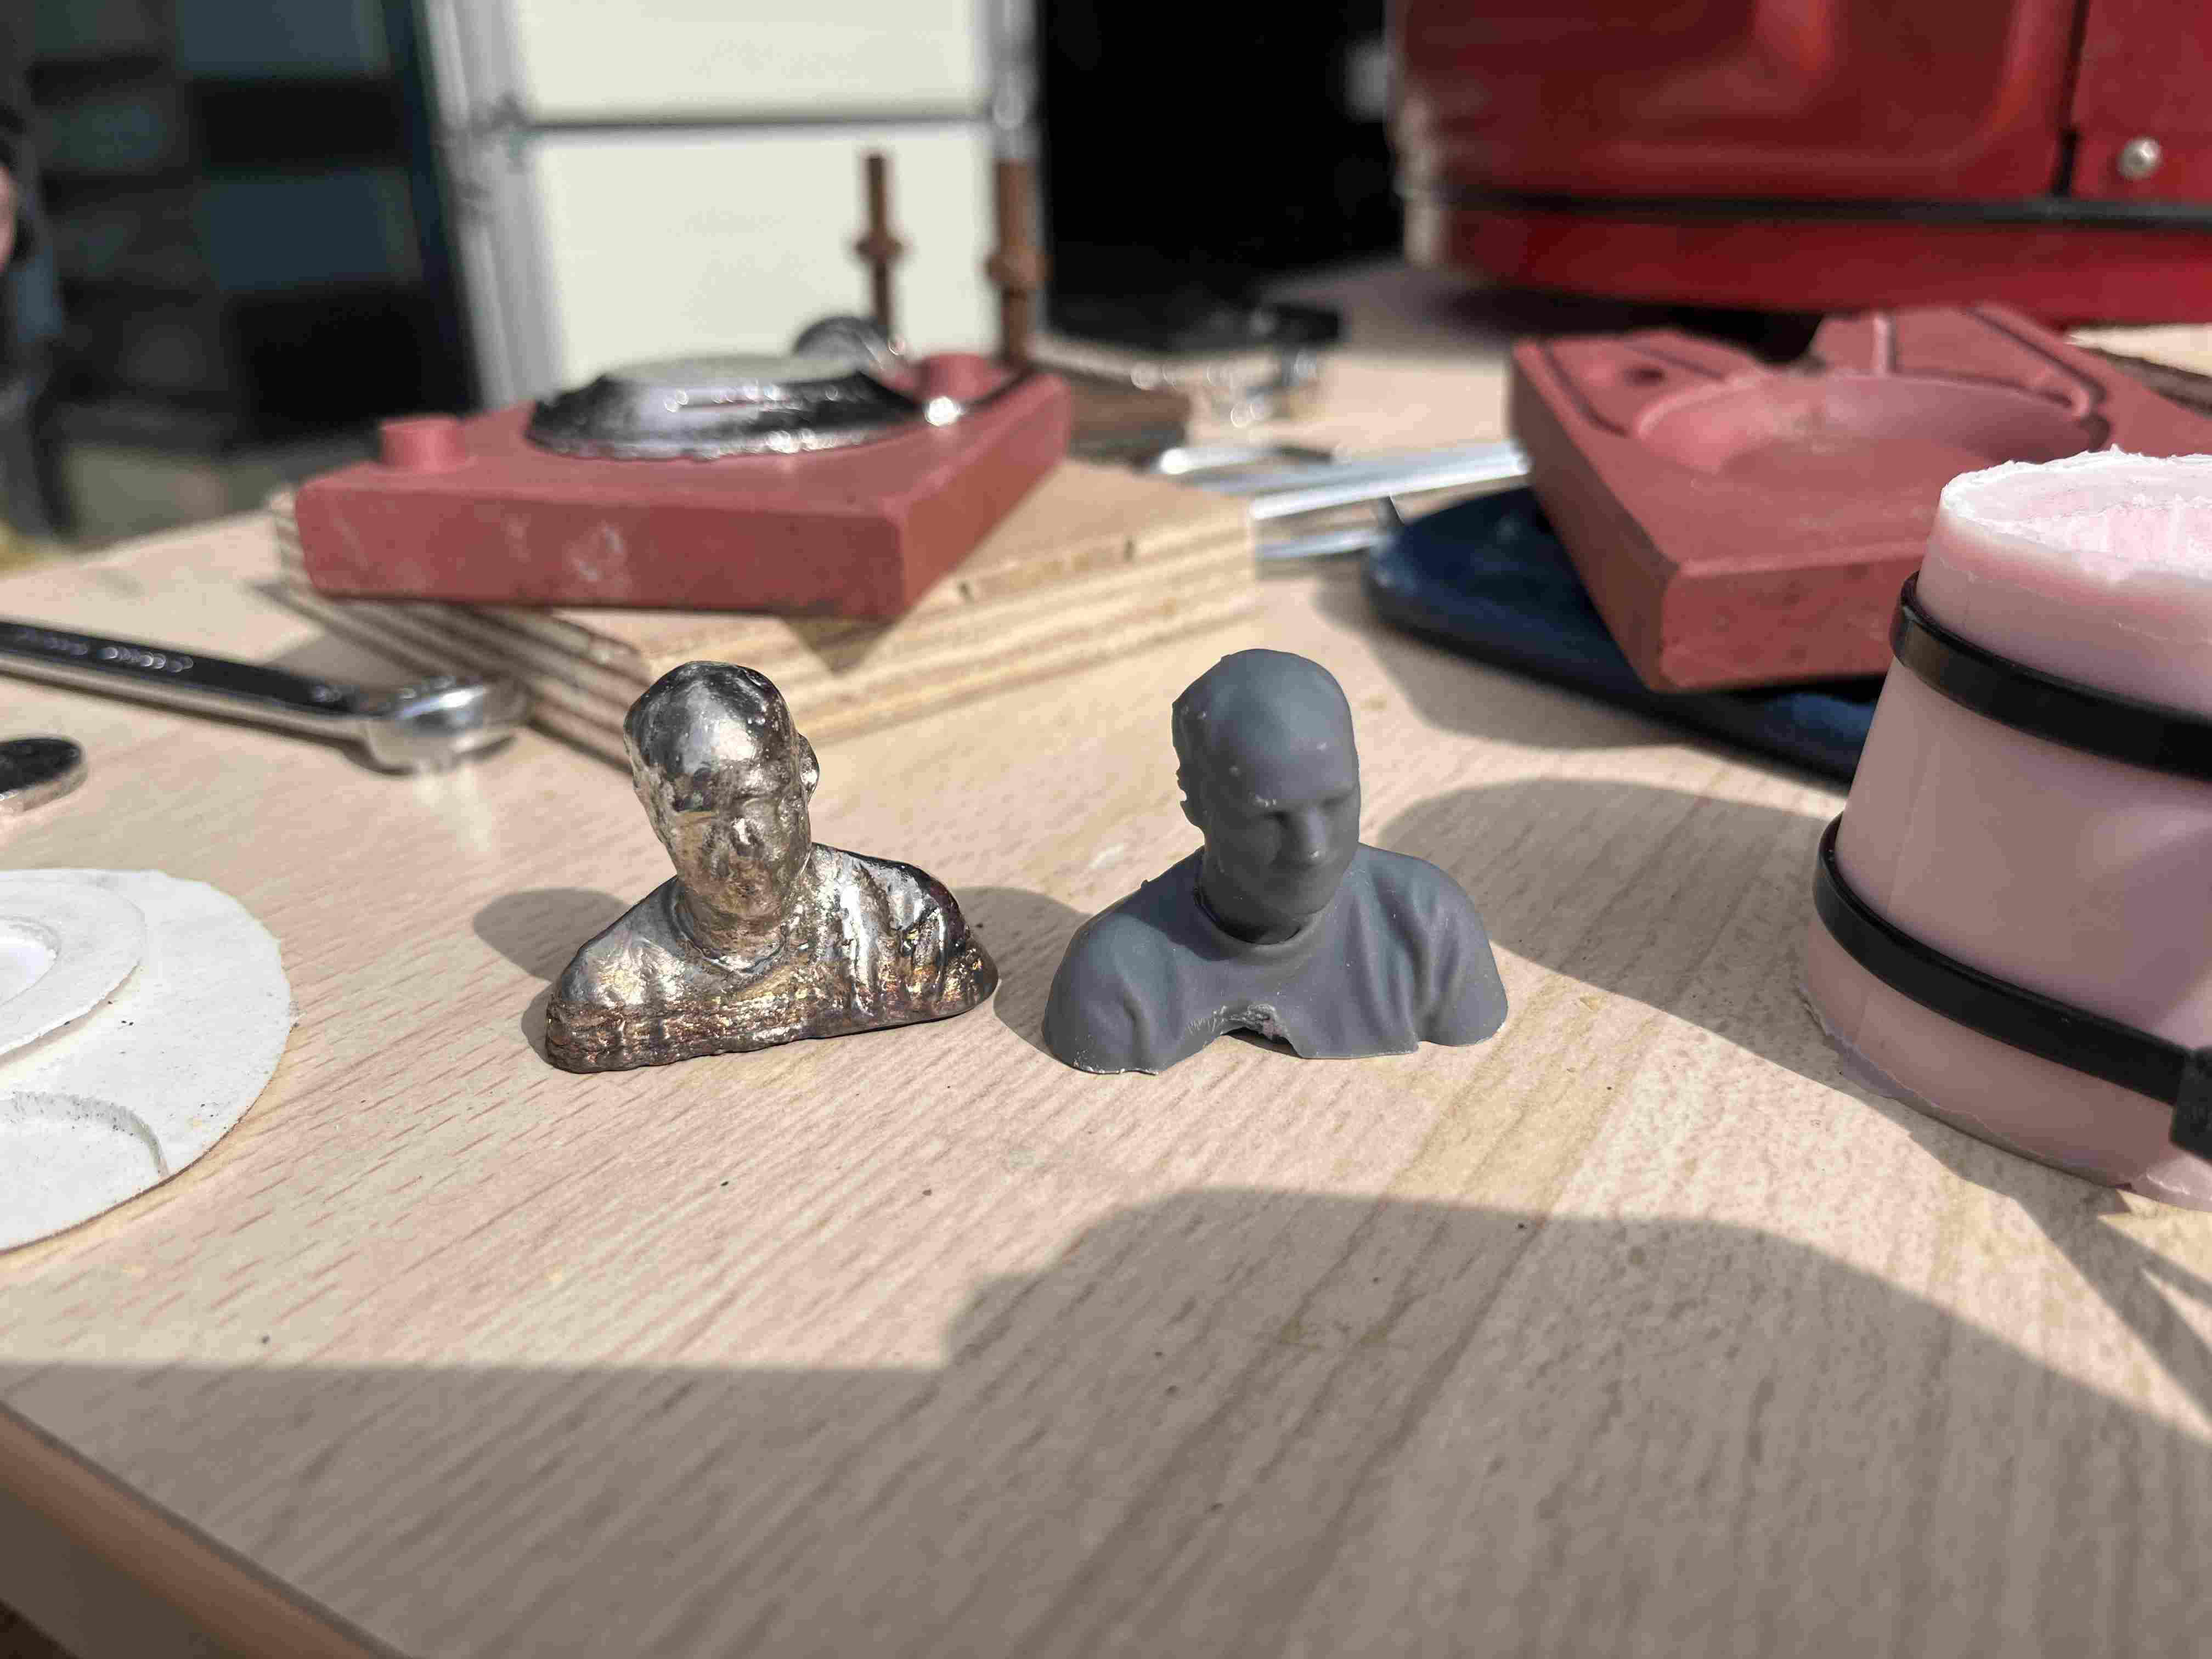
Metal cools very quickly, and it's important to pour it as soon as it comes out of the kiln to ensure quality work. On the other hand, you can quickly make objects with it. Of all the tests we've carried out, the one that gives us the most satisfactory result is probably Alexis's mold, as the metal can spread everywhere, given that it's quite large. Once molten, the metal is probably less liquid than lead, and diffused poorly in the soldier's mold.
Comparaison
| Material | Curing Time | Ease of Use | Mixing | Preparation Equipment | Hazard | Strength |
|---|---|---|---|---|---|---|
| Smooth Sil 940 | Less than a day | Fairly simple | By weight | Container, scale | Low | Elastic, high |
| Concrete mix | Half a day | Fairly simple | By weight | Container, scale | None | Low |
| Epoxy crystal resin EC161 | A day | Fairly simple | By weight | Container, scale | High | Hard but very brittle |
| RTV 3428 | Less than a day | Fairly simple | By weight | Container, scale | None | Very elastic, high |
| Bismuth | A few minutes (depending on weight) | Fairly simple | By weight | Scale, crucible, oven | Medium | Very hard, quite fragile |
You can find all our group documentation on our group page
Individual assignment
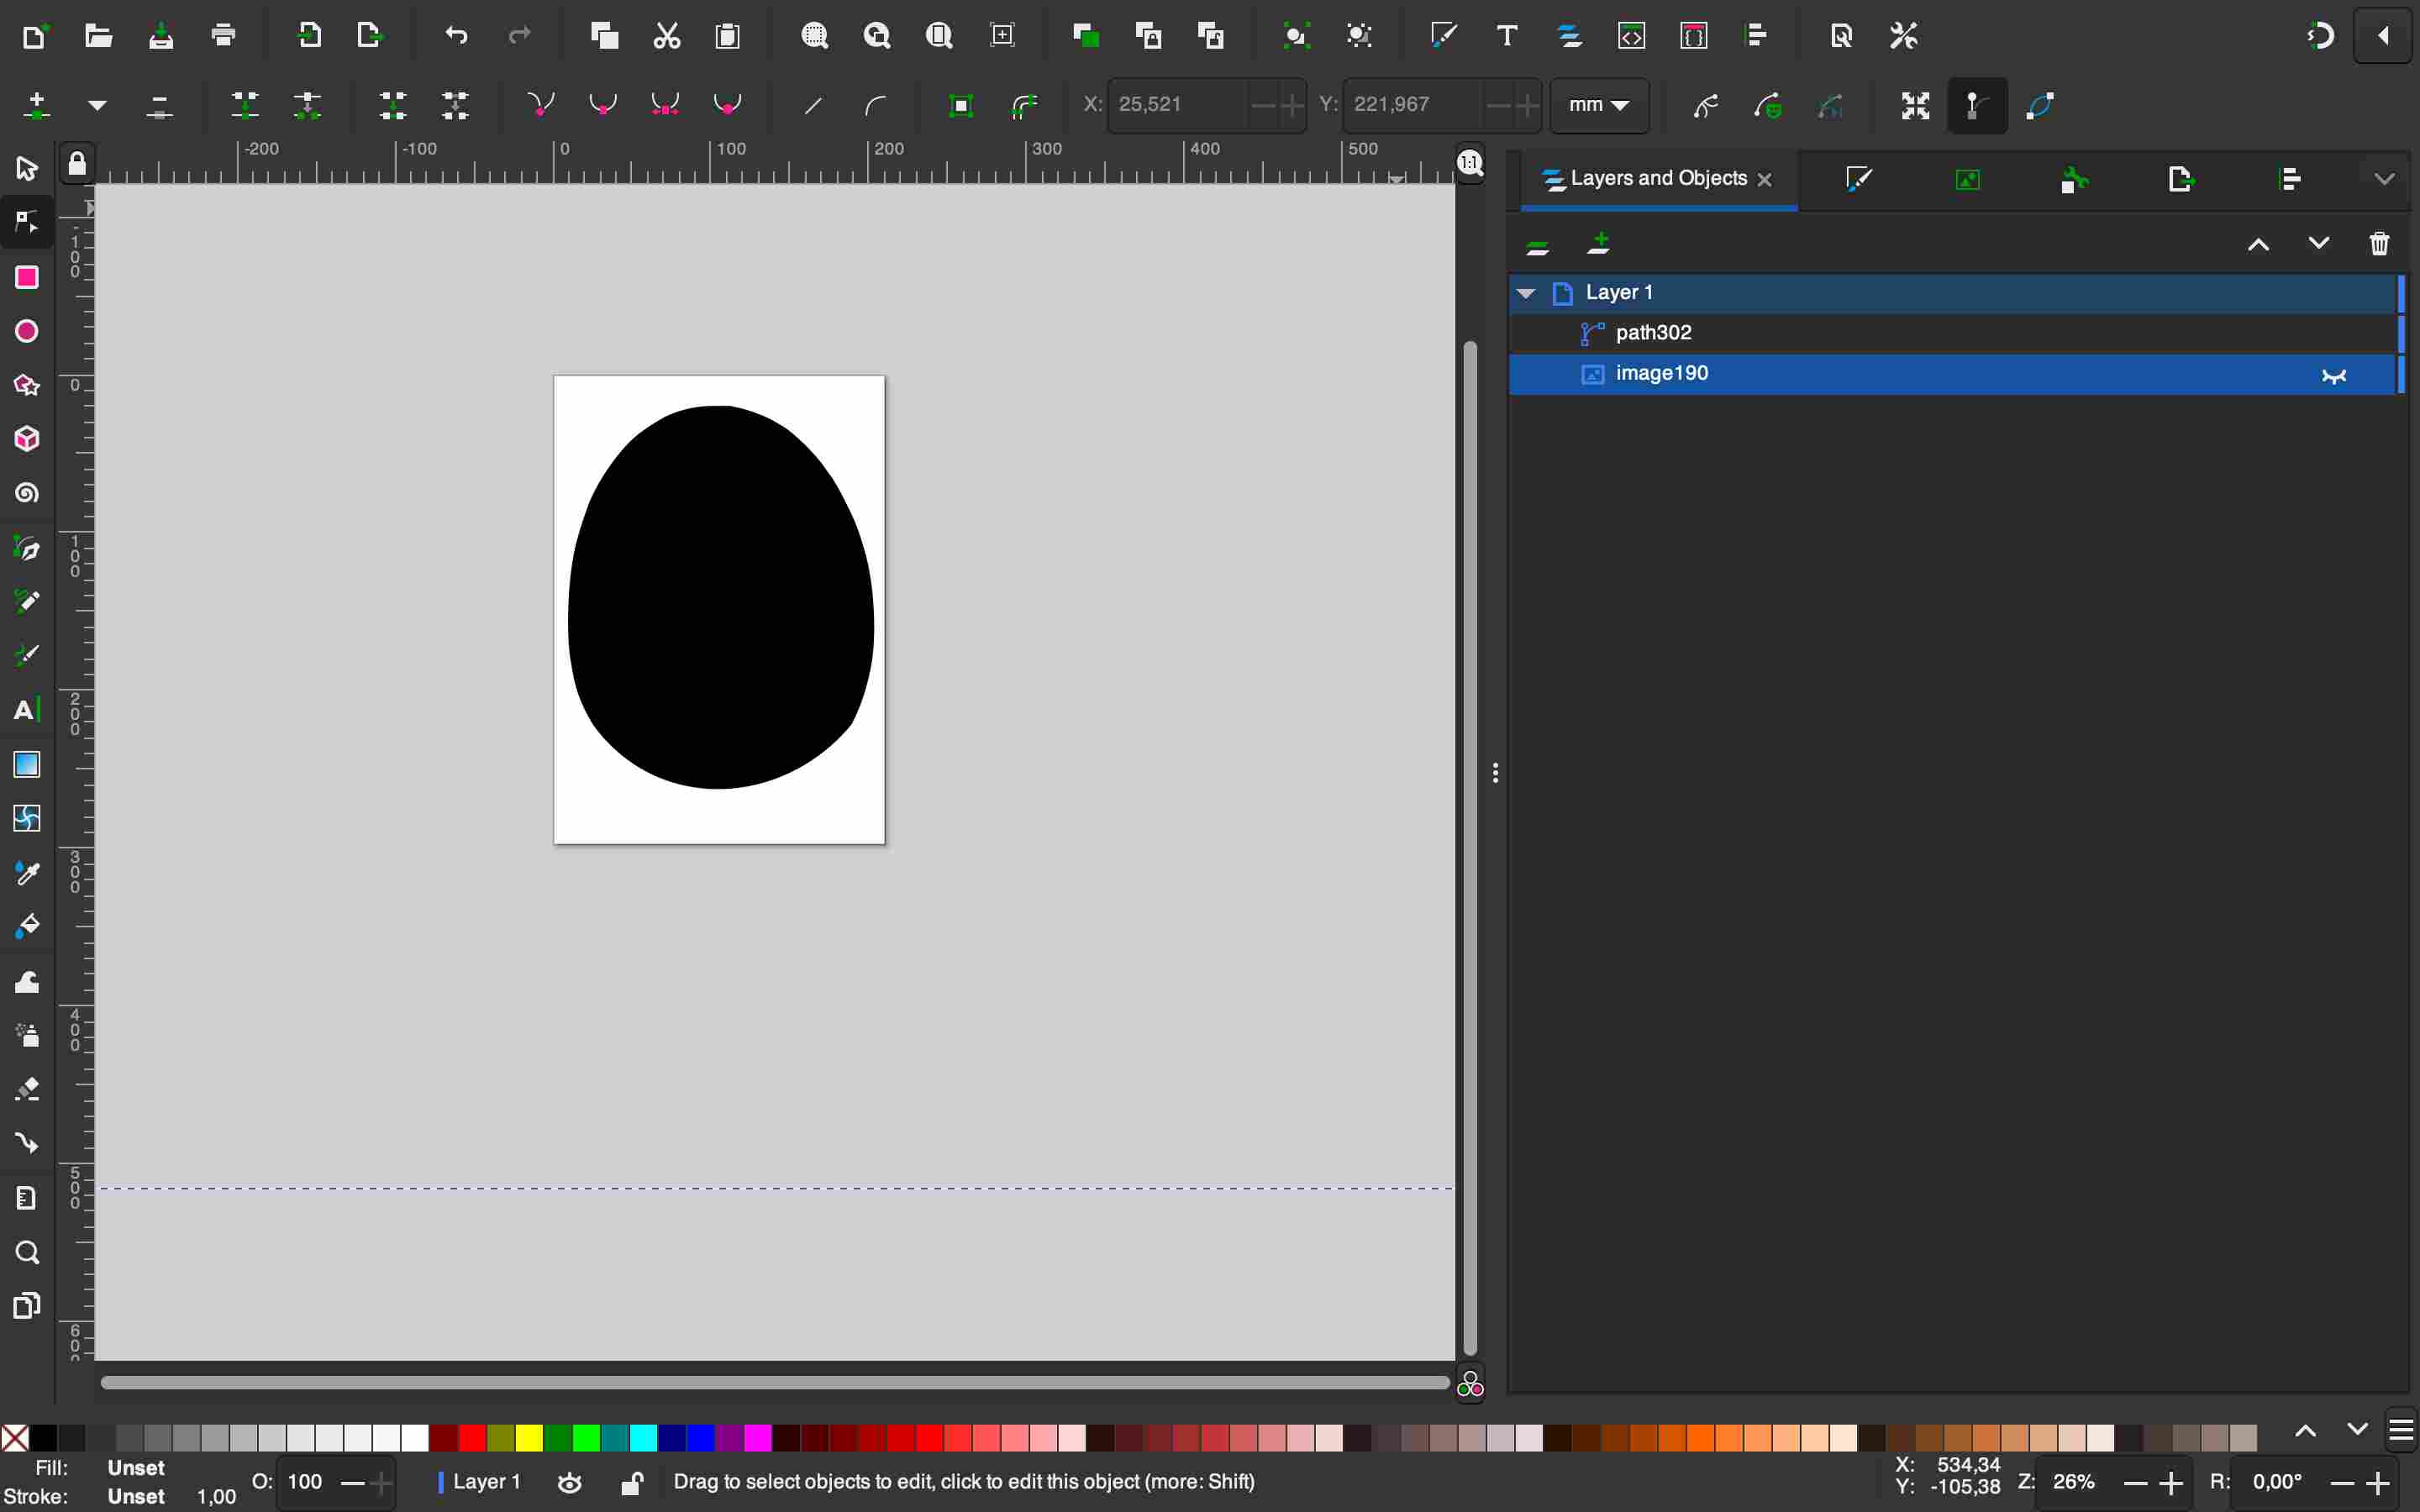
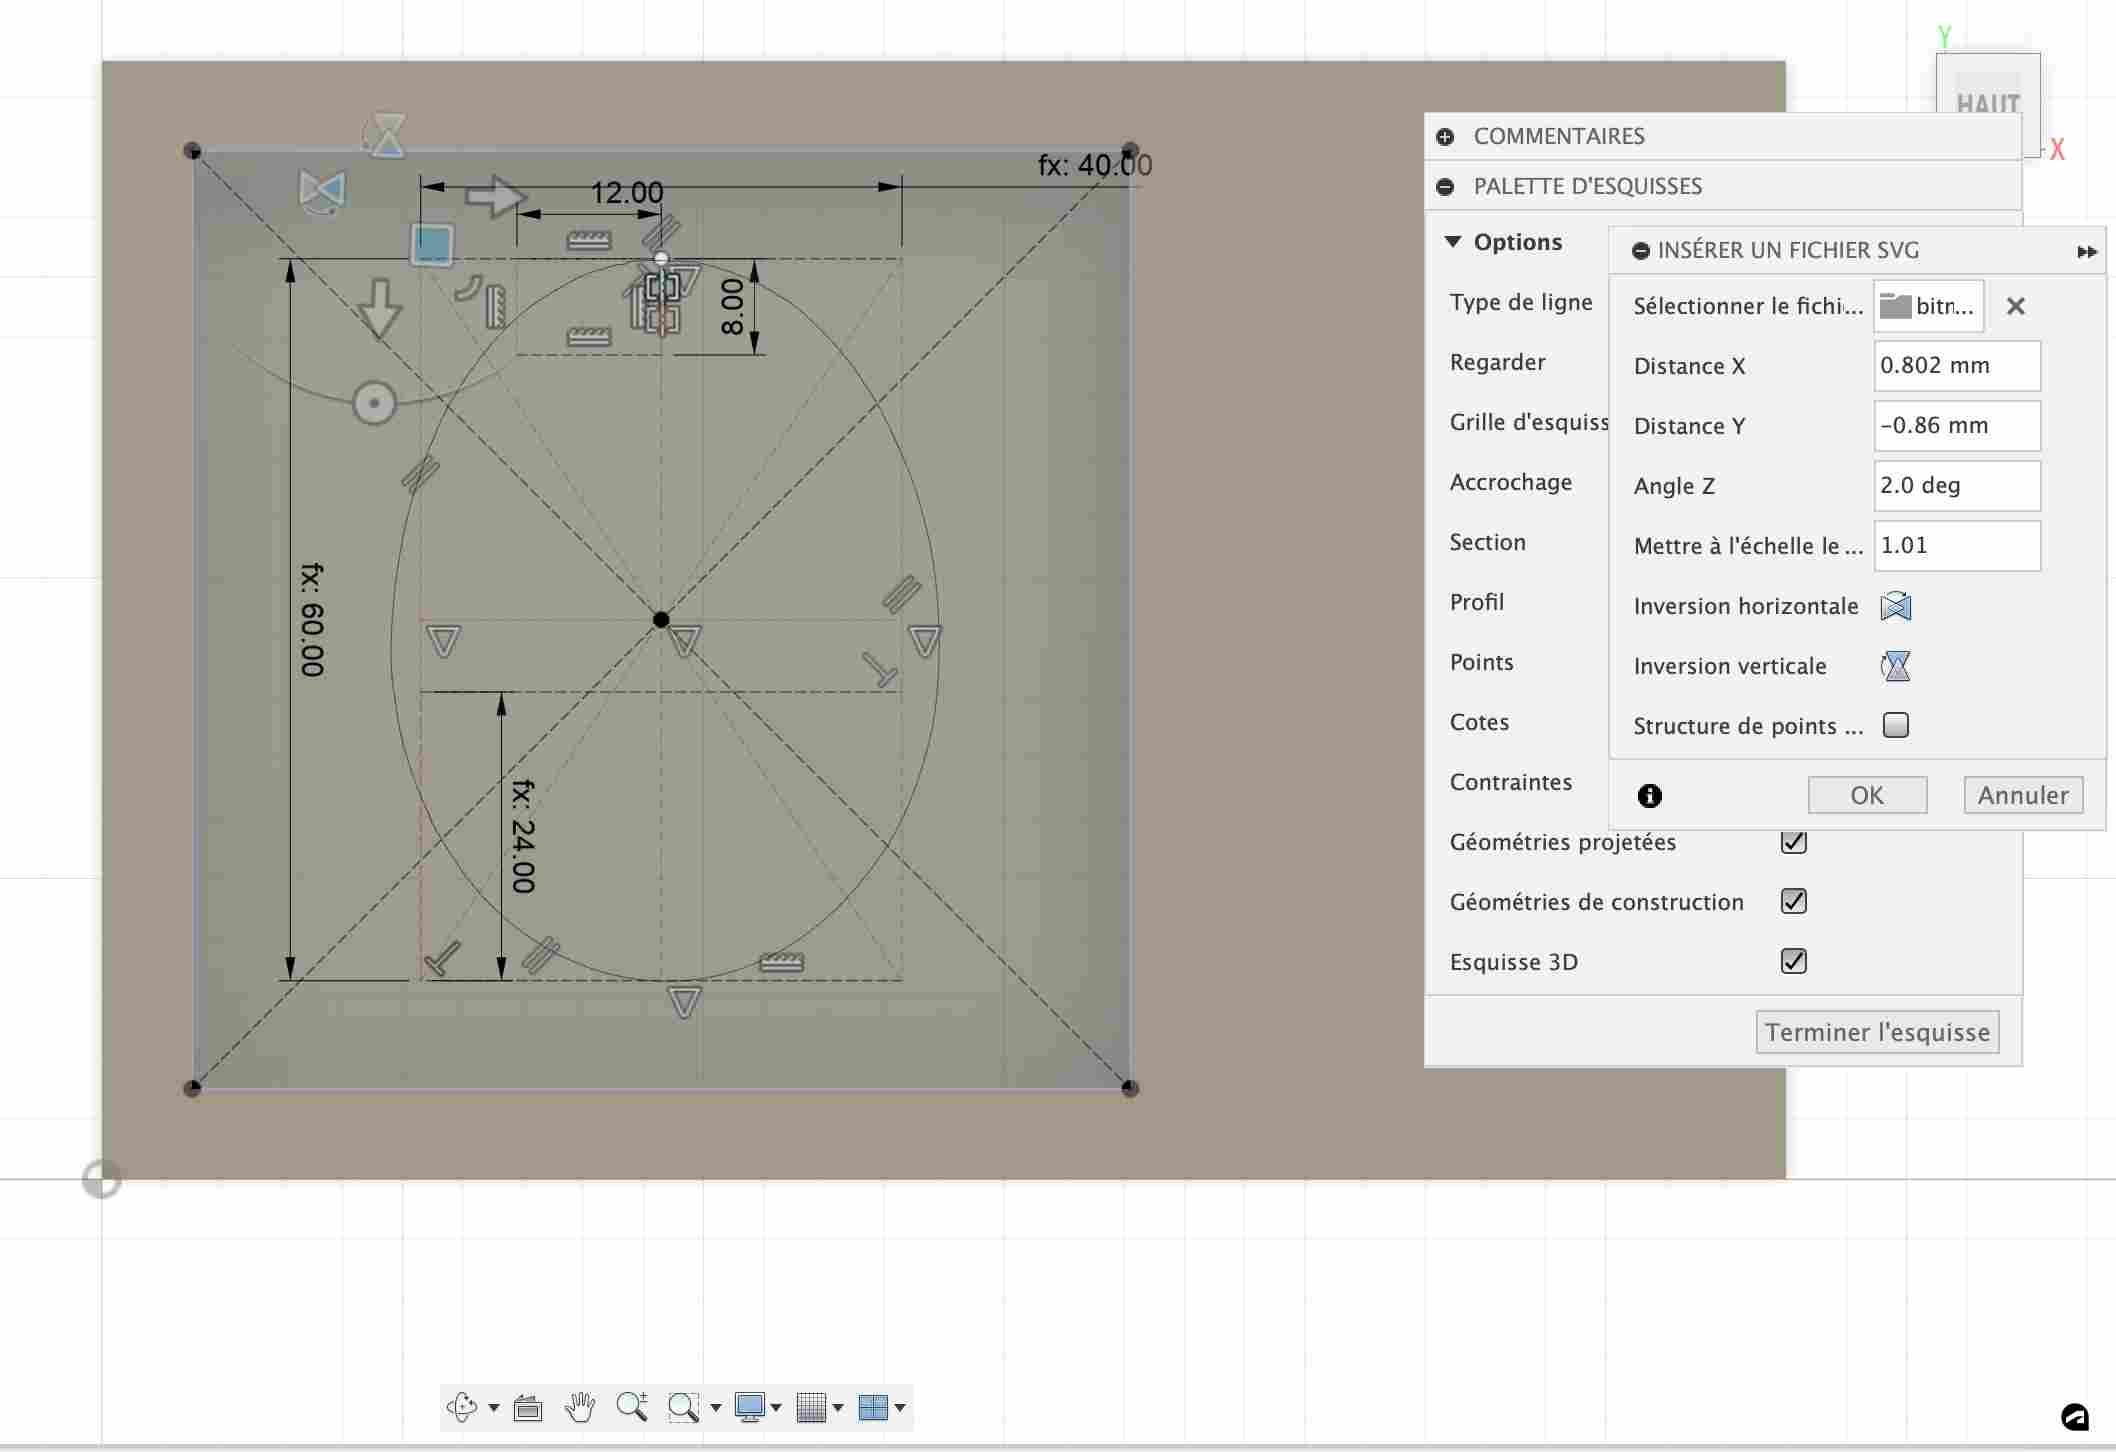
In order to make my individual assignment, I wanted to do something simple, so I chose to make an egg. The mold could be used to make a chocolate egg, for example. To make my mold, I started by creating a design on Fusion 360. To do this, I made cavities and then drew the shape of my egg on the bottom. To draw an egg, I downloaded a photo of an egg from this website then I vectorized it on inkscape
I then added the SVG to my sketch and made a revolution of one half to bring out the positive side of my egg. I also added spheres to make the two parts of the mold fit together, and chimneys to let the material in and the air out.
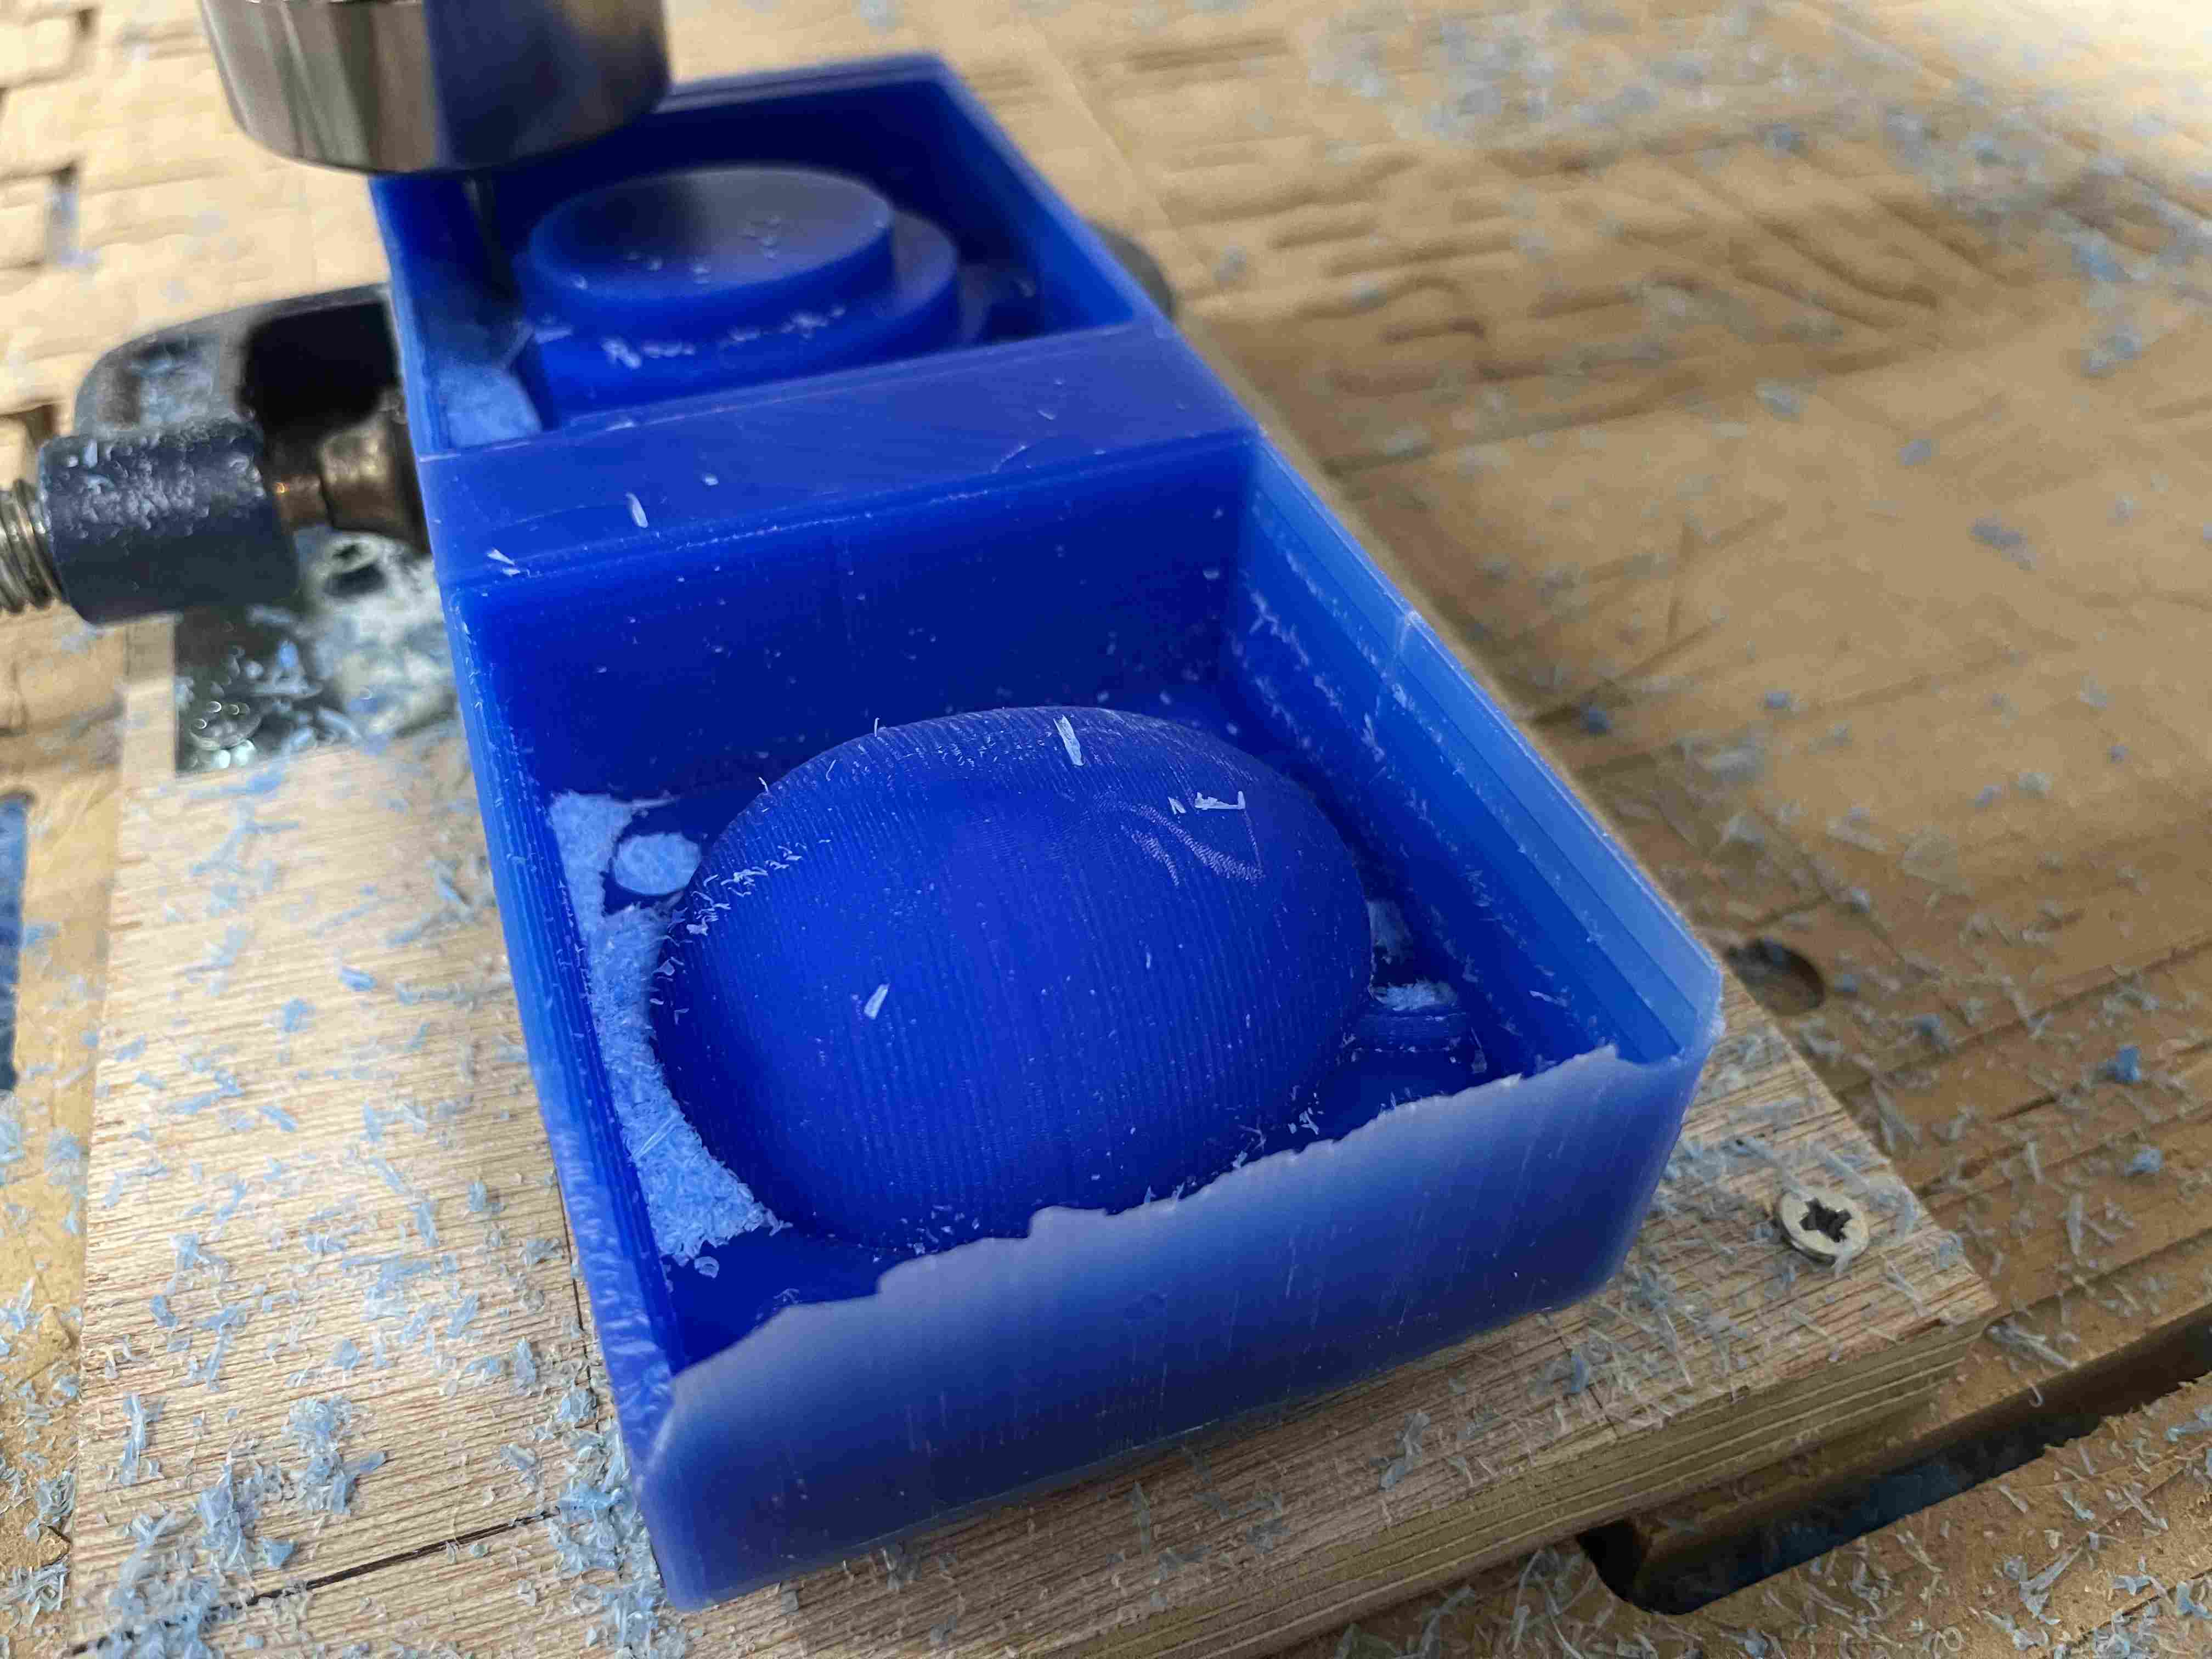
Once I'd finished my design, I was able to move on to the machining stage, which was the first we'd done in 3D, as in previous weeks we'd only worked in 2D. I started by using the pocket avoidance function, which enables me to remove a large amount of material.
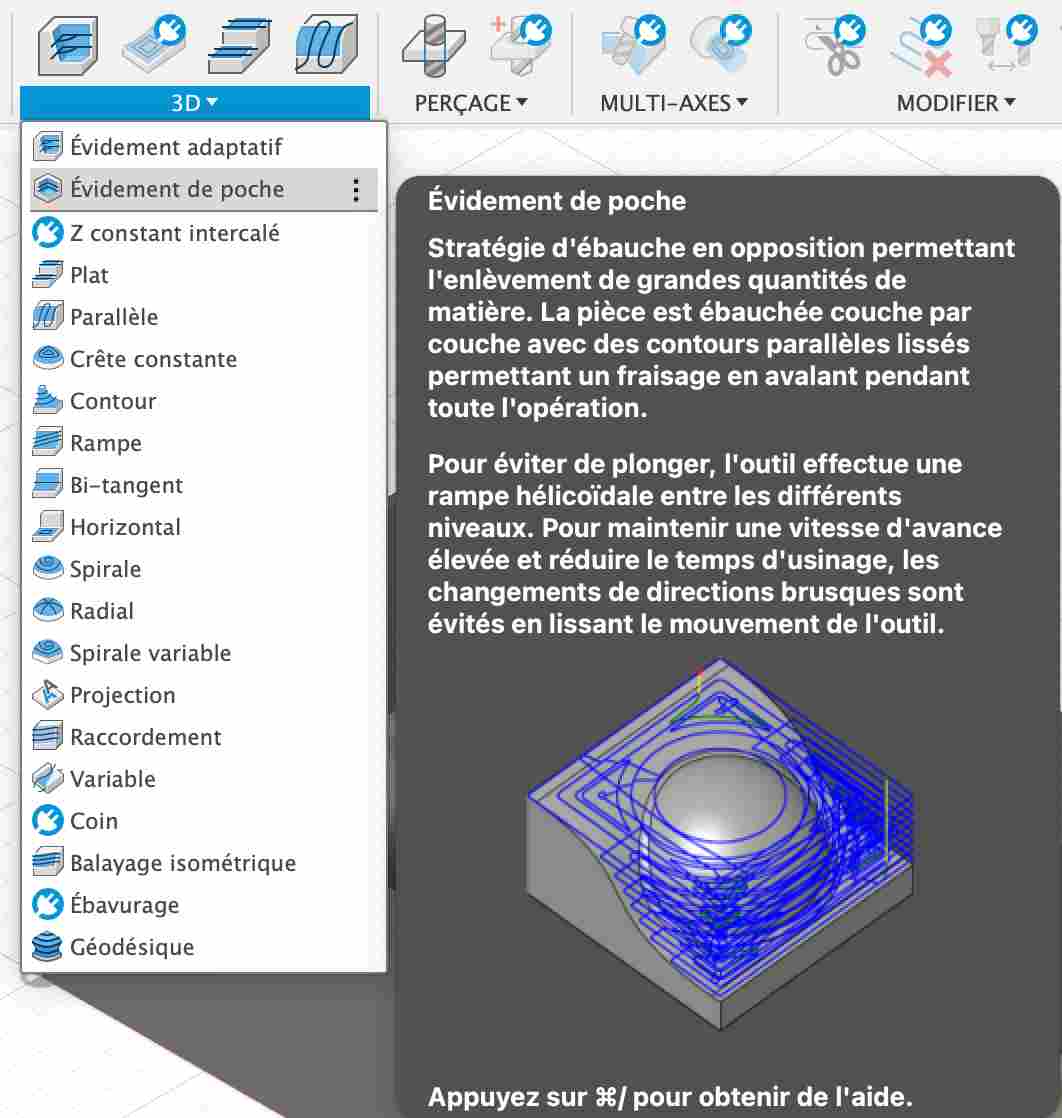
his step is not intended to produce a satisfactory rendering, but only to roughen the surface in order to remove material for the finishing steps. I performed this action with a 6mm milling cutter from Sorotec with the parameters provided in the cutting parameters. There are no parameters dedicated to wax machining, so I decided to use those for soft plastics, which were probably too fast because the milling cutter made a lot of noise. I set the spindle speed to 24,000 RPM, which corresponds to the machine's maximum speed. As for the feed per tooth, it's the one recommended by the manufacturer for plastic, i.e. 0.09mm.
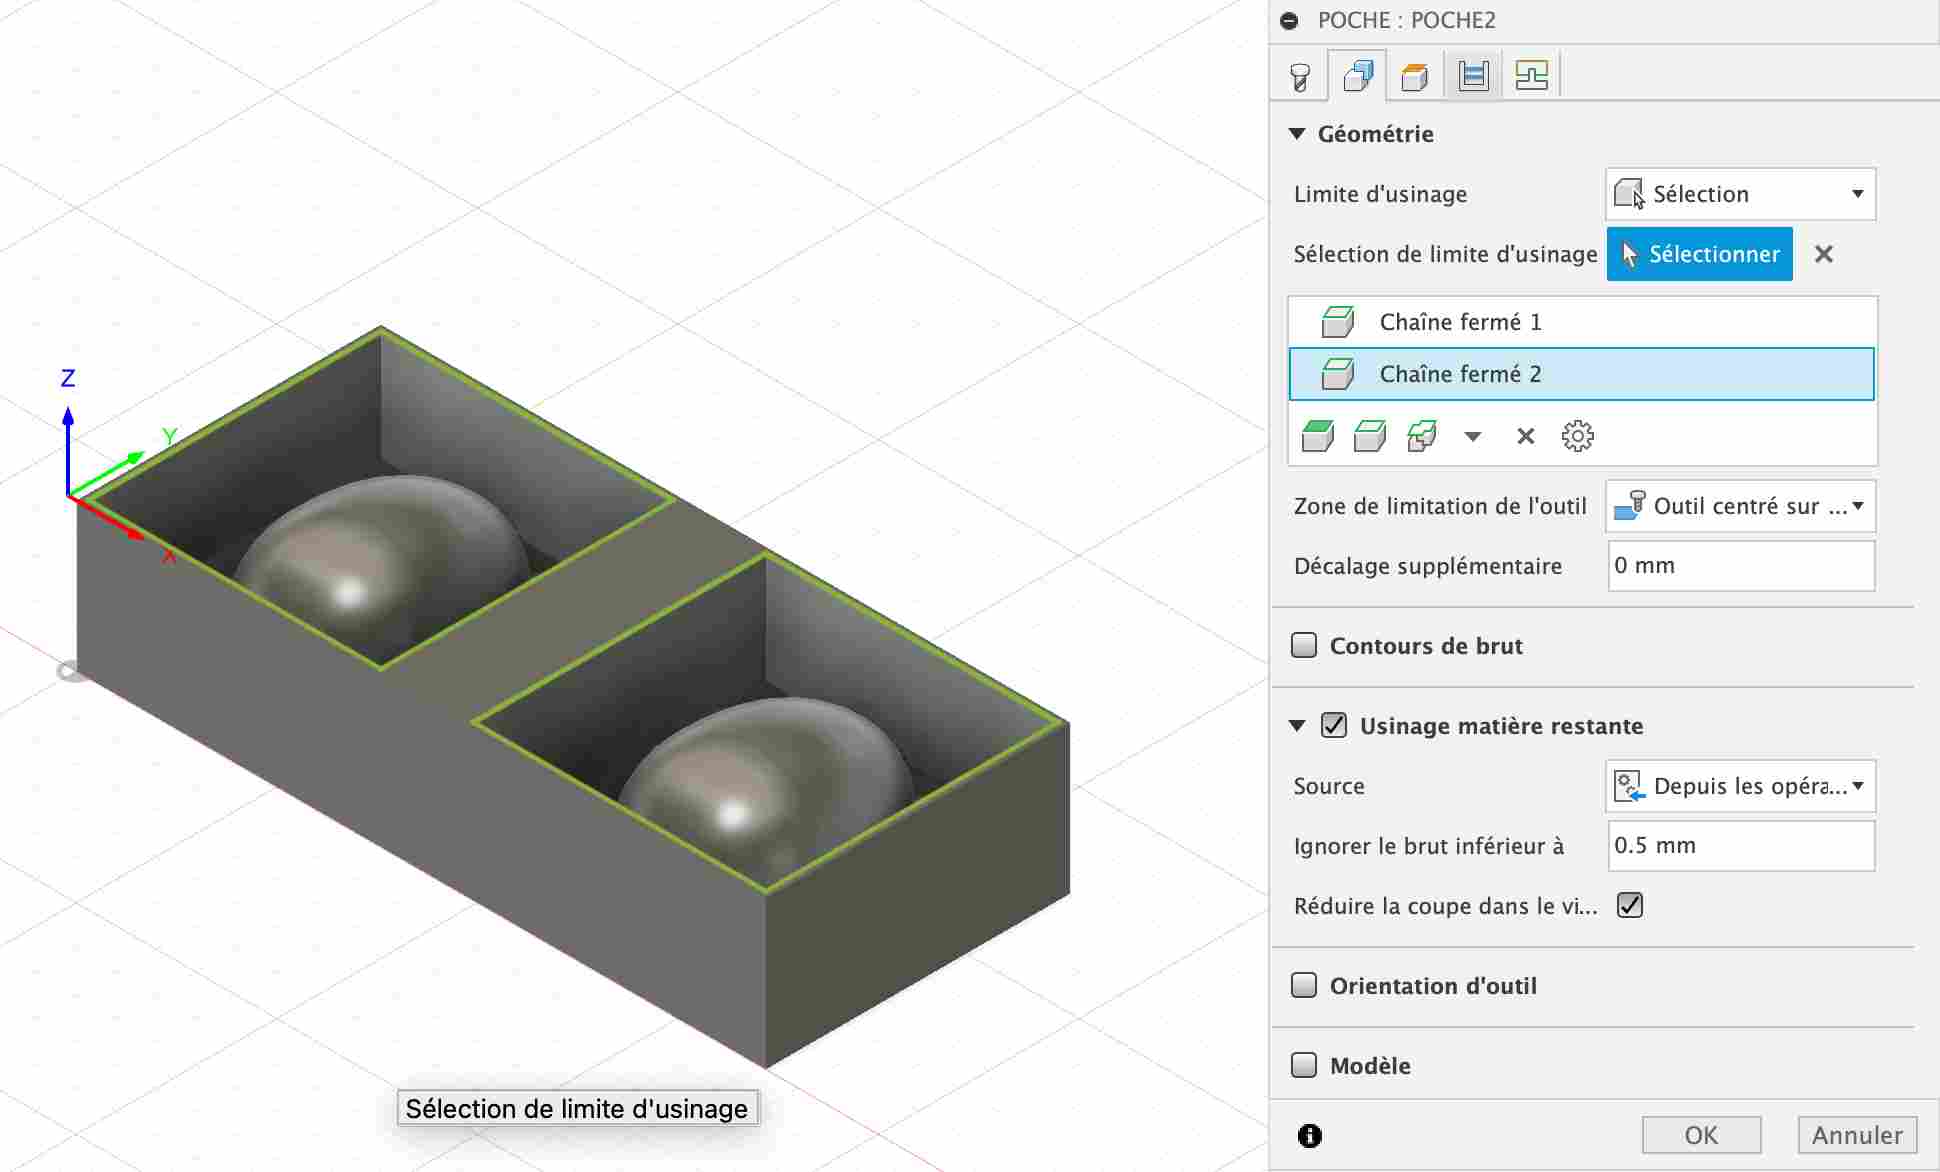
As the edges are curved, you need to select the top of the molds for milling so that it cuts all around. In the passes tab, you need to add an extra thickness to ensure you always have enough margin. In my case, I added 0.5mm radially and axially.

On the bonding tab, I've changed the type of ramp, which was originally a helix, but which was taking an extremely long time, and by switching to plunge mode, the machine went much faster, which wasn't necessarily dangerous since the material is wax and not very hard. By changing the ramp mode, I went from 40 minutes of milling to 4 minutes, which is a huge difference.
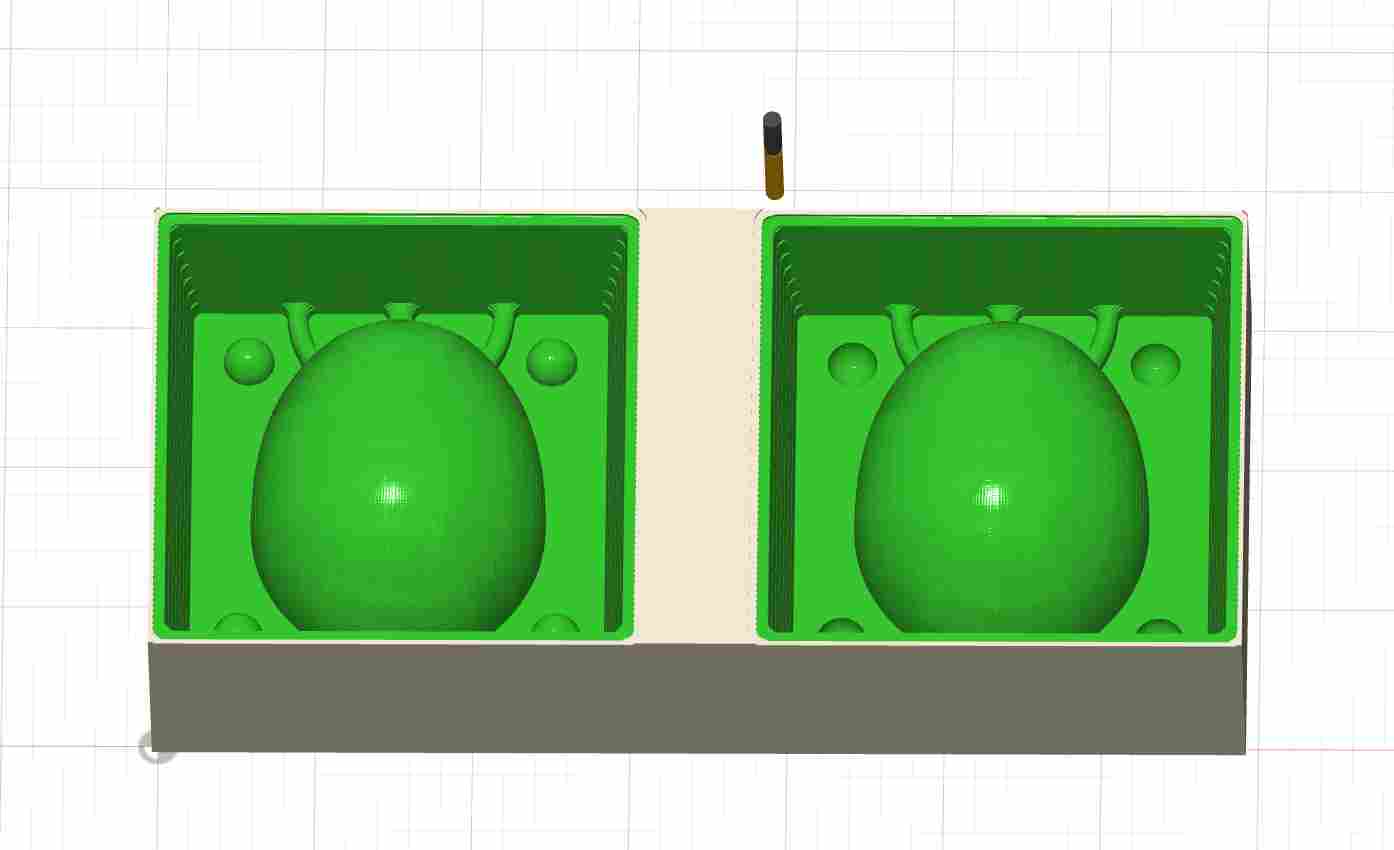
For finishing, I chose to use the parallel mode. This allows parallel passes to be made with maximum precision, in order to reproduce the desired shape. As for the cutter, I chose to use a 3mm cutter, using the same parameters as Théo Gauthier, a former Agrilab student. He had used the same milling cutter as me and the quality of his milling was very satisfactory. So I had a spindle speed of 10,000 RPM and a feed per tooth of 0.075 mm. As for the geometry, we'll select the same zones as for the pocket.
As for the tab passes, you can choose which finish you're going to use, but being limited by time I opted for a 0.5mm finish with perpendicular passes. I should have chosen a lower overlap by removing the perpendicular passes, which didn't have a considerable effect. The simulation output was as follows, showing a total milling time of 54 minutes.
If you'd like to reproduce this mold at home, you'll find the fusion file below:
Milling
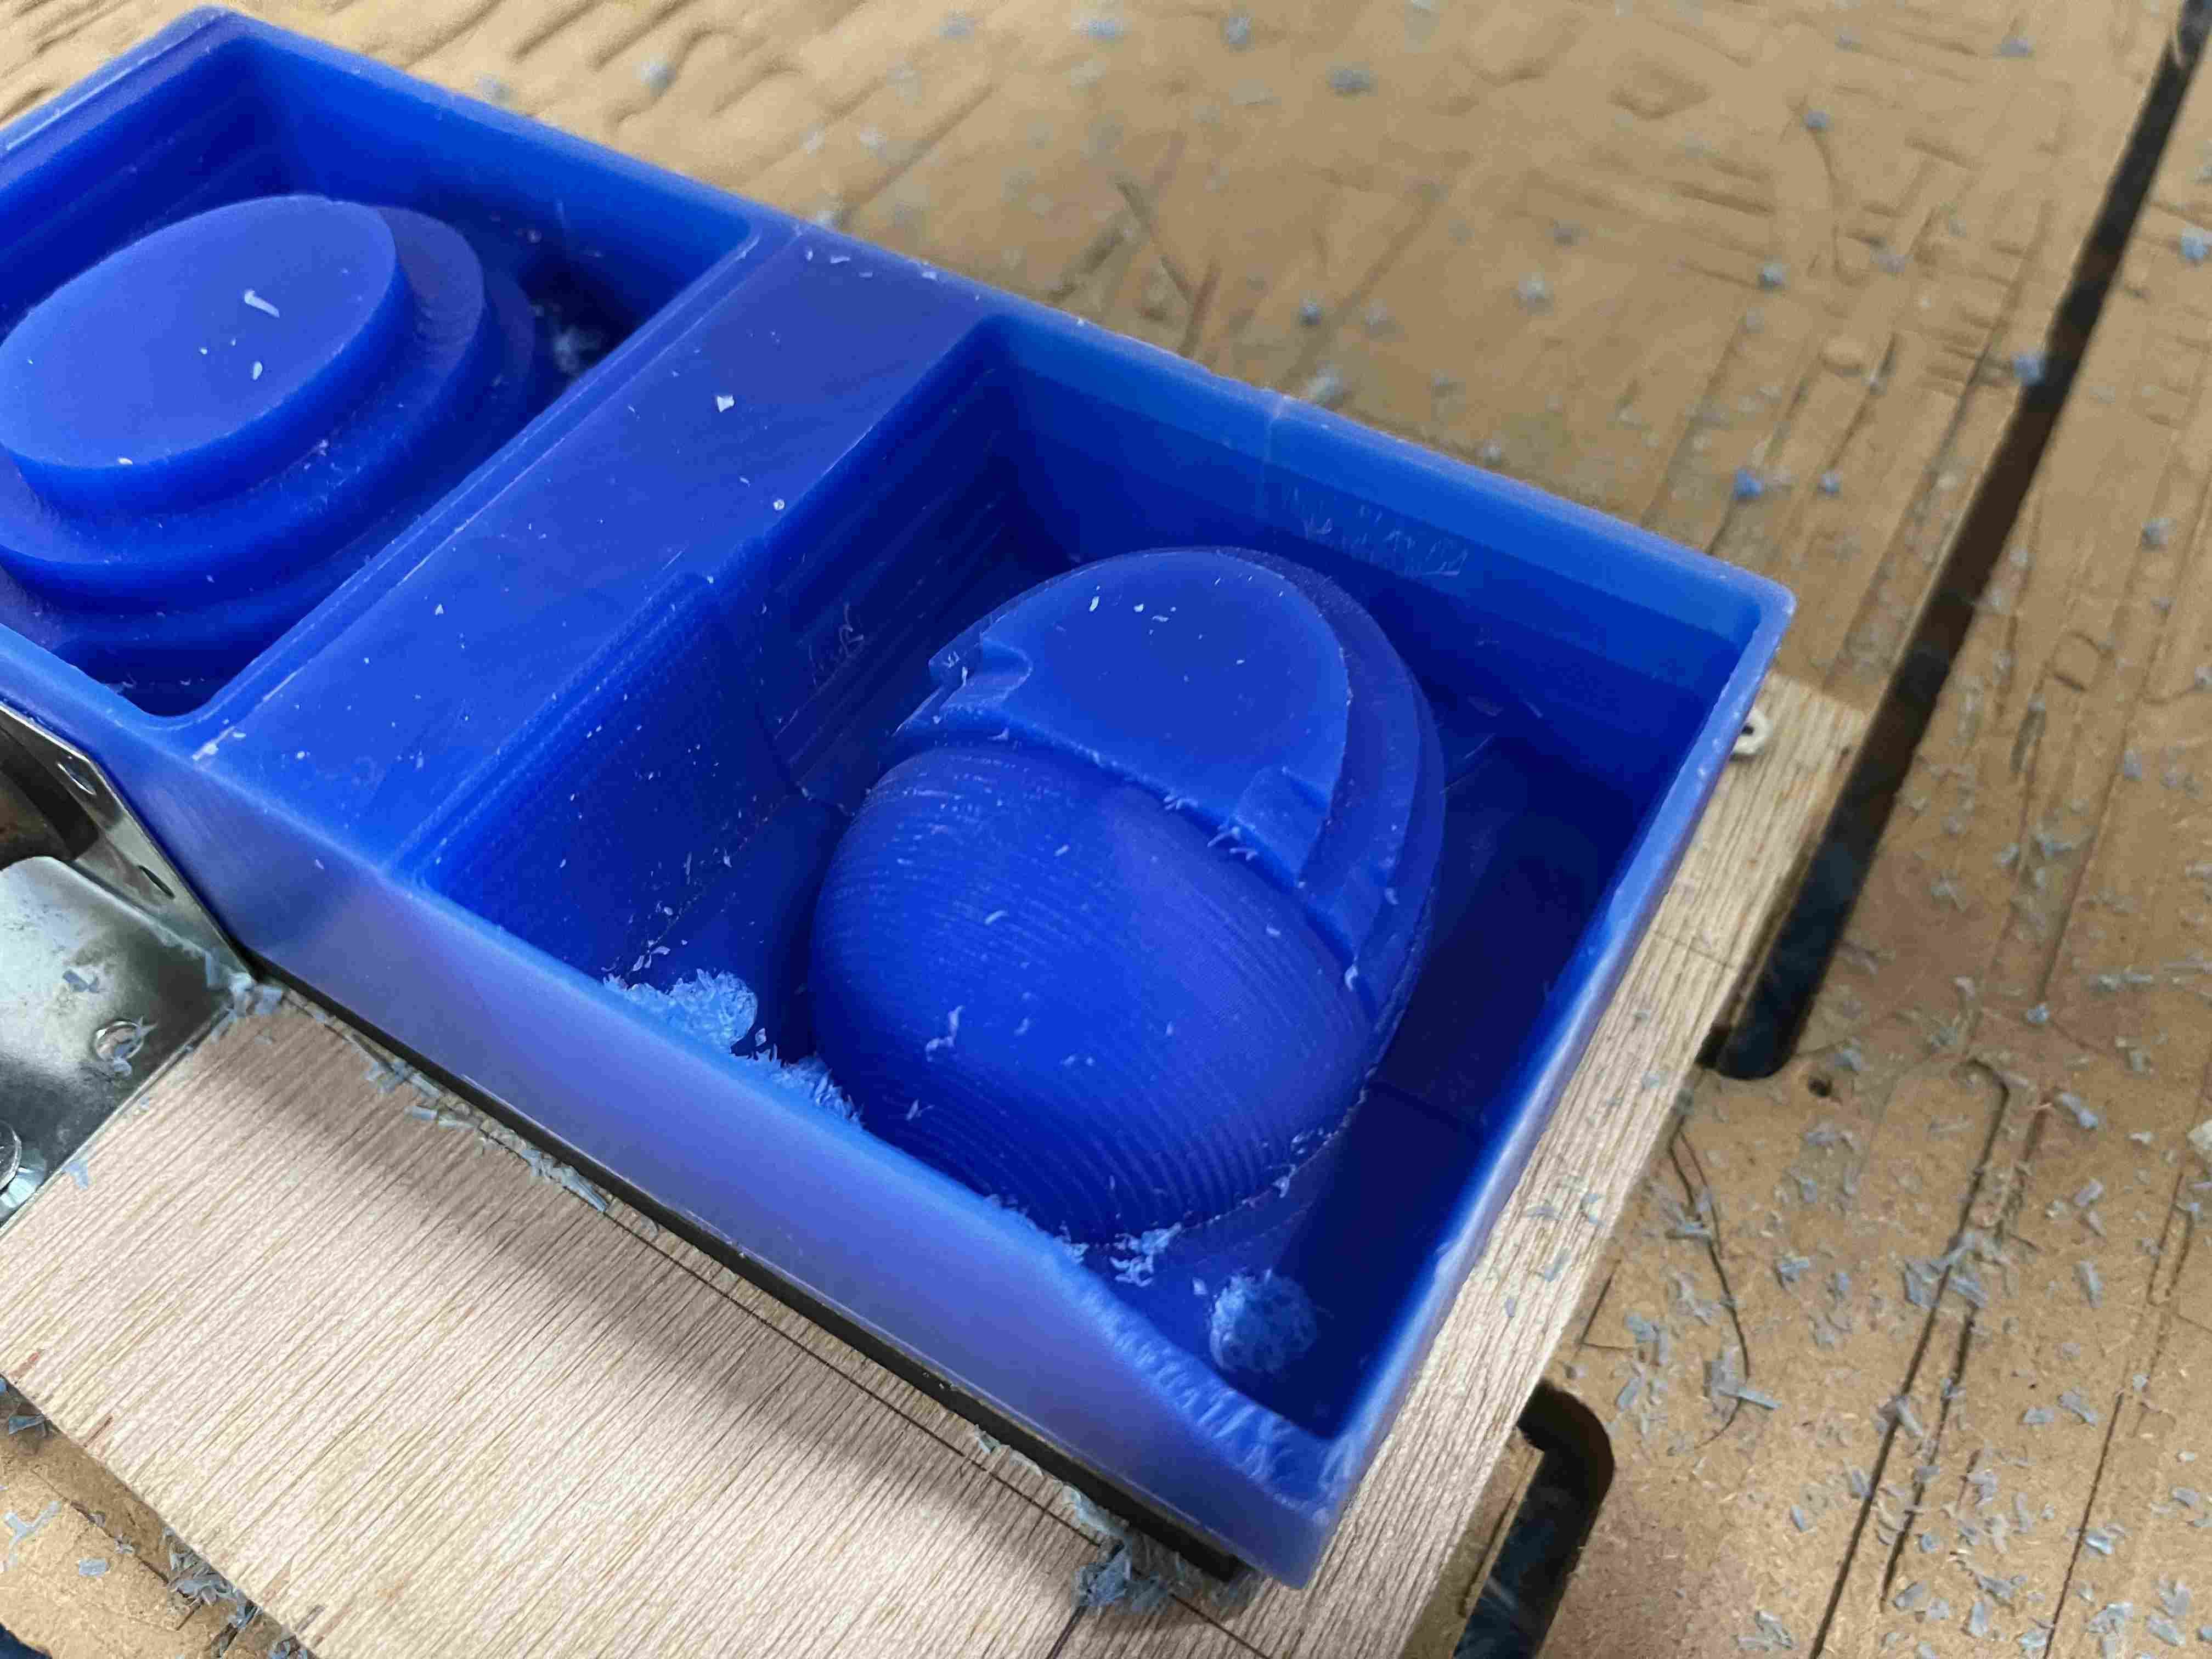
Once the file was ready, I moved on to the milling stage, which wasn't as easy as I'd thought. It took me a long time to realize my origins, as my design corresponded exactly to the size of the cobblestones, and I only had a 2mm margin. As a result, some of the pieces fell off when I approached the milling cutter.
Once the first pass was finished, I was able to change spindle to get my 3mm milling cutter. When I started milling, I broke the cutter, and when I set up my tool, I entered a 0 minus, which meant that it didn't go fast enough and broke when it came into contact with the wax.

When I restarted milling, I forgot to switch on the vacuum, so my sacrificial layer wasn't pressed against the CNC work surface and I was milling dopnc too high. I had to redo my Z and restart milling with the vacuum. I then tried again, and while milling, the machine stopped for no reason. When I restarted, the milling went as planned and milled all the material well. I stopped the milling while it was making the perpendicular pass, as I could see almost no difference in the shape of the egg, and the already thin walls became even thinner.
If I had to mill again, I'd make sure I had a safety margin to avoid having walls that were too thin. In order to correct my mistake, and to gain height as the limit of my egg is close to the edge, I had to create a wooden formwork to close my wax block. Unfortunately, I made it too small for our paving stones, but you can find the fusion file here. here.
Negative manufacturing
Once everything was ready, I moved on to casting my negative. I'd have liked to make my mold with food-grade silicone, but we didn't have enough of it, so I used Smooth-Sil 940, which I'm used to and which is fairly easy to use. I repeated the same operations as in the test above, but with larger quantities. I used almost 600gr of mixed product in total (separated into two cups) to fill my mold, and I didn't have too much. I vacuum-packed twice before pouring, then vacuum-packed three times once the mixture was poured and there were hardly any bubbles left.
Once vacuum bagging was complete, I poured my cups into my wax positive to create my negative. As it was a large quantity, I had to wait until the following day to unmold, even though I had poured my silicone around midday. Once my silicone was dry, I was able to proceed with demolding.
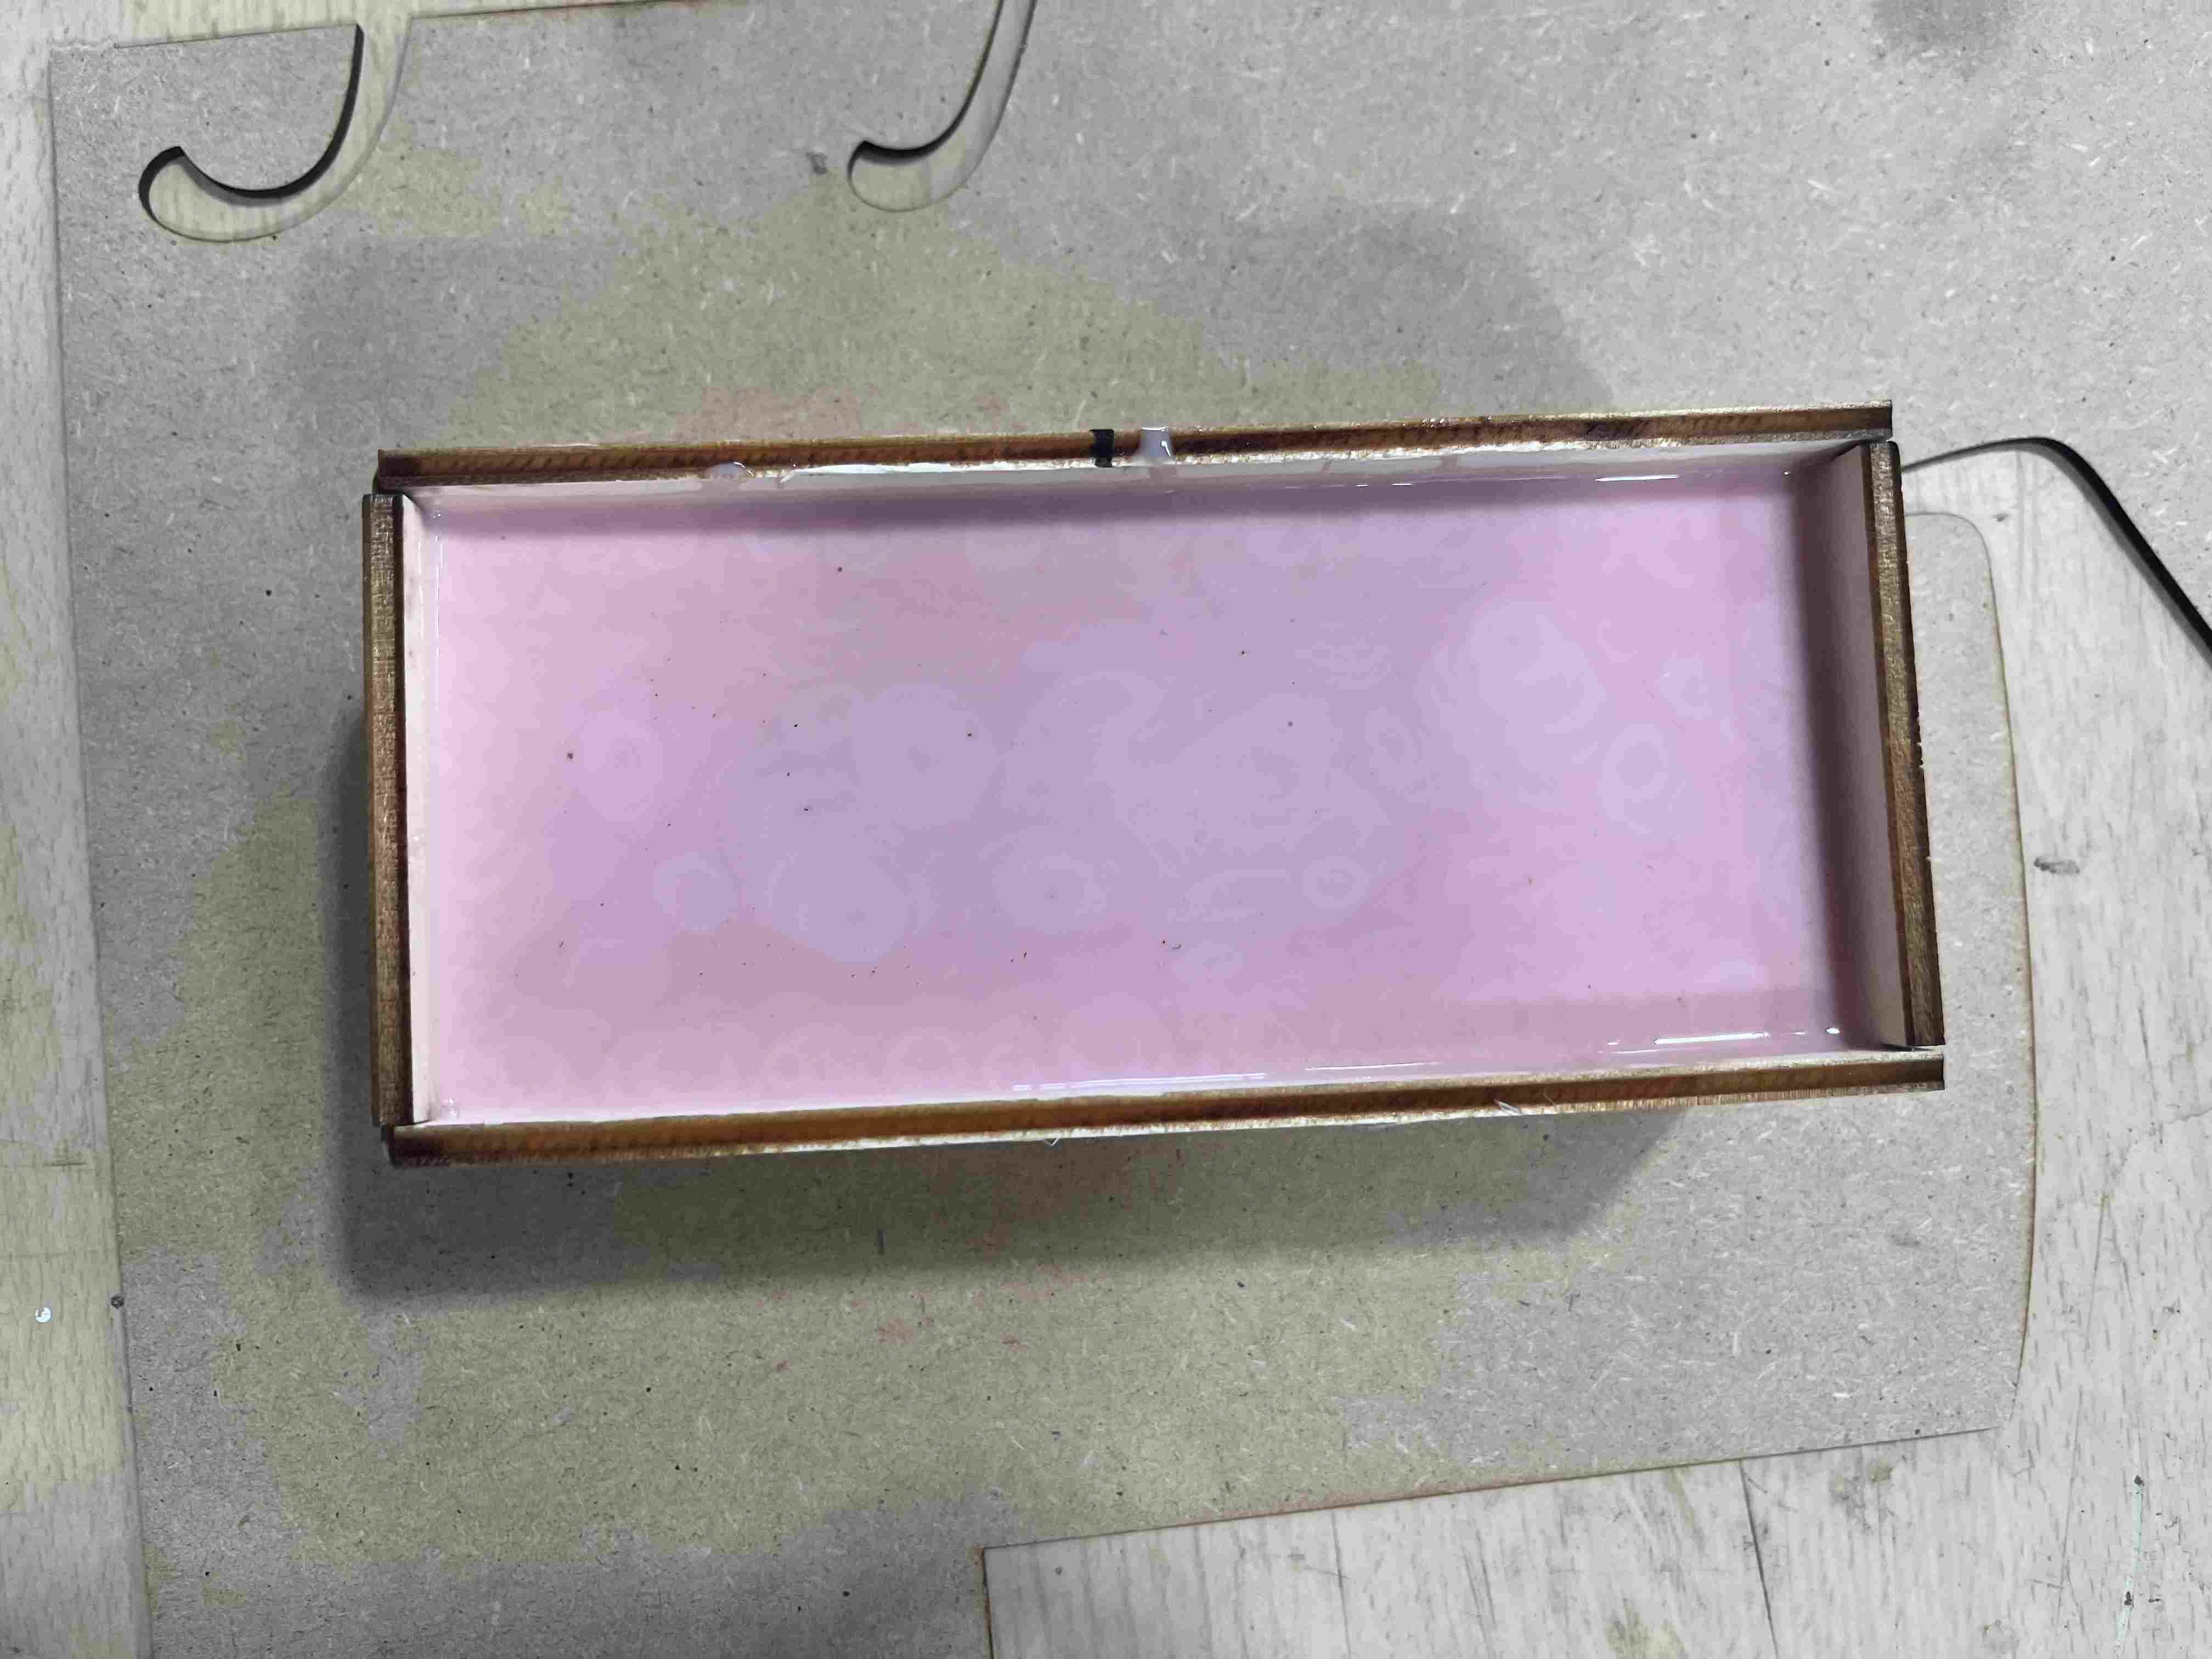
The idea of the formwork was good, but the choice of material wasn't the best: 4mm poplar planks. This material is a raw wood where you can see the wood grain. The silicone impregnated itself into the grain and was quite difficult to remove. A smoother material like MDF or Plexiglas would have been more appropriate. Nevertheless, I managed to unmold it without too much trouble and without breaking anything.
Once my mold was unmolded, I used a cutter to remove the silicone that had passed through the gaps that had formed between the wax and the cauffrage. I also enlarged the filling hole to make it easier to fill the mold.
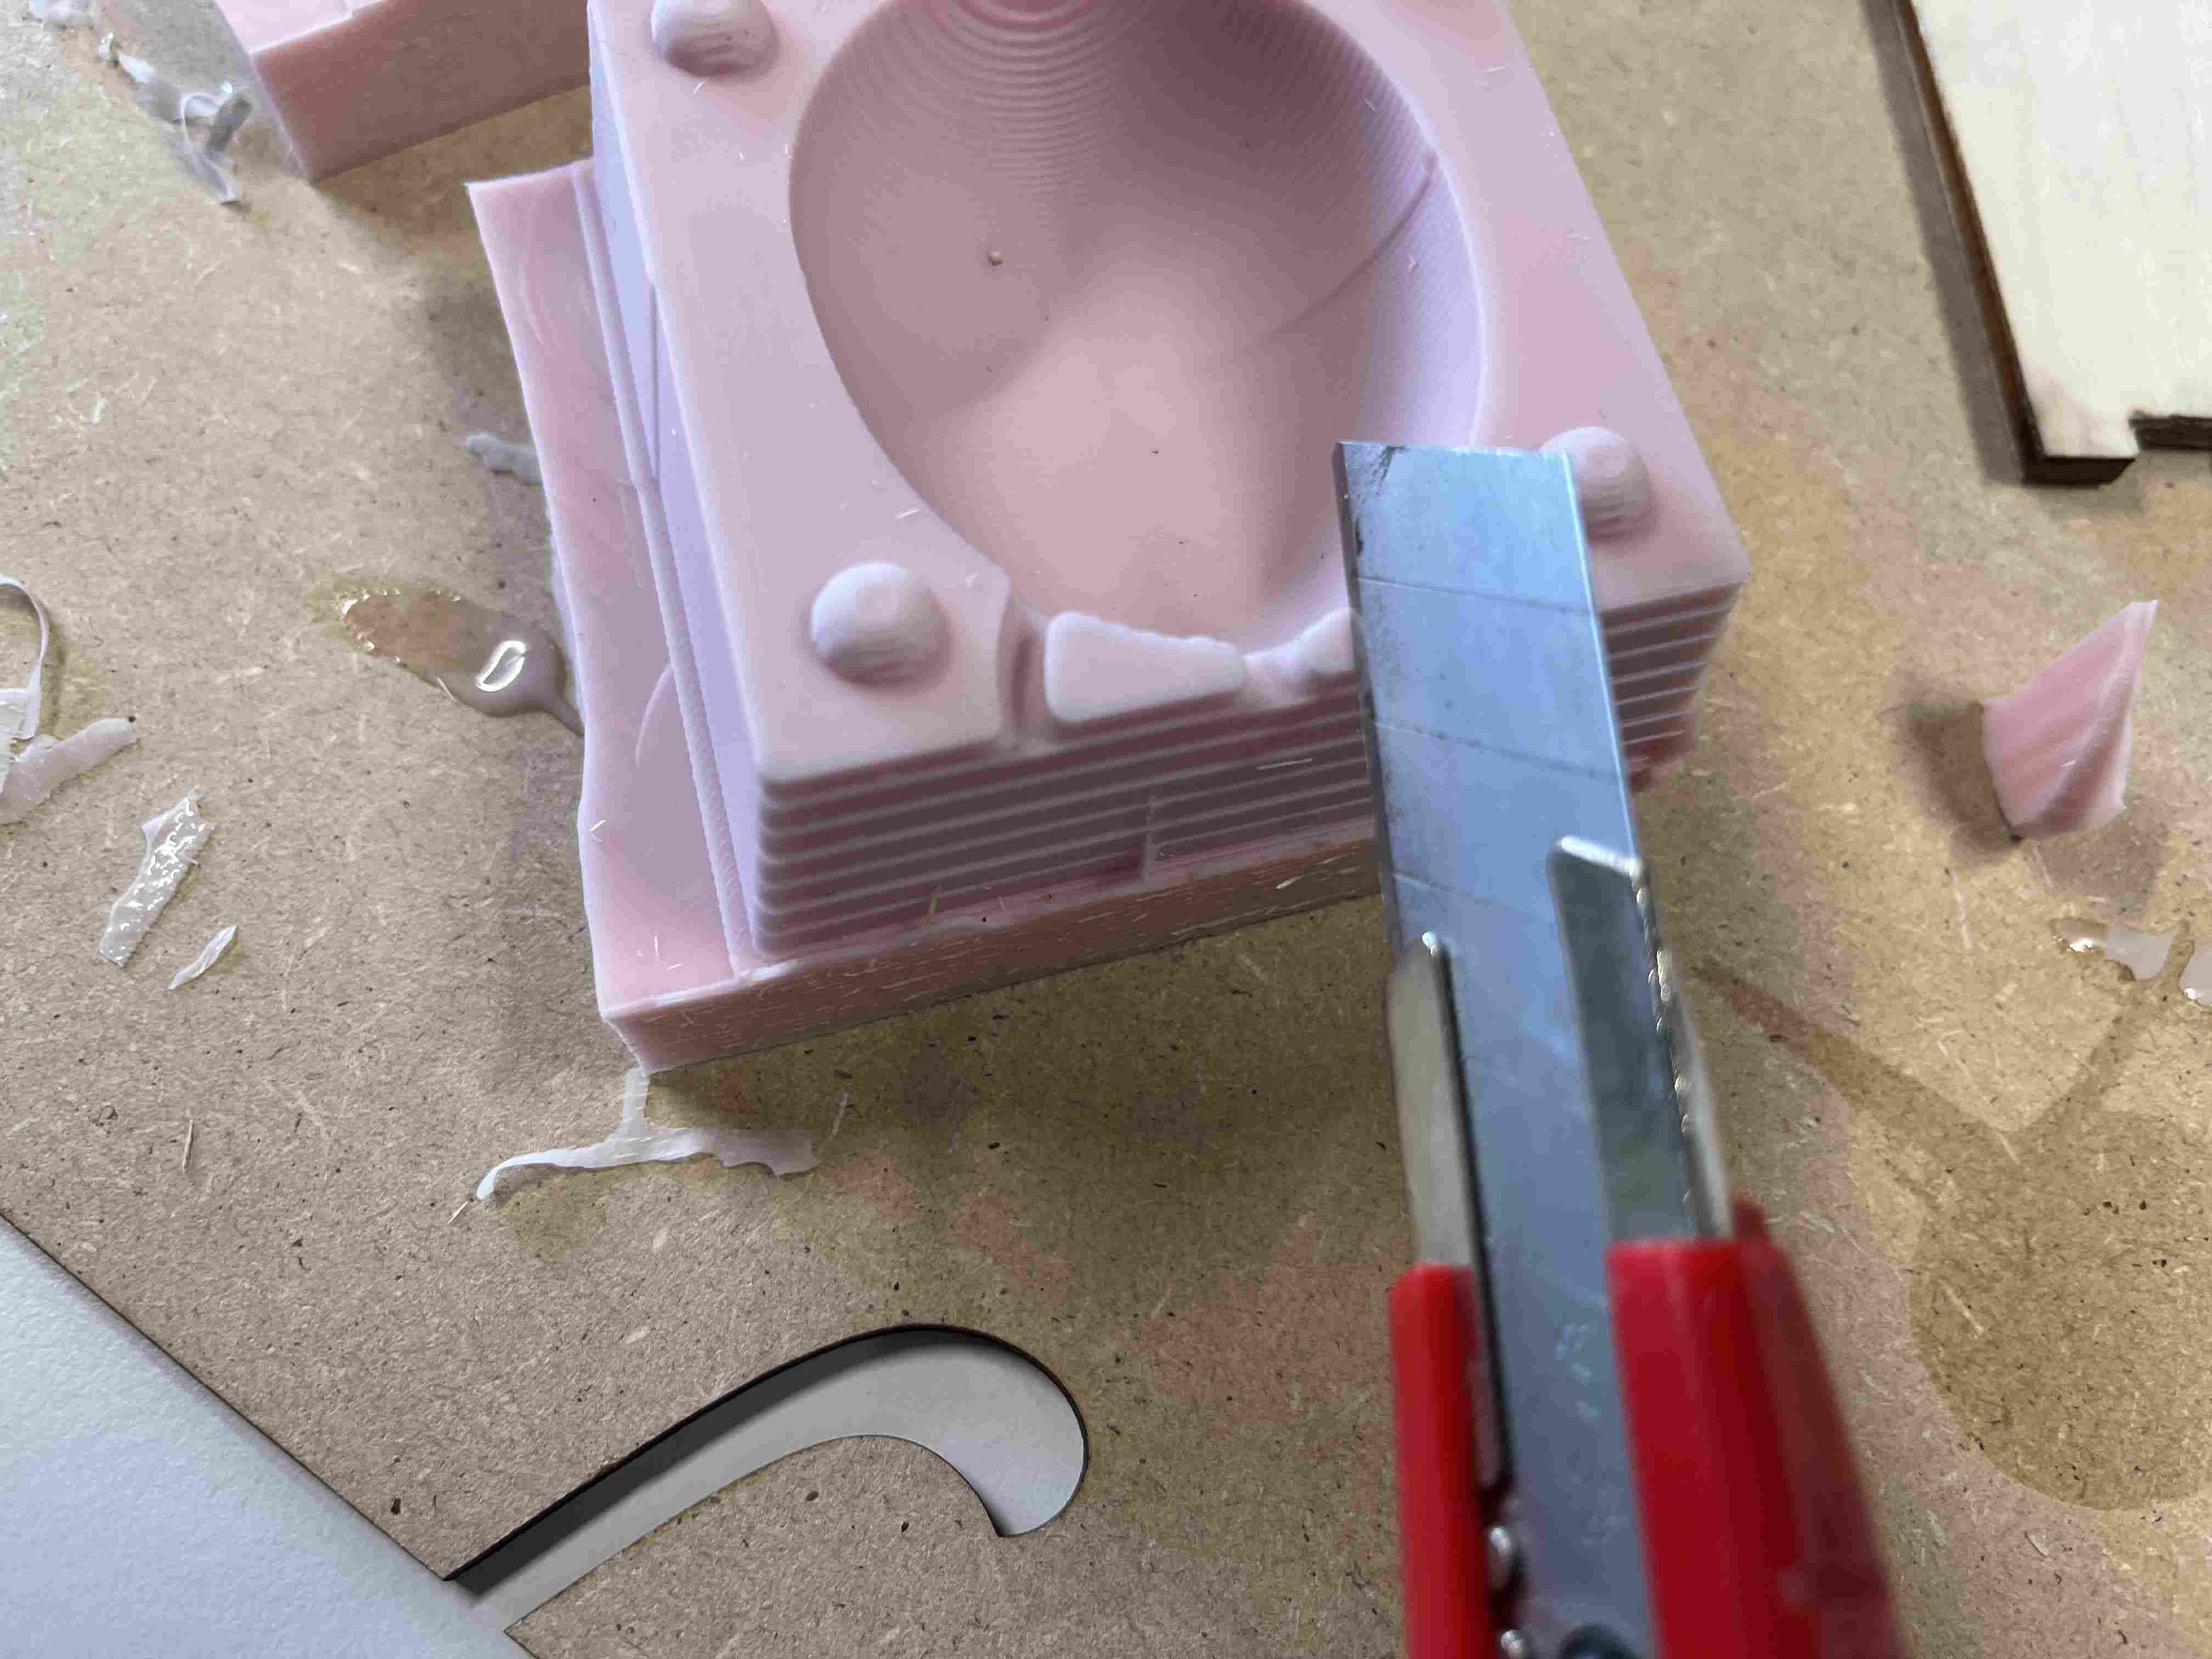
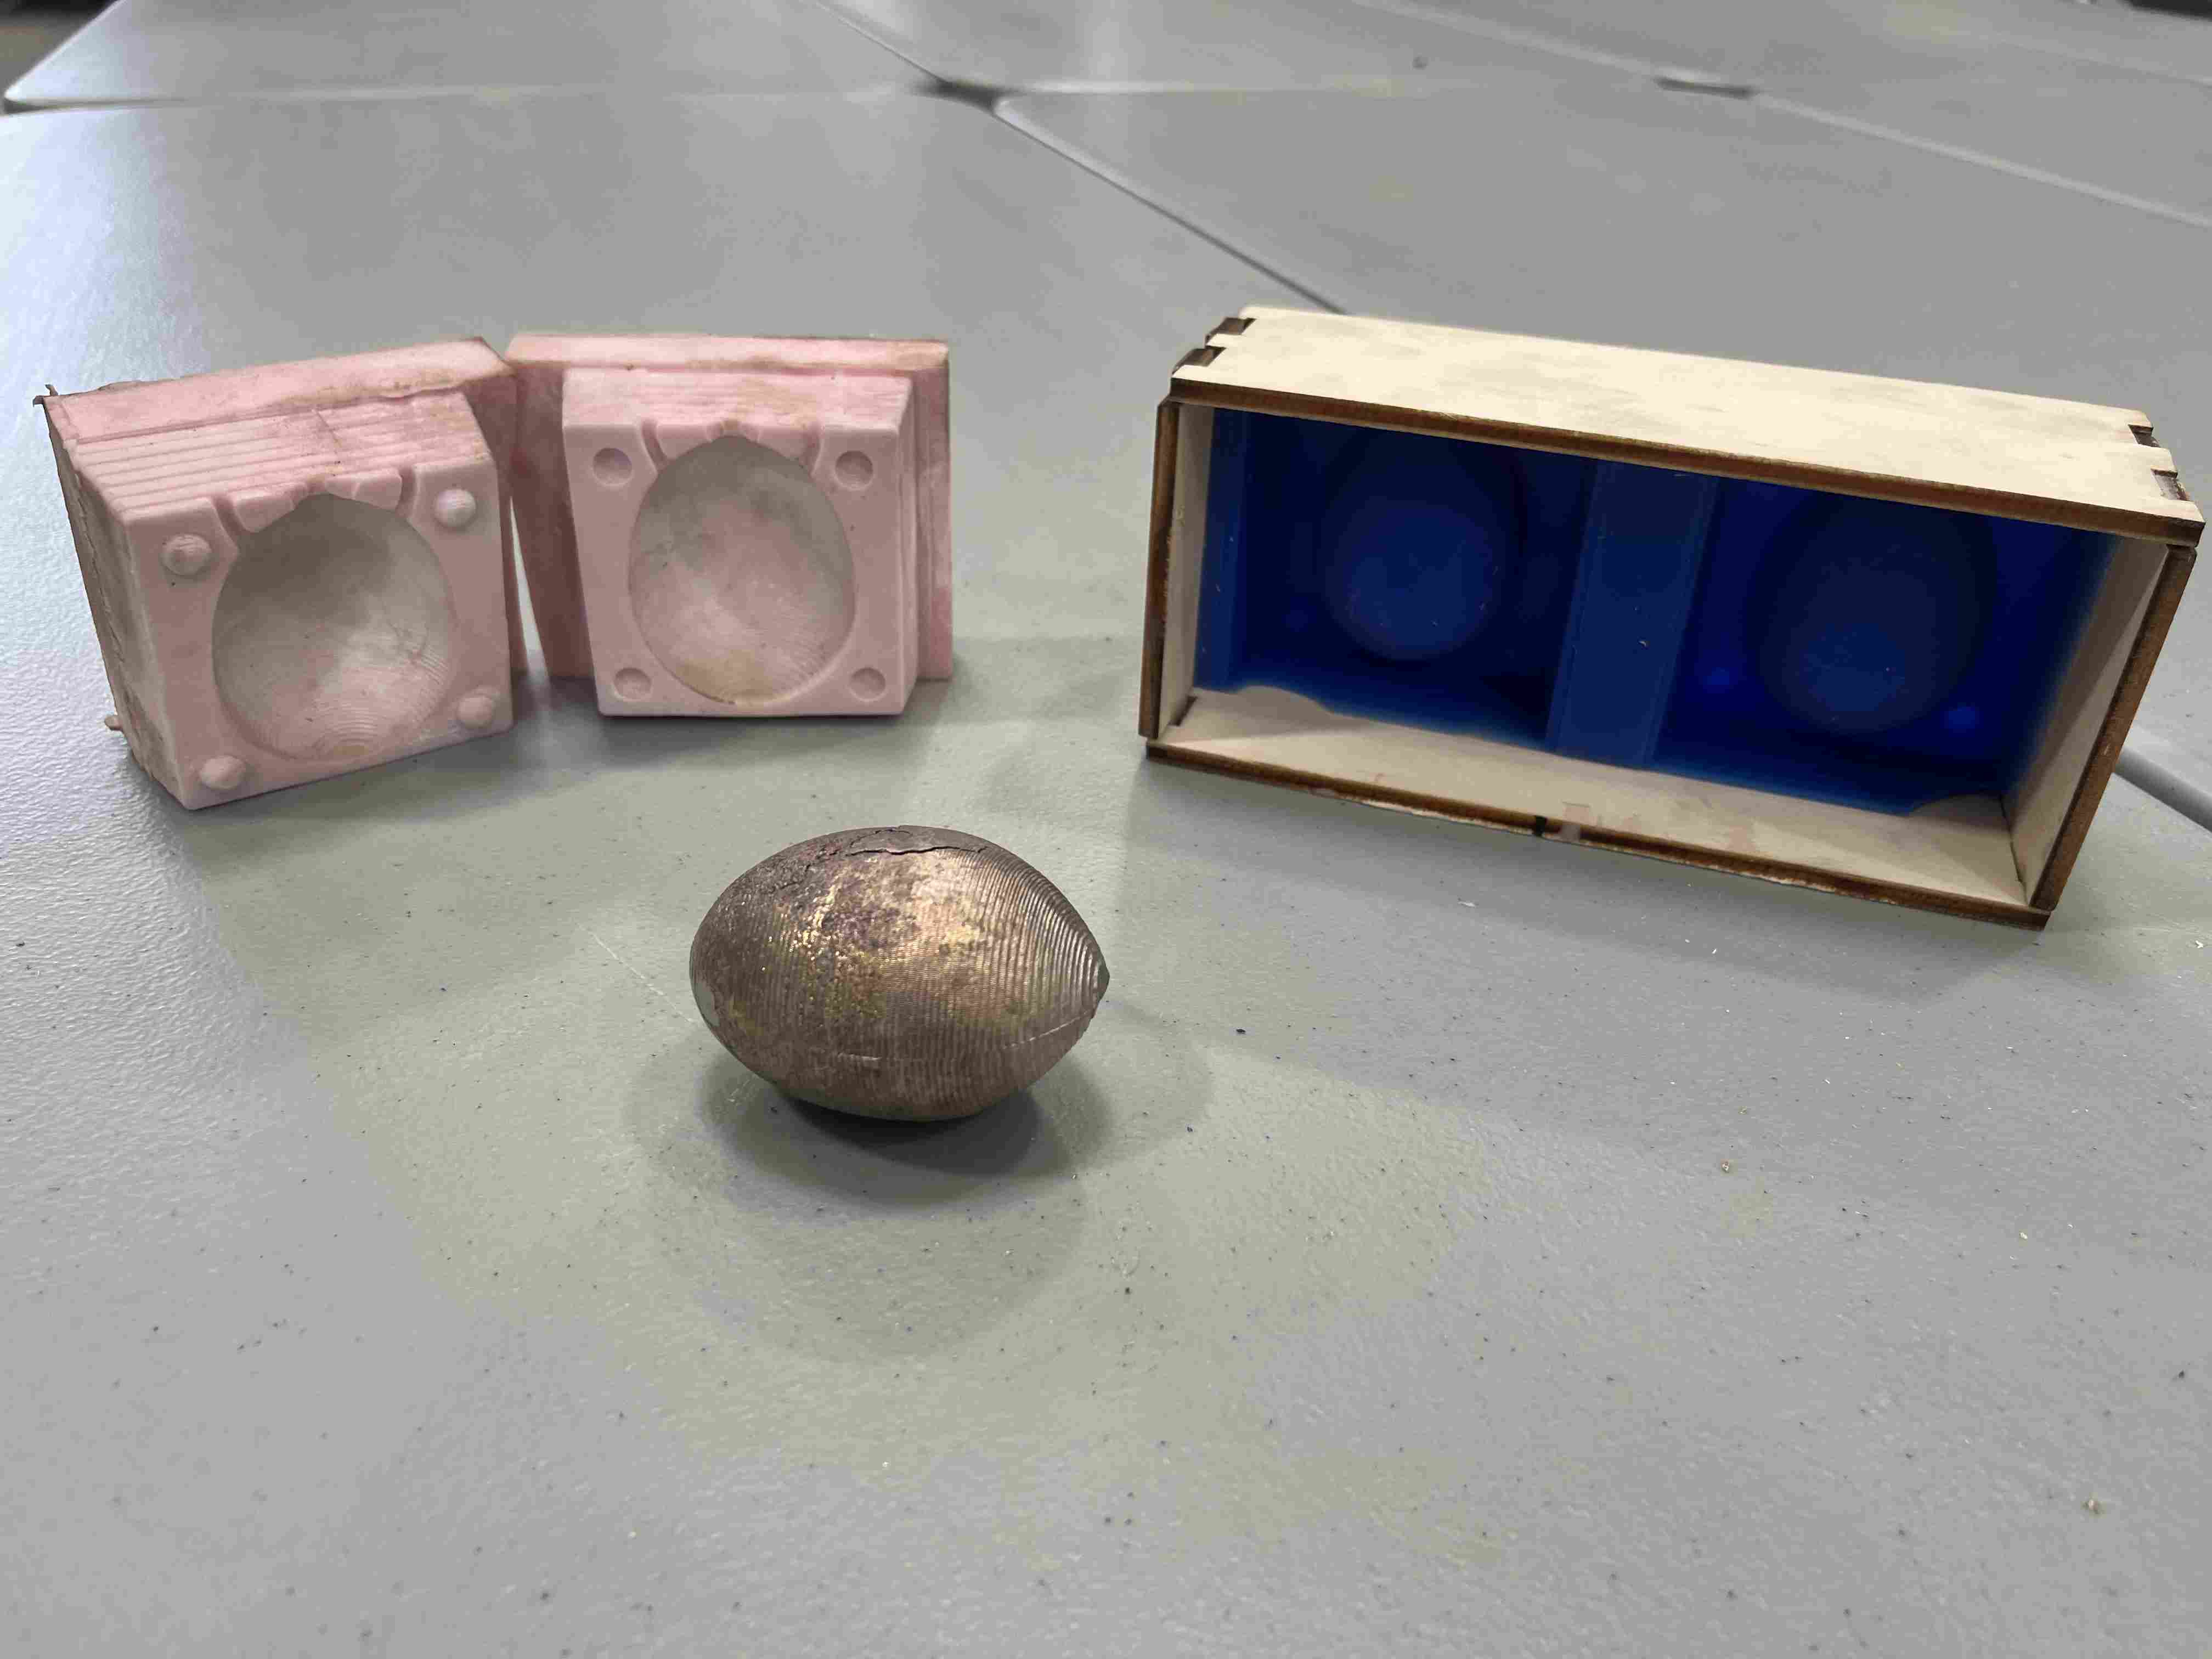
Once my mold was ready, I cut the two parts apart to check that they fitted together. Once ready, I put some talcum powder on top to protect my mold before pouring. I crimped my mold with clamps to keep it closed. To estimate the capacity of my mold, I filled it with water and measured its volume. I determined that I had a capacity of around 70ml.
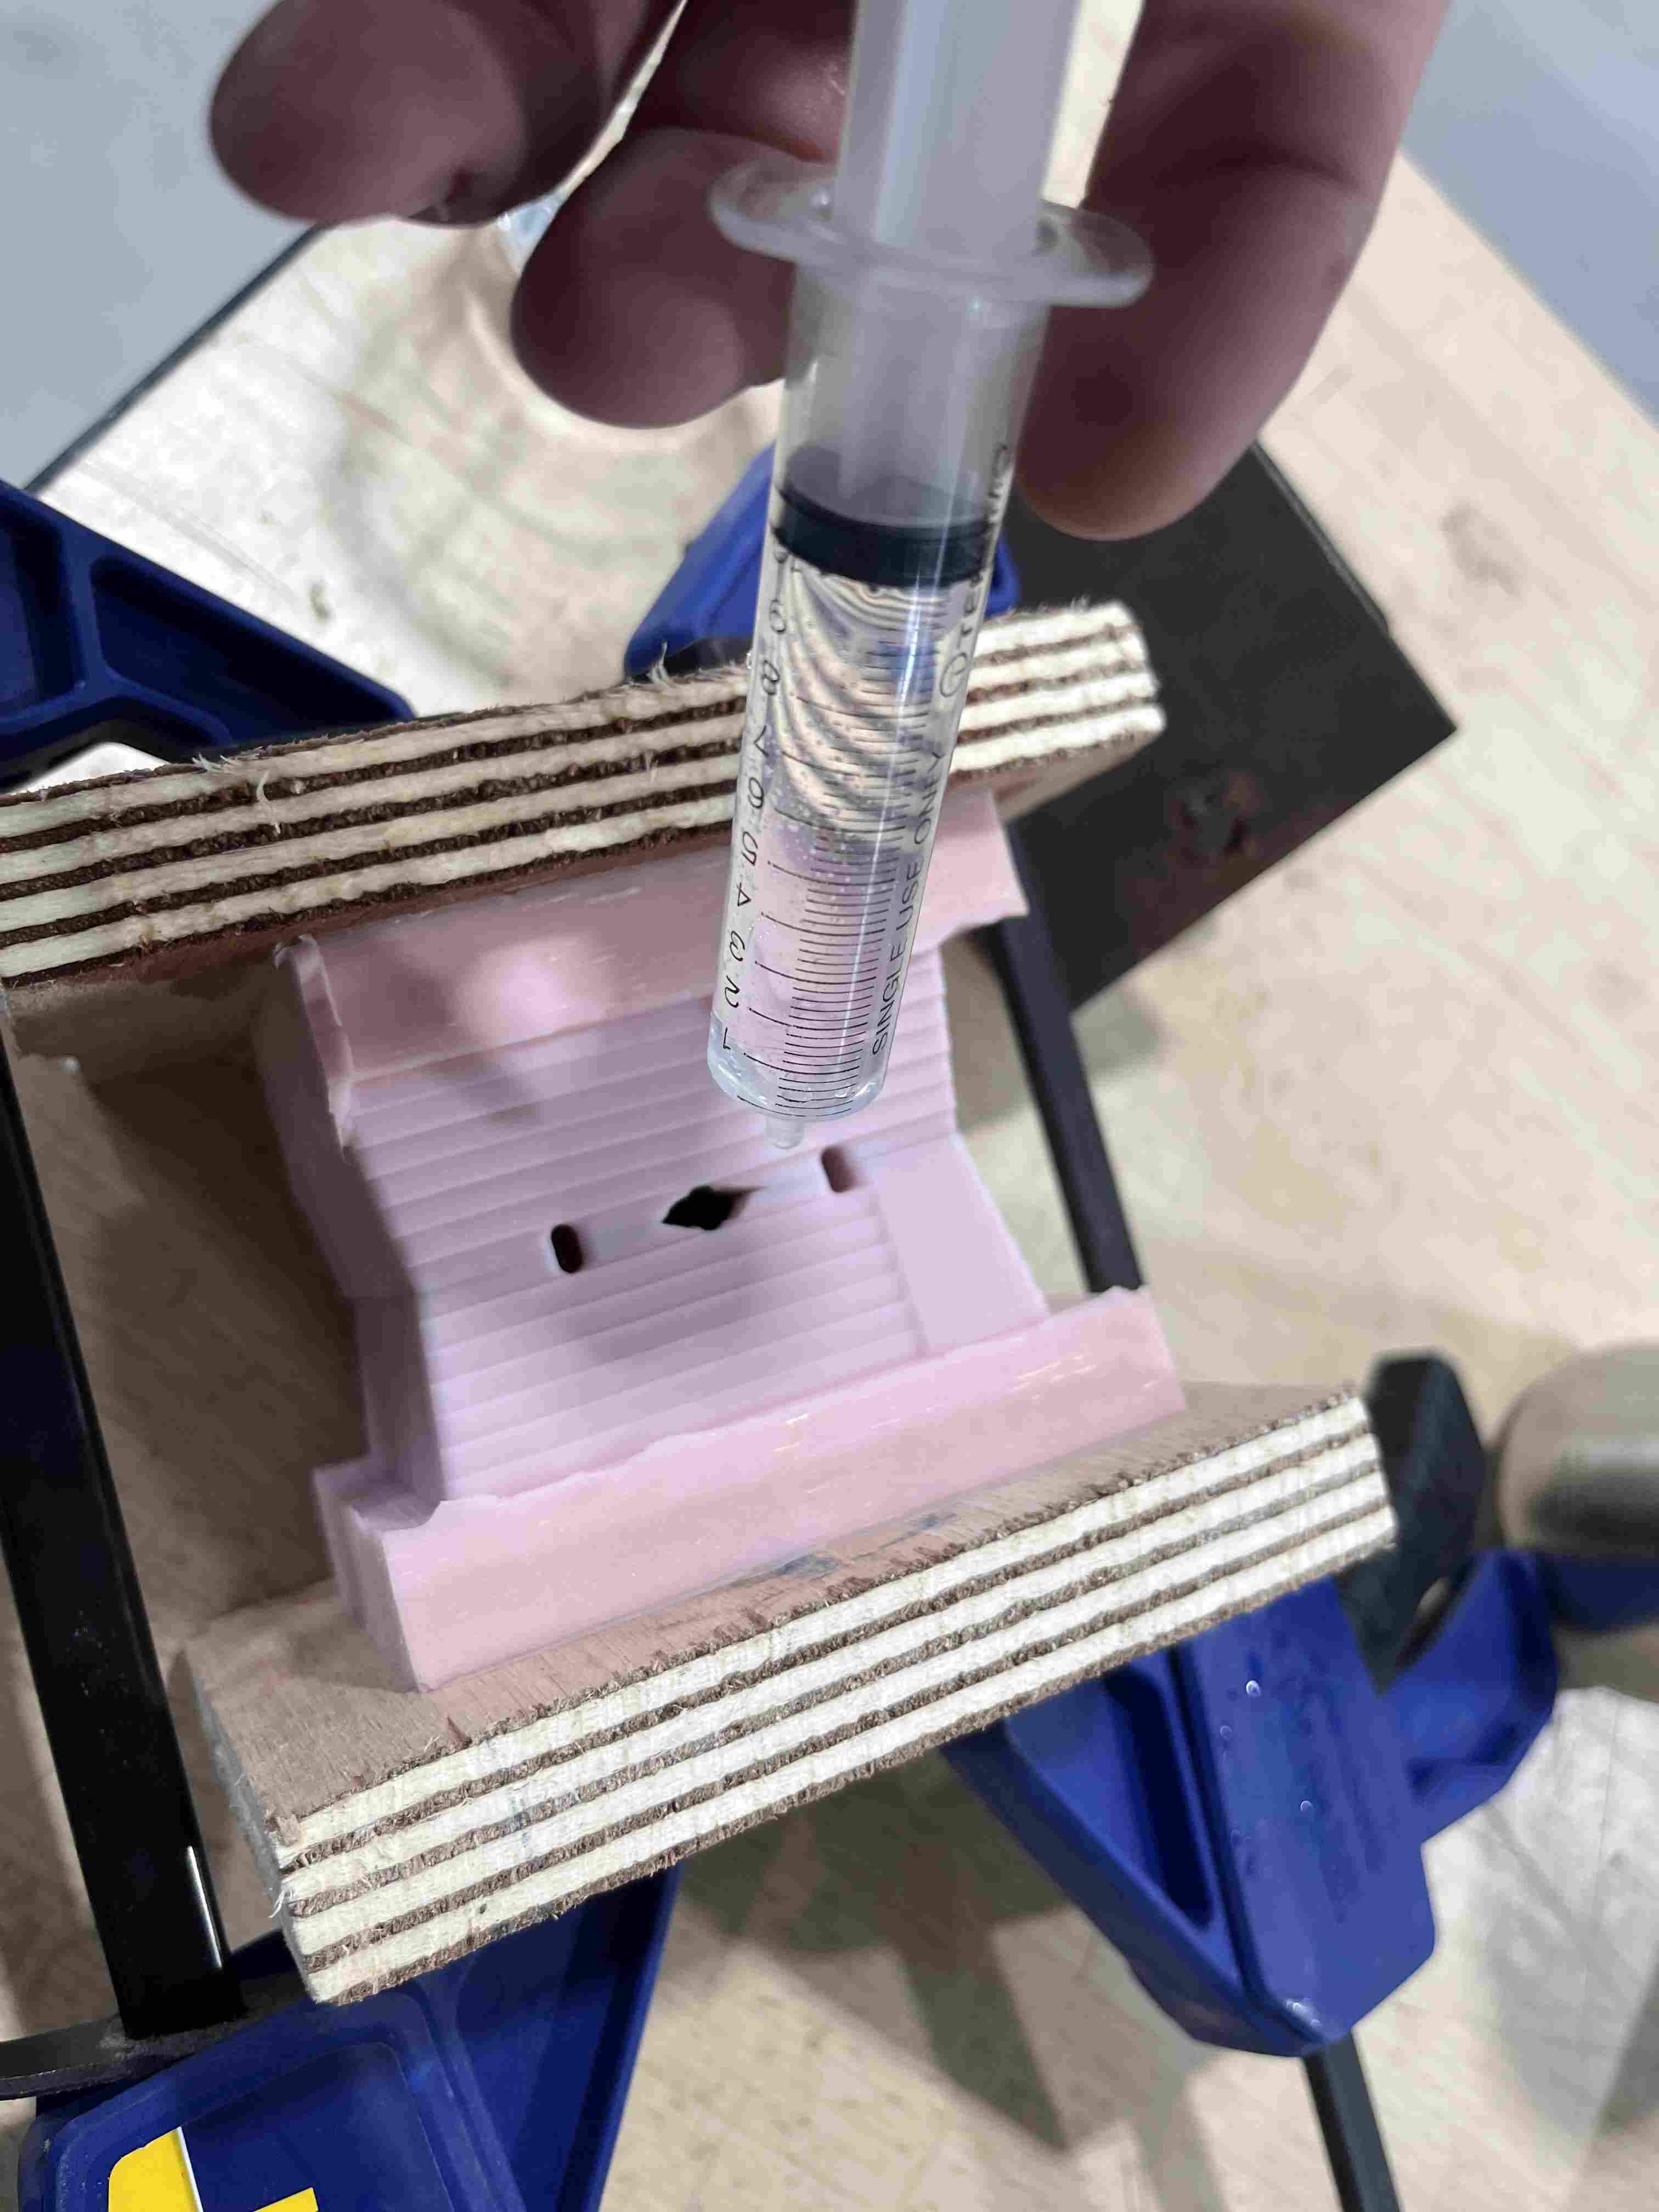
I then moved on to pouring the bismuth into my mold. I chose to use this material because it's very quick to use and takes very little time to dry, unlike all the others we tried. On the other hand, the size of my mold required a large quantity of bismuth and I had to pour it 3 times, adding extra bismuth each time to get the required quantity, but I finally succeeded.
The unmolding stage was a failure; when I removed my egg from the mold, it was broken.
Half of it had solidified, but the second half broke. Bismuth is a metal that solidifies very quickly; when I cast it, the chimneys set in less than a minute, but when the metal shrank at the edges and resumed melting inside, the metal must have broken because of the contraction. In order to cast such a large volume successfully, we might need better poisitioned mantels, and perhaps find a way for the metal to come down in temperature more quickly. We could also cast it in two parts, open at the top, so that it cools more evenly.
The material used to make the mold wasn't the right one either: it's too soft for such a heavy weight, so it deformed with the weight of the metal.
Here is the final result of my individual assignment this week
File
Egg moldFormwork box