Assignment
Individual Assignment:
- Design, build, and connect wired or wireless node(s) with network or bus addresses
Group Assignment:
Individual Assignment
- For this weeks assignment....I have been struggling. I feel that this is my weakest area as I have no prior experience with networking and I know I will need help. I have tried to follow several other students assigments to try to get a better understanding so I am following Adrian's documentation based on Neil's example from lecture to try to get something done here.
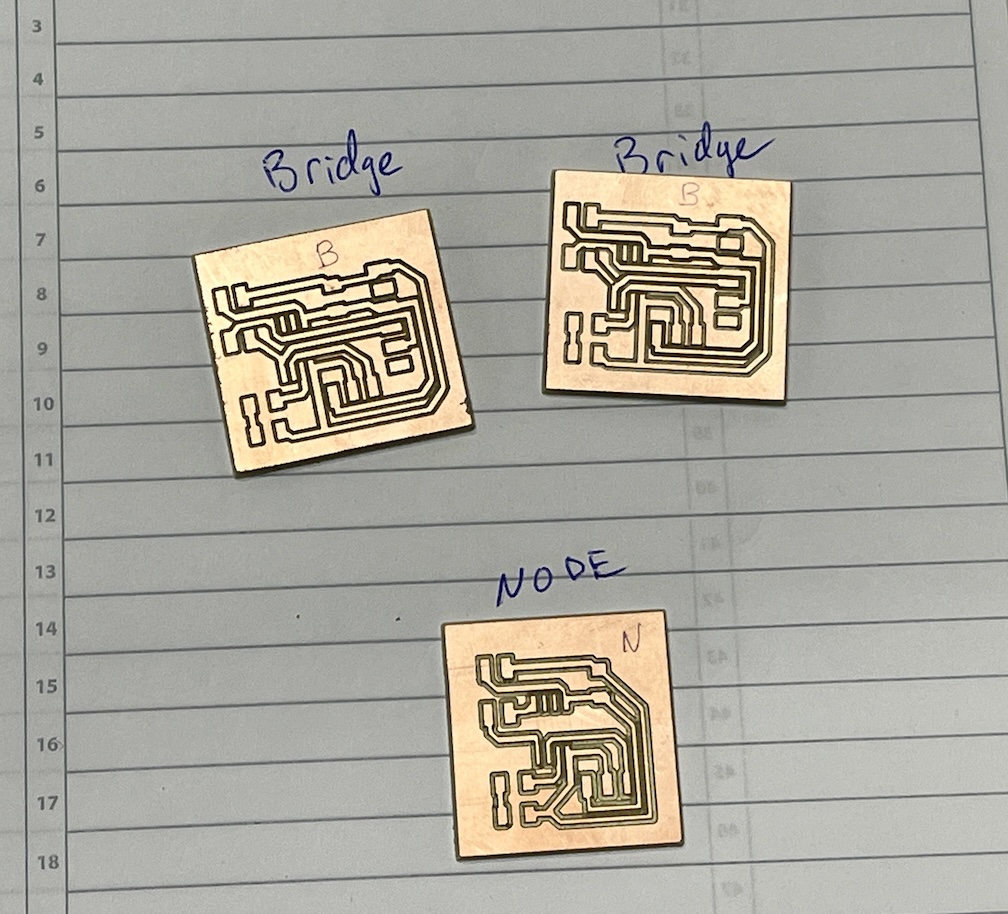
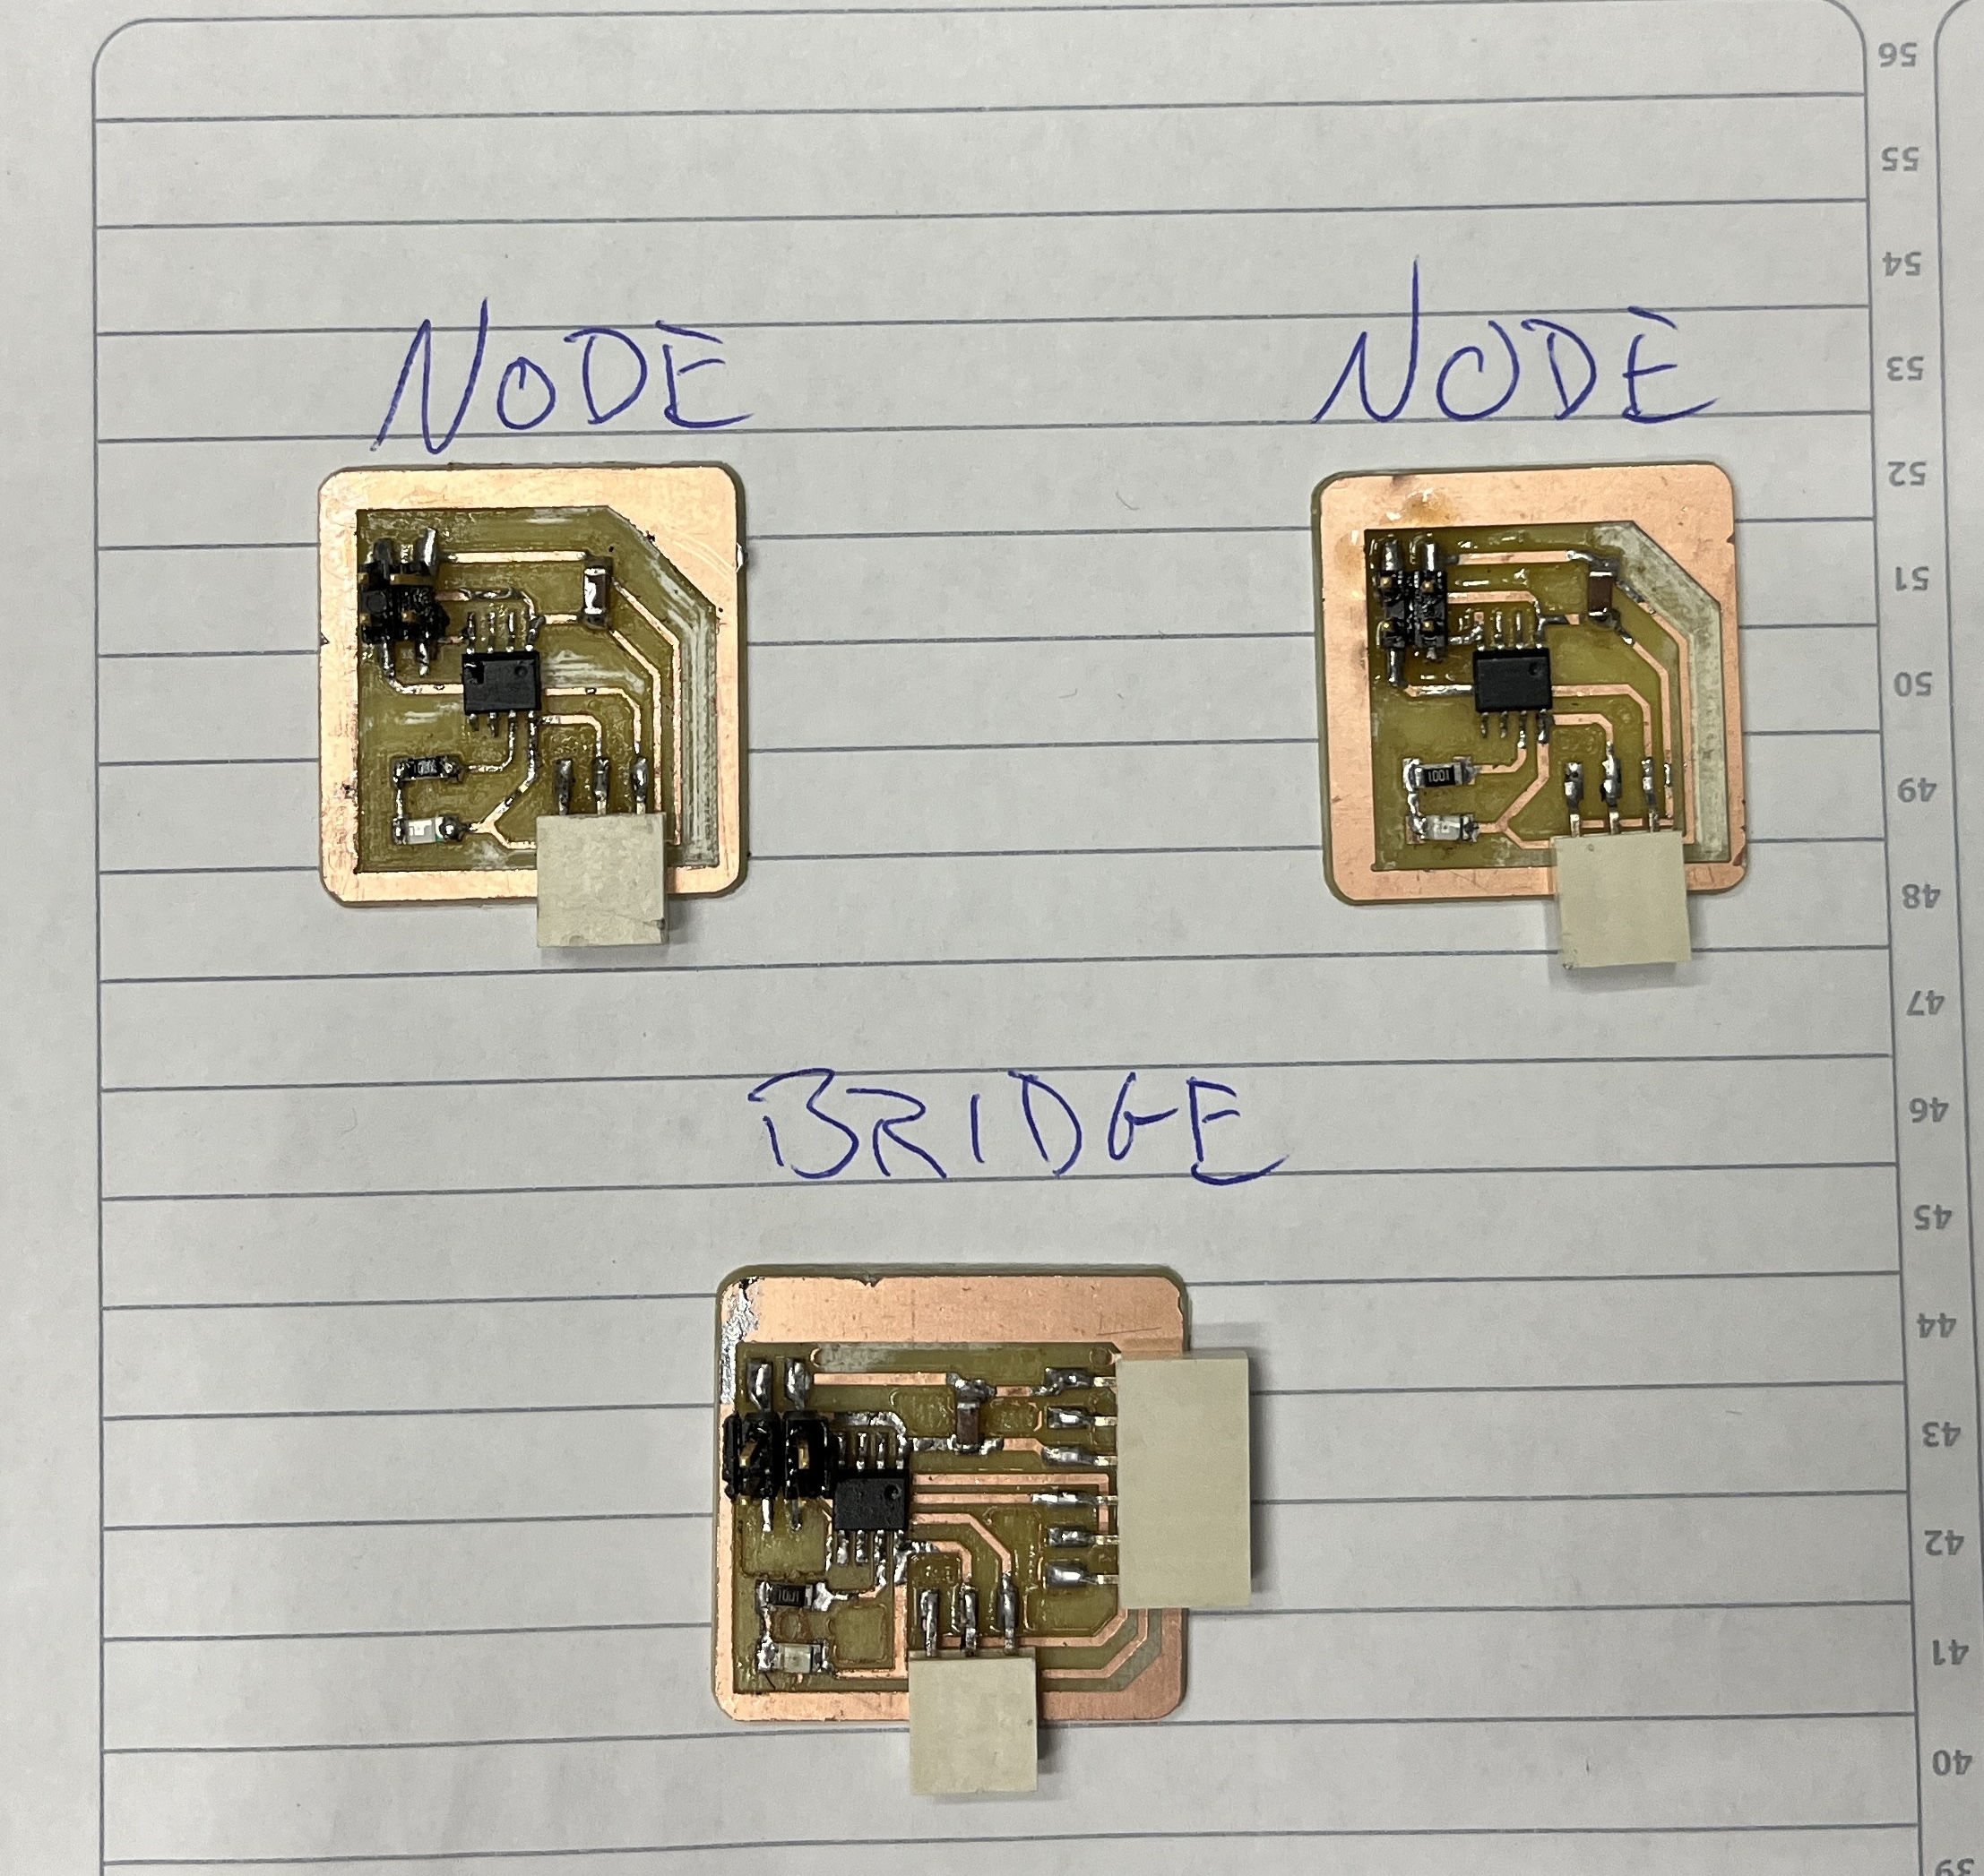
- I was able to mill the PCB boards for the Bridge and Nodes needed for this week but they were not quite right the first time. See the images below.
- These nodes and bridge will be a wired connection set up as described in lecture. The serial communication consists of two cables, TX (Transmitter) and RX (Receiver).
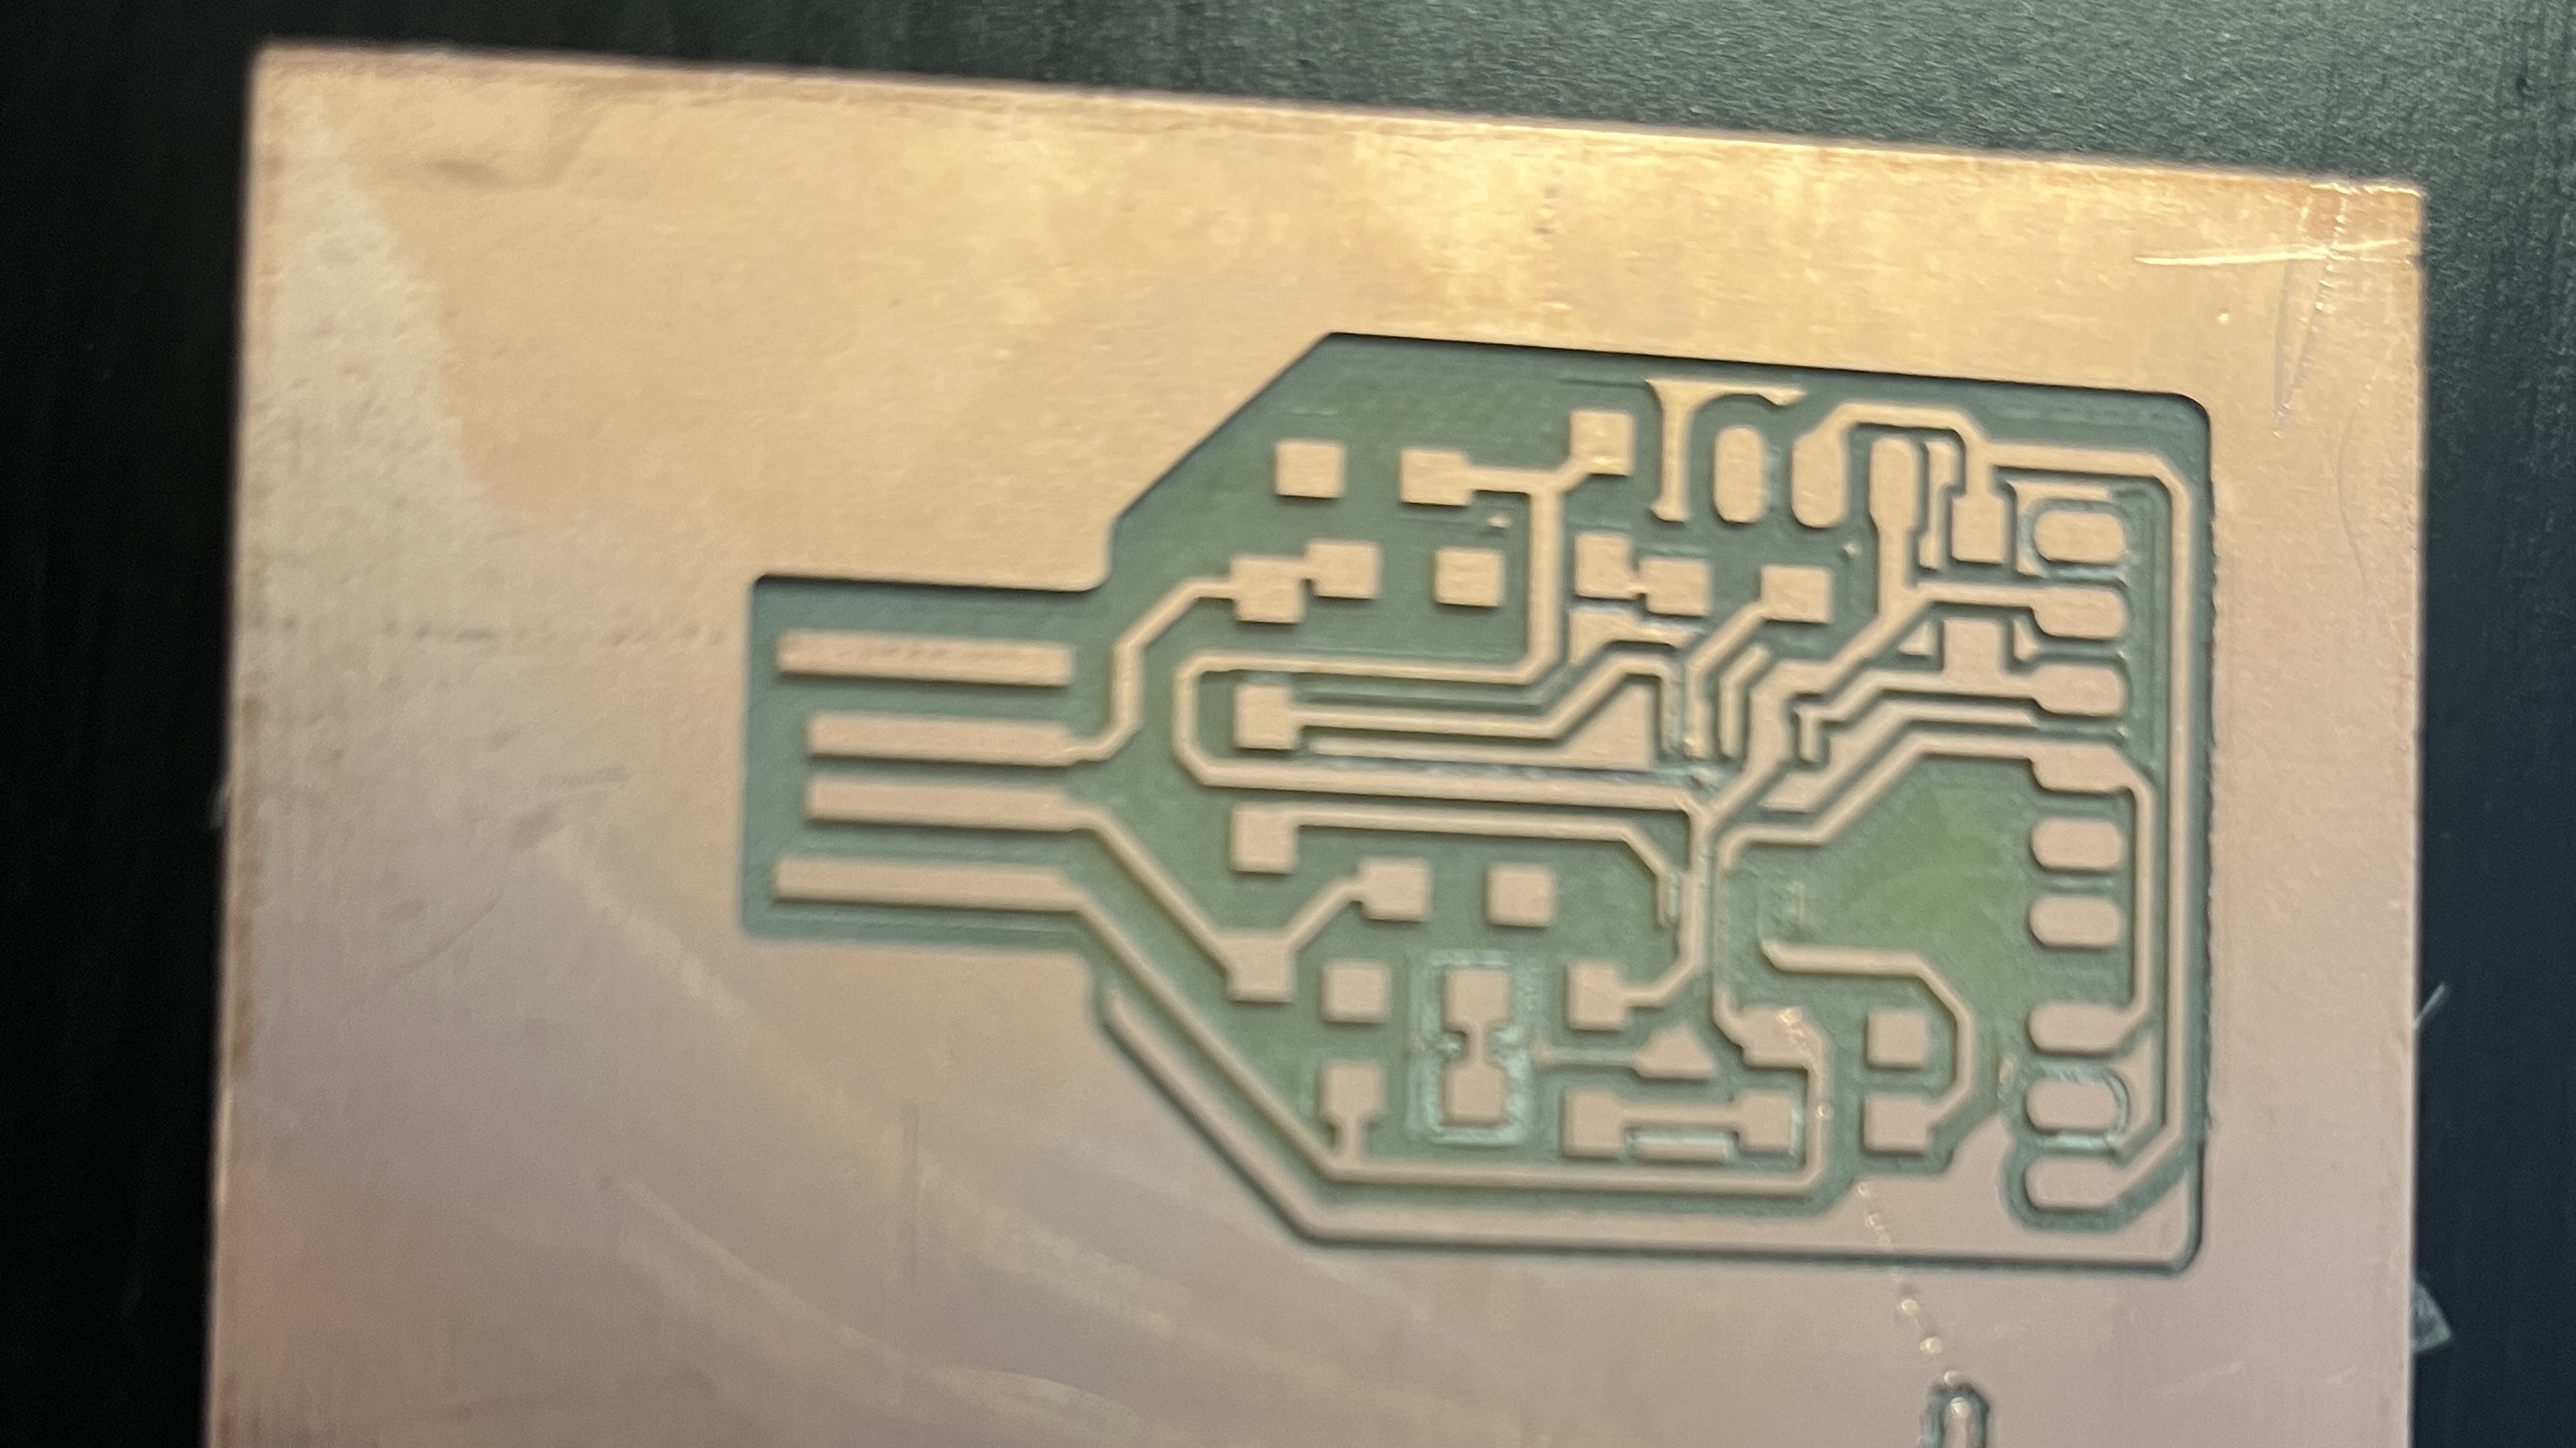
- I have had to bail on this attempt for the assignment. I am not able to mill the USB connection for part of this assignment. In the photos below you can see that the milling of the PCB was not successful despite having new 1/64 inch end mill bits. The contact pads are milled away in some areas while they are fine in others. I checked my tool paths and you can see in the milled part that the bit did not create seperate pads.

New Attempt at Creating Wired Network
For this next attempt I am going to try to connect two Raspberry Pi Pico's in a wired set up. I have found on other Fab Academy stuent pages that they had luck with this so I am going to give it a shot.
I have Thonny installed on my MacBook Pro so I am hoping that by following the VIDEO I will have some luck!
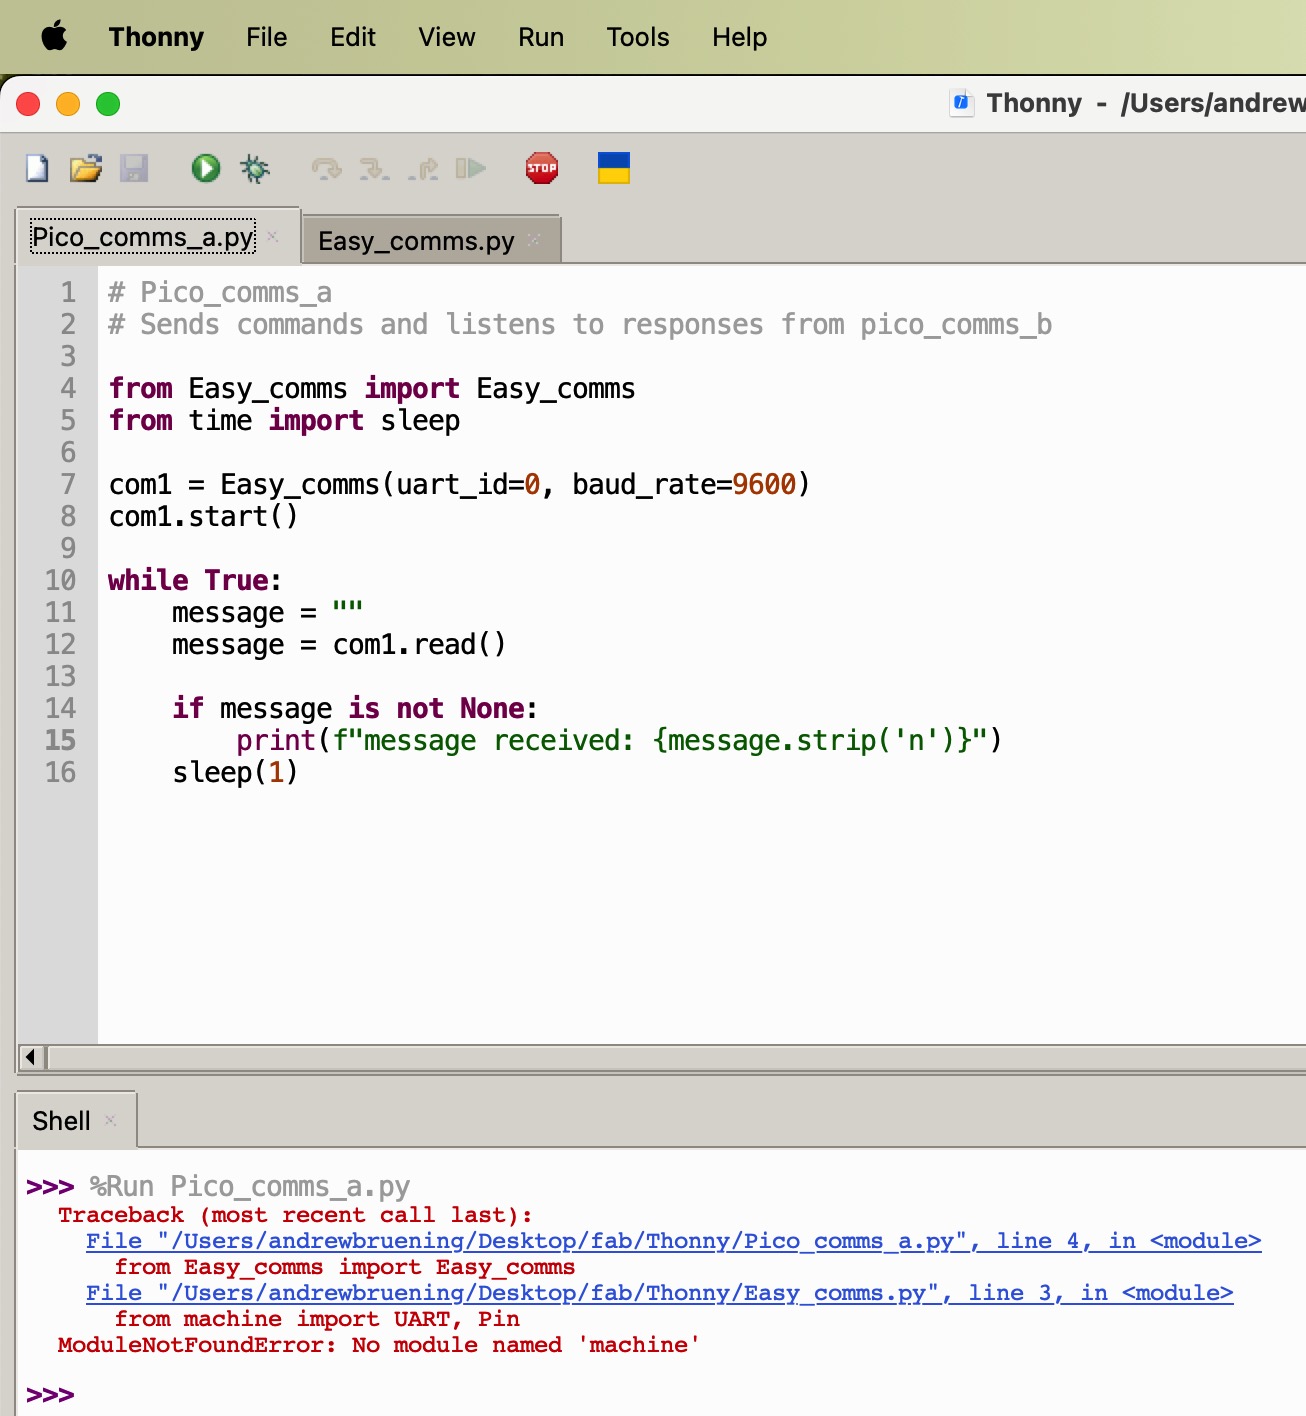
I am using the code from the video as seen below. The code is using micropython and two Pi Pico's. Based on the video, I will create comms_a and comms_b so they can "talk" to each other.
Comms_a
# Pico_comms_a
# Sends commands and listens to responses from pico_comms_b

from easy_comms import Easy_comms
from time import sleep

com1 = Easy_comms(uart_id=0, baud_rate=9600)
com1.start()

while True:
    message = ""
    message = com1.read()

    if message is not None:
        print(f"message received: {message.strip('\n')}")
    sleep(1)
Comms_b
# Pico_comms_b
# Sends commands and listens to responses from pico_comms_a

from easy_comms import Easy_comms
from time import sleep

com1 = Easy_comms(uart_id=0, baud_rate=9600)
com1.start()

count = 0
while True:
    # send a message
    com1.send(f'hello, {count}')

    #check for messages
    message = com1.read()

    if message is not None:
        print(f"message received: {message.strip('\n')}")
    sleep(1)
    count +=1
Easy_Comms
#Easy comms is a simple class that allows you to send and receive messages over a serial port.

from machine import UART, Pin
from time import time_ns

class Easy_comms:

    uart_id = 0
    baud_rate = 9600
    timeout = 1000 # milliseconds

    def __init__(self, uart_id:int, baud_rate:int=None):
        self.uart_id = uart_id
        if baud_rate: self.baud_rate = baud_rate

        # set the baud rate
        self.uart = UART(self.uart_id,self.baud_rate)

        # Initialise the UART serial port
        self.uart.init()

    def send(self, message:str):
        print(f'sending message: {message}')
        message = message + '\n'
        self.uart.write(bytes(message,'utf-8'))

    def start(self):
        message = "ahoy\n"
        print(message)
        self.send(message)

    def read(self)->str:
        start_time = time_ns()
        current_time = start_time
        new_line = False
        message = ""
        while (not new_line) or (current_time <= (start_time + self.timeout)):
            if (self.uart.any() > 0):
                message = message + self.uart.read().decode('utf-8')
                if '\n' in message:
                    new_line = True
                    message = message.strip('\n')
                    # print(f'received message: {message}')
                    return message
        else:
            return None
Unfortunately, I am having some issues AGAIN. I am not sure what I am doing wrong...see images below. This is very frustrating because I am using the same set up and the guy in the video. He is using has one Pico connected to his MacBook and the other to a Pi 400. I am using the same set up but I am not getting the same results so far. I clearly am missing something...
I found that had typed a capital letter in Easy_comms in one place and a lowercase letter in easy_comms in another line of code so it was not able to find what it was supposed to be looking for. I fixed that issue and they two Pi Pico's are communicating...BUT the code is not running or counting continously like in the video. I also had to switch to using two MacBooks rather than the Pi 400 (I was missing an HDMI cord so I could not connect the Pi 400 to a screen). Not sure what I missed there so back to the code to look...
Video of two Pi Pico's communicating using Thonny

I know this is not the ideal way to wire up the Pi Pico's but I am working from home today and I had to work with what I had. I wired the TX(Pico a) –> RX(Pico b) (through the breadboard), RX(Pico a) –> TX(Pico b) (through the breadboard), and GND –> GND with the breadboard. As you can see in the shell in Thonny (video) the two sending each other messages. I can update the image when I get back to work with the proper supplies.
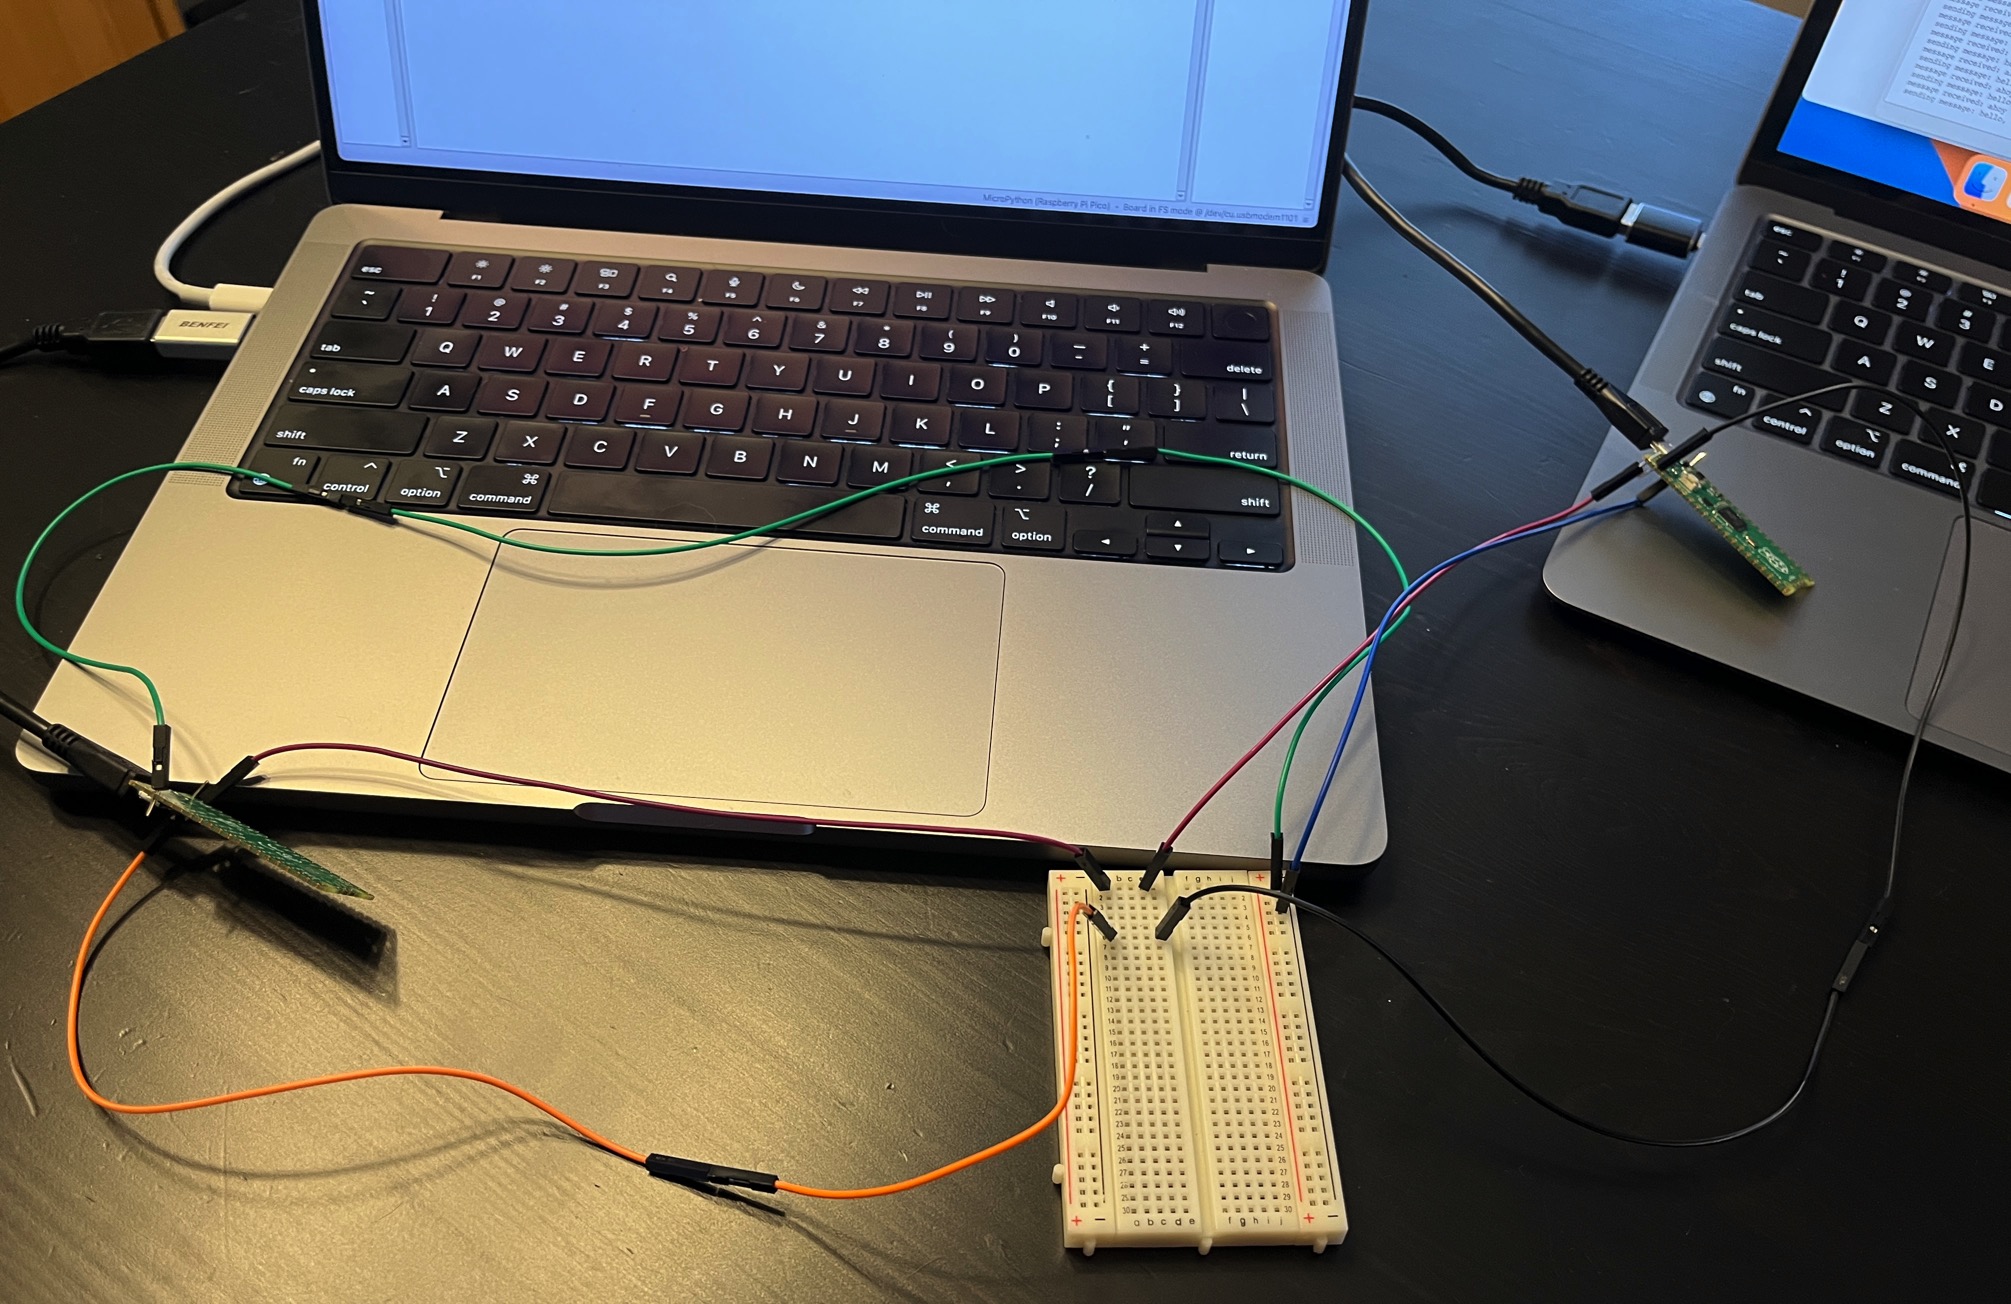
Following the video for the LED server and client addition, I connected an LED board I created in between the two Pi Picos so the LEDs would blink as they two boards communicated. I wired this up similarly to the original Pi Pico example
(TX(pico a) –> RX(pico b), RX(a) –> TX(b), and GND –> GND.
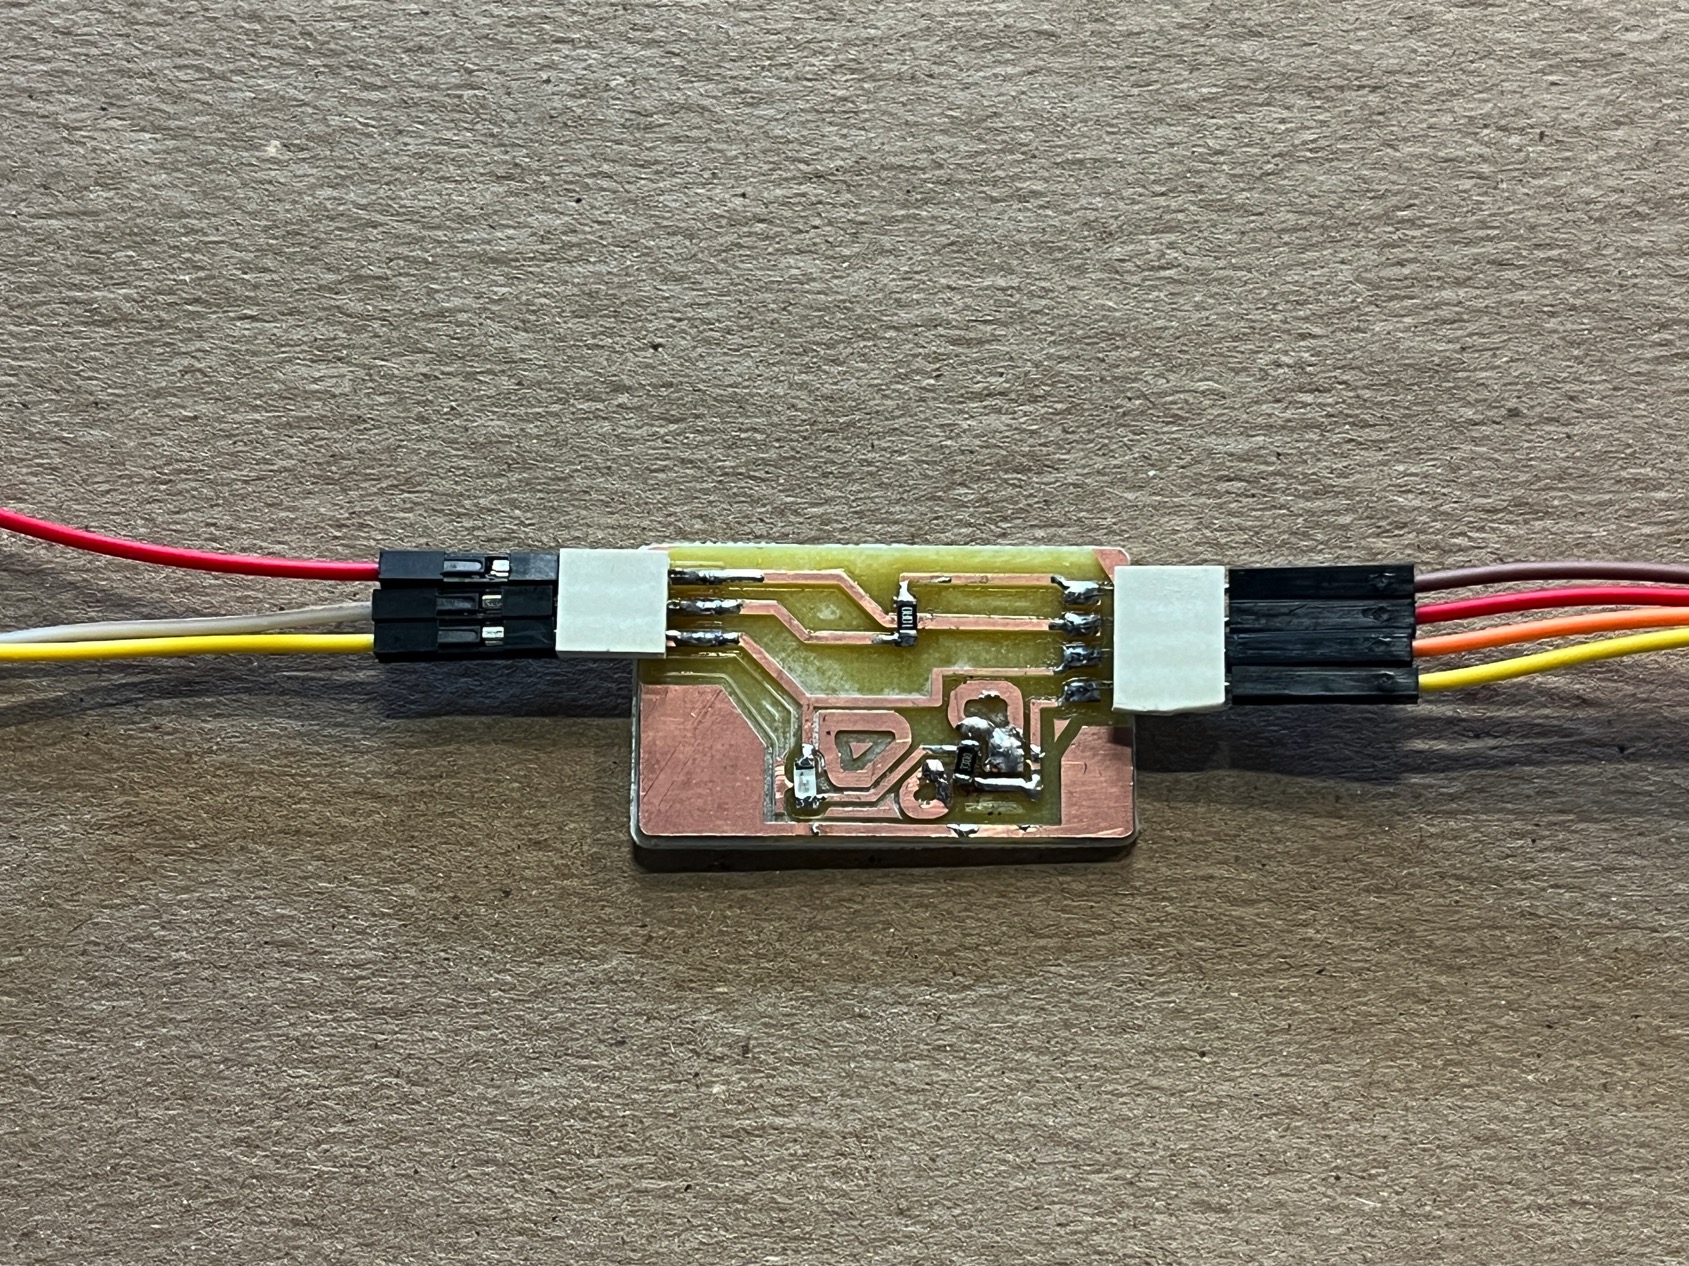
My LED board consisted of a 3-pin surface mount header, a 4-pin surface mount header, a red LED, a 0 Ohm resistor and a 330 Ohm resistor. Once this board was soldered together and then wired between the two Pico’s I ran the led_client on Pico “A” and led_server on Pico “B”. Then I ran the program on each computer. The Picos began sending messages back and forth and the messages could be seen in the shell window and the LED blinked in response to the Picos sending messages back and fourth.
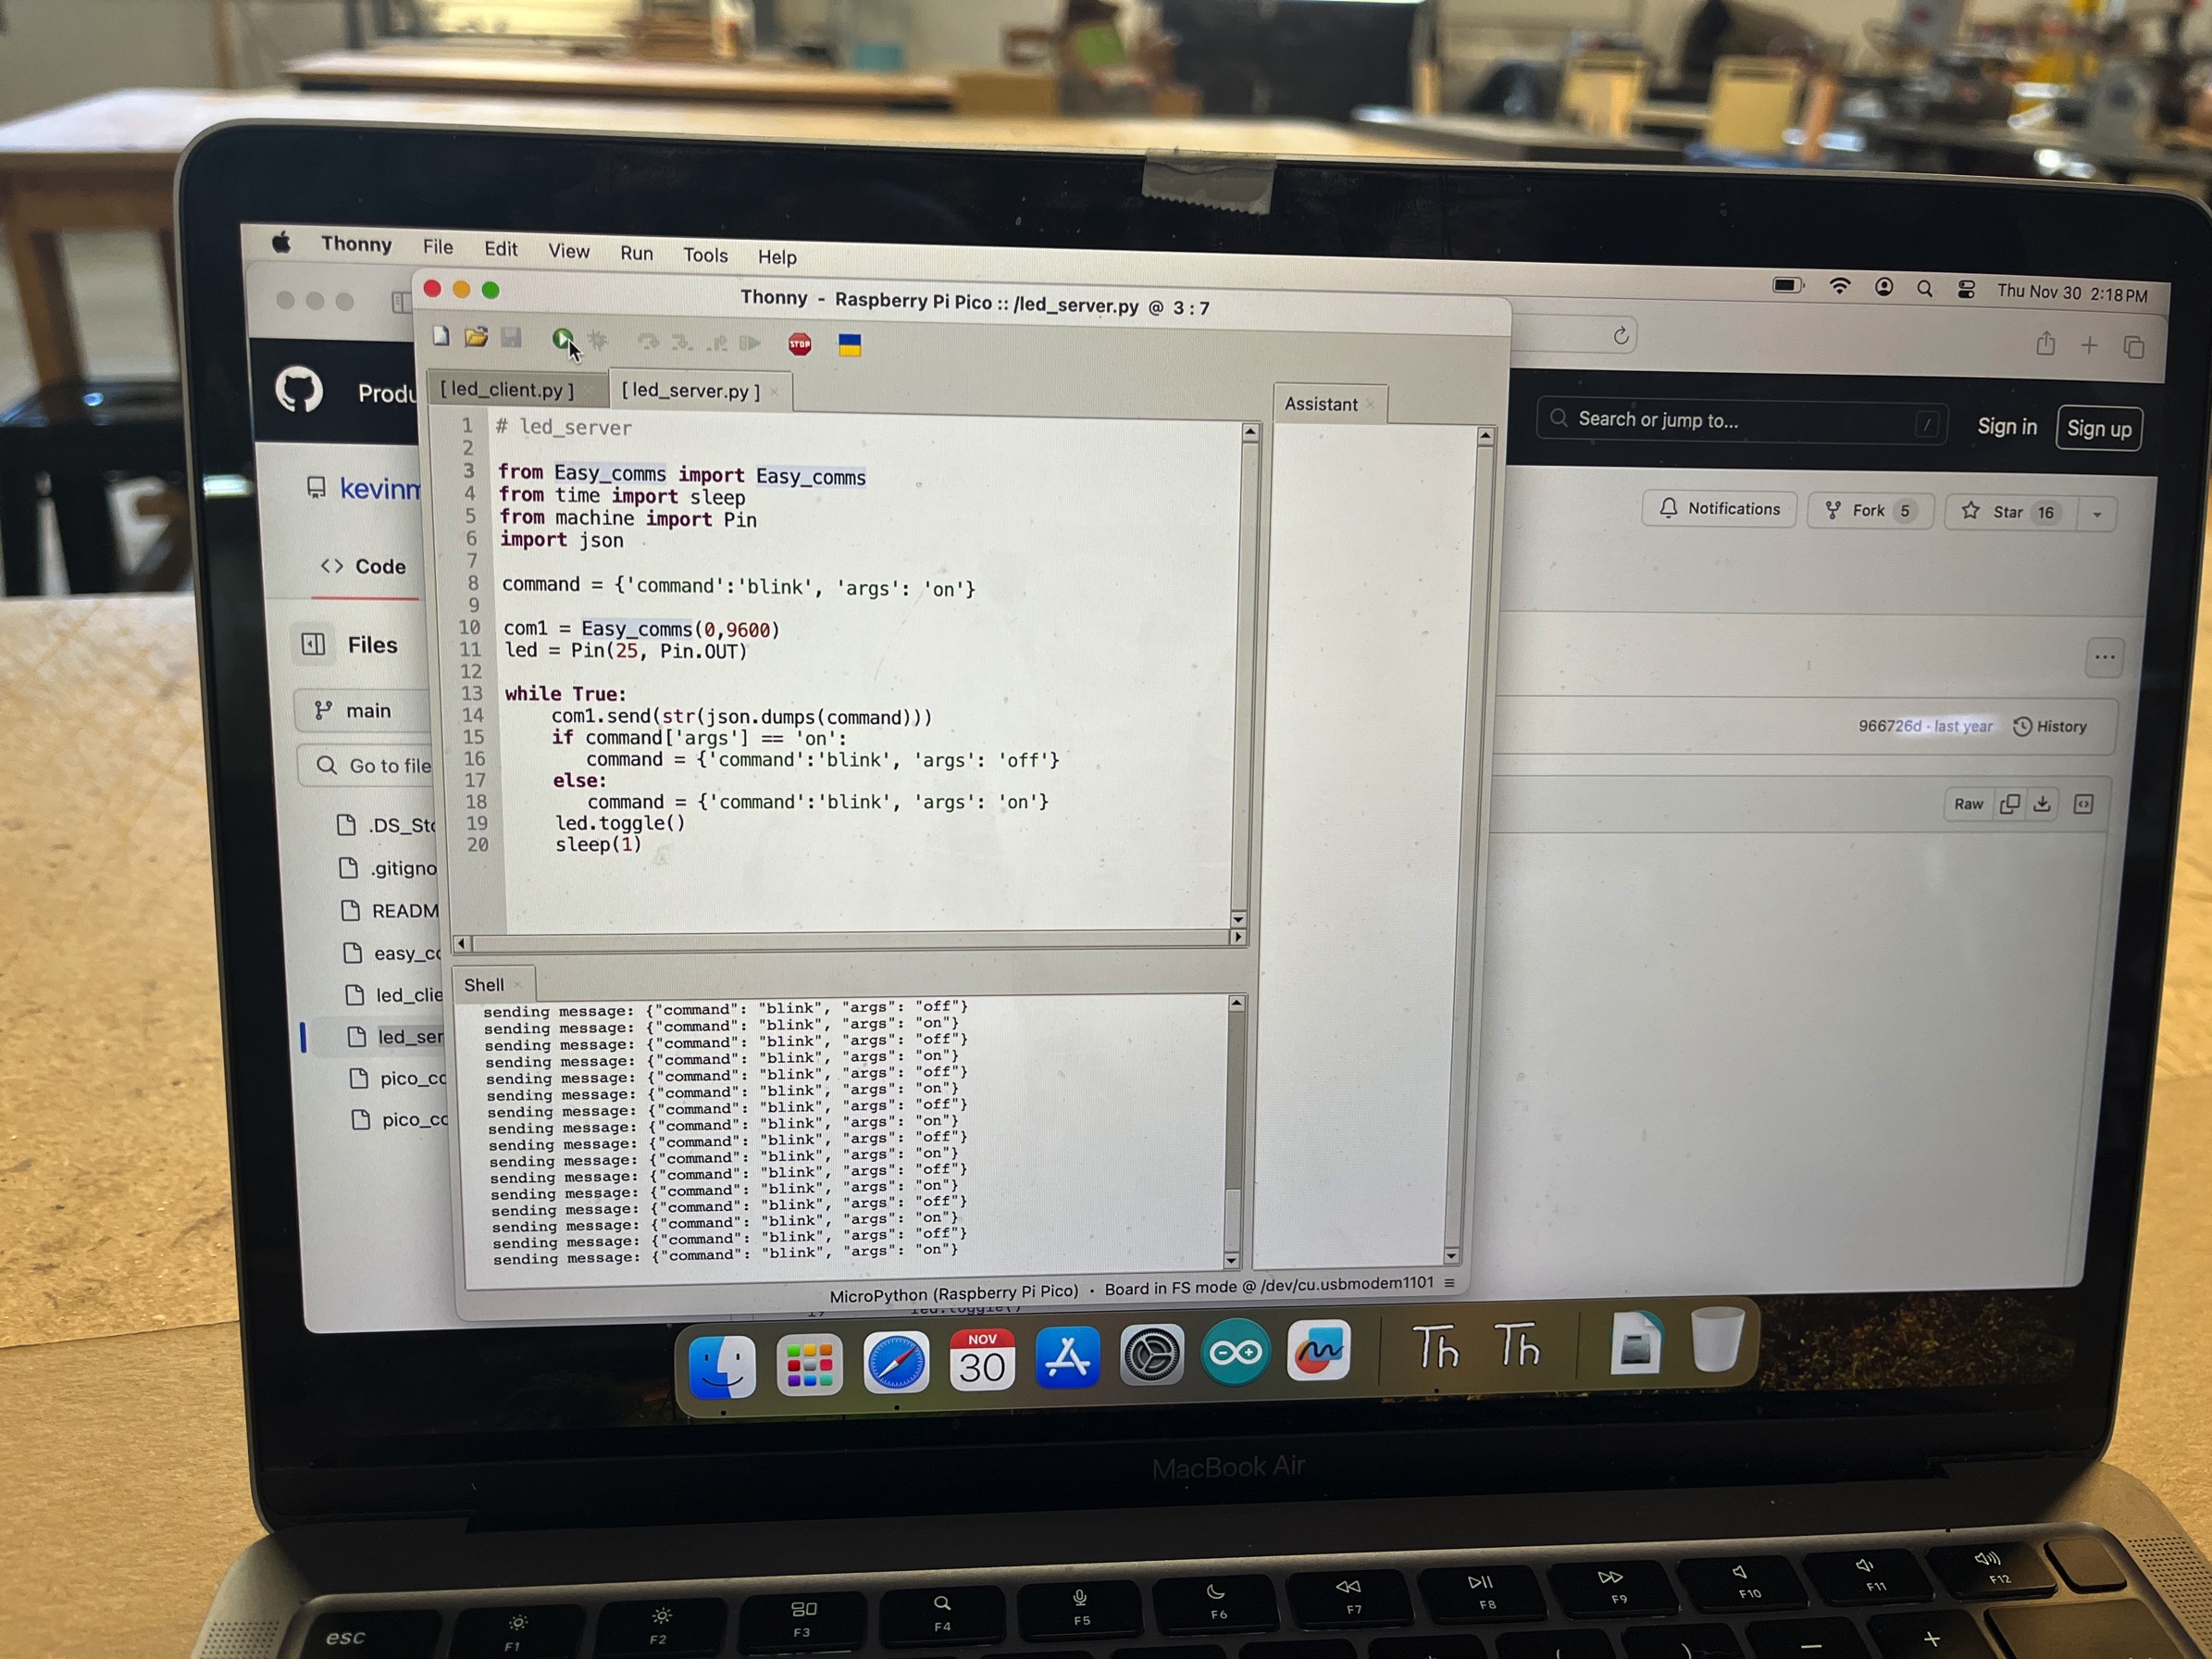
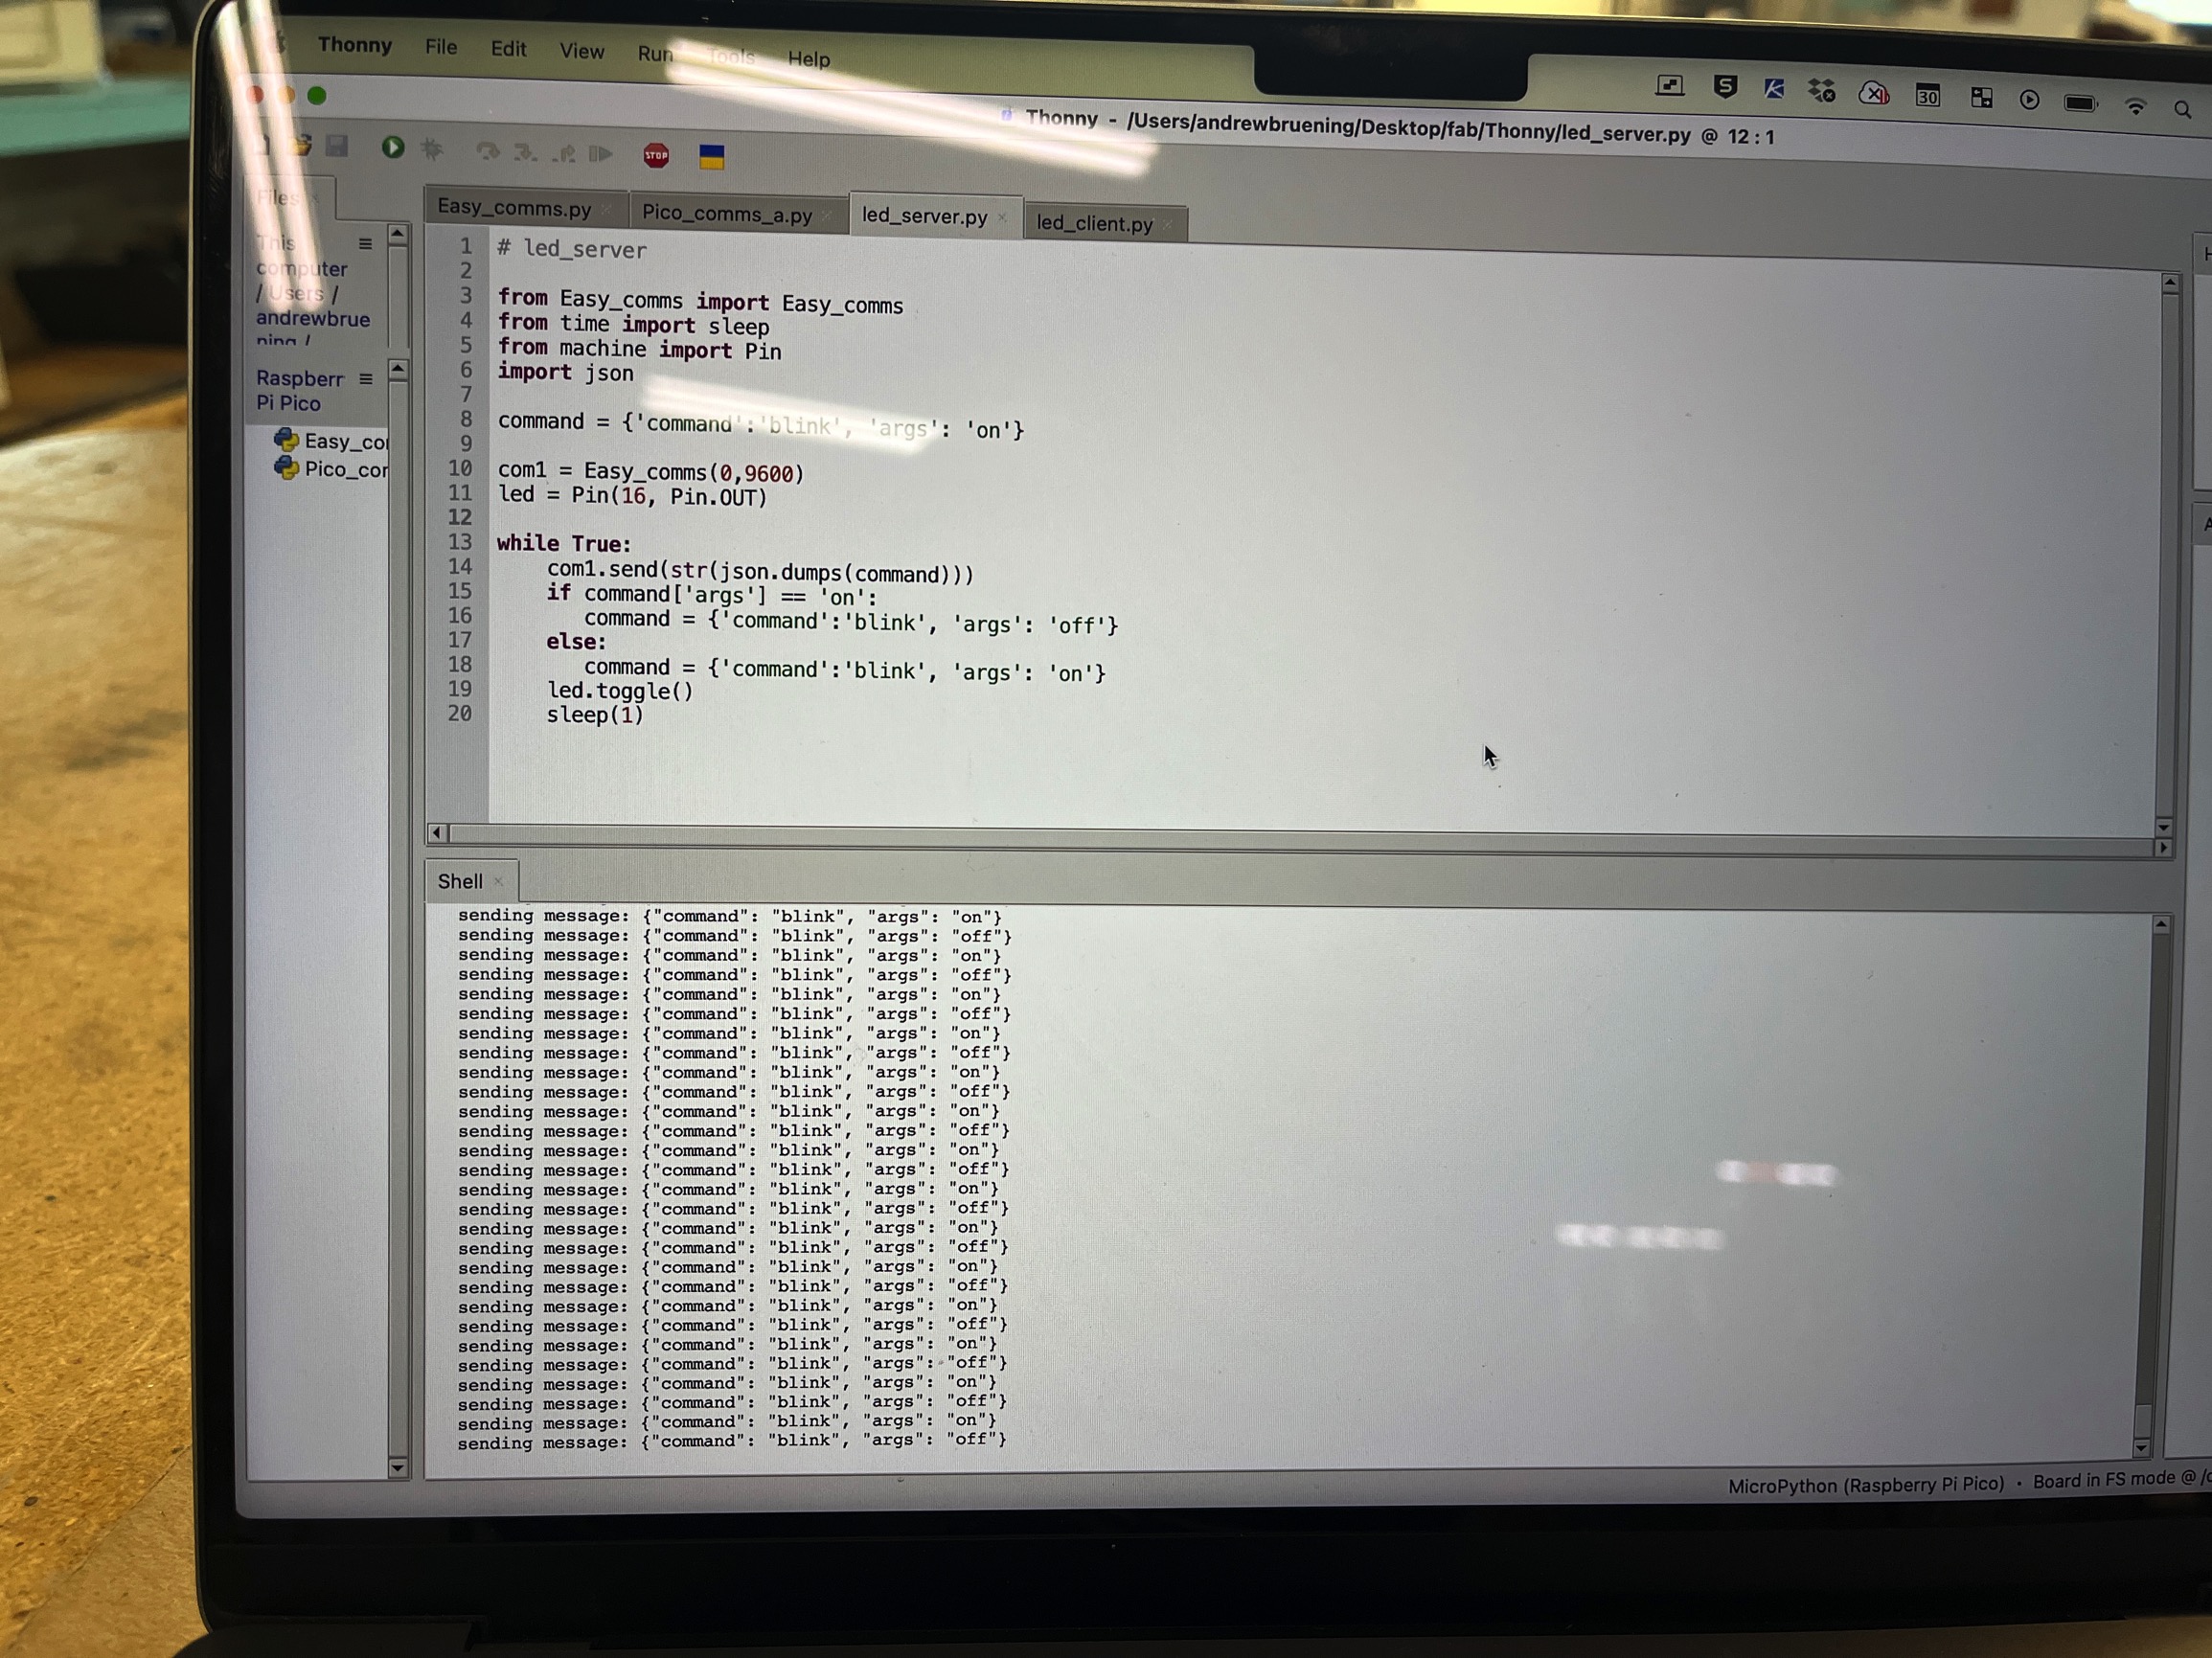
LED Server and Clinet Code
    # led_server

    from easy_comms import Easy_comms
    from time import sleep
    from machine import Pin
    import json

    command = {'command':'blink', 'args': 'on'}

    com1 = Easy_comms(0,9600)
    led = Pin(25, Pin.OUT)

    while True:
        com1.send(str(json.dumps(command)))
        if command['args'] == 'on':
           command = {'command':'blink', 'args': 'off'}
        else:
           command = {'command':'blink', 'args': 'on'}
        led.toggle()
        sleep(1)
  # led_client

from easy_comms import Easy_comms
from time import sleep
from machine import Pin
import json

com1 = Easy_comms(0,9600)
led = Pin("LED", Pin.OUT, value=0)

while True:
    message = com1.read()
    if message is not None:
        print(f'message: {message}')
        try:
            command = json.loads(message)
            print(f'json: {command}')
            if command['command'] == 'blink':
                if command['args'] == 'on':
                    led.on()
                if command['args'] == 'off':
                    led.off()
            sleep(0.1)
        except Exception as e:
            print(f'error: {e}')
I learned a lot while completing this weeks assignment! I know there is much. more to learn and I will make more mistakes along the way BUT... I did learn a lot
I had never even tried any kind of networking or communications prior to this so it was all new and caused some headaches. I learned about UART and how to communicate using the transmitter (TX) and receiver (RX) pins of a Pi Pico microcontroller. I learned how to use Thonny and micropython…at least a little. While I did not do any wireless communications this week, I can see the advantages of wireless communication in projects. It could reduce the electronic components needed (or rather different components) but it also allows for more creativity in your project. I would like to add wireless to my final project but I need to get the wired version done first so I can then figure out what I would change to make it connect wirelessly with others in the office.