Computer-Controlled Cutting
Assignment
Group Assignment:
Characterize your lasercutter's focus, power, speed, rate, kerf, joint clearance and types.
Group Assignment
Laser Cutting Tutorial:
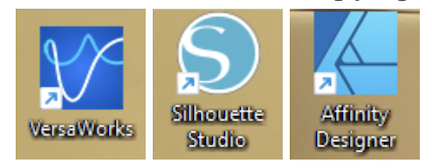
You need these programs:
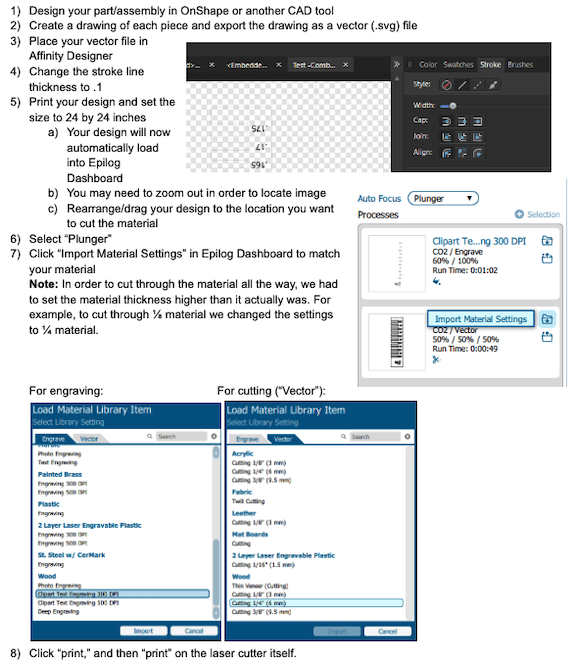
Using the Laser Cutter:
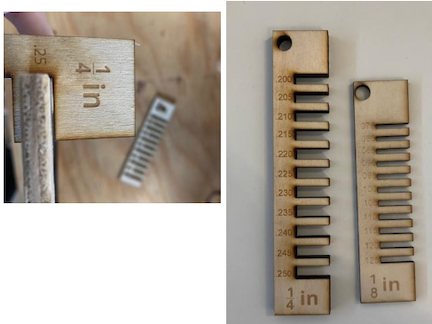
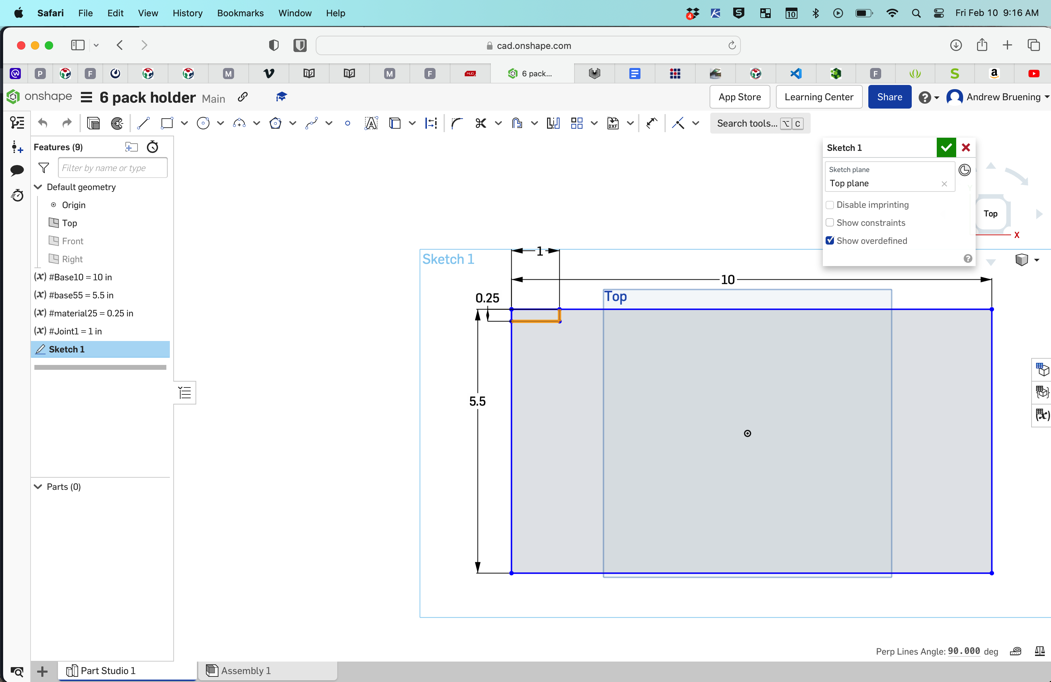
In order to determine the proper design dimensions for a good “press fit” accounting for the kerf (the laser burns away a portion of material when it cuts through) we used the following designs to find the proper fitting depending on the thickness of the material.
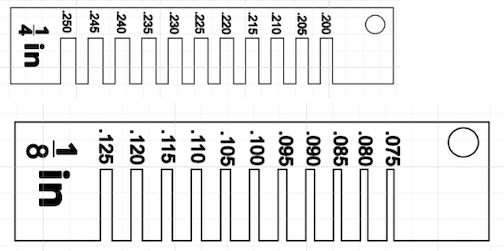
Example: While the material is ¼ (.25) inches thick, a slot that is .25 leaves too much wiggle room for a proper fit.
Vinyl Cutting Tutorial
You need these programs:
Getting Started/Design:
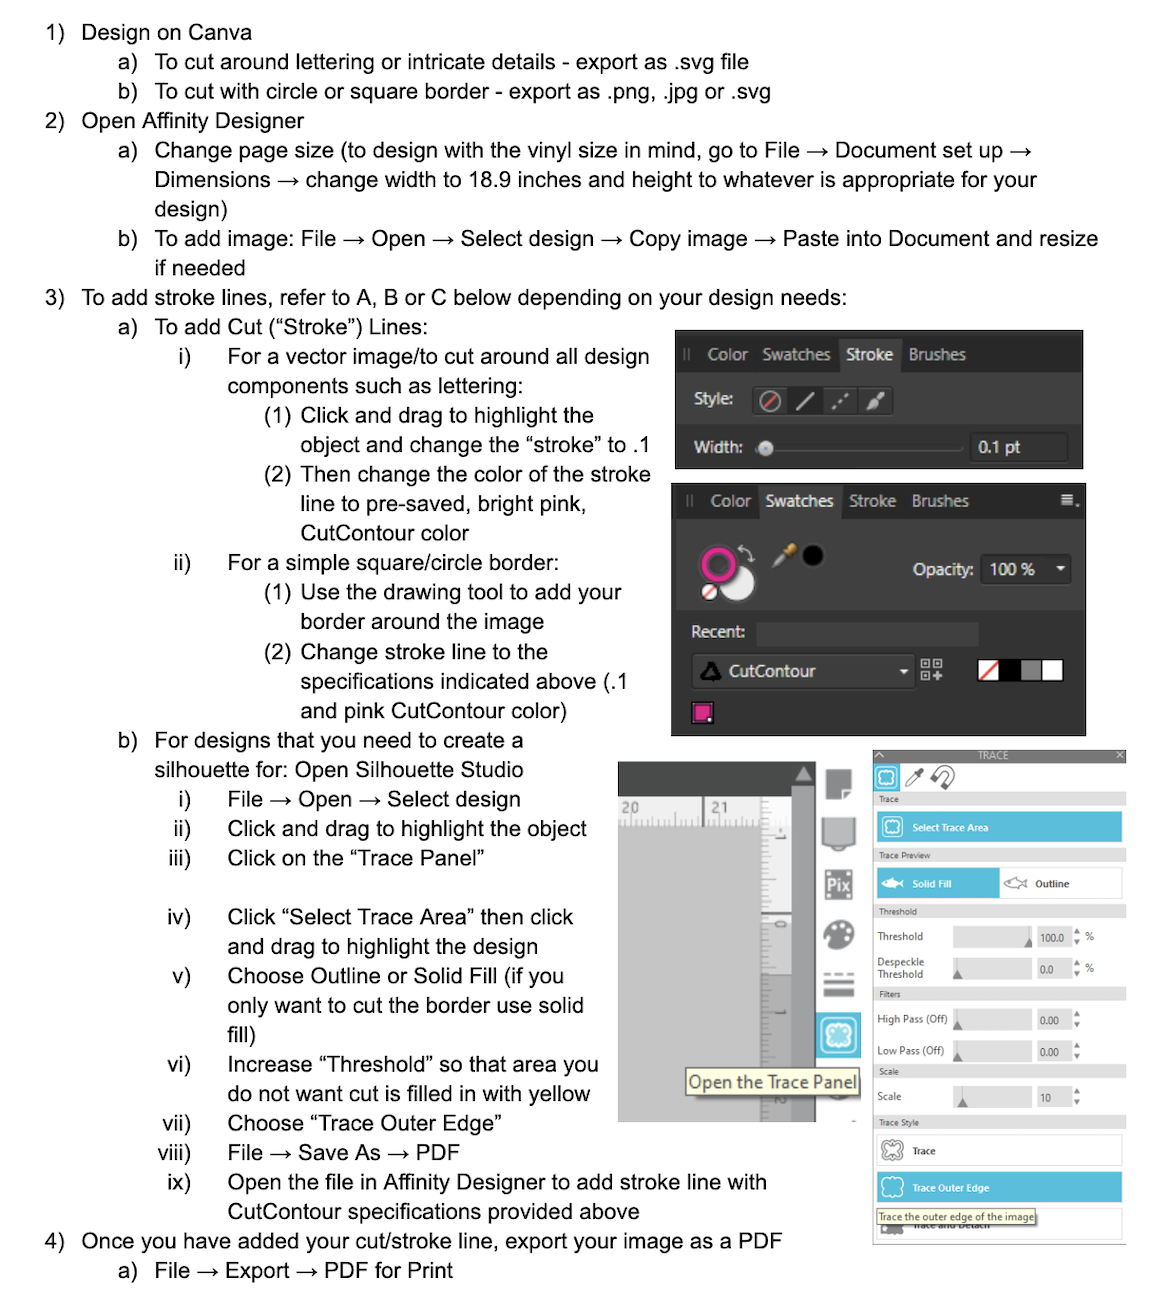
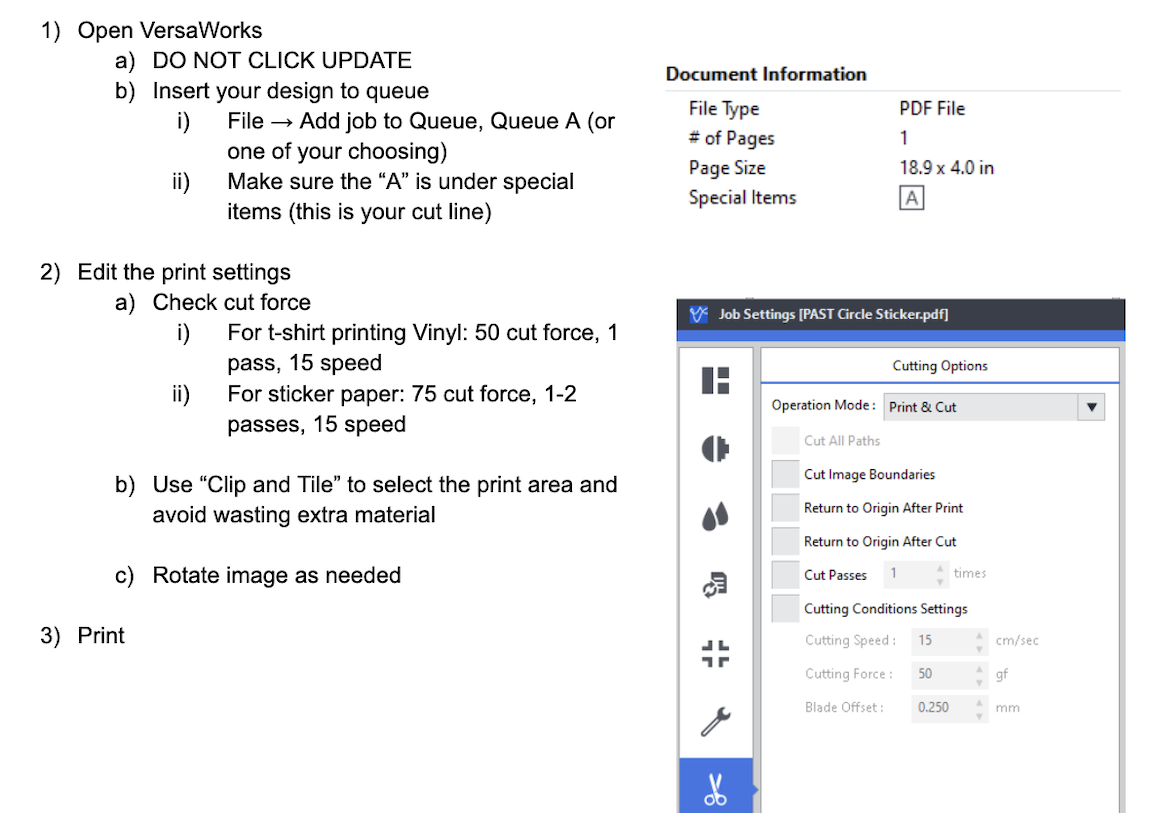
Using the Vinyl Cutter:
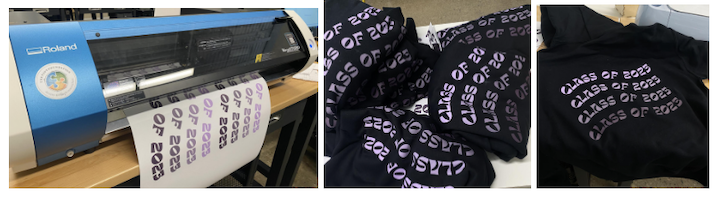
Project: We have been helping the senior class design and press 133 sweatshirts using the vinyl cutter and heat transfer press. Through this process, we have run into many issues that required trouble shooting and have been able to determine the best settings to use for various materials and designs.
Here are photos of the finished design:
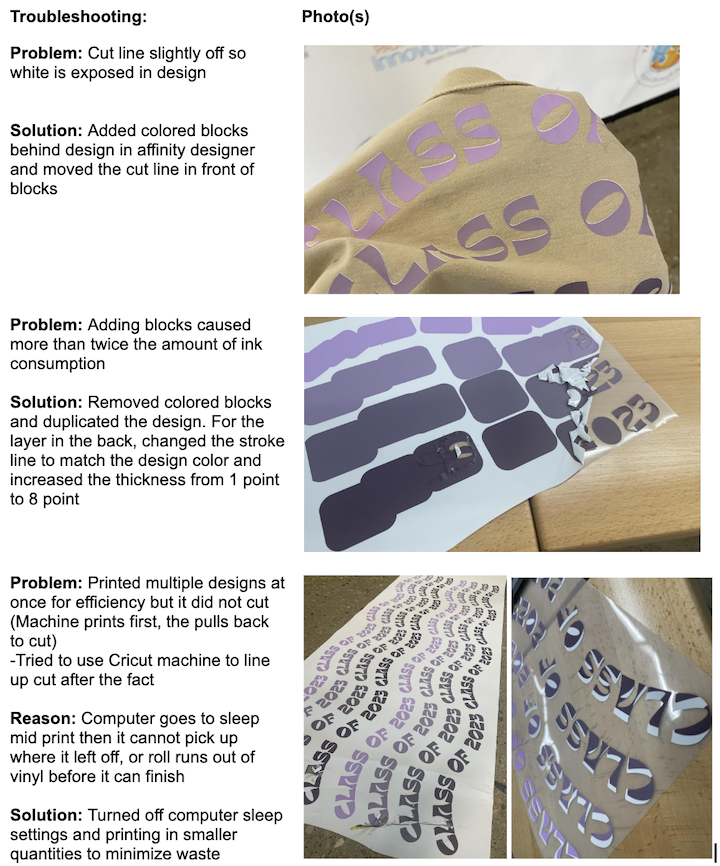
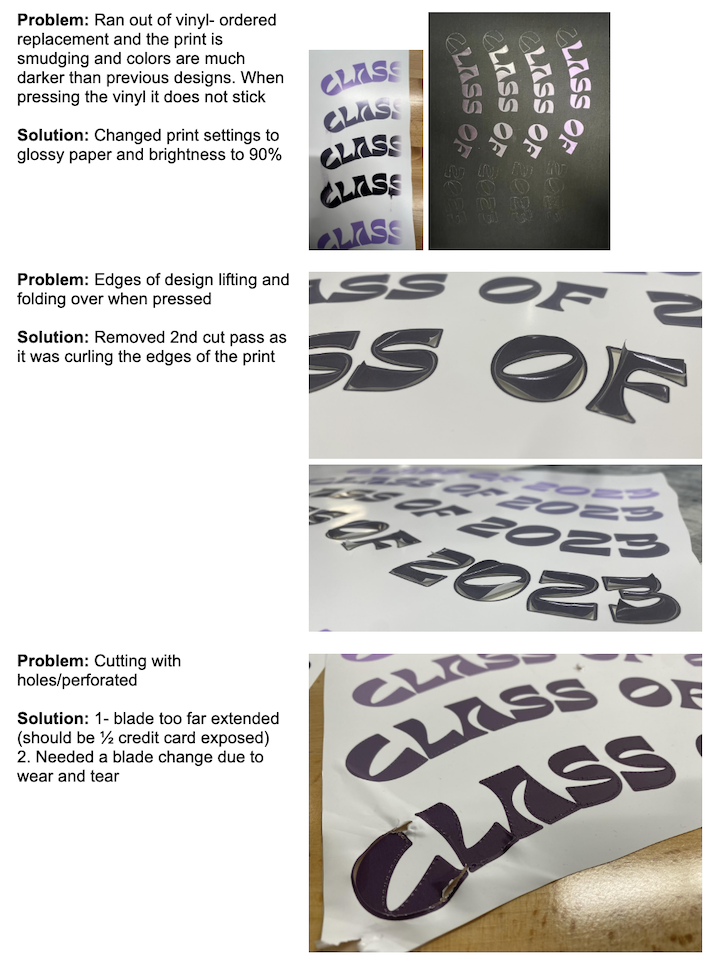
Here are photos of some of the problems we have experienced and the solutions:
Individual assignment:
Cut something on the vinylcutter design, lasercut, and document a parametric construction kit, accounting for the lasercutter kerf, which can be assembled in multiple ways, and for extra credit include elements that aren't flat
Individual Laser Cutter Assignment:
For this project I decided to revisit something that I made several years ago. In the original design I did not use parametric dimensioning. I have use parametric dimensions before but not in Onshape so there was bit of learning to do there. Ultimately, I created a box with snap fit box joints.
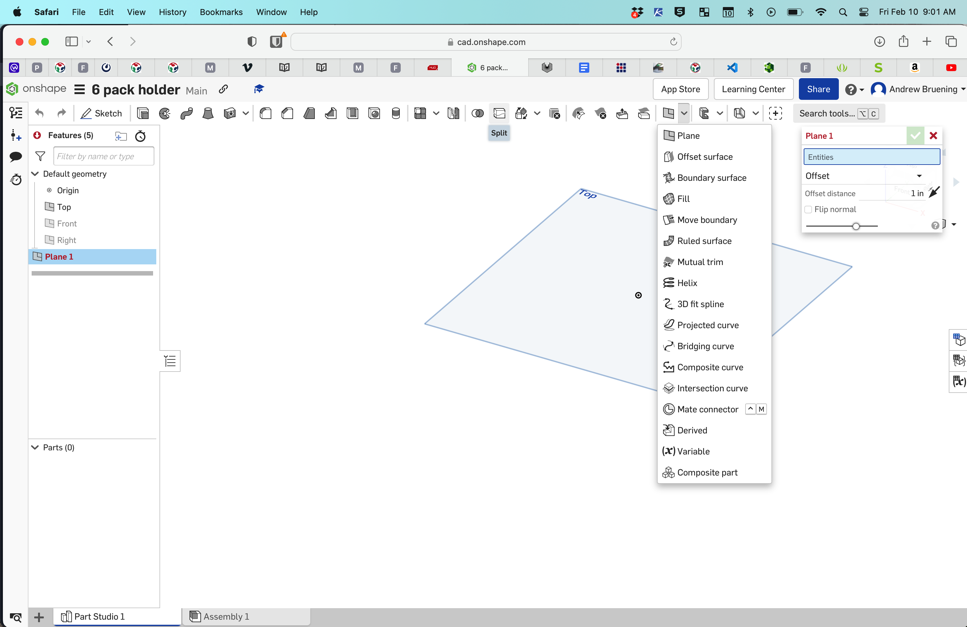
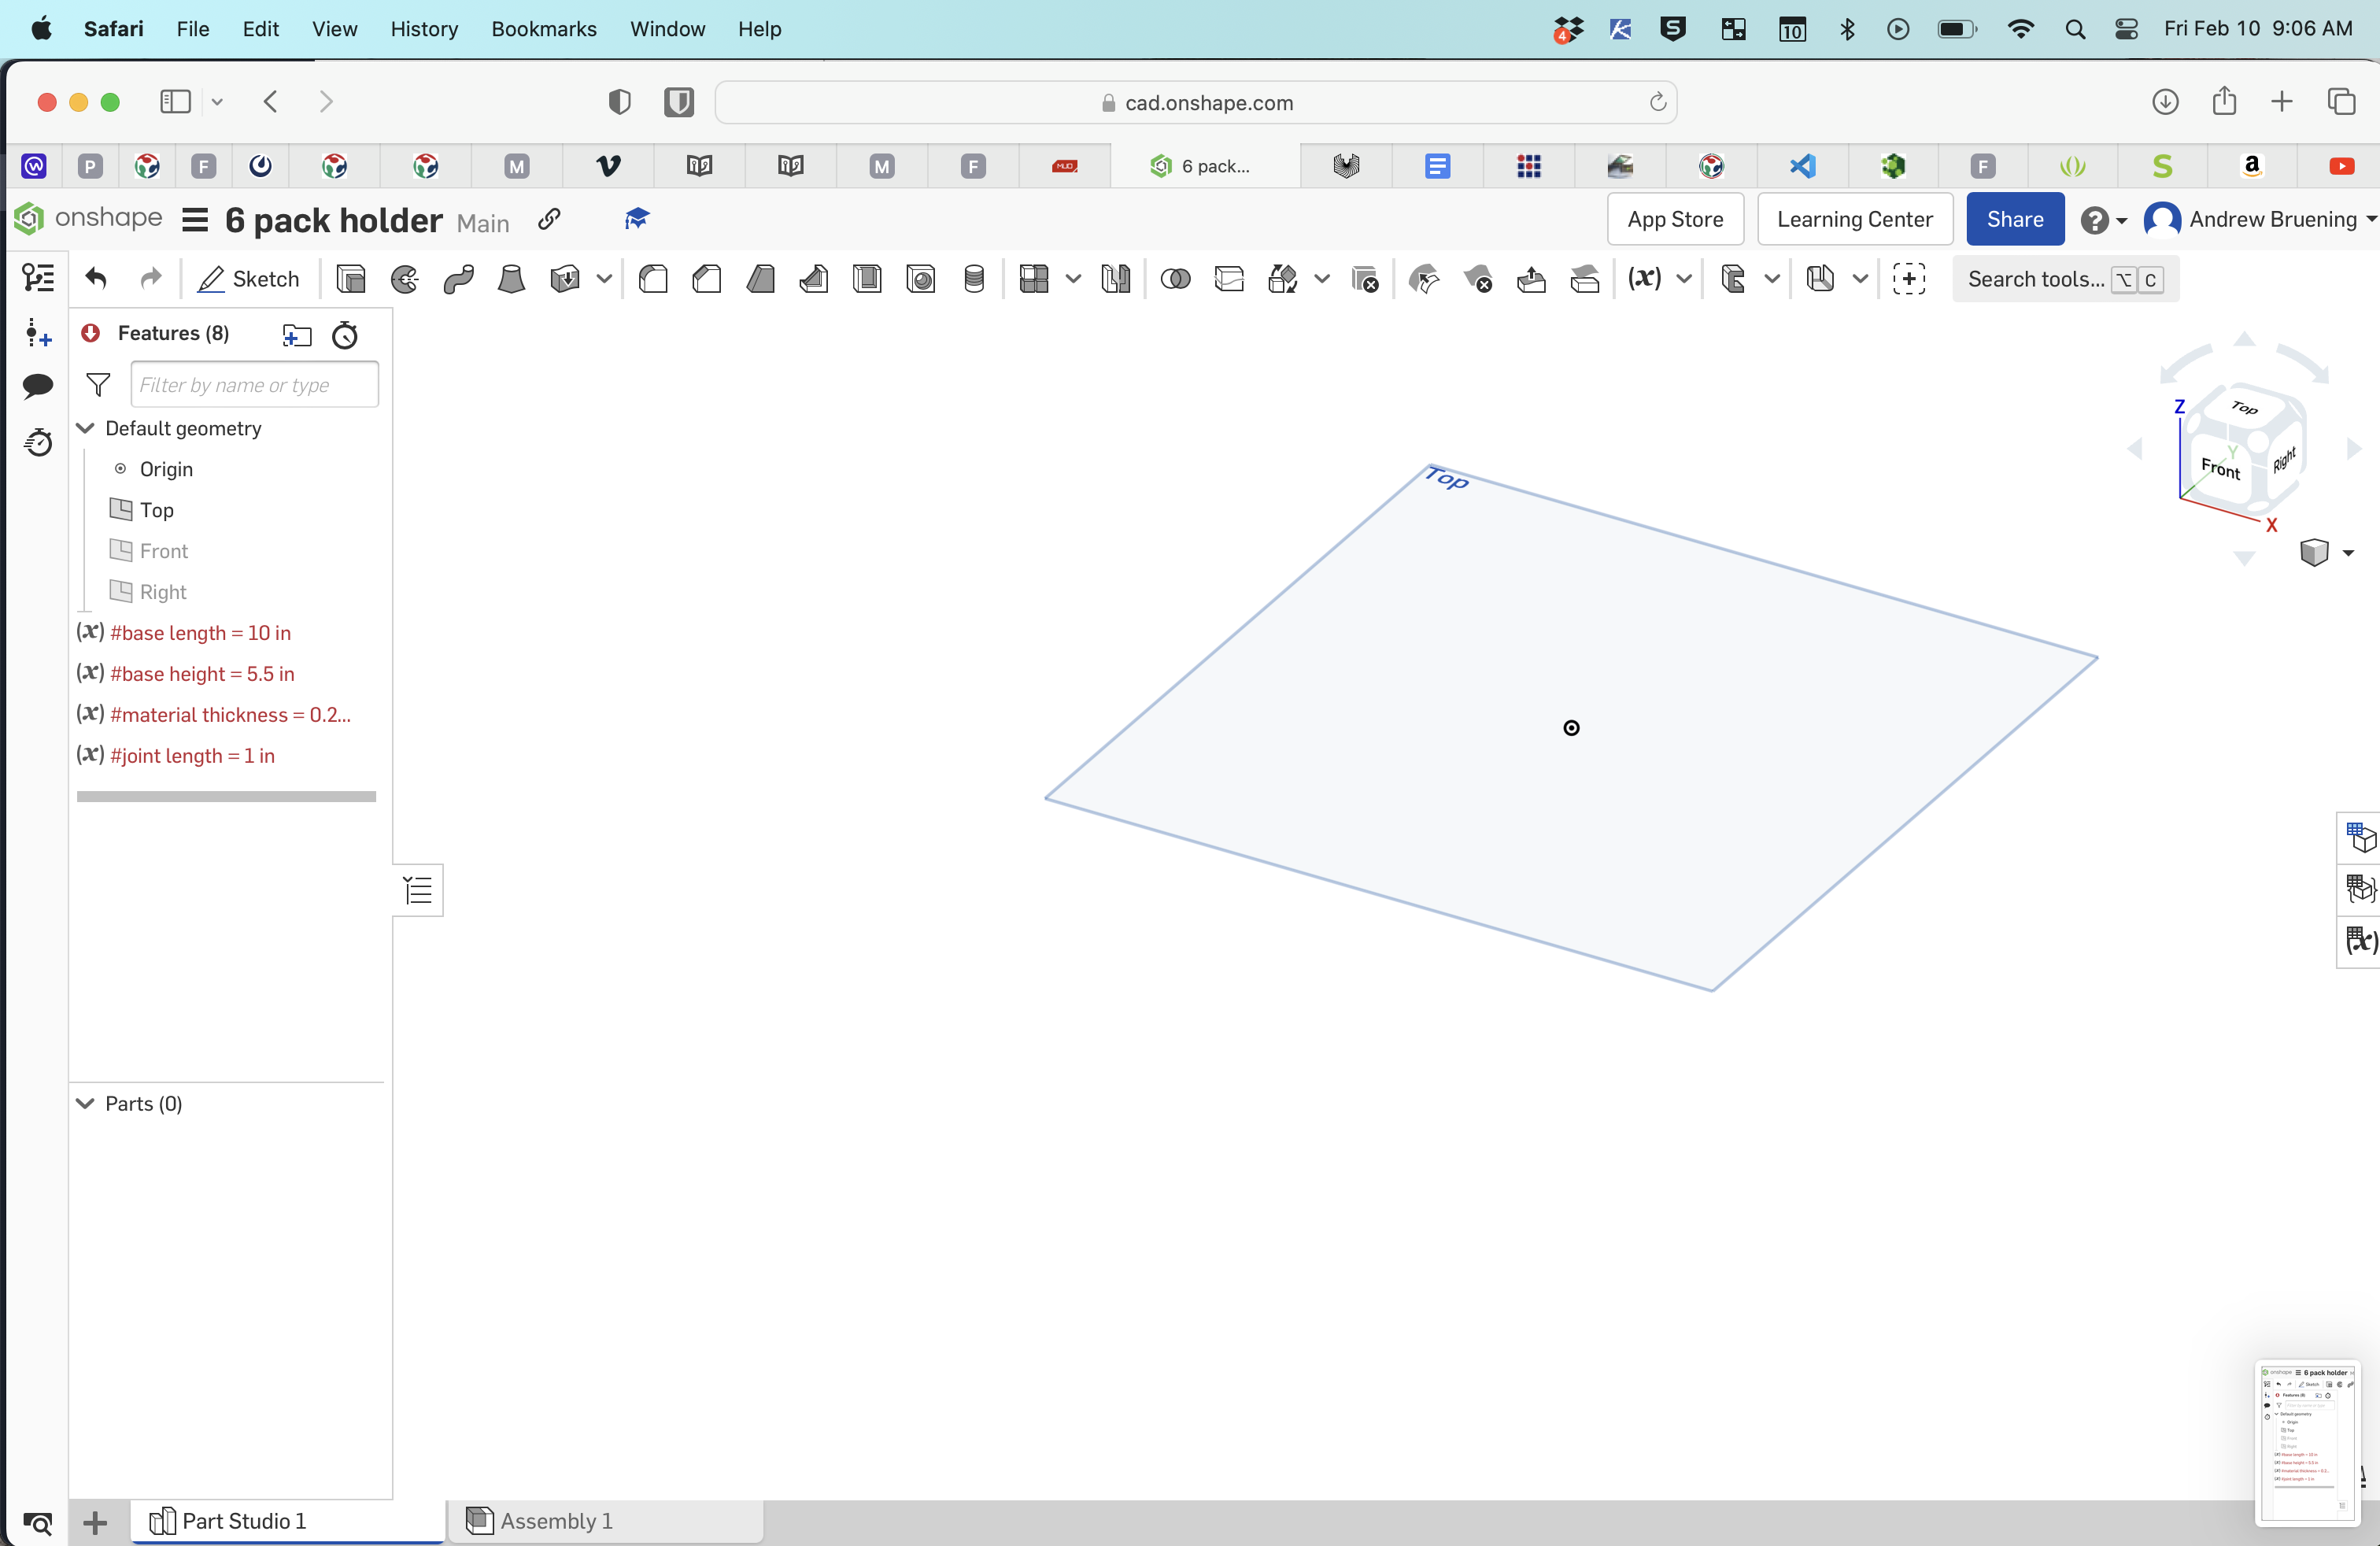
Started by creating sketch in Onshape by selecting the top plane to sketch from. I then realized I forgot to create the variable formulas needed for parametric dimensions so I had to save the initial sketch and create the formulas.
CAD Design and Laser Cut Process
- Open Onshape
- Create new document and name document
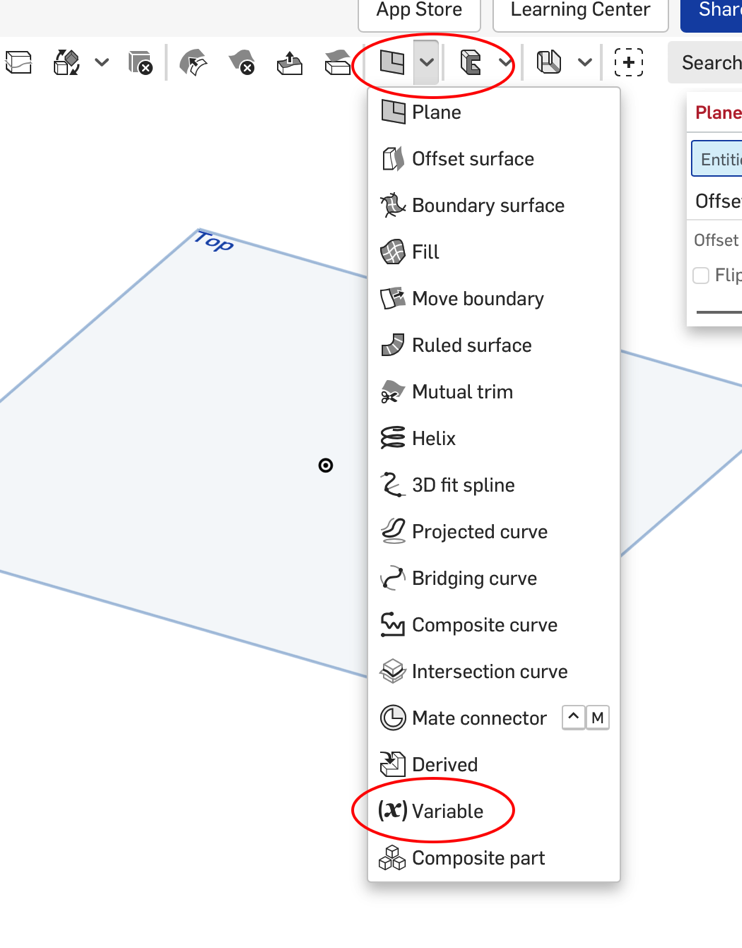
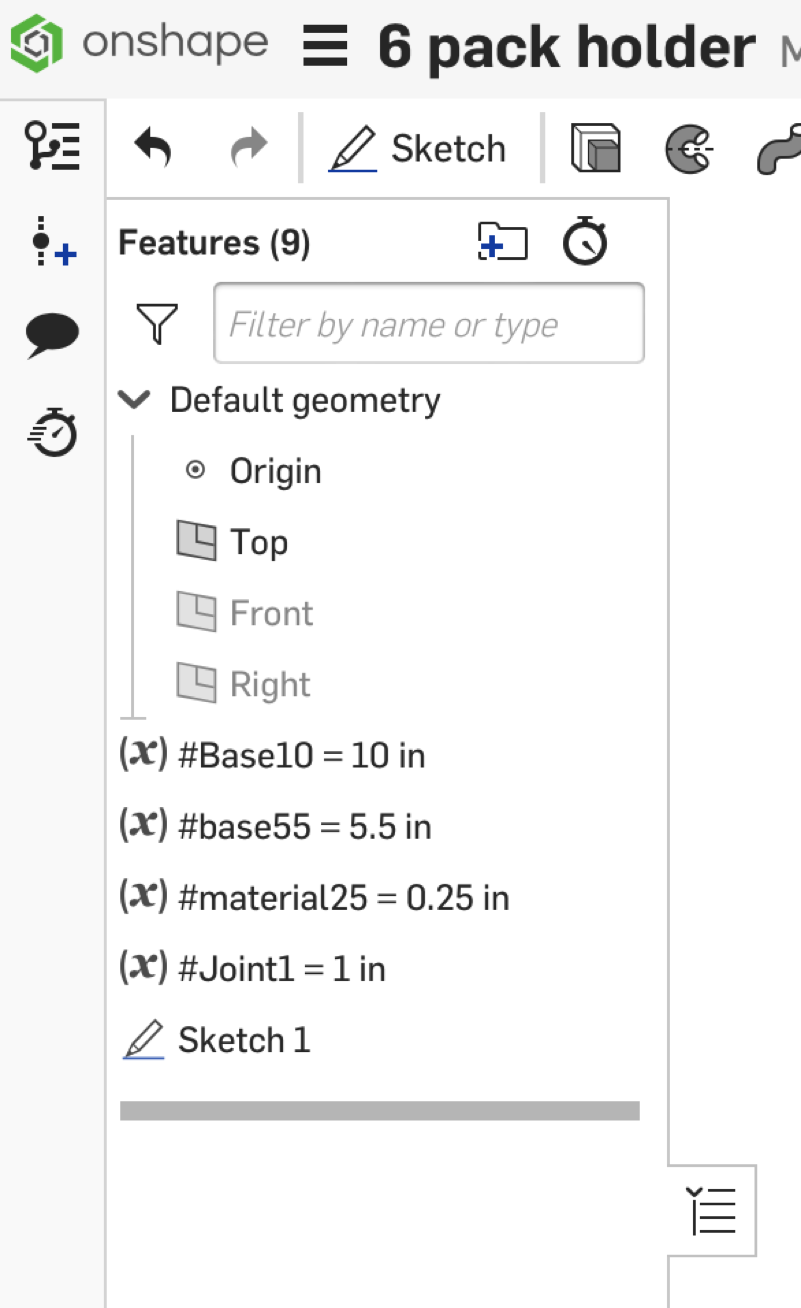
- Create variable for parametric dimensions. A driven or parametric dimension is a reference parameter that reports a measurement value for the associated geometry. It does not define or drive the geometry and therefore cannot be directly edited.
- Select sketch plane
- Select corner rectangle tool to being creating base of box
- Select corner rectangel tool again to start making box joint tabs.
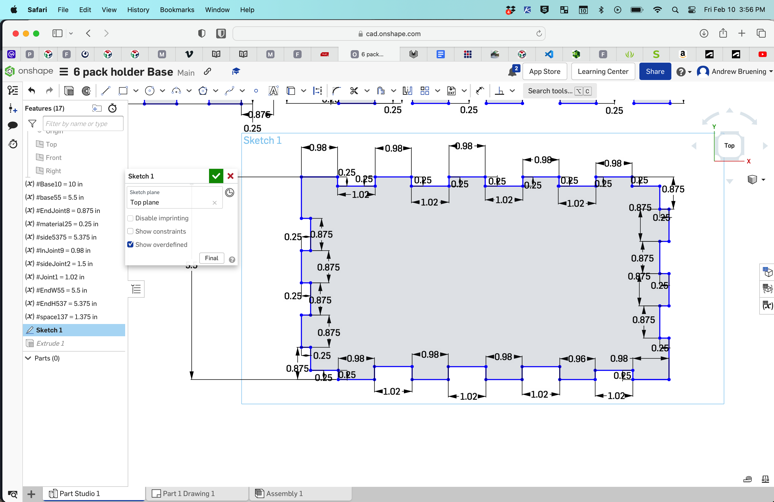
- Dimension length and height of box and tabs using variables established at the beginning.
- Repeat for each side of the box as well as the ends.
- After all dimensions are set click finish sketch and extrude geometry to create 3D parts
- Assemble parts to make sure box fits together properly
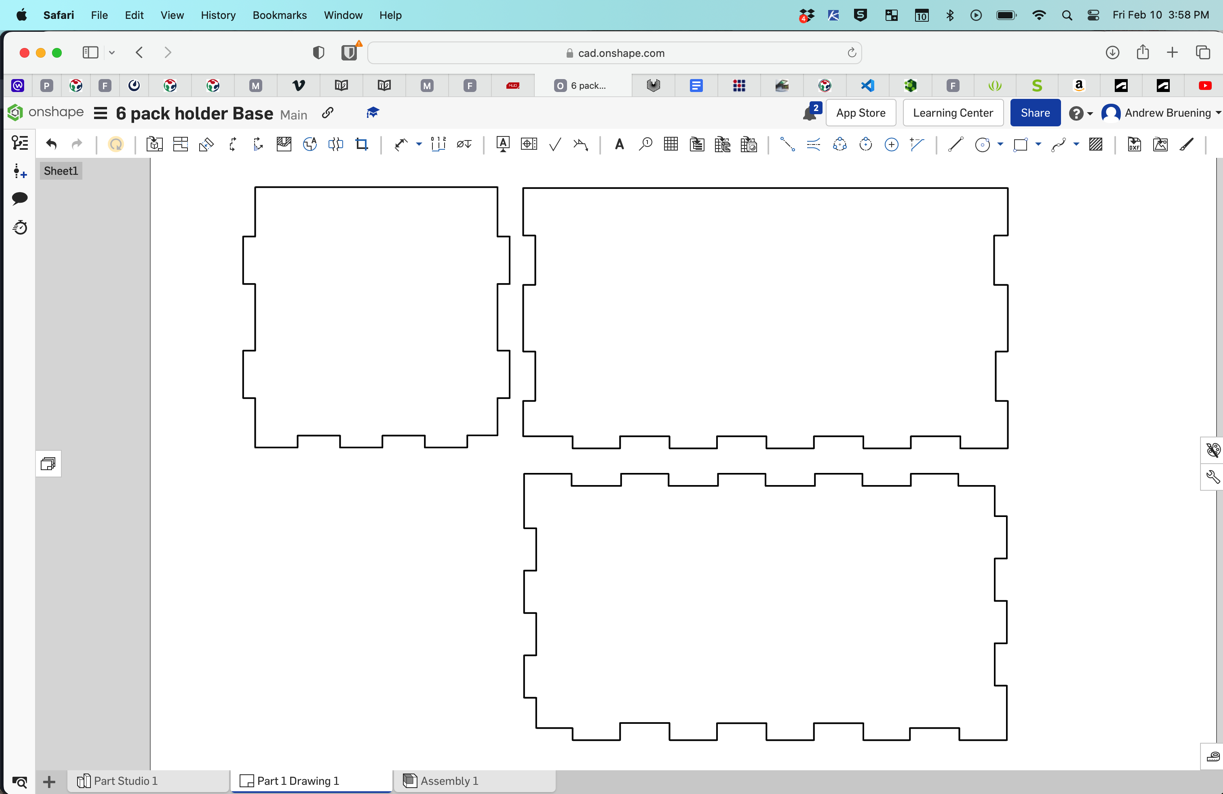
- Create drawing file of parts to export to laser cutter.
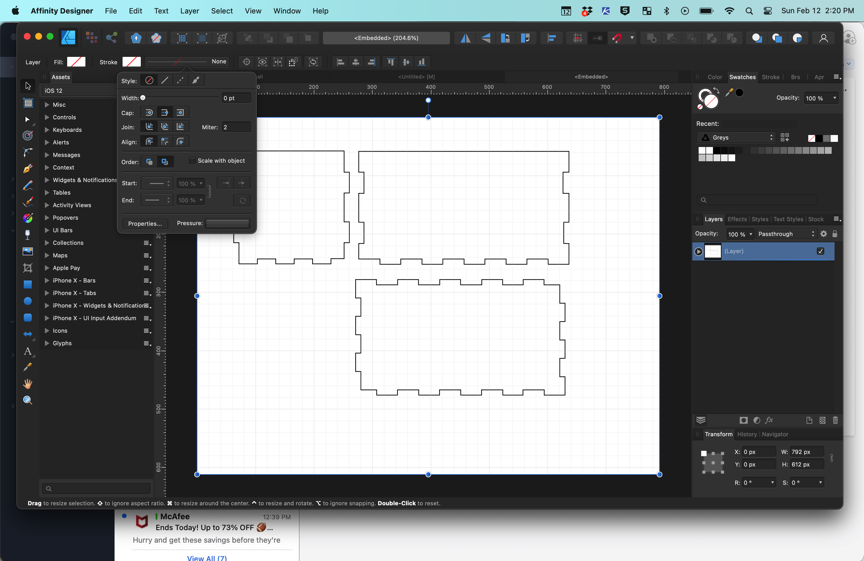
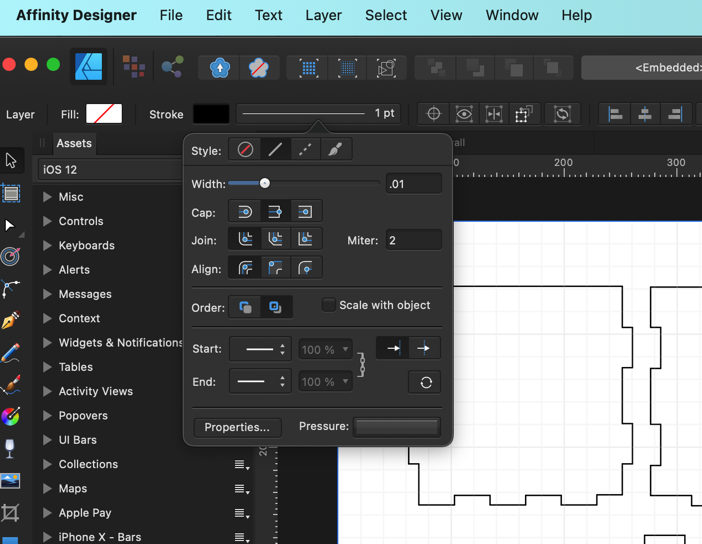
- Open Affinity Designer and import drawing file of box to prep for laser cutter. In Affinity Designer I have to edit line thikness to make sure that they will read as vectors in the Epilog laser cutter. Lines must have a thickness of .01pt in order to be read as vectors.
- .....


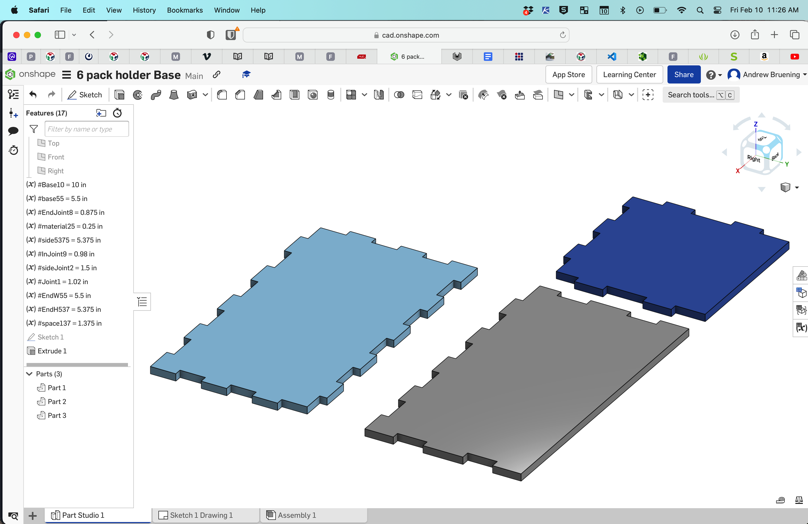
Laser Cut Box Version 1
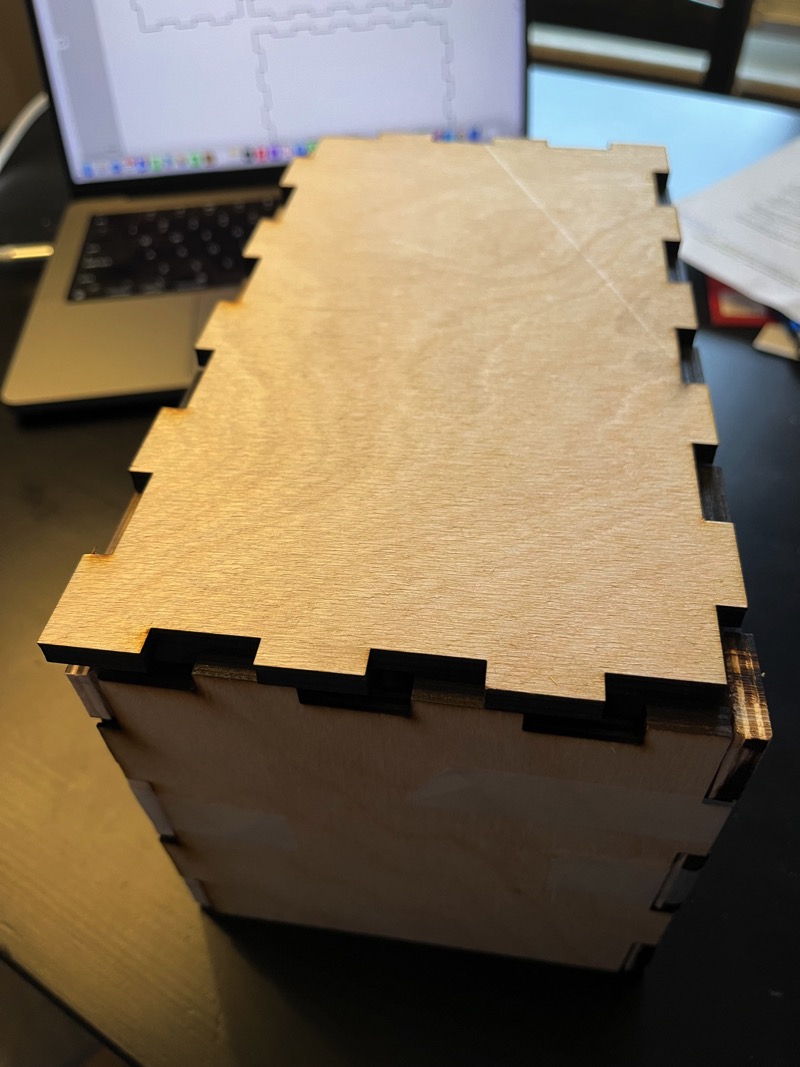
First attempt at assembly of the box. I realized I had made an error on one of the dimensions so I had to go back and inspect the original sketch and dimensions. I will admit that I did not do the full assembly in Onshape prior to laser cutting the parts.
After looking back at the sketch I realized I created a dimension off of the wrong edge line. So after correcting the dimension placement I recut box and it all worked out.
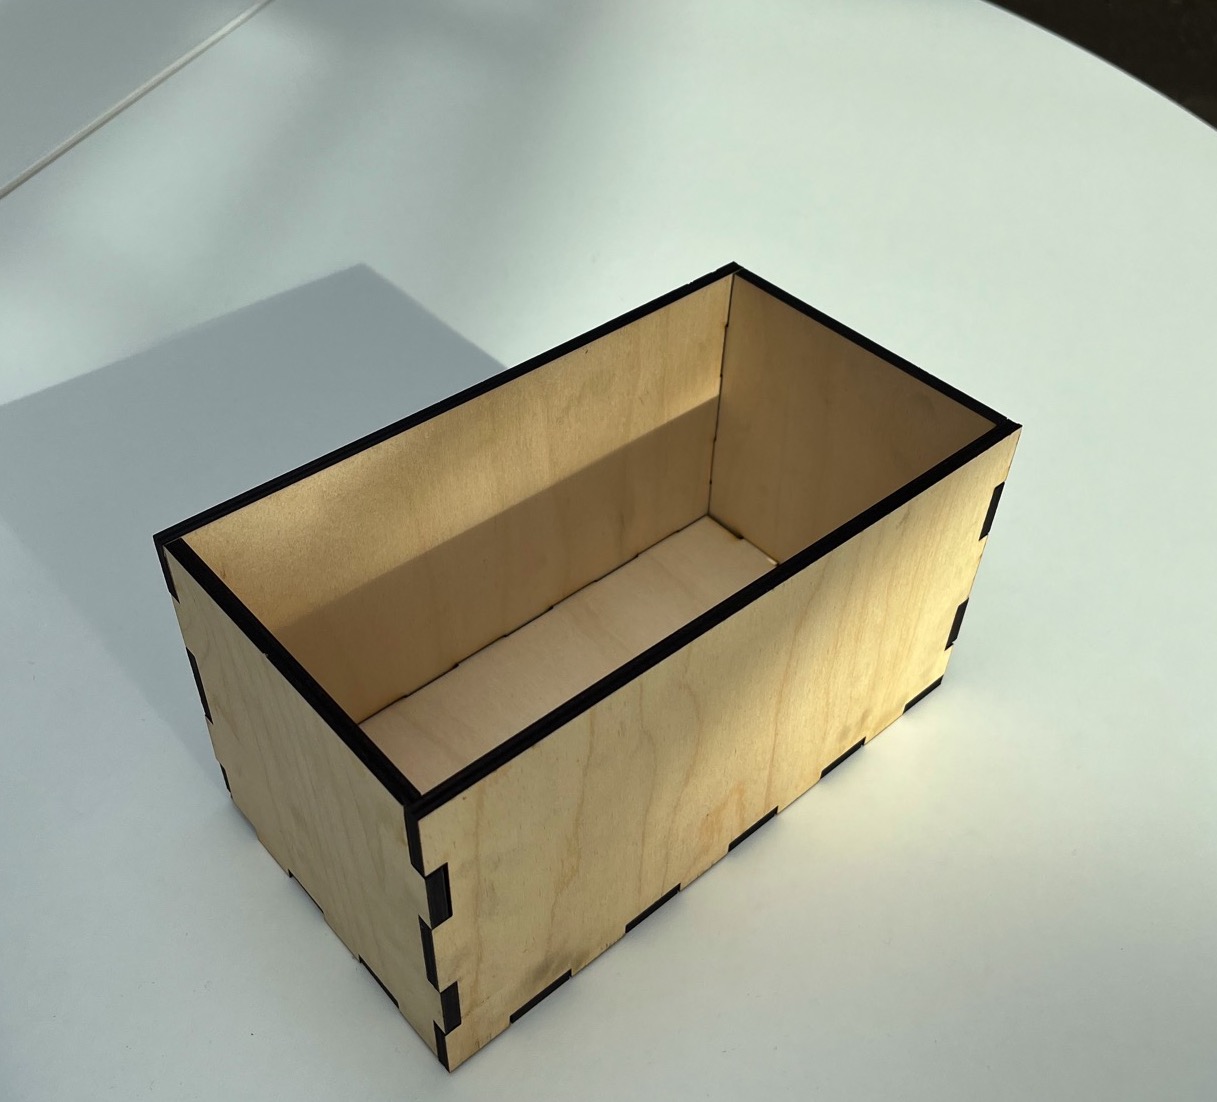
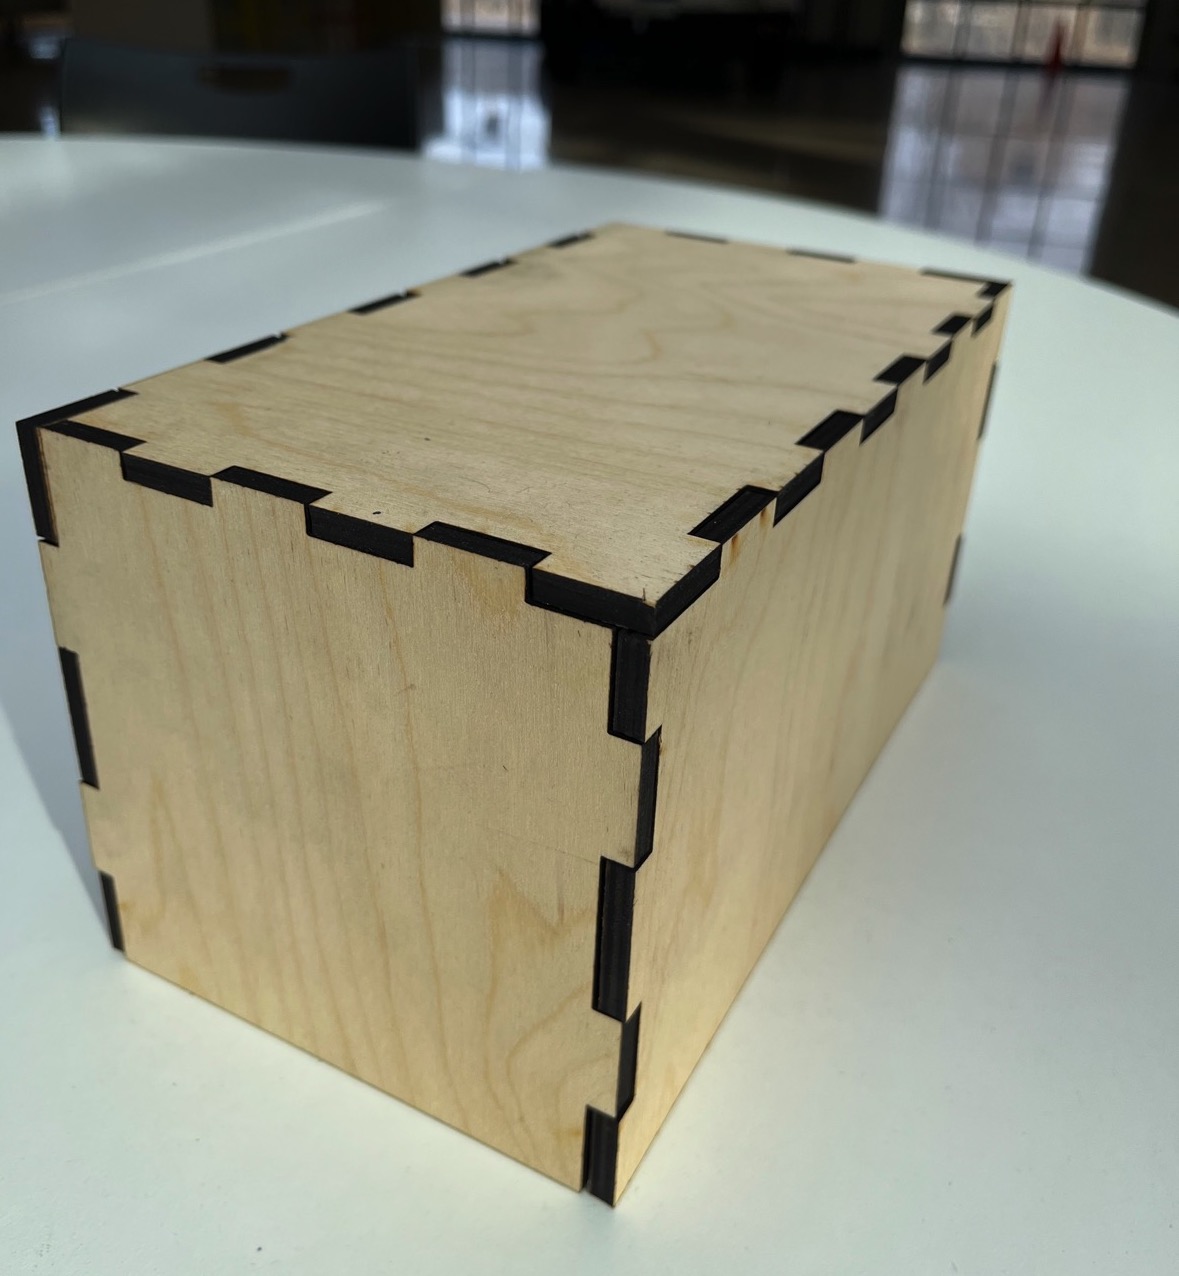
Laser Cut Box Version 2
Laser Cutter - Lessons Learned 1
Even though I have used the laser cutter many times before and I have years of CAD experience, I learned a few things completing this project.
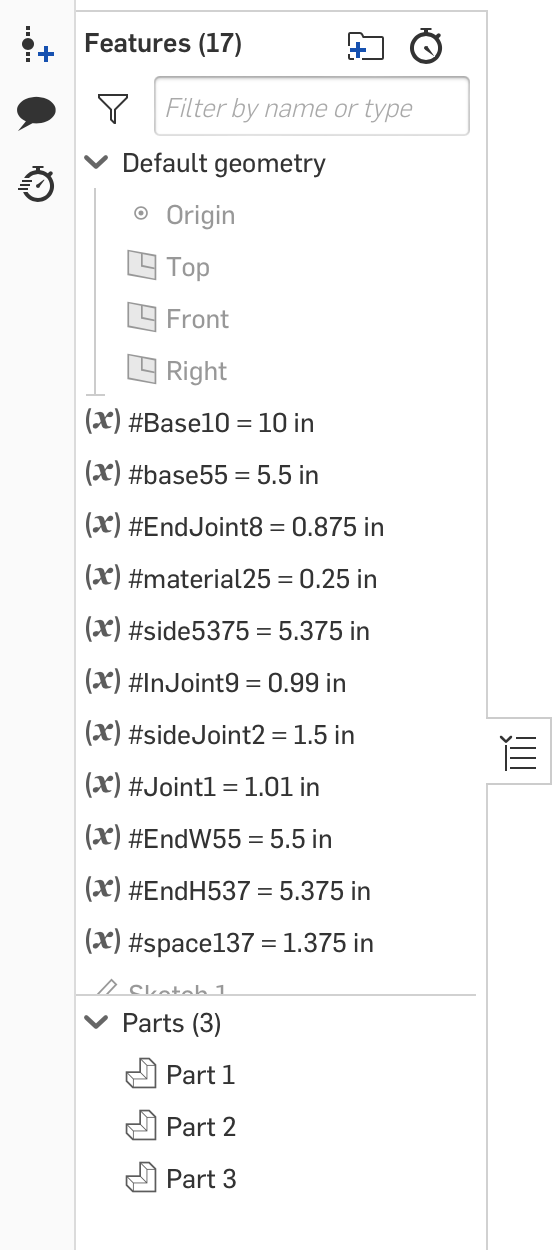
- I learned how to use the variable tool to create parametric dimensions I also should have created formulas from one base dimension rather than creating a variable for each change in part geometry this way I would only have to change one variable and the rest would adapt to that one change.
- I learned to be more careful when creating dimensions on a sketch.
- I learned to fully assemble parts in CAD to make sure they will assemble after fabrication.
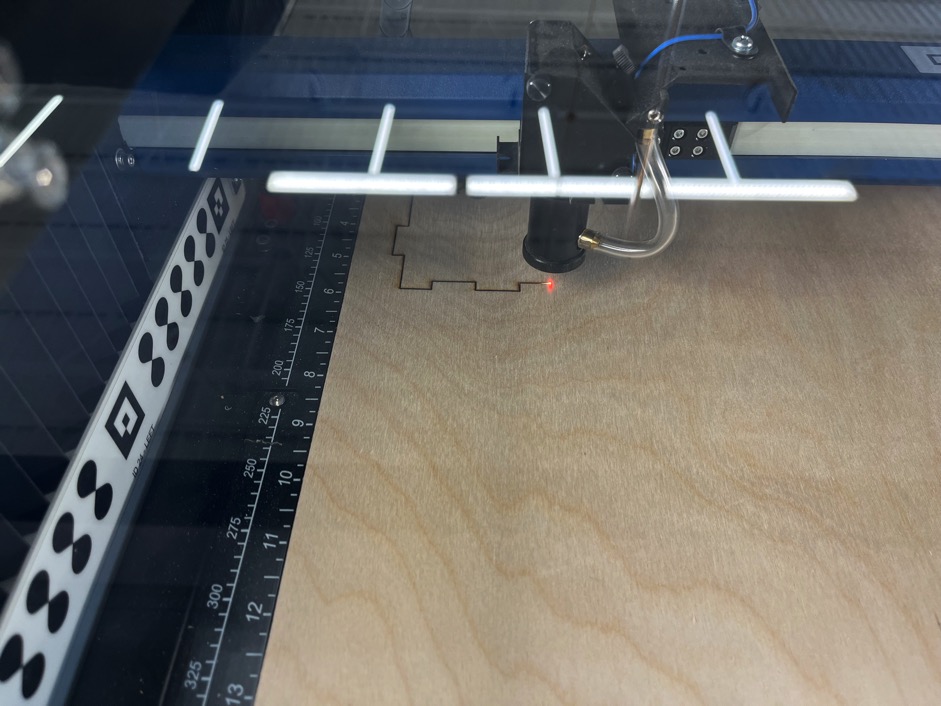
- I learned that not all materials are created to the same quality. One of the parts cut on the laser did not cut all the way through...but only in random small segments. I think the coor of the plywood had more dense wood preventing a full depth cut.
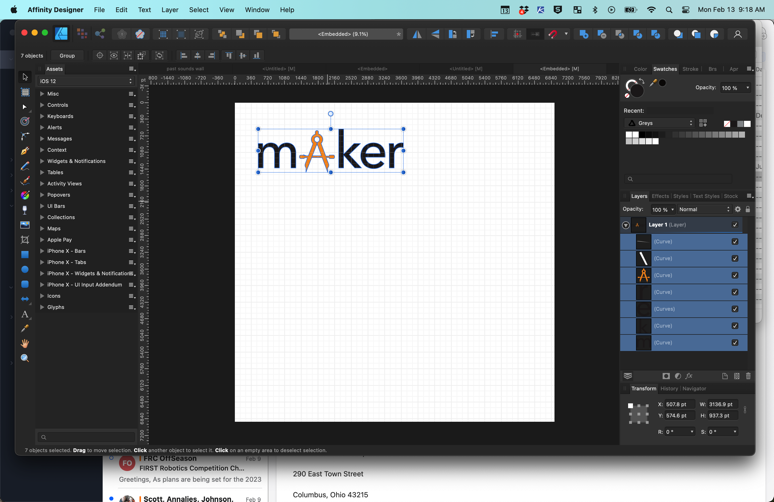
Vinyl Cutting - Sticker
- Open Affinity Designer or other 2D design tool.
- Create new document and name document.
- Create logo or 2D design to be cut.
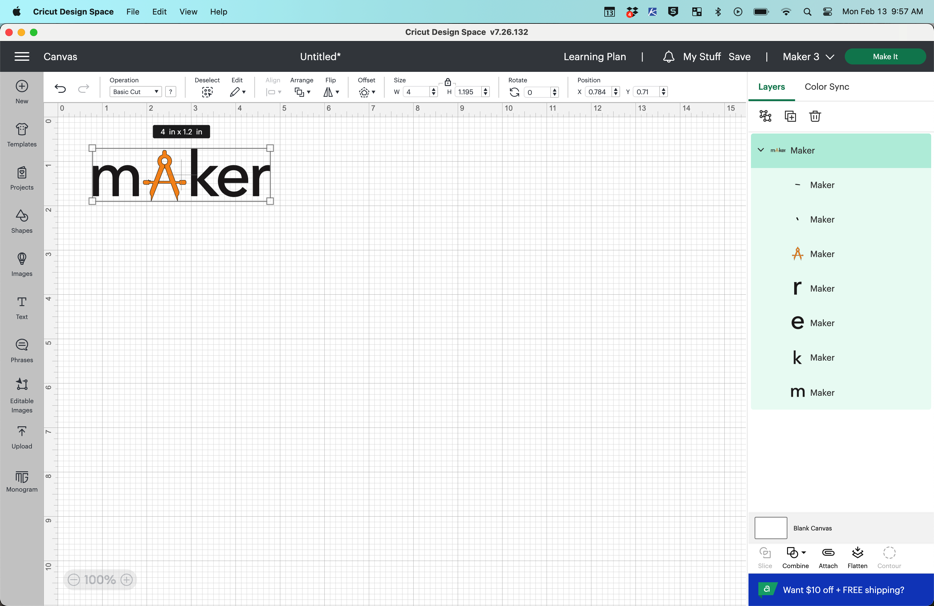
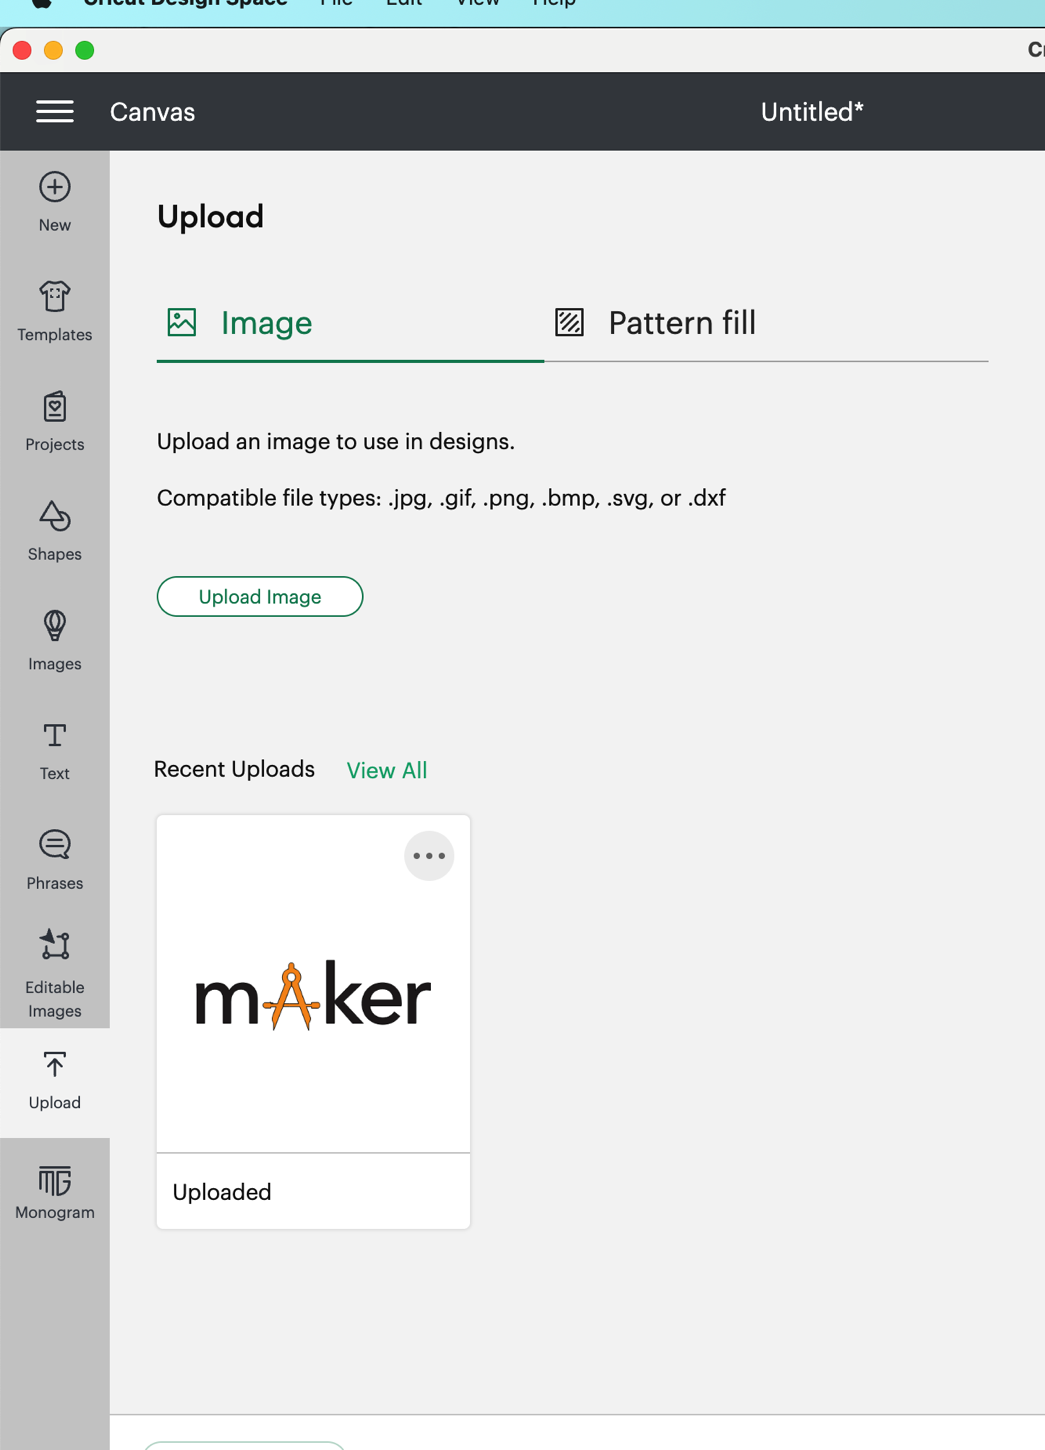
- Open Cricut.
- Upload file to be cut.
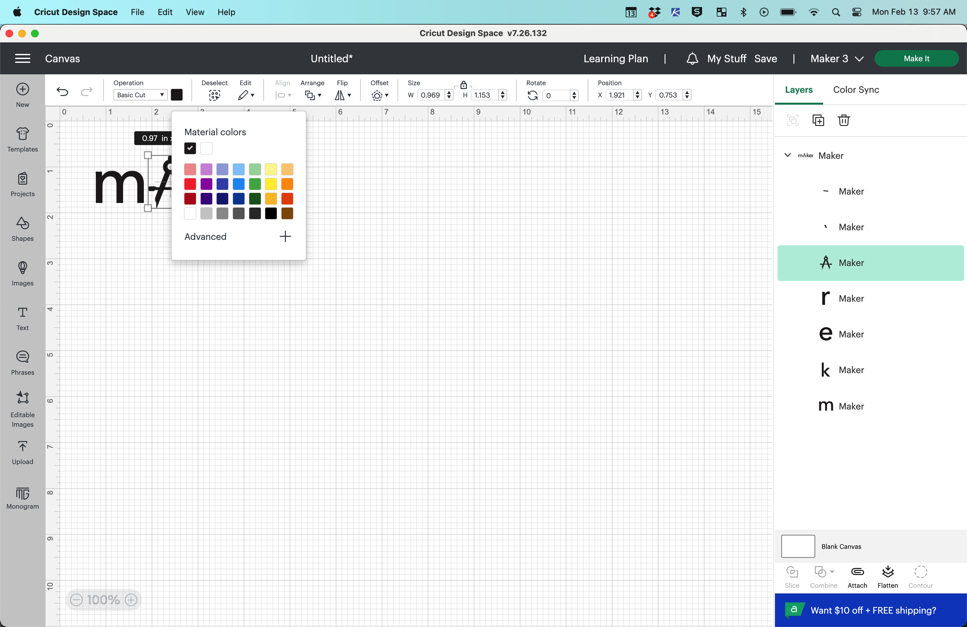
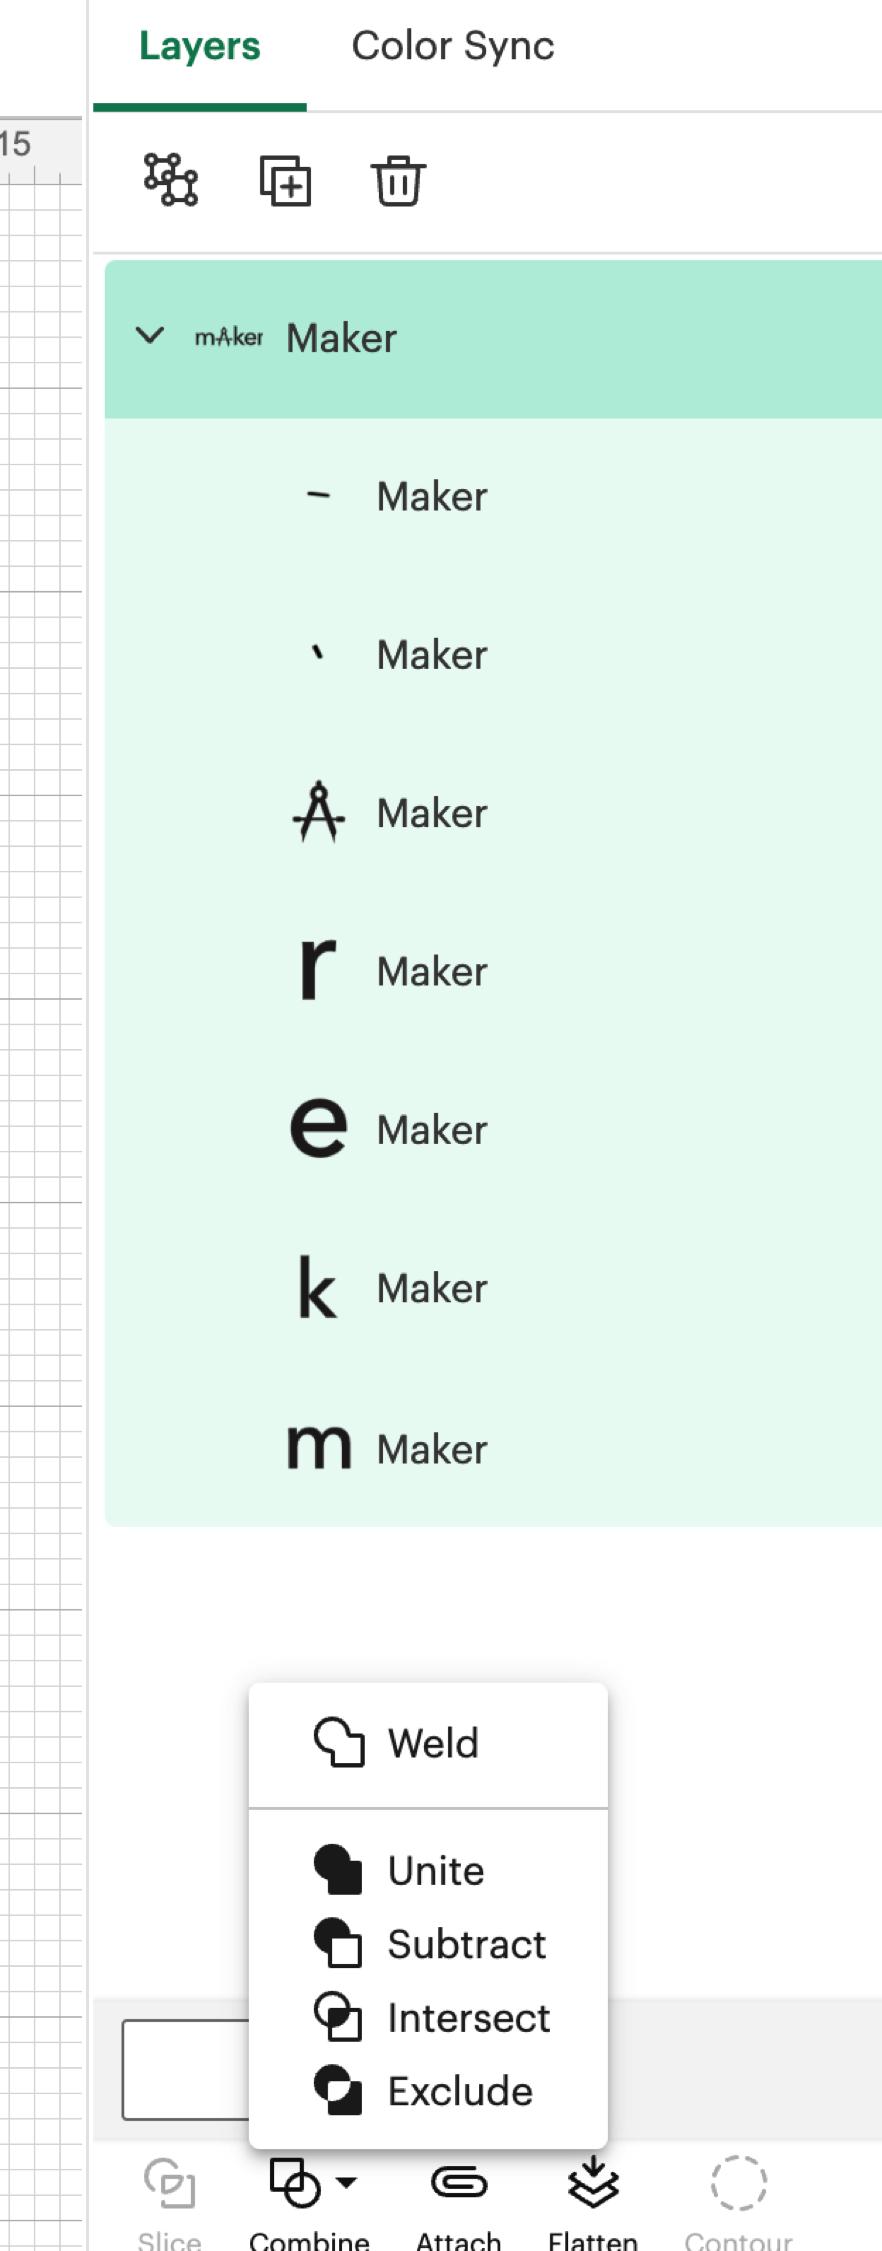
- Change design to be single color.
- Select entire design and select the "Unite" tool.
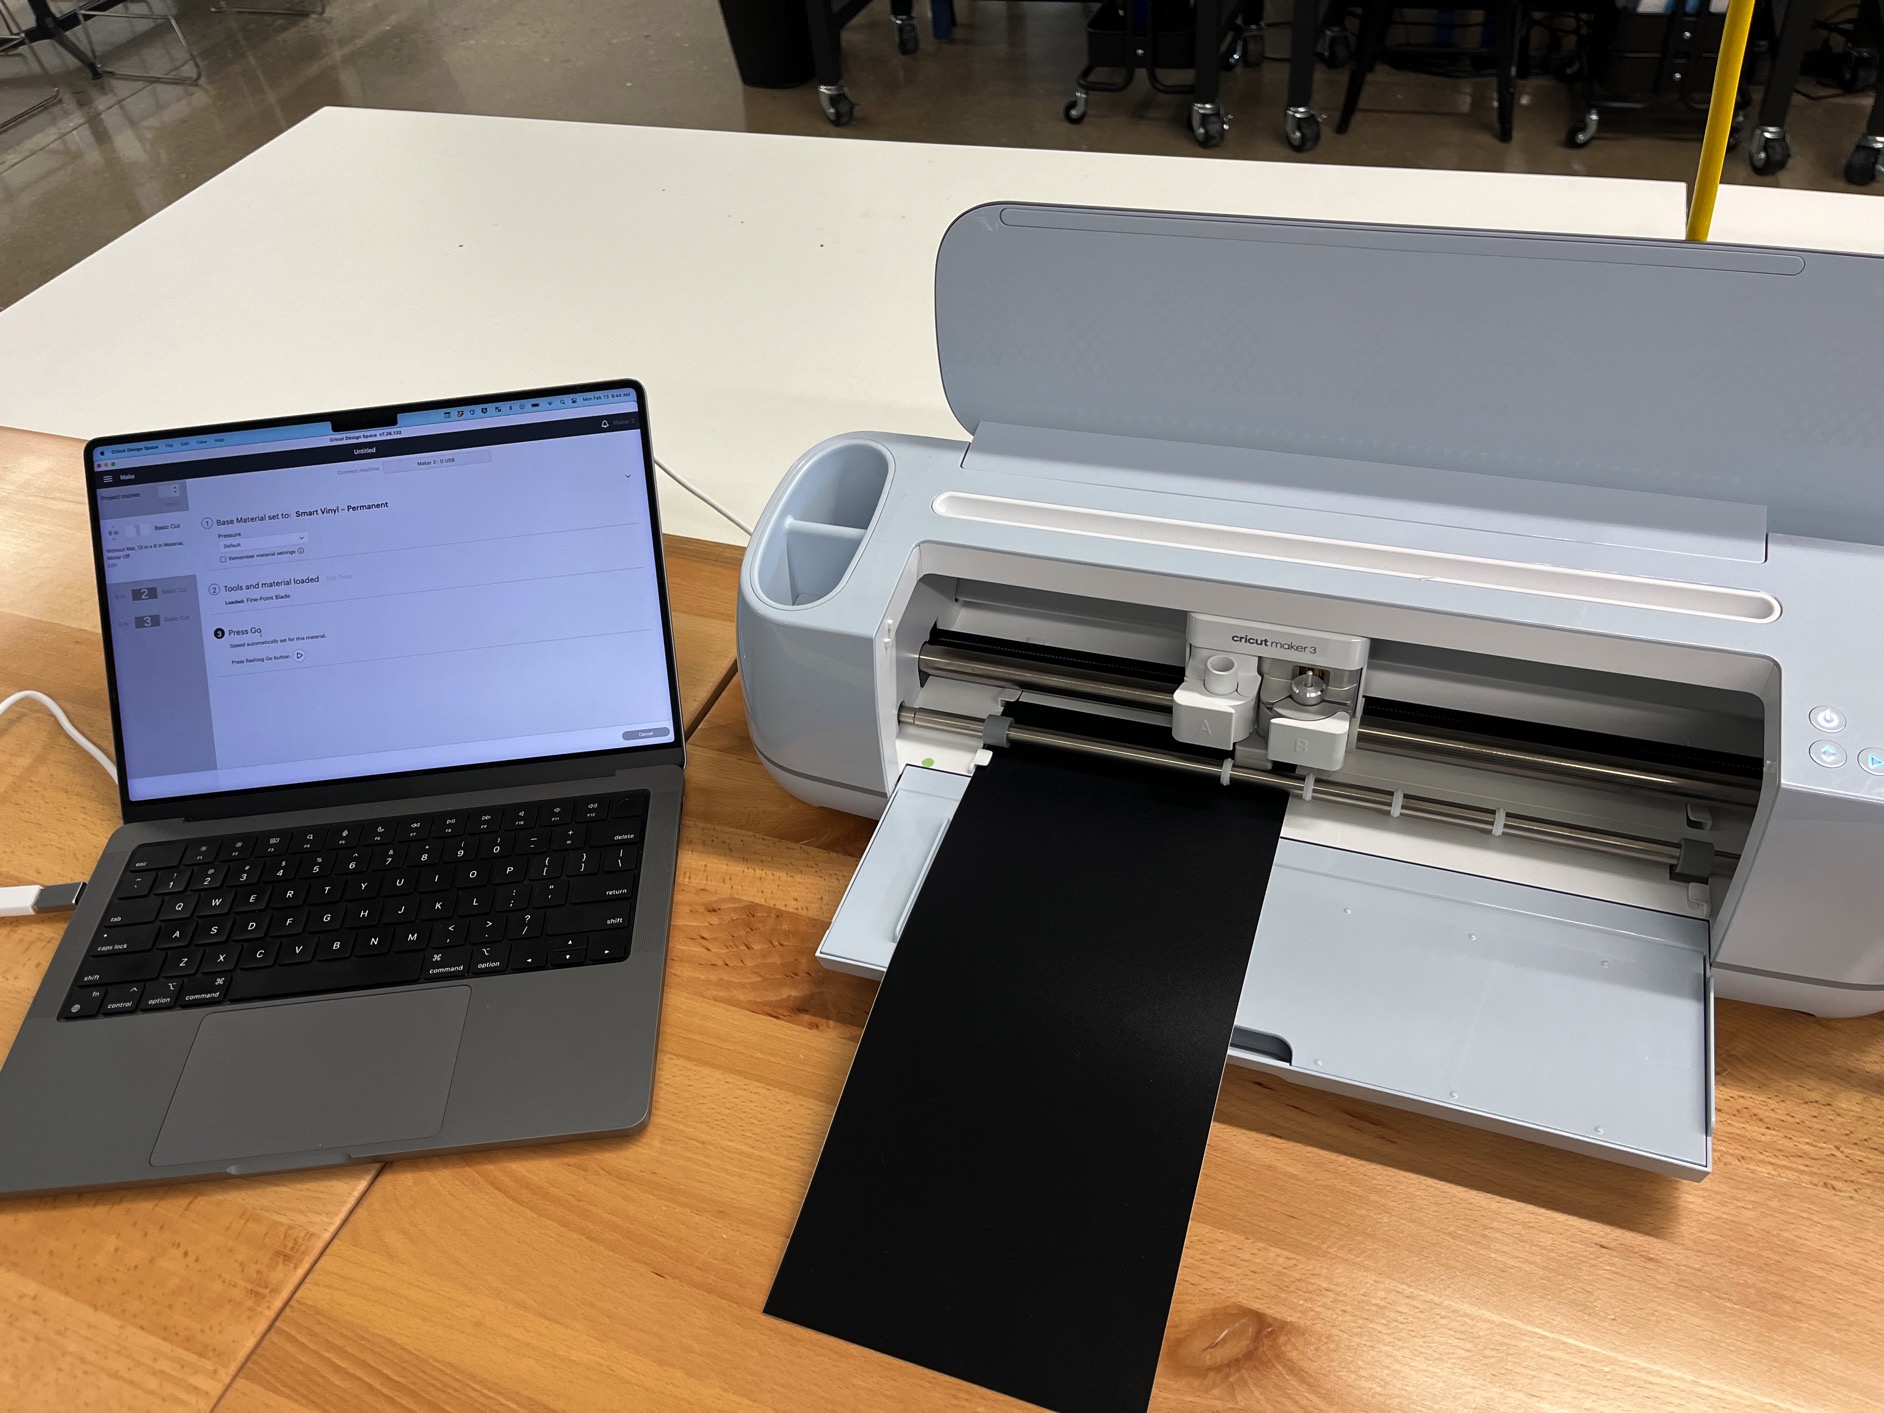
- Send to cutter.
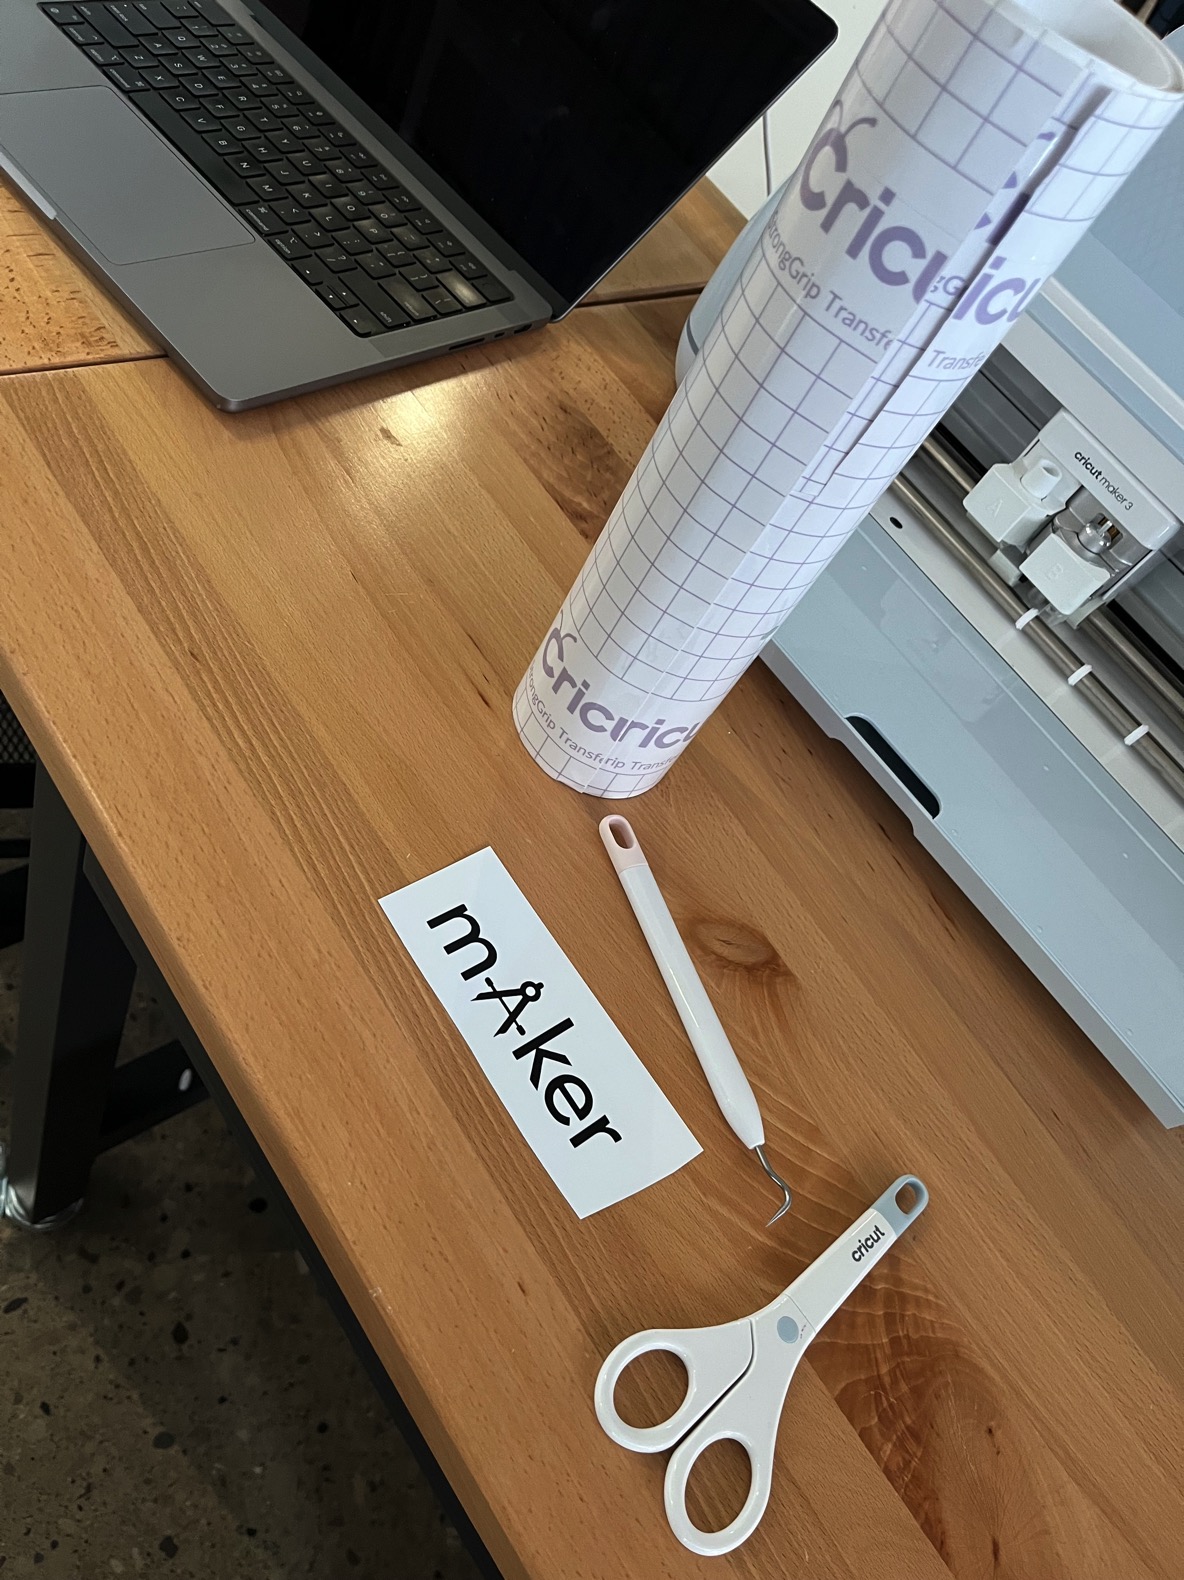
- After cut weed design to be transferred.
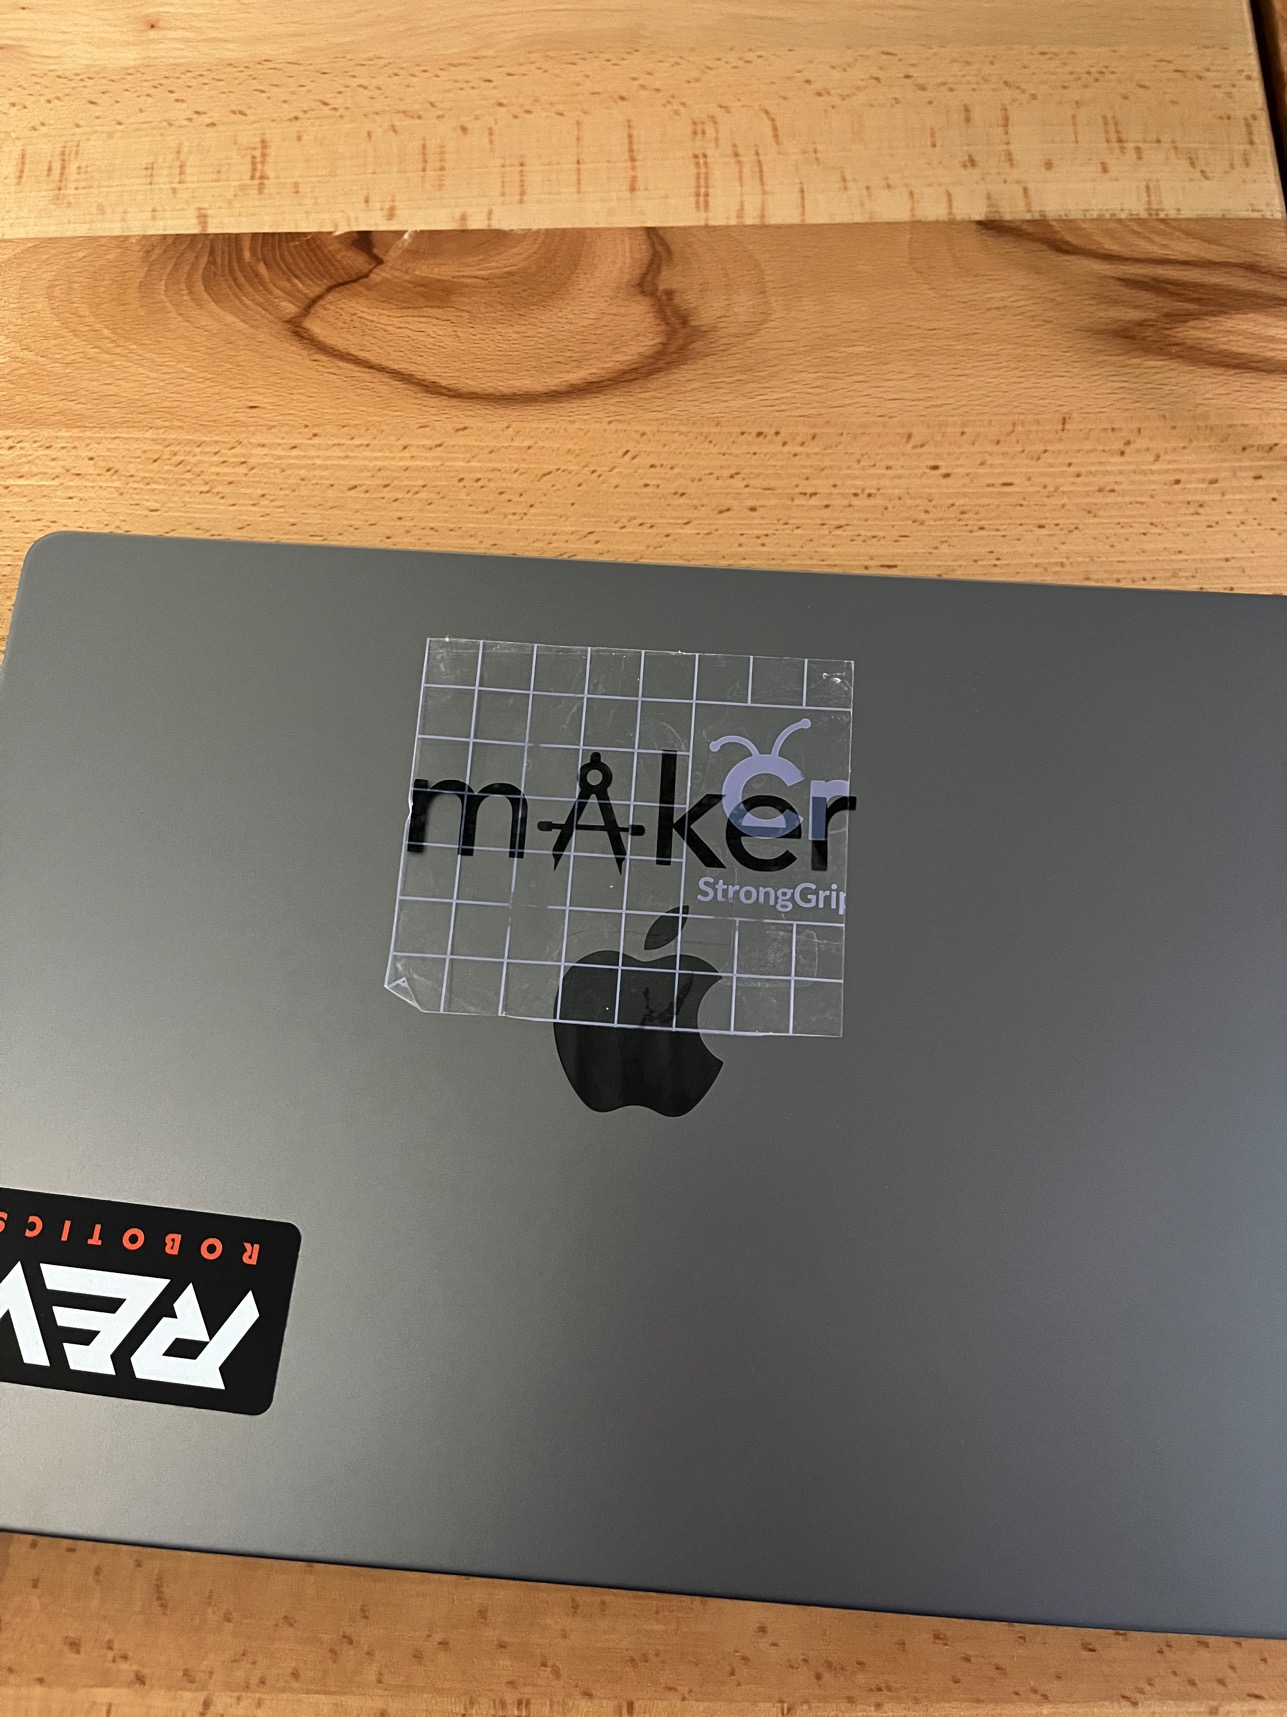
- Cut transfer paper and press onto cut vinyl.
- Place transfer paper with design on surface where you want the sticker.