Assignment
Individual Assignment:
- Browse through the data sheet for your microcontroller
- Program a microcontroller development board to interact (with local input &/or output) and communicate (remotely)
- Extra Credit: Use different languages &/or development environments
Group Assignment
The group assignment this week was the following:
You can find our group page here.
Comparing XIAO RP2040 and XIAO SAMD21
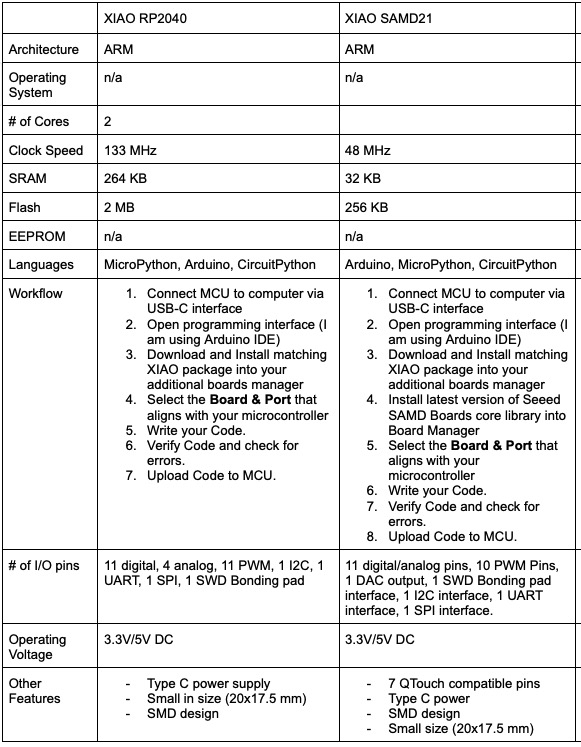
Unfortunately, at our lab right now, we have a very VERY limited selection of microcontrollers to explore and play around with. This SEVERELY limits my options for comparing the performance of various microcontrollers. The only two we have currently are the Seeed Studio XIAO RP2040 and the Seeed Studio XIAO SAMD21. They are almost exactly the same based on appearances, but have some key differences that you can see upcoming on this page. My individual assignment I used only the XIAO RP2040, but for the group assignment I read/skimmed the datasheets for both controllers, found out the specifications and features, and made a table to display some of the major similarities and differences.
I created this table with the anticipation that I would be comparing one more additional miccrocontroller, but unfortunately we do not have any in our facility currently. I am hoping that later on I can compare another architecture type that is different than the ARM.
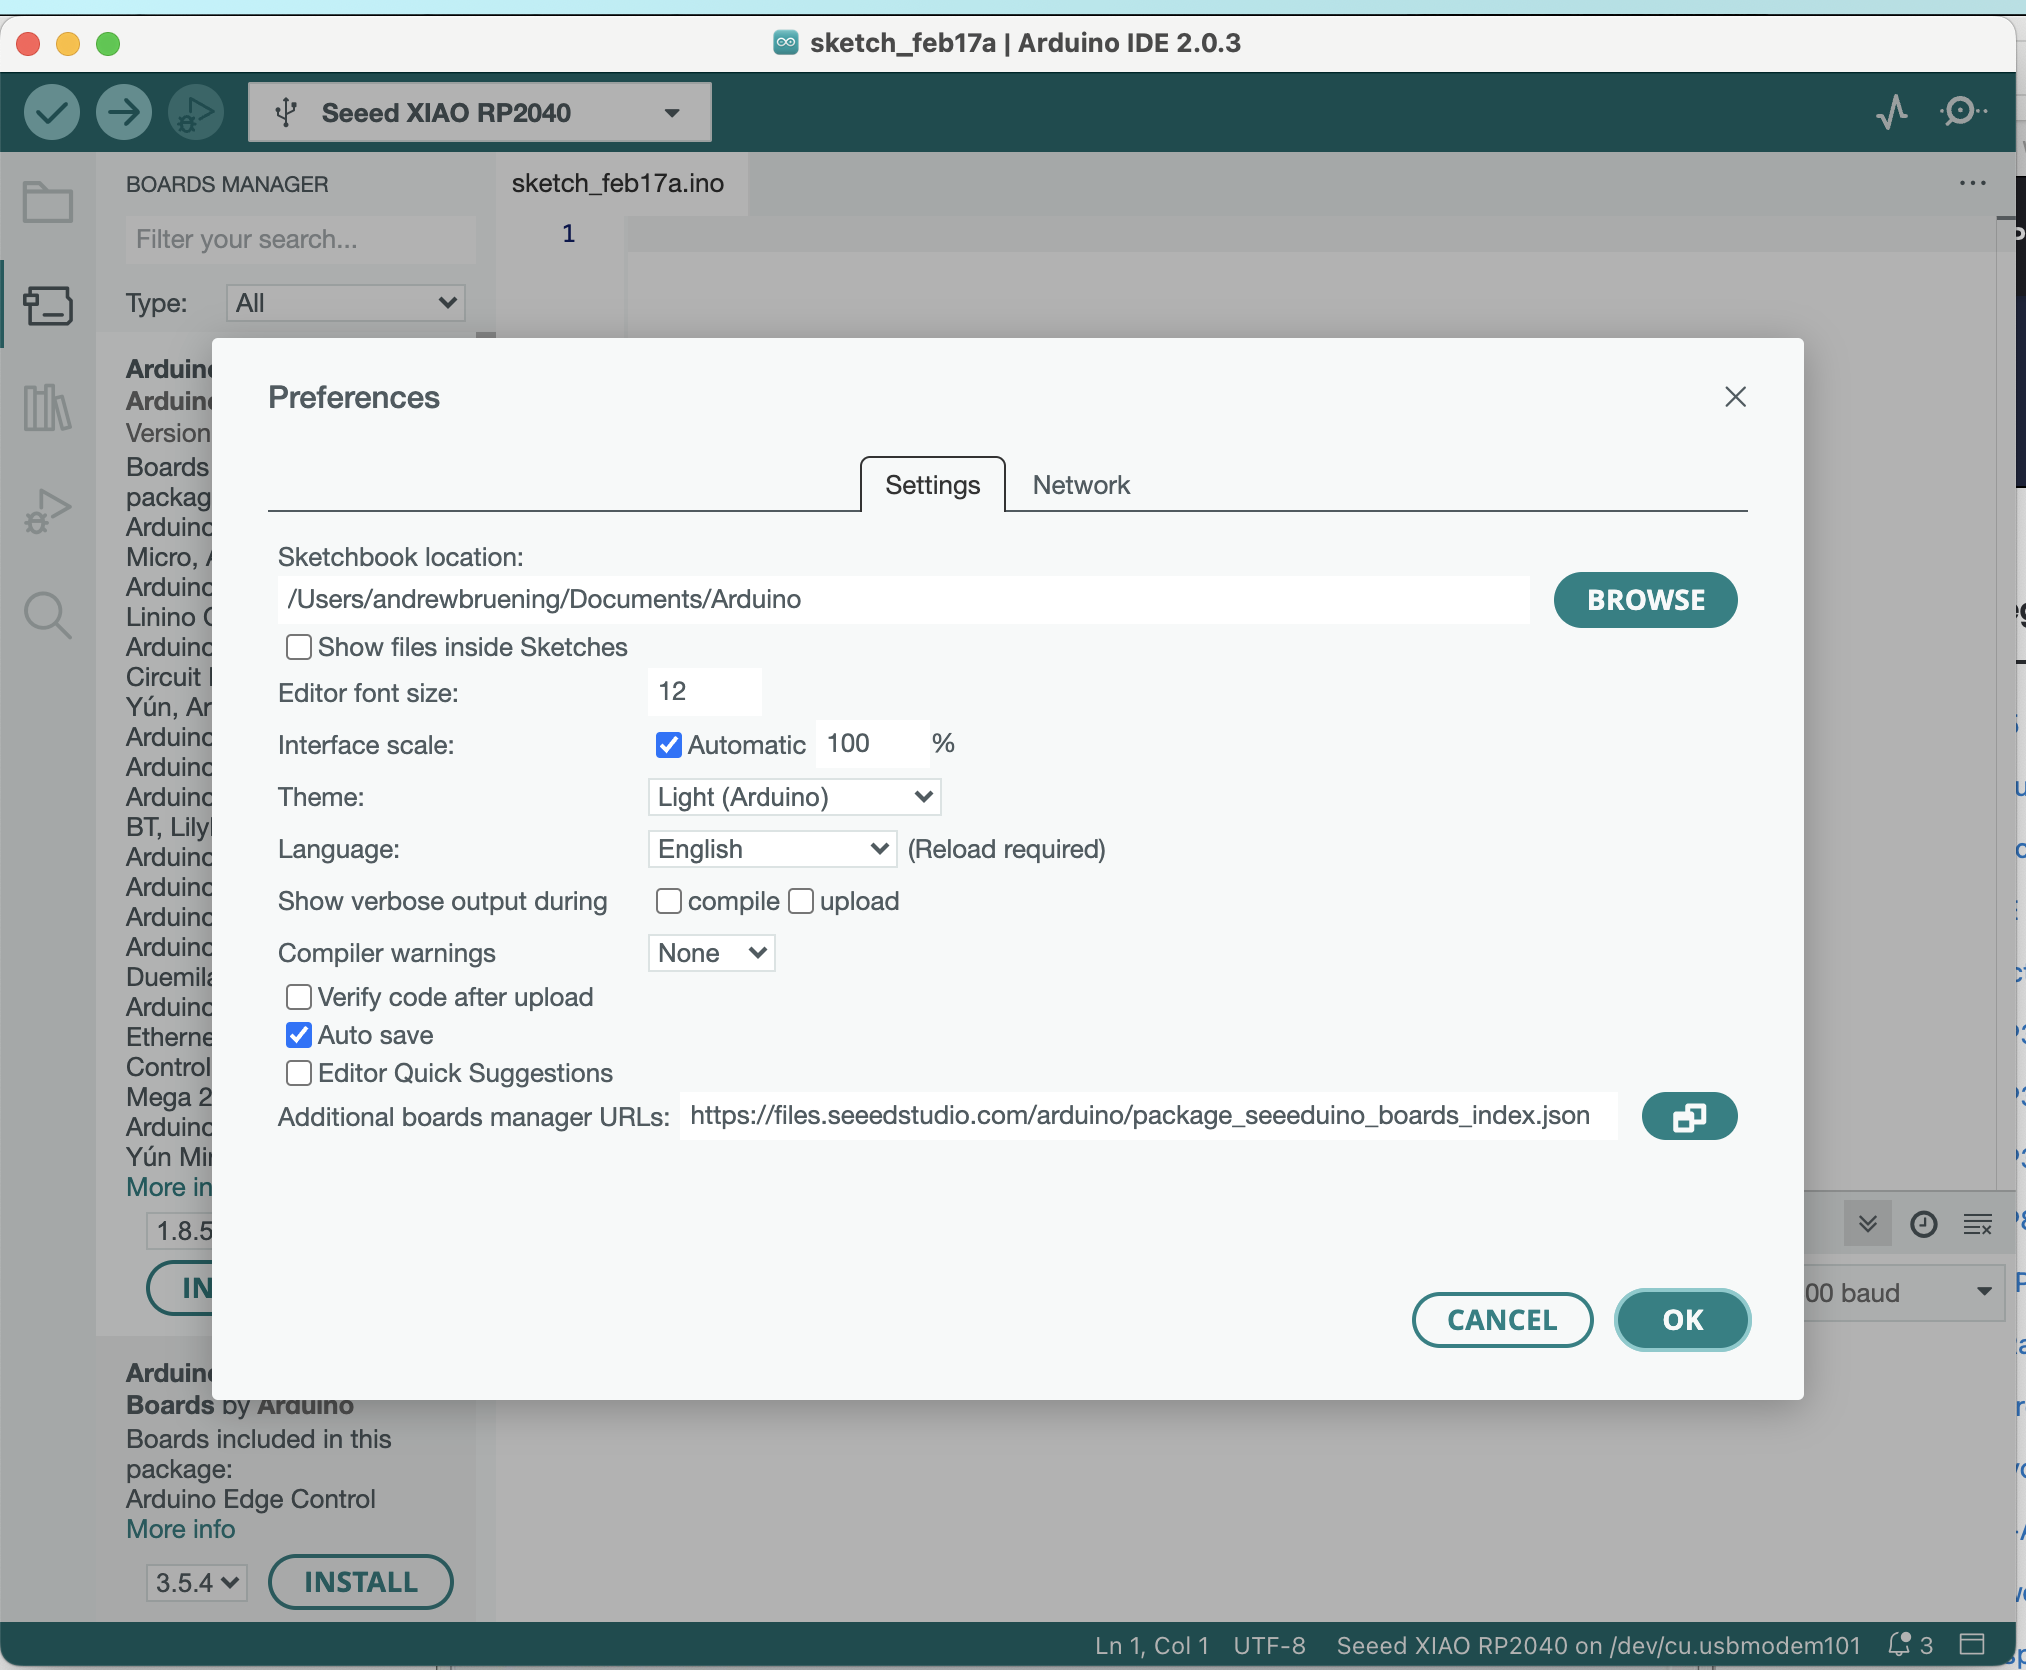
Note** the library download for the XIAO package is the same for both of these boards (in Arduino IDE --> additional boards manager --> URL input). More information is available below for programming the rp2040. The next step after, is searching for either the XIAO rp2040 library or the SAMD21. Depends on which you are using.**
The RP2040 and the SAMD21 are very similar in a lot of ways. Some key differences I noticed are the clock speeds (rp2040 much faster than samd21), memory capacities for Flash and SRAM, and the pins themselves. The SAMD21 supports QTouch, which offers built-in hardware for touch measurements for sensors, buttons, sliders, etc. This can add a different component to a project that may elevate your design compared to using an rp2040.
Both microcontrollers have UART, SPI, and I2C capabilities. Overall, the two boards, given they share the same architecture, overlap a lot in their features and functions.
Research
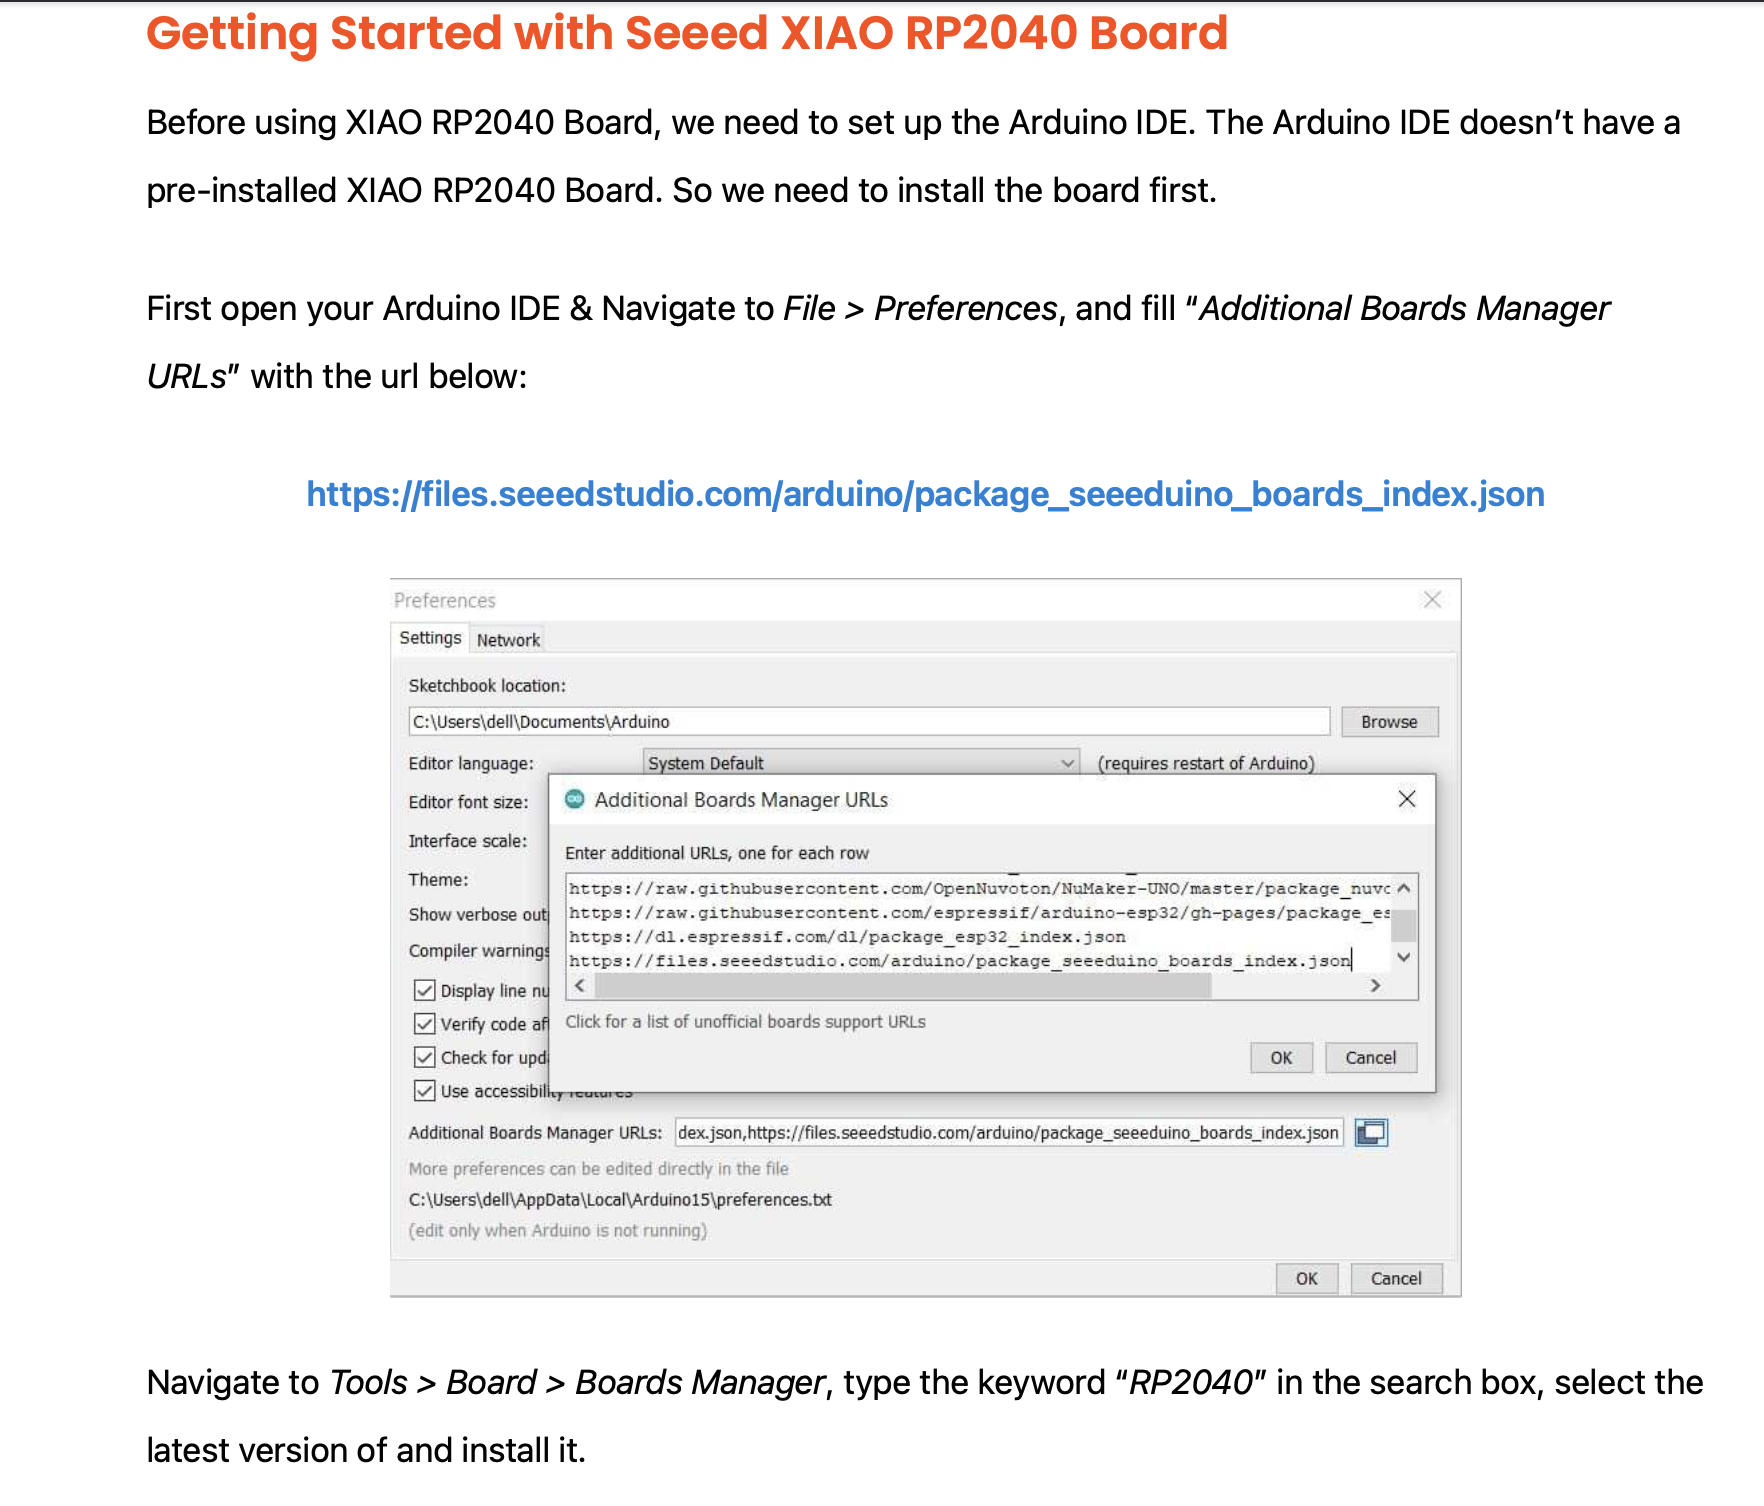
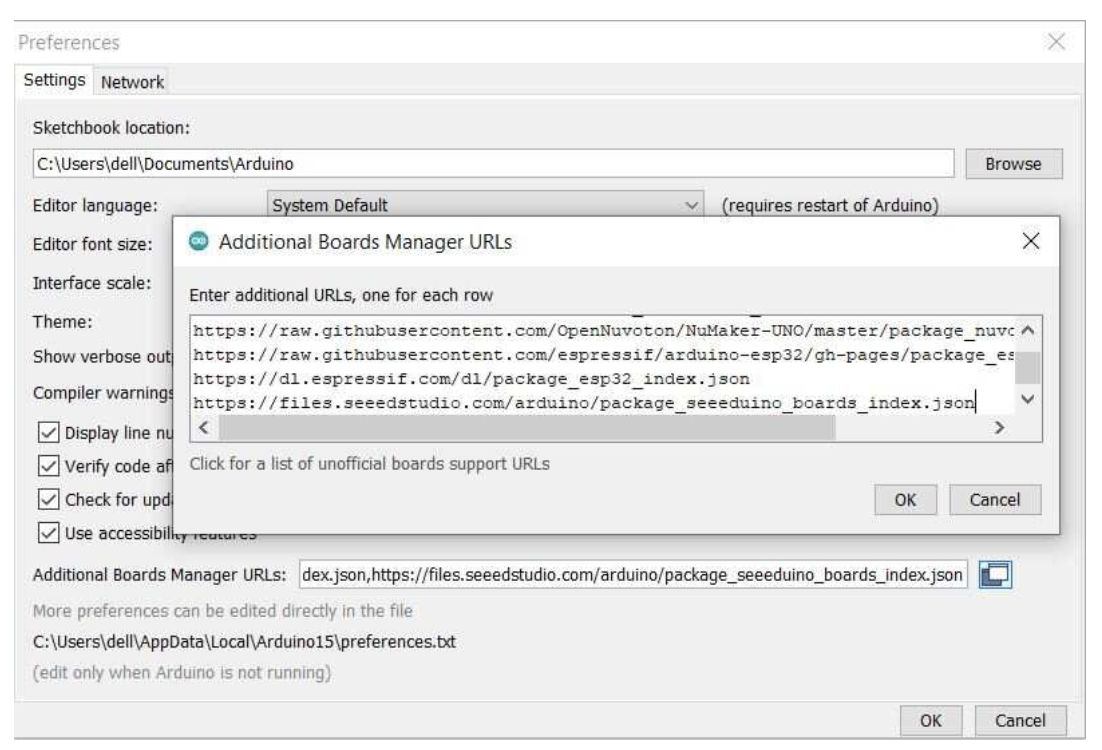
Set up Arduino and RP2040
- First thing I had to do was to update Arduino IDE on my computer since I had not used the app in several years.
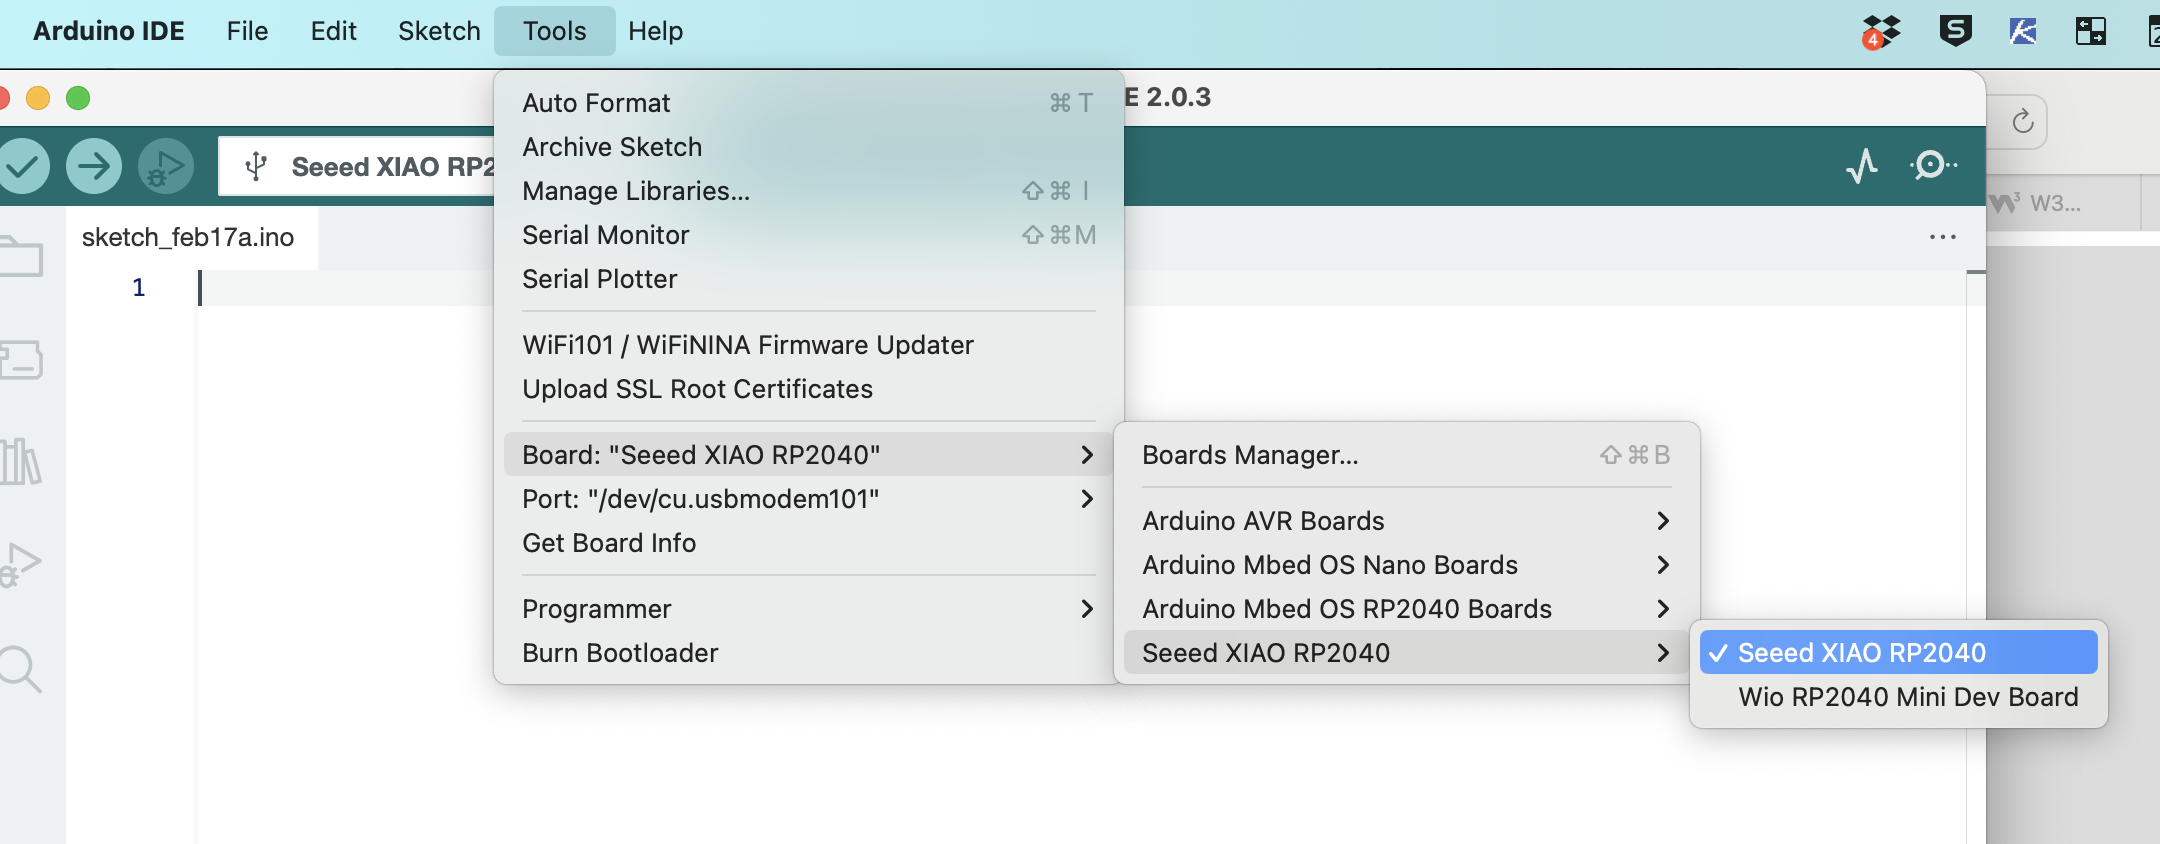
- Once updated, I had to install the correct library for the Seeed Xiao RP2040.
- First thing I had to do was to update Arduino IDE on my computer since I had not used the app in several years.
- Once I opened the Board Manager and installed the proper libraries I found that I was still missing the proper board. After some research I found the right files since the Arduino IDE doesn’t have a pre-installed XIAO RP2040 Board so I installed the board correct board.
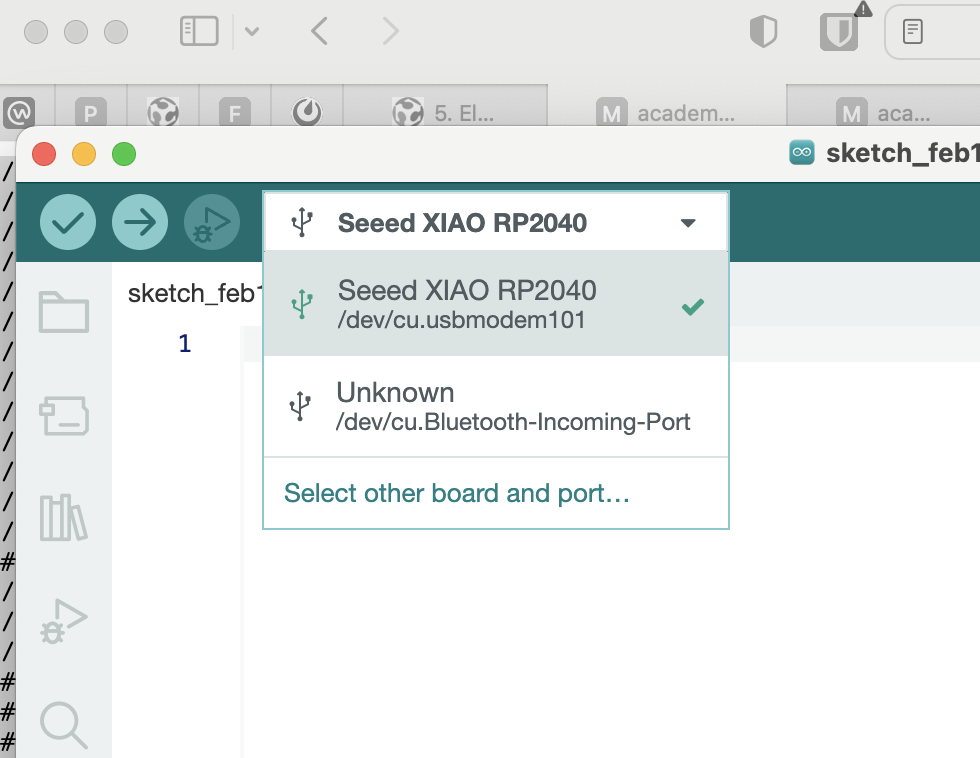
- After installing the correct libraries and the Seeed Xiao RP2040 board I was able to finally connect.
Example Code for Neopixel blink
The following code was taken from the example provided to the class. I did make a modification to the serial.print to be "hello from FabAcademy: you typed". I also changed the neopixel delay from 100ms to 500ms to increase the time the color stayed on.
        //
        // hello.RP204-XIAO.blink-echo.ino
        //
        // Seeed XIAO RP2040 blink and echo hello-world
        //
        // Neil Gershenfeld 2/12/23
        //
        // This work may be reproduced, modified, distributed,
        // performed, and displayed for any purpose, but must
        // acknowledge this project. Copyright is retained and
        // must be preserved. The work is provided as is; no
        // warranty is provided, and users accept all liability.
        //
        #include
        //
        // globals
        //
        #define numpixels 1
        #define pixelpower 11
        #define pixelpin 12
        #define bufsize 25
        char buf[bufsize];
        int count=0;
        //
        // setup
        //
        Adafruit_NeoPixel pixel(numpixels,pixelpin,NEO_GRB+NEO_KHZ800);
        void setup() {
           Serial.begin(9600);
           pixel.begin();
           pinMode(pixelpower,OUTPUT);
           digitalWrite(pixelpower,HIGH);
           }
        //
        // main loop
        //
        void loop() {
           char chr;
           //
           // check for a char
           //
           if (Serial.available()) {
              //
              // read, save, and send char
              //
              chr = Serial.read();
              buf[count] = chr;
              count += 1;
              buf[count] = 0;
              if (count == (bufsize-1))
                 count = 0;
              Serial.print("hello from FabAcademy: you typed ");
              Serial.println(buf);
              //
              // blink LED red green blue white black
              //
              pixel.setPixelColor(0,pixel.Color(255,0,0));
              pixel.show();
              delay(500);
              //
              pixel.setPixelColor(0,pixel.Color(0,255,0));
              pixel.show();
              delay(500);
              //
              pixel.setPixelColor(0,pixel.Color(0,0,255));
              pixel.show();
              delay(500);
              //
              pixel.setPixelColor(0,pixel.Color(255,255,255));
              pixel.show();
              delay(500);
              //
              pixel.setPixelColor(0,pixel.Color(0,0,0));
              pixel.show();
              pixel.show();
              }
           }
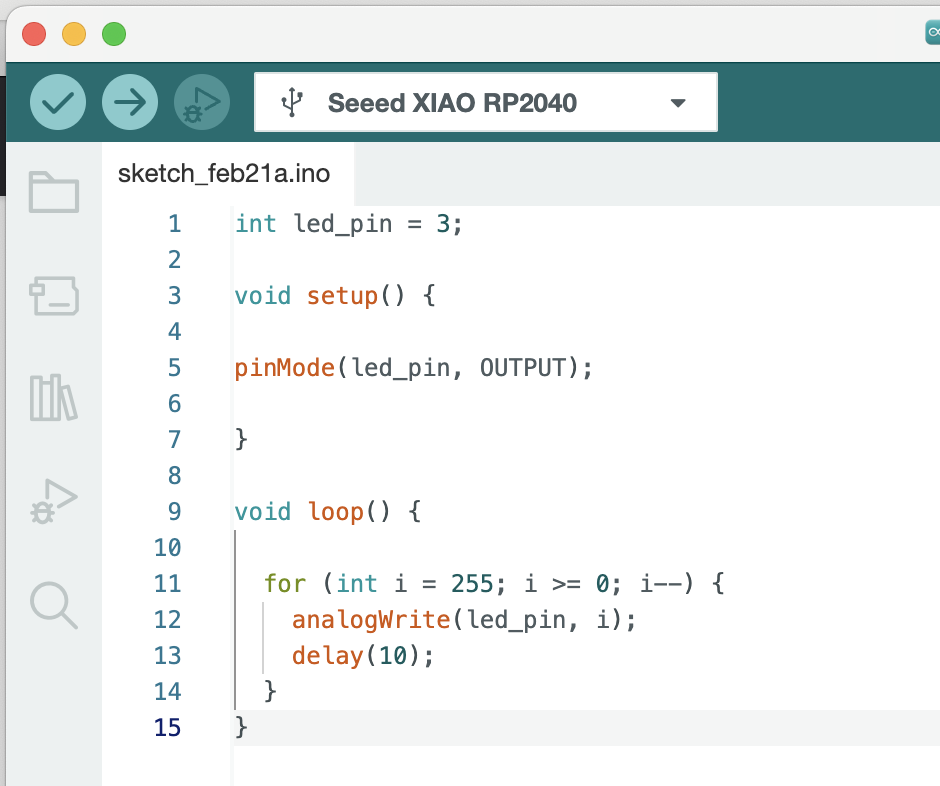
Example Code for LED blink
After running the code from class I decided to attempt my own basic LED blink code. Below are two examples of basic blink and a fade blink. Video and code for each.
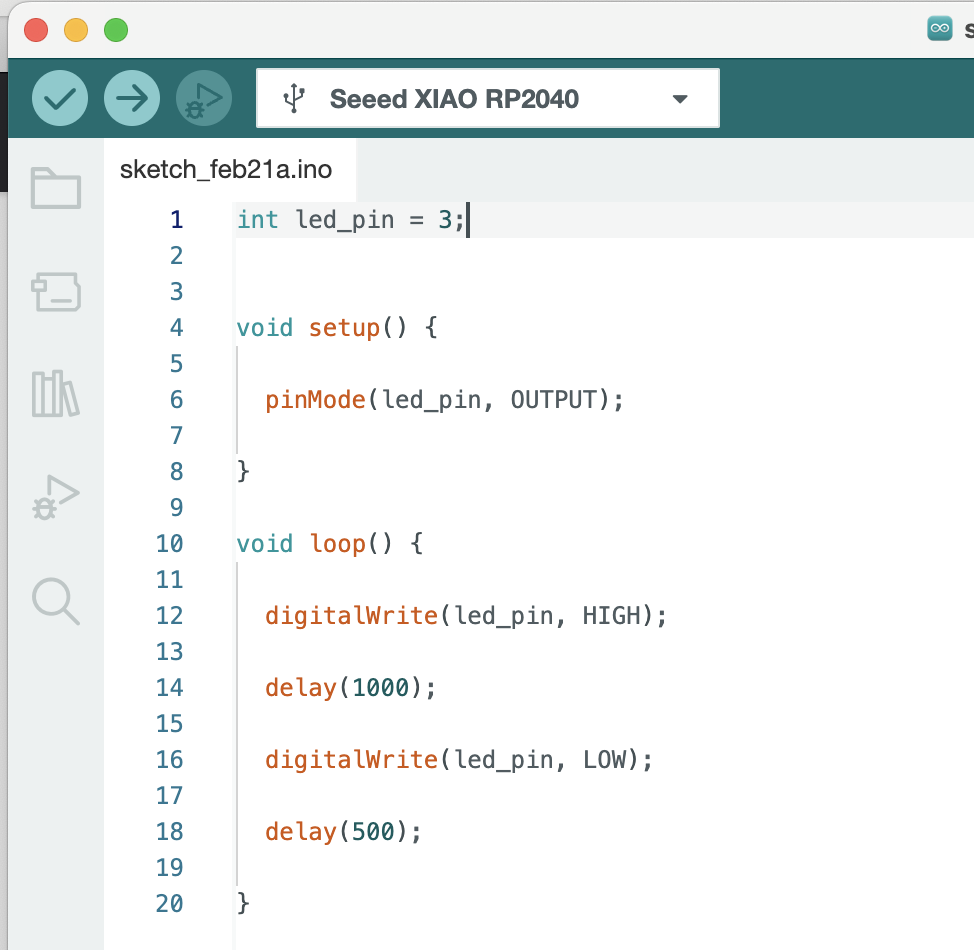
Made changes to dealy to make the LED blink rate change
Seeed XIAO RP2040