Assignment
Individual Assignment:
- Design and 3D print an object (small, few cm3, limited by printer time) that could not be made subtractively
- 3D scan an object (and optionally print it)
Group Assignment:
Link to Group Work- Test the design rules for your 3D printer(s)
Research
3D Digital Design
3D design refers to creating, modifying, and visualizing objects in three-dimensional space using digital tools. You will explore the types of 3D design, 3D design tools and file formats.
Types of 3D Design
- Solid Modeling:** Represents actual object volume; used in engineering and CAD (Computer-Aided Design) tools for mechanical parts and product design.
- Surface Modeling:** Focuses on outer surfaces, ideal for industrial design, animation, and visual effects.
- Mesh Modeling:** Uses polygons to define shapes; standard in animation, gaming, and effects industries.
- Parametric Modeling:** Objects defined by parameters and relationships—easier to revise and automate complex shapes. **Popular 3D Design Programs**
- OnShape, Autodesk Fusion 360, AutoCAD, Inventor:** Engineering and product design.
- SolidWorks & CATIA:** Mechanical and aerospace design.
- Blender**: Free/open source, animation, modeling, rendering, VFX.
- Rhino:** Industrial and architectural design.
- Maya, 3ds Max:** Animation, games, film.
- TinkerCAD:** Educational and beginner 3D modeling. **3D Interchange Formats**
- STL (Stereolithography):** Widely used for 3D printing, stores mesh geometry only (no color/texture).
- .OBJ:** Popular for sharing between programs—supports meshes, colors, textures.
- .FBX:** Animation and game development; supports geometry, lights, cameras, animation.
- .3MF:** Advanced 3D printing format—stores rich data including textures, materials, and metadata.
- .DAE (Collada):** Best for VR/AR and cross-platform sharing, supports textures, animation, physics.
- .GLTF/.GLB:** Efficient web/VR/AR format, ideal for real-time applications.
- .USDZ:** Optimized for AR on Apple devices.
- .STEP/.IGES:** Common in engineering for sharing precise geometry/data between CAD programs.
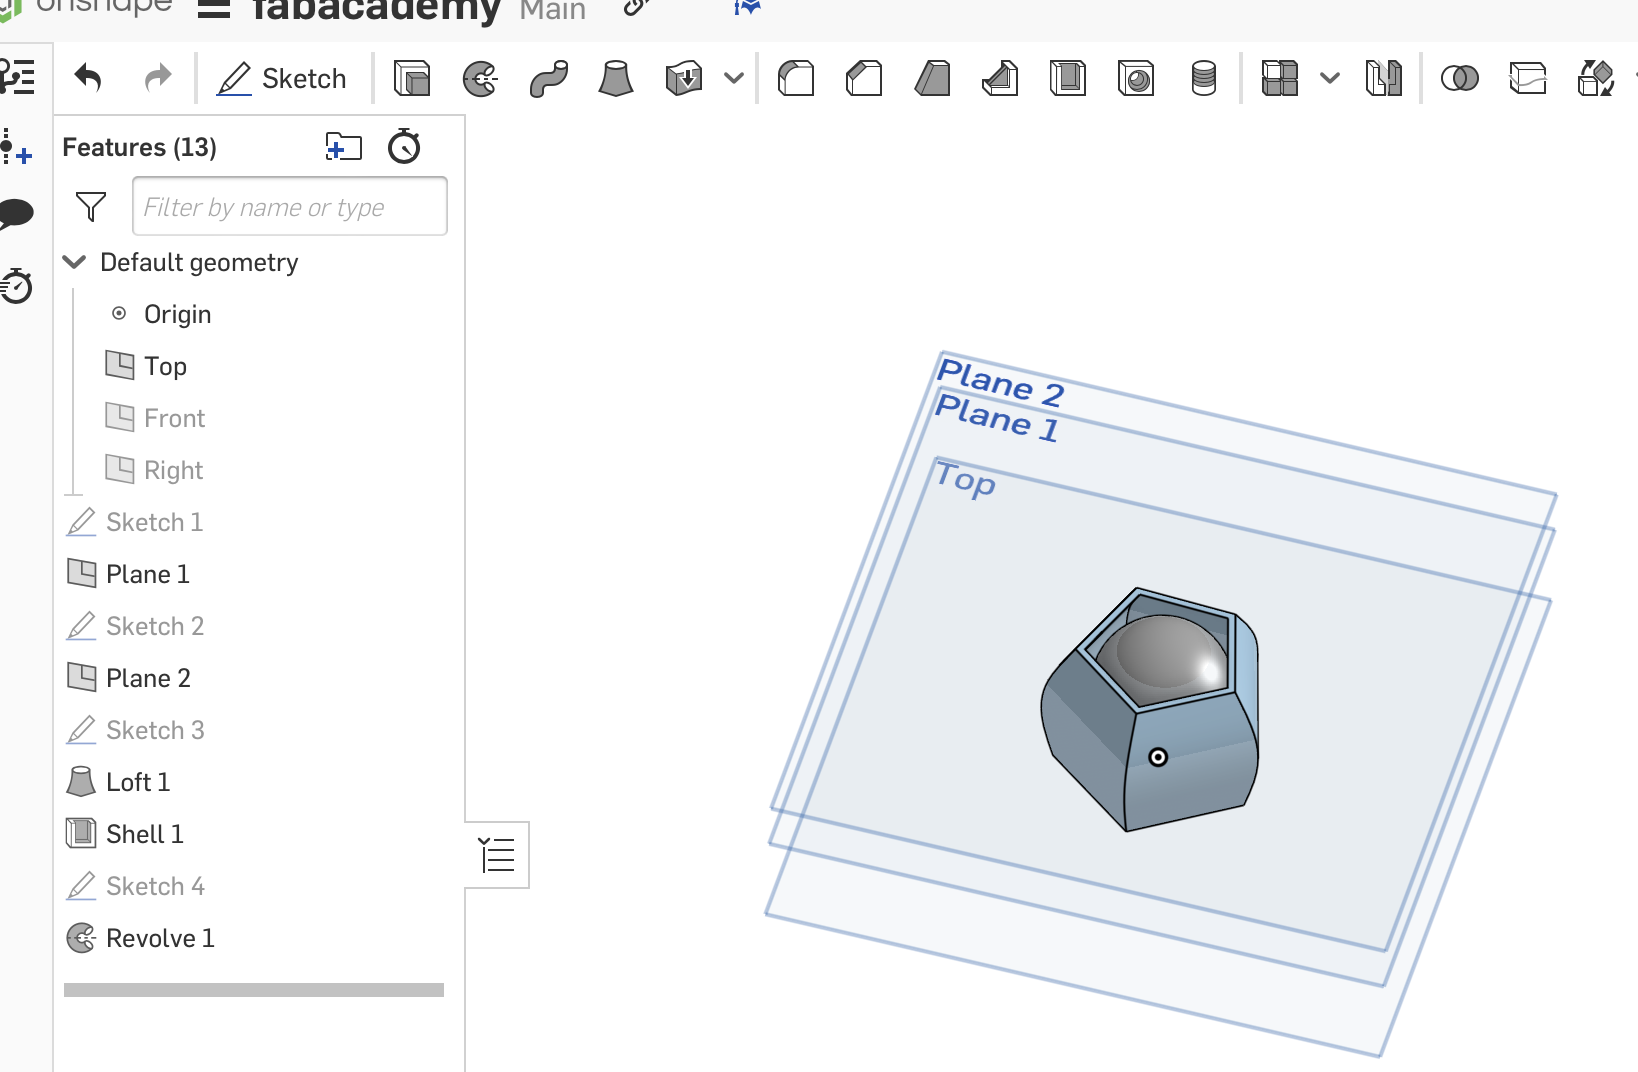
OnShape Creation of 3D Printed Part
- First thing was to design a part in Onshape that must be created through additive processes rather than subtractive.
- Considerations for part design included using various shapes that could "fit" together when printed but would still act as separate parts but could not be able to be fully disassembled. Detailed OnShape instructions below. Here's a basic overview of how to use Onshape to create a part file:
- Access Onshape: To get started, you need to access the Onshape platform. You can use a web browser to access the Onshape website. If you don't have an account, you'll need to sign up for one.
- Create a New Document: - After signing in, click on "Documents" in the top menu. - Click "Create Document" to start a new project.
- Create a Part Studio: - Inside the new document, click "Create" and select "Part Studio." - Give your Part Studio a name.
- Sketch Your Part: - In the Part Studio, you can create 2D sketches that form the basis of your 3D part. Click "Sketch" and choose a plane (e.g., Top, Front, Right). - Use sketching tools to draw your 2D profile, including lines, arcs, circles, rectangles, and more. - Add dimensions and constraints to define the size and position of your sketch elements.
- Extrude or Revolve the Sketch: - After sketching, you can turn your 2D sketch into a 3D part by extruding or revolving it. Click "Extrude" or "Revolve" and select the sketch profile. - Set the extrusion or revolution parameters (e.g., distance or angle) and click "Check" to create the 3D feature.
- Add Additional Features: - You can add more features to your part, like holes, fillets, chamfers, and other geometric shapes, by creating additional sketches and using extrusions, cuts, or other operations.
- Modify and Edit: - At any time, you can go back to your Part Studio and make modifications by editing sketches or features. Simply click on the feature you want to modify and make your changes.
- Save and Manage Versions: - Onshape automatically saves your work as you go along, but you can also create versions or checkpoints to track changes and collaborate with others effectively.
- Document Organization: - You can create multiple Part Studios within a document to design different parts. - You can also create Assemblies within a document to assemble multiple parts together.
- Sharing and Collaboration: - Onshape allows for real-time collaboration. You can share your document with team members, and they can view, edit, and comment on it simultaneously.
- Export and Use Your Part: - Once you've created your part, you can export it in various formats (e.g., STL, STEP) for 3D printing, manufacturing, or use in other software.
- Learning Resources: - Onshape provides extensive documentation and tutorials, so be sure to explore these resources to learn more about advanced features and techniques.
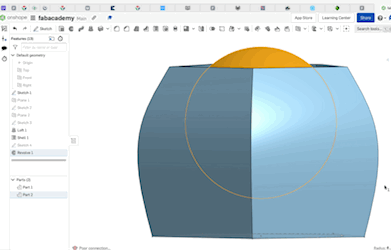
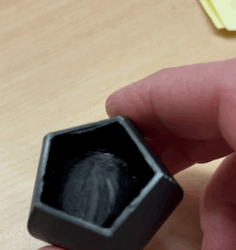
- In the gif above, you can discern the individual geometries that be printed at the same time but sill remain individual parts so the are able to move independantly.
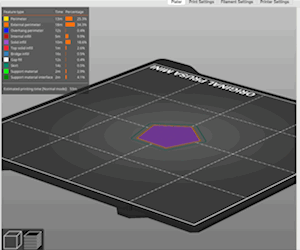
- Once the parts were created the .stl needed to be sliced in order to be printed. I used Prusa Slicer for our Prusa Mini printer. In the gif below you can see the animation of the slice showing the two parts and the support material under the sphere. The support material was carfully removed after to allow the parts to move independantly

Understanding Limitations of 3D Printing
3D printing is very useful for rapid prototyping and getting your hands on designs quickly to make sure they will work as designed. There are some limitations that must be considered before printing. The list below is just a sample of some of the limitations of 3D printing
- Build Plate Size
- Part Structure
- Limited Materials
- Post Processing
- Funcitonal End Use
- Part Orientation During Printing
- Print Time
- Large Print Volumes
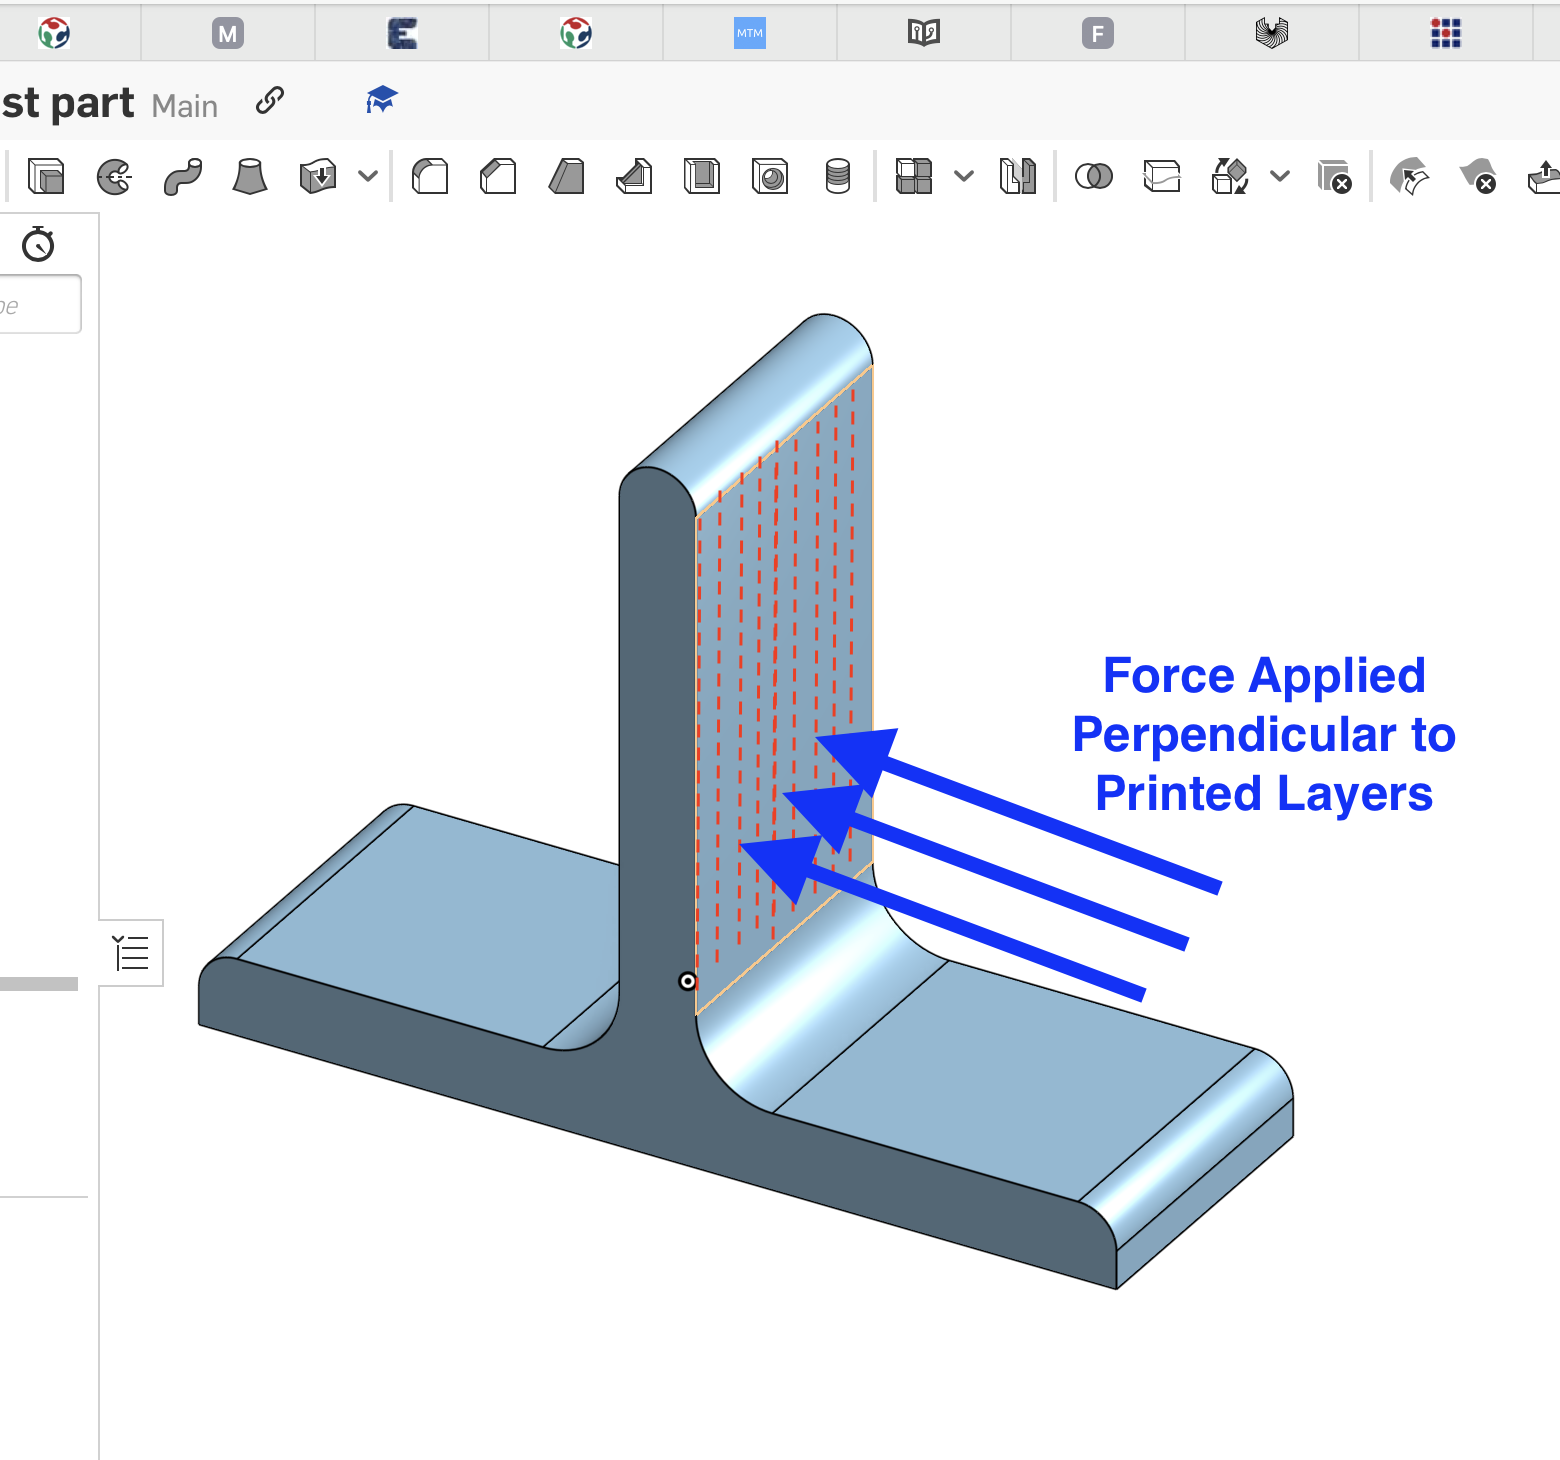
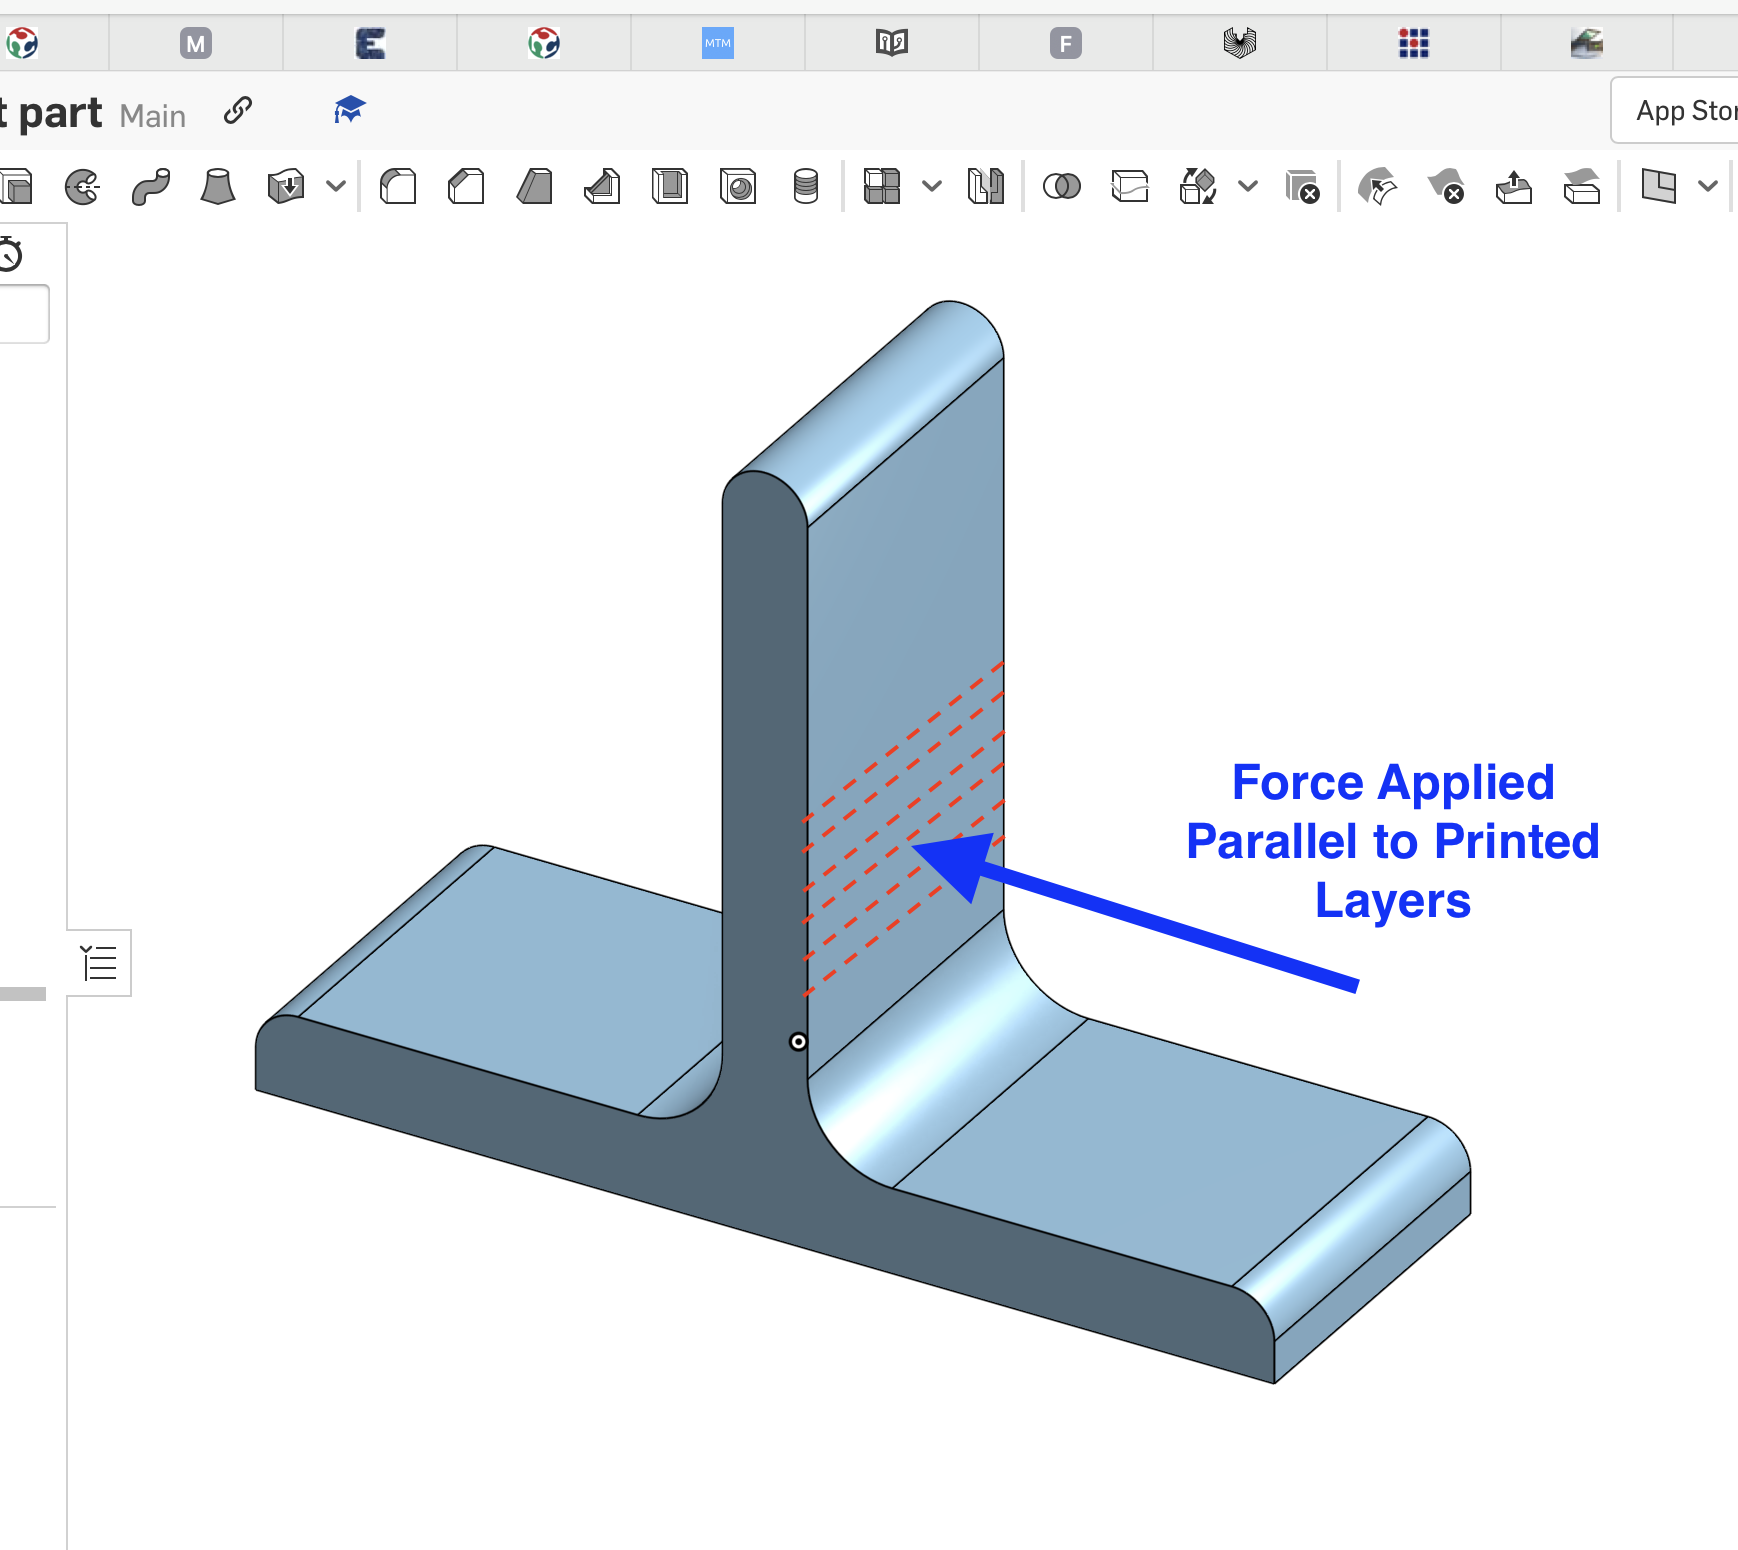
One consideration that is often overlooked is how the part will be placed on the print bed during printing. Since the part is created in layers you need to think about how the part will be used in the end. One example is a part designed by my robotics team to hold two motor controllers to save space. They created a "T" shaped mounting bracked designed to have one motor controller mounted on each side. But what they did not think og was how it was placed on the print bed and then how it would behave once on the robot. In the images below you can see two examples of how the layer orientation may impact end use.
Anisotropy Layer Strength: 3D-printed parts are usually strongest in the layer (XY) plane; Z-axis (between layers) is weaker due to poorer layer adhesion. Design Orientation: Arrange parts so principal stresses align with the strongest print direction (XY). Be cautious designing load paths across layers. Material Effects: FDM/FFF and resin prints both exhibit anisotropy, but resins (SLA, DLP) may be less pronounced than thermoplastics.
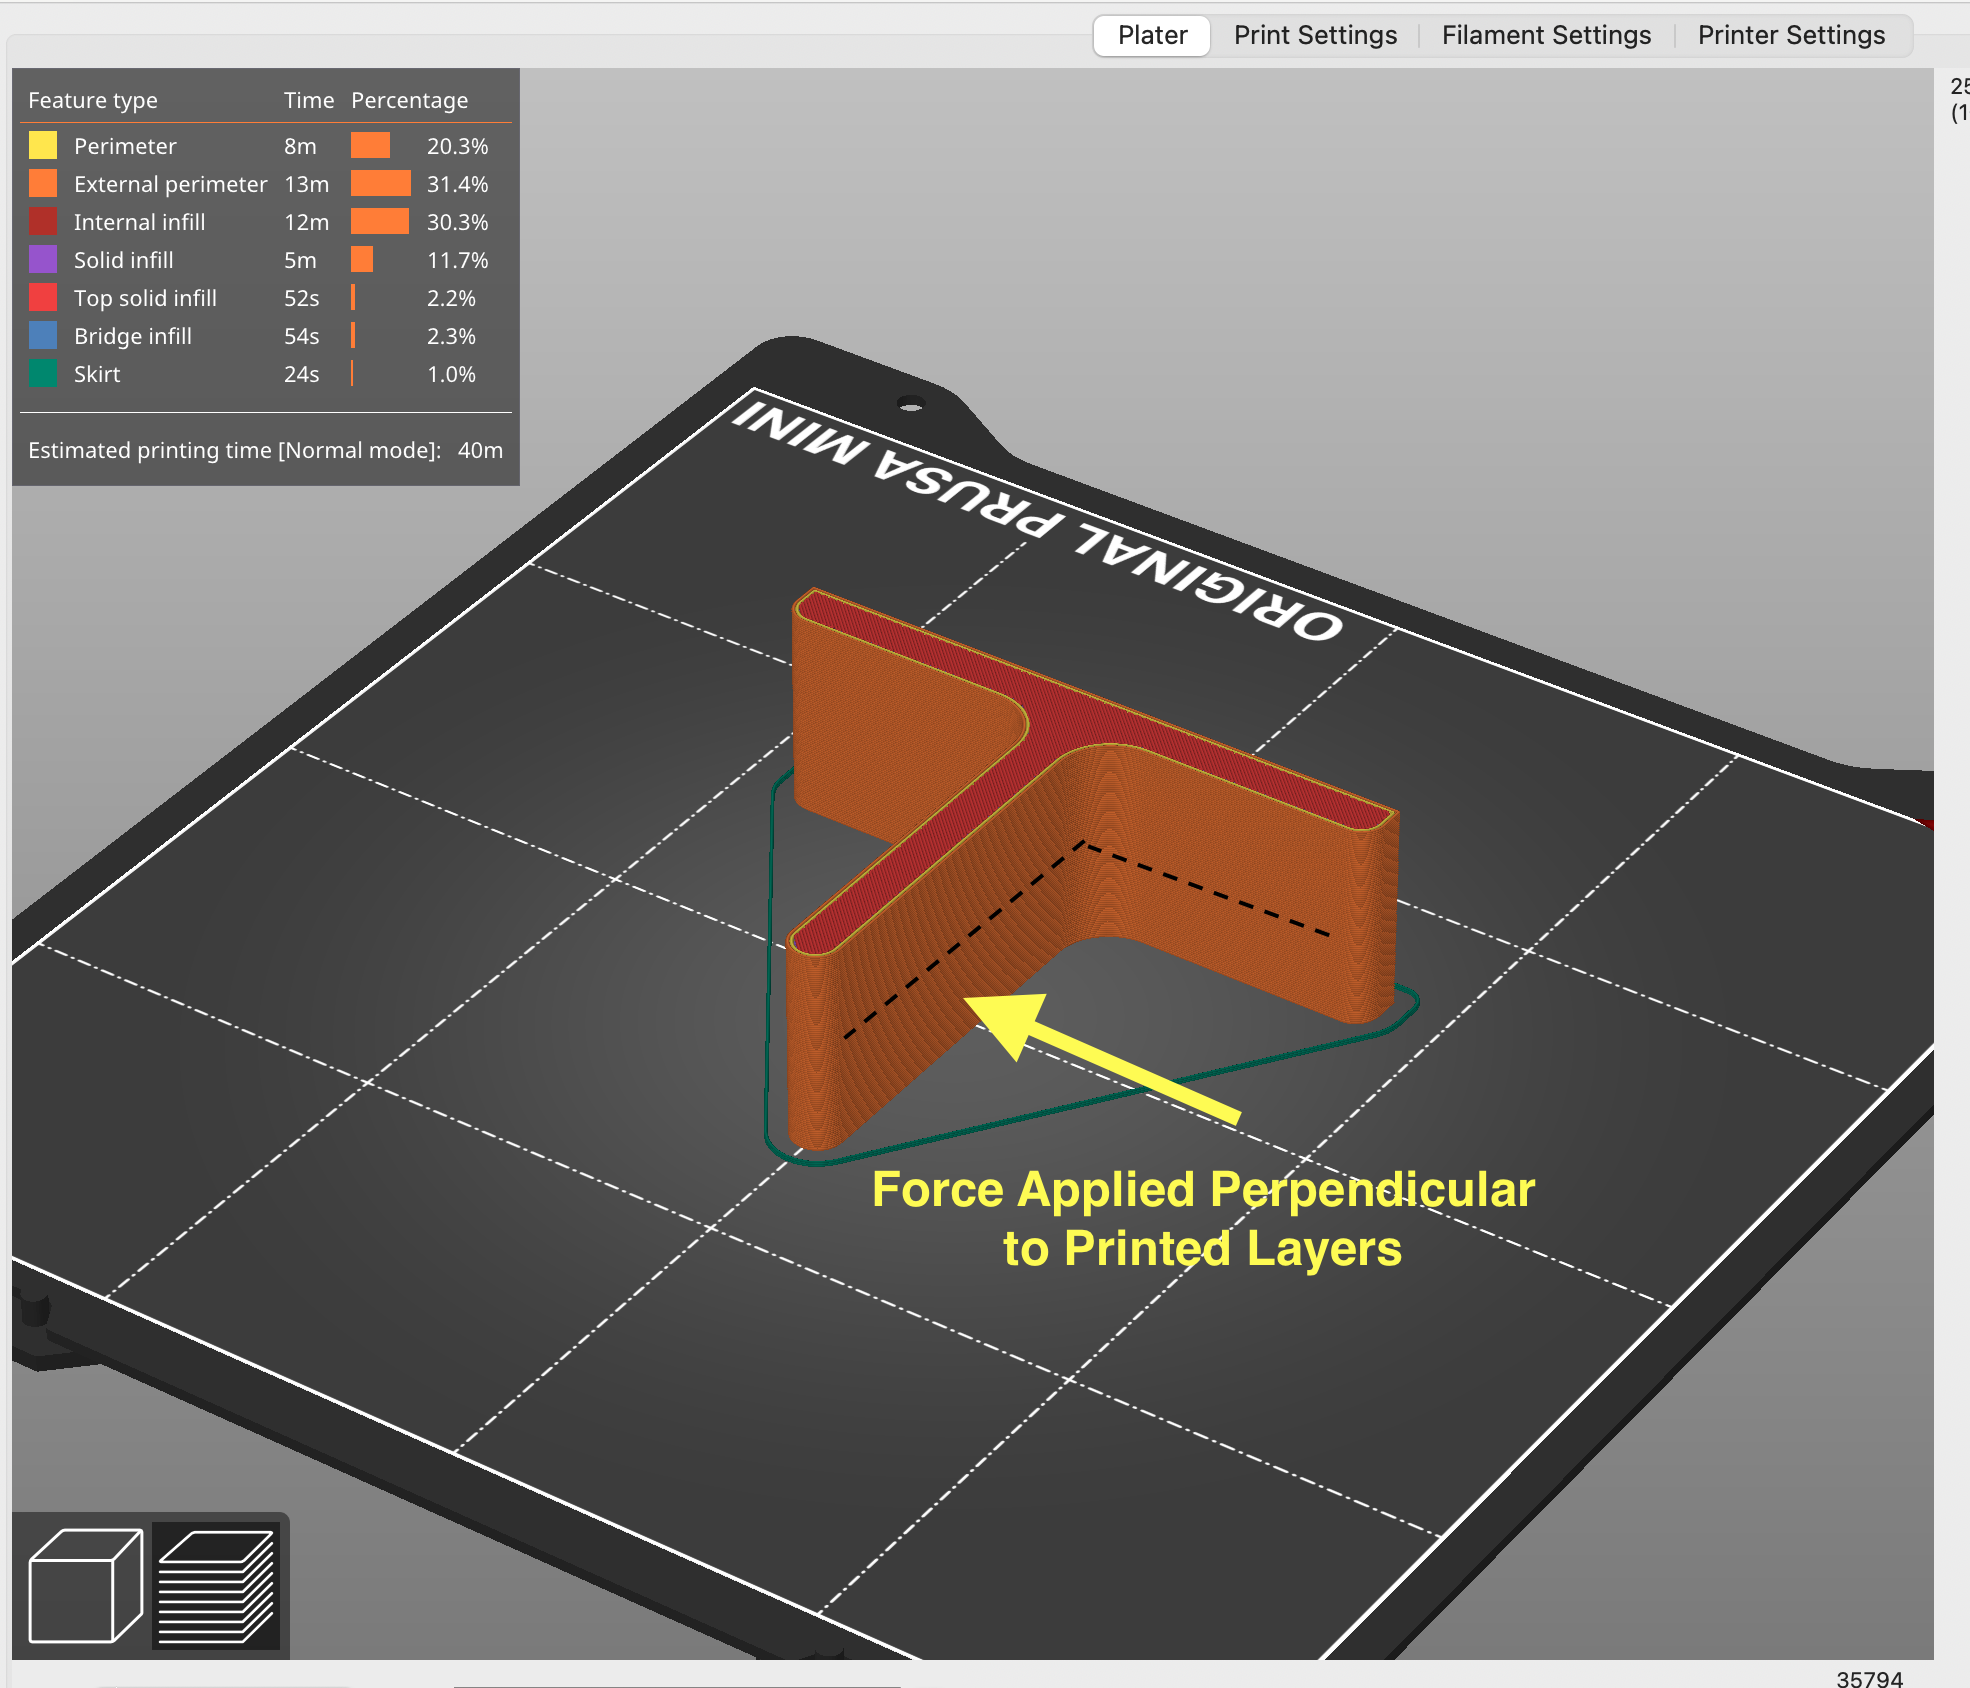
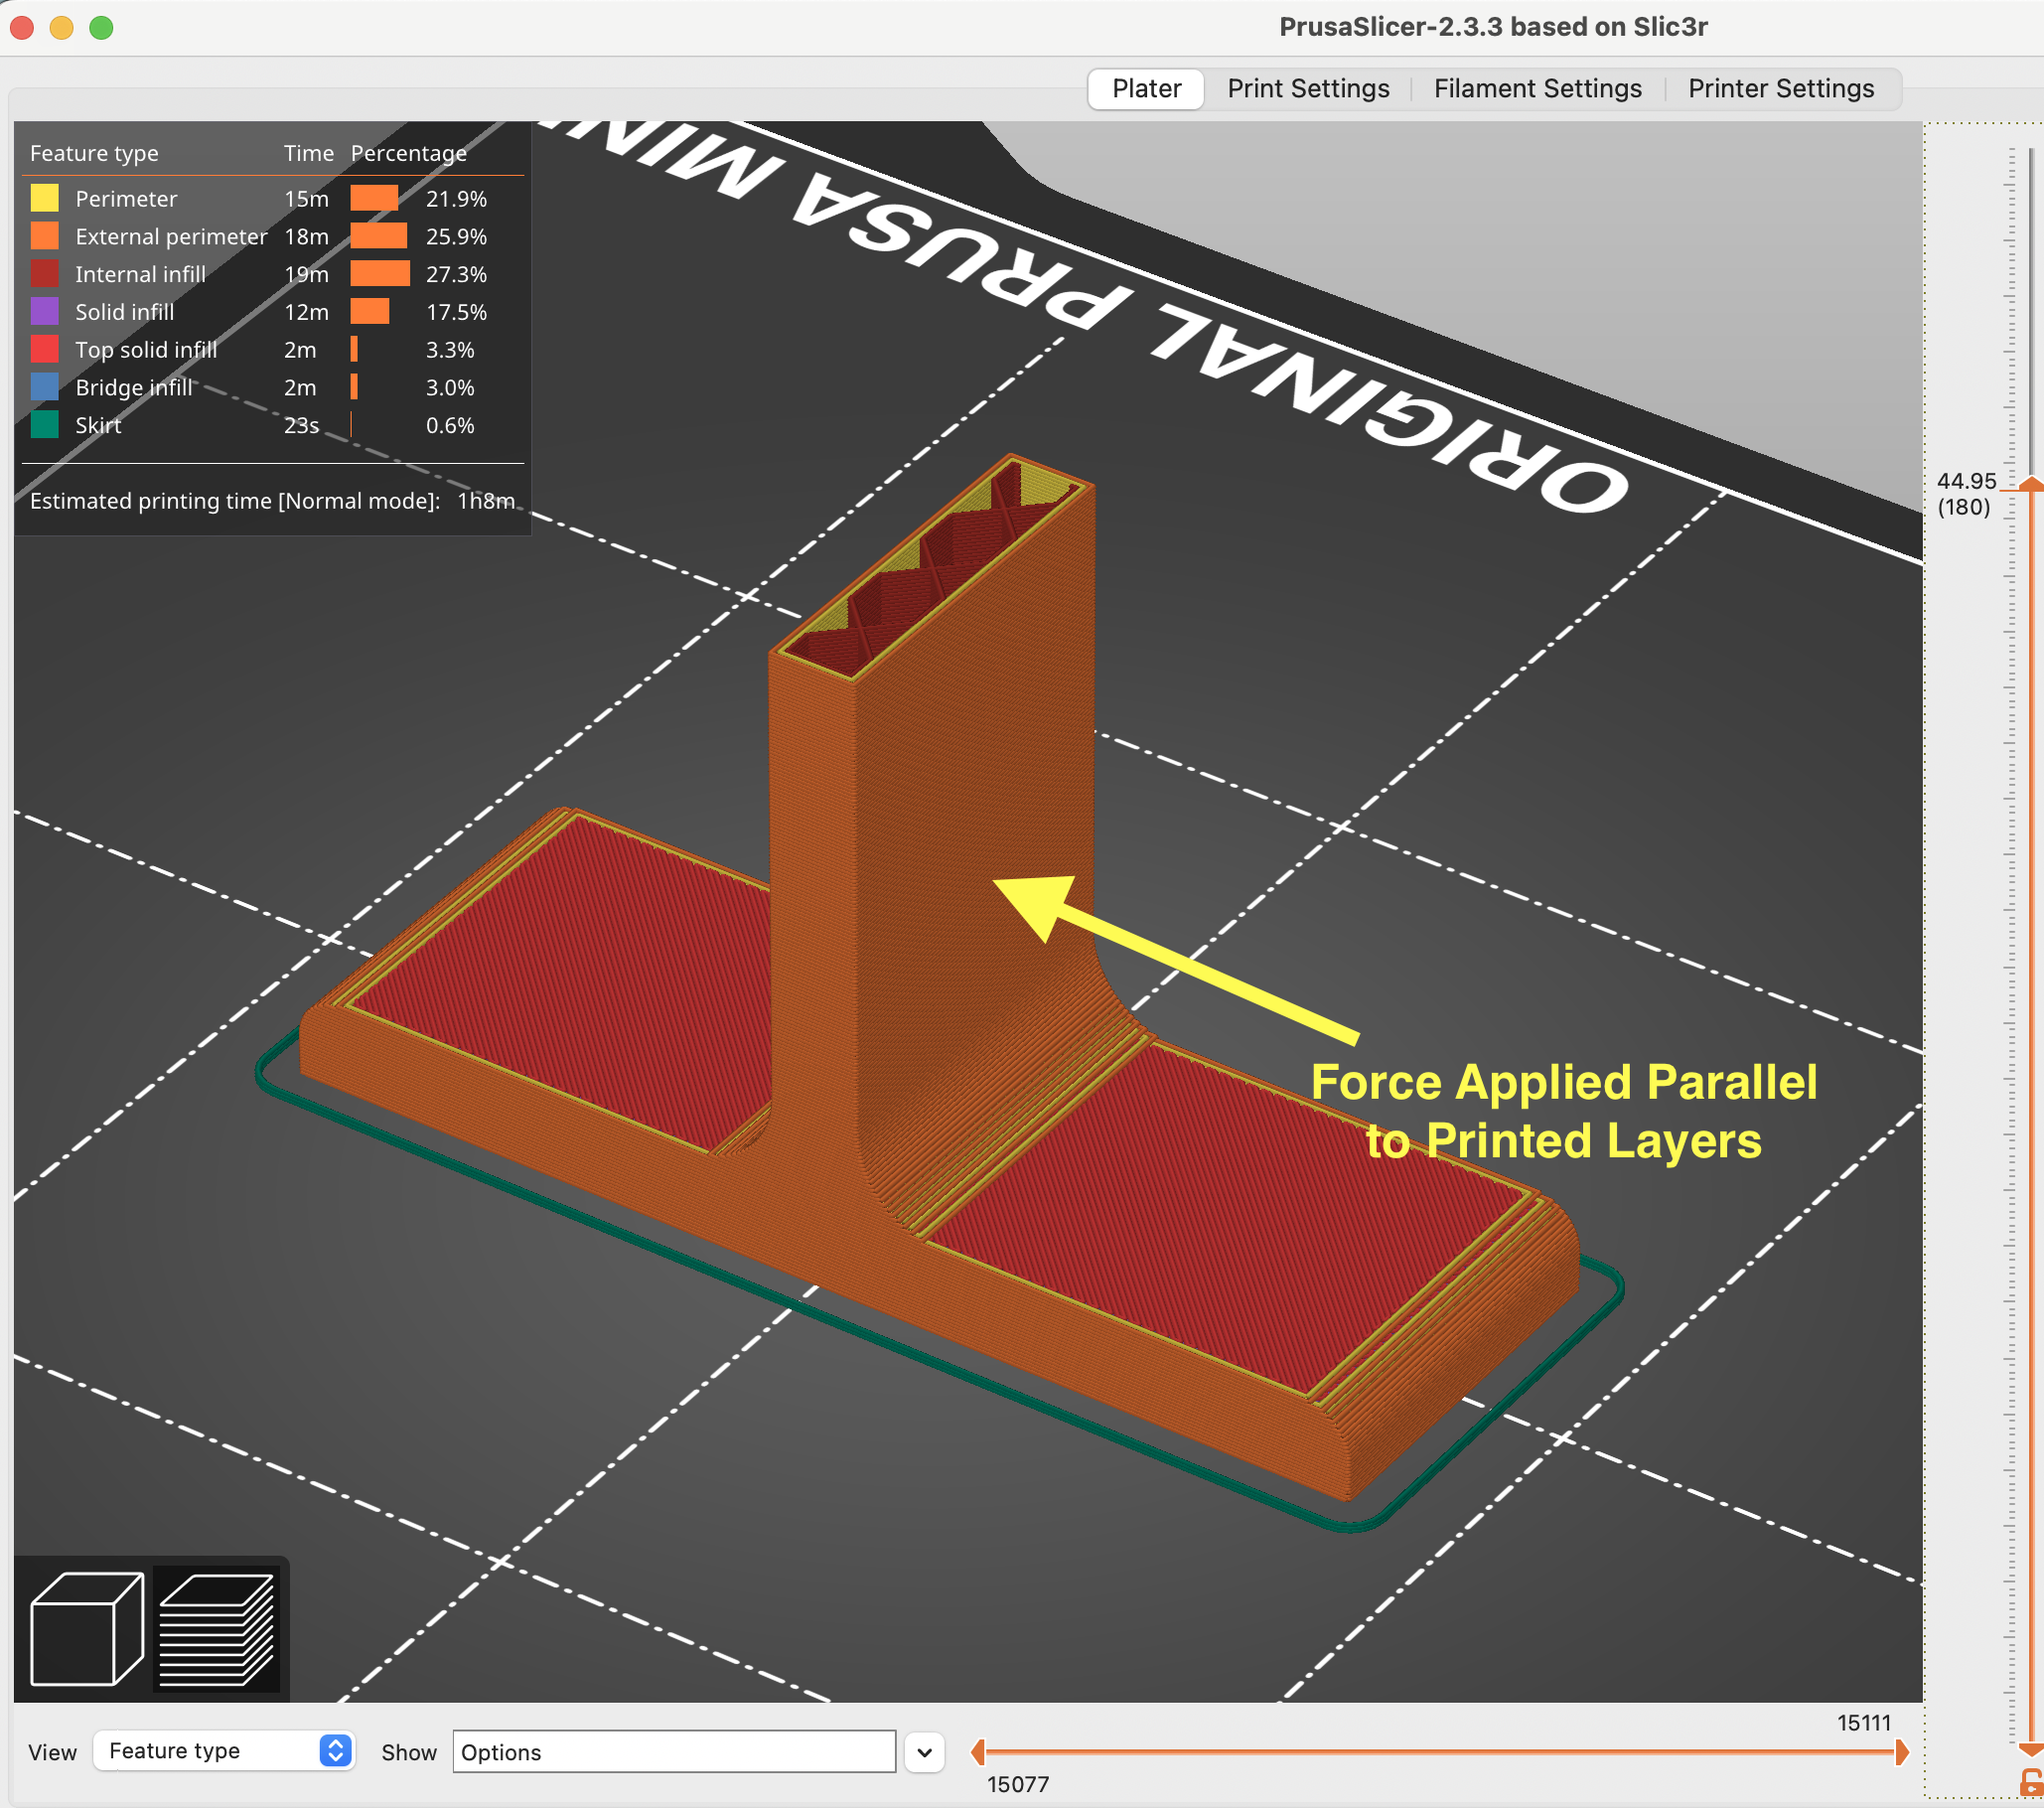
In the end the part that was printed "tall" or had forces parallel to the layer direction failed when installed on the robot and it experienced impact from other robots. In addition to being a stronger part it also printed 20 minutes faster in this orientation.
3D Scanning
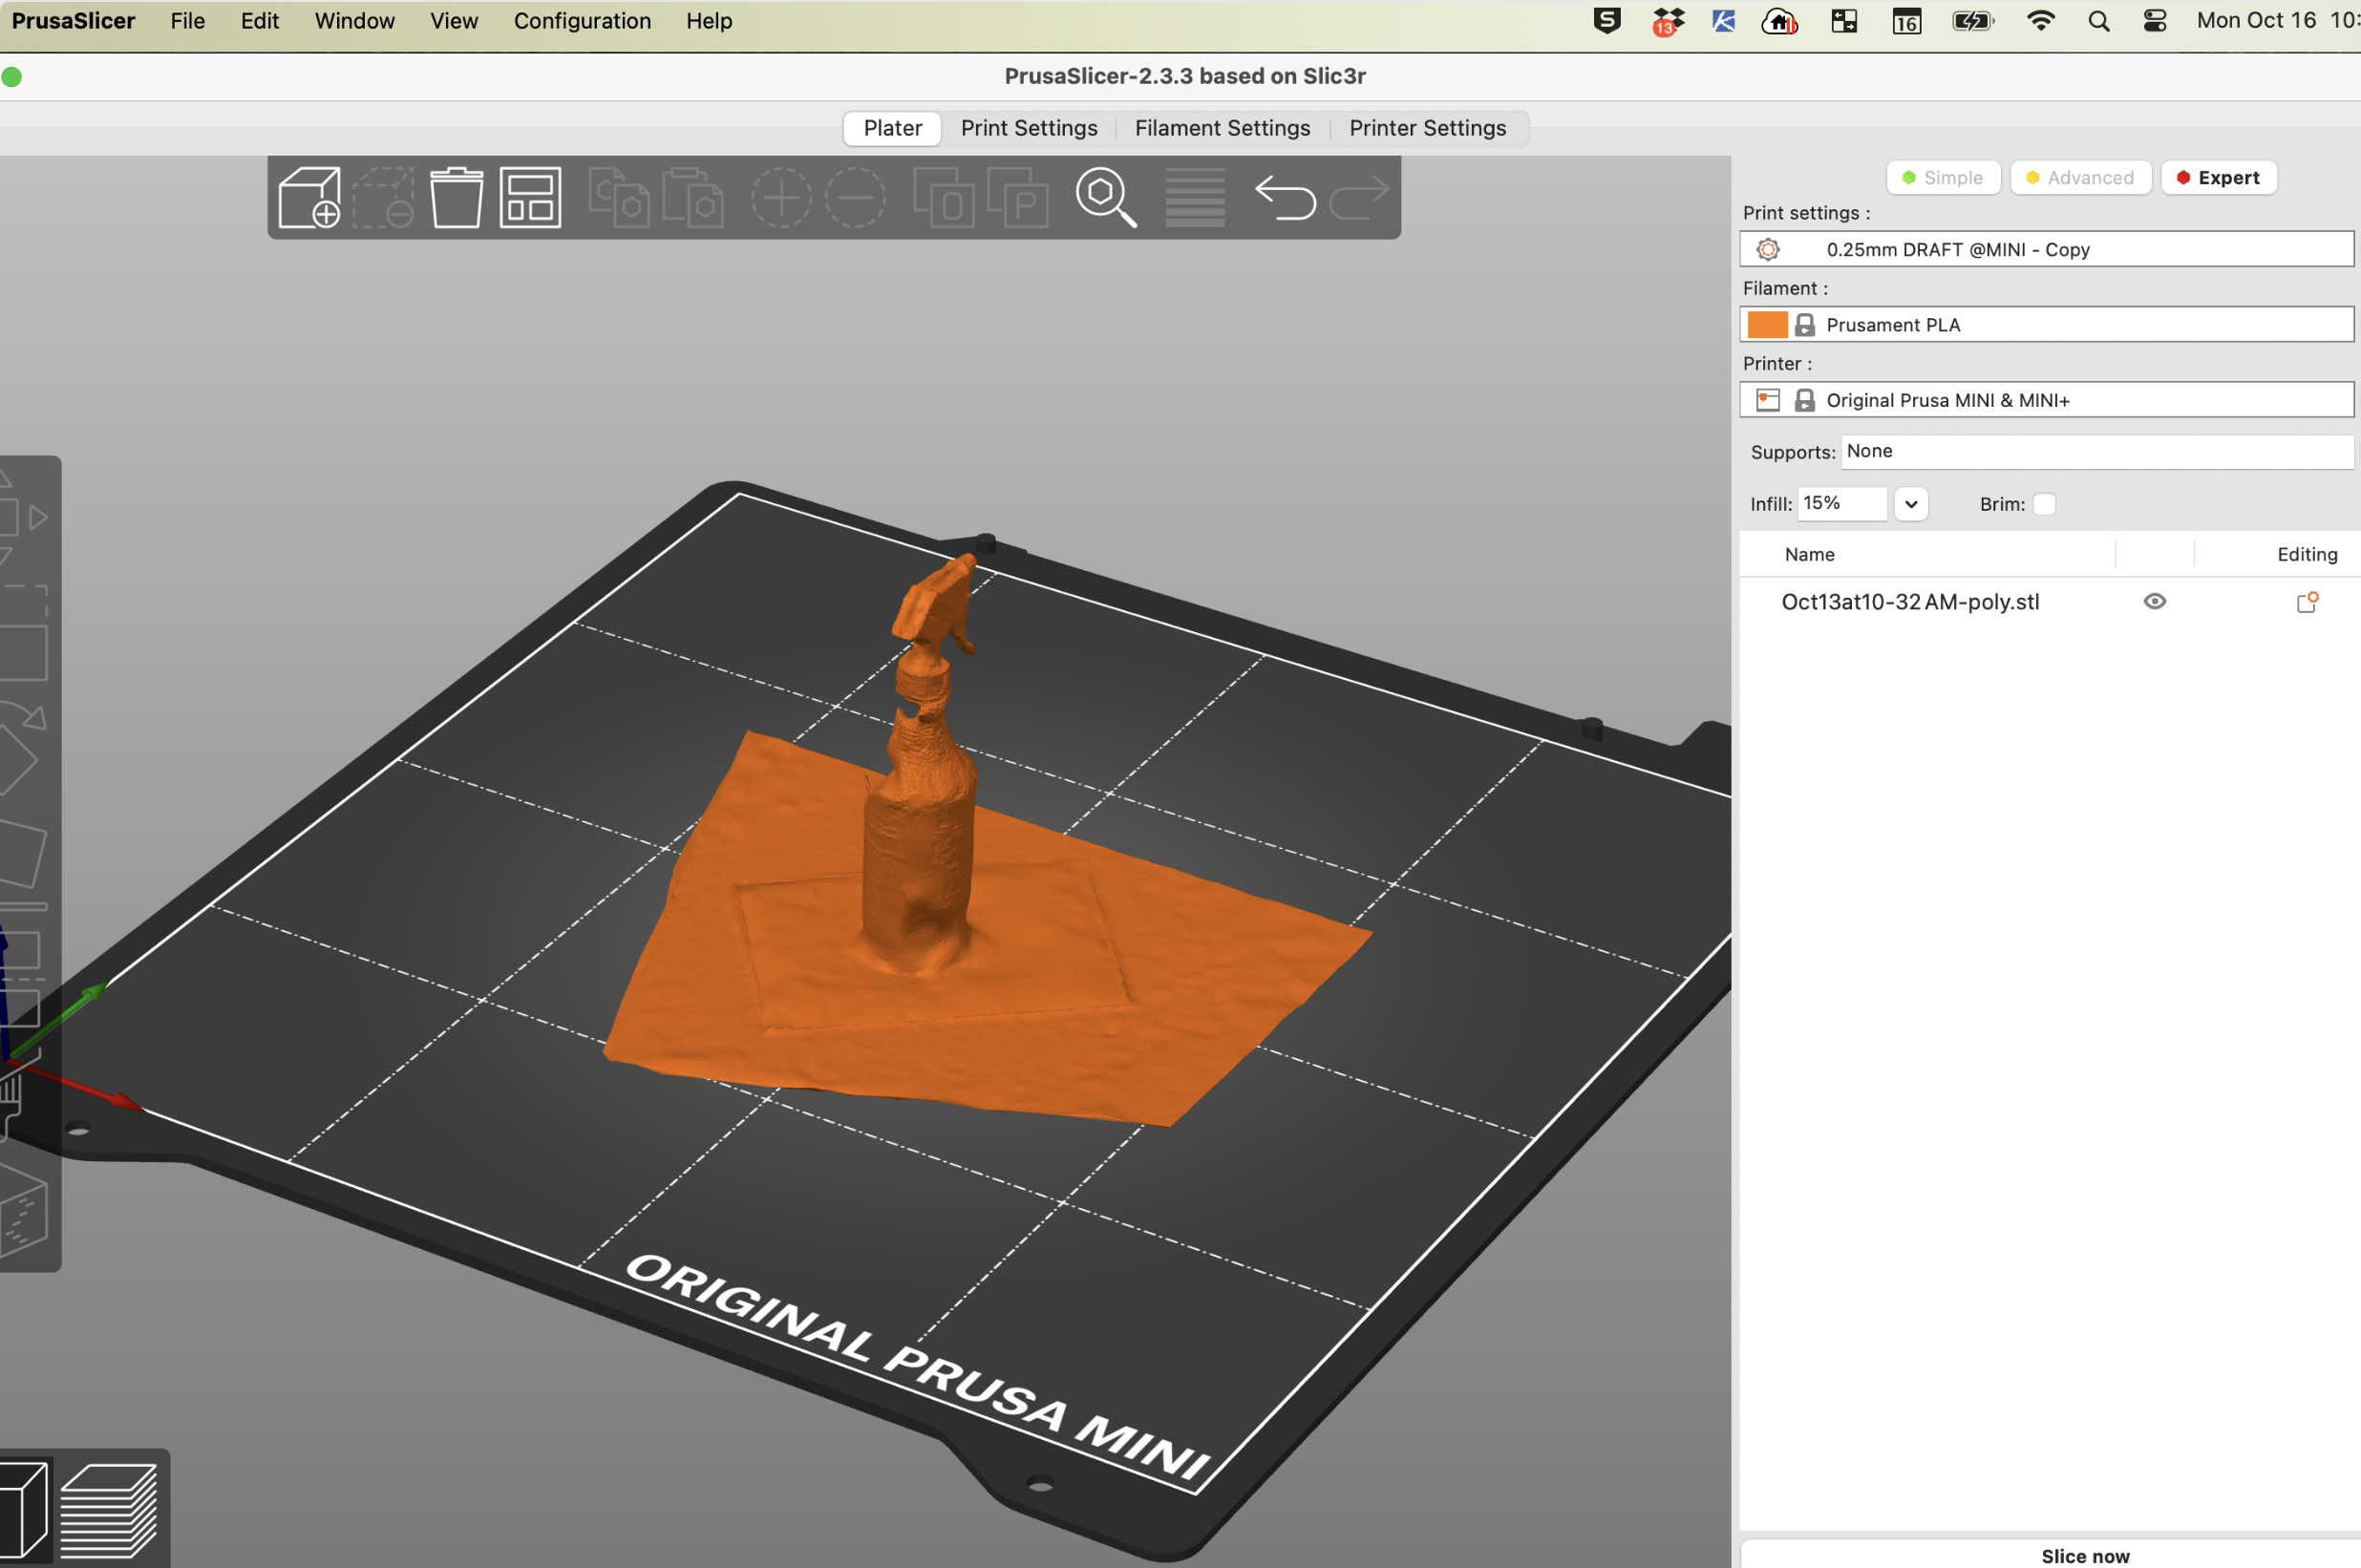
For the 3D scanning I used the iPhone app Polycam. See link above in Research section. You can see in the images below that the sanner app works to capture the object but when imported to Prusa Slicer you can see that there are gaps in the data so it will not print very well. If I had taken more time with the scanner it may have produced a better final scan and print.

Part Files